Jump to content

  • Chat
  •  
  •  

Welcome to Formiculture.com!

This is a website for anyone interested in Myrmecology and all aspects of finding, keeping, and studying ants. The site and forum are free to use. Register now to gain access to all of our features. Once registered and logged in, you will be able to create topics, post replies to existing threads, give reputation points to your fellow members, get your own private messenger, post status updates, manage your profile and so much more. If you already have an account, login here - otherwise create an account for free today!

Photo

Dspdrew's Formicarium 09 Research and Design (Updated 11-12-2023)

formicarium out world ant nest how-to tutorial dspdrew

  • Please log in to reply
345 replies to this topic

#161 Offline Nathant2131 - Posted March 18 2017 - 7:02 PM

Nathant2131

    Advanced Member

  • Members
  • PipPipPip
  • 1,509 posts
  • LocationDracut, Massachusetts

Since Gaige Daughtrey asked, here are step-by-step instructions on how to make these.


I use these two containers for this.


Larger container:

http://www.container...ductId=10028594

#60100 (2-5/16" sq. x 5-1/16" h)


Smaller container:

http://www.container...ductId=11000251

#60300 (1-3/16" sq. x 2-7/16" h)


1. Pour 1/8" of Hydrostone in the bottom of the larger container.

2. Drill a hole in the top of the smaller container, and attach a tube with a cap (small plastic test tube works great).

3. Cut the bottom off the smaller container.

4. Once the Hydrostone is hardened in the larger container, pour another 1/8" and place the smaller container inside it and let that harden.

5. Fill the small container with dirt, leaving the tube empty to act as a reservoir to hold water as you wait for it to soak in.

6. Fill the larger container with dirt until it just covers the smaller container by about 1/8".

7. Drill a hole in the lid and apply Fluon.

Wait a sec. So how exactly does number 5 work? It hydrates the larger container if you pour the water in the smaller one?  :thinking:


  • C_B likes this

#162 Offline dspdrew - Posted March 18 2017 - 8:25 PM

dspdrew
  • LocationSanta Ana, CA


Since Gaige Daughtrey asked, here are step-by-step instructions on how to make these.


I use these two containers for this.


Larger container:

http://www.container...ductId=10028594

#60100 (2-5/16" sq. x 5-1/16" h)


Smaller container:

http://www.container...ductId=11000251

#60300 (1-3/16" sq. x 2-7/16" h)


1. Pour 1/8" of Hydrostone in the bottom of the larger container.

2. Drill a hole in the top of the smaller container, and attach a tube with a cap (small plastic test tube works great).

3. Cut the bottom off the smaller container.

4. Once the Hydrostone is hardened in the larger container, pour another 1/8" and place the smaller container inside it and let that harden.

5. Fill the small container with dirt, leaving the tube empty to act as a reservoir to hold water as you wait for it to soak in.

6. Fill the larger container with dirt until it just covers the smaller container by about 1/8".

7. Drill a hole in the lid and apply Fluon.

Wait a sec. So how exactly does number 5 work? It hydrates the larger container if you pour the water in the smaller one?  :thinking:


Yes. Water flows (extremely slowly) through Hydrostone. Because of the first 1/8 inch of Hydrostone in the bottom, the smaller container is up 1/8 inch off the bottom of the larger one, leaving room for the water to make its way through and into the larger container.


#163 Offline Nathant2131 - Posted March 19 2017 - 3:33 AM

Nathant2131

    Advanced Member

  • Members
  • PipPipPip
  • 1,509 posts
  • LocationDracut, Massachusetts


Since Gaige Daughtrey asked, here are step-by-step instructions on how to make these.


I use these two containers for this.


Larger container:

http://www.container...ductId=10028594

#60100 (2-5/16" sq. x 5-1/16" h)


Smaller container:

http://www.container...ductId=11000251

#60300 (1-3/16" sq. x 2-7/16" h)


1. Pour 1/8" of Hydrostone in the bottom of the larger container.

2. Drill a hole in the top of the smaller container, and attach a tube with a cap (small plastic test tube works great).

3. Cut the bottom off the smaller container.

4. Once the Hydrostone is hardened in the larger container, pour another 1/8" and place the smaller container inside it and let that harden.

5. Fill the small container with dirt, leaving the tube empty to act as a reservoir to hold water as you wait for it to soak in.

6. Fill the larger container with dirt until it just covers the smaller container by about 1/8".

7. Drill a hole in the lid and apply Fluon.

Wait a sec. So how exactly does number 5 work? It hydrates the larger container if you pour the water in the smaller one?  :thinking:


Yes. Water flows (extremely slowly) through Hydrostone. Because of the first 1/8 inch of Hydrostone in the bottom, the smaller container is up 1/8 inch off the bottom of the larger one, leaving room for the water to make its way through and into the larger container.


Ohhhhh I got it. Thanks!  :)


#164 Offline dspdrew - Posted March 19 2017 - 4:19 AM

dspdrew
  • LocationSanta Ana, CA
Okay... so the Hydrostone blocks were basically a fail. Well, maybe they weren't that bad, but they did pose a new problem that's worse than the ones they solved. I guess I had no idea how inadvertently perfect the original design was. With the block, it's basically no different than filling the whole container with dirt as far as capillary action and evaporation are concerned. The inner container was actually creating a pretty good moisture gradient up the sides because of the way it held the water in. With the block, there was never much of a gradient. The tank also kept the water from evaporating as quickly because of much less area where the water vapor can escape (only around the sides as opposed to the entire surface). These two things are pretty much the most important factors, so I decided to go back to the tank.
 
Of course I still wanted to try solving some of the problems I had with the old ones, so I completely redesigned them. The new design is quite a bit more complex looking, but it's really not too much harder to make. It just takes a lot longer because there are now four parts that have to be printed instead of just one. You can see three of them below. The fourth is just a little square bracket that's really not that exciting to see.
 
sml_gallery_2_295_499473.png  sml_gallery_2_295_610911.png  sml_gallery_2_295_138649.png
 
 
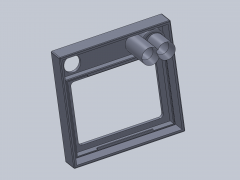
Here's a list of every problem solved by the new design:
 
1. I needed to be able to refill them WITHOUT having to remove the lid. That was the most annoying thing about the old ones, and made hydrating larger colonies a real pain in the butt.
 
2. With the big hydration tube sticking up from the center, there was no room to place a feeder inside. This is very important to me, because it's a LOT of work having to keep manually feeding tons of colonies every week; my feeders can last for months.
 
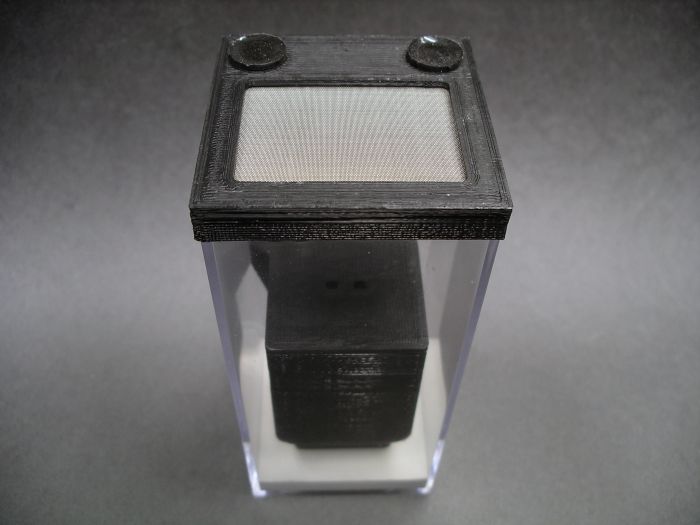
3. The lids had to have holes drilled in them and mesh glued on. This obviously is TONS of work and I really was just getting sick of doing it. The new design also has a much larger screen, giving it a lot more ventilation.
 
4. There was no easy way to clean out the inner container.
 
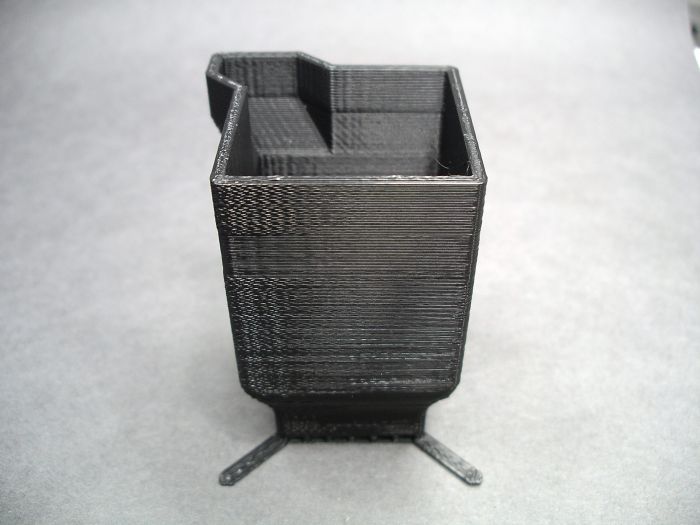
5. This isn't really a problem, but something nice that the block version had--more space around the bottom where nearly all ants like to make their chambers.
 
 
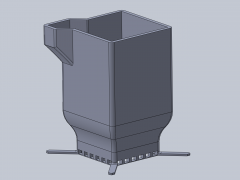
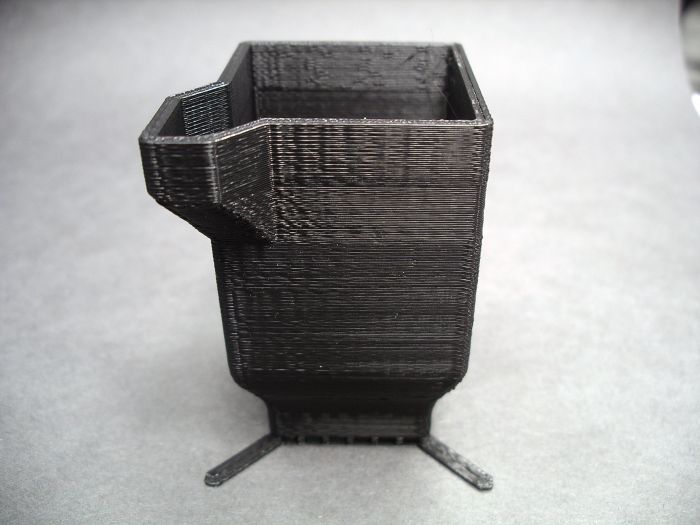
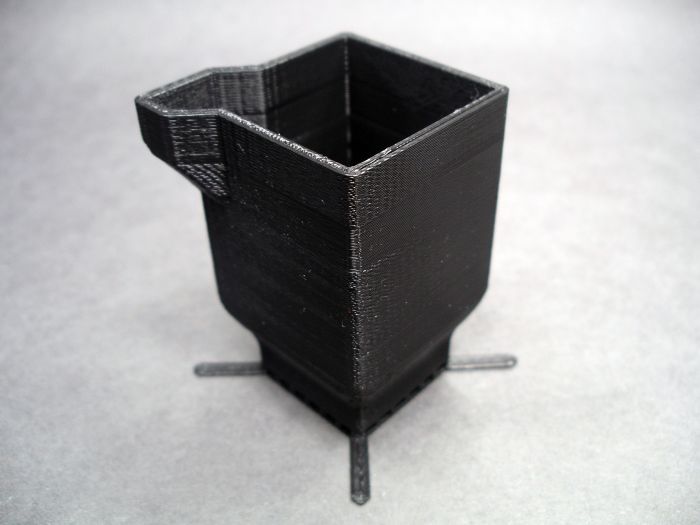
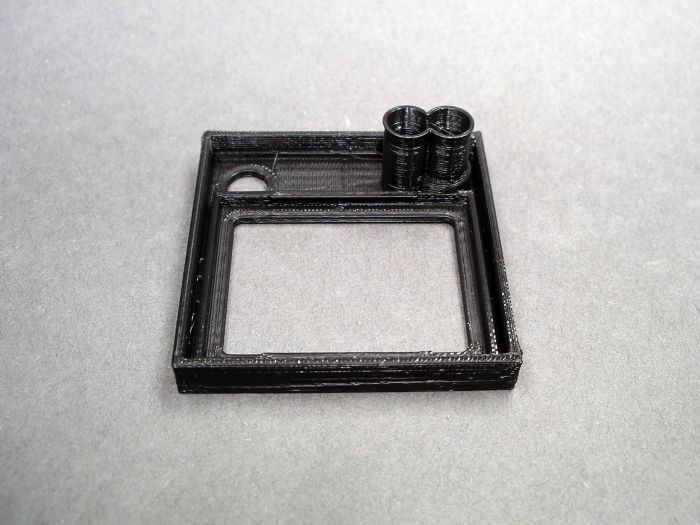
So here's the first one I printed up. I'll explain everything below, if you can't already figure it out.
 
As you can see the container is wide open.
 
med_gallery_2_295_499024.jpg
 
med_gallery_2_295_347365.jpg
 
med_gallery_2_295_558609.jpg
 
 
Ports where the water flows between containers, within the Hydrostone.
 
med_gallery_2_295_1221145.jpg
 
 
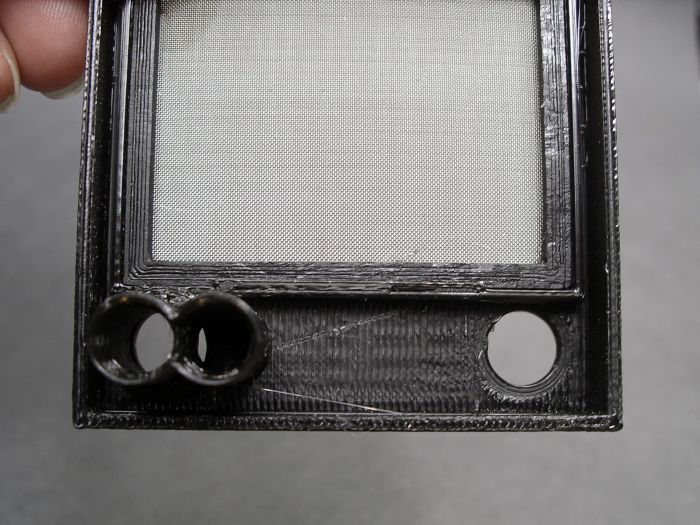
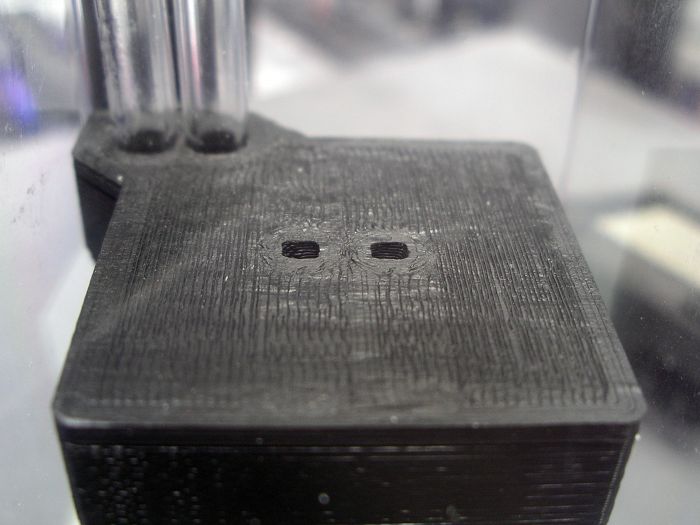
This is the inner container lid. The two large holes are for the two vinyl tubes used for hydrating. The water flows down one tube, while the displaced air escapes out the other, combining into a single hole on the lid. This allowed me to use smaller tubing, allowing for even more room on the surface. The two small holes in the center basically create a tunnel that acts as a hook that can be used to pull the lid off while it's down inside the main container.
 
med_gallery_2_295_1135262.jpg
 
 
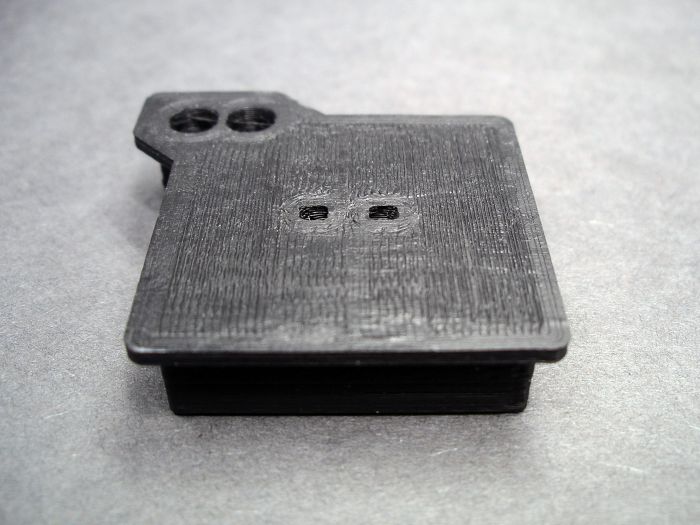
You can see the bottom side of the "tunnel" here.
 
med_gallery_2_295_706752.jpg
 
 
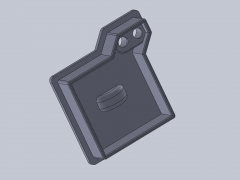
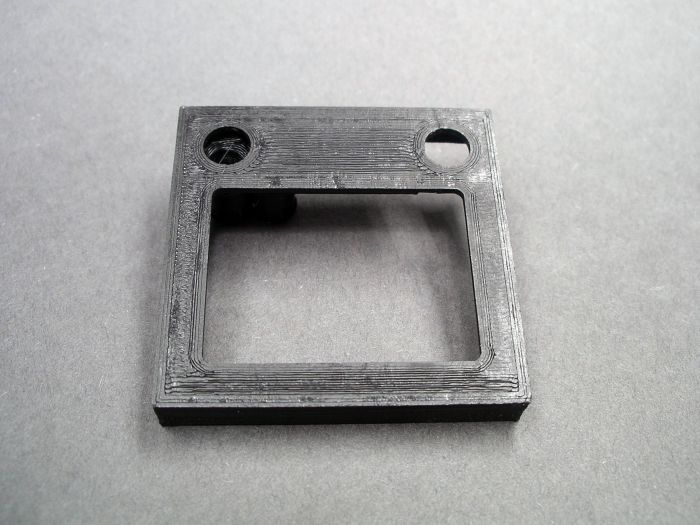
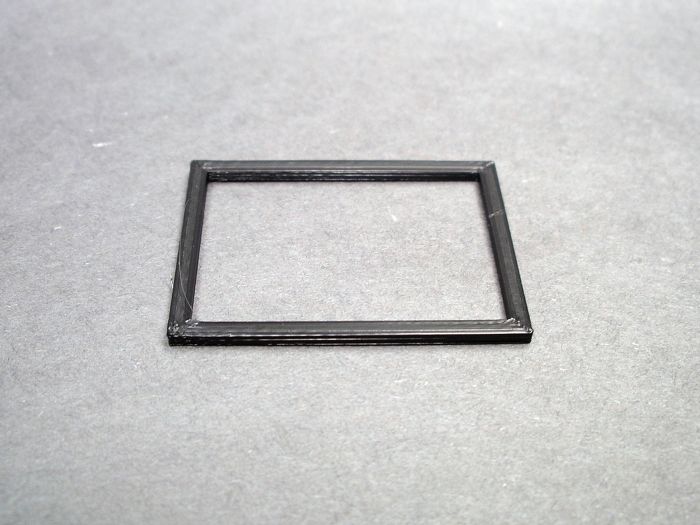
This is the lid that replaces the stock lids (it took quite a while, but I finally got them to fit perfectly). The left hole is where the two tubes are combined, and is used for hydrating from outside the nest. The right hole is just used for dropping food into the nest. With those two things, you rarely need to remove the lid.
 
med_gallery_2_295_179612.jpg
 
med_gallery_2_295_737591.jpg
 
 
This is that one not-so-exciting part, yet it is pretty important. :P This holds the screen in, as you can see in the next picture.
 
med_gallery_2_295_438926.jpg
 
 
Soooo much easier than glue, and it's removable too.
 
med_gallery_2_295_1489760.jpg
 
 
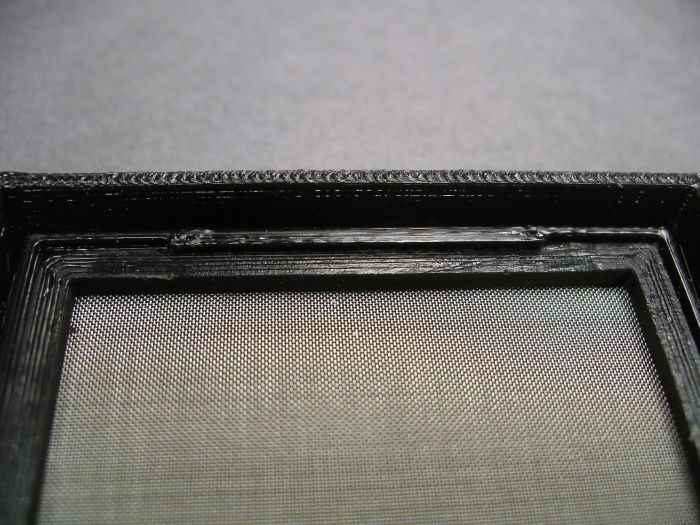
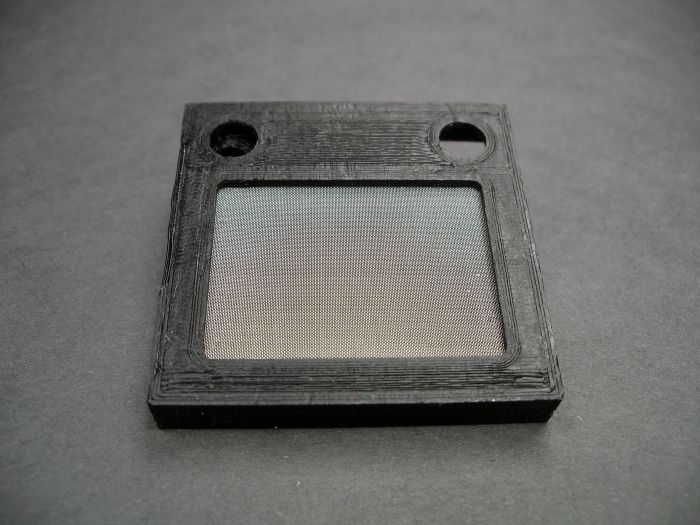
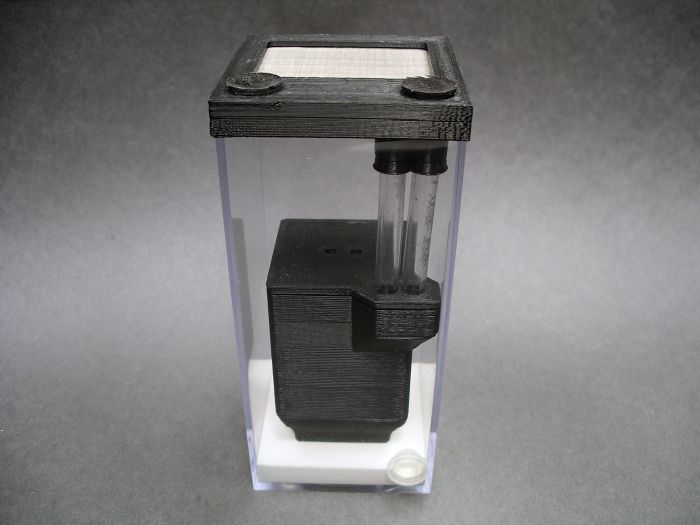
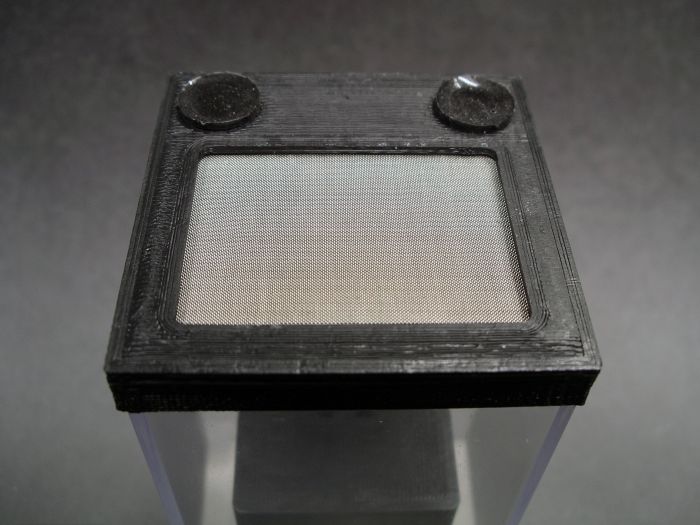
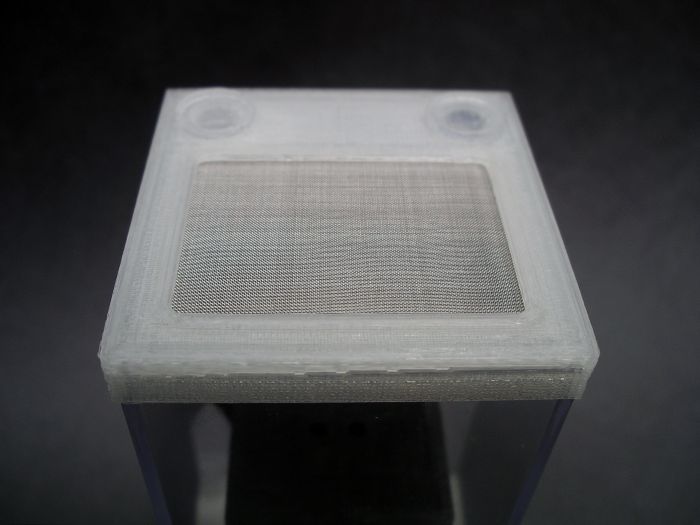
Here's the lid with the screen installed.
 
med_gallery_2_295_904411.jpg
 
 
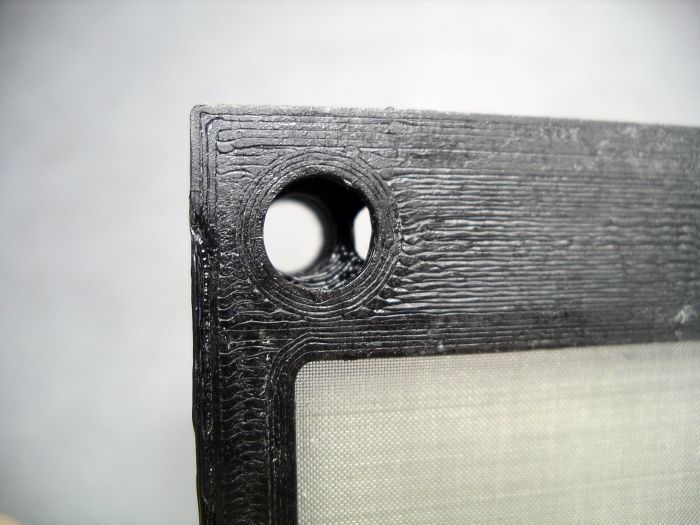
A better view inside the hydration hole/port.
 
med_gallery_2_295_282269.jpg
 
med_gallery_2_295_384424.jpg
 
 
The inner container lids fit tight enough to be sure they can't be pulled off by pulling on the vinyl tubes, yet are not so tight, they can't be removed by pulling on the hook.
 
med_gallery_2_295_543861.jpg
 
 
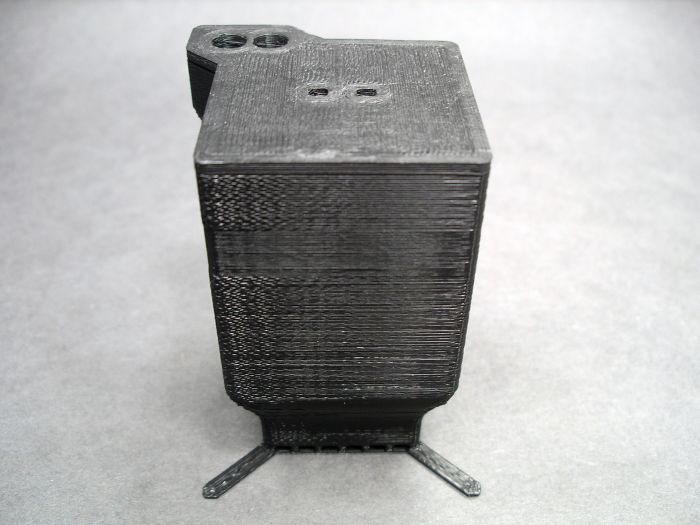
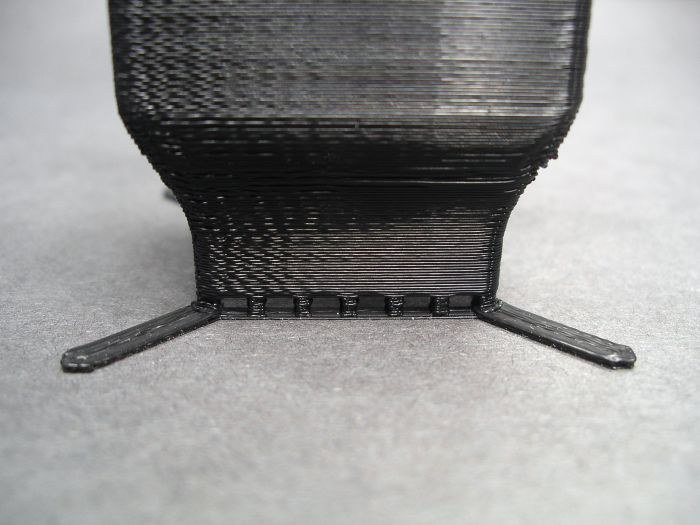
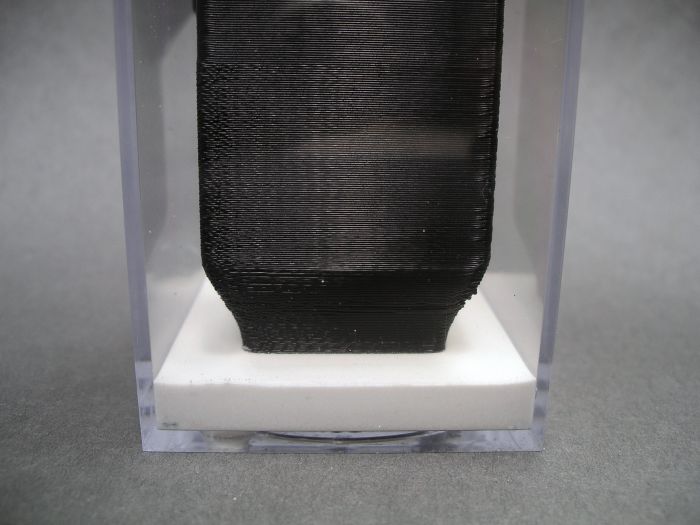
The "feet" on these new inner containers fit so much more perfectly inside the outer containers than the old ones did, allowing for a much more consistent thickness between the containers.
 
med_gallery_2_295_71173.jpg
 
 
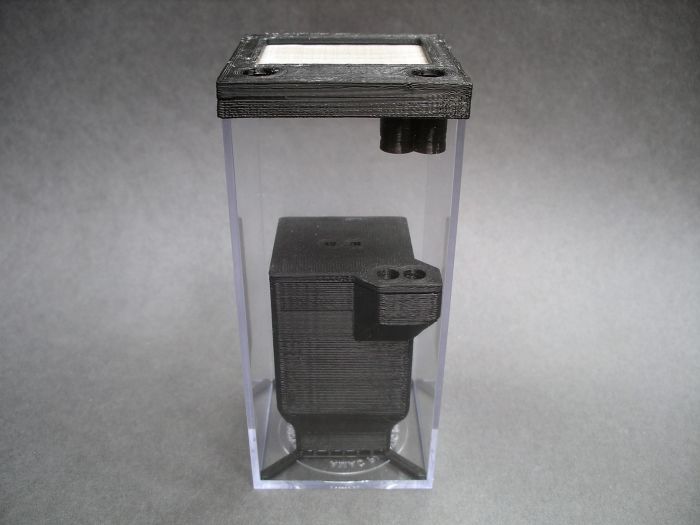
Here it is all complete without the substrate added. Now you can see what the black plugs are for. :)
 
med_gallery_2_295_641.jpg
 
med_gallery_2_295_700076.jpg
 
med_gallery_2_295_240680.jpg
 
 
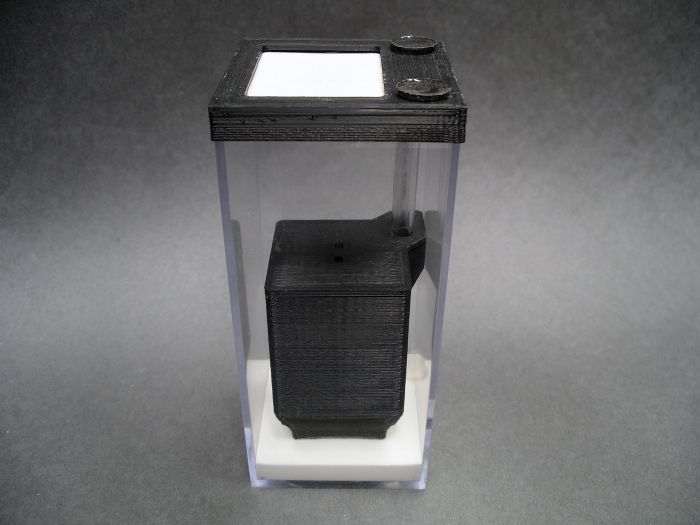
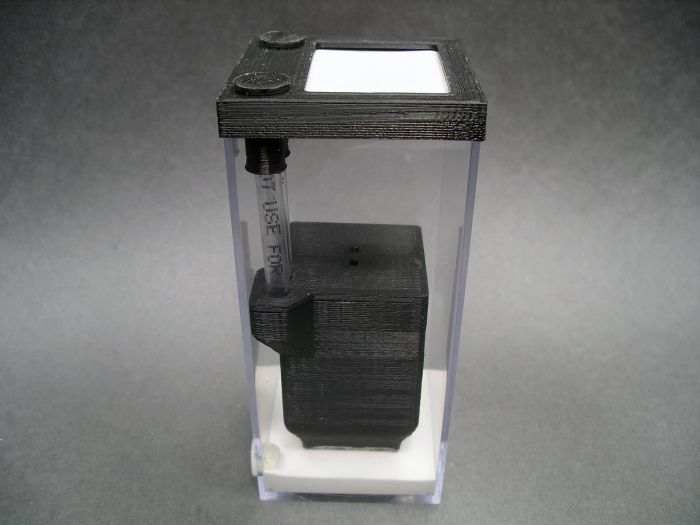
Not that it matters too much, but I need to try to find some tubing this size that doesn't have the stupid writing on the side of it.
 
med_gallery_2_295_779104.jpg
 
med_gallery_2_295_584791.jpg
 
med_gallery_2_295_1052642.jpg
 
med_gallery_2_295_767689.jpg
 
 
The tubing fits perfectly inside the lids, with as little friction as possible, making it very easy to place the lid on all the way, and ensuring that removing the lid will never result in pulling the tubes out of the inner container.
 
med_gallery_2_295_226362.jpg
 
 
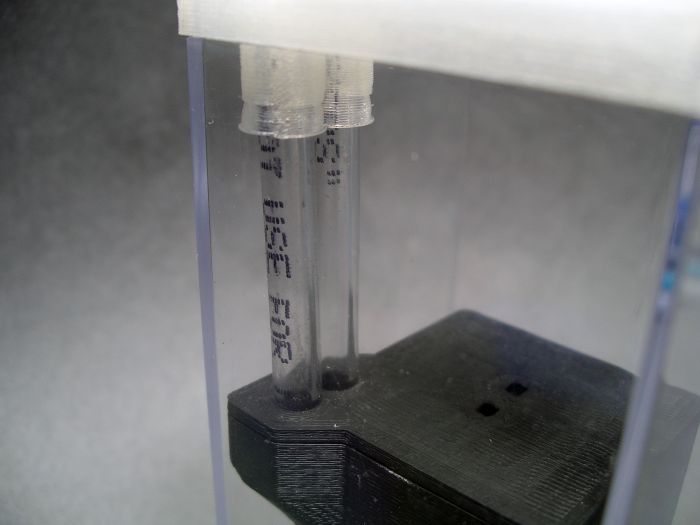
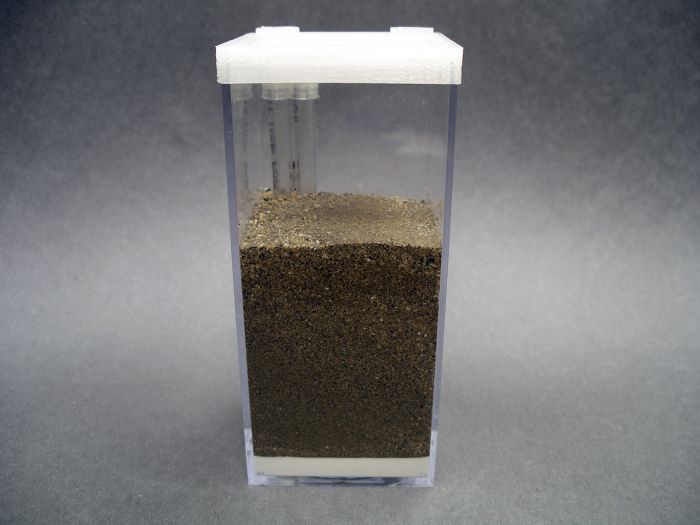
Here you can see how tightly the tubes fit into the inner container.
 
med_gallery_2_295_782862.jpg
 
 
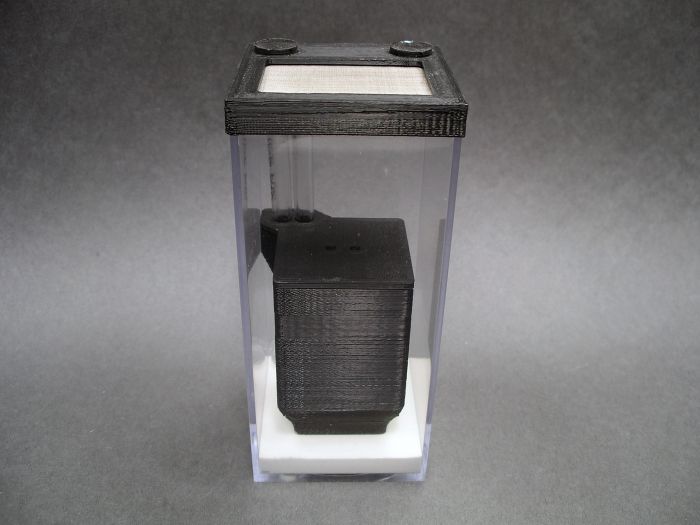
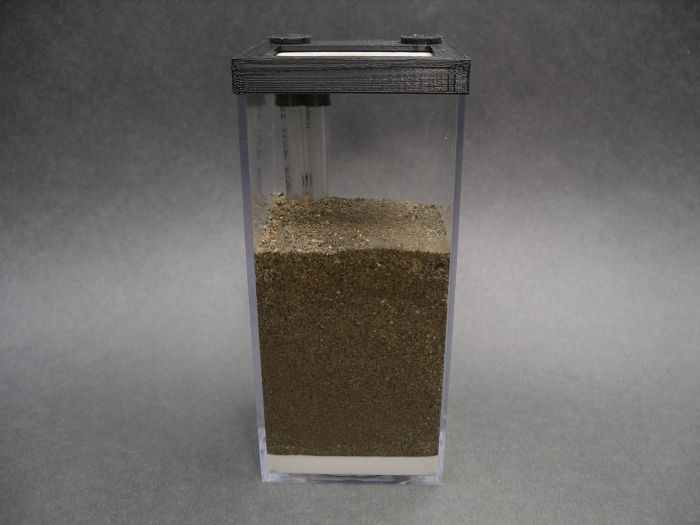
I made a translucent lid also. I'm still not sure which one I like more. The nice thing about this, is it might allow me to see if there are any ants around the feeding port/hole before pulling the plug out, one nice thing I may miss about the transparent stock lids.
 
med_gallery_2_295_1034727.jpg
 
med_gallery_2_295_265720.jpg
 
 
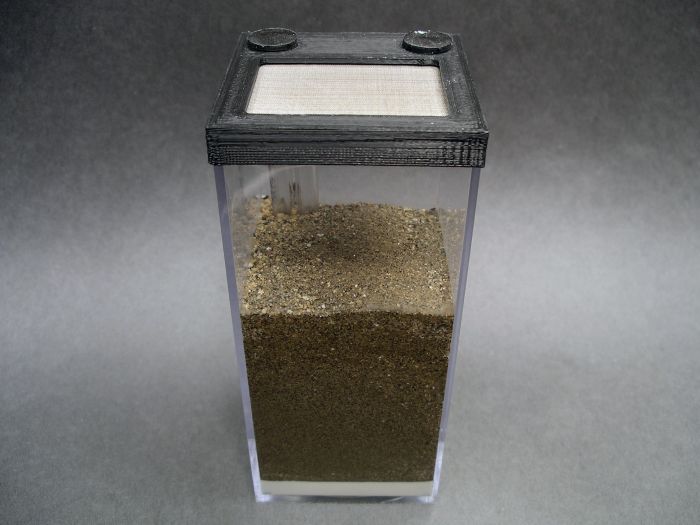
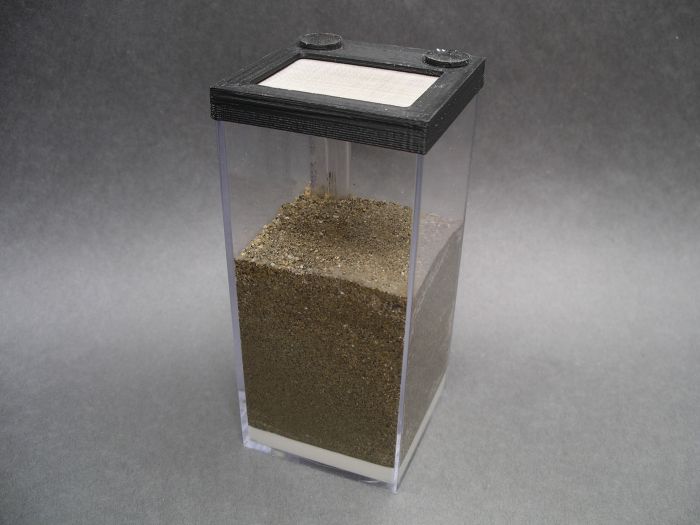
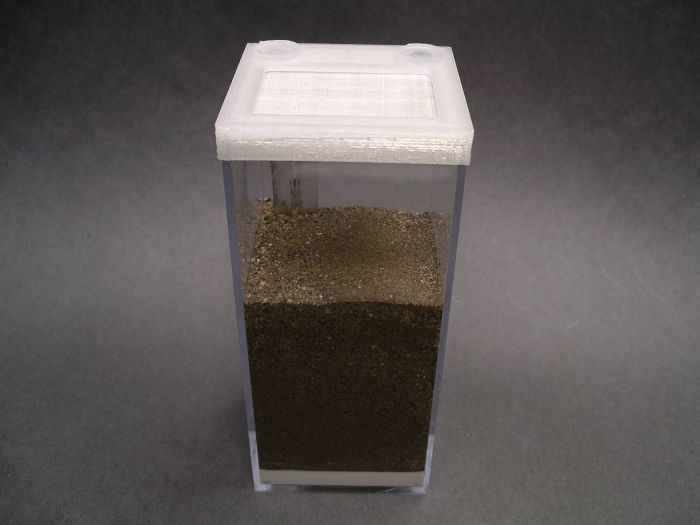
Here it is all filled with substrate and ready for use. :D
 
med_gallery_2_295_225592.jpg
 
med_gallery_2_295_1001228.jpg
 
med_gallery_2_295_520223.jpg
 
med_gallery_2_295_271091.jpg
 
med_gallery_2_295_80489.jpg
 
 
Let me know what you guys think about the colors so I can decide on one of them. Also, if any of you more technical people out there have any better ideas for some of these solutions I came up with, let me know.
  • Ants4fun, drtrmiller, ctantkeeper and 1 other like this

#165 Offline Kevin - Posted March 19 2017 - 4:46 AM

Kevin

    Advanced Member

  • Members
  • PipPipPip
  • 833 posts
  • LocationSouth Jersey

I would go with a lighter color, preferably white. Black looks worse 3D printed because of all of the flaws, and it is obvious you could use a bit of a tune as well. Other than that, the new Dirt Shack looks pretty straight forward. I'm guessing the printed parts aren't actually too big right? A few hours to print?


Edit: Not to mention, the white accents and matches the hydrostone.


Edited by Kevin, March 19 2017 - 7:19 AM.

Hit "Like This" if it helped.


#166 Offline Antking117 - Posted March 19 2017 - 4:50 AM

Antking117

    Advanced Member

  • Members
  • PipPipPip
  • 405 posts
  • LocationOmaha, Nebraska, USA

The translucent one is way cooler looking with that color of substrate. This is a very cool idea, and I can not wait to see it tested! How large is the container?


#167 Offline dspdrew - Posted March 19 2017 - 12:50 PM

dspdrew
  • LocationSanta Ana, CA

I would go with a lighter color, preferably white. Black looks worse 3D printed because of all of the flaws, and it is obvious you could use a bit of a tune as well. Other than that, the new Dirt Shack looks pretty straight forward. I'm guessing the printed parts aren't actually too big right? A few hours to print?


Edit: Not to mention, the white accents and matches the hydrostone.


A few hours yeah. The lighting in those pictures makes the print look worse than it normally does. It shows every little flaw.


#168 Offline dspdrew - Posted March 19 2017 - 12:51 PM

dspdrew
  • LocationSanta Ana, CA

Well, I sure am glad I spent all this time on these only to find out the damn Container Store discontinued these Amac boxes as well as all the others I use.


Edit: Okay, I found them on the website and it looks like they are still carrying them. Not sure what happened to the page they were on before. I also just called them and the girl on the phone said that she doesn't see that they have been discontinued in their system. She did say however that a lot of other sizes have been discontinued. I hope she isn't mistaken.


Edited by dspdrew, March 19 2017 - 1:14 PM.

  • Nathant2131 likes this

#169 Offline drtrmiller - Posted March 19 2017 - 1:00 PM

drtrmiller

    Vendor

  • Members
  • PipPipPip
  • 2,714 posts
Holy mackerel. That looks like a lot of work and planning.

You know, the Russians just use coarse pebbles on bottom.


byFormica® is the manufacturer of the iconic nectar feeders and Sunburst Ant Nectar.
byFormica ant products always deliver consistent performance, convenience,
and reliability, making them among the most beloved ant foods and kit enjoyed by
ant keeping enthusiasts worldwide. For more information, visit www.byFormica.com.

#170 Offline dspdrew - Posted March 19 2017 - 1:21 PM

dspdrew
  • LocationSanta Ana, CA

The translucent one is way cooler looking with that color of substrate. This is a very cool idea, and I can not wait to see it tested! How large is the container?


2-5/16" sq. x 5-1/16" h


#171 Offline ctantkeeper - Posted March 19 2017 - 2:23 PM

ctantkeeper

    Advanced Member

  • Members
  • PipPipPip
  • 704 posts
  • LocationCT

Really awesome design, love it!!!!


#172 Offline Alabama Anter - Posted March 19 2017 - 4:45 PM

Alabama Anter

    Advanced Member

  • Members
  • PipPipPip
  • 1,102 posts
  • LocationBoulder, Colorado

Wow.... Amazing...


YJK


#173 Offline Superant33 - Posted March 19 2017 - 5:45 PM

Superant33

    Advanced Member

  • Members
  • PipPipPip
  • 184 posts
Nice. Very nice.

#174 Offline Antking117 - Posted March 19 2017 - 9:20 PM

Antking117

    Advanced Member

  • Members
  • PipPipPip
  • 405 posts
  • LocationOmaha, Nebraska, USA

Oh I see! So is this for founding colonies? Also plan on making a larger one? This is way cooler in my opinion than anything any of the shops out there offer.


  • Runner12 likes this

#175 Offline dspdrew - Posted March 19 2017 - 9:26 PM

dspdrew
  • LocationSanta Ana, CA

Oh I see! So is this for founding colonies? Also plan on making a larger one? This is way cooler in my opinion than anything any of the shops out there offer.


Yeah, I plan to update the larger sizes too.


#176 Offline Antking117 - Posted March 19 2017 - 9:48 PM

Antking117

    Advanced Member

  • Members
  • PipPipPip
  • 405 posts
  • LocationOmaha, Nebraska, USA


Oh I see! So is this for founding colonies? Also plan on making a larger one? This is way cooler in my opinion than anything any of the shops out there offer.


Yeah, I plan to update the larger sizes too.


I want some sort of formica this year, also camponotus. Would this sort work for them? It should to Formica, but IDK about the camponotus. Also would you sell these if so? how much money would they go for? or would you share a download to make them ourselves? :) thank you


#177 Offline dspdrew - Posted March 19 2017 - 9:50 PM

dspdrew
  • LocationSanta Ana, CA


Oh I see! So is this for founding colonies? Also plan on making a larger one? This is way cooler in my opinion than anything any of the shops out there offer.


Yeah, I plan to update the larger sizes too.


I want some sort of formica this year, also camponotus. Would this sort work for them? It should to Formica, but IDK about the camponotus. Also would you sell these if so? how much money would they go for? or would you share a download to make them ourselves? :) thank you


If your Camponotus is ground-nesting, then it should work. Sure, I will make the files available once they are complete.


#178 Offline Antking117 - Posted March 19 2017 - 9:59 PM

Antking117

    Advanced Member

  • Members
  • PipPipPip
  • 405 posts
  • LocationOmaha, Nebraska, USA


Oh I see! So is this for founding colonies? Also plan on making a larger one? This is way cooler in my opinion than anything any of the shops out there offer.


Yeah, I plan to update the larger sizes too.


I want some sort of formica this year, also camponotus. Would this sort work for them? It should to Formica, but IDK about the camponotus. Also would you sell these if so? how much money would they go for? or would you share a download to make them ourselves? :) thank you


If your Camponotus is ground-nesting, then it should work. Sure, I will make the files available once they are complete.


Since a Camponotus pennsylvanicus is in wood, probably not so much? Either way fantastic looking! Can't wait to see it in action, any ideas of when you will use it?


#179 Offline dspdrew - Posted March 19 2017 - 10:15 PM

dspdrew
  • LocationSanta Ana, CA


Oh I see! So is this for founding colonies? Also plan on making a larger one? This is way cooler in my opinion than anything any of the shops out there offer.


Yeah, I plan to update the larger sizes too.


I want some sort of formica this year, also camponotus. Would this sort work for them? It should to Formica, but IDK about the camponotus. Also would you sell these if so? how much money would they go for? or would you share a download to make them ourselves? :) thank you


If your Camponotus is ground-nesting, then it should work. Sure, I will make the files available once they are complete.


Since a Camponotus pennsylvanicus is in wood, probably not so much? Either way fantastic looking! Can't wait to see it in action, any ideas of when you will use it?


I'm using tons of the older ones right now, but the next honeypot queen I find will go in one of these new ones.


#180 Offline Antking117 - Posted March 19 2017 - 10:25 PM

Antking117

    Advanced Member

  • Members
  • PipPipPip
  • 405 posts
  • LocationOmaha, Nebraska, USA

Good luck! 


Also tagged with one or more of these keywords: formicarium, out world, ant nest, how-to, tutorial, dspdrew

0 user(s) are reading this topic

0 members, 0 guests, 0 anonymous users