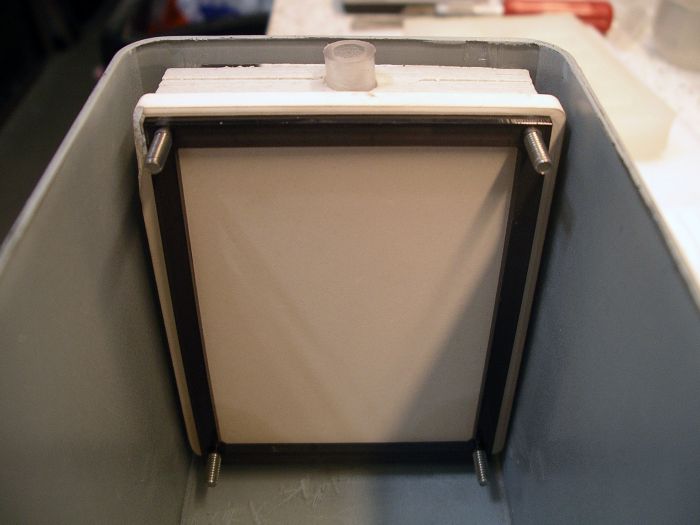
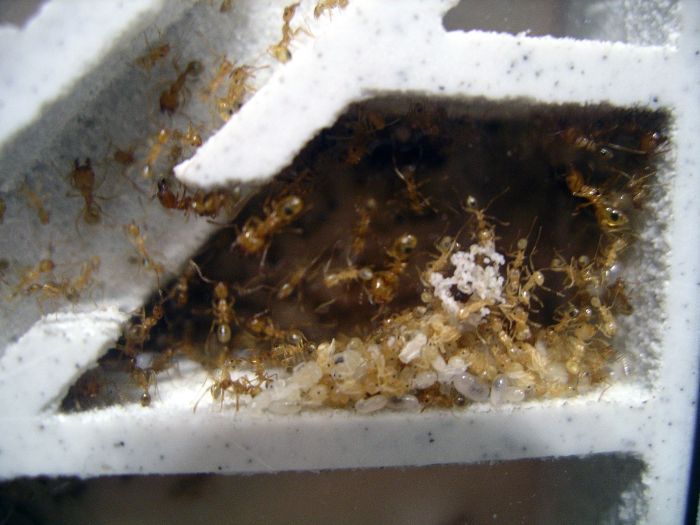
I'm still testing out the prototypes. Both colonies in the prototypes are doing really well. The
Veromessor pergandei colony has been in one for two and a half months, and the
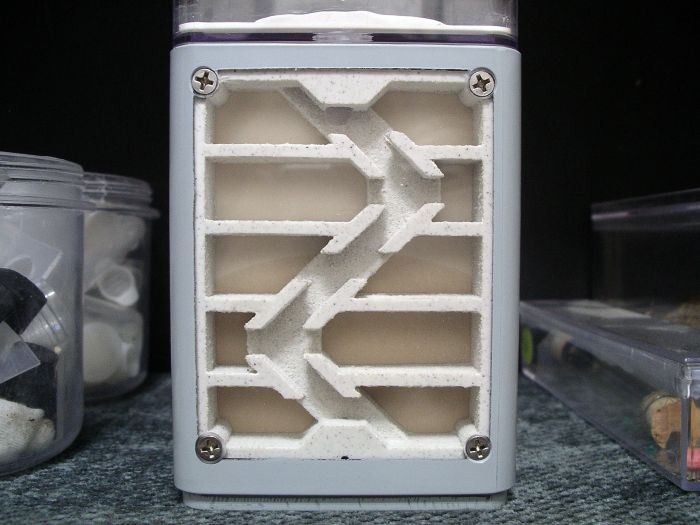
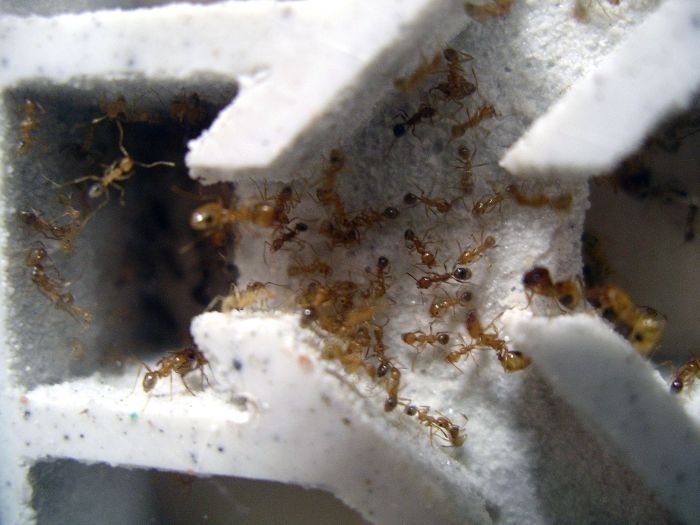
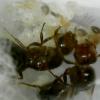
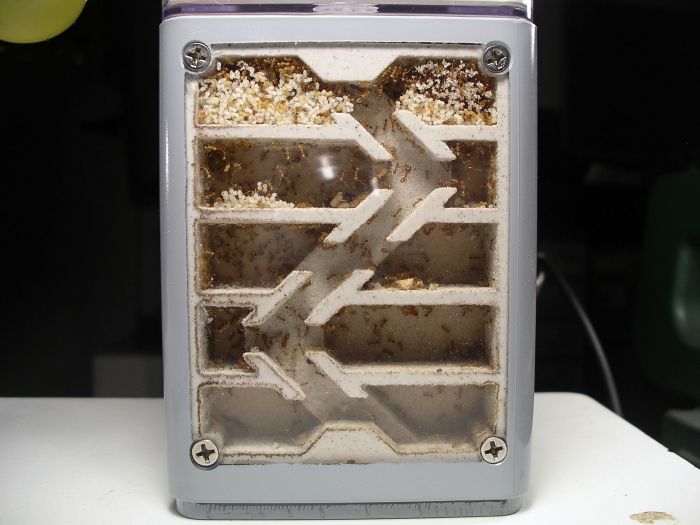
Pheidole hyatti have been in one for a month and a half so far. Here you can see how much the
Pheidole colony has grown since I put them in it.
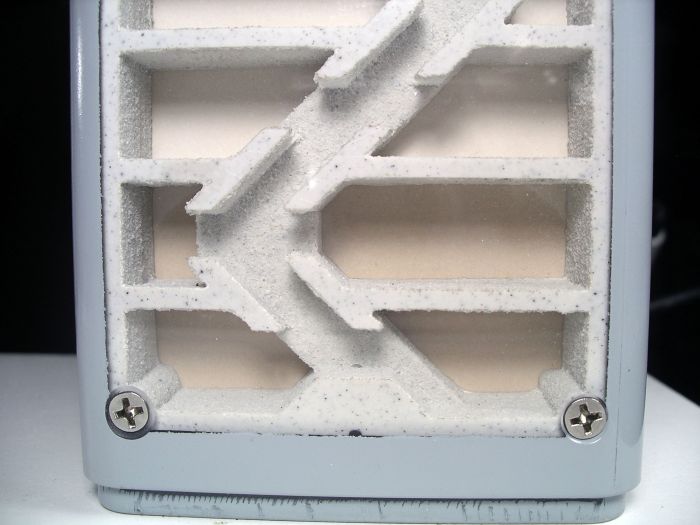
The prototype I'm keeping the
Veromessor in for some reason keeps building up a little water on the very bottom, and I really can't figure out why. It might have something to do with the angle of the bottom. When it was being cast, it might have pushed out slightly, making the bottom angle downward toward the front just a tiny bit. The other prototype doesn't have this problem.
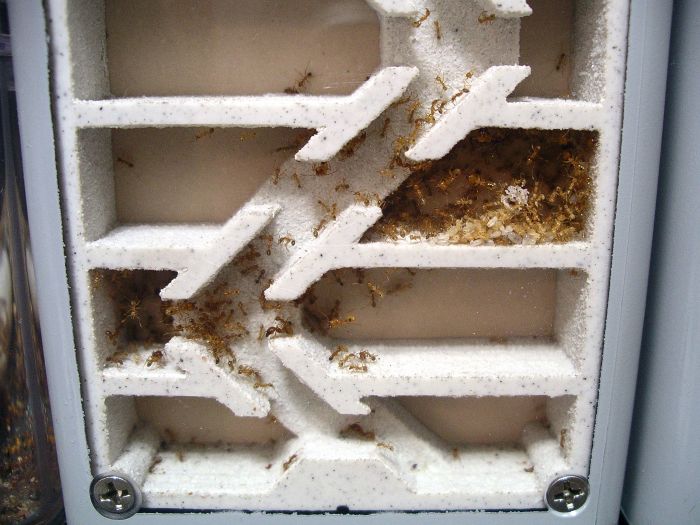
One thing I found out because of this problem, is how much the ants prefer a very specific moisture level. Since it floods slightly, I've been having to pull the tank away from the backing for a while, and once it starts drying out, I have to put it back on it for a while. Every time I do this, there is a time frame of about 8 hours that almost every single one of the 1500 or so ants are inside the nest. Every time, shortly after this, the ants all start piling out of the nest and start streaming up the sides of the out world. The ones left in the nest are mostly all in the bottom chambers, where they also start moving all of their brood. They go through this cycle every single time, so I know for sure there is a very specific moisture level that they prefer. Because of this, I think I'm going to look into some sort of simple way to adjust the moisture level.
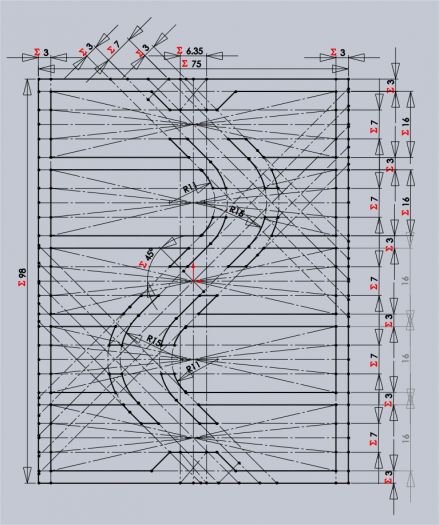
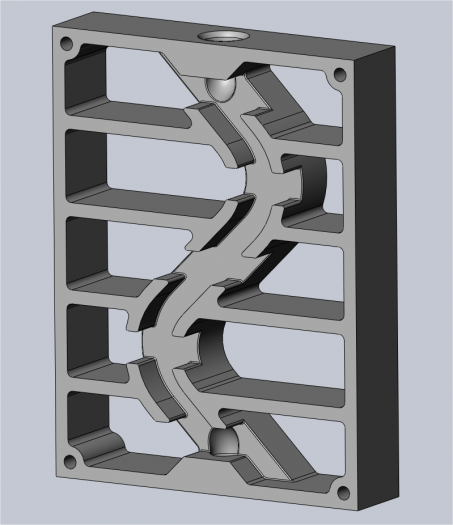
At this point, I still need to get the nest digitally drawn out so I can have a high resolution 3D print made of it.