Jump to content

  • Chat
  •  
  •  

Welcome to Formiculture.com!

This is a website for anyone interested in Myrmecology and all aspects of finding, keeping, and studying ants. The site and forum are free to use. Register now to gain access to all of our features. Once registered and logged in, you will be able to create topics, post replies to existing threads, give reputation points to your fellow members, get your own private messenger, post status updates, manage your profile and so much more. If you already have an account, login here - otherwise create an account for free today!

Photo

Dspdrew's Formicarium 05 Research and Design (Updated 11-22-2023)

formicarium container out world enclosure how-to diy design dspdrew nest tutorial

  • Please log in to reply
237 replies to this topic

#1 Offline dspdrew - Posted January 28 2014 - 10:57 PM

dspdrew
  • LocationSanta Ana, CA
For a while now I have been trying to come up with the perfect formicaria for myself. I'm basically designing a whole series of completely customizable, interchangeable, and reusable, laboratory style formicaria. I plan to make these as simple, compact, and uniform as possible, and with a hydration system that can last at least one month before needing to be refilled. I am starting with some that will hold fairly small colonies, and have the capability of holding very tiny ants also, ants as small as Brachymyrmex. This seems to be something absent from most of the formicaria being built today. It basically means these can't be built sloppily; they'll need to be made with precision and with very little slack.
 
In this thread I'm going to keep a journal of all my designing, researching and testing. I have not actually designed this in a computer drafting application yet, because at this point, I really have no idea if some of my ideas and concepts will even work the way I'm thinking they will. I'm a very logical person with a good understanding of how a lot of things work, but I am not an engineer, so there will still be a lot of trial and error, and of course a lot of learning along the way.
 
So far I have made this prototype to use for all of my testing (and of course to put my Myrmecocystus sp. colonly in once I retire it, because they desperately need a new home). I was jsut winging it as I made this, so of course there's a lot of obvious mistakes, but none of which should have any effect on its use in testing.
 
gallery_2_131_47562.jpg
 
gallery_2_131_157191.jpg
 
gallery_2_131_125199.jpg
 
gallery_2_131_25860.jpg
 
gallery_2_131_19151.jpg
  • T.C. likes this

#2 Offline dspdrew - Posted January 28 2014 - 11:04 PM

dspdrew
  • LocationSanta Ana, CA
This is the basic idea for the water tank, as you can see it's similar to the gas tank on a car. it should feed water to the nest ONLY as fast as it evaporates, being that it's a sealed container with a vacuum inside, just like a test tube. I made this from a smaller container of the same type the formicarium is made from and a few small plastic test tubes. I tested it and it's completely air-tight; solvent plastic welding works great.
 
gallery_2_131_35480.jpg
 
gallery_2_131_129613.jpg

#3 Offline dspdrew - Posted January 28 2014 - 11:22 PM

dspdrew
  • LocationSanta Ana, CA
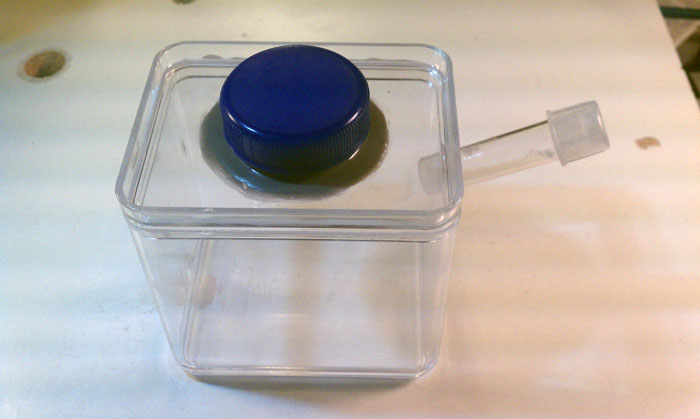
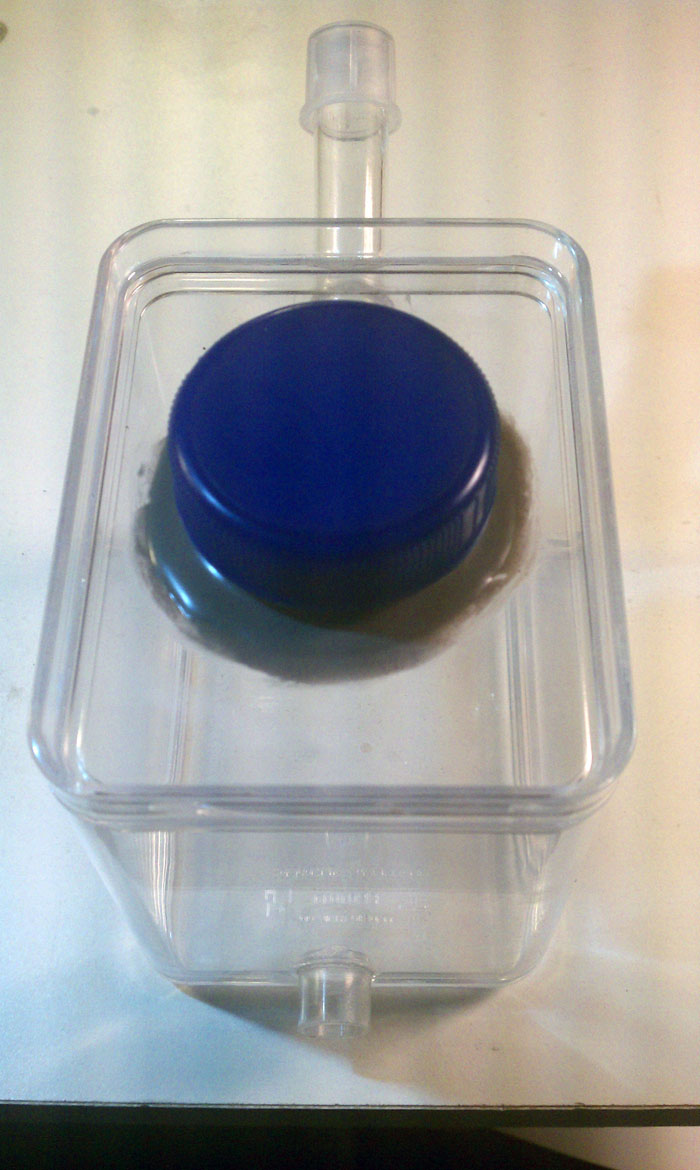
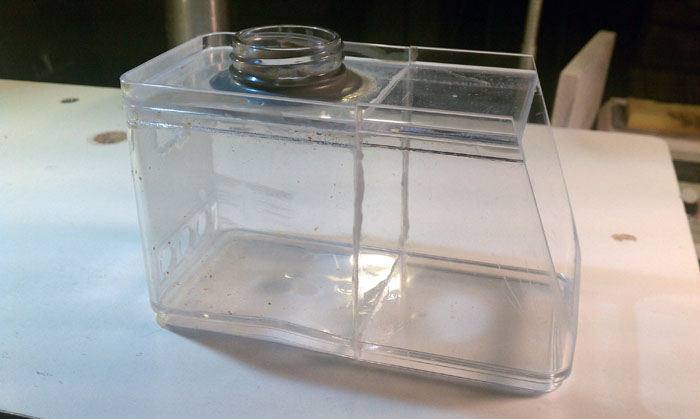
Ok, so I gave my tank a little test, and it pretty much failed. Having a hose a few inches long coming out the side almost horizontally will never allow any water to come out as long as the container is sealed. If the hose came out the bottom, there would be enough gravity pulling the water down to allow it to flow out and air to seep in. Since I have no plan to have a hose coming out of the bottom of the water tank, I had to think of some other way to solve this problem. Getting rid of the hose all together would most likely do the job.
 
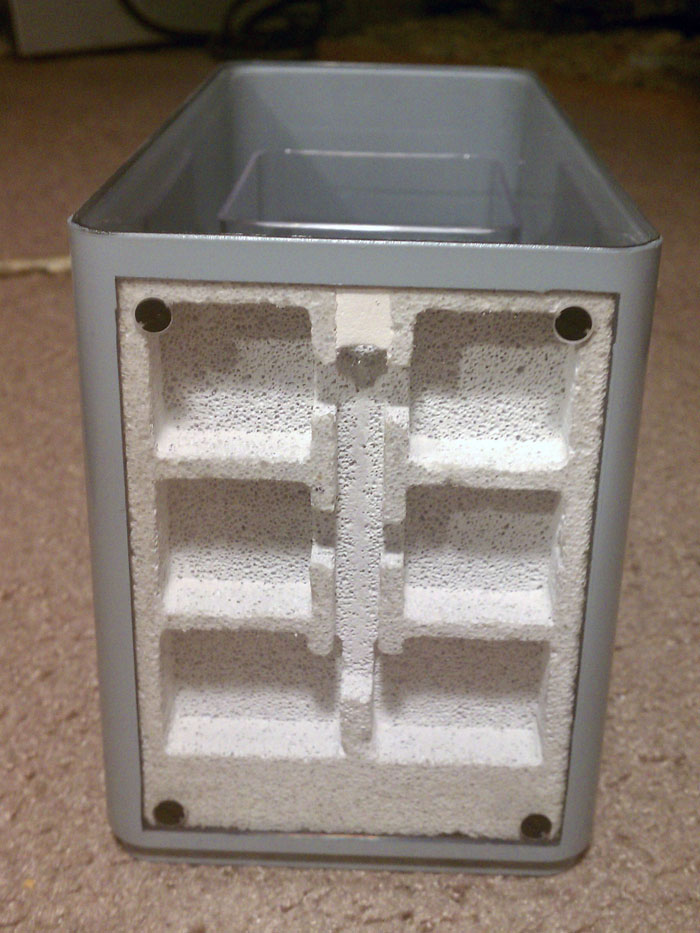
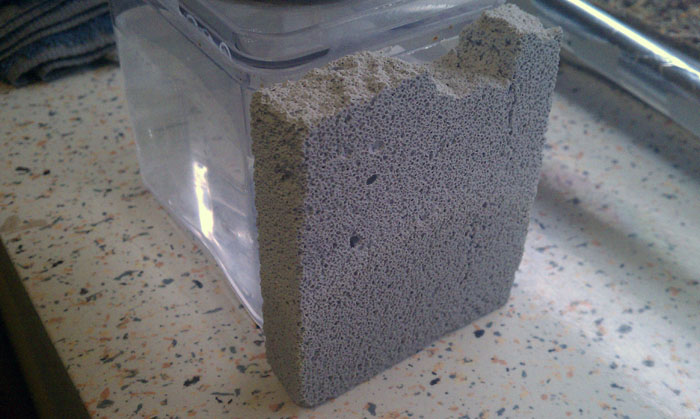
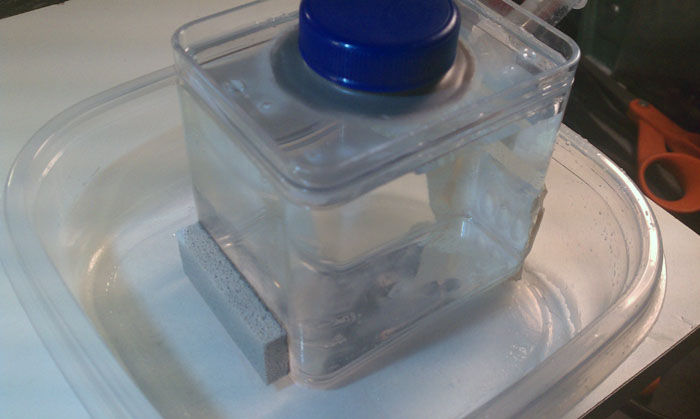
My plan now is to drill more holes along the bottom of the tank, and actually mount the piece of Ytong or Hydrostone directly to it, covering over the holes. This would make it even more like the common test tube setup. I first drilled the holes and filled the tank just to see how well the water would drain without any material used for resistance; the water slowly and steadily drained out with a steady flow of air bubbles going in. I cut a small piece of Ytong, and a small piece of Hydrostone down to size and glued them over the holes. I decided to test both out, one on each side at the same time which was a bad idea because it kind of messed up the vacuum inside the tank. I ended up having to duct tape over each side as I tested the other. I decided to attach the Ytong with JB Weld, and I used silicone for the Hydrostone. I'm not sure if JB Weld is safe to use, especially coming in contact with the ants' drinking water, so I most likely will be using silicone unless this test shows that silicone just isn't going to hold good enough. I do know that silicone works great on glass, but does not stick well at all on plastic, so we'll see. I also sanded down the plastic making it very rough before applying the silicone too, so we'll see if this makes any difference.
 
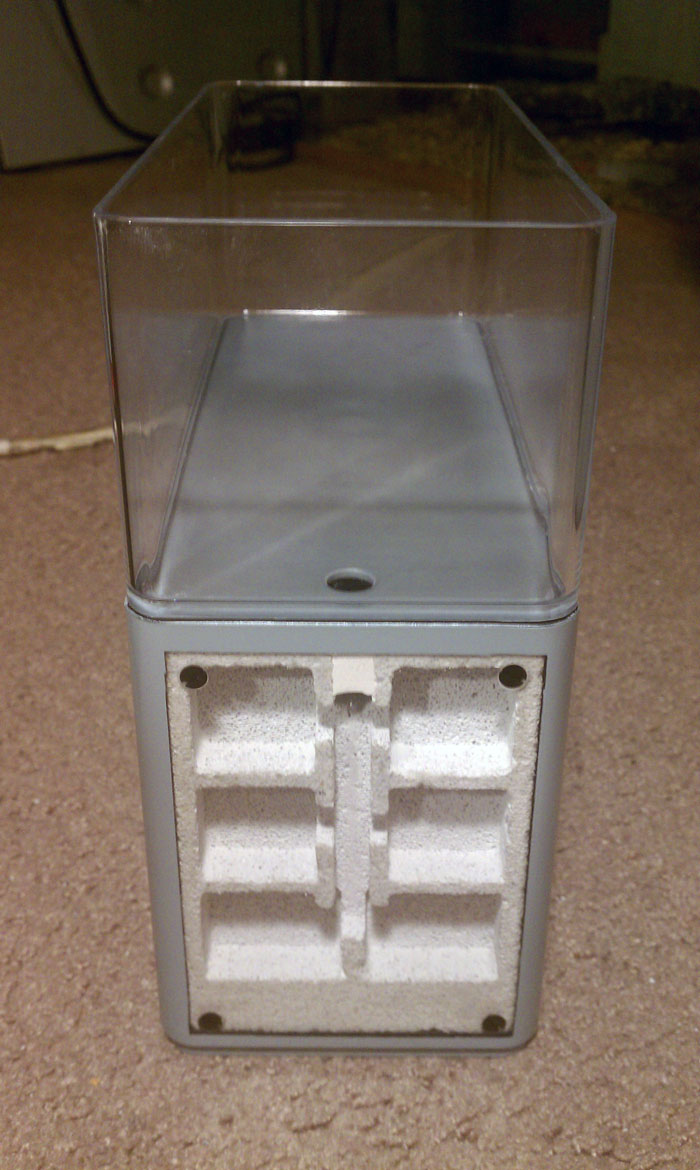
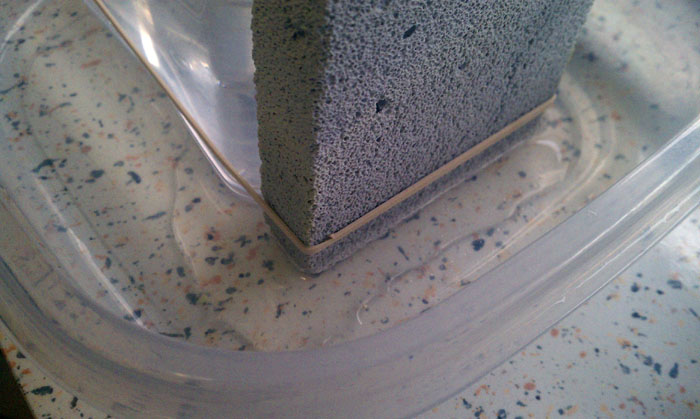
Here's a picture of the tank with the Ytong being tested out.
 
gallery_2_131_22880.jpg
 
So far it seems to be working well, but I do notice that once the Ytong is saturated and the water has nowhere else to go, it does starts to drip down to the bottom a little bit. This probably won't be a problem considering how fast the water evaporates from Ytong. Once this is up against the larger Ytong nest backing, it will never be able to completely saturate all of it, so there shouldn't be anything dripping onto the bottom of the formicarium. I'm going to leave this overnight without anything for the water to wick into, and see how much of it drips down.
 
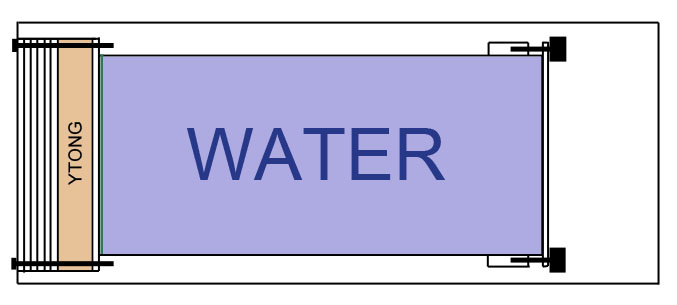
While working on the water tank, I have also been testing out some pieces of Ytong of different thicknesses, to see how far up the water would wick while it sits with about 1/2 inch of it submerged. Out in the open air with about 40 to 60 percent humidity in my apartment, the water wicked up about 1.5 inches on all of the pieces regardless of their thickness. This amount will make the ideal moisture gradient for the nest size of most of these formicaria I'm designing. I am now going to test this out inside something that will raise the humidity quite a bit to see how far up that allows the water to wick. I'm assuming it will be the same, with just a slower rate of wicking and evaporation, since it's really just gravity verses the power of capillary action. I should have some results in the morning.

#4 Offline dspdrew - Posted January 29 2014 - 6:25 AM

dspdrew
  • LocationSanta Ana, CA

This morning I checked the water tank, and the Ytong plate was still saturated, without any moisture below it or on the bottom of the tank, so this design should work perfectly. I'll check it again about eight hours from now to be sure, and then I will try putting it up against a larger piece of Ytong about the size of what will be the nest backing, to see how well the water transfers to it from the Ytong plate on the tank. As for the wicking test, it did exactly what I expected; it wicked up to the same level at 85 percent humidity as it did at 60 percent.


  • BugFinder likes this

#5 Offline Crystals - Posted January 29 2014 - 6:45 AM

Crystals

    Advanced Member

  • Moderators
  • PipPipPip
  • 2,048 posts
  • LocationAthabasca, AB (Canada)

I will be watching this with curiosity.  It looks interesting, especially for people who are constantly gone for a week or so.


"Always do right. This will gratify some people, and astound the rest." -- Samuel Clemens


List of Handy Links   (pinned in the General section)

My Colonies


#6 Offline dspdrew - Posted January 29 2014 - 1:29 PM

dspdrew
  • LocationSanta Ana, CA

Okay, so wook just gave me a great idea. There really is no need for Ytong or Hydrostone on the tank, and instead just a bunch of very small holes. This would basically behave exactly the same as the Ytong, but with MUCH less work and complexity involved in making it. I'll be going with this plan as soon as I get home today and we'll see how well it works.


#7 Offline wook - Posted January 29 2014 - 2:07 PM

wook

    Advanced Member

  • Members
  • PipPipPip
  • 126 posts
  • LocationSarajevo, Bosnia and Herzegovina

you will need very very tiny holes to sustain that much of water unless it's going to be closed can. :P


...:::]|wook|[:::...


#8 Offline dspdrew - Posted January 29 2014 - 2:17 PM

dspdrew
  • LocationSanta Ana, CA

What? You already know this tank is sealed. :P


#9 Offline LAnt - Posted January 29 2014 - 7:50 PM

LAnt

    Advanced Member

  • Members
  • PipPipPip
  • 211 posts
  • LocationLos Angeles

just wondering but how does the water get to the nest from the tank? 


#10 Offline dspdrew - Posted January 30 2014 - 7:08 AM

dspdrew
  • LocationSanta Ana, CA

just wondering but how does the water get to the nest from the tank?

 
With the design I have at this point, the water soaks into the nest's Ytong backing directly through the holes drilled in the side of the tank. It took it a while, but after a few hours, the Ytong was hydrated perfectly with a nice moisture gradient half way up, and not a drop of water on the counter-top below it.
 
Here's a picture of the Ytong and the moisture gradient.
 
gallery_2_131_87772.jpg
 
 
I put a line on the tank right at the water level, so after 12 hours I can see exactly how much has evaporated. This should give me an idea of how long the water in this tank will last.

#11 Offline Crystals - Posted January 30 2014 - 7:50 AM

Crystals

    Advanced Member

  • Moderators
  • PipPipPip
  • 2,048 posts
  • LocationAthabasca, AB (Canada)

Will the water potentially flood the tunnels when you refill the tank?


I know once it is sealed and the vacuum gets established it will act like a test tube or one of my ant waterers.


"Always do right. This will gratify some people, and astound the rest." -- Samuel Clemens


List of Handy Links   (pinned in the General section)

My Colonies


#12 Offline dspdrew - Posted January 30 2014 - 9:50 AM

dspdrew
  • LocationSanta Ana, CA

Will the water potentially flood the tunnels when you refill the tank?


I know once it is sealed and the vacuum gets established it will act like a test tube or one of my ant waterers.


If you just tried to open the tank and fill it, then yes, it probably would start to flood a little bit before you could get it filled up. This is why I am planning to take the tank out to fill it up. The idea is to set the full tank in place, and have a fence like piece at the back of where the tank sits with some thumb screws that you will tighten up to hold it tightly against the Ytong. The out world will be able to be easily lifted up and moved out of the way, because it will be connected to the nest with a soft silicone tube. I plan to try filling it without taking it out first just to see how badly it floods, if it's not too bad, then you might not even need to take it out. I will of course still give you the option of taking it out to allow for cleaning.


#13 Offline dspdrew - Posted January 30 2014 - 2:45 PM

dspdrew
  • LocationSanta Ana, CA
Here's a quick drawing I did of what the base container will look like from the top.
 
gallery_2_131_37983.jpg
 
After all day at work, I came home and checked the test again, and there is still not a drop of water on the counter, and the moisture gradient is perfect now. This definitely looks like the hydration method I'm going with.

#14 Offline dspdrew - Posted January 30 2014 - 8:58 PM

dspdrew
  • LocationSanta Ana, CA
12 hours have gone by, and at 50 percent humidity, the water in the tank dropped down 2.5mm (5mm per day). This means with this tank filled all the way to the top, it can drop about 75mm, giving it about 15 days of hydration. Inside the formicarium, the humidity should be much higher than 50 percent, and I am also planning to use a much larger water tank, so this length of time might easily exceed one month, which would meet my minimum goal.
 
Another issue I was a little afraid of was what would happen when the water level dropped below the holes. I assumed this would basically break the seal, and cause the air pressure to increase way to fast, allowing the rest of the water to continue leaking out without the natural regulation of the sealed tank. I tested this out, and it actually wasn't a problem because the Ytong was so saturated where the holes are, that it still kept a good enough seal.
 
Now for the problem of filling the tank without removing it, which would be ideal, but might cause a flood. I gave this a try, and it wasn't too bad. I filled it up rather fast, but still got a bit of a flood.
 
gallery_2_131_54796.jpg
 
Since this is water basically pouring through the Ytong, and not wicking up and evaporating at a very slow rate, smaller holes might greatly reduce the amount of flooding. Another thing I noticed, is that the water is flowing through the Ytong directly down to the bottom of the container. Because of this, it doesn't look like much, if any of it is really going to flow into the chambers, being that  they are up a few millimeters from the bottom. A little flood of water in the bottom of the tank doesn't really matter anyways, because the Ytong will soak it up and it will evaporate away, not really causing any problems. This is nice, because it will make filling the tank a little less work, and the only real reason to take the tank out then, will be to clean it.

#15 Offline LAnt - Posted January 30 2014 - 9:02 PM

LAnt

    Advanced Member

  • Members
  • PipPipPip
  • 211 posts
  • LocationLos Angeles

Do you think you could sacrifice humidity by decreasing the number of holes so it would last longer?


#16 Offline dspdrew - Posted January 30 2014 - 9:05 PM

dspdrew
  • LocationSanta Ana, CA

Do you think you could sacrifice humidity by decreasing the number of holes so it would last longer?


I'm pretty sure it would still evaporate just as fast. The rate that the water comes out of the tank is not held back by the size of the holes, it's the rate of evaporation, and how much water the Ytong can hold. The only way to change the length of time the water will last, would be to change the amount of ventilation the formicarium has, therefor changing the rate of evaporation. I plan on making this adjustable anyways, with some simple vents in the base container, and the out world.


#17 Offline LAnt - Posted January 31 2014 - 7:36 PM

LAnt

    Advanced Member

  • Members
  • PipPipPip
  • 211 posts
  • LocationLos Angeles

That makes sense but another thing that came to mind was how are you going to prevent fogging on the glass. Is there such thing as a non fogging pane. 


  • RampageCrumpet likes this

#18 Offline dspdrew - Posted January 31 2014 - 11:03 PM

dspdrew
  • LocationSanta Ana, CA

I am thinking of using a layer of glass for the front of the formicarium, and if I do, I might heat it. Otherwise, as long as it's not too humid, and there is enough ventilation, I think you can avoid too much fogging.


#19 Offline dspdrew - Posted February 3 2014 - 7:50 AM

dspdrew
  • LocationSanta Ana, CA
I didn't spend much time working on the formicarium this weekend, so just a little of the water tank prototype is all I got done. I was unable to find any containers that would fit the way I wanted, so I decided to take two of the ones that I originally started testing with, and cut a portion off of each one, and then weld them together. I bought a new 14-inch cut-off saw that should make cutting these containers in half pretty easy, but if it still turns out to be too much work, I might just continue looking for another container that would at least work good enough. The tank also needs to have the front top corner cut off to allow for ventilation of the nest, and room for the tubing to come out the top horizontally towards the back.
 
Here you can see how it looks so far. It still needs a piece of acrylic welded to it to cap off the front, and the line of holes drilled along the bottom for the water transfer, but I ran out of time. Ignore the holes in the back I was using for testing, those are all capped off with acrylic.
 
gallery_2_131_23485.jpg
 
gallery_2_131_27723.jpg

#20 Offline dspdrew - Posted February 4 2014 - 7:26 AM

dspdrew
  • LocationSanta Ana, CA
Yesterday I didn't do much but put the last side piece on where I made the 20 degree angled cut (which I decided now I'm not going to do) and sanded it all down. Next it needs the row of small holes along the bottom of the front side where the water transfers to the nest.
 
Here's a picture of it so far.
 
gallery_2_131_15636.jpg


Also tagged with one or more of these keywords: formicarium, container, out world, enclosure, how-to, diy, design, dspdrew, nest, tutorial

0 user(s) are reading this topic

0 members, 0 guests, 0 anonymous users