Jump to content

  • Chat
  •  
  •  

Welcome to Formiculture.com!

This is a website for anyone interested in Myrmecology and all aspects of finding, keeping, and studying ants. The site and forum are free to use. Register now to gain access to all of our features. Once registered and logged in, you will be able to create topics, post replies to existing threads, give reputation points to your fellow members, get your own private messenger, post status updates, manage your profile and so much more. If you already have an account, login here - otherwise create an account for free today!

Photo

Pictures of Formicariums and Outworlds

photo pictures formicarium outworld

866 replies to this topic

#801 Offline GrandAntKing - Posted August 29 2022 - 6:53 PM

GrandAntKing

    Advanced Member

  • Members
  • PipPipPip
  • 65 posts
  • LocationWashington State

Nice setup!  Will you put queens in there or a colony?

Thanks! I already put about 7 queens around July 1st, only of one of them actually started a colony in there. A link to my journal if you want to read about it: https://www.formicul...s-ants-journal/


#802 Offline rptraut - Posted September 9 2022 - 9:47 PM

rptraut

    Advanced Member

  • Members
  • PipPipPip
  • 345 posts
  • LocationOntario, Canada

FOUNDING SETUP BECOMES FOUNDATION FOR MODULAR FORMICARIUM


A founding formicarium will become the foundation of a modular formicarium as the colony grows and additional sections are added.  I bought two Brachymyrmex depilis queens last year. These are my all time favorite ants, I think they are a marvel and an amazing example of Nature's ability to miniaturize a social insect. The founding setup I used for them is pictured below.  It is made from a modified spice container.  I put cotton padding in the bottom which will soak up water and wick it up to the substrate.  Then I layered sphagnum moss and wood chips, leaving lots of spaces for a queen to make a chamber,  and finished off with moss and stones on the top.  In one container I put a piece of wood, (a cut down 2x4) in the center and put the sphagnum moss and chips around it so the ants will hopefully nest where I can see them.  I wrapped red cellophane and black felt around the outside for later observation.  I keep these setups well hydrated as you can see from the condensation.


 post-6706-0-77505000-1662619567.jpg


post-6706-0-32195000-1662619619.jpg


For B depilis I supply water and sugar water with cotton waterers, so no water hole was provided in this setup.  I hydrate from the top and try to keep it fairly moist.  I run the water down the side and it wicks back up to the chips and moss and no one gets flooded out.  The top on this spice jar lifts up on the large side for feeding/watering, while the smaller side is screened for added ventilation when it is lifted up. 


I use a similar setup for founding Lasius and Tetramorium colonies with the addition of the water hole (tower) and hydration port plus at least one, usually two, 1/2 inch tubes installed for later connections.


post-6706-0-66361200-1662619649.jpg


post-6706-0-84397100-1662619682.jpg


These founding formicaria are placed on a piece of wet cardboard in a covered box and placed on plant lights for heat.  They can dry out quickly when heated so regular hydration is important. 


I use these setups for B. depilis as it is thought they require higher humidity than a test tube can supply, but they work equally well for other ants with a somewhat modified watering schedule to lower the humidity to acceptable levels for that species.  I have also used it for queens that wouldn't settle down in a test tube and were constantly trying to dig their way out.  Once placed in this setup, they quickly got established and set up house.  Once a colony is growing in this setup and requires more room, it is easy to connect to another nest chamber, or outworld/nest chamber combination.  I have found that this smaller chamber often then becomes the queen's chamber while her brood is being transferred to and raised in the larger connected nest chamber.  Many queens seem to prefer this type of arrangement.  I have found that Lasius, Tetramorium and Myrmica queens will take advantage of a separate chamber, or even a test tube connected between nest chambers, as a secluded place to lay their eggs and care for the very young larvae.   When they reach a certain size the workers transfer them to the larger space and rear them there.  


2022-08-21 002.JPG


This is an example of how these sections have been combined when more space was required by this growing Tetramorium colony.  First an additional nest chamber/outworld was added and as they turned more and more of it into their nest chamber  I added the additional outworld to make feeding and watering easier.  The tubing between the sections also adds a little entertainment value for me as I watch their comings and goings.  This has been a successful system for me because I can gradually increase the size of housing to match the needs of the colony, adding sections as required.  Last fall, colonies in this type of combination, congregated in their winter huddle in one of the main nest sections and I was able to disconnect the other sections and only store the one formicarium for hibernation.  This allowed me to recombine each section differently this spring and summer as each colony grew.  I have found that a modular formicarium is a flexible and practical system for growing colonies.


  • UtahAnts likes this
My father always said I had ants in my pants.

#803 Offline rptraut - Posted December 2 2022 - 3:04 AM

rptraut

    Advanced Member

  • Members
  • PipPipPip
  • 345 posts
  • LocationOntario, Canada

Formicarium for a Small Colony

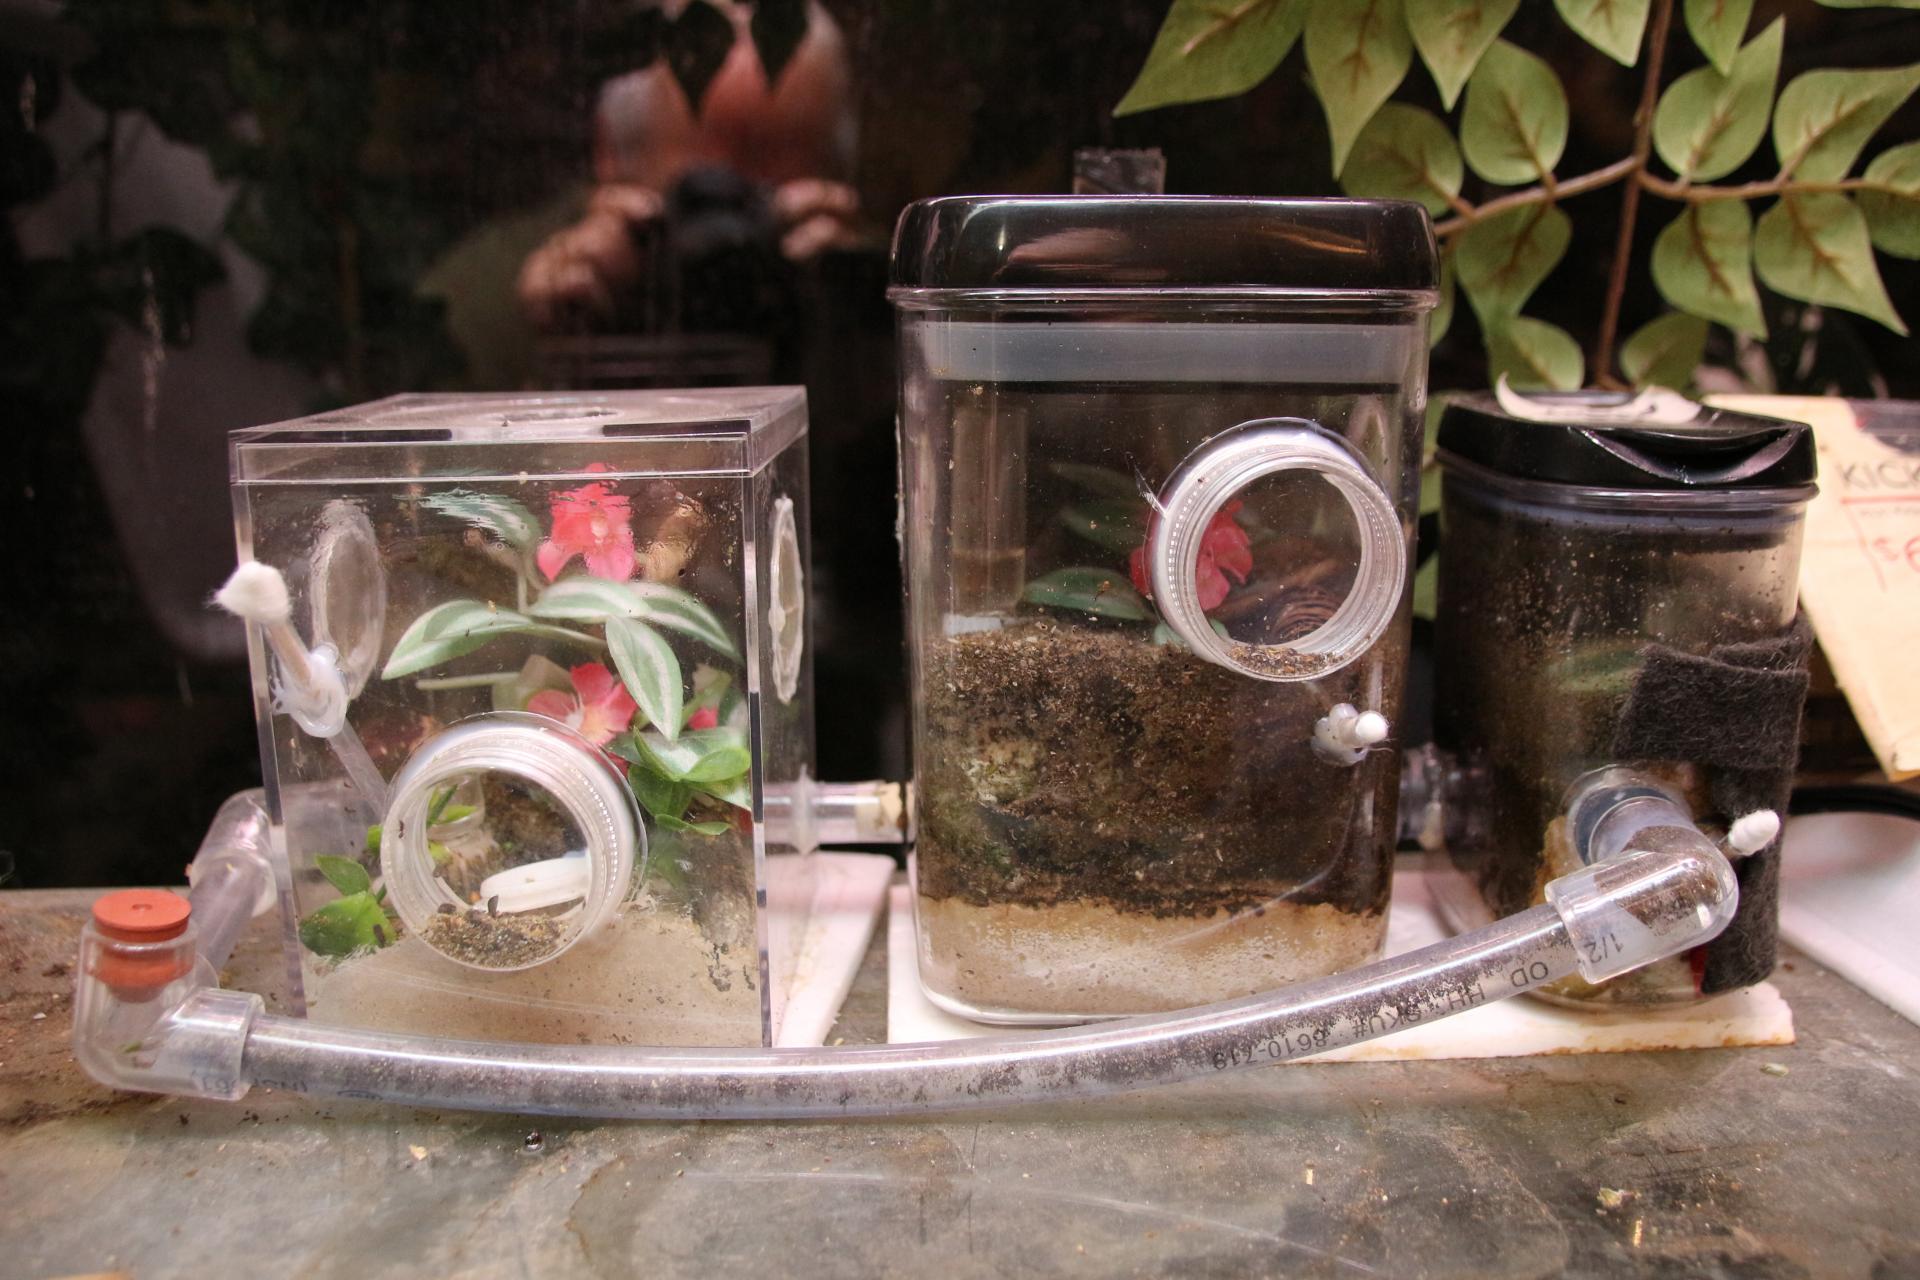
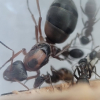
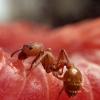
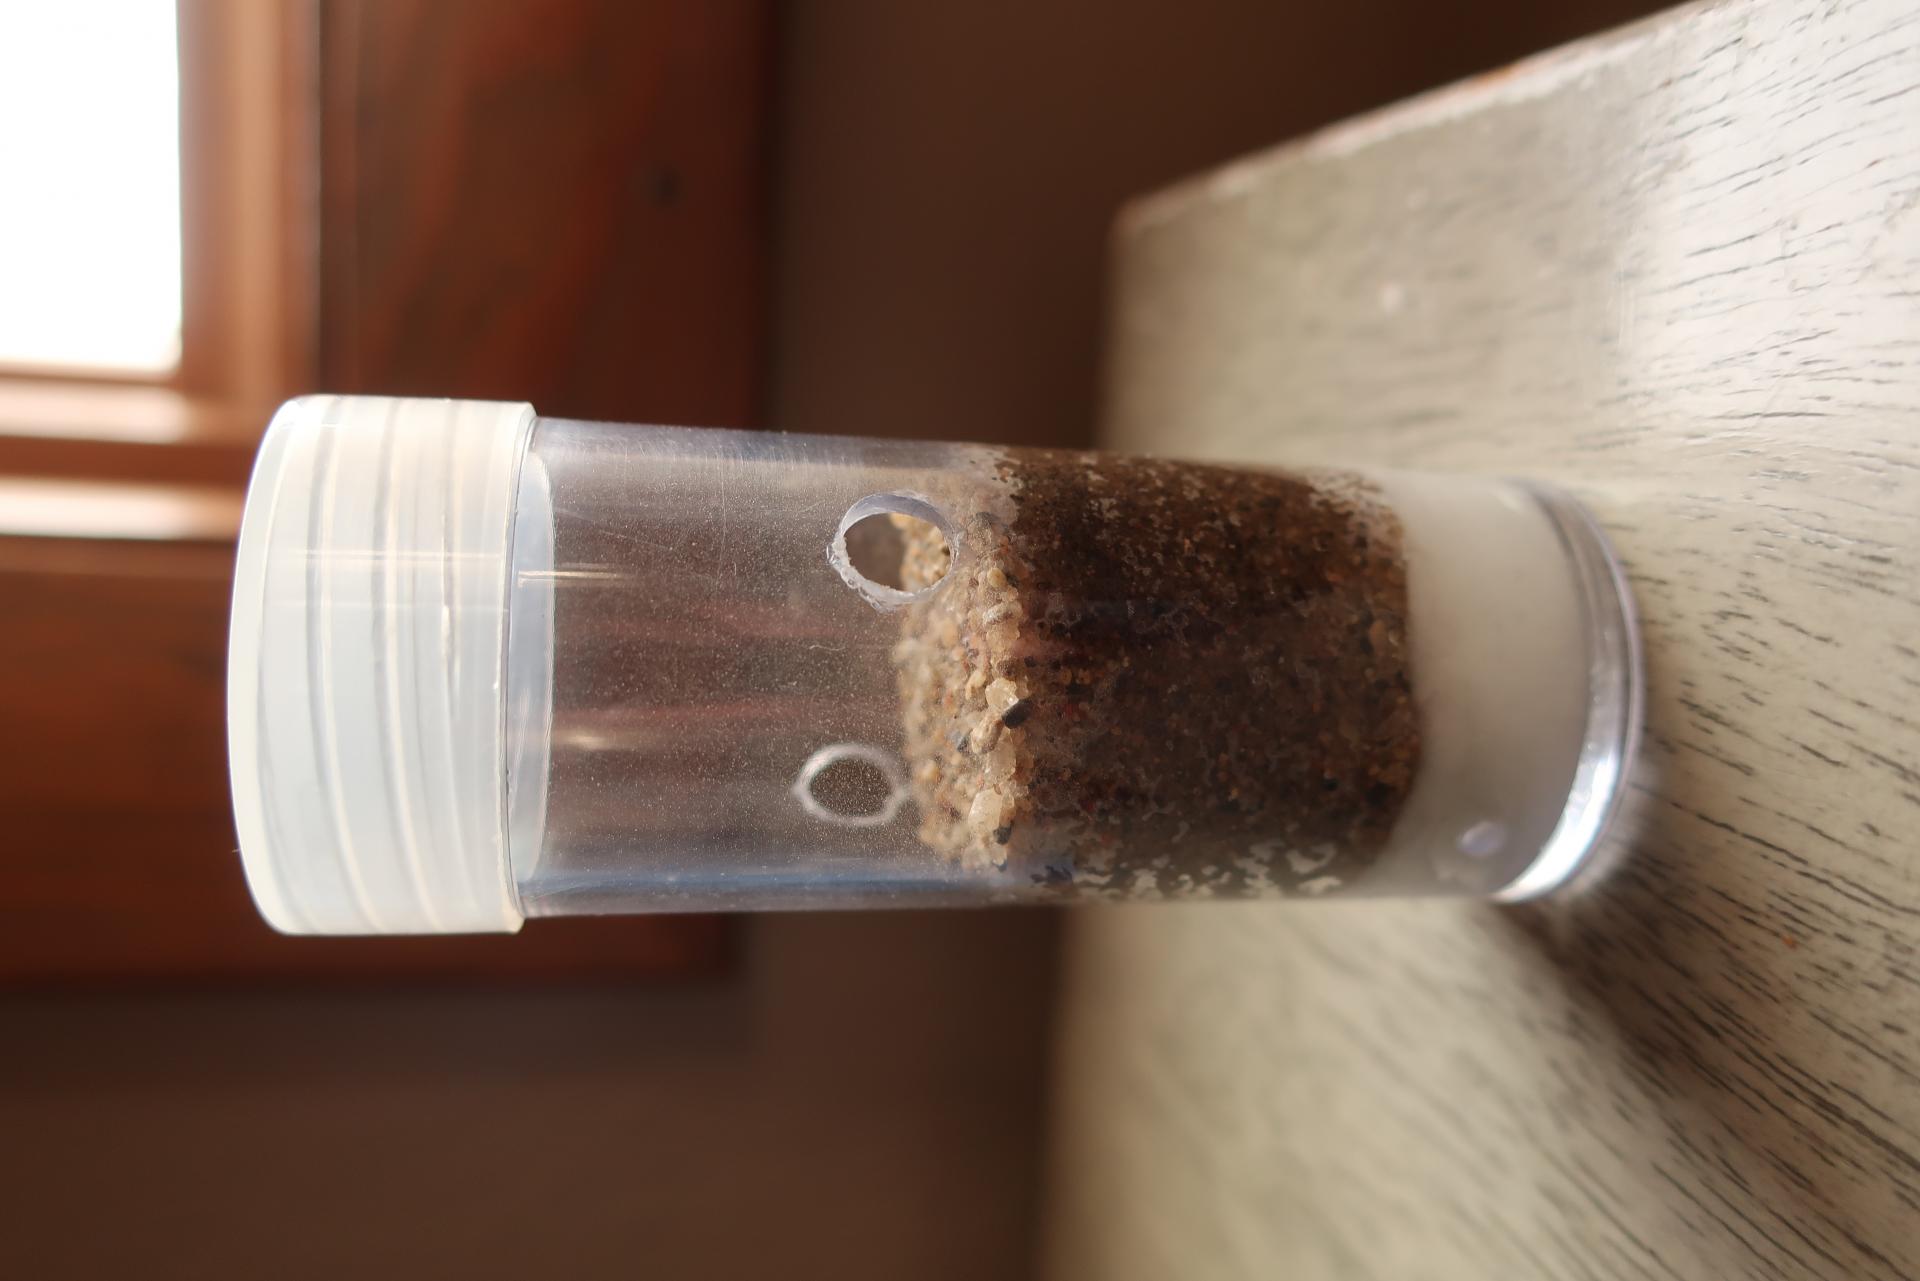
I designed this formicarium for a small Lasius brevicornis colony that consists of the queen and about 15 workers plus some larvae.  I wanted to move them from their test tube into a small formicarium for hibernation because of questionable water in their tube.  A young colony like this doesn't need a huge nest or outworld, but they do need to feel secure and have ready access to food and water.  I chose a small acrylic container (21/4 x 21/4 x 3 in or 5.5 x 5.5 x 7.5 cm) with straight sides and a snug lid that I can remove with one hand for easy feeding.  It's the one in the middle.  One of the advantages of making your own formicaria is that you can tailor the design to the type of ants and the size of the colony you are going to install.   These details should be considered well in advance of the build and drawing up a plan beforehand will help you to evaluate the layout and draw a final design for your build.  Make your mistakes on paper.


2022-09-11 002.JPG


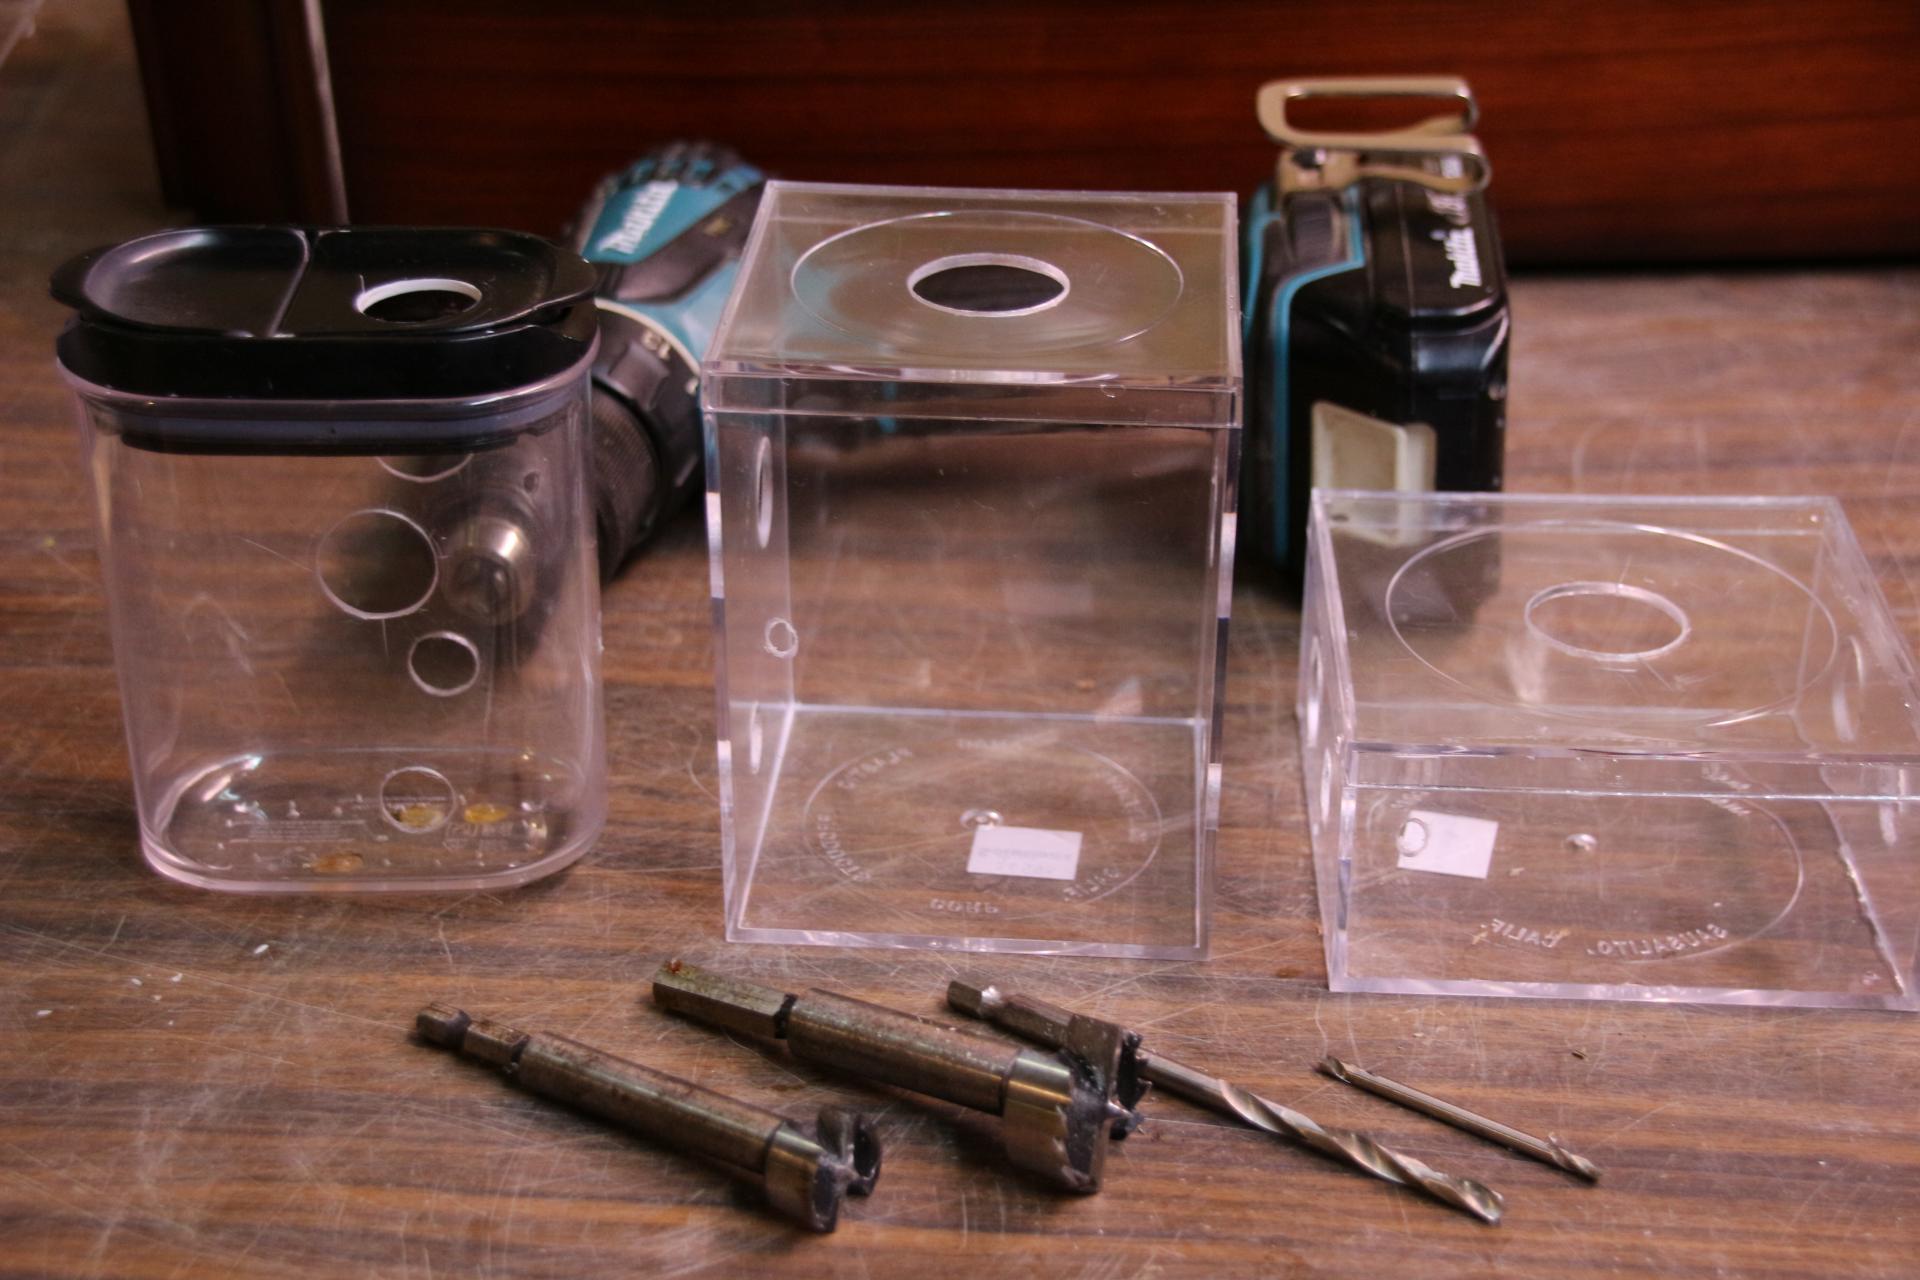
The first step in the construction process is to drill all of the holes for ventilation, water fill tube, and access tubes for later additions.  I used the Forstner bits and the drill that you see in the picture.  Drill a small pilot hole to rest the point of the Forstner bit into and whirl away.  I usually also drill a larger hole in bigger setups for a feeding port.  For smaller holes I use a brad point bit.  I braced the plastic with a piece of wood from behind and drilled slowly.  Once the piece was removed, I smoothed the rough edges with sandpaper 


2022-09-19 012.JPG


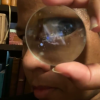
The water tower that I made is a bottle cap with a notch cut in the side for overflow.  I position this overflow in the corner or at the side so I can see it while I'm filling the water tower.  I place a cotton pad on the bottom of the setup to absorb the overflow and act like a drainage layer, soaking up excess water.  I use cotton pads that are made for removing makeup, not cotton balls. They are more absorbent and will sit flat on the bottom, so I usually allow enough overflow to moisten it, but not flood it.  


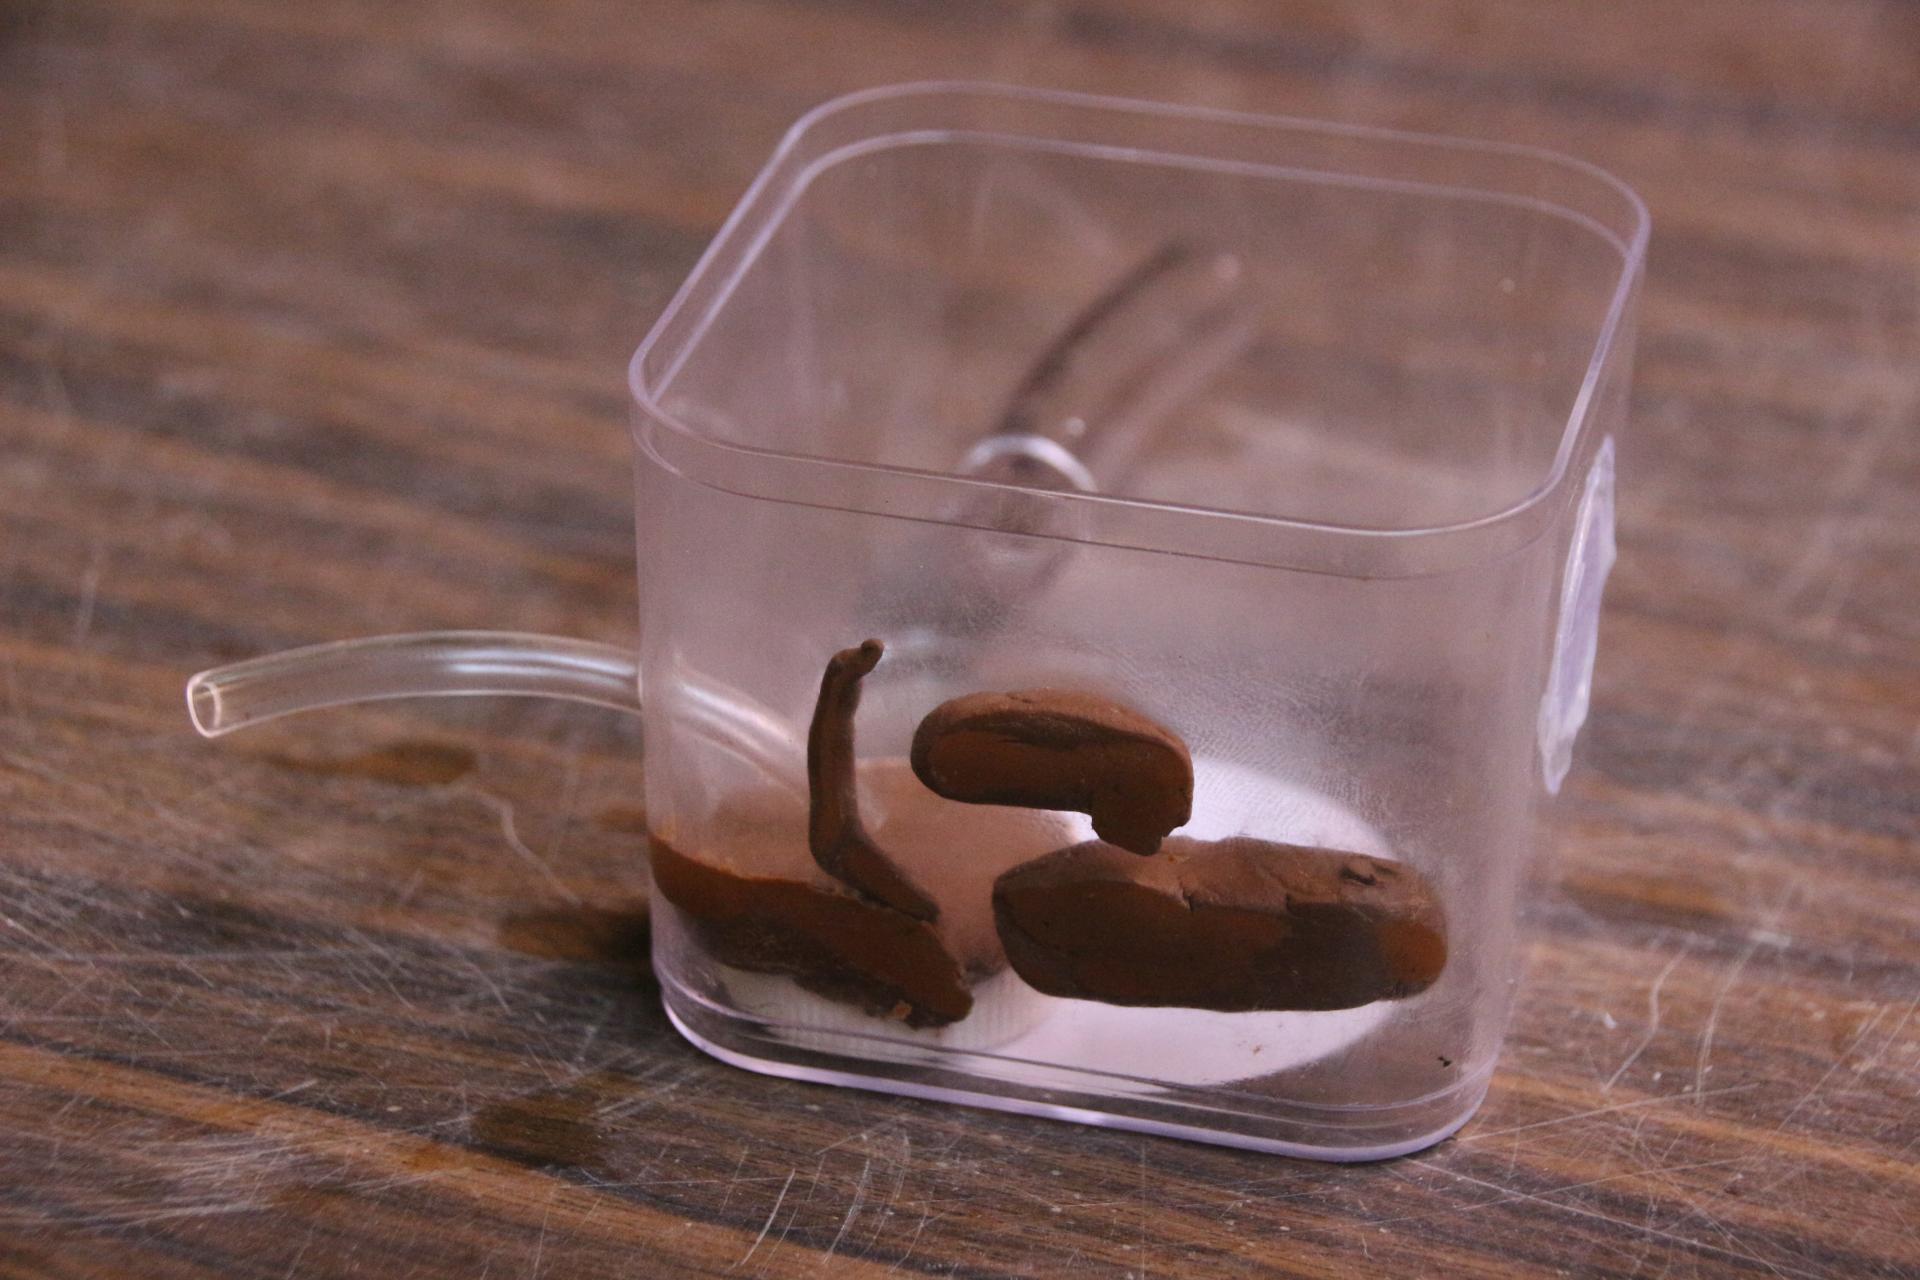
Before going any further I had to cover the inside of the container with mineral oil to make it easier to remove the casting later.   I used modeling clay (we used to call it plasticine?) to form the chambers and to cover any areas that I didn't want grout to fill, like the water tower, and made sure the clay was secure to the wall.  I formed a chamber at the water tower, a larger chamber beside it and a smaller chamber above for the queen if she needs a space of her own.   Ultimately this formicarium could become the queen's chamber when the colony gets large enough to require additional nest sections.  For now, I wanted to give them large enough chambers to raise brood for a season, but not so big that they rattled around and felt insecure.


2022-09-25 001.JPG


For the grout mixture I used coloured tile grout from the hardware store and horticultural grade vermiculite from the garden center.  The vermiculite should be fine grained and not too coarse.  The advantage of adding vermiculite to the mix is that it holds water and can wick water up into the grout from the cotton pad on the bottom.  Ants that like high humidity will benefit greatly from this.

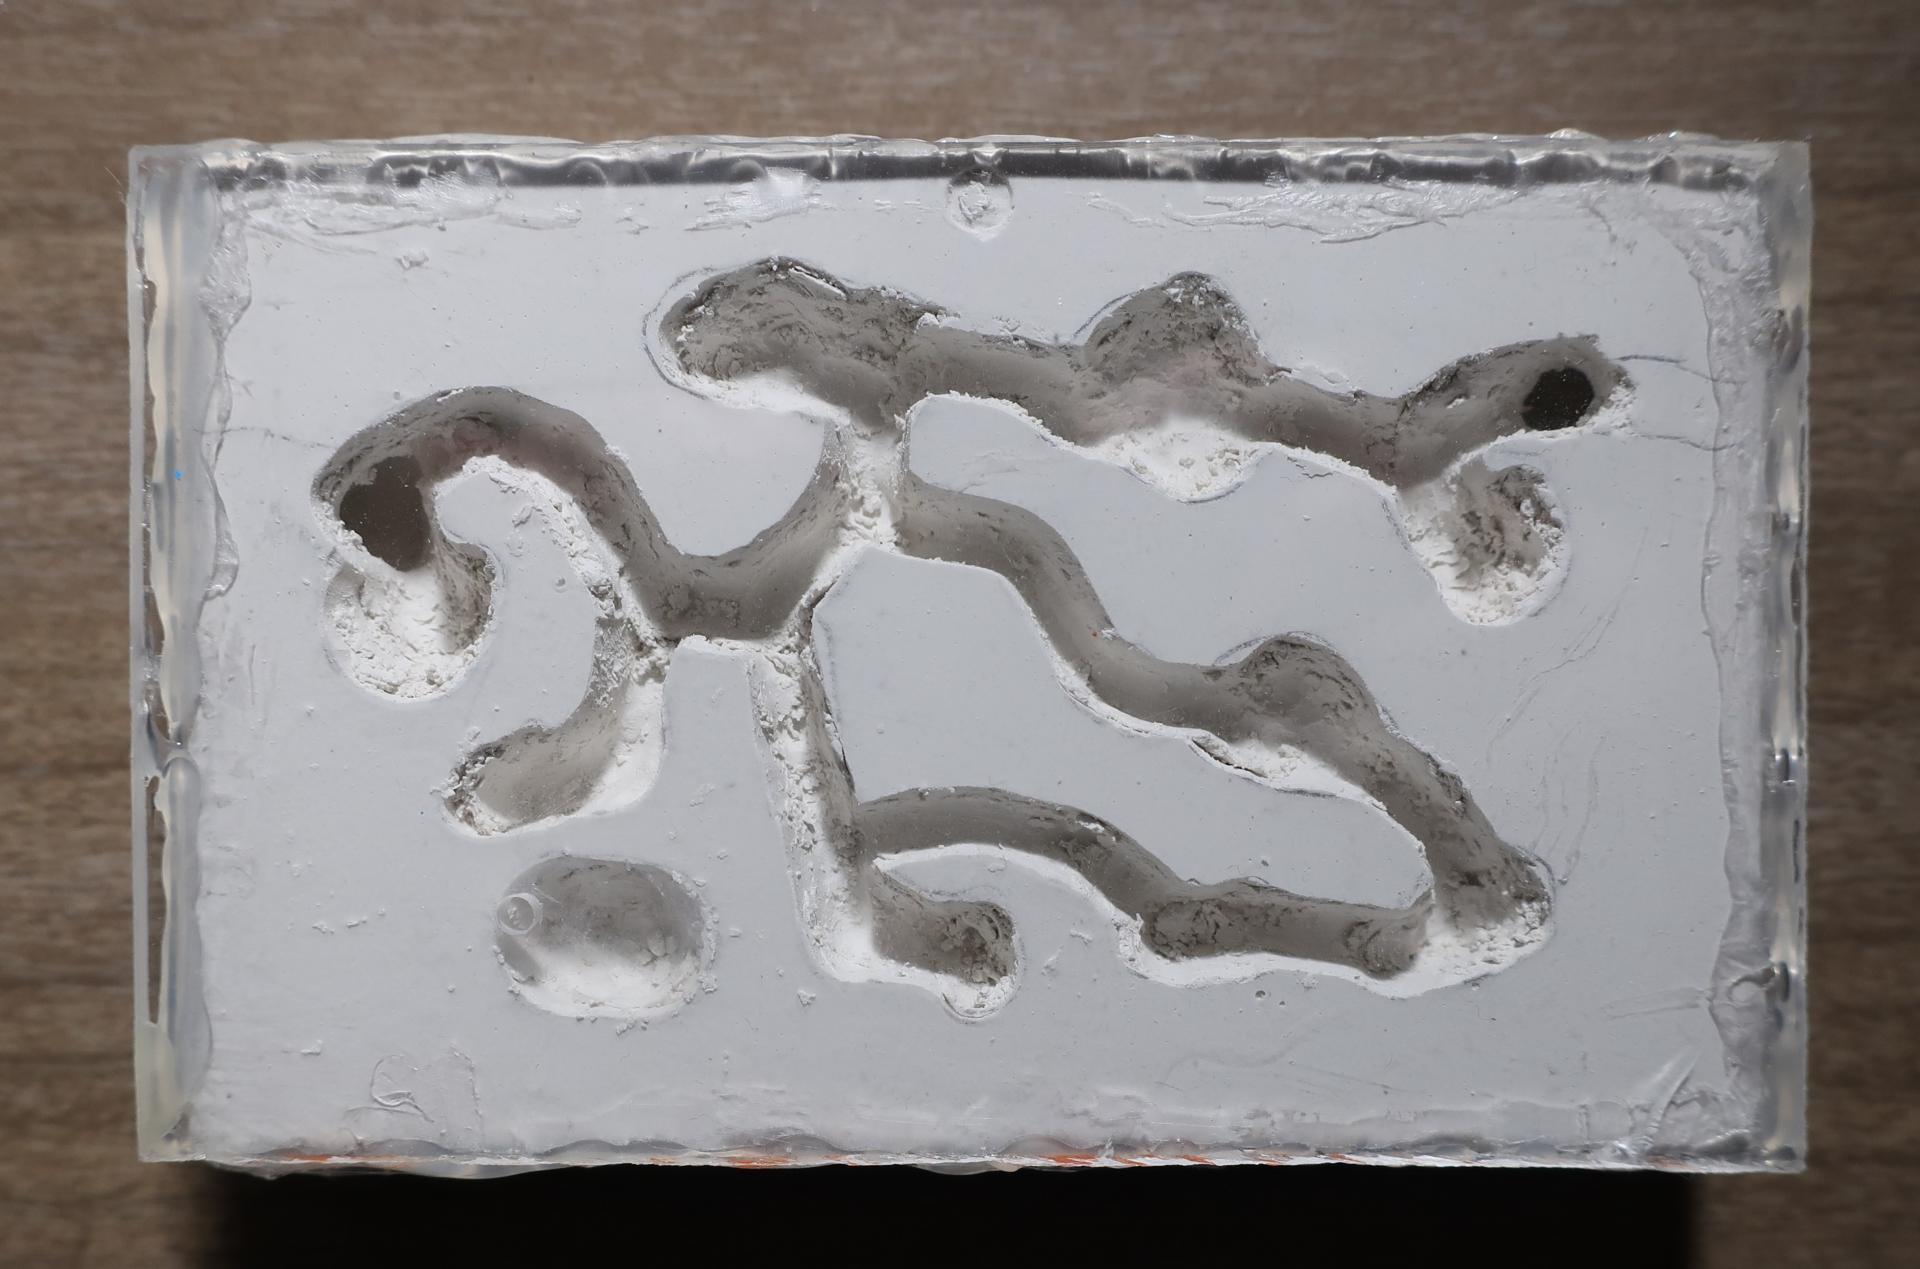
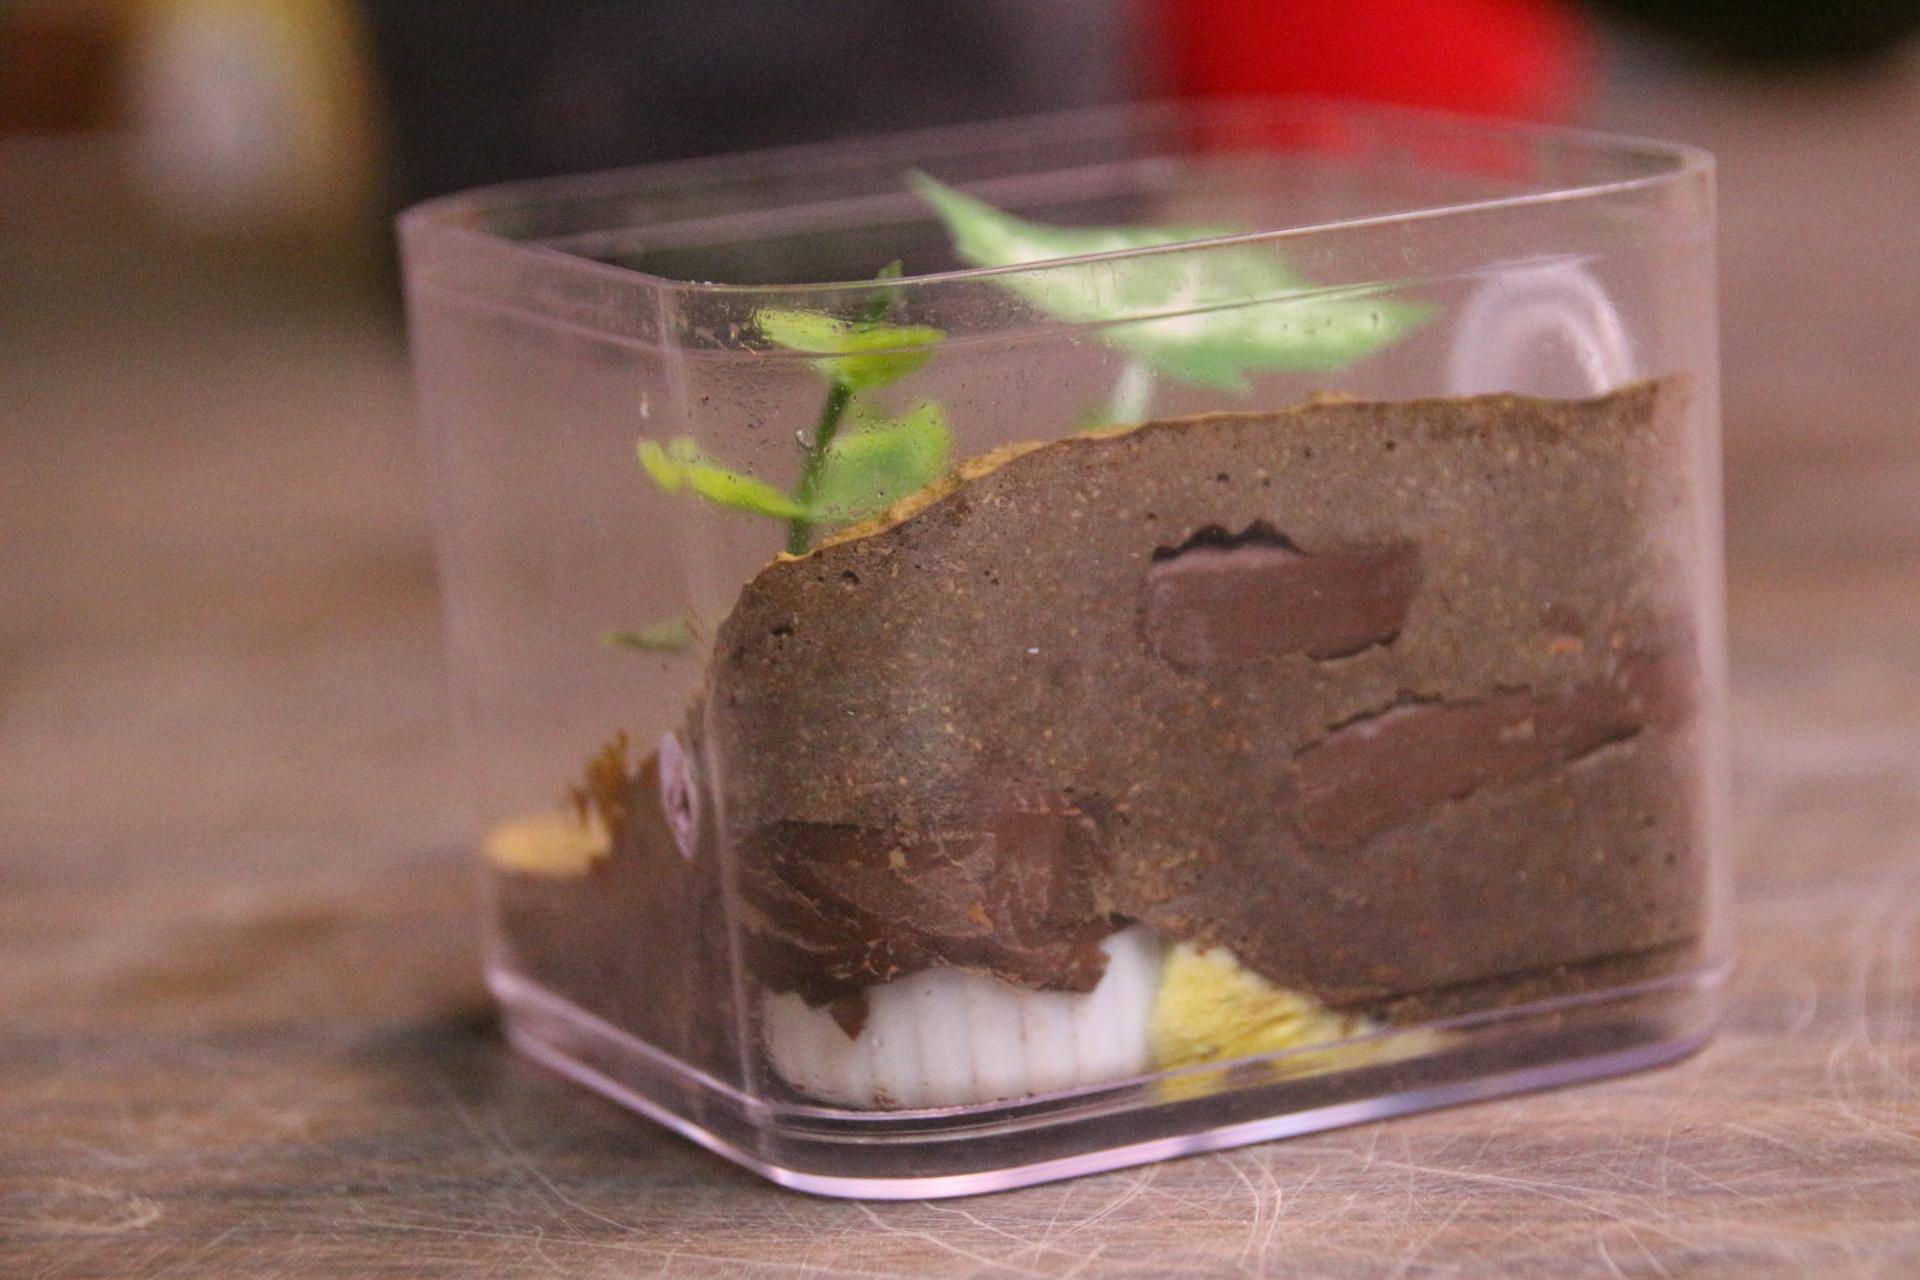
I mixed the grout with enough water to make a slurry the consistency of pancake batter, and then I added enough vermiculite to make a thick mixture, like oatmeal porridge.  I strive for equal amounts by volume of grout and vermiculite in the mix.  Sometimes extra water is required as the vermiculite will absorb water from the slurry.  When it was ready, I spooned it over the clay chambers, making sure to agitate it slightly to fill small spaces around them and continued until I was satisfied with the coverage.  I propped the setup on an angle while it set and added a few plastic plants to the front.  I also formed a flat area in the front for a feeding dish.


2022-09-25 007.JPG


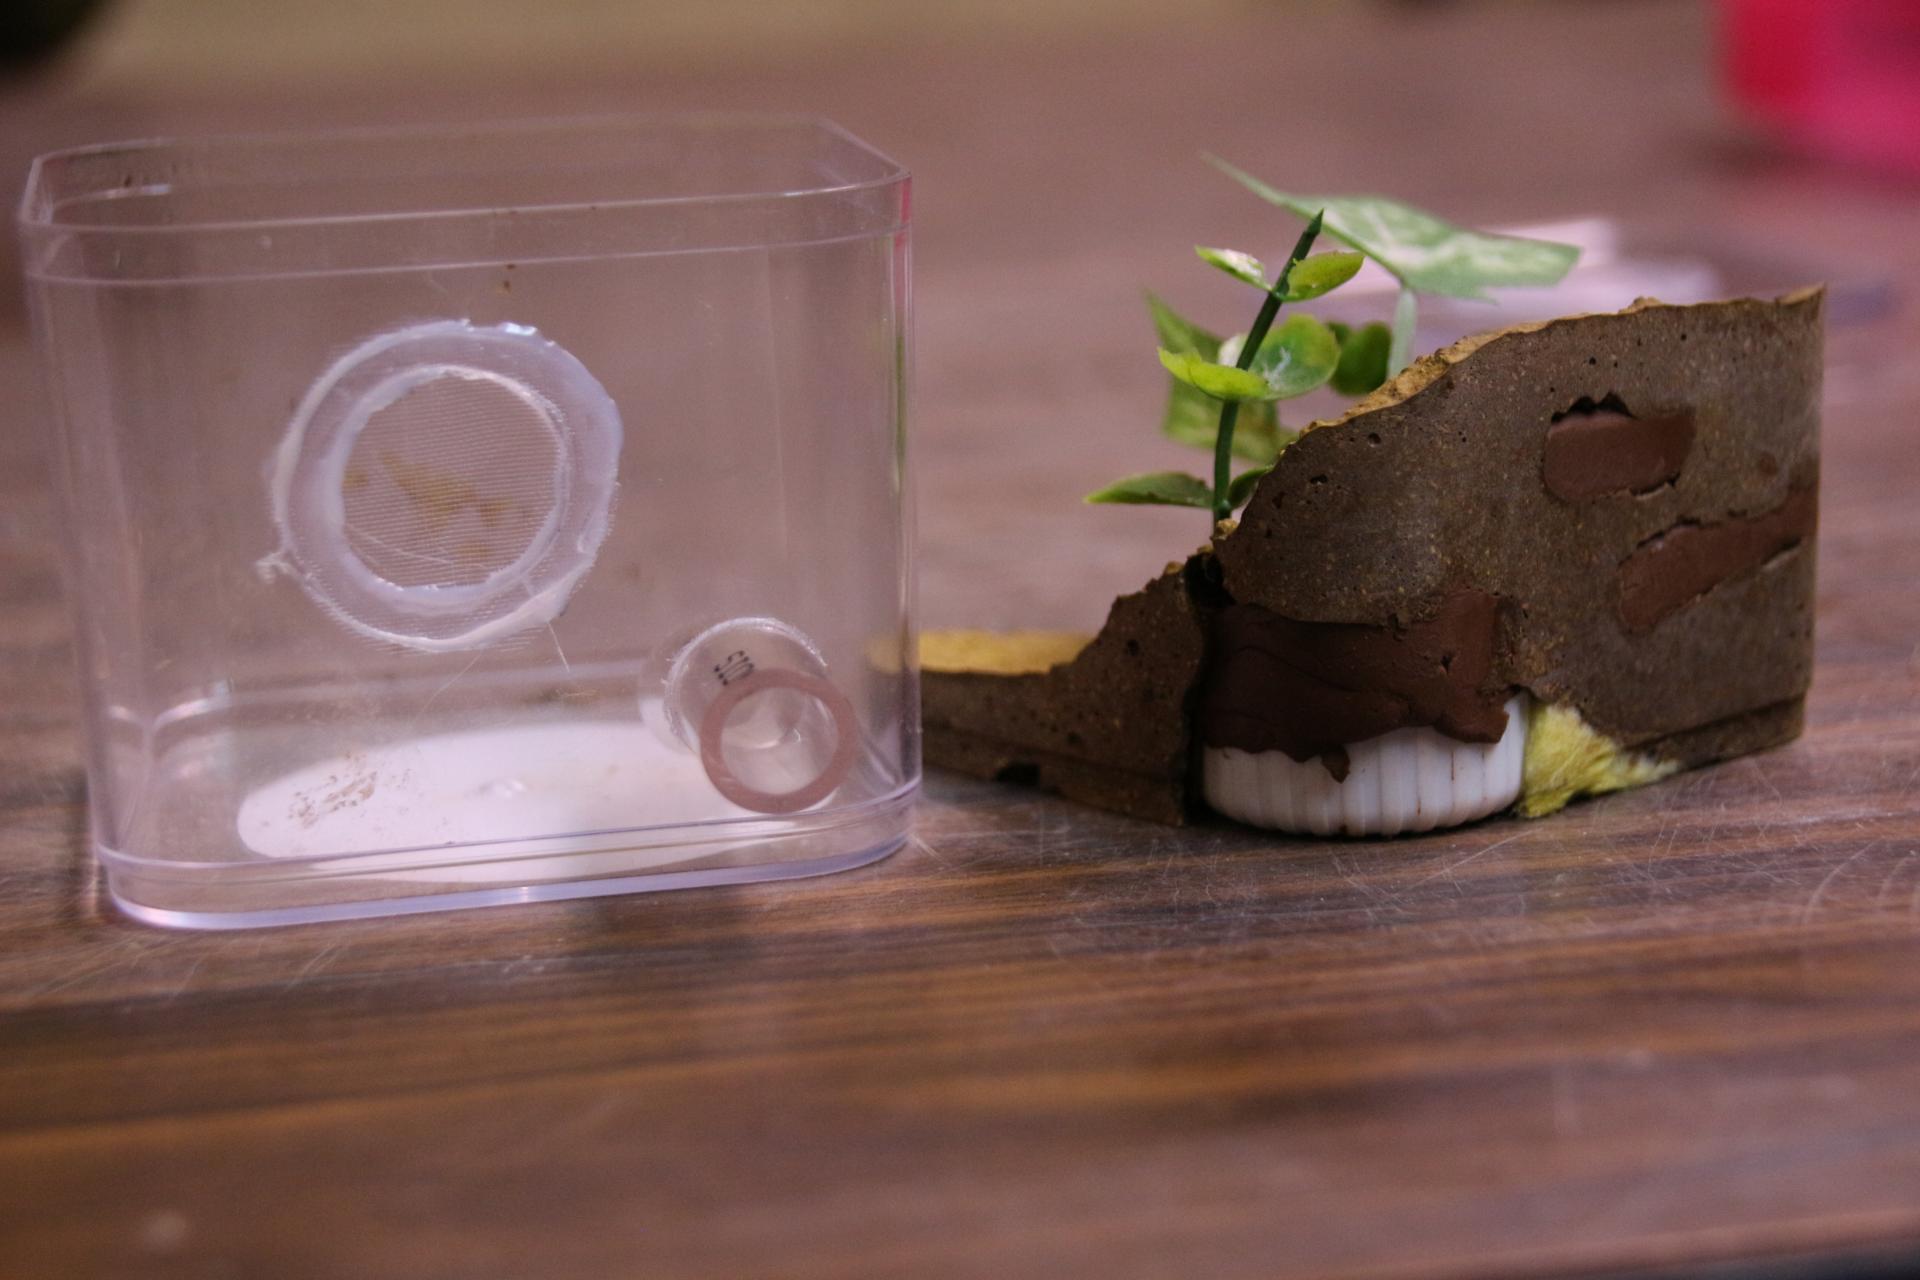
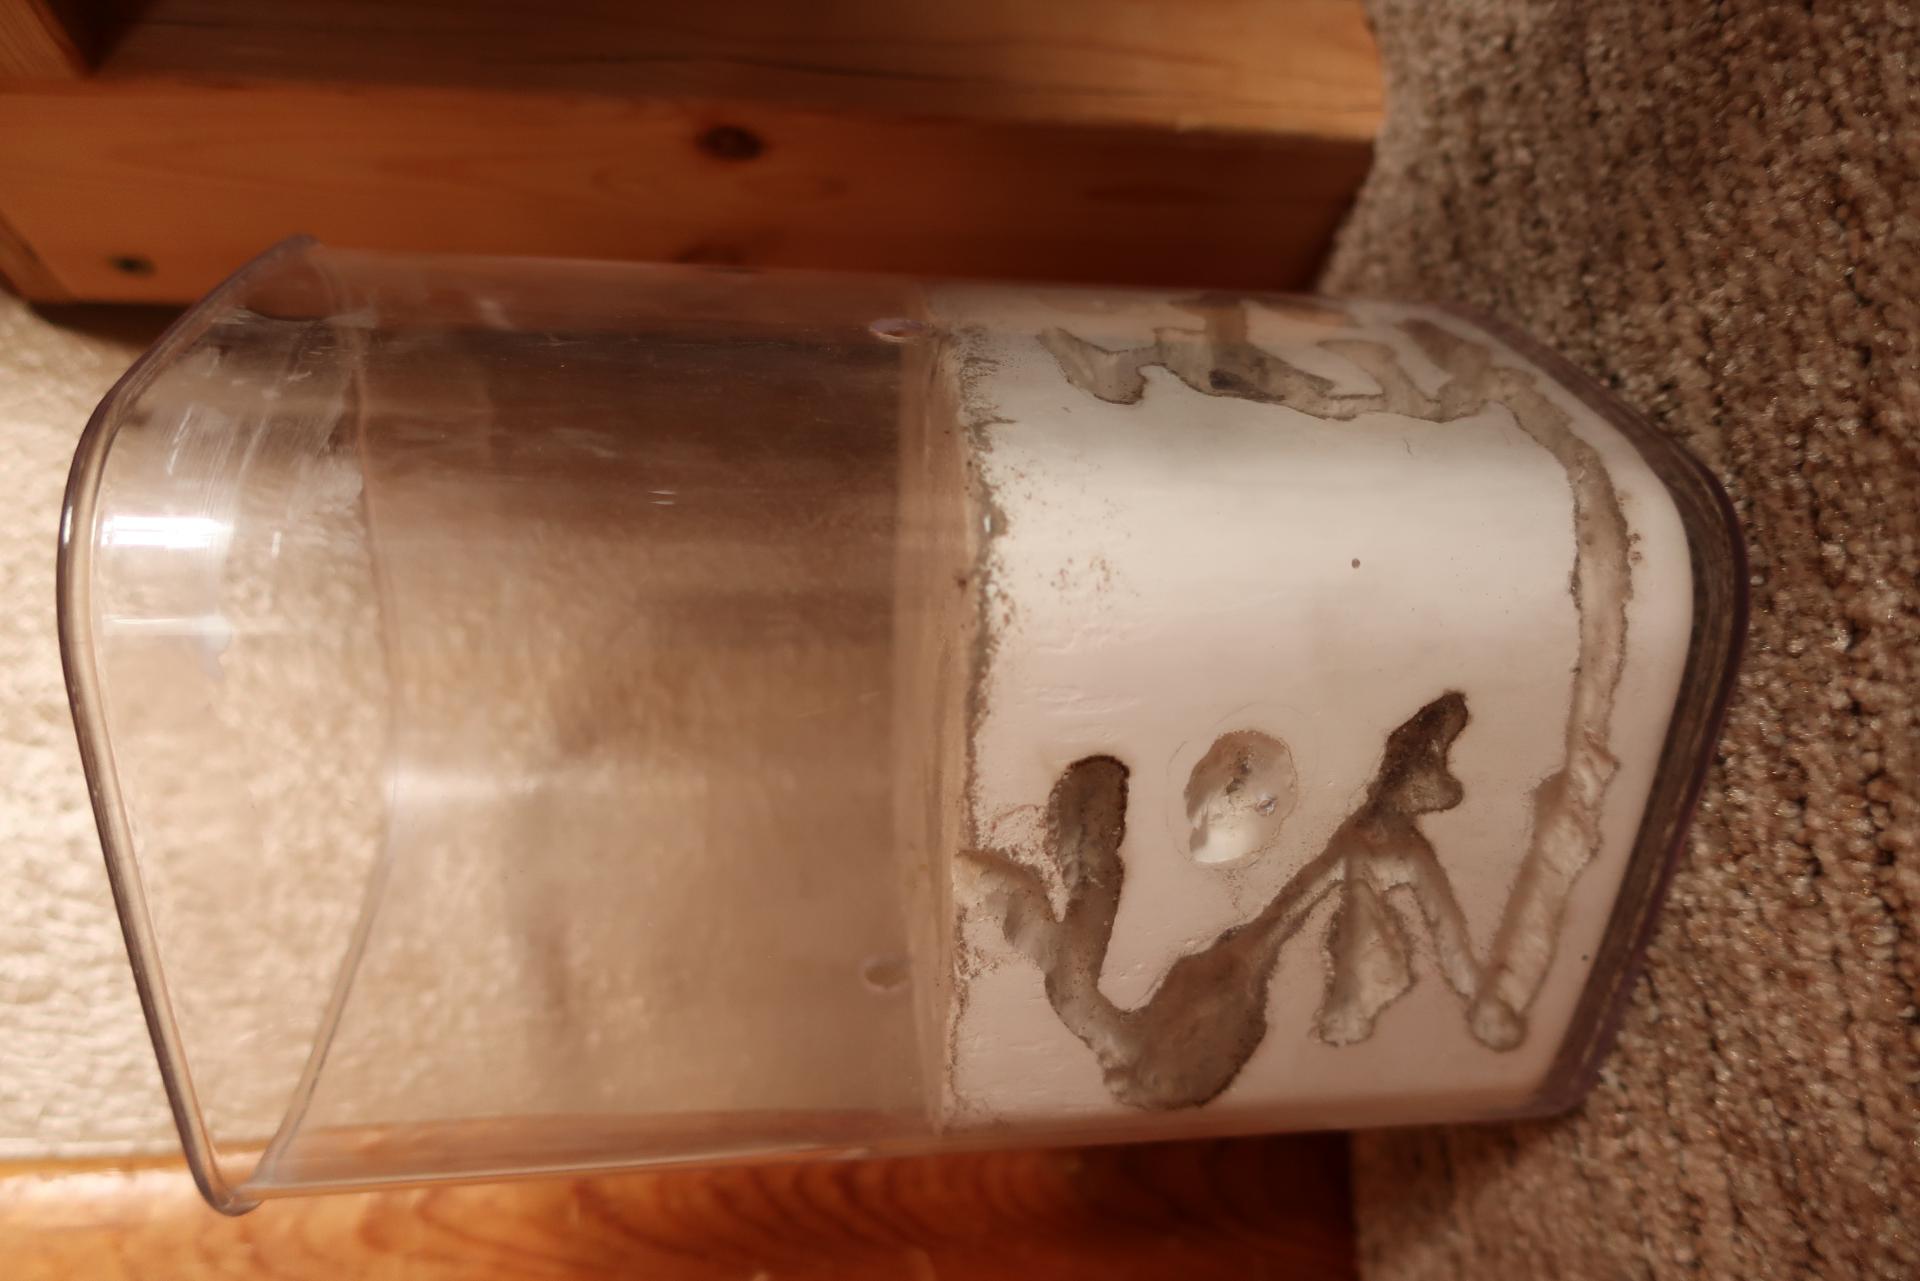
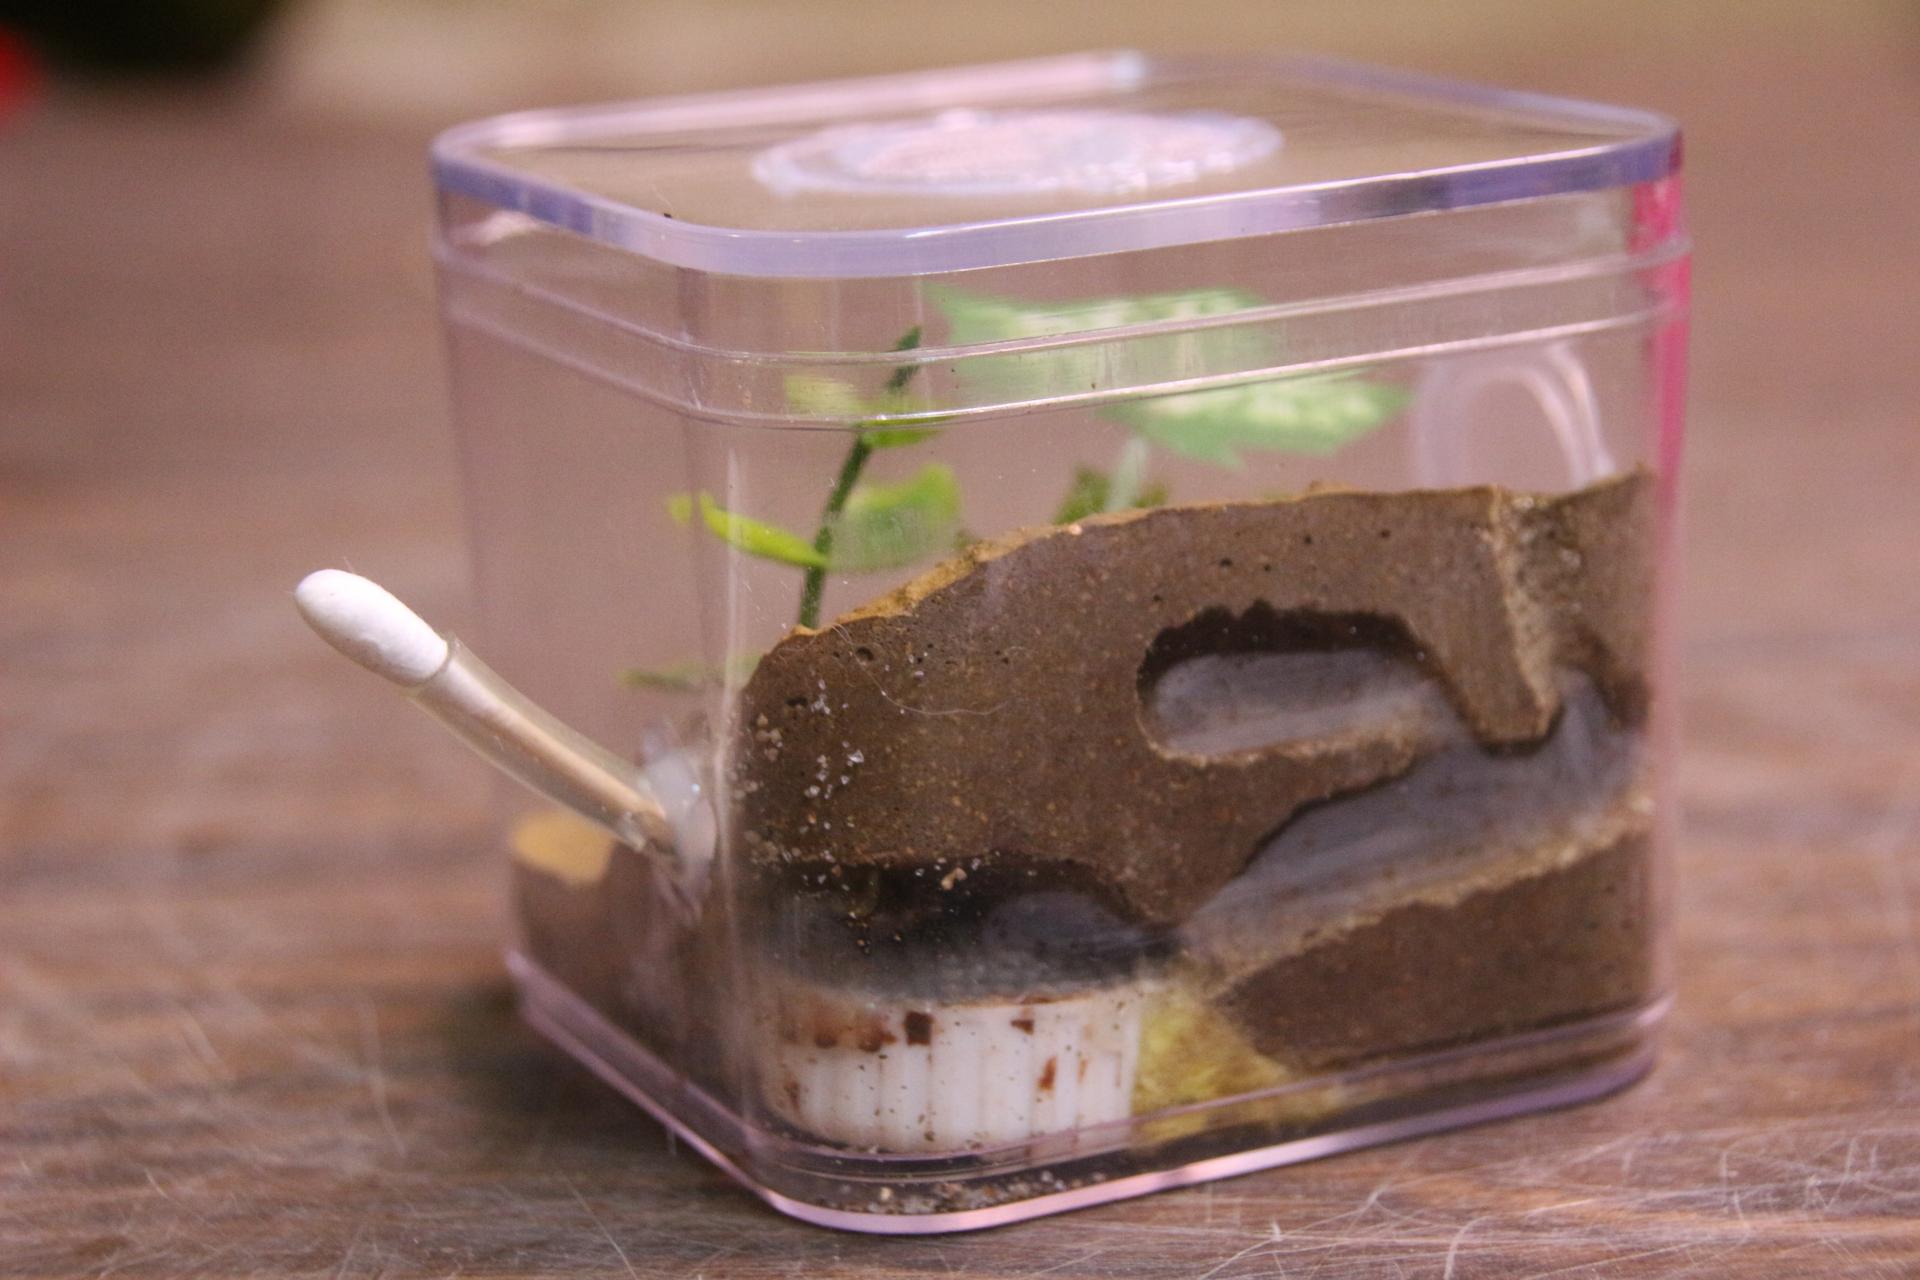
I let the grout cure for a couple of days as it is softer with the addition of the vermiculite and can break while being handled unless well cured.  The next step is when you'll be glad you remembered to oil the container, because the whole thing should just slide out of the container, I said should.  I find that holding onto a plastic plant and patiently working it loose will usually let me slide the whole issue out.  Of course, it helps if you've chosen a container with straight sides.  Once I got it out, I removed all the clay and used a grinding bit to shape the chambers and construct the tunnels.   Then I made the water tower.  I filled the bottle cap with cotton pad and hot glued mosquito screen on top with a cut for the fill tube to go in.  Then, I hot glued the whole thing to the bottom of the grout nest, making sure that it fit back into the container. I washed the oil from the container before I slid the grout casting into place.   A couple of spots of hot glue holds it there.  There can be considerable variation in an individual container, so I put it back in exactly the same position in which it was cast.  I had already drilled a pilot hole through the acrylic for the water fill tube, so I followed the same line, drilled through the grout to the water tower and installed and hot glued the fill tube in place.      


2022-09-25 009.JPG


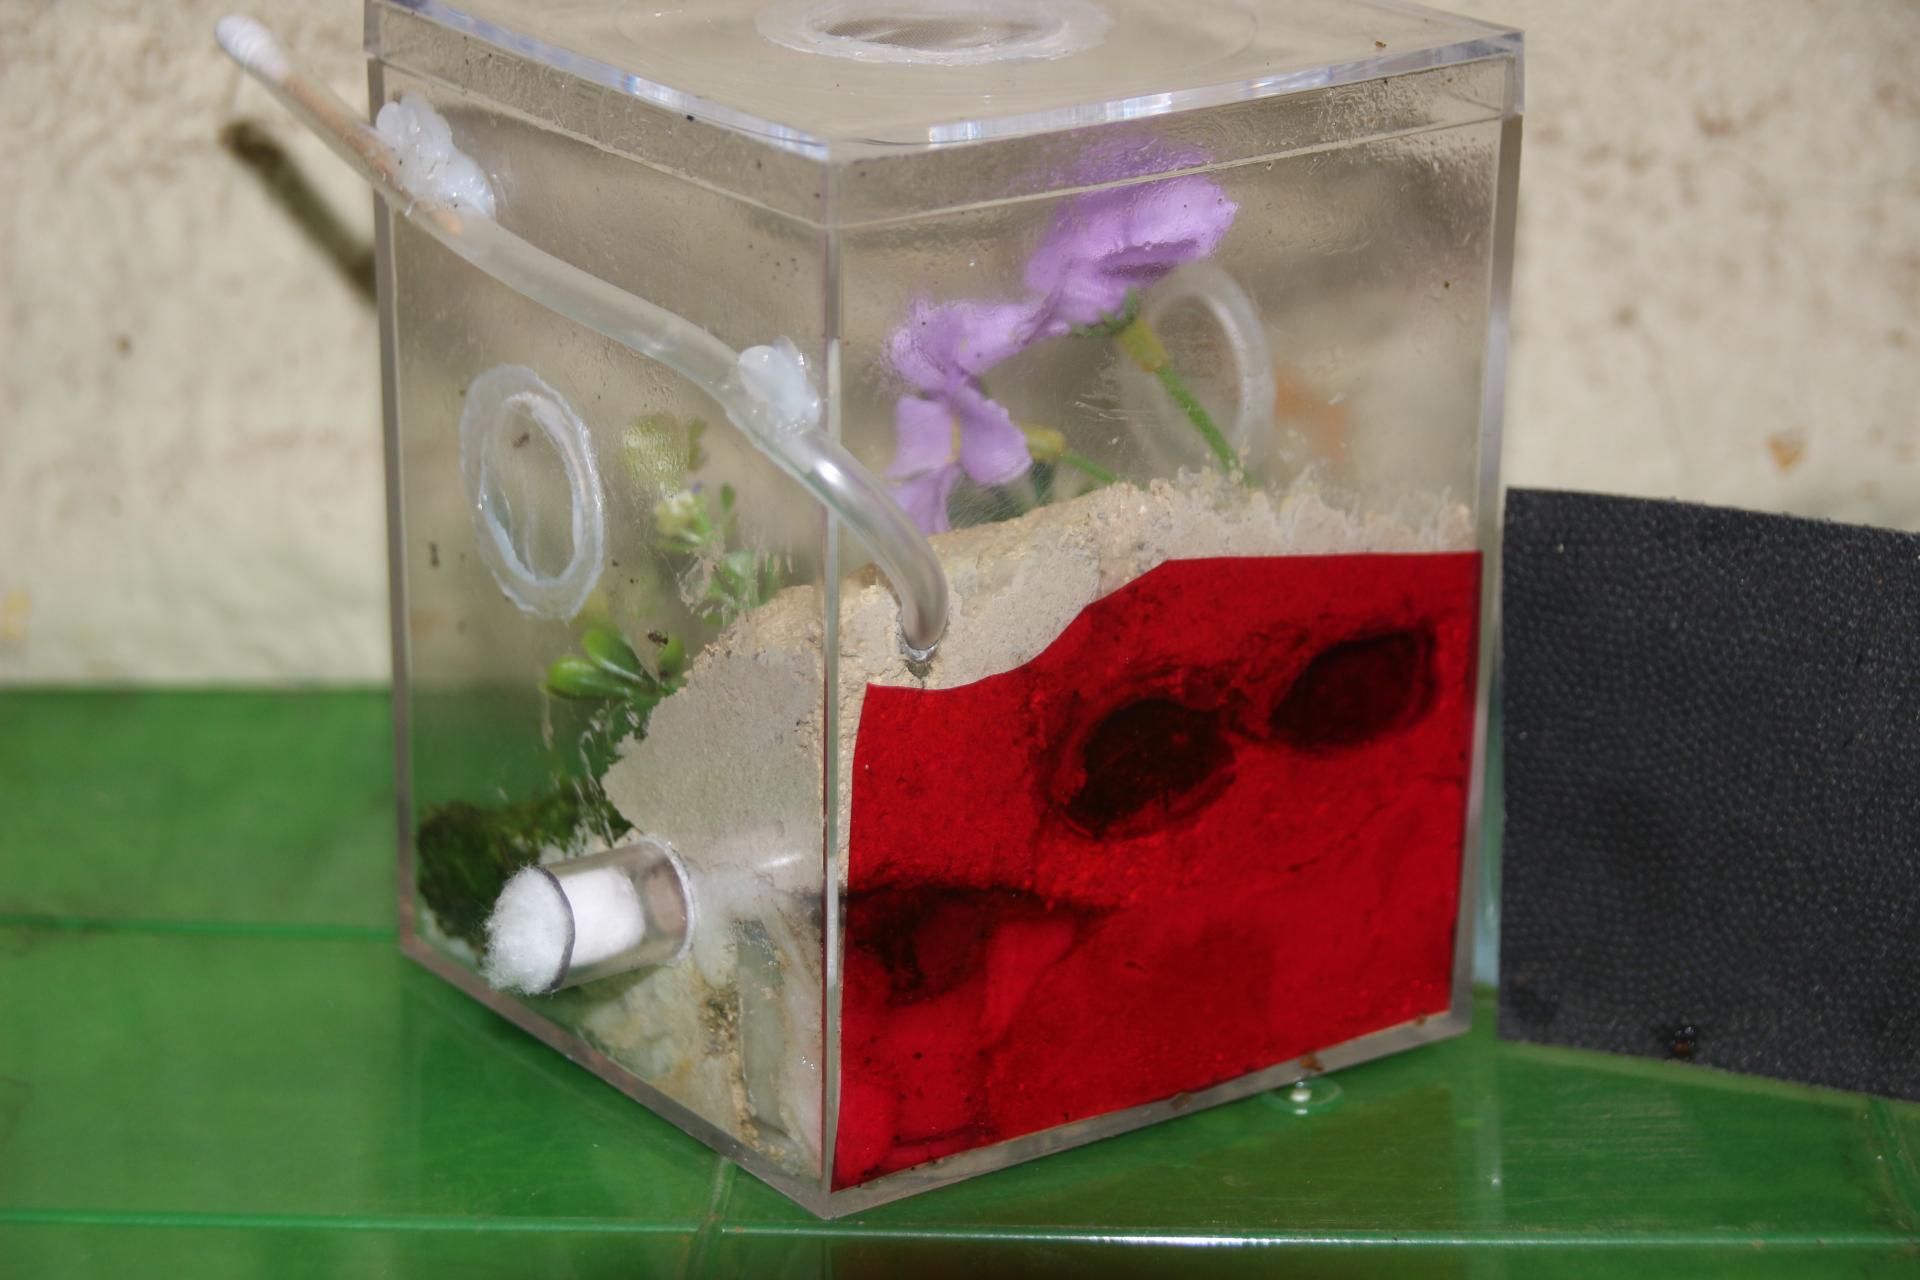
Now I finished up all the details like gluing tubes for future access and screens for ventilation.  I used a fine mesh screen for these small ants, but I consider screens a last resort to prevent escapes.  I put mineral oil around all my screens and around the top rim of the formicarium as it provides excellent escape prevention for most of my colonies.  


2022-10-03 001.JPG


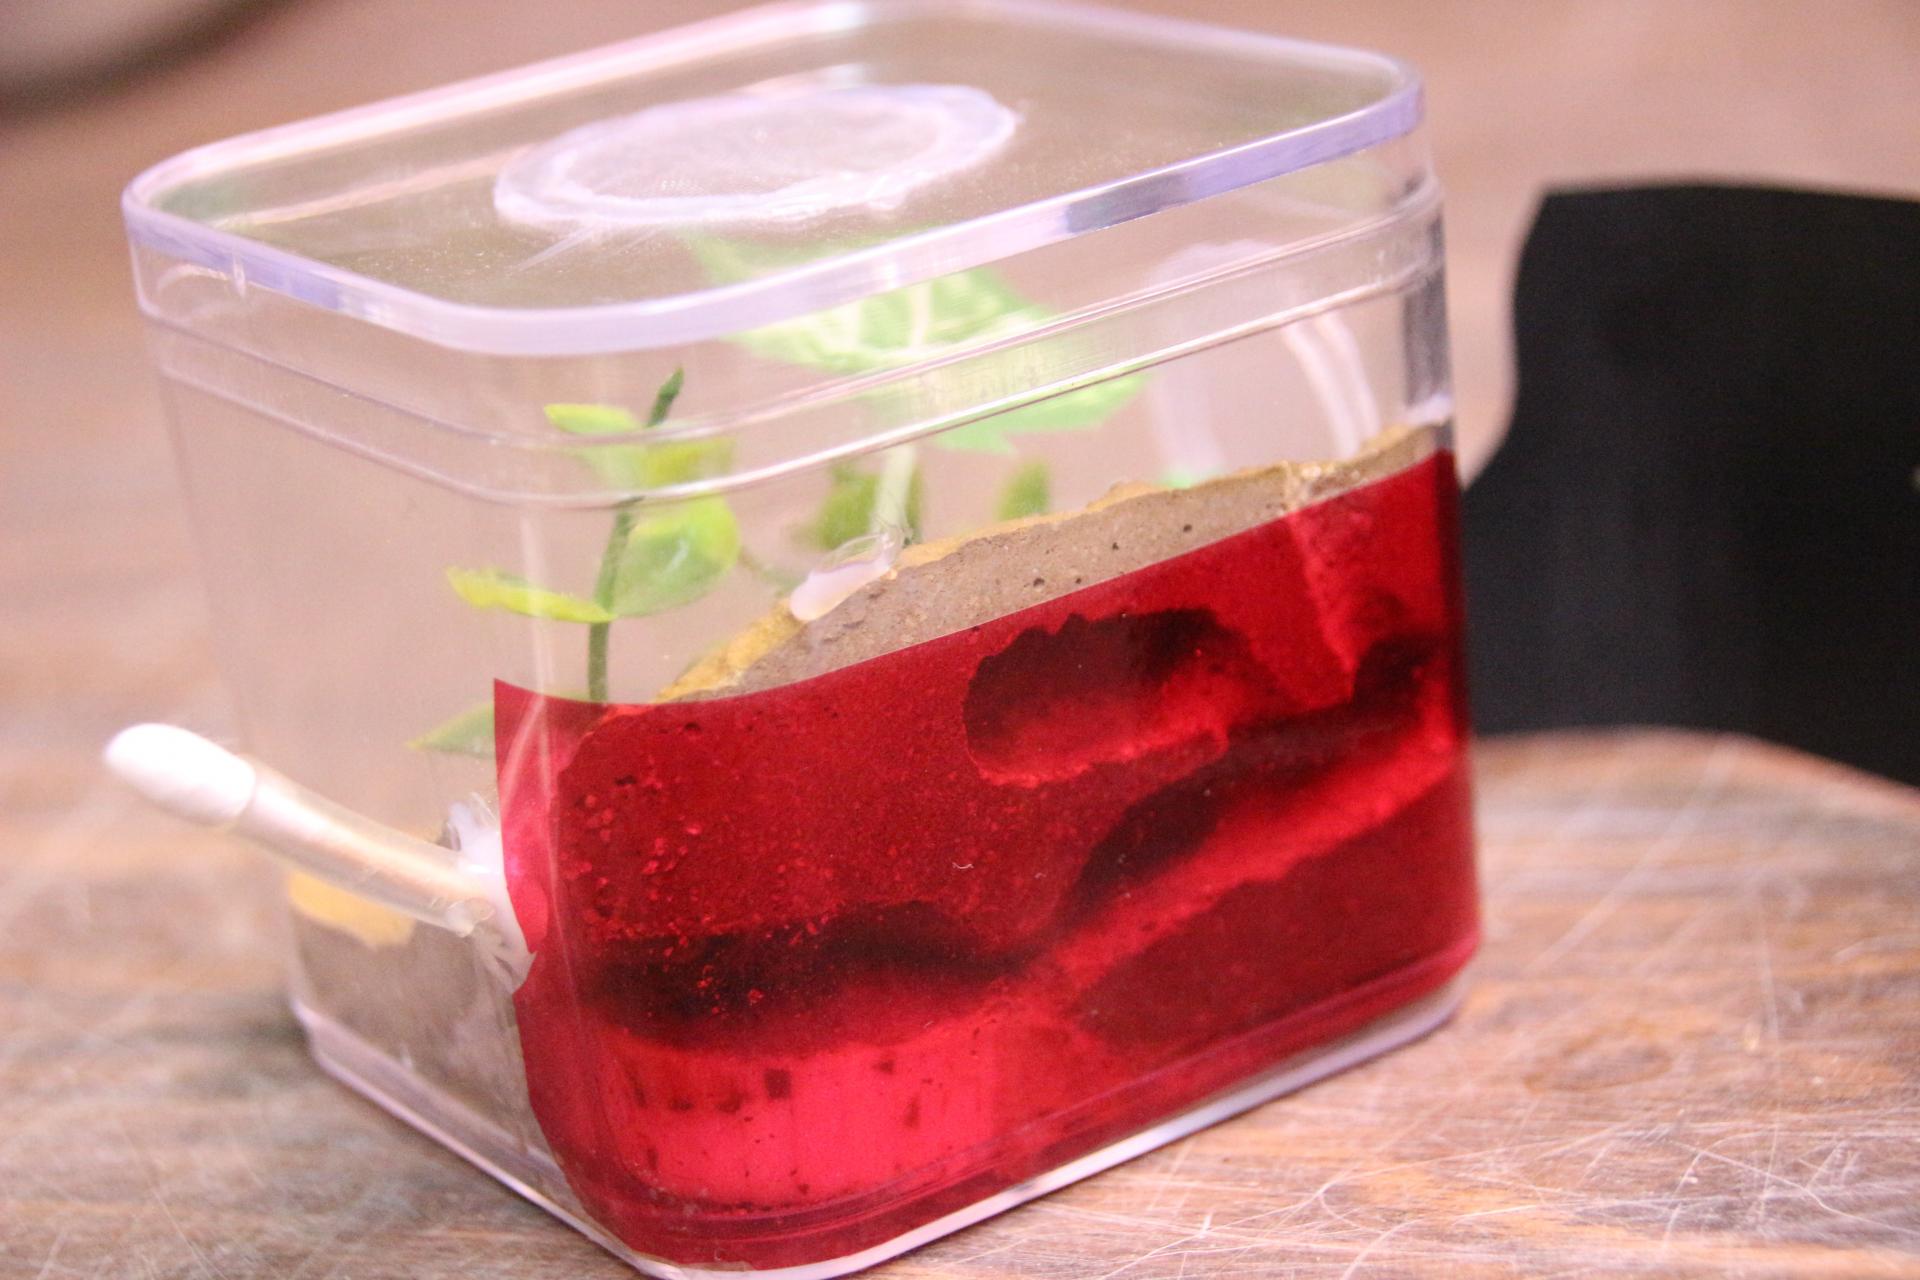
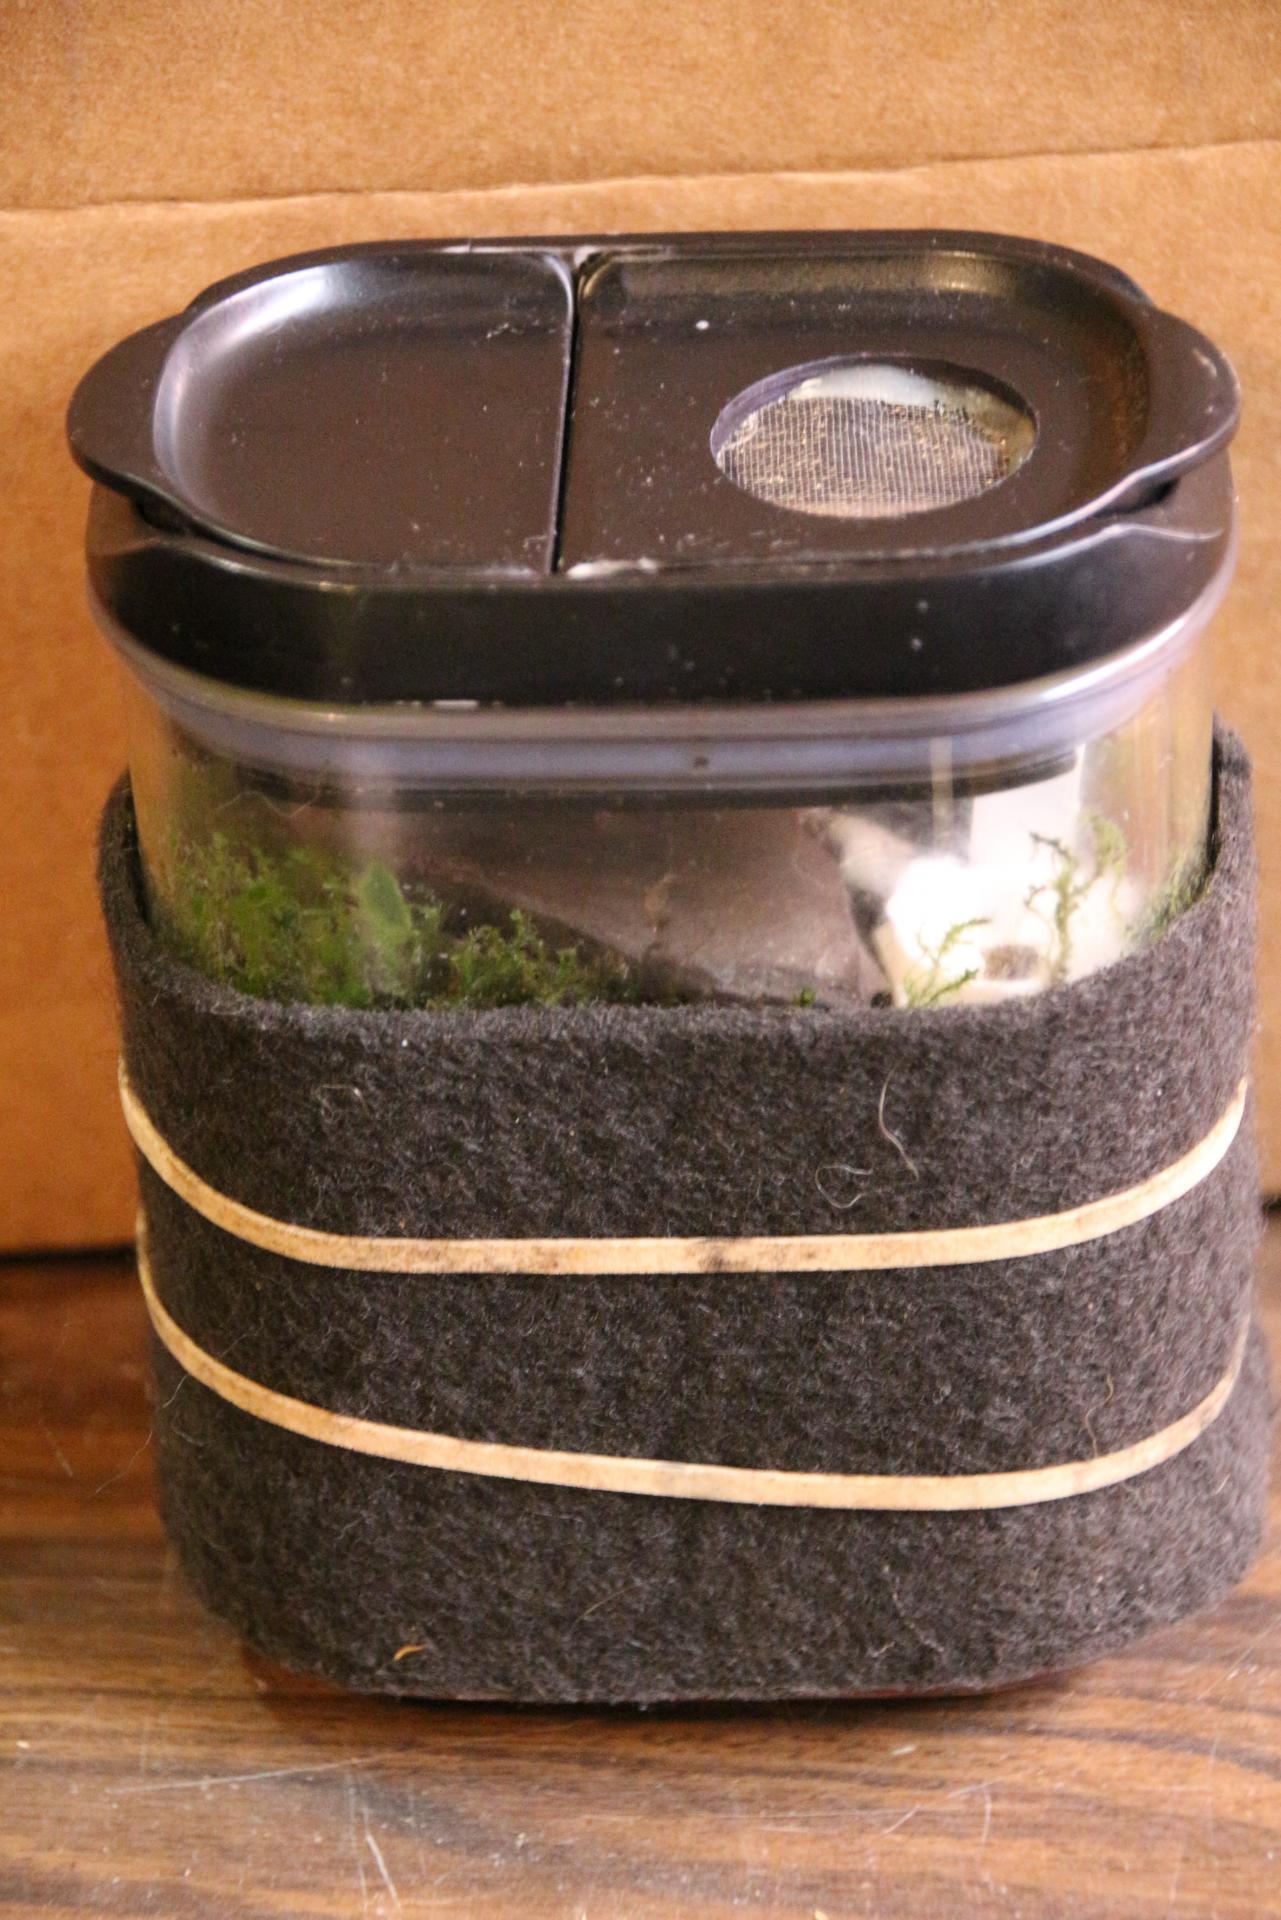
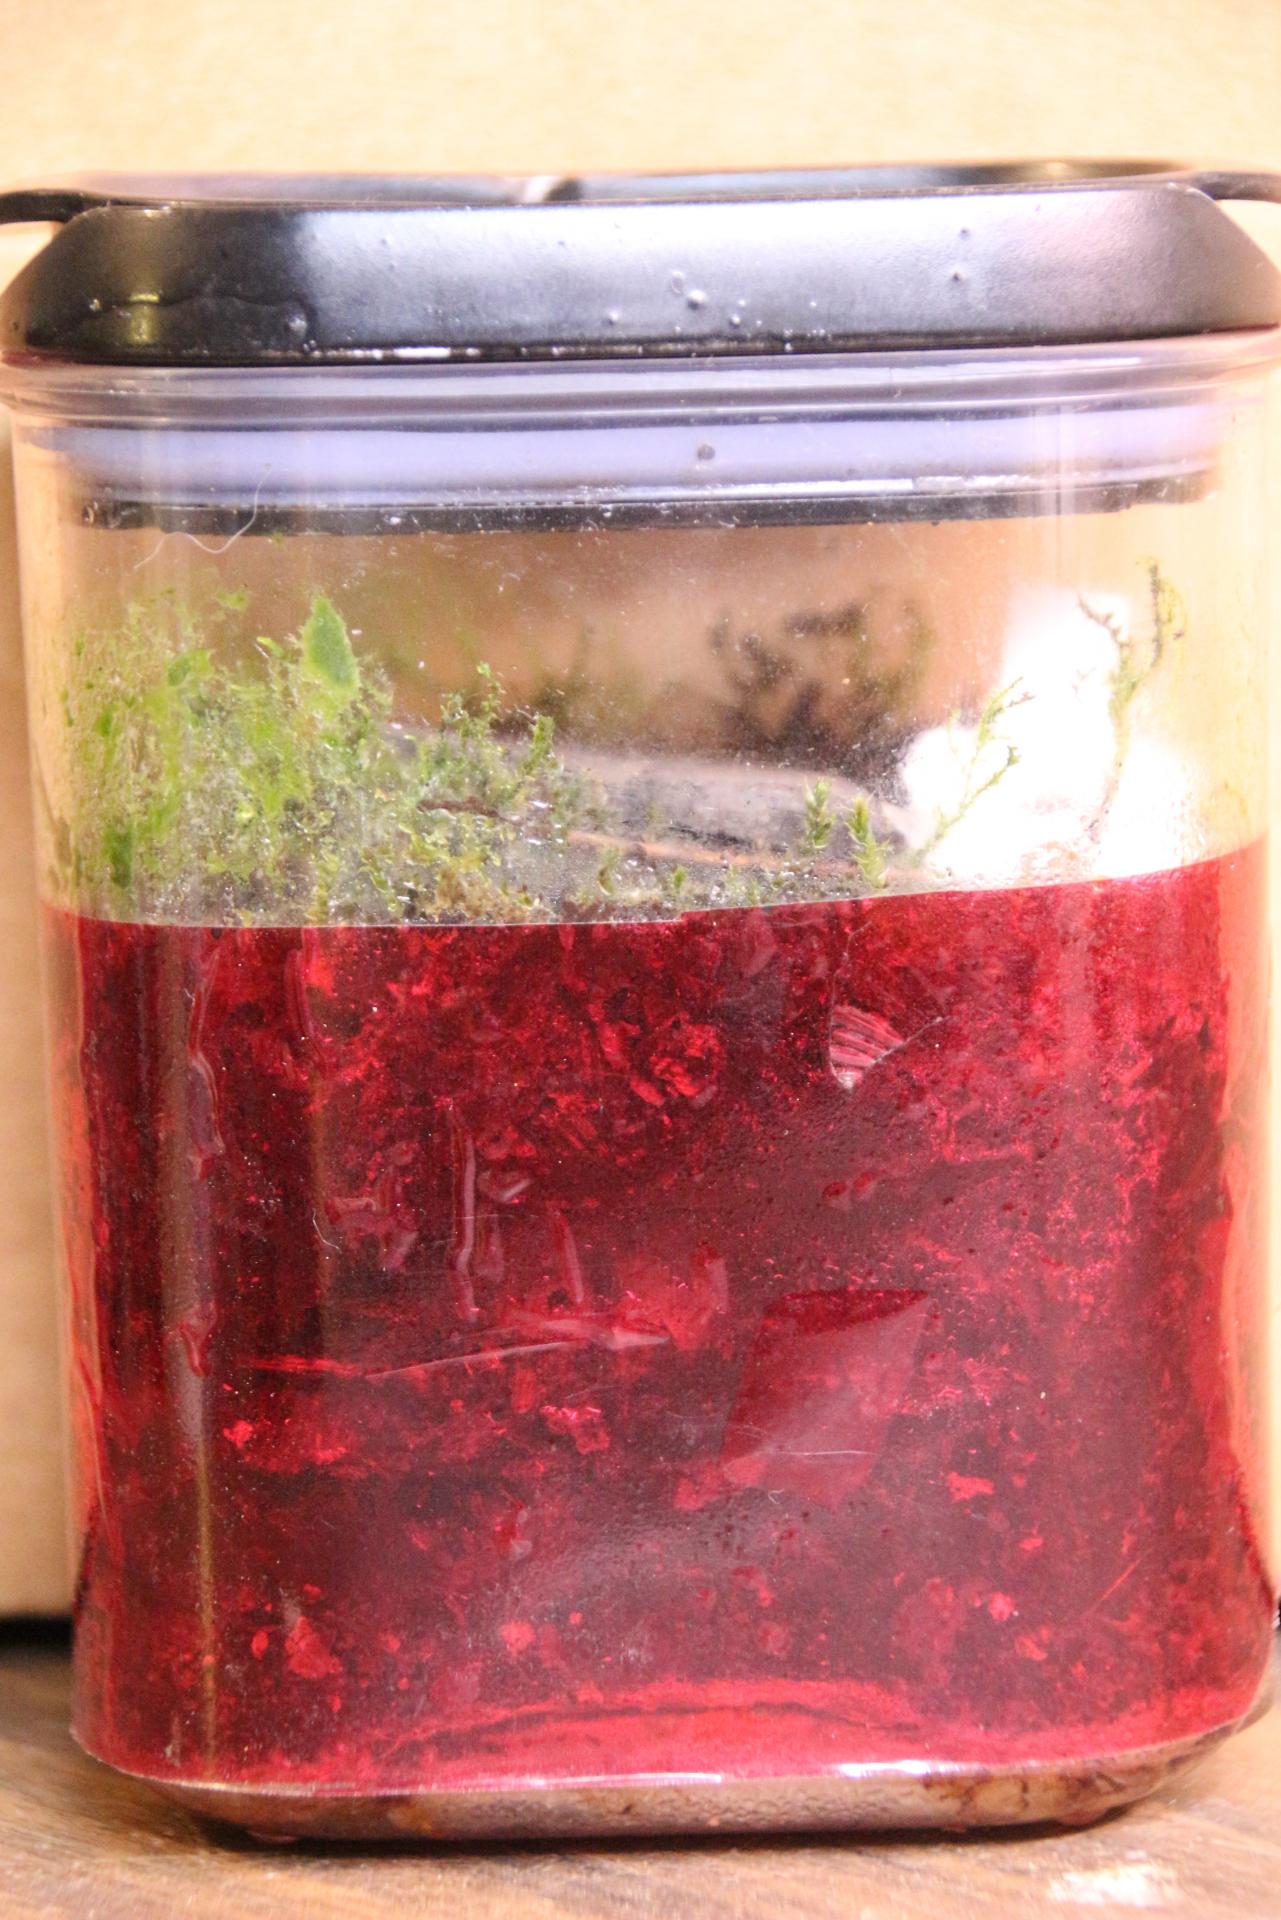
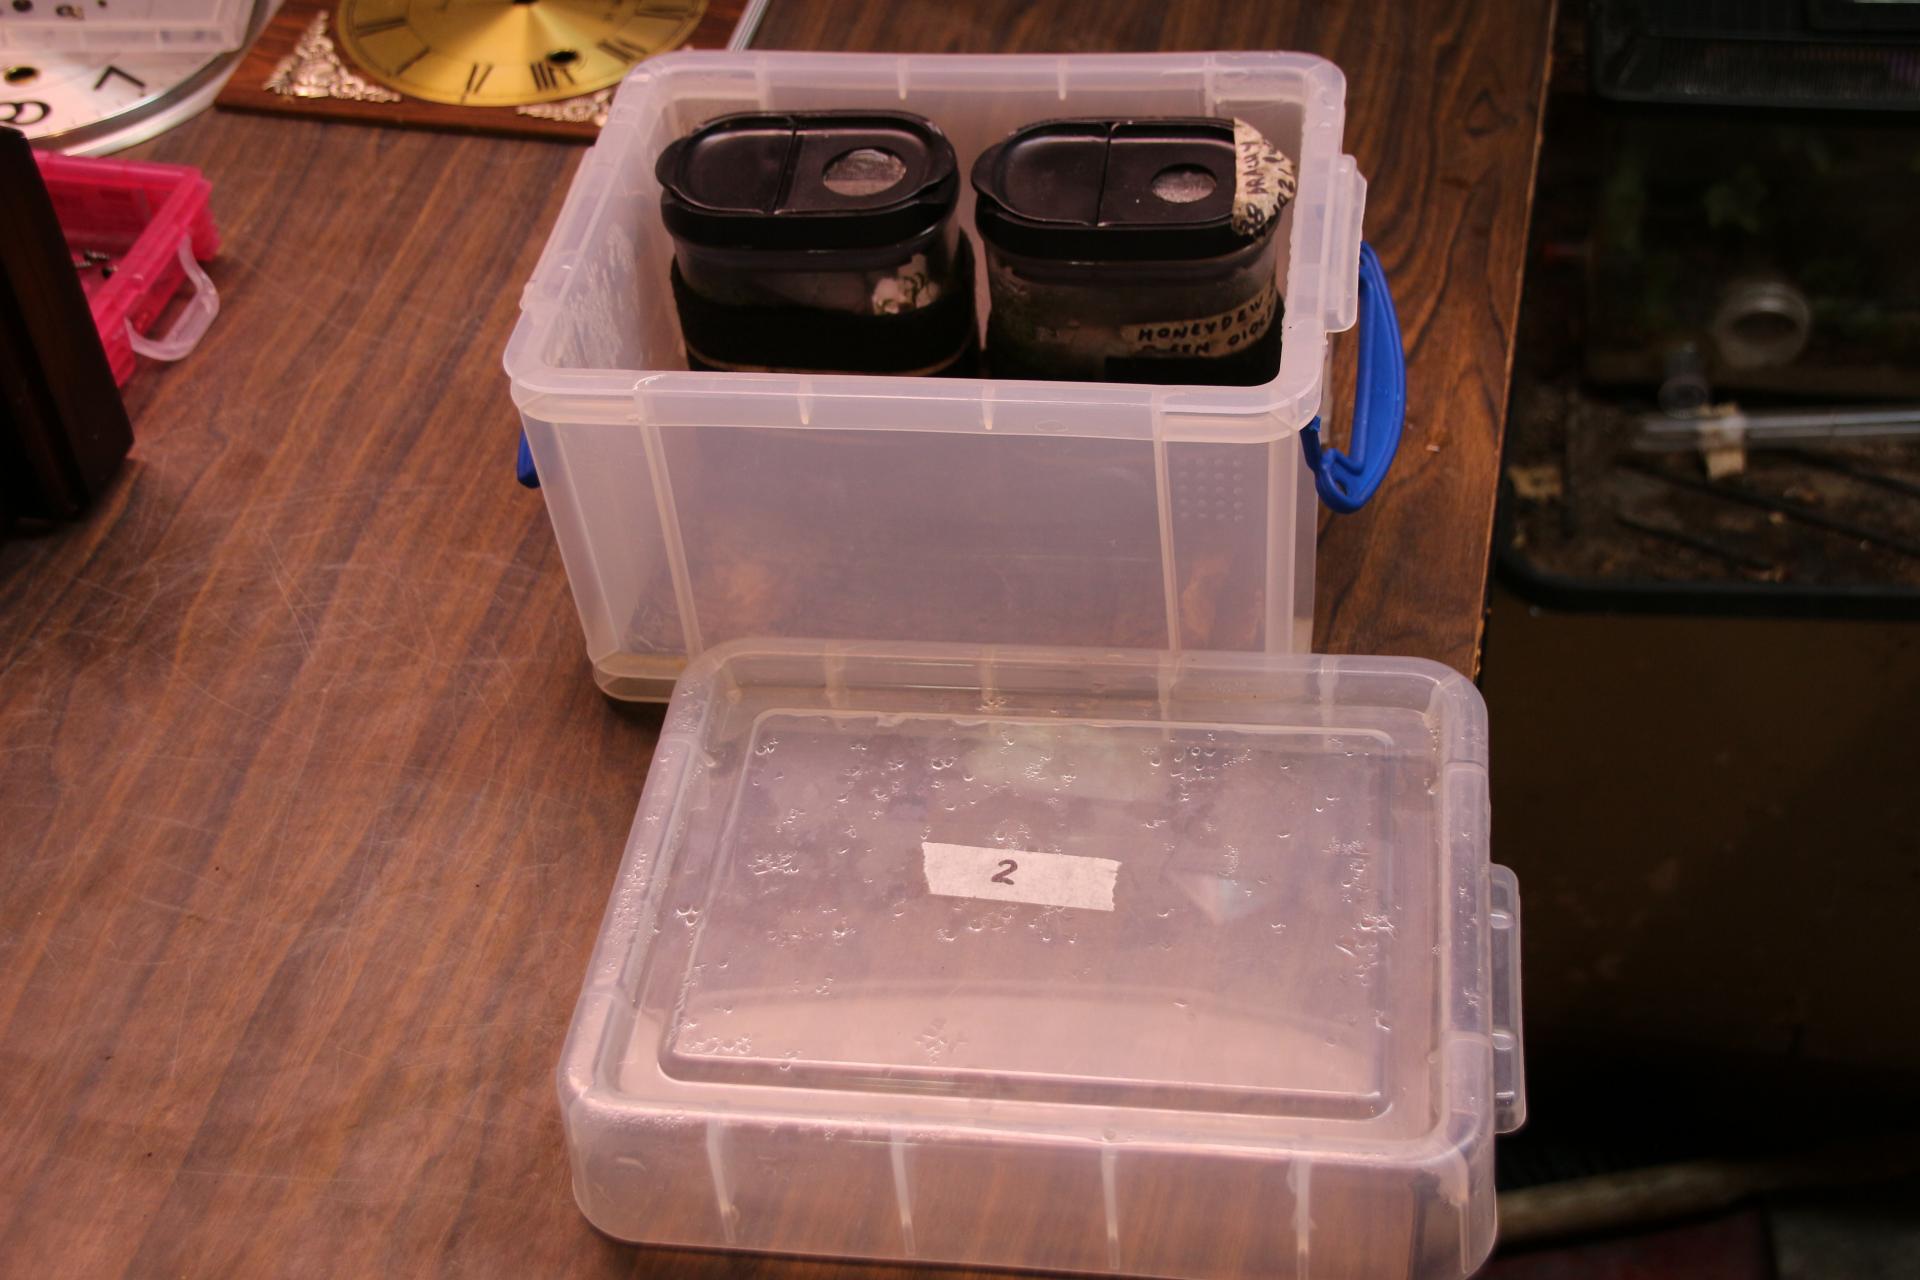
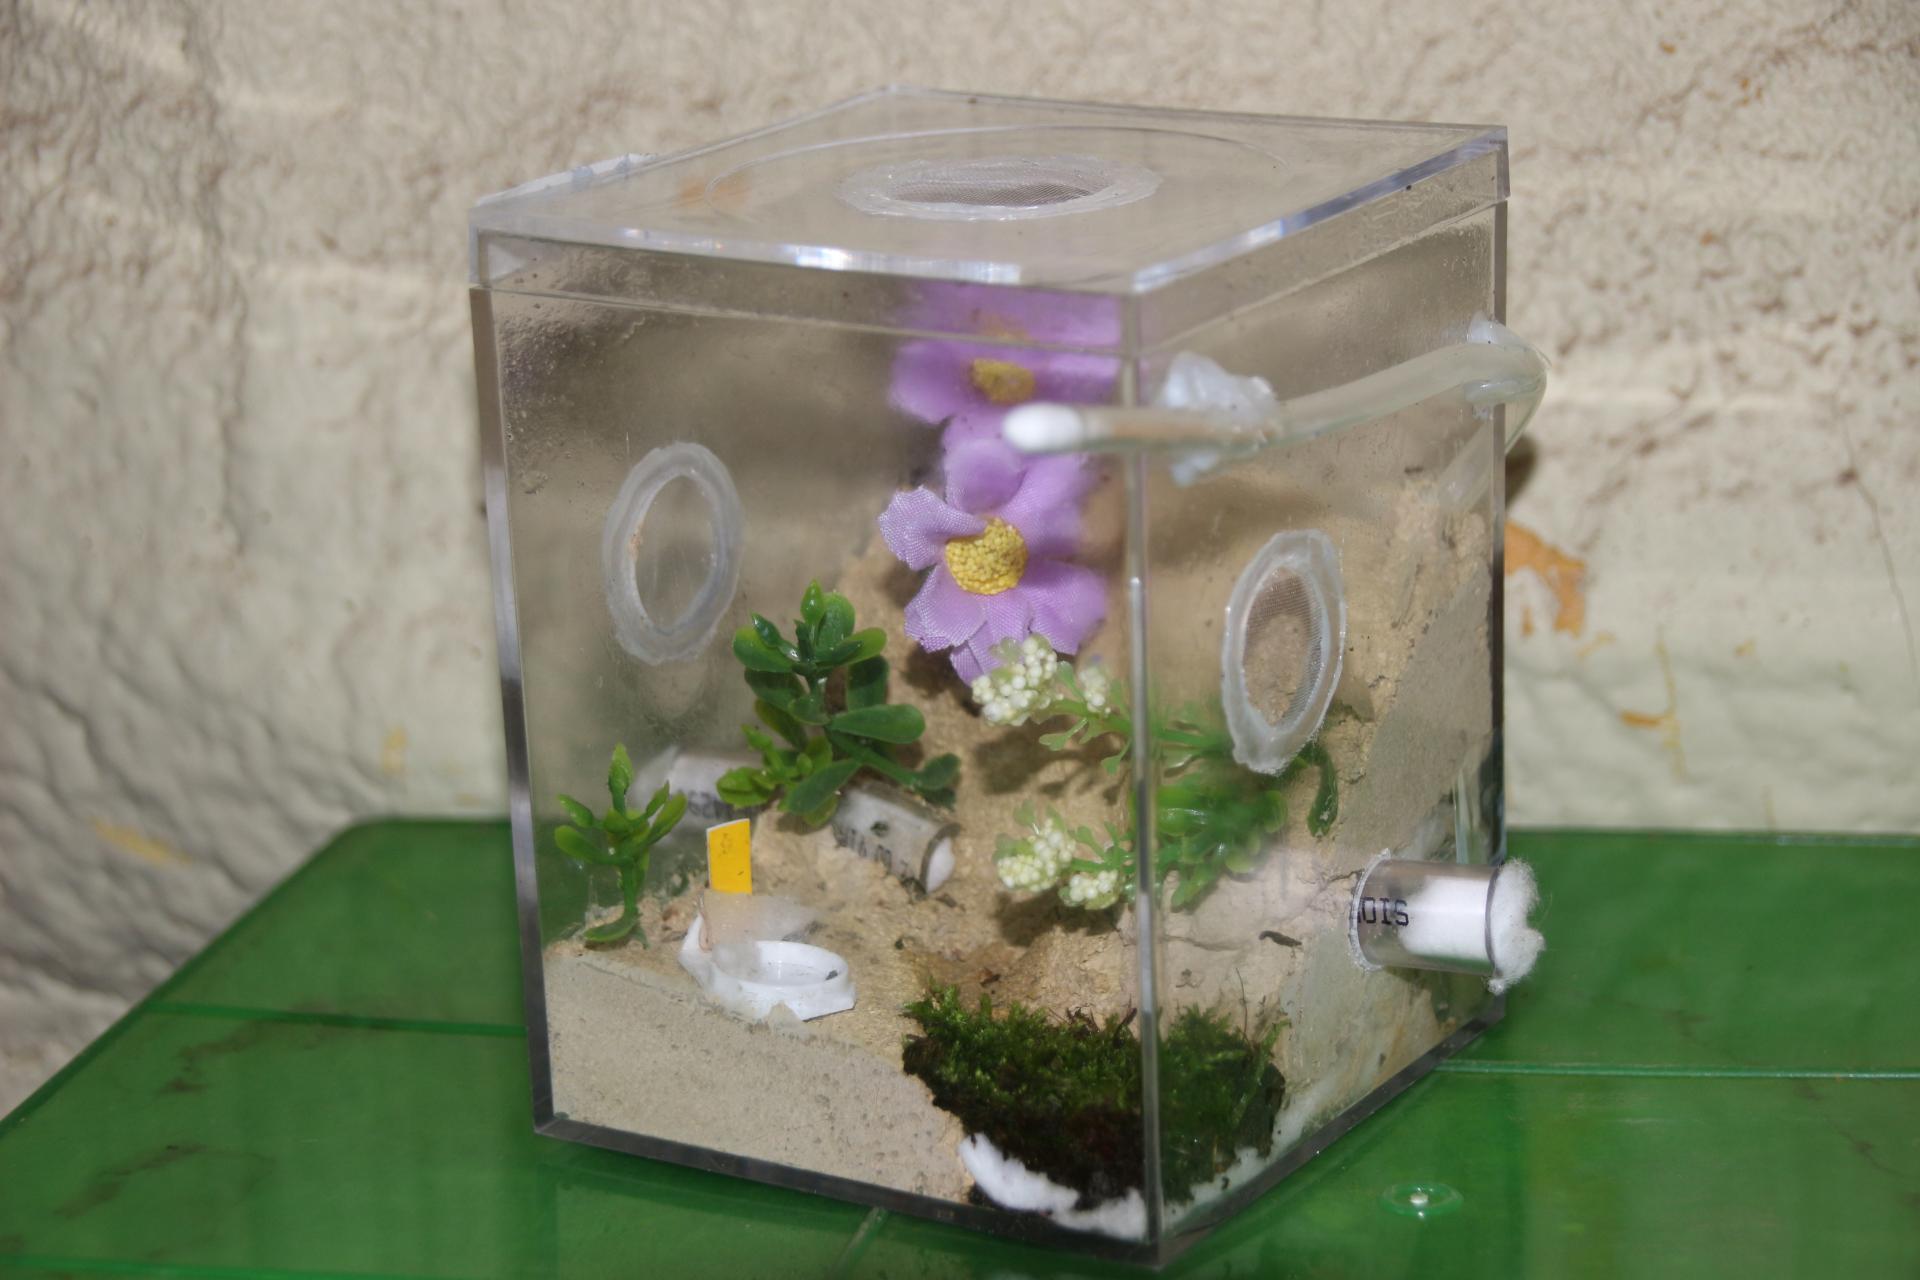
The final things I added to the back were the red cellophane filter and the blackout cover.  I used a cotton swab as a stopper for the fill tube.


2022-10-03 002.JPG


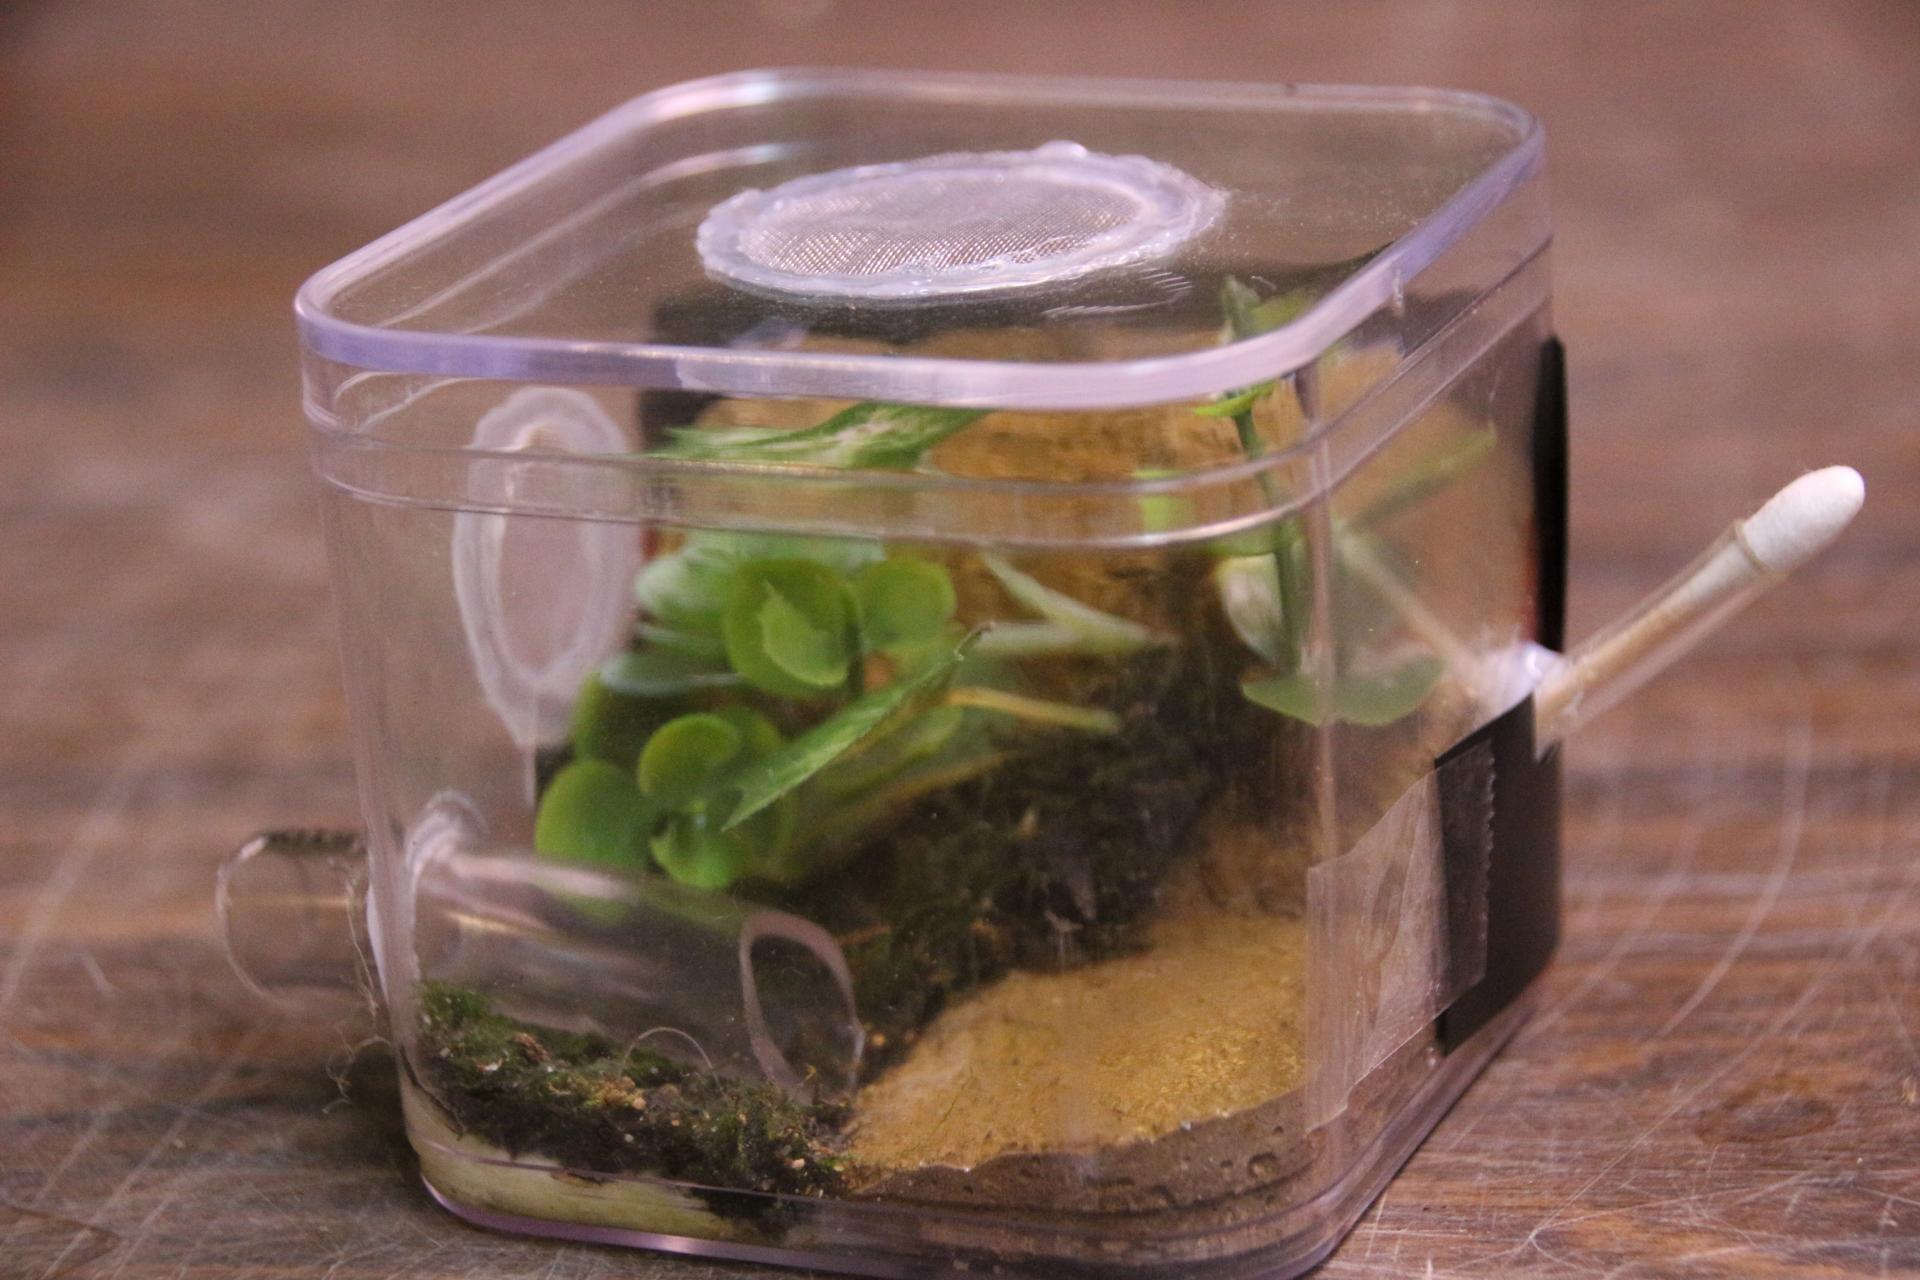
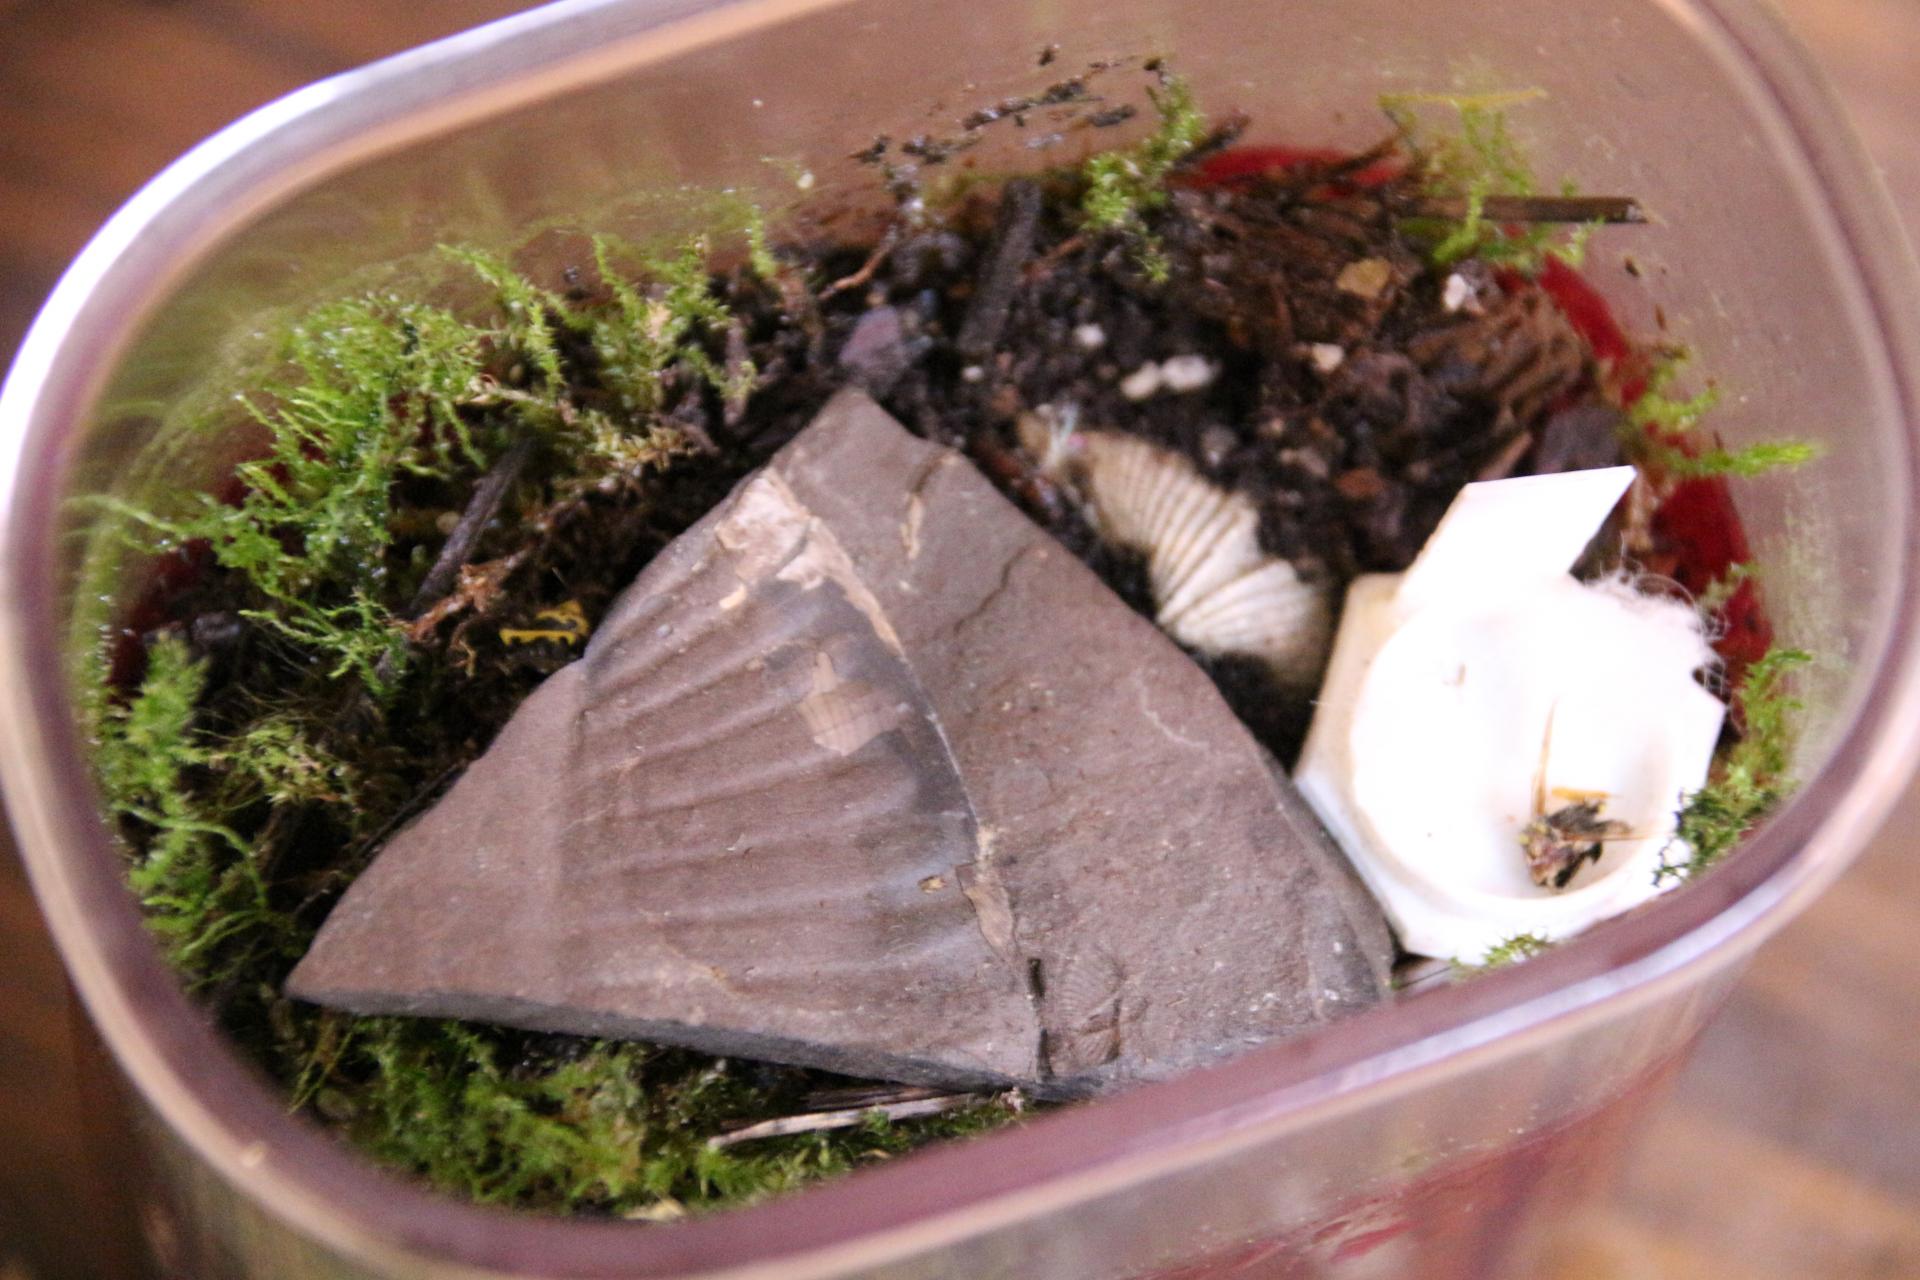
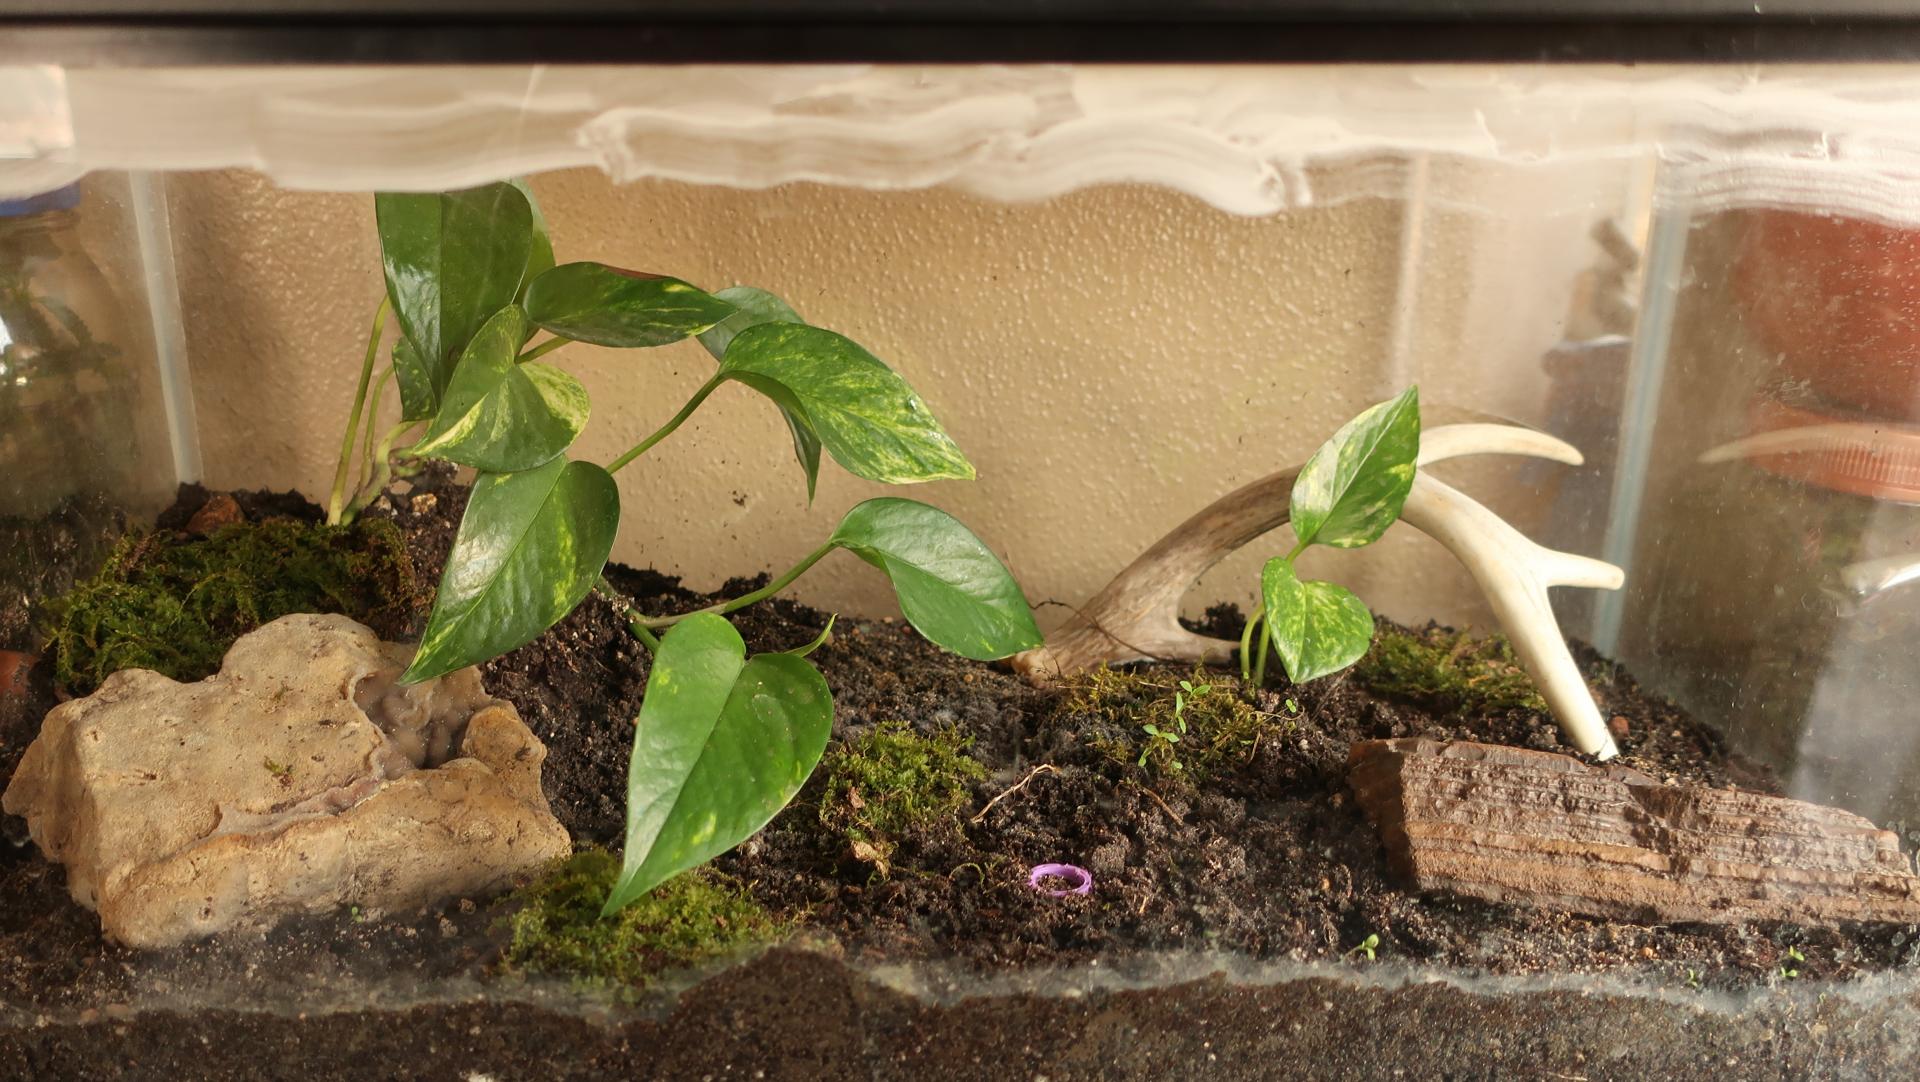
I finished off by putting some moss in the front corner.  It'll be watered by the cotton underneath that has soaked up the overflow from the water tower.  I always like to have a wet hole in a corner of all of my formicaria to provide humidity and water for any desperate ant.  However, It's very tempting for a young queen, newly placed in a formicarium, to make a dash for the moss and not the entry hole to the formicarium, so, this time I waited until I had them comfortably installed before I added the moss.  


After about a week the colony was settled in quite nicely, they even found a way to squeeze their way through from the water tower to the front, right to the feeding dish.  Perfect. Now they've made it a tunnel and they're quite comfortable, so I put them into their winter quarters, and we can hardly wait for spring.  


Try your hand at making a formicarium for a colony of your own.  Part of the satisfaction of ant keeping for me is to watch as a young colony thrives and grows in a formicarium I've made for them that satisfies their needs and mine.


My father always said I had ants in my pants.

#804 Offline ANTdrew - Posted December 2 2022 - 3:16 AM

ANTdrew

    Advanced Member

  • Moderators
  • PipPipPip
  • 9,376 posts
  • LocationAlexandria, VA
These look great! My only concern would be the mosquito mesh on the water tower; small ants would crawl in and nest in there. I’d recommend 100 micron mesh for this purpose.
"The ants are a people not strong, yet they prepare their meat in the summer." Prov. 30:25
Keep ordinary ants in extraordinary ways.

#805 Offline Flu1d - Posted December 2 2022 - 7:18 AM

Flu1d

    Advanced Member

  • Members
  • PipPipPip
  • 393 posts
  • LocationPensacola, Florida
I love this, I think this might be how I make my first formicarium. I want a nice little 3x3 or 4x4 for a tiny species in the near future

Edited by Flu1d, December 2 2022 - 7:20 AM.


#806 Offline rptraut - Posted December 2 2022 - 12:31 PM

rptraut

    Advanced Member

  • Members
  • PipPipPip
  • 345 posts
  • LocationOntario, Canada

Thank you for all your comments.  I'm glad to hear you like this setup, I think it provides everything a small colony needs without taking up a lot of space.  One of the main drawbacks is that a smaller formicarium will usually dry out faster than a larger one.  I have to be vigilant about hydration and I always try to keep the water tower full at all times.  This probably discourages nesting in there, I've never had a problem that way, but a finer screen would ensure that they couldn't.  I also think the cotton pads are denser and more difficult to dig in than cotton balls. 


I usually water my colonies every three or four days, especially in summer as I have them in a partly sunny window and they do warm up quite a bit on sunny days.  I have some on a heating mat (I can get quite a few of these small ones on it) and they dry out faster there as well.   I locate the water tower where it is quite visible when being filled because in a smaller setup, it is easier to overwater and flood the cotton on the bottom.  If this happens, I just suck the excess water out of the moss area in front as the whole water system is interconnected through the cotton pad.  I also watch for ants that are scrambling around to avoid the overflow as they move brood to higher ground.  The chambers are all sloped to drain to the water tower area.  Ideally, there should never be standing water for an ant to drown in, but they might get flooded occasionally. 


My father always said I had ants in my pants.

#807 Offline Katla - Posted December 2 2022 - 2:48 PM

Katla

    Advanced Member

  • Members
  • PipPipPip
  • 144 posts
  • LocationFrankreich

This is a tank i made for my myrmecia, but i couldn't give her the temperatures needed and wouldn't want to loose site during founding stage 

20210821_083449.jpg?width=1440&height=67


image.png


#808 Offline rptraut - Posted December 3 2022 - 2:00 AM

rptraut

    Advanced Member

  • Members
  • PipPipPip
  • 345 posts
  • LocationOntario, Canada

Two More Small Colony Formicaria


In a previous post I described how I made a formicarium for a small colony.  Please read it first for exact mixing instructions for the grout/vermiculite and other details referred to later in this post.  I made three of these formicaria at one time because it's hard to mix a small amount of grout for only one.  I followed the same procedure for construction as formicarium #1 for these two, but I used different methods to form the chambers.  In the first post, I described how I used modeling clay to form the chambers when it was removed from a casting.  In the second one I will show how I made chambers using acorns and in the third example I made chambers by sand casting.


2022-11-05 001.JPG


Formicarium #2 has all the usual features in the front, complete with an oasis and a feeding platform in a tranquil, landscaped environment.  A small drill made the entrance to these chambers part way up the side like a proper front door.


2022-11-05 002.JPG


While in the back, there is ample room to house a small Tapinoma sessile colony in chambers that I formed from hollow acorns.  Unfortunately, the ants don't show up very well against a dark background.  The stiff grout/vermiculite mixture (I'll just call it grout) allows me to shape it and then put sand in the areas that I eventually want to be open for ants.   In this example I only had to cover the acorns with grout to form the chambers.   I used a strip of sand beside the acrylic for a tunnel to join the acorns together and I made spaces in the grout with sand for the water tower and the entrance hole.  Anywhere that I put sand, there will be no grout, so an empty space is left when the sand is removed.  When complete it should cure for a couple of days, but for the next step it has to be dry as well.  The sand absorbs water from the grout, and it will be quite wet after the casting process.  I put mine on top of some plant lights and it dried in about four days.  The sand has to be dry enough to flow out of your casting.  I loosen it with a piece of thin wire- it flows quite well when loosened and if it's dry it flows out easily.  I usually only empty enough sand so the ants can reach the water tower and I empty as much chamber as I think the ants will need to get established.  They can excavate the rest as they need it.  


2022-11-05 005.JPG


The front of the third version (#3) is similar in construction to the other two with the addition of a feeding port for easier access.  It's made from a plastic screw top container. I cut the bottom off, sanded the neck and bottle cap part that was left and then hot glued it into a matching sized hole in the front of the formicarium.  The screw top then becomes the feeding port.


2022-11-05 006.JPG


I used a form of sand casting to make the chambers and used wire to form tunnels.  To make tunnels I put a wire in place and poured sand down the opening as I pulled the wire out. I also used thin tubing and poured sand down the tube as I pulled it out.  Whatever the method, I made sure there was sand from the entrance down to the water chamber and to at least one nest chamber.  I followed the same procedure of sand removal as above, opening enough of a chamber to keep this Tapinoma colony busy. 


To be successful with either one of these methods, two things are critical.  The grout must be quite thick.  You should be able to use the back of a spoon to smooth it into a shape and it will stay.   Being so thick, you can sculpt the chamber bottom close to the acrylic and make the tunnels along the acrylic as well.  I found a small spoon worked well for adding and shaping small amounts of grout to form the sides and back of each chamber.  A small spoon also works well for adding small amounts of sand to the area where you want the chamber cavity to be.  I tried to pile the sand higher against the acrylic because it makes viewing easier when each chamber has a nice open front.  Grout is then placed on top of the sand to form the ceiling of the chamber.


The other important factor for success is to keep the grout from getting on the acrylic.  This is easier said than done, and actually, I had good results cleaning grout off the acrylic with a damp paper towel wrapped around a knife blade.  The acrylic should be cleaned anyway before you add the sand where the chambers will be- It's the last time you'll be able to clean it, so make it good.    I used very fine sand that was dust free to help keep the acrylic clean.  I made sure the chambers were sloping towards the water tower for drainage and that the overflow of the water tower was clearly visible.  The consistency of the thick grout made me wonder just how well it would bond or would it dry as a crumbly mess.  So, I lightly sprayed the outside surface with water to help link it together.  I have sprinkled sand or powdered moss on the wet surface at this stage in other builds, to add texture or to rough up a smooth surface for larger ants, but for small ants like these, a smooth surface is fine.


These three formicaria demonstrate three different methods to create nest chambers and tunnels.  In the first one, modeling clay was used to form chambers when it was removed from a casting, while acorns were left in place to form the chambers in the second version.  Sand was used to fill areas where I didn't want grout, to form tunnels and chambers as demonstrated with the third formicarium.   Each has its' advantages and disadvantages.   Regardless, the ants will take whatever we give them and make it suit their needs to the best of their ability.


  • UtahAnts likes this
My father always said I had ants in my pants.

#809 Offline rptraut - Posted December 9 2022 - 12:52 AM

rptraut

    Advanced Member

  • Members
  • PipPipPip
  • 345 posts
  • LocationOntario, Canada

All-In-One Camponotus Founding Formicarium


I found the queen of this colony in the summer of 2021 and put her directly into this formicarium when it was new.  I took it and two others out of cold storage last night to check on them, I thought you might like to see their progress.  The formicarium is made from an acrylic bathroom container made to hold cotton balls etc. that I found in a hardware store.  It was divided in two already, so it was a natural for an outworld/nest combination.  I got three of them.  Once again, I used a grout/vermiculite mixture to form the nest and outworld components.  In this one, I sand cast the nest chambers, dried the whole unit, and then teased/poured most of the sand out a chamber and the water tower, just big enough for the queen.   She settled right in and raised six workers in her first season.  This year the colony increased to about 30 workers and they increased the size of their chambers as well by digging, not only the sand in the additional chambers, but the grout/vermiculite as well.  The grout is not only softer with the addition of the vermiculite, but the cured mixture does absorb water and become soft enough for them to remove.  


2022-12-08 001.JPG


From the front, you can see the outworld section, with feeding platform, and ramp up to the nest entrance.  These girls were also supplied with an oasis in a relaxing landscaped setting.  I put the piece of red cellophane to the left on a section of nest chamber that became visible from the front as the ants dug it out and made it bigger.  Although I don't use the outer lid very often, it's a nice feature to have during hibernation.


2022-12-08 002.JPG


With the lid off, you can see the removable inner lid complete with screen and feeding port.  You can also see the future access tube plugged with cotton and the hydrating tube that goes behind to the water tower.  I took these units out of winter storage to do some maintenance like cleaning the acrylic glass, vacuuming up debris and garbage, gluing reluctant magnets and covers, and refreshing the moss.  I checked the condition of each colony to assess whether their formicarium would be large enough for them in the coming season.  


2022-12-08 003.JPG


From the back, you can see the hydration tube into the water tower (please excuse the messy glue job).  I made the brood chambers by leaving depressions in the grout mix as I placed it near the glass.  I filled the depressions with sand and piled it a little higher at the glass.  Then I put more grout mix on top of the sand to form the ceiling of the chamber.  I made tunnels filled with sand to connect them all together.  There is a cotton pad on the bottom of this setup that links the oasis in the front with the overflow from the water tower in the back because sometimes hydrating the oasis is all the colony requires.  I finished the maintenance of the other two colonies and all went back to cold storage.  I think I'd better start making some brood chambers to hook up with these colonies next summer because they're probably going to need them. 


  • UtahAnts and LowQualityAnts like this
My father always said I had ants in my pants.

#810 Offline Full_Frontal_Yeti - Posted January 5 2023 - 11:11 AM

Full_Frontal_Yeti

    Advanced Member

  • Members
  • PipPipPip
  • 285 posts
Just got done catching up on all 41 pages here.

Got to say to all the cudgel jobs, yall totally impress me. I really appreciate making more wiht less, and all the dixicups, straws, and hobby lobby shelf inspiration cudgel jobs are just amazing yall.

While i'm total noob to this, so maybe there's a reason for it i'm unaware of. But i notice one thing in all the designs i see everywhere both hobbyist and professionally sold. Everyone that uses magnets for glass holding seem to be using rare earth magnets on both sides of the glass. And it is often advised when reattaching glass to be extra careful as the magnet pull is so strong and the magnets so hard they could break/chip/crack the glass.

I would have considered using the soft refrigerator seal magnets on the formicarium side and the rare earth magnets on the glass side.
https://www.amazon.c...749&sr=8-22

The magnet strip is very soft and would be a bit of a cushion surface compared to the rare earth magnet while still providing plenty of magnetic grip for the glass to hold in place.
As well the soft magnet can be cut into whatever shape/size is desired or even used on the thin edge side. It still gets a very strong magnetic grip with a rare earth magnet with potential for a minimal footprint on the formicarium side.

Or if we were using a rare earth on both sides, then dipping the formicarium side magnet into liquid laytex first would also give a softer cushion surface, and protect from the rust issue i notice these magnets are subject to if they get wet on the formicarium side. While a thin layer of latex is not going to reduce the magnet seal's strength any meaningful amount it will protect from rust and provide a softer surface for the glass to attach to.

Anyone tried this before, or know the reason why it's best to use rare earths on both sides?

Anyway just say'n love all the work, and i think i notice potential for a general design/materials improvement where use of magnets is concerned. Though i'm just getting started and still a couple years out from this level of the hobby to be sure. I can see that the creativity and problem solving of making your own is a real part of the draw to be found here.

Edited by Full_Frontal_Yeti, January 5 2023 - 11:11 AM.


#811 Offline rptraut - Posted January 6 2023 - 1:28 AM

rptraut

    Advanced Member

  • Members
  • PipPipPip
  • 345 posts
  • LocationOntario, Canada
I've used pieces of those magnetic business cards and they work fine. All of my formicaria are made from plastic, plexiglass, or acrylic. Glass is too fragile. I prefer the "soft close" to reduce the chances of startling and stressing my ants and I only use magnets to hold the blackout cloth in place. A super strong magnet isn't really required for that. If I was depending on magnets to keep my ants contained, I would want to get the best ones I could and use them on both sides.
My father always said I had ants in my pants.

#812 Offline ANTdrew - Posted January 6 2023 - 3:04 AM

ANTdrew

    Advanced Member

  • Moderators
  • PipPipPip
  • 9,376 posts
  • LocationAlexandria, VA
Another thing to keep in mind with the magnet issue is that these formicaria aren’t meant to be opened and closed all the time. It is basically impossible to remove magnetic glass without all holy heck breaking loose once you have a healthy colony filling a nest. A strong seal is more important than a cushioned closing.
"The ants are a people not strong, yet they prepare their meat in the summer." Prov. 30:25
Keep ordinary ants in extraordinary ways.

#813 Offline ANTdrew - Posted January 18 2023 - 11:06 AM

ANTdrew

    Advanced Member

  • Moderators
  • PipPipPip
  • 9,376 posts
  • LocationAlexandria, VA

I'm working on a new "CrematoProof" mega-outworld for my Pheidole bicarinata colony. I'll hook this up to their UtahAnts nest at some point after diapause. I still need to install the escape proof rim under the lid. I did add a removable magnetic vent at the top, though. 


IMG 4524
IMG 4523


  • UtahAnts and AntsCali098 like this
"The ants are a people not strong, yet they prepare their meat in the summer." Prov. 30:25
Keep ordinary ants in extraordinary ways.

#814 Online futurebird - Posted February 11 2023 - 10:36 AM

futurebird

    Advanced Member

  • Members
  • PipPipPip
  • 771 posts
  • LocationNew York City, NY

Just tried out this new product from underground city and it's pretty great. 

(video has narration.)


Starting this July I'm posting videos of my ants every week on youTube.

I like to make relaxing videos that capture the joy of watching ants.

If that sounds like your kind of thing... follow me >here<


#815 Offline Full_Frontal_Yeti - Posted February 11 2023 - 11:02 AM

Full_Frontal_Yeti

    Advanced Member

  • Members
  • PipPipPip
  • 285 posts

Just tried out this new product from underground city and it's pretty great. 


while I'm still very new to all this, it was one of the first things i imagined doing for an outworld was a water moat container without walls. around it. But the first consideration i had(year+ out from actually crafting just planing still) was that the water wold probably need to be moving. I imagined some ants had good potential to get drowned in still water and/or bridge still water that was too narrow(i imagined several inches of water width to the other side needed to prevent possible bridging. But if the water were moving that'd change how they interacted wiht it and prevent any ant from attempting to use dirt or themselves to bridge the gap.


I have also figured if the water is moving then the bottom of the channel can be grooved to direct the water to push into the island side more than the outside edge, so any ants that did get into the water wold be carried back to the island side of the bank quicky and unlikely to end up on the outside bank.


I'll be very curious to hear how this setup works out over time.


Edited by Full_Frontal_Yeti, February 11 2023 - 11:02 AM.


#816 Online futurebird - Posted February 11 2023 - 11:53 AM

futurebird

    Advanced Member

  • Members
  • PipPipPip
  • 771 posts
  • LocationNew York City, NY

This set-up is for photos and a little fun only. I'd never leave any colony with access like this 24-7... or even unsupervised. Least of all this particular colony of carpenter ants who are on their third year and VERY intelligent and interested in getting out and making satellite nests in my art supply drawer...


Starting this July I'm posting videos of my ants every week on youTube.

I like to make relaxing videos that capture the joy of watching ants.

If that sounds like your kind of thing... follow me >here<


#817 Offline ANTdrew - Posted February 11 2023 - 1:08 PM

ANTdrew

    Advanced Member

  • Moderators
  • PipPipPip
  • 9,376 posts
  • LocationAlexandria, VA

This set-up is for photos and a little fun only. I'd never leave any colony with access like this 24-7... or even unsupervised. Least of all this particular colony of carpenter ants who are on their third year and VERY intelligent and interested in getting out and making satellite nests in my art supply drawer...

Fill the moat with underfed fish.
  • FinWins and Full_Frontal_Yeti like this
"The ants are a people not strong, yet they prepare their meat in the summer." Prov. 30:25
Keep ordinary ants in extraordinary ways.

#818 Offline antperson24 - Posted March 3 2023 - 7:36 AM

antperson24

    Advanced Member

  • Members
  • PipPipPip
  • 182 posts
  • LocationNorth East Iowa

I really enjoy making my own formicaria, so here are some of them!


The terrarium I made, which my Tetramorium immigrans colony is living in:

IMG_4591.JPG


The two sided all-in-one plaster formicarium I made (if ants were living in it, I would have sand in the outworld part of it):

IMG_4592.JPG


The three inch tall sand tower I made recently:

IMG_4594.JPG


And another plaster nest:

IMG_3496.jpg


Sorry that a couple of them are sideways. :(


  • ANTdrew and UtahAnts like this

 Why keep ants that aren't found in your yard?

There are so many fascinating ants right were you live!

I disagree with the keeping/buying of ants that are not found in your area.


#819 Offline antperson24 - Posted March 7 2023 - 5:38 AM

antperson24

    Advanced Member

  • Members
  • PipPipPip
  • 182 posts
  • LocationNorth East Iowa

Here is my most recent nest, it is made out of fire brick:

IMG_4652.JPG


  • ANTdrew likes this

 Why keep ants that aren't found in your yard?

There are so many fascinating ants right were you live!

I disagree with the keeping/buying of ants that are not found in your area.


#820 Offline ANTdrew - Posted April 13 2023 - 5:47 AM

ANTdrew

    Advanced Member

  • Moderators
  • PipPipPip
  • 9,376 posts
  • LocationAlexandria, VA

Over my spring break holiday, I completed a couple more Antpartments using Dollar Tree containers. 


IMG 4903
 
IMG 4902


  • UtahAnts, futurebird, antsinvirgina and 2 others like this
"The ants are a people not strong, yet they prepare their meat in the summer." Prov. 30:25
Keep ordinary ants in extraordinary ways.


Also tagged with one or more of these keywords: photo, pictures, formicarium, outworld

1 user(s) are reading this topic

0 members, 1 guests, 0 anonymous users