Jump to content

  • Chat
  •  
  •  

Welcome to Formiculture.com!

This is a website for anyone interested in Myrmecology and all aspects of finding, keeping, and studying ants. The site and forum are free to use. Register now to gain access to all of our features. Once registered and logged in, you will be able to create topics, post replies to existing threads, give reputation points to your fellow members, get your own private messenger, post status updates, manage your profile and so much more. If you already have an account, login here - otherwise create an account for free today!

Photo

Firebrick Formicarium

firebrick formicarium diy dremel

46 replies to this topic

#41 Offline Rstheant - Posted December 2 2018 - 12:54 PM

Rstheant

    Advanced Member

  • Members
  • PipPipPip
  • 883 posts
  • LocationSan Jose, CA

Wow! This looks great! Just a suggestion for next time: you may want to use magnets in a Tarheel Ants style to connect the acrylic. It makes cleaning and moving in and out very easy. May I ask where you bought the Firebrick? I plan on making a Formicarium myself. Here are the crude designs, but the explanation helps compensate for it. It's a bit of a read though haha. http://www.formicult...-for-tiny-ants/
I would definitely move the Camponotus into this. It would be better for their first hibernation.


I purchase my k23 firebrick from Clay Planet @Major. It has a lot of pottery supplies too, like terra-cotta.

#42 Offline ANTdrew - Posted June 21 2019 - 9:50 AM

ANTdrew

    Advanced Member

  • Moderators
  • PipPipPip
  • 10,274 posts
  • LocationAlexandria, VA
Reviving this thread! How did this formicarium work out in real time? Update, please!
"The ants are a people not strong, yet they prepare their meat in the summer." Prov. 30:25
Keep ordinary ants in extraordinary ways.

#43 Offline Yosigi - Posted June 21 2019 - 10:50 AM

Yosigi

    Member

  • Members
  • PipPip
  • 23 posts
  • LocationSaranac, NY

The formicarium seemed to work well, but the queen never laid after hibernation and died about 6 weeks after I took them out.  I've made some smaller nests in the meantime, and I wanna make another large one with smaller tunnels and chambers for a multi queen Myrmica colony, since those will be flying for me soon.  I did catch roughly 40 Camponotus queens this season so far, so once they've gotten enough workers I can move one of them in; the rest I don't sell will get other nests once I've made them.


  • ANTdrew and AntsGodzilla like this

My current colonies:

1x 4 queen Myrmica colony, roughly 30 workers

1x 3 queen Myrmica colony, roughly 20 workers

2x Tetramorium Immigrans colony, one with probably 500 workers and the second has around 200

1x Pogonomyrmex Occidentalis colony from THA, about 40 workers


My 1st firebrick formicarium: http://www.formicult...ck-formicarium/


#44 Offline ANTdrew - Posted June 21 2019 - 10:55 AM

ANTdrew

    Advanced Member

  • Moderators
  • PipPipPip
  • 10,274 posts
  • LocationAlexandria, VA
Thanks! Would love to see photos of the nests you made when you get a chance.
"The ants are a people not strong, yet they prepare their meat in the summer." Prov. 30:25
Keep ordinary ants in extraordinary ways.

#45 Offline Dukagora - Posted June 23 2019 - 7:23 PM

Dukagora

    Advanced Member

  • Members
  • PipPipPip
  • 52 posts
  • LocationPrescott, Arizona
Has anyone tried K26 firebrick? I just finished carving a k23 but still need to gather some stuff to finish it. It really is quite soft and I was surprised when I was washing it after carving as it was soft enough that I was rubbing tiny pieces of it off with my fingers. didn't even realize it until checked. I just thought I had a lot of loose debris from carving.

Edited by Dukagora, June 23 2019 - 7:24 PM.


#46 Offline J20m83 - Posted July 4 2022 - 6:46 PM

J20m83

    Newbie

  • Members
  • Pip
  • 1 posts
Great tutorial. I will have to share my experience when I figure it out. Thanks!
  • AntsGodzilla likes this

#47 Offline antKeeper69 - Posted June 4 2025 - 6:40 PM

antKeeper69

    Newbie

  • Members
  • Pip
  • 1 posts


Picked up the sheet of acrylic today from Lowes, stuff is surprisingly cheap.  18"x24"x.080" sheet was only $11.00, which gives me enough for 16 4"x8.5" covers.


I decided to cut the sheet to the 4" side first.  I used a hacksaw with a metal-cutting blade to cut it, the saw I used for the brick was too coarsely toothed.  The sheet is wide enough to cut out 2 covers, but I only need 1 for now so that's all I'll do.


After I cut the cover out of the sheet, I noticed the edges where I cut were not very smooth.  I used some 120-grit sandpaper to smooth them out and get rid of the little bit and pieces left from me cutting.  For those of you who don't know, acrylic sheets come with a protective plastic film on both sides that you peel off when you are done cutting the sheet to size, that's what that triangle is in the corner, not a scratch.  I haven't peeled it off yet, as there is still one more step for the cover before I put it on the nest


Next thing to do is to mark and drill the holes you'll use to hydrate the nest.  I used a 3/32" drill bit for the holes which is just big enough for my syringe tip to fit through.


Last thing to do before glueing the cover to the nest is to cut a sponge down small enough that it just barely is compressed when you put it in the hydration chambers.  I found a pen or skewer is really helpful for getting the sponges down in the chambers, as the sponge acts like velcro against the brick.


I debated whether I wanted to use silicone or hot glue to attach the cover, but ultimately decided on hot glue as it's cheaper, more readily available to most people, and you don't risk wasting most of a tube if you don't plug the tip well.  My hot glue gun is a multi-temp, I used the high temp for this.  I see no reason why a low temp wouldn't work though.  To make sure you keep the cover perfectly squared up while you do this, you can use a clamp to hold it in place.  Just be gentle, the brick is very soft and you don't wanna ruin all the hard work you've put in.  I chose instead to hold the cover and push it tightly against the glass on one edge while I ran a bead of glue about 1" long.  I blew on it to cool it down faster while still holding it down, then did the same thing for the other three sides.  Once you've done that, you don't have to worry about it moving out of place at all.


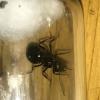
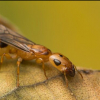
And here she is, all done and pretty!  Come spring, I will definitely be moving my Camponotus pennsylvanicus. in here, as they are living in a large Omni nest right now and just don't need that much room.  In another week or two, I'm probably going to start a new thread following the next formicarium I make.  Just to tease you guys and gals a bit, it'll be a vertical 2-sided nest.


I have the same thing i created it but i need to add the glass/  acrylic sheet i saw your post you used silicon, i will try the same now since i can't screw it as itt will crumble


  • AntsGodzilla likes this


Also tagged with one or more of these keywords: firebrick, formicarium, diy, dremel

1 user(s) are reading this topic

0 members, 1 guests, 0 anonymous users