Jump to content

  • Chat
  •  
  •  

Welcome to Formiculture.com!

This is a website for anyone interested in Myrmecology and all aspects of finding, keeping, and studying ants. The site and forum are free to use. Register now to gain access to all of our features. Once registered and logged in, you will be able to create topics, post replies to existing threads, give reputation points to your fellow members, get your own private messenger, post status updates, manage your profile and so much more. If you already have an account, login here - otherwise create an account for free today!

Photo

Photo journey of how to build a grout formicarium


  • Please log in to reply
65 replies to this topic

#41 Offline Foogoo - Posted April 22 2015 - 11:00 AM

Foogoo

    Advanced Member

  • Members
  • PipPipPip
  • 1,161 posts
  • LocationLos Angeles, CA

You can get polystyrene dram vials, that may work. I think they're fairly cheap too.


Take pictures as you do it, and create a picture how-to like I did.  :D


I have two picture how-to's in the works.


Definitely, I've already got some ideas to try and prove dspdrew wrong  :P . Any container ideas? I'd like to use a glass cylinder between 1"-4" in diameter or so but can't think of where I can find something like that.


Edit: Or acrylic/polycarbonate. Just not a huge fan of the cloudy tupperware material.


Maybe try polystyrene dram vials, I think they're fairly cheap.

Perfect, that's exactly what I had in mind but wasn't sure what they're called. 


Camponotus vicinus, Crematogaster 1, Crematogaster 2, Formica francoeuri, *, *, Myrmecocystus testaceus, Novomessor cockerelli, Pheidole hyatti, Pogonomyrmex californicus, Pogonomyrmex rugosus, Solenopsis invicta


#42 Offline Crystals - Posted April 22 2015 - 11:30 AM

Crystals

    Advanced Member

  • Moderators
  • PipPipPip
  • 2,048 posts
  • LocationAthabasca, AB (Canada)

For those interested, Foogoo started his how to thread here: http://www.formicult...est/#entry17255


"Always do right. This will gratify some people, and astound the rest." -- Samuel Clemens


List of Handy Links   (pinned in the General section)

My Colonies


#43 Offline Crystals - Posted April 27 2015 - 7:44 PM

Crystals

    Advanced Member

  • Moderators
  • PipPipPip
  • 2,048 posts
  • LocationAthabasca, AB (Canada)

How to build a Grout Formicarium in an aquarium

I had been asked to build a grout formicarium in a 5.5 gallon aquarium.  Considering ants in my location need hibernation, the nest itself must be removable from the aquarium to fit in the fridge. 


You will require:

an aquarium

2 pieces of glass (I used 3.5x5" picture frame glass)

oil based clay for building models

grout

sand

perlite

suran wrap/plastic wrap

olive oil

aquarium silicone


Take your two pieces of glass.  If you need to cut them, then do so.

Form the tunnels on them.


35699481382_9a9926ff15_b.jpg


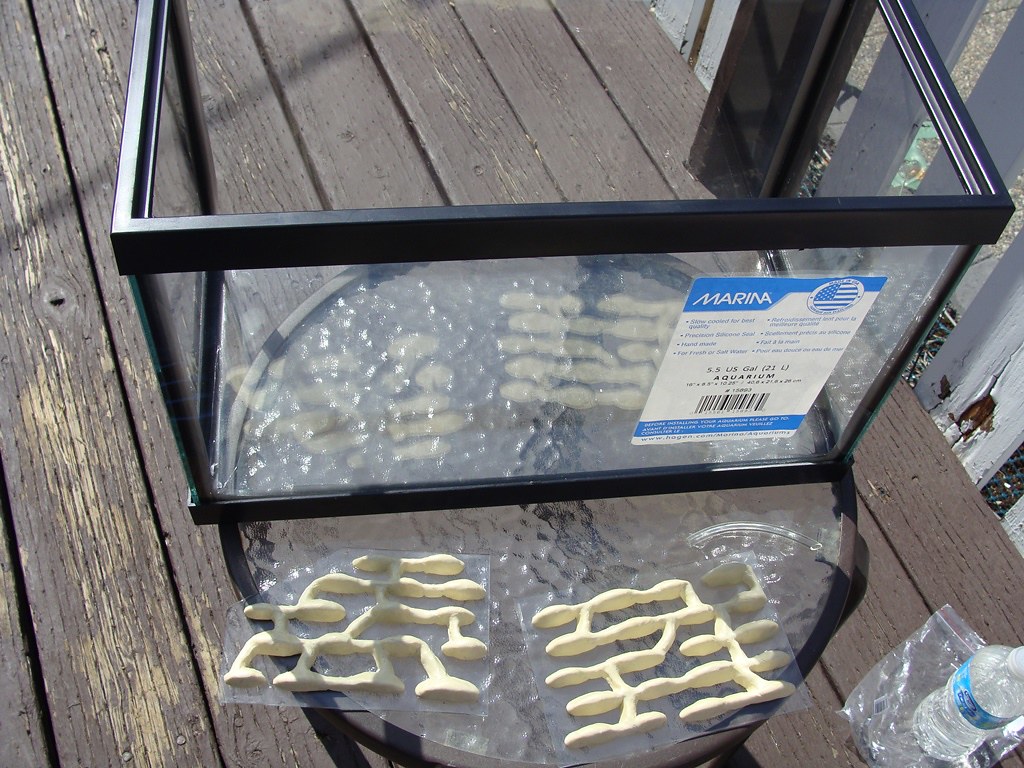
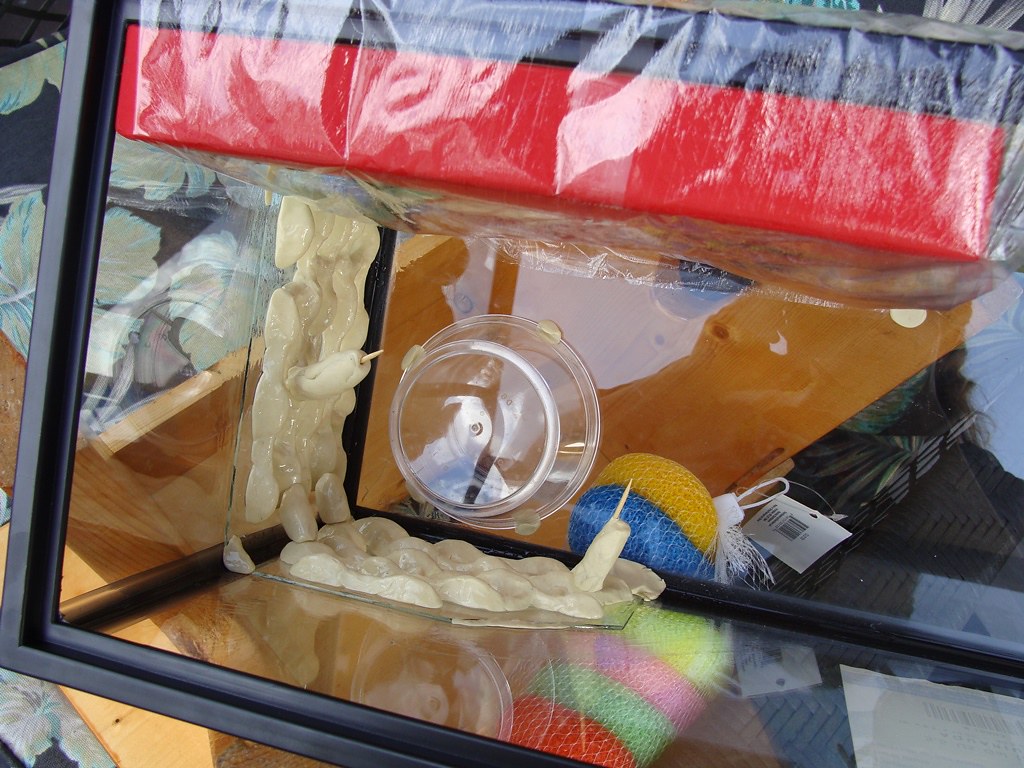
Somehow, tilt your aquarium so the corner faces down and the walls are just on a slight angle, not vertical.  I placed my aquarium inside of a foot stool.

Use clay to tack them in place.  I use a loop of clay to connect my two pieces together (I did not let it touch the aquarium or else the ants would be able to escape the nest if I removed it). 

Also form a long piece of clay for the entrance/exit.  You may need a toothpick/skewer to hold it straight.


35868606995_17ce6760f2_b.jpg


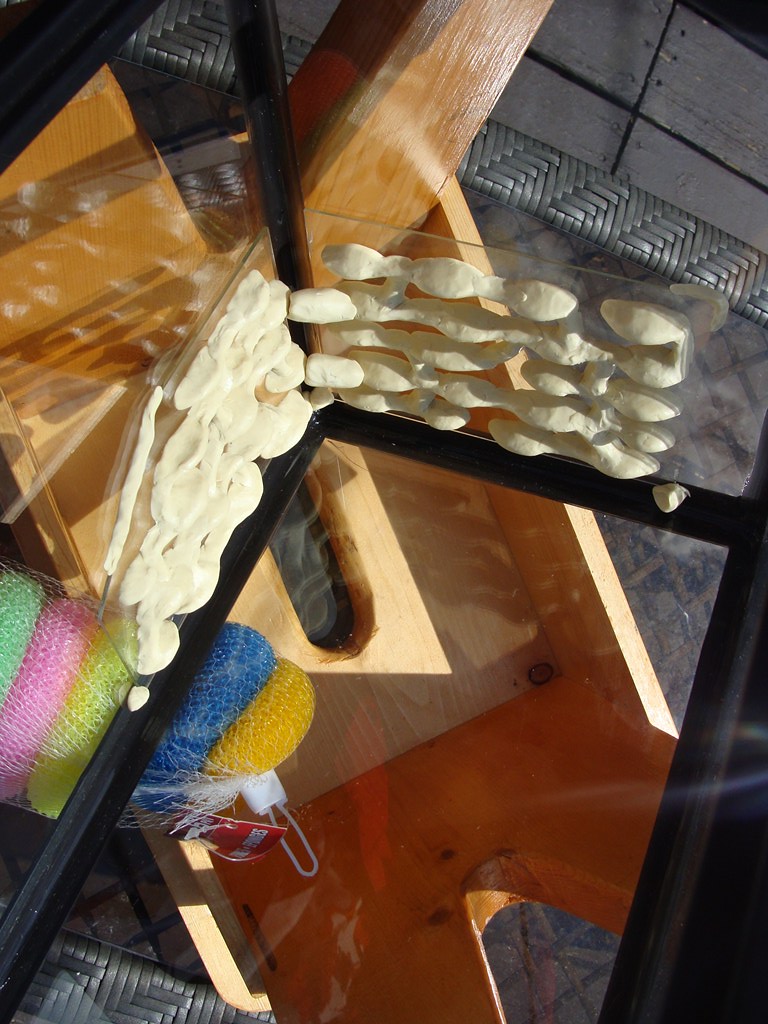
I used a cardboard lid from some chocolates to create a space between the nest and the 3rd wall.  Without the space, I would not have been able to get the nest out of the aquarium to remove the clay.  I covered the box with suran wrap and taped it tight.  Any hollow box lid should work, hollow because you may need to smash it a bit to get it out in the end.  (I didn't do it, but in the future I would add a layer of suran wrap to the floor as well to make it easier to remove).


I put an empty container in the middle to reduce the amount of grout I would need and also to reduce the weight.  I tacked it down with a bit of clay.  (I didn't do it, but in the future I would add a layer of suran wrap to the floor as well to make it easier to remove, before adding the container.  Making the suran wrap as wrinkle free as possible).


Take the olive oil and a paint brush and paint olive oil all over the tunnels, the two walls, floor, and on the suran wrap on the box lid.  Keep an eye on your glass, the clay blobs might start to slid.  If they do, add more clay until they stay put.


35699483722_80f2efc300_b.jpg


Mix your grout. Use 1/3 sand and only a bit of perlite for the first few layers.  Make it fairly runny, like honey, so it gets into all the cracks and joints in the tunnels - try to cover all the tunnels.  As you pour, use your skewer to knock any bubbles loose that get trapped between the tunnels. Later layers you can make thicker with more perlite to reduce weight.

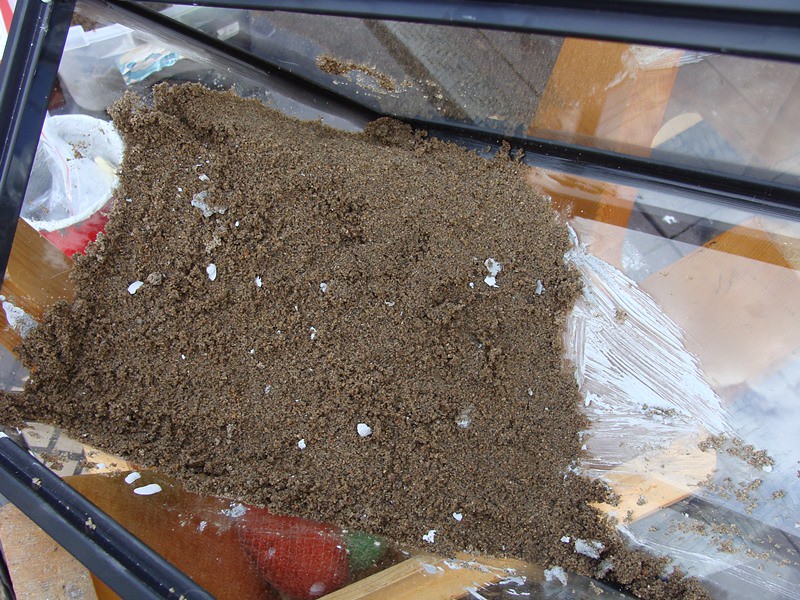
Once you have at least 3cm over the tunnels/glass you can add sand or decorations to the nest mound.  Let it dry - partway through the drying process, when the grout is cured enough to retain its shape, but still gives way under pressure, pull out the box lid and the suran wrap covering it.  The grout should be wet enough to tap sand into.  Let it finish drying. it will take 2-4 days for this much grout to dry enough to actually handle.


35868608365_f3f744f0c0_z.jpg

35699485752_796ff4c4ba_b.jpg


Once it has dried, now we have the fun part - getting it out.  I used a razor and used a screwdriver to sink a screw into the surface.  It took me 20 minutes of wiggling, pulling, and letting gravity pull it down.


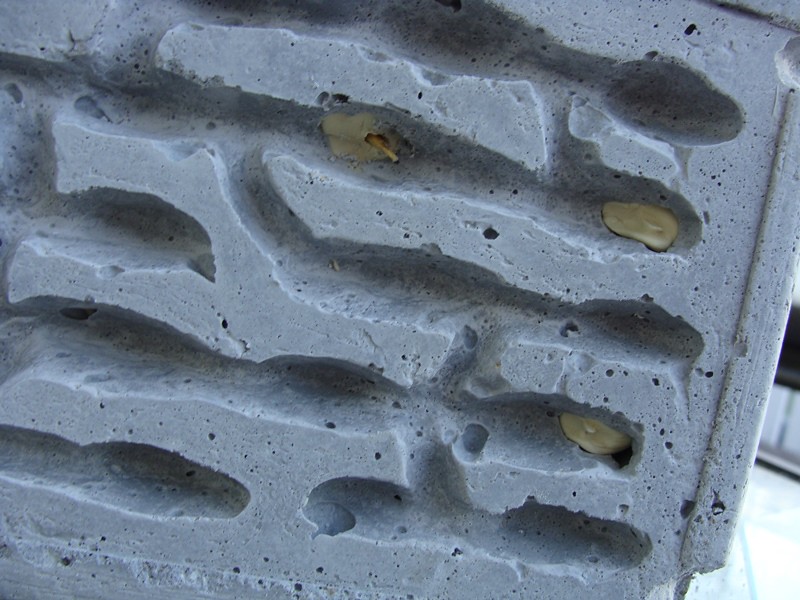
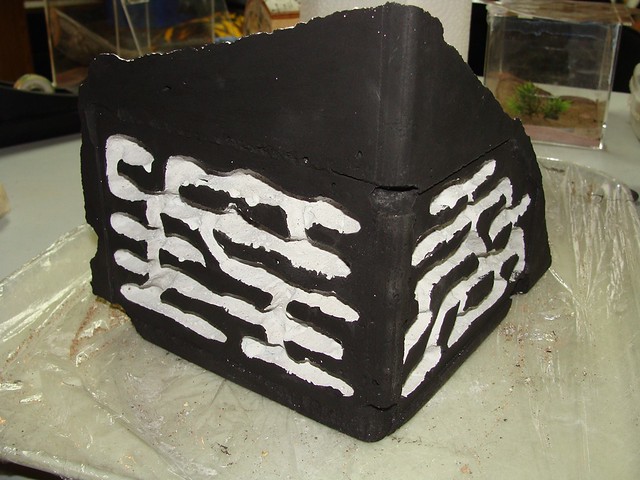
Carefully pry off the glass (Go slowly! work on one corner at a time lifting millimeter by millimeter).  Remove the clay tunnels and clean the glass.  I use the razor to expand the edges where the glass sat by 2-3mm on all sides.  Otherwise I find I have a hard time getting the glass back in.


35868609405_ba0a6b39de_b.jpg


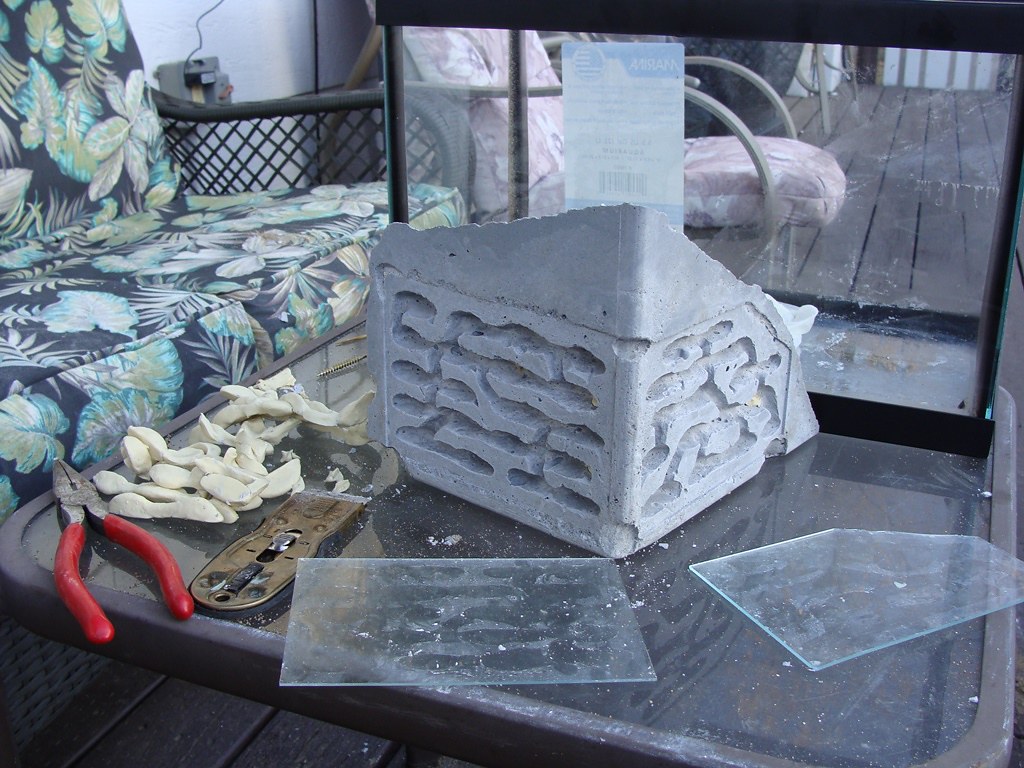
Remove the loops of clay and enlarge the entrances so you have a clear view of all of the nest.


35736994161_9c91ed81ed_b.jpg


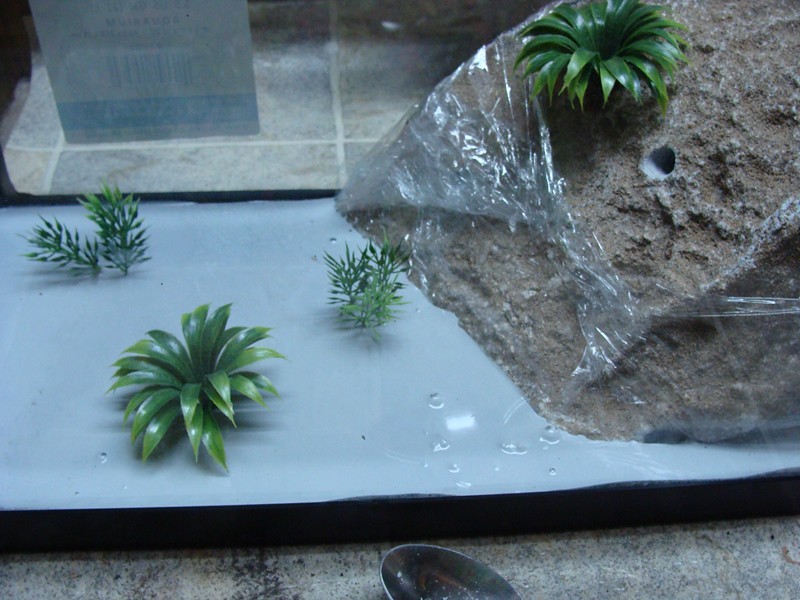
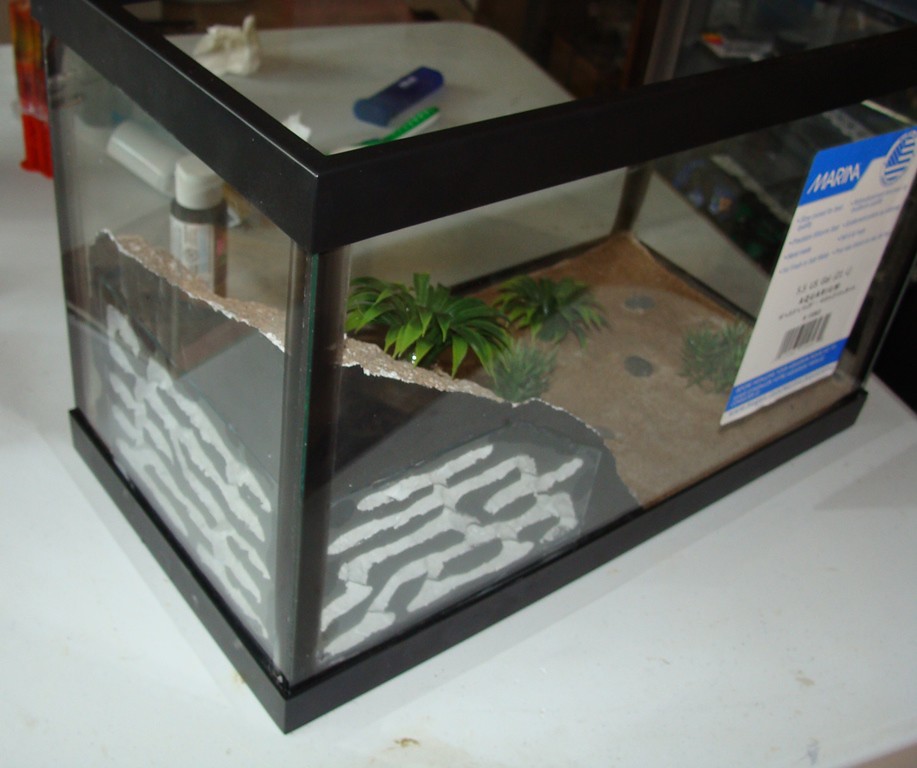
Cover the mound in suran wrap - try to minimize the wrinkles.  Tape it up well.  Take the tank (the nest mound is not in it yet), you can silicone in any plants in the far side where the nest does not sit.  Once it is dry, add a thin layer of very runny grout.  Just enough to cover the floor.  Don't use perlite on the floor, just grout (1/5 sand is optional).  Make it very runny so it levels itself as it pours.

Now, carefully place the suran wrap covered nest mound in - exactly where you want it to sit so it makes its own indentation.  Leave it there for now.

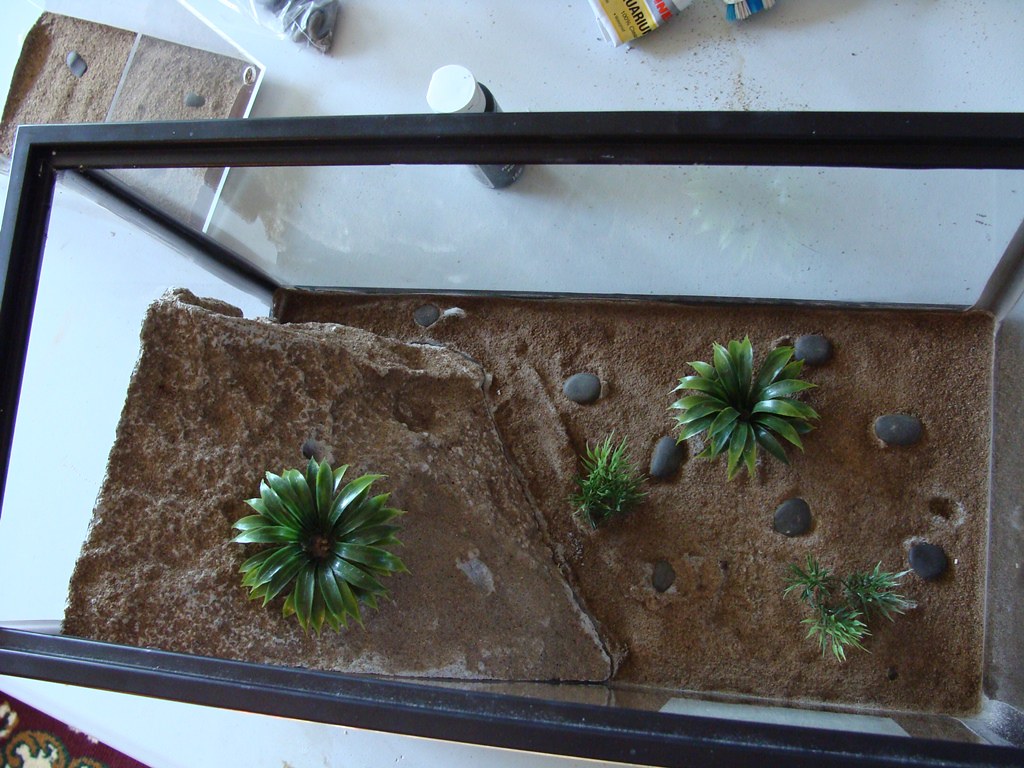
Add any rocks or other decorations.  Cover in sand. Carefully tap sand into the joint where the nest mound and floor meet.


35480745070_10a4cde909_b.jpg

35059294283_241aecfb32_b.jpg


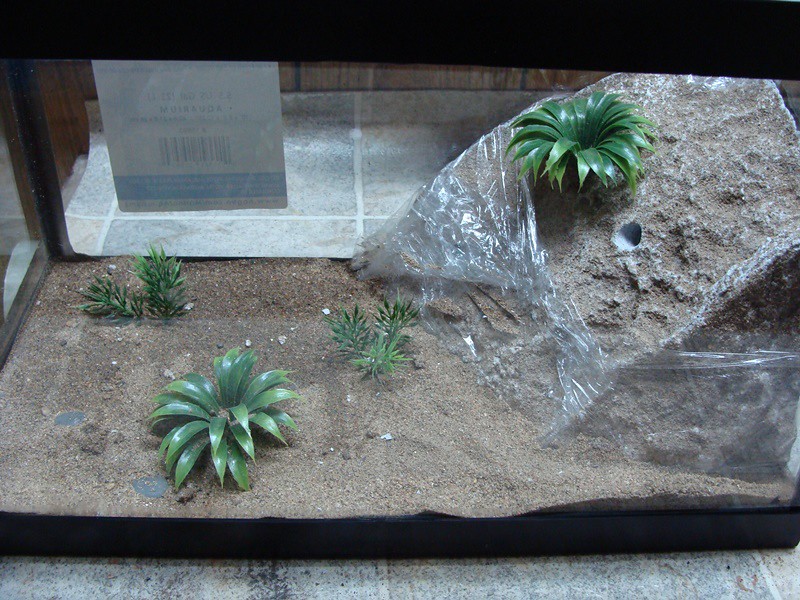
This may take 2-5 days to fully dry.  Within 12 hours the thin floor grout will have cured enough to hold its shape, but easily release the nest mound. Cut the suran wrap so that it can stay behind if it is stuck - just trim it, don't move the mound yet.  Carefully lift out the nest mound out of the tank and set it aside.  If the suran wrap stays behind, let it.  Now carefully peel out the suran wrap.  The grout under the mound will be damp - let it dry fully.  Don't cover it in sand or the ants may tunnel in it.  If there is any grout on the sides of the aquarium - clean it with a damp paper towel.


35480746890_fed6a36eb7_b.jpg


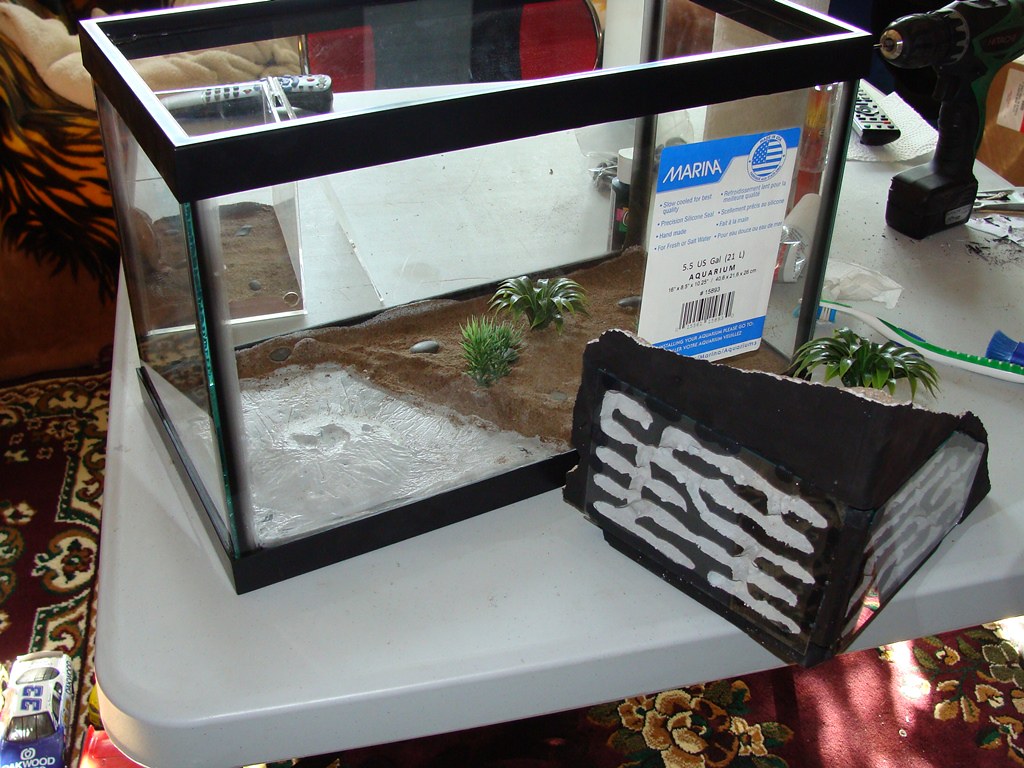
Now we can paint the nest if we want.  Once painted, ensure the glass still fits nicely. (I did it backwards and painted it before - and I kept getting grey finger prints all over the paint....)


35736995331_759238834f_z.jpg


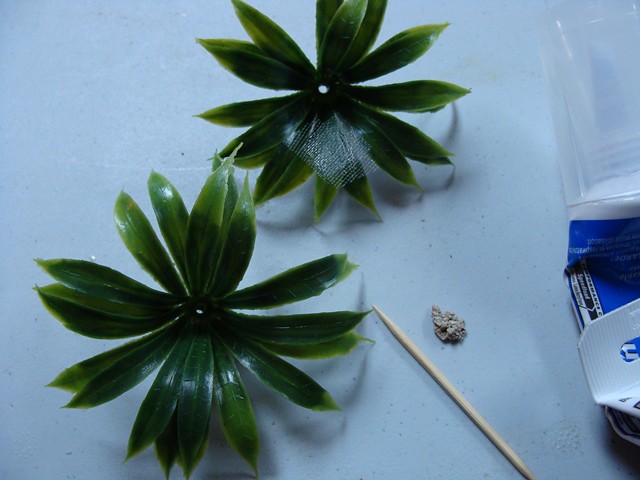
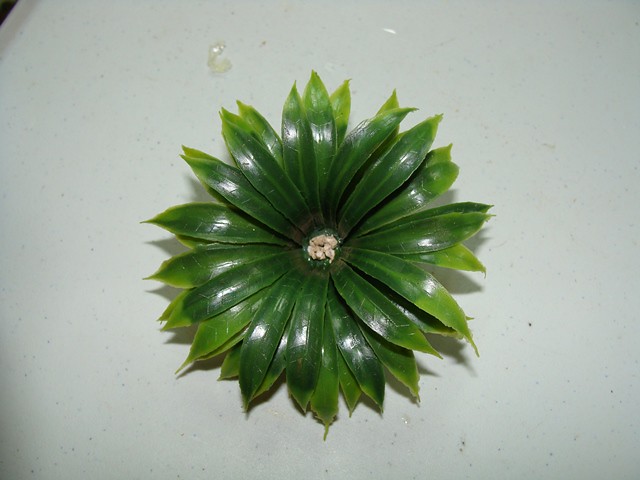
Before we silicone the glass in, lets add our watering tunnel.  Take a large drill bit (I used a 7/16") and drill into the sand covered nest mound ensuring you will not hit the tunnels or entrances.  Drill it as deep as you can.  You can cover the tunnel with plain steel mesh, but I covered mine with a plant that had mesh between 2 pieces and some stone pieces siliconed on top - leaving the hole too small for the intended ants (Formica) to climb into.  I siliconed the plant onto a small piece of 7/16" tubing which I siliconed into the tunnel I drilled.


35059291843_91a5dc2489_z.jpg[/url]

35480744090_1458e813aa_z.jpg


Now you can silicone your glass on - ensure it is clean!


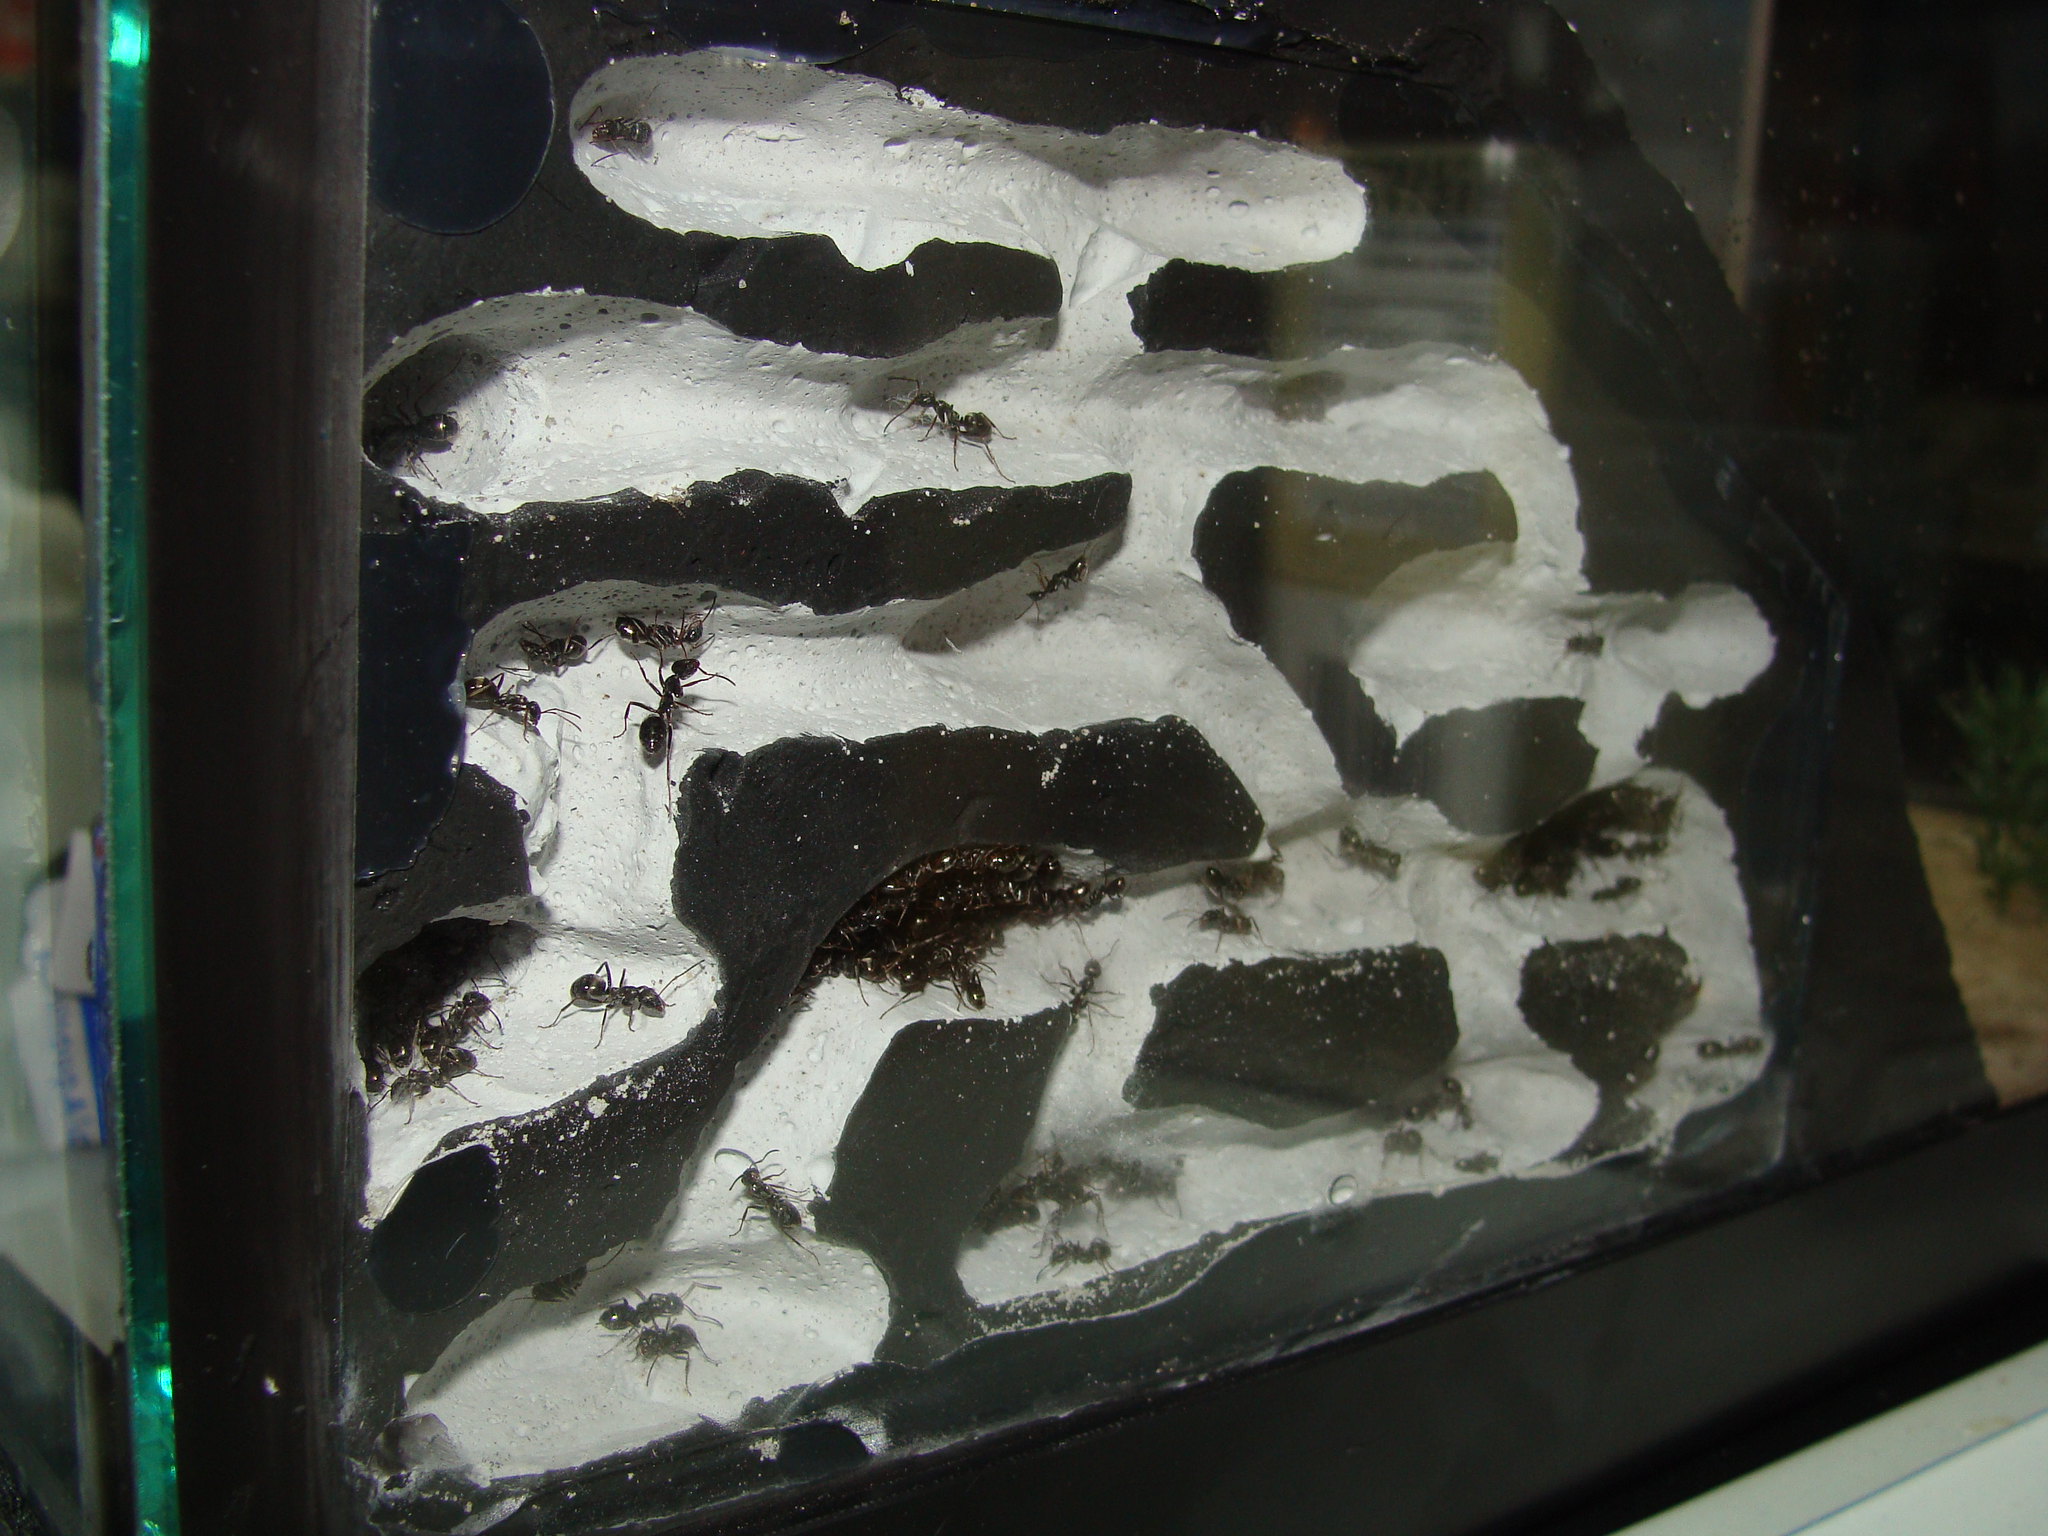
Let everything dry another 24 hours and put the nest mound into the aquarium.  It should sit snugly into its depression with no room for larger ants (Formica, Camponotus, etc) to get under or between the nest and floor/walls.


35059296233_90789a07f9_b.jpg

35029075234_a8014456a5_b.jpg


There you have it. A removable formicarium.

35480746890_fed6a36eb7_z.jpg

35059304393_36163efd2f_k.jpg


Edited by Crystals, December 28 2017 - 4:15 PM.

  • Ants4fun, dermy, Gregory2455 and 2 others like this

"Always do right. This will gratify some people, and astound the rest." -- Samuel Clemens


List of Handy Links   (pinned in the General section)

My Colonies


#44 Offline dermy - Posted April 28 2015 - 10:23 AM

dermy

    Advanced Member

  • Members
  • PipPipPip
  • 1,392 posts
  • LocationCanada

That looks so cool with the plant as your watering hole! Great Work!


What do you plan to keep in it?


#45 Offline Crystals - Posted April 28 2015 - 11:18 AM

Crystals

    Advanced Member

  • Moderators
  • PipPipPip
  • 2,048 posts
  • LocationAthabasca, AB (Canada)

It was designed with Formica in mind, by the person who requested it.  They are larger, common in my location, and very easily contained with olive oil (which is good because this tank has no lid and has silicone on the joints).


It is also designed to be heated by a low wattage light bulb hanging above it.


"Always do right. This will gratify some people, and astound the rest." -- Samuel Clemens


List of Handy Links   (pinned in the General section)

My Colonies


#46 Offline Trailandstreet - Posted April 28 2015 - 1:52 PM

Trailandstreet

    Advanced Member

  • Members
  • PipPipPip
  • 290 posts

What is this grout you use usually used for, I can find a few different meanings for it. Maybe it is harder than the plaster in which my ants dig at the moment.


:hi: Franz

if you find any mistakes, it's my autocorrection. it doesn't speak english.


#47 Offline Crystals - Posted April 28 2015 - 2:13 PM

Crystals

    Advanced Member

  • Moderators
  • PipPipPip
  • 2,048 posts
  • LocationAthabasca, AB (Canada)

It is used between floor tiles to fill in the gaps.  In some ways, it is similar to cement, but different.

It is much harder than plaster.


"Always do right. This will gratify some people, and astound the rest." -- Samuel Clemens


List of Handy Links   (pinned in the General section)

My Colonies


#48 Offline Myrmicinae - Posted April 28 2015 - 2:49 PM

Myrmicinae

    Advanced Member

  • Members
  • PipPipPip
  • 274 posts
  • LocationFort Collins, CO

The trouble with grout is that it requires longer to cure and is not as absorbent as plaster.  Also, certain types may cause harm to ants, depending on the chemical components.  Advantages that I know of include greater durability and lower susceptibility to mold growth.


Edited by Myrmicinae, April 28 2015 - 2:51 PM.

Journals on Formiculture:
Pheidole ceres
Tapinoma sessile

Old YouTube Channel:
ColoradoAnts

#49 Offline Crystals - Posted April 28 2015 - 3:55 PM

Crystals

    Advanced Member

  • Moderators
  • PipPipPip
  • 2,048 posts
  • LocationAthabasca, AB (Canada)

The trouble with grout is that it requires longer to cure and is not as absorbent as plaster.  Also, certain types may cause harm to ants, depending on the chemical components.  Advantages that I know of include greater durability and lower susceptibility to mold growth.

Yes, it does depend on what they put in it.  

I mix in sand and perlite to increase absorbency.  I have had immense success using chamois cloth to speed up water absorption as well (another post I am working on)


I use Polyblend grout, I did try one other type, but I didn't like it.  The ants lived in both types for over a year without harm.


On a side note, if anyone wants a pouring mold stronger than cardboard, cottle boards work well and you can easily choose the exact size.


"Always do right. This will gratify some people, and astound the rest." -- Samuel Clemens


List of Handy Links   (pinned in the General section)

My Colonies


#50 Offline AntsAnonymous - Posted April 28 2015 - 5:59 PM

AntsAnonymous

    Advanced Member

  • Members
  • PipPipPip
  • 34 posts
  • LocationSpring, Texas (Houston Area)

I think I had a bad grout. Or something else happened. I had a colony of Solenopsis Invicta in a grout formicarium I made.  And at least half the colony died within 2 days, possibly queen included. Now I have tunnels lined with dead ants, and a ever growing graveyard outside.  They had both food and water. And no mold.  Unfortunate. But at least the local colonies are all getting ready for their nuptial finally.


#51 Offline Crystals - Posted April 29 2015 - 6:30 AM

Crystals

    Advanced Member

  • Moderators
  • PipPipPip
  • 2,048 posts
  • LocationAthabasca, AB (Canada)

I have found that there are 2 things I must keep an eye on.


Ensuring the grout is 100% cured before hydrating it.  (it usually takes 2-8 days depending on temp and humidity)

I must ensure the silicone is completely cured.  (it takes at least 24 hours, I usually give it 3-5 days).


Other than that, I have never had mass deaths and all of my colonies are doing quite well.


  • Jonathan21700 likes this

"Always do right. This will gratify some people, and astound the rest." -- Samuel Clemens


List of Handy Links   (pinned in the General section)

My Colonies


#52 Offline Trailandstreet - Posted May 3 2015 - 11:22 AM

Trailandstreet

    Advanced Member

  • Members
  • PipPipPip
  • 290 posts

Aha. Thank you Crystals. But I think it is only made for the small gap between the tiles and in a solid form it tends to shrink, so it could crack.


:hi: Franz

if you find any mistakes, it's my autocorrection. it doesn't speak english.


#53 Offline Crystals - Posted May 3 2015 - 11:35 AM

Crystals

    Advanced Member

  • Moderators
  • PipPipPip
  • 2,048 posts
  • LocationAthabasca, AB (Canada)

It was designed for the gap between tiles.  Un-sanded grout is designed for the smaller gaps, while Sanded grout was designed for larger gaps.


I have used both and while the un-sanded grout may occasionally develop a hairline crack if unwatered for 3+ months or if it dries too fast, ants cannot crawl into it.  Although the crack may be sufficient for some ants to be able to get a good grip and try to dig.


Different brands will behave differently.  I am not sure how grout in your location may work.  If you do try, please let us know how it goes.


"Always do right. This will gratify some people, and astound the rest." -- Samuel Clemens


List of Handy Links   (pinned in the General section)

My Colonies


#54 Offline Trailandstreet - Posted May 3 2015 - 11:47 AM

Trailandstreet

    Advanced Member

  • Members
  • PipPipPip
  • 290 posts

Ok, if I try one, i will let you know. I'm still working with plaster, but the bigger ants, like Formica are digging through it.


:hi: Franz

if you find any mistakes, it's my autocorrection. it doesn't speak english.


#55 Offline BrittonLS - Posted June 4 2015 - 9:58 AM

BrittonLS

    Advanced Member

  • Members
  • PipPipPip
  • 284 posts
  • LocationFt. Worth, Texas

Grout Mixture Experiment

I mixed 5 tablespoons of unsanded grout with various additives in small disposable plastic cups and let them dry for a week.
I recorded how badly it cracked after one week of drying and how absorptive it was.

I experimented with:

  • Uncrushed perlite (called Regular Perlite below)
  • Perlite lightly crushed with a rolling pin (called Perlite Powder below)
  • Perlite finely ground in a coffee grinder (called Ground Perlite below)
  • Sand (regular sand meant for kid's sandboxes)
Pure un-sanded grout: No cracks Absorbed extremely slowly and moisture did not seem to spread far
1/6 Perlite Powder + 1/6 Regular Perlite: No cracks Absorbed at an average rate
1/6 sand + 1/6 Regular Perlite : No cracks Absorbed at an average rate
1/6 sand + Perlite Powder: Cracked Absorbed at an average rate
1/4 Regular Perlite: No cracks Absorbed at an average rate
1/3 Regular Perlite: Cracked Absorbed quickly
1/4 Perlite Powder: Slight crack Absorbed at an average rate
1/3 Perlite Powder: Slight crack Absorbed at an average rate
1/2 Sand: Cracked Absorbed at an average rate
1/3 Sand: No cracks Absorbed at an average rate
1/4 Sand: No cracks Absorbed slowly and somewhat unevenly
1/3 Sand + 1/6 Regular Perlite: Slight crack Absorbed at an average rate
1/3 Sand + 1/6 Perlite Powder: Cracked Absorbed at an average rate

Definition for cracks:
No cracks = no cracks of any kind.
Slight crack = a tiny hairline crack that was barely visible.
Cracked = a crack that went all the way through, and an ant might be able to get a good enough grip to chew on it. The crack was quite obvious.

The grout mixture was only about 5mm thick, so that may account for some of the cracks. If it was thicker some of the cracks may have not occurred.

Perlite Powder seems to lead to a higher cracking possibility.

Sand settles quite quickly, which may affect the absorbancy on the reverse side. I left these in the cups and did not remove them when testing the absorbancy.

So it looked like the only advantage to perlite was the 1/3 powder and that cracked. And it mixing with sand seemed to affect the absorbency just as much as other combos with less cracking.

Just mixed up grout yesterday to try out in some testing, except what I thought was perlite (it looks exactly like it) was actually some kind of polymer that turned spongy and expanded when wet... Probably water crystals or something similar, completely unusable.
In lieu of this, I took a hammer to some lava rock, which should work similar to perlite I imagine.

I also am doing this so I can put some test ants in it to make sure they don't just all die from whatever stuff I used

Also, I'm starting to see the allure of just buying a formicarium lol

#56 Offline Ants4fun - Posted June 4 2015 - 10:04 AM

Ants4fun

    Advanced Member

  • Members
  • PipPipPip
  • 1,142 posts
  • LocationSouth Dakota

Lava rock would be a good idea for a small formicarium. It should work sort of like pumice...


#57 Offline Slimjim - Posted November 25 2015 - 11:13 AM

Slimjim

    Member

  • Members
  • PipPip
  • 26 posts
  • LocationOrlando Florida
Hi Crystal,
I have a question,
I made my last Formicarium out of plaster,it was doing fine until I added a heating pad to the under side,
The heat lifted the condensation to the glass,when the cold spell ended the heat was reduced and the H20 fell from the glass to the tunnels and other compartments and formed mold very fast.

(You were right)
I went out and got polyblend sanded and non-sanded grout,and I built another Formicarium ,I am ready to pour and I noticed that I need perlite,
My Question is,Where do I get the perlite from? AND do I have to use it ?
Thank you,
Kindly,
J.R.

#58 Offline Crystals - Posted January 15 2016 - 7:52 PM

Crystals

    Advanced Member

  • Moderators
  • PipPipPip
  • 2,048 posts
  • LocationAthabasca, AB (Canada)

Hi Crystal,
I have a question,
I made my last Formicarium out of plaster,it was doing fine until I added a heating pad to the under side,
The heat lifted the condensation to the glass,when the cold spell ended the heat was reduced and the H20 fell from the glass to the tunnels and other compartments and formed mold very fast.

(You were right)
I went out and got polyblend sanded and non-sanded grout,and I built another Formicarium ,I am ready to pour and I noticed that I need perlite,
My Question is,Where do I get the perlite from? AND do I have to use it ?
Thank you,
Kindly,
J.R.

Sorry, I did not see this earlier.

Perlite is the white puffy stuff they use in plant pots as an additive to the soil.  Recently, I have been omitting perlite in some nests and just adding more sand.  Kind of like in this new thread I made - http://www.formicult...ion/#entry28868


"Always do right. This will gratify some people, and astound the rest." -- Samuel Clemens


List of Handy Links   (pinned in the General section)

My Colonies


#59 Offline Reevak - Posted August 13 2017 - 10:48 PM

Reevak

    Advanced Member

  • Members
  • PipPipPip
  • 183 posts

I can't see the images on any of your posts anymore


#60 Offline Crystals - Posted August 14 2017 - 6:43 PM

Crystals

    Advanced Member

  • Moderators
  • PipPipPip
  • 2,048 posts
  • LocationAthabasca, AB (Canada)

I can't see the images on any of your posts anymore

Photobucket no longer supports the 3rd party posting and I am switching over to Flickr.

I have slowly been moving the pictures over and updating them here.

Most of my tutorials have been updated, but I am leaving this one for last since it has more picture links than is currently allowed on formiculture. It was made when there were no such limits. I may have to get Drew to help me on this one, but I am waiting until my internet access is more reliable before trying to arrange something.


"Always do right. This will gratify some people, and astound the rest." -- Samuel Clemens


List of Handy Links   (pinned in the General section)

My Colonies


0 user(s) are reading this topic

0 members, 0 guests, 0 anonymous users