Jump to content

  • Chat
  •  
  •  

Welcome to Formiculture.com!

This is a website for anyone interested in Myrmecology and all aspects of finding, keeping, and studying ants. The site and forum are free to use. Register now to gain access to all of our features. Once registered and logged in, you will be able to create topics, post replies to existing threads, give reputation points to your fellow members, get your own private messenger, post status updates, manage your profile and so much more. If you already have an account, login here - otherwise create an account for free today!

Photo

Dspdrew's Formicarium 09 Research and Design (Updated 11-12-2023)

formicarium out world ant nest how-to tutorial dspdrew

  • Please log in to reply
345 replies to this topic

#1 Offline dspdrew - Posted December 30 2014 - 1:45 PM

dspdrew
  • LocationSanta Ana, CA
I have been planning to make some very big and very nice looking ant farm-style formicariums for a long time now. Before I spend a lot of time designing these, I first need to find the best way to make something similar to the classic "ant farm"  that will not only be safe from collapse, but also leave he glass as clean as possible. I'm going to make a few smaller formicariums in an attempt to test out different methods, and also house some ants with them in the mean time.
 
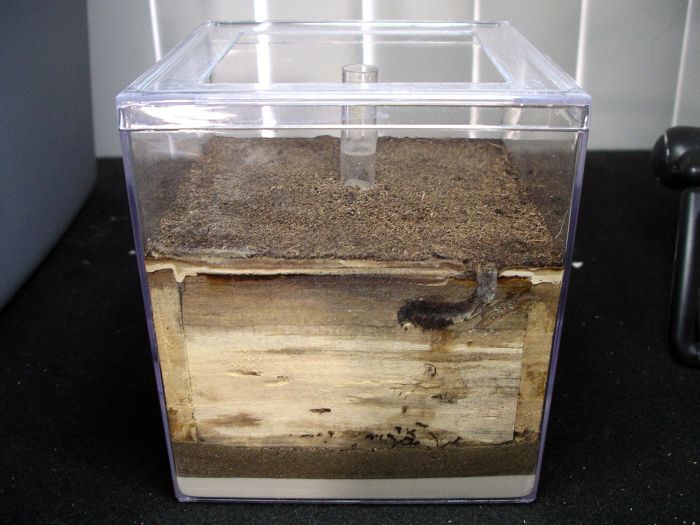
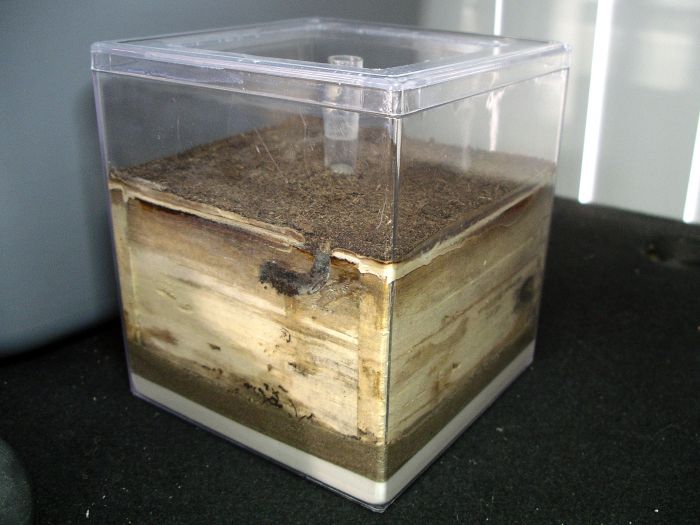
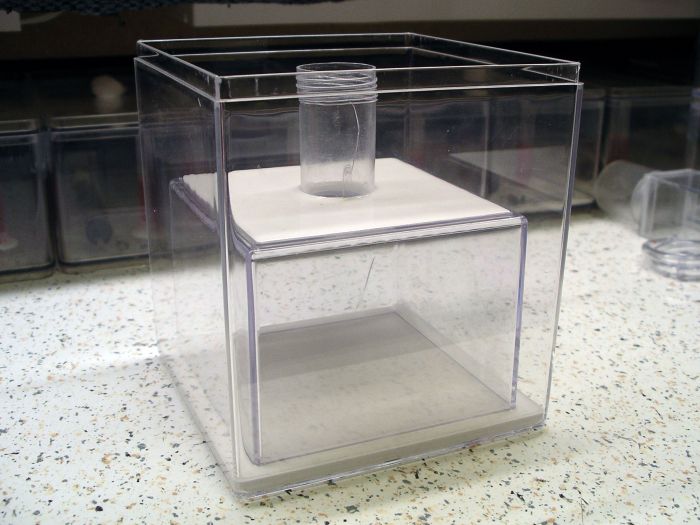
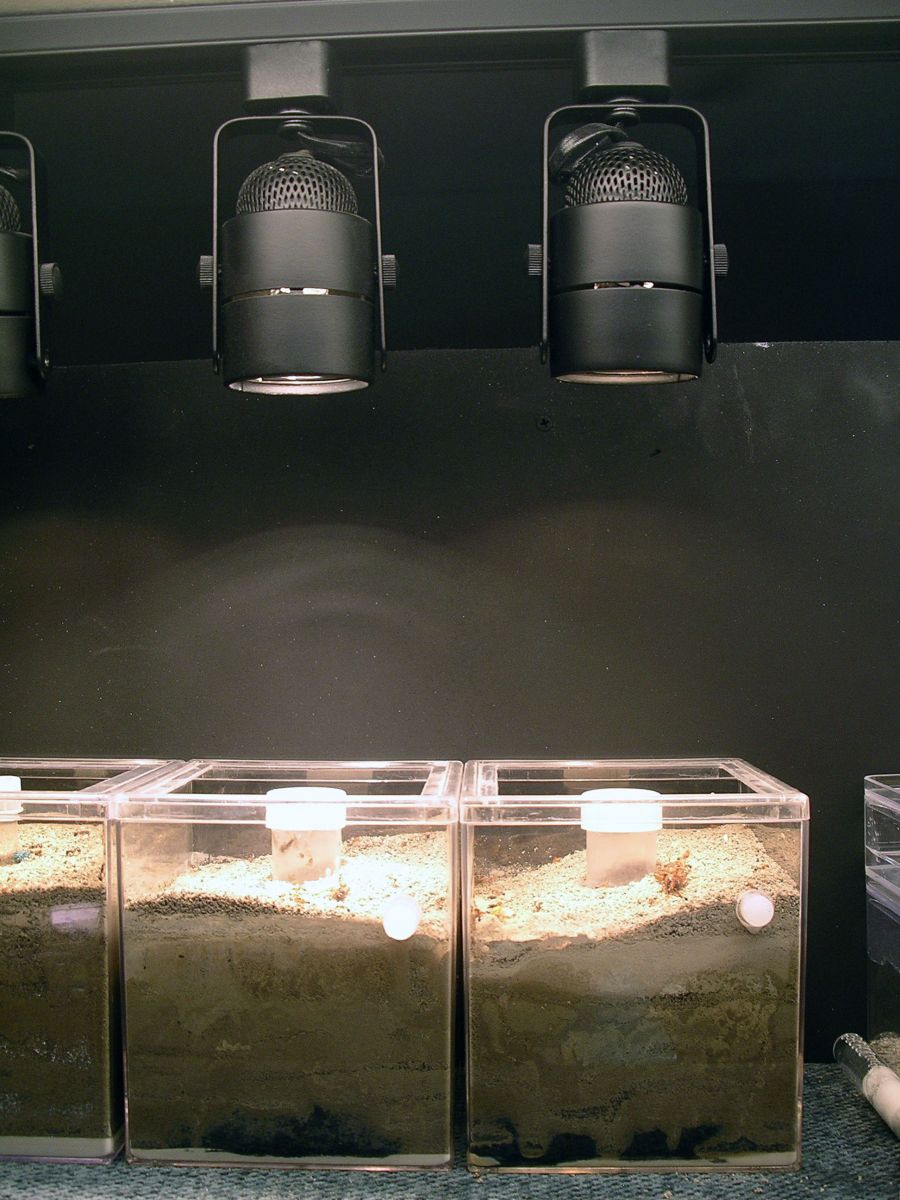
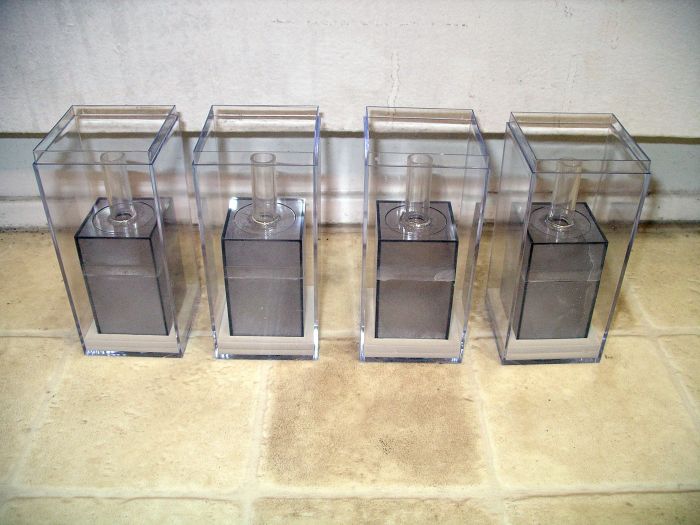
First I'm just going to try using plain old mud that will be allowed to harden between the panes. I used two clear plastic boxes--one inside the other to create a sort-of 360 degree ant farm, with a hydration tank in the middle.
 
Smaller container: 75 mm height
Plastic tubing: 1/2" OD, 7/16" ID, 50 mm length
Hydrostone (hydrated) Bottom of larger container 1st pour: 120 g
Hydrostone(hydrated) Bottom of larger container 2nd pour: 120 g
Hydrostone (hydrated) Top of smaller container: 80 g
Plug hole (for the silicone plugs I cast): 21/64"
Lid overhang: 3/4"
 
med_gallery_2_295_497600.jpg
 
 
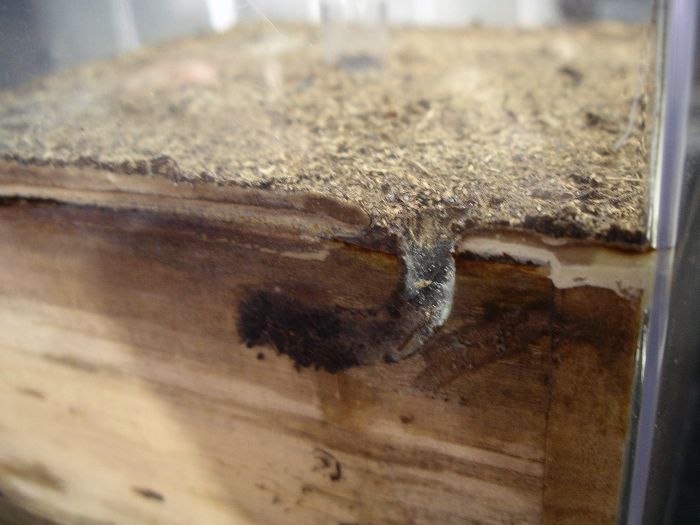
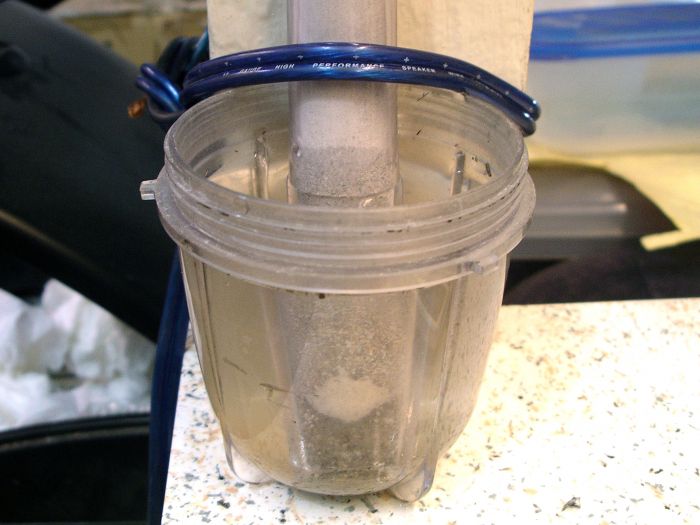
The tank has holes in the very bottom all covered with Hydrostone on both sides. This should allow the water to soak through from the tank, on up the substate around it.
 
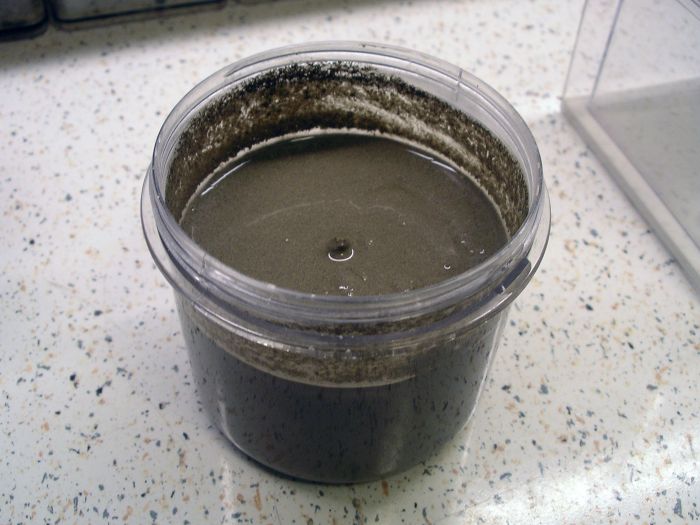
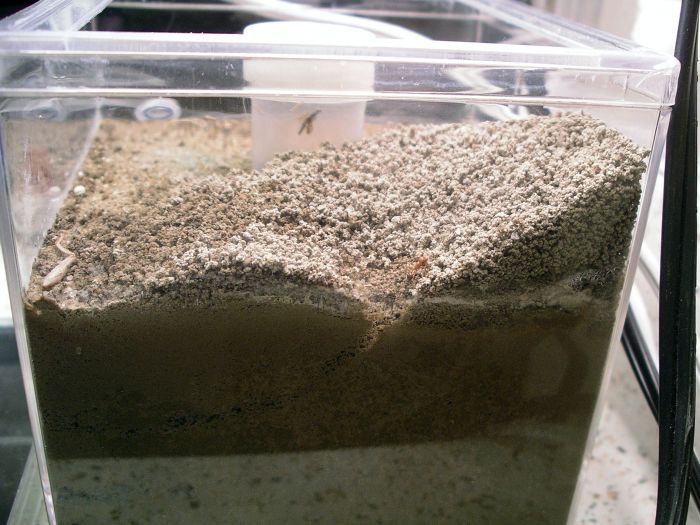
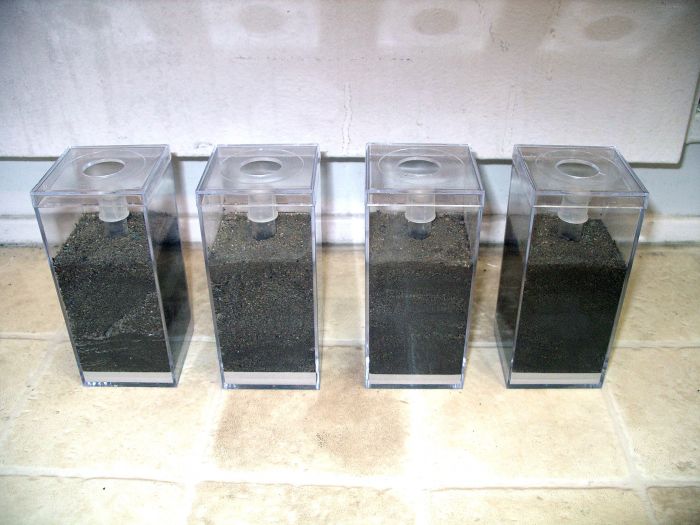
I mixed up a batch of 50 percent sand and 50 percent clay dirt, added water and poured it between the panes.
 
med_gallery_2_295_444599.jpg
 
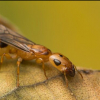
I completely covered the inner container, and left a cylinder sticking out the top to add water. I dried it with a fan for a while, and once it was hard enough, I hooked it up to the broken old jar I've been keeping a colony of Pogonomyrmex californicus in.
 
med_gallery_2_295_346039.jpg
 
med_gallery_2_295_639110.jpg
 
 
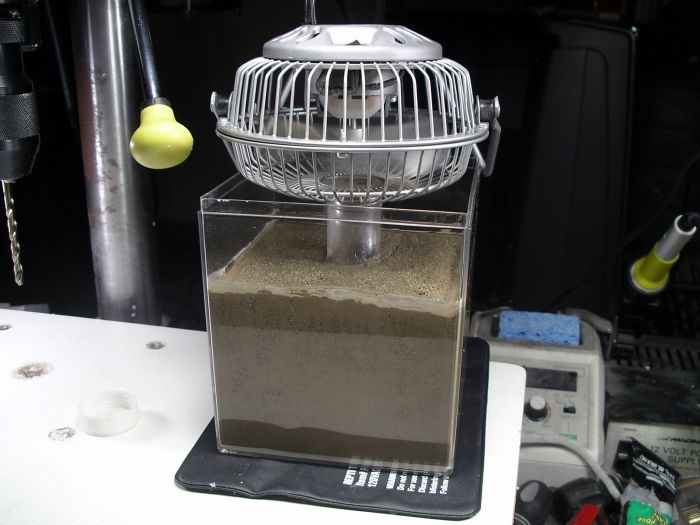
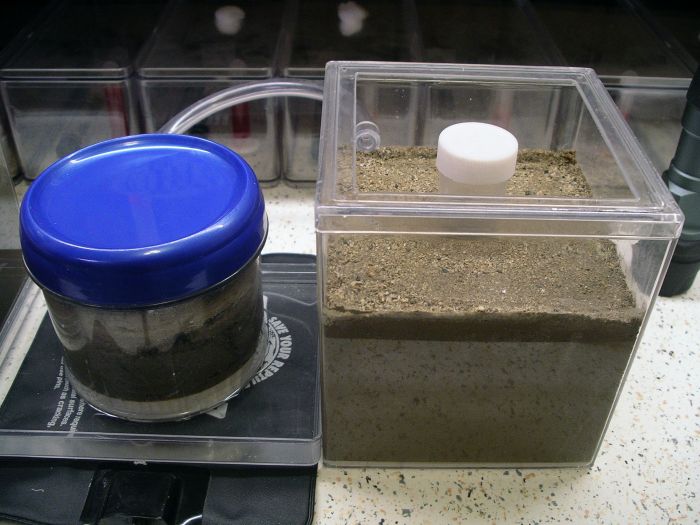
The colony immediately started digging like crazy and moved in just two days later. As you can see, this is very sturdy, but horrible for visibility.
 
med_gallery_2_295_129847.jpg
 
gallery_2_295_495246.jpg
  • Huch, Nawor3565 and John7429 like this

#2 Offline LAnt - Posted December 30 2014 - 10:56 PM

LAnt

    Advanced Member

  • Members
  • PipPipPip
  • 211 posts
  • LocationLos Angeles
I hope you can find a good solution so i can steal it.
  • dspdrew likes this

#3 Offline AntsAreUs - Posted January 3 2015 - 12:09 PM

AntsAreUs

    Advanced Member

  • Members
  • PipPipPip
  • 1,029 posts
  • LocationMarion, IN

Couldn't you make it thinner where the inner box meat the outer box? also some LEDs might help if you hook them up on the inside and turn them on when you want to see them.


#4 Offline William. T - Posted January 3 2015 - 7:22 PM

William. T

    Advanced Member

  • Members
  • PipPipPip
  • 725 posts
  • LocationWestern Maryland

Nice!


Species I keep:


1 Lasius cf. Neoniger 30 workers

1 Camponotus sp. 15 workers

20 Tetramorium SpE 30 workers

1 T. Sessile 200 workers


#5 Offline dspdrew - Posted January 4 2015 - 6:58 AM

dspdrew
  • LocationSanta Ana, CA

Couldn't you make it thinner where the inner box meat the outer box? also some LEDs might help if you hook them up on the inside and turn them on when you want to see them.

The gap between both containers is only about 3/8 of an inch. That's pretty thin already.


#6 Offline dspdrew - Posted March 23 2015 - 11:13 PM

dspdrew
  • LocationSanta Ana, CA
Made some small ones today for my Dolopomyrmex pilatus queens. These should make nice little founding nests.
 
Plastic tubing: 1/2" OD, 7/16" ID, 37 mm length
Hydrostone (hydrated) 1st pour: 15 ml / 28 g
Hydrostone(hydrated) 2nd pour: 15 ml / 28 g
Plug hole (for the silicone plugs I cast): 21/64"
Lid hole: 7/8"
 
med_gallery_2_295_474819.jpg
 
med_gallery_2_295_435026.jpg

#7 Offline Jonathan21700 - Posted March 24 2015 - 1:05 PM

Jonathan21700

    Advanced Member

  • Members
  • PipPipPip
  • 807 posts

Are you going to keep all of them in these setups? Nice! I like natural nests.


#8 Offline NorthEdge - Posted March 24 2015 - 3:17 PM

NorthEdge

    Member

  • Members
  • PipPip
  • 19 posts
  • LocationMassachusetts

Very nice looking formicariums. All of your work always comes out so clean and even looking. 


Have you experimented with substrate at all? You might be able to get a cleaner look into the nests if you use a coarser sand mixed with a very small amount of peat or potting soil. 


#9 Offline dspdrew - Posted March 24 2015 - 3:49 PM

dspdrew
  • LocationSanta Ana, CA

Are you going to keep all of them in these setups? Nice! I like natural nests.


No. Only four right now.


Very nice looking formicariums. All of your work always comes out so clean and even looking. 


Have you experimented with substrate at all? You might be able to get a cleaner look into the nests if you use a coarser sand mixed with a very small amount of peat or potting soil. 


Thanks. "clean and even looking" is exactly what I want. I'm not quite sure what you mean by cleaner in regards to the substrate. I actually purposely mix sand and clay to make substrate closer to what they nest in, while also something that drys hard.


#10 Offline dspdrew - Posted April 7 2015 - 5:26 PM

dspdrew
  • LocationSanta Ana, CA

Since Gaige Daughtrey asked, here are step-by-step instructions on how to make these.


I use these two containers for this.


Larger container:

http://www.container...ductId=10028594

#60100 (2-5/16" sq. x 5-1/16" h)


Smaller container:

http://www.container...ductId=11000251

#60300 (1-3/16" sq. x 2-7/16" h)


1. Pour 1/8" of Hydrostone in the bottom of the larger container.

2. Drill a hole in the top of the smaller container, and attach a tube with a cap (small plastic test tube works great).

3. Cut the bottom off the smaller container.

4. Once the Hydrostone is hardened in the larger container, pour another 1/8" and place the smaller container inside it and let that harden.

5. Fill the small container with dirt, leaving the tube empty to act as a reservoir to hold water as you wait for it to soak in.

6. Fill the larger container with dirt until it just covers the smaller container by about 1/8".

7. Drill a hole in the lid and apply Fluon.


  • KooYon and ryanp347 like this

#11 Offline antsinmypants - Posted April 7 2015 - 6:33 PM

antsinmypants

    Advanced Member

  • Members
  • PipPipPip
  • 124 posts
  • LocationFresno, CA

Very nice looking formicariums. All of your work always comes out so clean and even looking. 


Have you experimented with substrate at all? You might be able to get a cleaner look into the nests if you use a coarser sand mixed with a very small amount of peat or potting soil. 


If only there were such a thing as transparent glass gravel. If ants could build there nest out of this material with some sort of transparent adhesive between the glass gravel, then you wouldn't need two panes of glass to see ants dig in 2 dimensions. Imagine being able to see their nests in their natural 3 dimensions!


As for a more eco-friendly look, have you thought about using small cacti or other small plants in your formicariums. There would need to be large rocks of sufficient size and density around the plants to prevent ants from digging around it into the soil where the roots are. The plants would need a separate container or a porous layer to prevent the roots from growing into where the ants live.


#12 Offline dspdrew - Posted April 7 2015 - 8:06 PM

dspdrew
  • LocationSanta Ana, CA

Sure I would use plants and things in a big natural exhibit-style formicarium, but that's not what I'm designing at the moment. All the formicariums I'm designing now are for storage.


#13 Offline dspdrew - Posted April 11 2015 - 1:19 PM

dspdrew
  • LocationSanta Ana, CA
I've been planning to make some of these out of tall cylindrical vases with a sealed pipe in the center for an actual air pressure hydration system as opposite to a simple water reservoir that has to be manually regulated.
 
To figure out the right height, I decided to first find out exactly how high up water will wick up into the clay/sand dirt mixture I use in these. From experience, I'm thinking it is somewhere around 12 to 15 inches, but I have never done an actual experiment to find out for sure.
 
I took my largest vinyl tubing and stretched about 18 inches of it out straight and tied it to a post. i filled that end with the dirt, and set it in a cup of water.
 
gallery_2_295_725567.jpg
 
 
After about 10 minutes, you could see the moisture level at about 1/2 inch over the water level in the cup.
 
med_gallery_2_295_507674.jpg
 
 
Obviously the humidity is going to probably make this vary a bit, because the rate of evaporation is going to change. I'll just have to remember that the humidity is probably on the high side because of the length of the tubing.

#14 Offline dspdrew - Posted April 11 2015 - 6:48 PM

dspdrew
  • LocationSanta Ana, CA

Okay, it's been about six hours now, and the water has soaked up about seven inches from the water level in the cup. It's been at this height for a few hours now, so I don't think it's going to go much further. This means I need to use a container that's tall enough to allow for about 10 inches of substrate at least. This way they will have a perfect moisture gradient.


#15 Offline drtrmiller - Posted April 11 2015 - 7:46 PM

drtrmiller

    Vendor

  • Members
  • PipPipPip
  • 2,714 posts

Hey Andrew,


This is your landlord.  We saw what you're doing to the place, and we've decided to evict you, effective yesterday.


--

Thanks,

Paradise Apartments


  • dspdrew, nurbs, Mannomorth and 2 others like this


byFormica® is the manufacturer of the iconic nectar feeders and Sunburst Ant Nectar.
byFormica ant products always deliver consistent performance, convenience,
and reliability, making them among the most beloved ant foods and kit enjoyed by
ant keeping enthusiasts worldwide. For more information, visit www.byFormica.com.

#16 Offline dspdrew - Posted April 11 2015 - 8:06 PM

dspdrew
  • LocationSanta Ana, CA

Paradise. :lol: Riiiight.


What's great is they're completely rebuilding all the apartments here, so when I leave they're ripping the entire place out. That means it doesn't matter what happens to anything in here; No matter what I get my deposit back. :)


#17 Offline dspdrew - Posted April 14 2015 - 2:44 PM

dspdrew
  • LocationSanta Ana, CA

This experiment is still going, and unfortunately the water has soaked up about 16 inches now. This means these things are going to have to be very tall. It will definitely be cool to see the ants dig that deep, but this is not going to make them very space-efficient.


#18 Offline dean_k - Posted April 22 2015 - 7:41 PM

dean_k

    Advanced Member

  • Members
  • PipPipPip
  • 845 posts
  • LocationWaterown, Ontario, Canada

A question. How will you deal with garbage within the nest?


Maybe that doesn't matter in soil nests. Might as well let the insect pieces rot and return to earth. I, too, have been leaning toward a similar setup like this. I'd lose most of visibility though. Or perhaps ... semi-transparent substrate?


Edited by dean_k, April 22 2015 - 7:42 PM.


#19 Offline dspdrew - Posted April 22 2015 - 8:12 PM

dspdrew
  • LocationSanta Ana, CA

Yeah, in a soil nest YOU don't deal with it; the ants and other critters like springtails do. In larger, more mature nests, trash isn't really much of a problem. The colony usually has a dump in the out world where they put all their trash. Every large colony I have always takes their trash out of the nest.


#20 Offline dspdrew - Posted April 22 2015 - 8:25 PM

dspdrew
  • LocationSanta Ana, CA
BTW, that tube ended up soaking up about 18 inches, so that means the round ones are going to be reallllllly tall.
 
I decided to try making another one of the large square ones for my up-coming Liometopum occidentale colony using rotted wood between the panes of plastic, instead of dirt. Most of this wood I plan on keeping fairly dry, since that seems to be the way these ants' nests are in the wild. I didn't plan this thing out very well, so I made all sorts of mistakes, and it kind of looks like crap. It's okay though, because part of the reason I made this was just to get an idea of what using wood between the panes is like, since I plan on making a really big formicarium like this for Camponotus in the near future.
 
med_gallery_2_295_150469.jpg
 
med_gallery_2_295_91823.jpg
 
 
I started a small hole and chamber where they can live initially, and then hopefully continue expanding from there. The wood slabs were VERY soft, so they should have no problem chewing through them.
 
med_gallery_2_295_288071.jpg
 
 
Looking at it now, if I was to plan this out better, I would design it to have a slab of wood covering the top, instead of the layer of Hydrostone and peat moss like i ended up with.
  • dermy, Jonathan21700 and PTAntFan like this


Also tagged with one or more of these keywords: formicarium, out world, ant nest, how-to, tutorial, dspdrew

0 user(s) are reading this topic

0 members, 0 guests, 0 anonymous users