A friend of mine uses Fusion and raves about it. There is a Web based version they are moving to, so hoping they continue the free hobbyist version and I can use that 
It's not intuitive at all. It's been a major struggle. I'm getting the hang of it. It seems more like a "I want to sit here for hours doing tedious adjustments, but make them 100% precision" kind of software. Whereas sketchup is more a quick thing that doesn't really have much support for 3D printing.
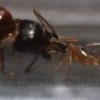
I've recently been designing 3D printed nests for my tetramorium colonies as well! I'm a noob at keeping ants, this is my first year to have a colony with workers. If I need to patch any holes on the interior of my print, any recommendations for filler material that would be ants friendly?
Here was my first attempt: hexagonal pattern wrapped around a cylinder with moist cotton in the middle. I'm working on an improvement for this one that will let me hydrate the nest without having to remove the outworld.

And here is the one I'm printing right now:

Fancy. I would suggest silicone that's good for aquariums to seal cracks and whatnot. Just make sure it has time to cure and has no ants in it while you do it.
Show me a finished one!
I've recently been designing 3D printed nests for my tetramorium colonies as well! I'm a noob at keeping ants, this is my first year to have a colony with workers. If I need to patch any holes on the interior of my print, any recommendations for filler material that would be ants friendly?
Here was my first attempt: hexagonal pattern wrapped around a cylinder with moist cotton in the middle. I'm working on an improvement for this one that will let me hydrate the nest without having to remove the outworld.
That's pretty cool, the cylinder design is really creative; hadn't thought of something like that before. Is the lower one a maze converted to nest design? I hadn't thought of that either. I had been drawing them out and exporting designs as an SVG in 2d, then importing into Tinkercad to turn into 3d chambers.
I haven't found anything I like yet to fix them... I've been considering something like this for repairing prints: http://the3doodler.com/
One of the parts I had purchased for my new printer broke this week; turns out the guy printing the parts skimped some and I snapped a low infilled clip for the fan shroud. Spent the weekend rebuilding it with a better fan and repairing it, really close but not quite happy with the results yet. Ahh the joys of 3d printing
I had success on https://makeprintable.com/It's pretty neat and fixed one of mine that SketchUp exported. It's more geared for people paying though, so no good for budget people like me.
Loving all the ideas, tips, and samples here. Have not done any 3D printing myself but I wanted to tell others that they should check out their local library, especially if they live in larger cities.
One branch of our city library has two quality 3D printers as well as two laser cutters. They are free to use, but you pay for any filament used. You do have to book about a month in advance which is the only issue.
They also have a free mandatory short course I took where they explain the basic of how to use them. The hard part for me is finding the time for some designs I had in mind.
Feel free to share STL files.
Hit me up in a message, I could probably put together a ZIP file with all my STL files I've used so far. Save you time and effort.
Finals for school are finally over. Between work I'll actually finish a design. I've been set back way too much. I feel Fusion 360 will be what I need to finish it though. I also wish I had a better 3D printer, my school one is pretty hit or miss.