Jump to content

  • Chat
  •  
  •  

Welcome to Formiculture.com!

This is a website for anyone interested in Myrmecology and all aspects of finding, keeping, and studying ants. The site and forum are free to use. Register now to gain access to all of our features. Once registered and logged in, you will be able to create topics, post replies to existing threads, give reputation points to your fellow members, get your own private messenger, post status updates, manage your profile and so much more. If you already have an account, login here - otherwise create an account for free today!

Photo

46&2's Camponotus vicinus/modoc Journal

formicarium build camponotus formicarium

  • Please log in to reply
70 replies to this topic

#1 Offline fortysixandtwo - Posted October 1 2016 - 11:39 PM

fortysixandtwo

    Advanced Member

  • Members
  • PipPipPip
  • 98 posts
  • LocationNor Cal

Hello ant peoples.


I am not new to formiculture as I experimented with ants my whole life. However it has been a while since I had a colony. Things have changed a lot it seems, I had no idea there was even products beyond Uncle Milton lol. This will definitely be the most "advanced" formicarium I have ever done. I did a lot of reading the last week or so and set out the other day to build my new project. A modern formicarium is something I've wanted to do for a long time so this has been a fun experience so far. Hope my plans work out. Will definitely be open to any suggestions or advice, like I said its been a while.


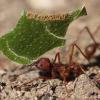
I always seemed to have the best luck with Camponotus in the past. They are really plentiful and easy to find here in the Sierra Nevada as well. Plan is to build the formicarium and then see what happens. It is late in the year so no new queenies till spring. 


I already had most of this stuff. Hence why I went the all-in-one 10 gallon vs smaller plastic set ups. 
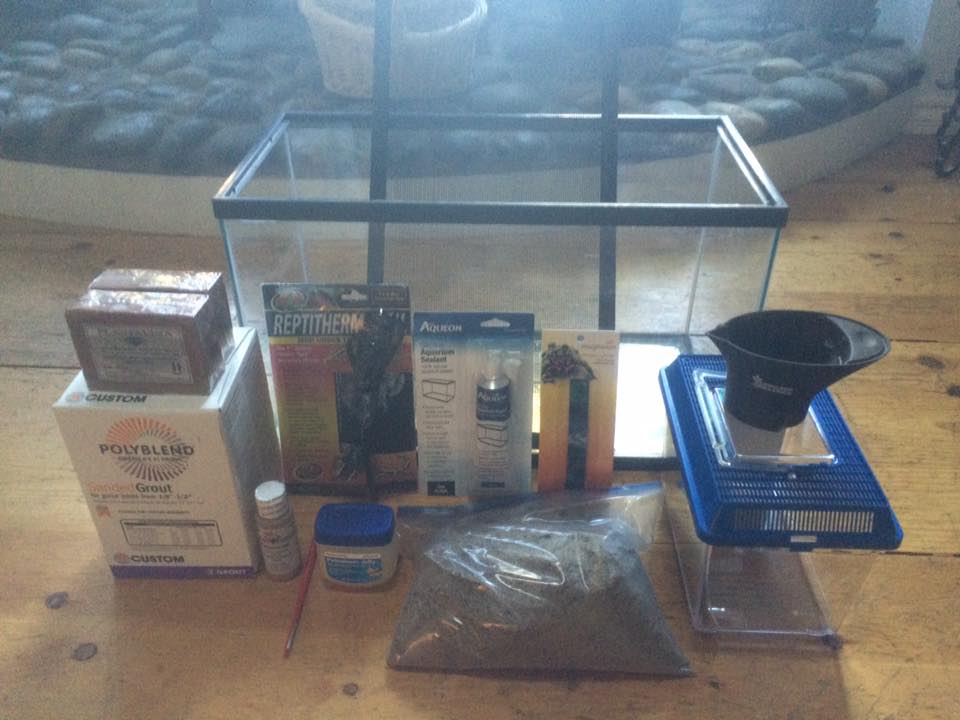
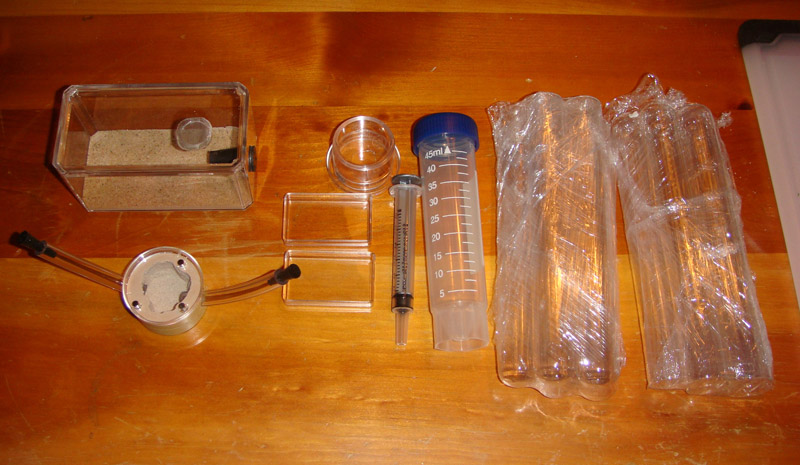
 

14469472_1275541022469789_58341321590511


Begining Equipment:


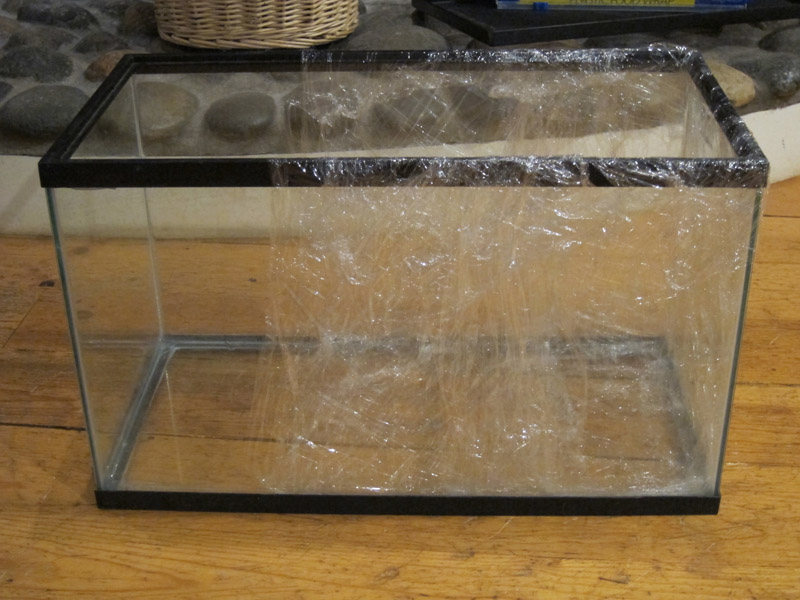
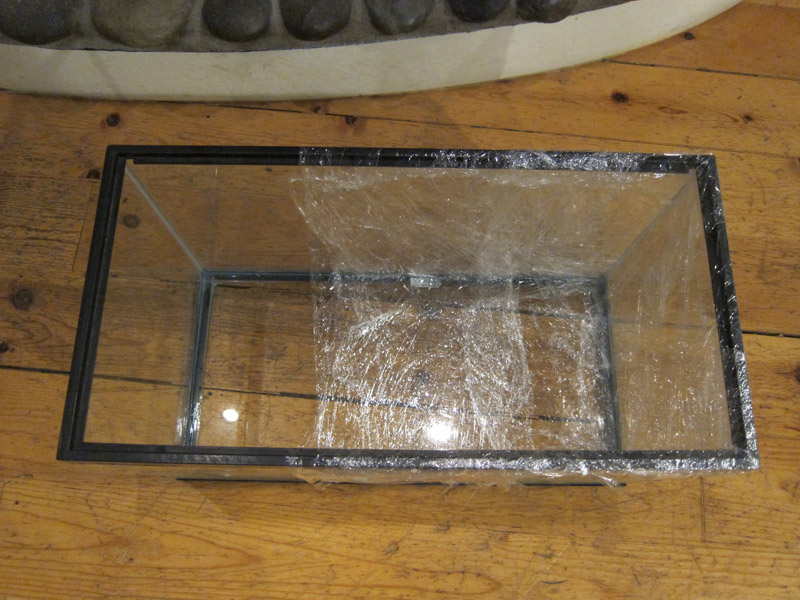
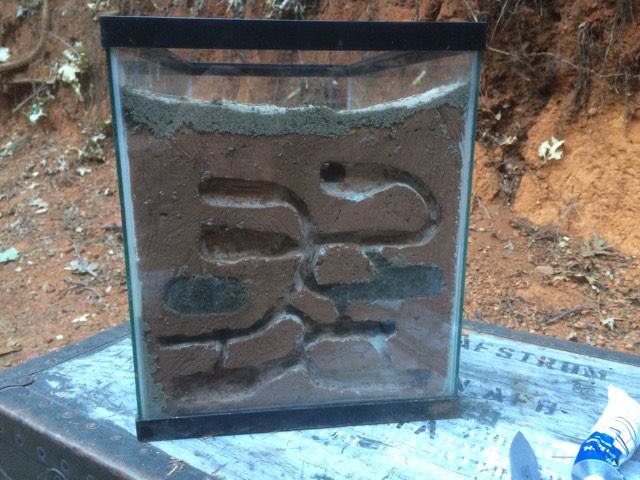
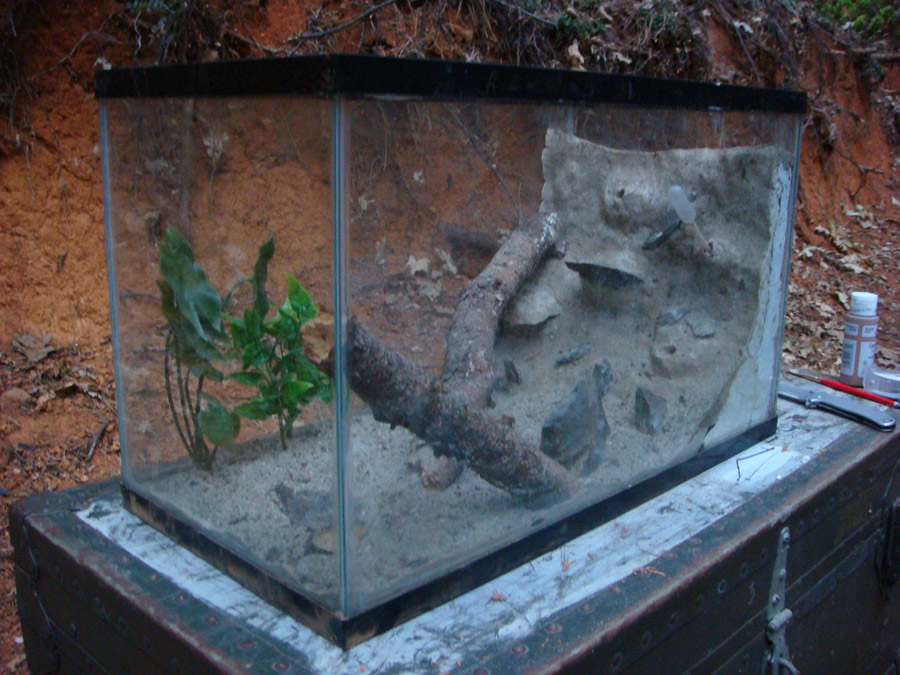
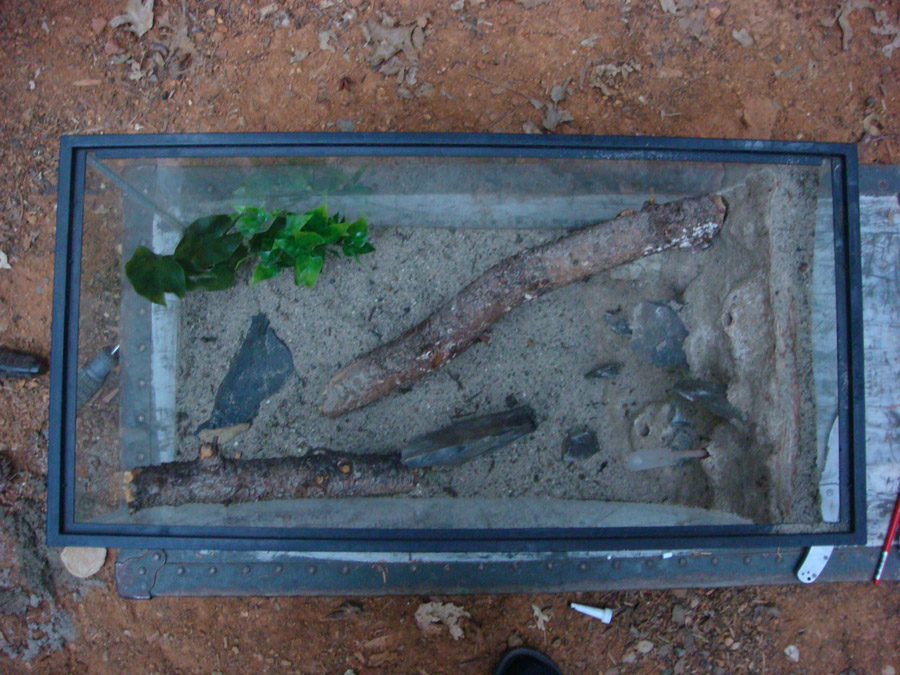
10 gallon terrarium w/lid 
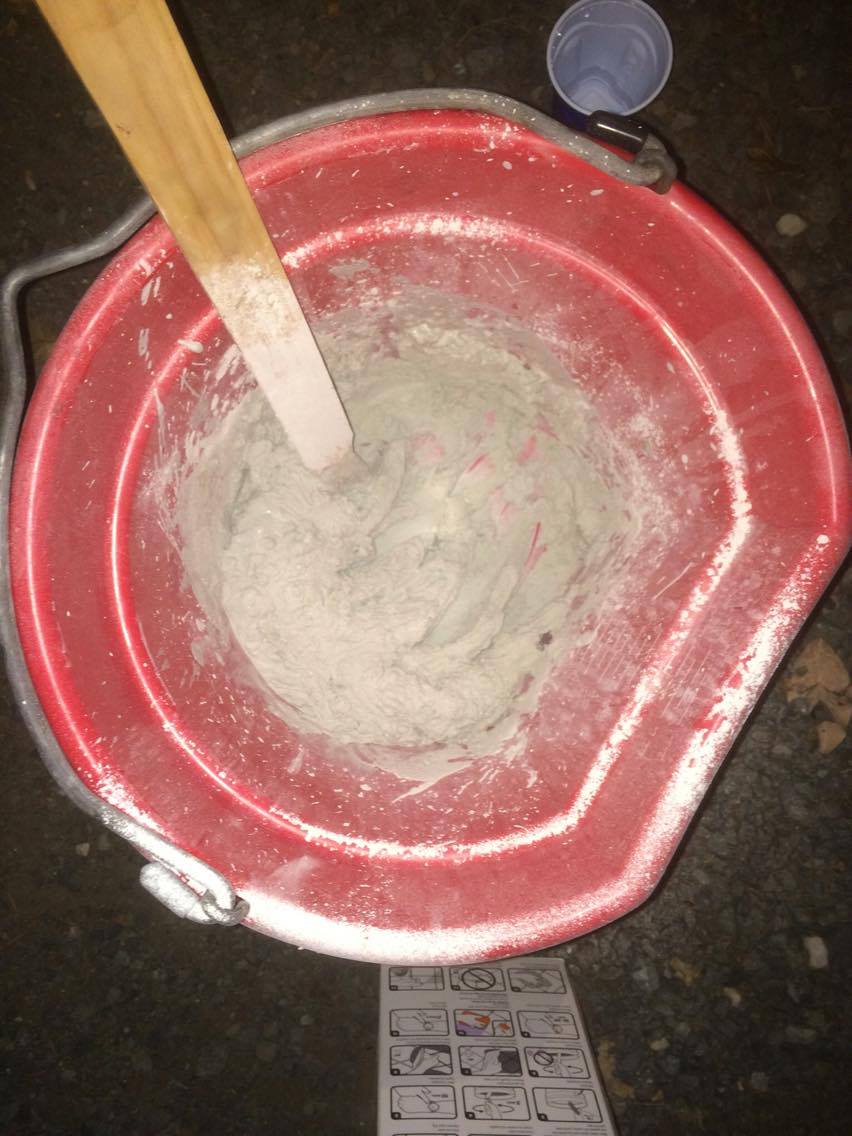
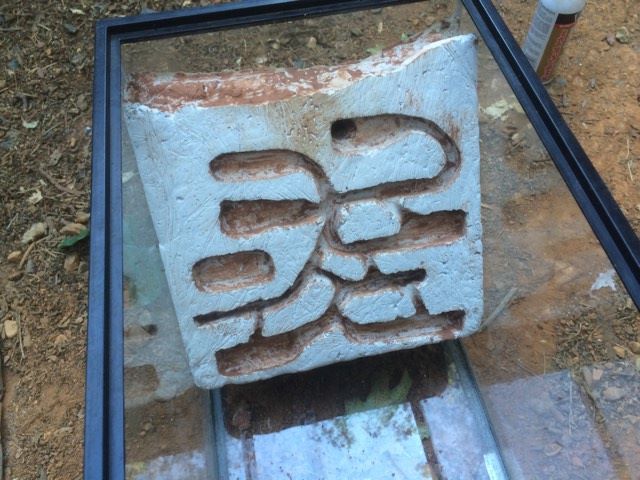
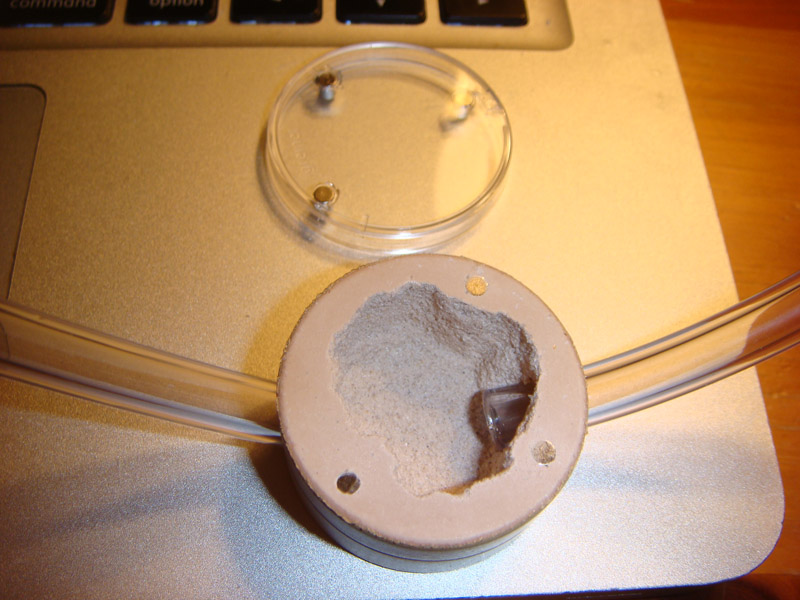
14 lbs Sanded grout - to build colony and provide a dig proof base
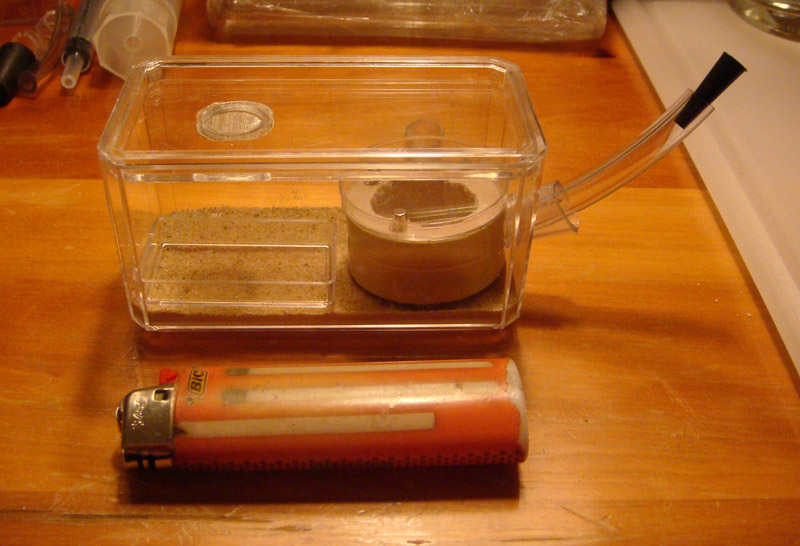
Saran wrap - for molding the grout to the shape of the container
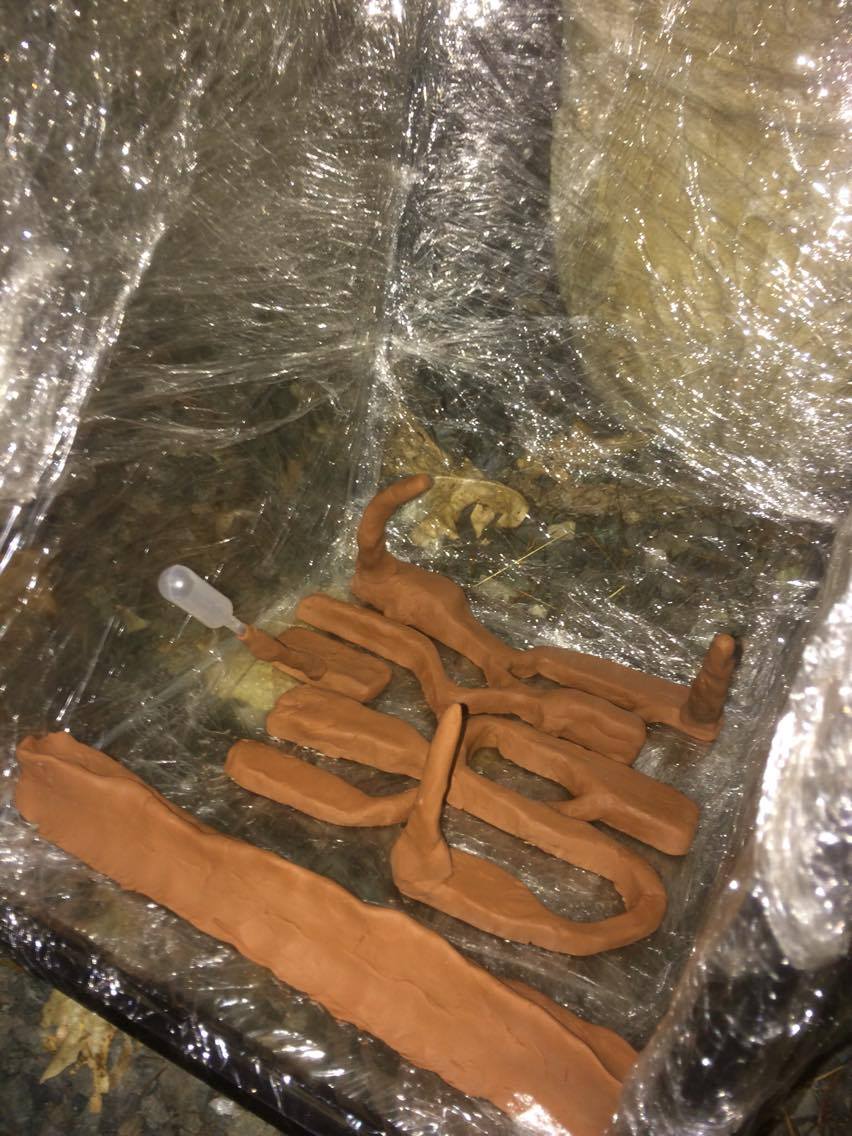
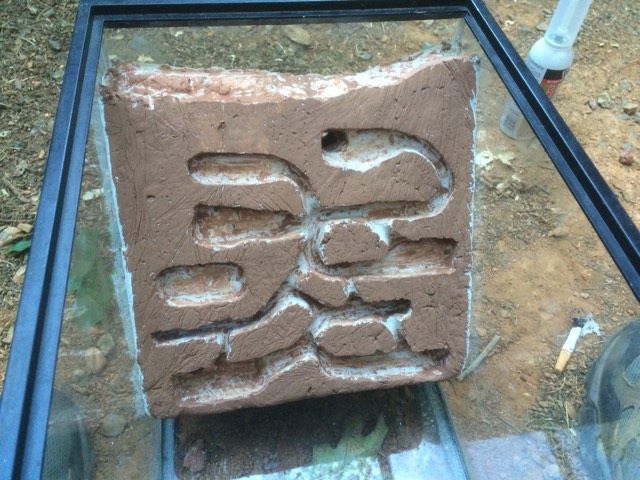
No-dry model clay - for designing the tunnels in the grout
Aquarium glue - sealing once finished

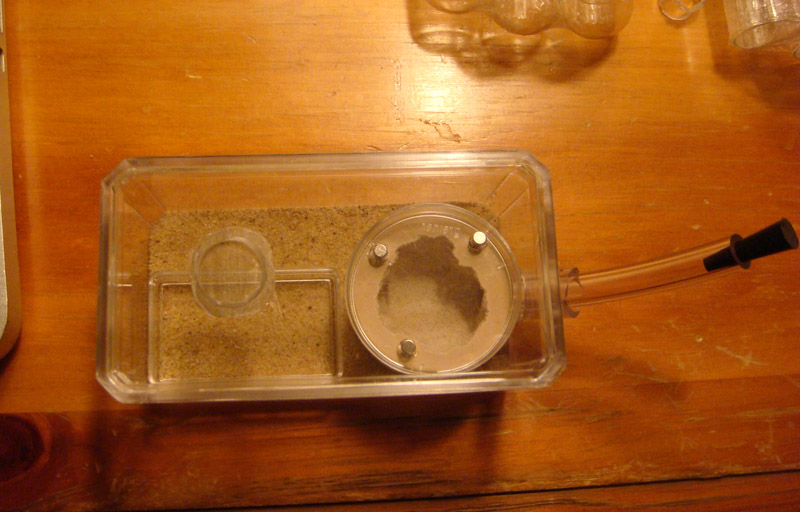
Substrate - I'm using sand. This will be thinly layered to add texture and "landscape" as well as provide materials for the ants to make modifications to the nest if they want
Non toxic paint - painting the grout to make the tunnels stand out
Stick on reptile heating pad - provide heat
At least one test tube - to provide water

Micropipet - will function as a water port in theory

Fake aquarium plants - decorations

Sticks

River rocks


Edited by fortysixandtwo, January 8 2017 - 1:26 AM.


#2 Offline fortysixandtwo - Posted October 1 2016 - 11:45 PM

fortysixandtwo

    Advanced Member

  • Members
  • PipPipPip
  • 98 posts
  • LocationNor Cal

Step 1: Cleaned the terrarium and saran wrapped the area that will be the foundation of the colony. 


tank-2.jpg


tank-1.jpg


#3 Offline fortysixandtwo - Posted October 2 2016 - 12:21 AM

fortysixandtwo

    Advanced Member

  • Members
  • PipPipPip
  • 98 posts
  • LocationNor Cal

Step 2: Using non-dry modeling clay, I did a bunch of mock ups for tunnel design. This was more or less the final "mock up" I decided on. 


14459807_1276666652357226_942382743_n.jp


Step 3: Transfered it to the terrarium and finalized the design, added additional tunnels and smoothed it all out. The chamber that is not connected will be packed with sand and (in theory) a way to add humidity to the colony. 


14455898_1277703545586870_448506626_o.jp


Step 4: Added tunnels that will connect with outworld. In hindsight I should have used straws to make the tunnels. Clay was a PITA to clear out.


14466277_1277703465586878_260032178_o.jp


Edited by fortysixandtwo, October 2 2016 - 12:22 AM.

  • ctantkeeper and CrazyLegs like this

#4 Offline fortysixandtwo - Posted October 2 2016 - 12:37 AM

fortysixandtwo

    Advanced Member

  • Members
  • PipPipPip
  • 98 posts
  • LocationNor Cal

Step 5: Mixed the grout. I initially got 7lbs of sanded grout. Was $15 if I recall correctly at the local hardware store. I've never worked with grout before so this was a learning experience. I already made some mistakes or could have done things better knowing what I know now. I'll recap that later. Long story short: I used 14 lbs instead of 7 to get the slope I wanted in the deep 10 gallon.


14455989_1277703455586879_2090832759_o.j


Step 6: Poured the grout. Made a slope towards the bottom and build mounds around the tunnels. Added some texture and dimension to the slope and added some nice river rock pieces I had laying around. I tried to make it so the top would have a channel for water, but when removing the saran wrap I accidently broke the back wall off on the top.


14518532_1278593888831169_31338186_n.jpg


Step 7: Added sand for texture and color. Best to add it when still wet so you can press it in.


14502053_1278593795497845_87290336_n.jpg


Edited by fortysixandtwo, October 2 2016 - 12:38 AM.

  • soulsynapse likes this

#5 Offline MichiganAnts - Posted October 2 2016 - 4:50 AM

MichiganAnts

    Advanced Member

  • Members
  • PipPipPip
  • 331 posts
  • LocationMichigan

looking good bud!


Owner of MichiganAnts, a YouTube Channel dedicated to all my Michigan colonies found and raise in my backyard

https://www.youtube.com/MichiganAnts

https://twitter.com/MichiganAnts

https://www.facebook.com/MichiganAnts/


Keeper of:


Camponotus Pennsylvanicus


Camponotus Noveboracensis


Tetramorium


#6 Offline fortysixandtwo - Posted October 2 2016 - 8:48 PM

fortysixandtwo

    Advanced Member

  • Members
  • PipPipPip
  • 98 posts
  • LocationNor Cal

looking good bud!

Thanks man. 


#7 Offline fortysixandtwo - Posted October 2 2016 - 8:55 PM

fortysixandtwo

    Advanced Member

  • Members
  • PipPipPip
  • 98 posts
  • LocationNor Cal

Let the grout set for 24 hours. I think 16 was what the label said. 


Step 7: Removed the saran wrap. Because I am using a terrarium with a lip on the top I had to make sure I would be able to rotate the mound to remove the saran wrap when the grout dried. No option to take it all the way out. 


14509144_1279476725409552_1402507496_n.j


Step 8: Removed the clay. Now that I know how sturdy the grout is when dry, I think for future builds I will mold it and then use a dremel to carve the tunnels.


14502052_1279476675409557_374028758_n.jp


Edited by fortysixandtwo, October 2 2016 - 8:56 PM.


#8 Offline fortysixandtwo - Posted October 2 2016 - 8:57 PM

fortysixandtwo

    Advanced Member

  • Members
  • PipPipPip
  • 98 posts
  • LocationNor Cal

Step 9: Used a non toxic paint for kids to paint the back. 


14528408_1279476628742895_1185968387_n.j


#9 Offline fortysixandtwo - Posted October 2 2016 - 9:05 PM

fortysixandtwo

    Advanced Member

  • Members
  • PipPipPip
  • 98 posts
  • LocationNor Cal

Step 10: Added sand to my "reservoir" and packed some sand in there too. Maybe they will want to tunnel in it. Dunno. This is all an experiment, lol. Cleared the corner of all debris and pushed the mound in as tight as I could get it. Used aquarium glue to fill in any cracks or gaps along the side and top. 


14483410_1279476495409575_113465132_n.jp


Step 11: Added some fish tank plants, and some local rocks and sticks for decor. Filled with about a 1/2" of sand. 


formicariumfinished1.jpg


formicariumfinished2.jpg


formicariumfinished3.jpg


Now onto escape proofing this thing.


Edited by fortysixandtwo, October 2 2016 - 9:06 PM.

  • Crystals, Martialis and CrazyLegs like this

#10 Offline T.C. - Posted October 3 2016 - 5:22 AM

T.C.

    Advanced Member

  • Members
  • PipPipPip
  • 3,059 posts

Beautiful, looks great! However i am curious, how does the hydration work, are you directly adding water to the tunnels?


“If I am killed for simply living, let death be kinder than man.” -Althea Davis

#11 Offline sgheaton - Posted October 3 2016 - 6:06 AM

sgheaton

    Advanced Member

  • Members
  • PipPipPip
  • 933 posts
  • LocationMinnesota

Escaping proofing..haha...Using fluon right now though I'd like to double down on a lid. I'm tossing between mesh or just using big...acrylic fin pieces in a way..


"I'm the search bar! Type questions into me and I'll search within the forums for an answer!"


#12 Offline fortysixandtwo - Posted October 3 2016 - 3:56 PM

fortysixandtwo

    Advanced Member

  • Members
  • PipPipPip
  • 98 posts
  • LocationNor Cal

Beautiful, looks great! However i am curious, how does the hydration work, are you directly adding water to the tunnels?


I packed one seperate chamber with sand and built in a port for a micropipet. My idea was I can keep the sand moist to increase humidity if I need to. So far just experimenting with it, it seems to keep the lower left portion of the chambers humid with the top ones remaining dry. I have no idea if this will actually work out as it did in my head, but so far seems to be keeping part of it humid and part of it dry which was kind of my goal. 


Escaping proofing..haha...Using fluon right now though I'd like to double down on a lid. I'm tossing between mesh or just using big...acrylic fin pieces in a way..


Yeah, I was told fluon doesnt work well on glass. So I bought some acrylic and I am attempting to build my own lid that will in theory fit tight into the grooves in the top of the terrarium. 


#13 Offline drtrmiller - Posted October 3 2016 - 5:28 PM

drtrmiller

    Vendor

  • Members
  • PipPipPip
  • 2,714 posts
Where'd you get the tank?

One problem I came across while designing lids, is that the plastic frames have slightly different dimensions, and some, including yours, have unusual, tiny tabs on the left and right.


byFormica® is the manufacturer of the iconic nectar feeders and Sunburst Ant Nectar.
byFormica ant products always deliver consistent performance, convenience,
and reliability, making them among the most beloved ant foods and kit enjoyed by
ant keeping enthusiasts worldwide. For more information, visit www.byFormica.com.

#14 Offline fortysixandtwo - Posted October 3 2016 - 7:38 PM

fortysixandtwo

    Advanced Member

  • Members
  • PipPipPip
  • 98 posts
  • LocationNor Cal

Where'd you get the tank?

One problem I came across while designing lids, is that the plastic frames have slightly different dimensions, and some, including yours, have unusual, tiny tabs on the left and right.


The tank I got years ago. It housed scorpions and camel spiders most of its time with me. I think I originally got it from Petco on one of their $1 per gallon sales.


And yeah, I worried about that. We'll see how my attempts at lid making go tomorrow lol


#15 Offline sgheaton - Posted October 4 2016 - 5:45 AM

sgheaton

    Advanced Member

  • Members
  • PipPipPip
  • 933 posts
  • LocationMinnesota

Walmart sells JUST the tank for $13 if everyones rushin' out to get them now. I would NOT recommend buying the lid that they sell along with it. 


Rather than the 100 micron mesh, I might resort to just constructing a donut halo of sorts that will further extend the lip out by an inch or so. Night one I slept rather poorly as the idea of ants in an open container was odd... When they ended up in their formicarium I calmed down some. Between the Fluon on the glass, the under lip, and the top lip -- I can't imagine anything getting out. 


"I'm the search bar! Type questions into me and I'll search within the forums for an answer!"


#16 Offline fortysixandtwo - Posted October 21 2016 - 9:24 PM

fortysixandtwo

    Advanced Member

  • Members
  • PipPipPip
  • 98 posts
  • LocationNor Cal

Walmart sells JUST the tank for $13 if everyones rushin' out to get them now. I would NOT recommend buying the lid that they sell along with it. 


Rather than the 100 micron mesh, I might resort to just constructing a donut halo of sorts that will further extend the lip out by an inch or so. Night one I slept rather poorly as the idea of ants in an open container was odd... When they ended up in their formicarium I calmed down some. Between the Fluon on the glass, the under lip, and the top lip -- I can't imagine anything getting out. 


Yeah I have two of those janky lids. They work for scorpions and tarantulas but this project, not so much. Working with this acrylic is not as easy as I had invisioned in my head. Trying to think of solutions until I can get this acrylic the way I want it. 


I have heard promising things about extra virgin olive oil and Camponotus. If it really will stop them (petroleum does nothing) I will modify one of the lids I have for starters and see how it works with olive oil while I tinker with the acrylic more. I also had wrist surgery a month ago so my right hand is in a cast. Makes projecting difficult lol.


I experimented with the olive oil and a completetly different invert and it worked, so I have some hopes for Camponotus. Tomorrow I finally have some free time so I intend on getting this formicarium ant ready tomorrow. 


Edited by fortysixandtwo, October 21 2016 - 9:52 PM.


#17 Offline fortysixandtwo - Posted October 21 2016 - 9:33 PM

fortysixandtwo

    Advanced Member

  • Members
  • PipPipPip
  • 98 posts
  • LocationNor Cal

For those of you interested in other inverts I have seen this pink toe tarantula (Avicularia avicularia) at the local pet store a while and it was only $20 so I figured I'd give it a better home than where it was at. I've got a lot of terrariums laying around lol. I've had large scorpions and camel spiders before but never a tarantula. It will get about 6" or so across when full grown. Only 6 months or less right now. This is an arboreal species so it prefers to climb. I'm eventually going to get a vertical terrarium for it but it seems to be doing fine in a 10 gallon with lots of sticks to climb at the moment. If it is a female it may live up to 12 years, can't tell the sex yet.


dsc08066.jpg


Also started a Blaptica dubia cockroach colony. This will be a food supply for the tarantula and eventually the ants as well. 


dsc08021.jpg


  • T.C. likes this

#18 Offline fortysixandtwo - Posted October 22 2016 - 12:50 AM

fortysixandtwo

    Advanced Member

  • Members
  • PipPipPip
  • 98 posts
  • LocationNor Cal

Needed some misc supplies, figured I'd get all my equipment in order before spring so I am ready to go when Camponotus queenies start showing up. I like the little starter formicarium sets Tar Heels sells, for the price they look like they will work well. Since I haven't really actively hunted ants (outside of pest control work) in a while I think I am going to spend my winter building a variety of different formicarium for other genus than just Camponotus. Will really depend on what I find come spring but I am enjoying this project so why not. No more girlfriend to compain about my bug projects so its game on. lol. Lighter for scale


randomstuff.jpg


minioutworld.jpg


chamber.jpg


miniformicarium.jpg


miniformicarium2.jpg


Edited by fortysixandtwo, October 22 2016 - 12:52 AM.


#19 Offline Crystals - Posted October 22 2016 - 8:08 AM

Crystals

    Advanced Member

  • Moderators
  • PipPipPip
  • 2,048 posts
  • LocationAthabasca, AB (Canada)

Nice build. I usually coat a bit of olive oil on my clay and it helps when removing the clay.


For Camponotus that I have dealt with, they will walk vertically over olive oil, but are unable to walk upside down on it - they just fall down.  You can cut a 2" rim from acrylic that fits into the plastic top.  Camponotus are big enough that they rarely get out of any slight imperfections in the frame top.


  • fortysixandtwo likes this

"Always do right. This will gratify some people, and astound the rest." -- Samuel Clemens


List of Handy Links   (pinned in the General section)

My Colonies


#20 Offline fortysixandtwo - Posted October 22 2016 - 10:22 AM

fortysixandtwo

    Advanced Member

  • Members
  • PipPipPip
  • 98 posts
  • LocationNor Cal

Nice build. I usually coat a bit of olive oil on my clay and it helps when removing the clay.


For Camponotus that I have dealt with, they will walk vertically over olive oil, but are unable to walk upside down on it - they just fall down.  You can cut a 2" rim from acrylic that fits into the plastic top.  Camponotus are big enough that they rarely get out of any slight imperfections in the frame top.


Good to know. Thank you. Do you have any advice on working with acrylic? I bought a cutting blade tool when I bought the material but you are basically just supposed to cut grooves then snap it. I want to cut out something similar to you are describing but am afraid a grinder with a cutoff wheel will just destroy the material. 


Also tagged with one or more of these keywords: formicarium build, camponotus, formicarium

0 user(s) are reading this topic

0 members, 0 guests, 0 anonymous users