Jump to content

  • Chat
  •  
  •  

Welcome to Formiculture.com!

This is a website for anyone interested in Myrmecology and all aspects of finding, keeping, and studying ants. The site and forum are free to use. Register now to gain access to all of our features. Once registered and logged in, you will be able to create topics, post replies to existing threads, give reputation points to your fellow members, get your own private messenger, post status updates, manage your profile and so much more. If you already have an account, login here - otherwise create an account for free today!

Photo

3D Printed Water Tower Experiment


  • Please log in to reply
14 replies to this topic

#1 Offline Voidley - Posted November 4 2023 - 1:46 PM

Voidley

    Advanced Member

  • Members
  • PipPipPip
  • 62 posts
  • LocationNYC
Hey guys, I'm looking for some feedback on a project I've been working on lately—a 3D printed water tower. I'm in the testing phase and would love to hear your thoughts and suggestions, as well as share the steps I've taken thus far.
 
Creating the water tower:
 
To start off, I'll go over how to create this 3D printed water tower, it's pretty strait forwards so don't worry.
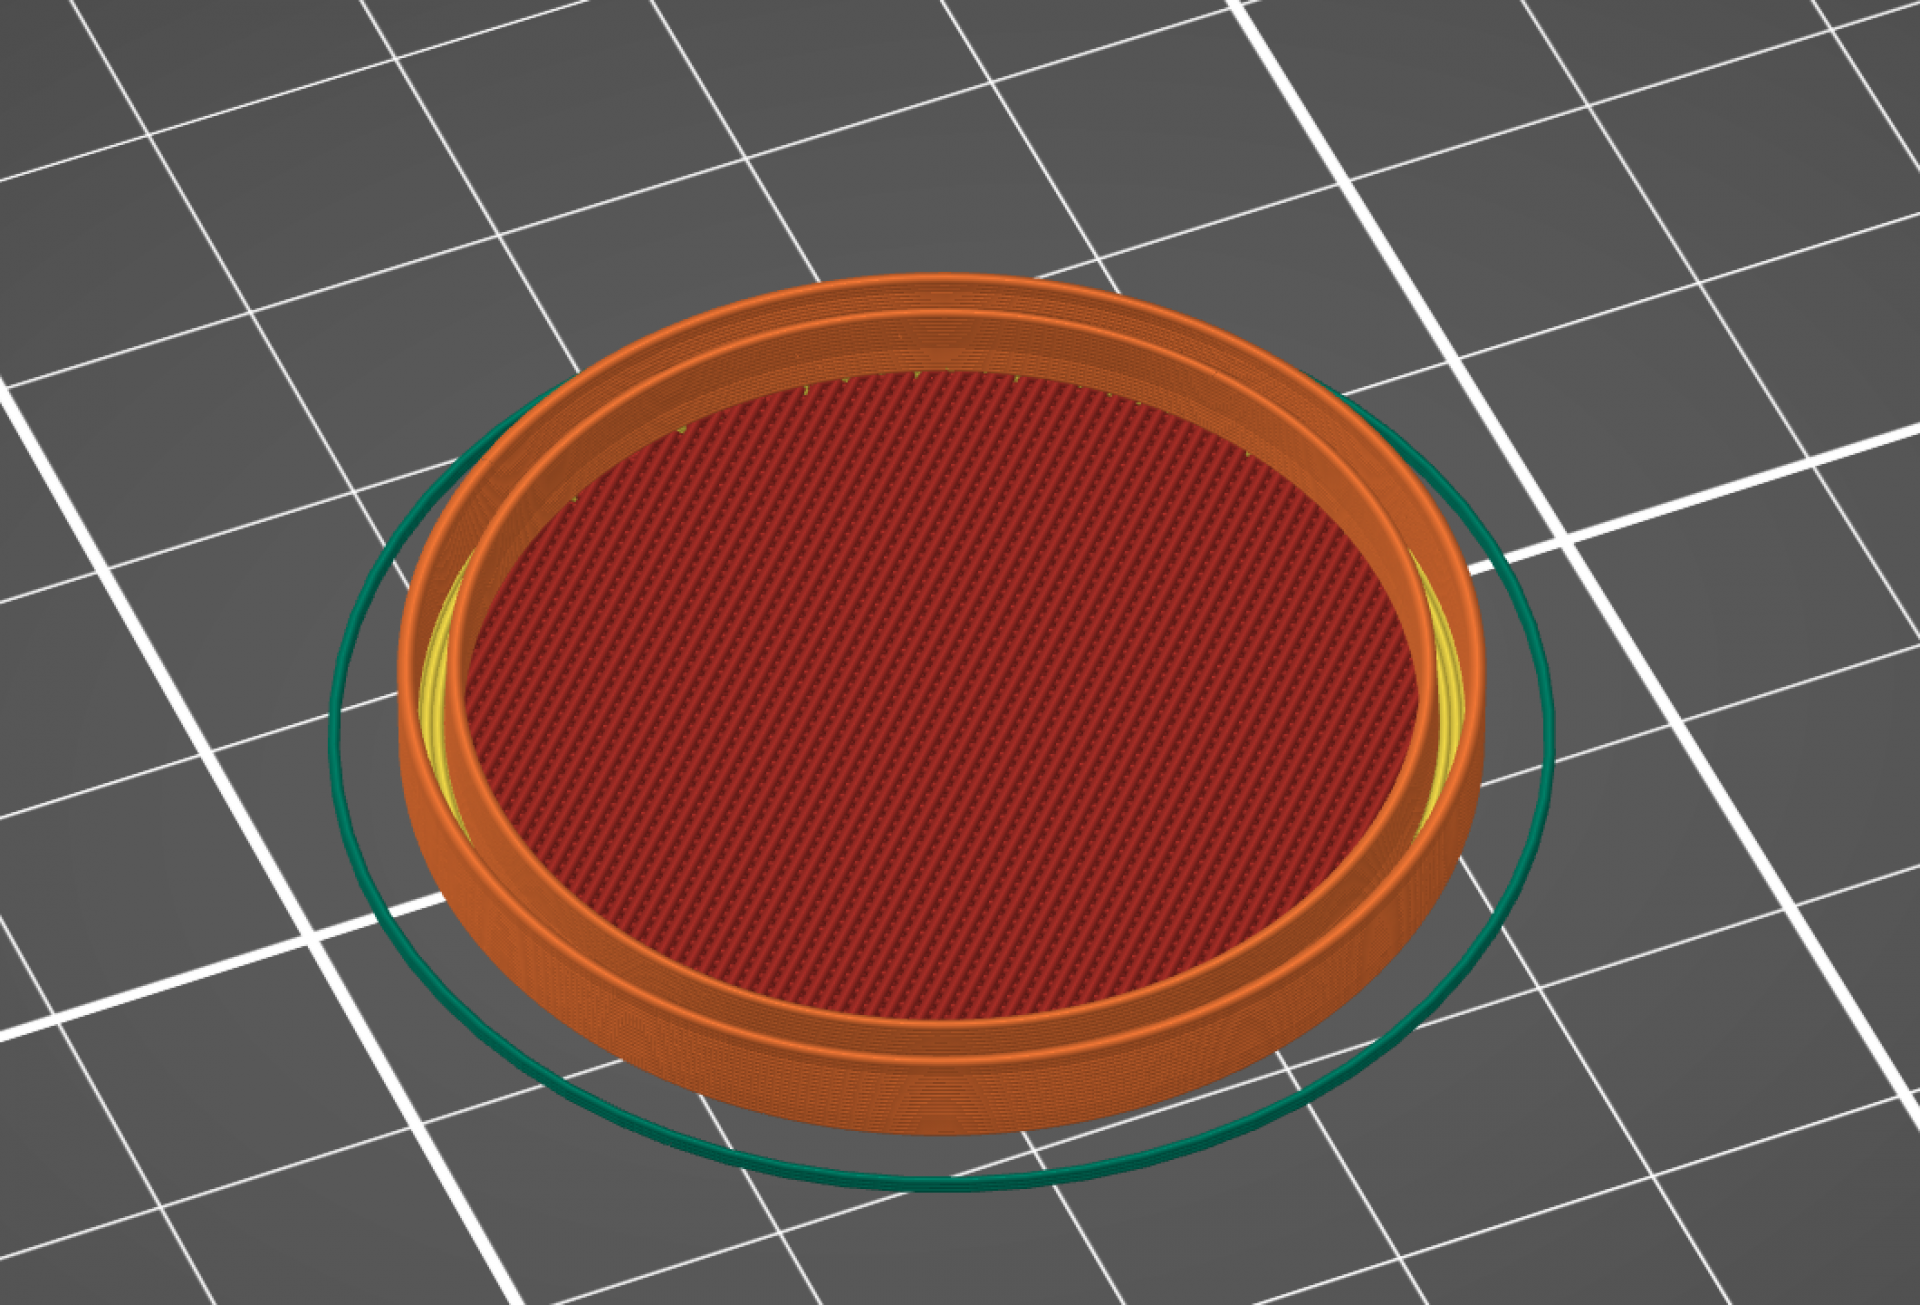
  1. Start by opening your 3D printer's slicer and adding a basic cylinder shape
  2. Adjust its size to fit your desired water tower dimensions
  3. Set perimeters to 1
  4. Chose the rectilinear infill pattern and set the infill density to 0%
  5. Set the top solid layers to 0
  6. Get rid of infill anchors by setting their max length to 0mm
  7. I've been using a layer height of 0.2mm, but feel free to experiment with different heights
  8. Make sure supports are turned off
  9. The crucial step: add a height range modifier from the height of your cylinder down to 2mm lower (e.g., if your cylinder is 20mm tall, set the height range modifier from 18-20mm).
  10. Within this height range modifier, set the infill density to 70%
  11. Slice the model and start printing. I highly recommend using clear filament to see the water level better.
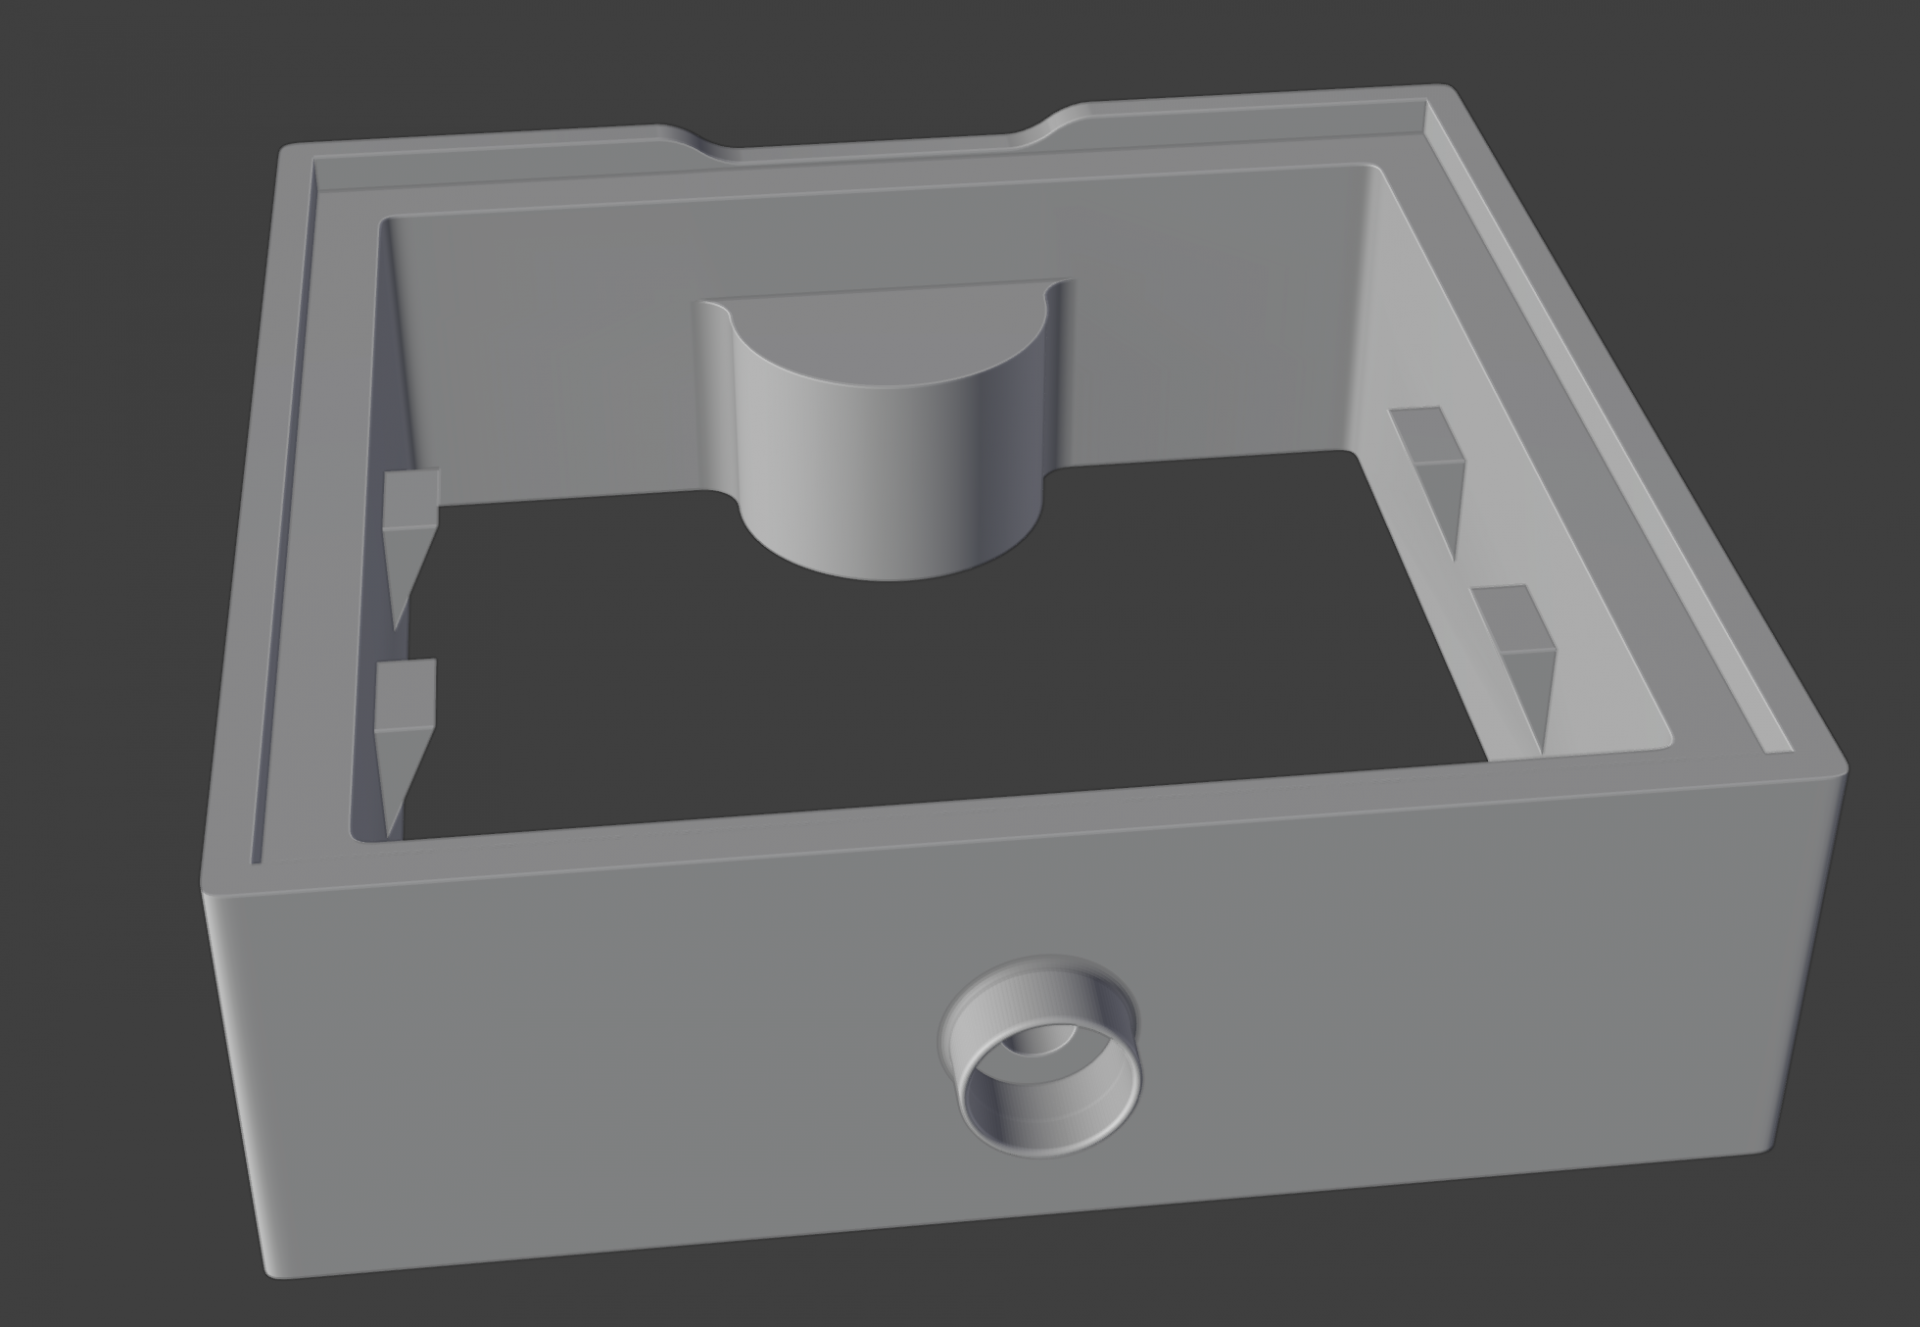
  12. After the printing is complete, create a hole in the side using a hot needle
For my attempts, I've been using PLA, but I'm curious about trying it with other materials.
 
Testing the water tower:
 
To see how well my 3D printed water tower performs, I ran a small test using two tupperwares. One with the water tower, and the other remained empty. They both started off with with 49% humidity at 74.9°F when I put the water tower in.
KvpX5CAKn2s1CGEw1gmNQ_fB2zJbYgb_iDx0xpjKky7PJbOwnGAdNQZJMz63XJiTyZ0yLIBQhRkOC-XA
By the following morning, the container with the water tower had reached 91% humidity, and the control hadn't changed (minor differences in temp or humidity are expected with these cheap hygrometers)
YKEoklTp77J7Dujm9dTxexSCRxKFegp0SFvlFtqc
 
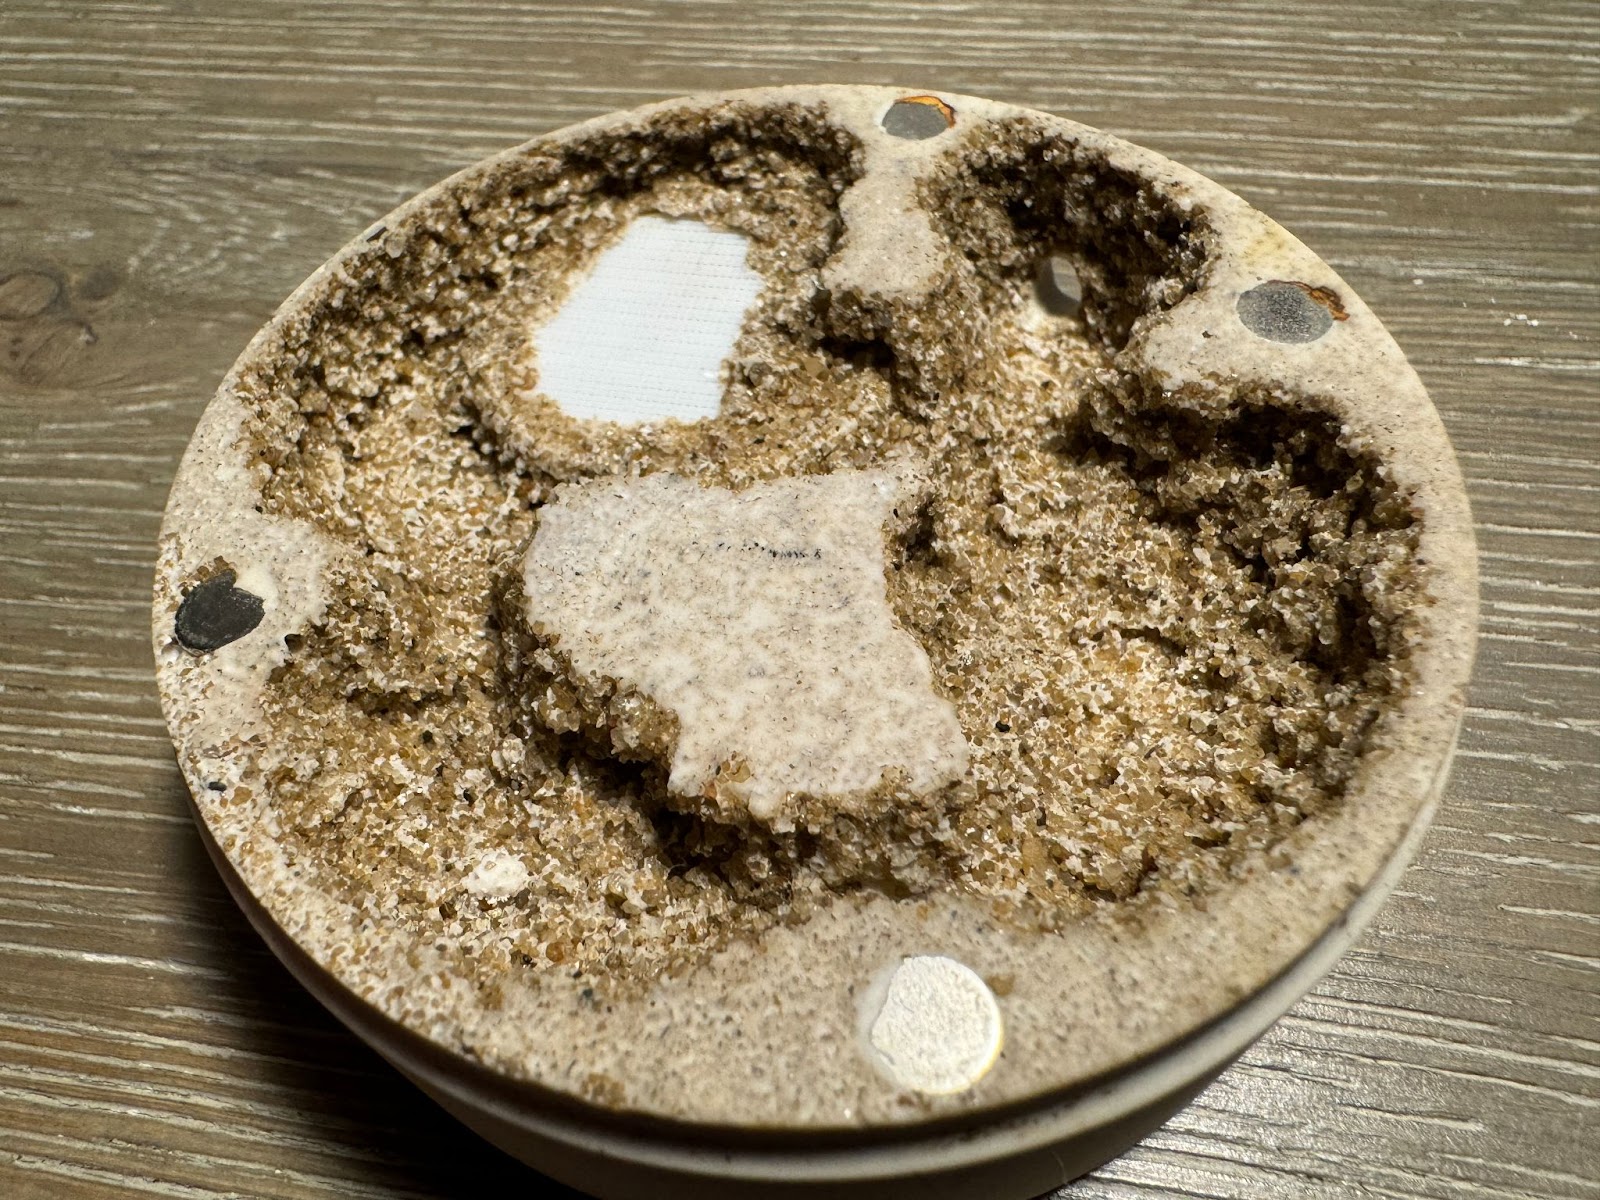
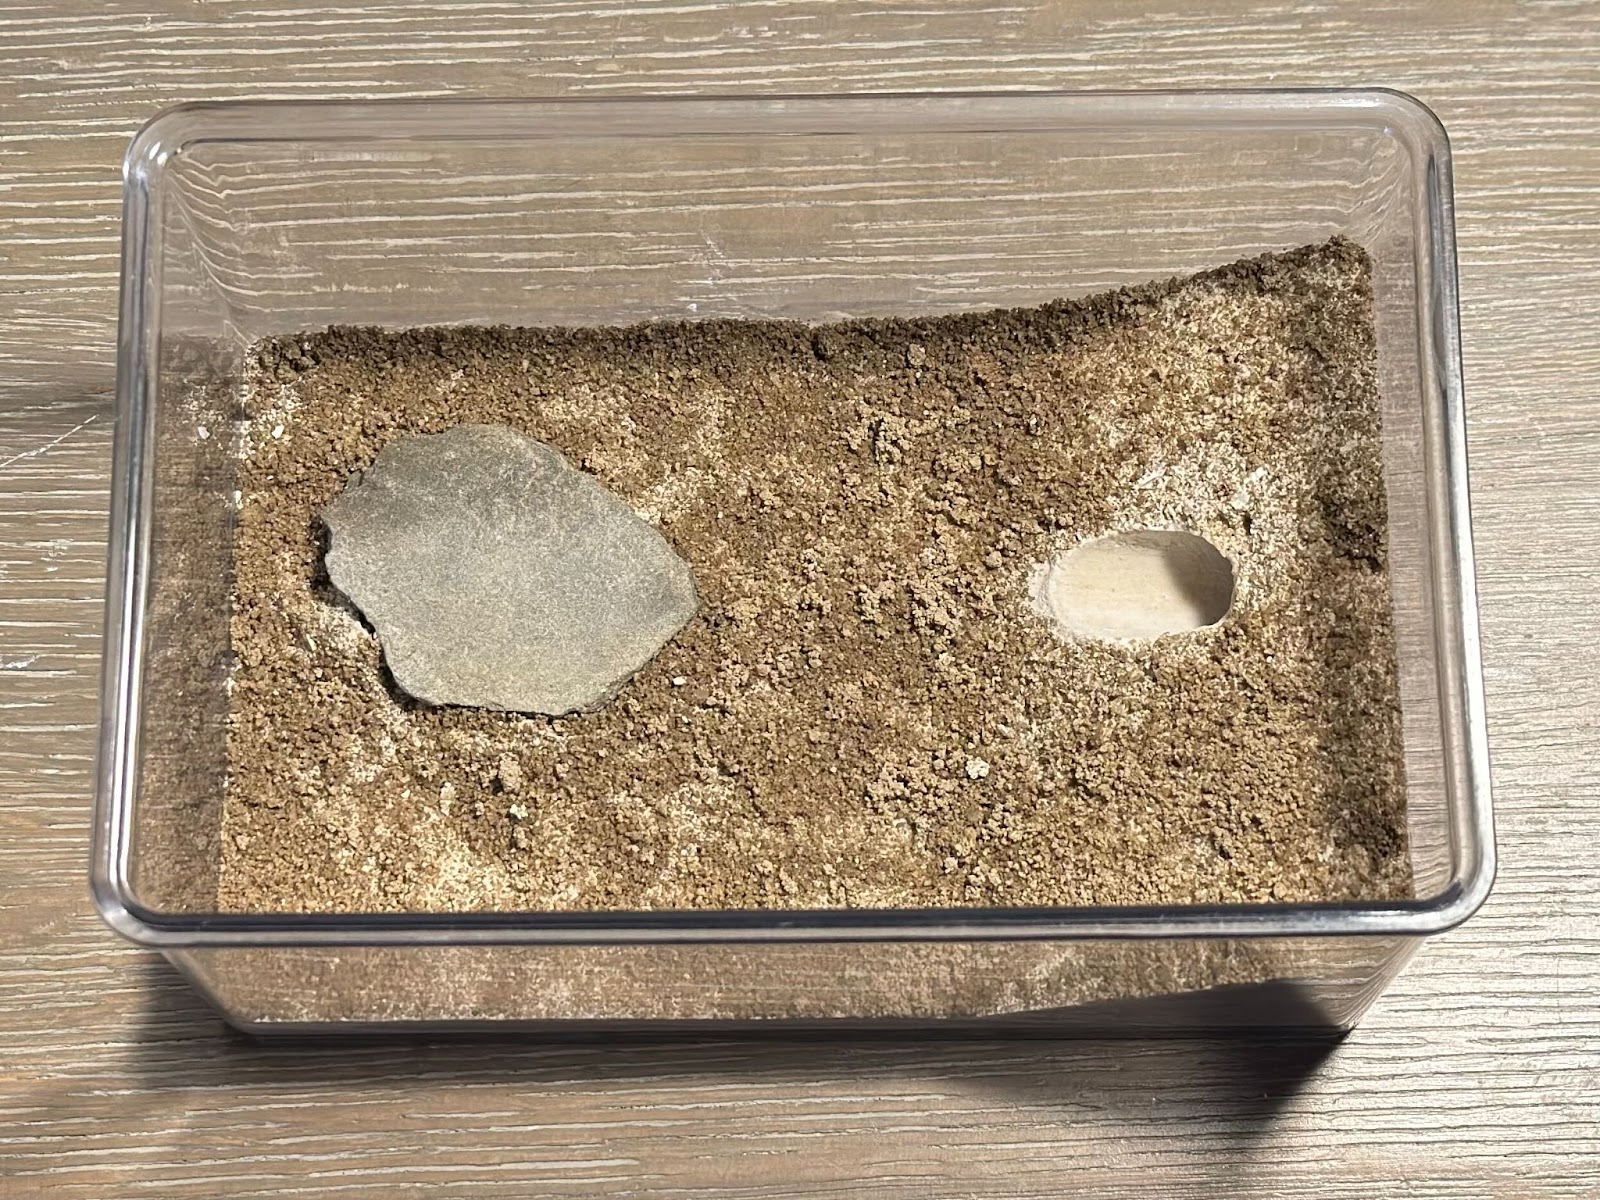
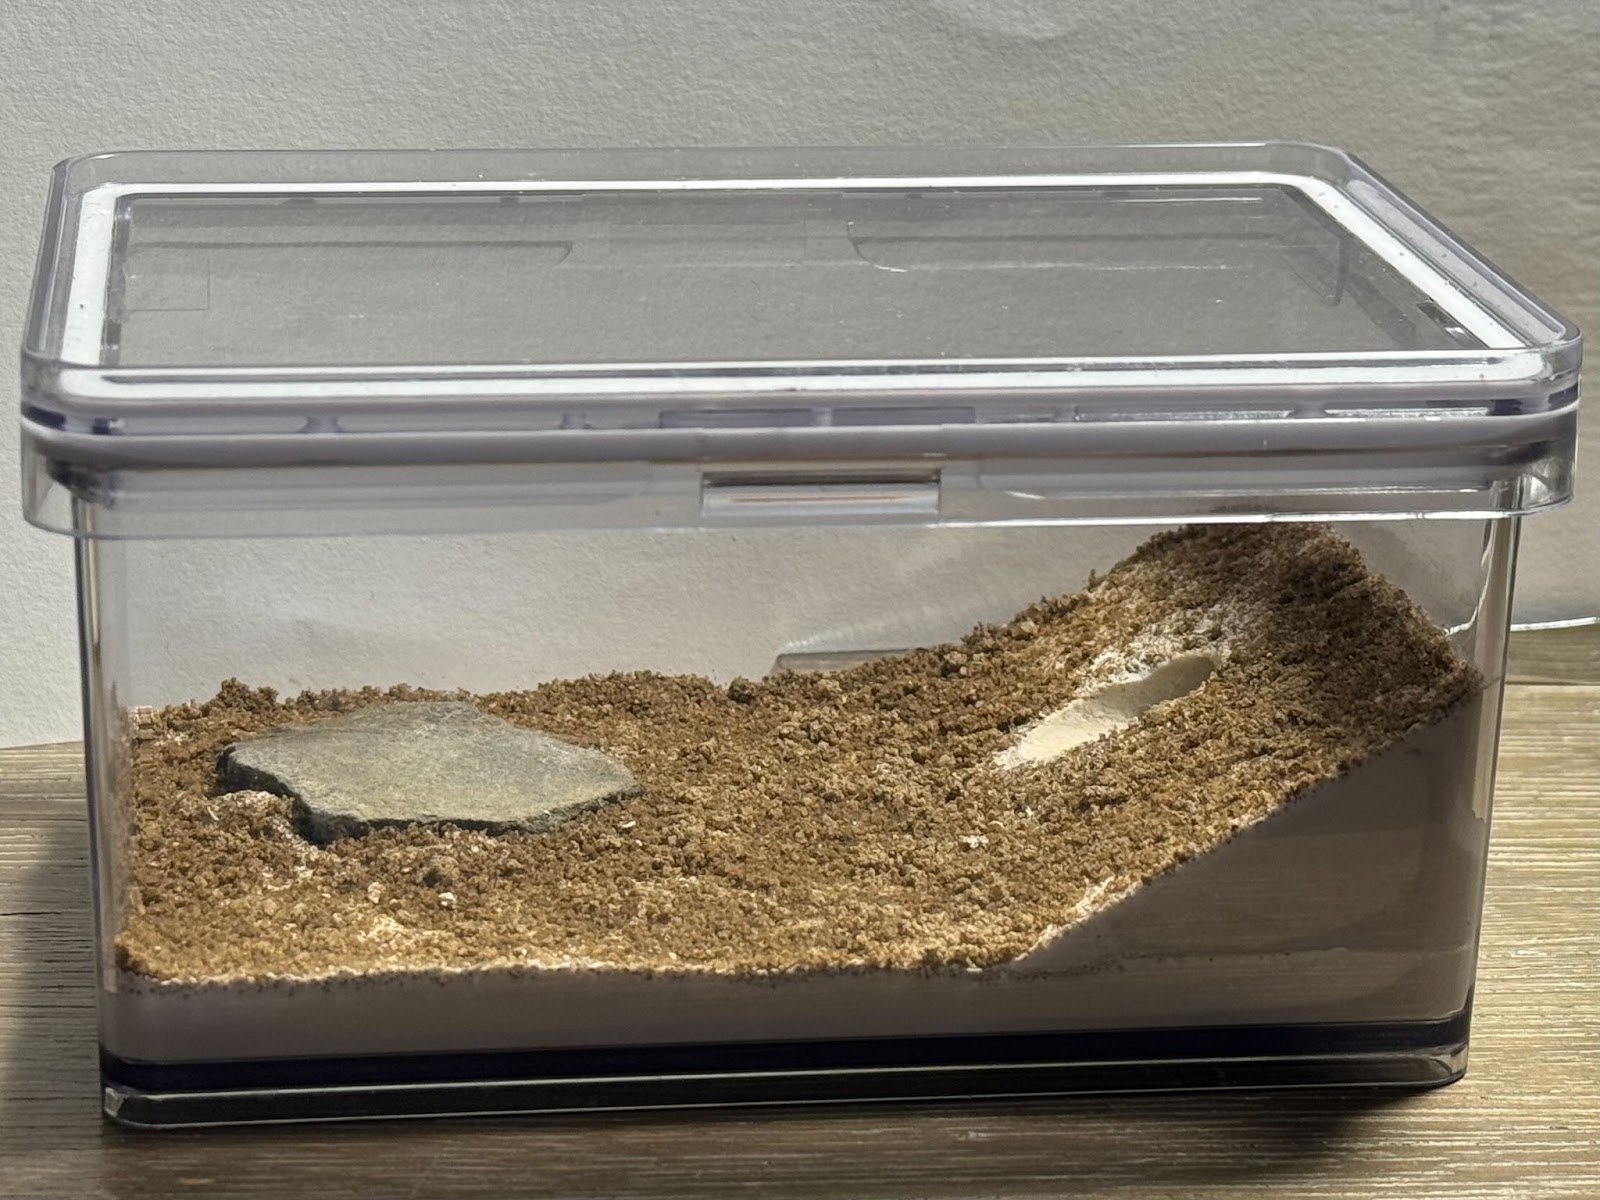
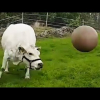
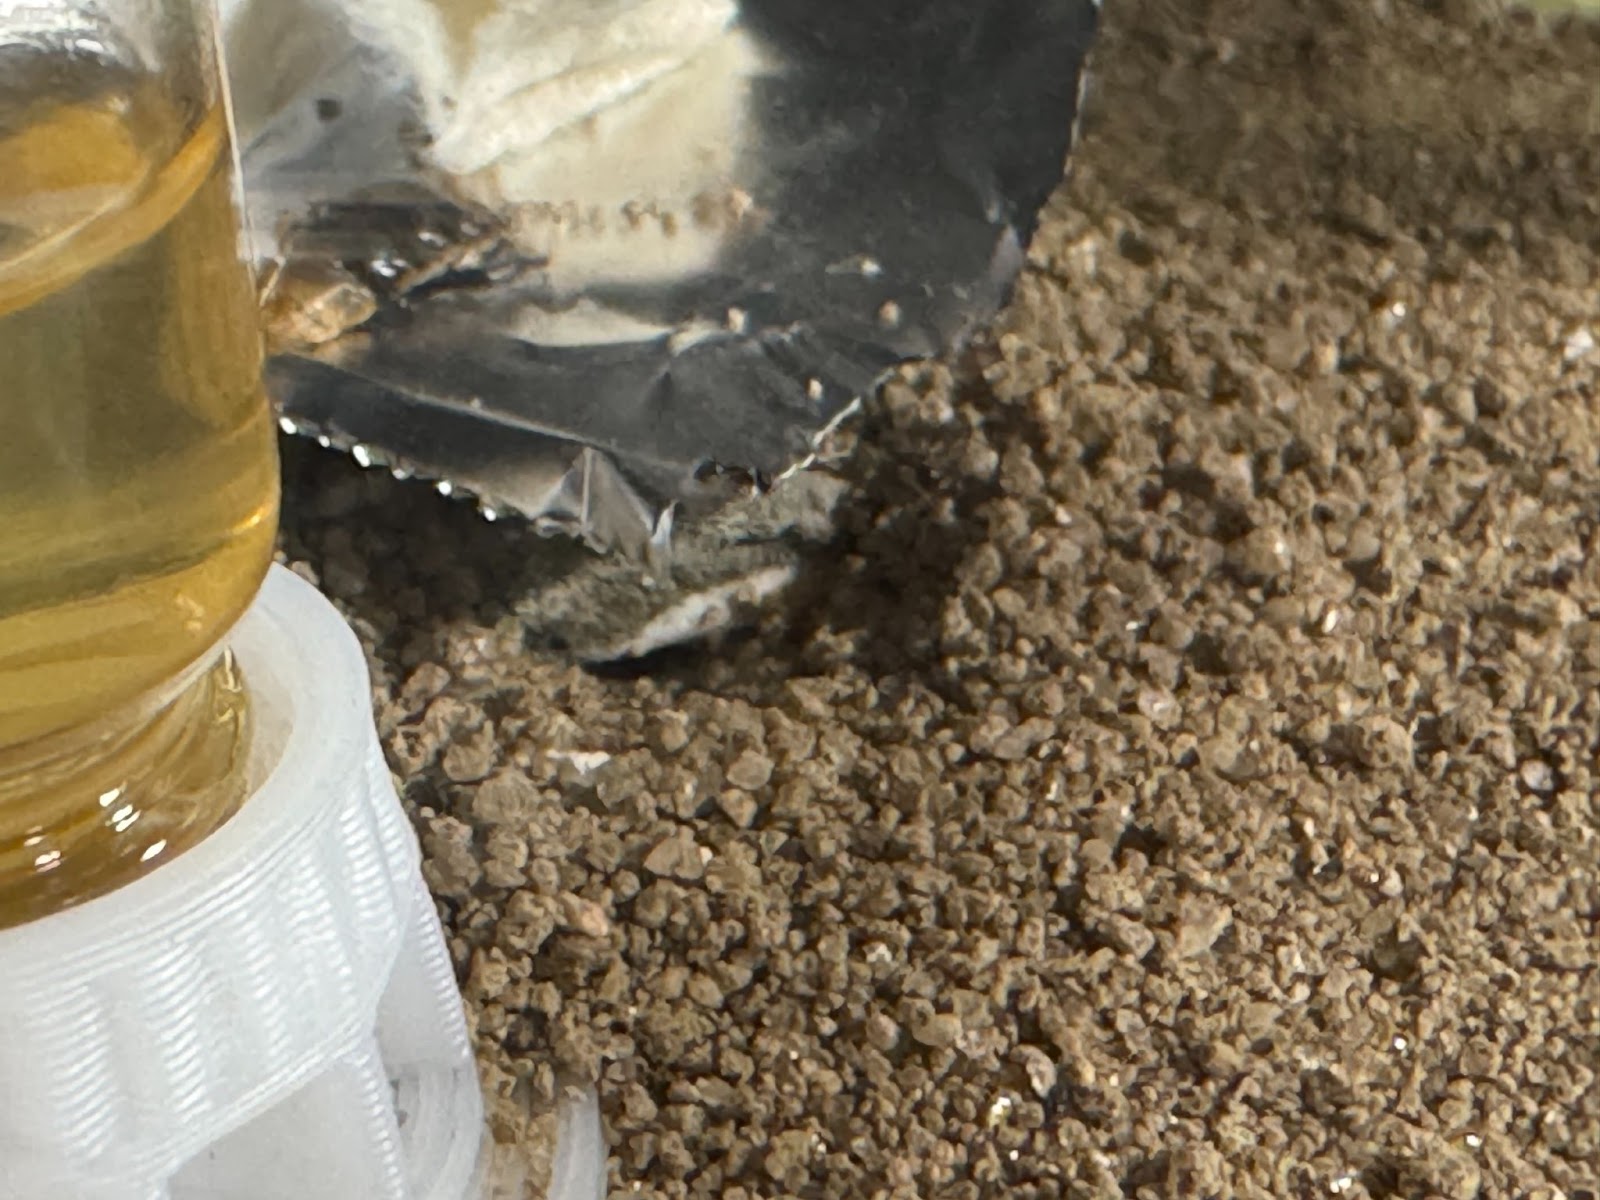
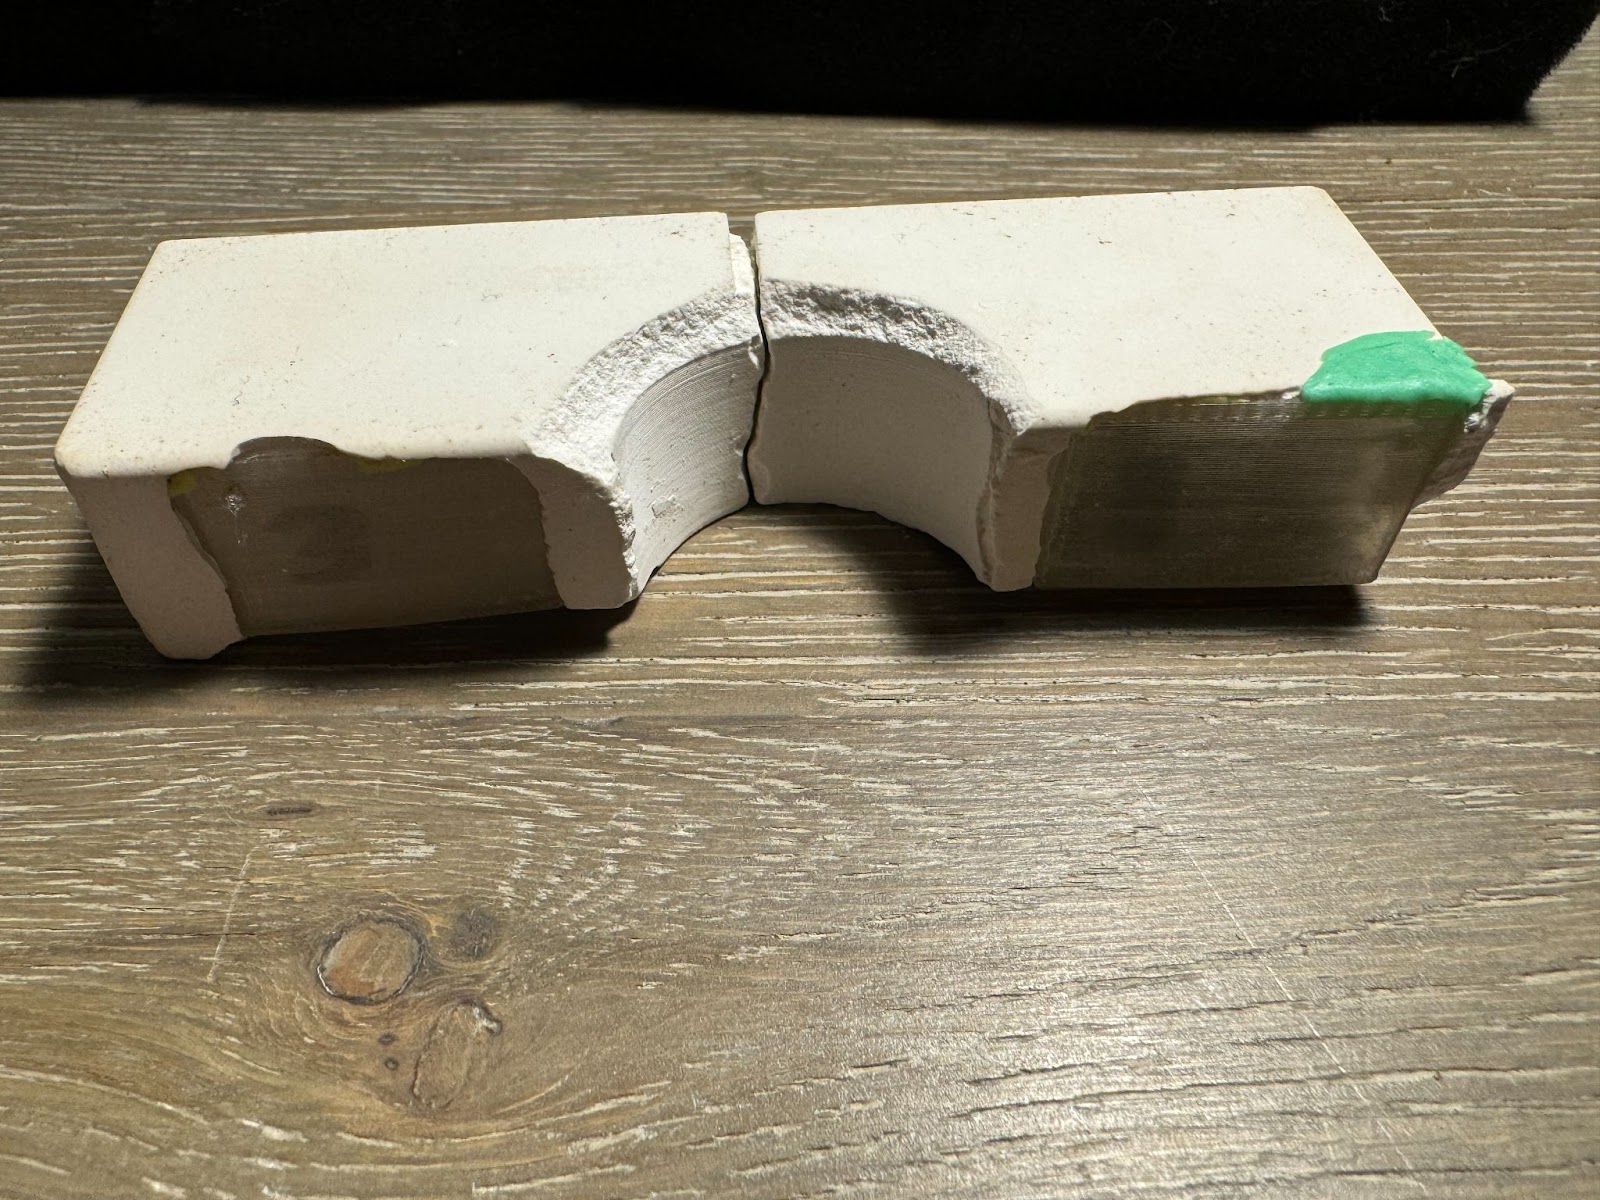
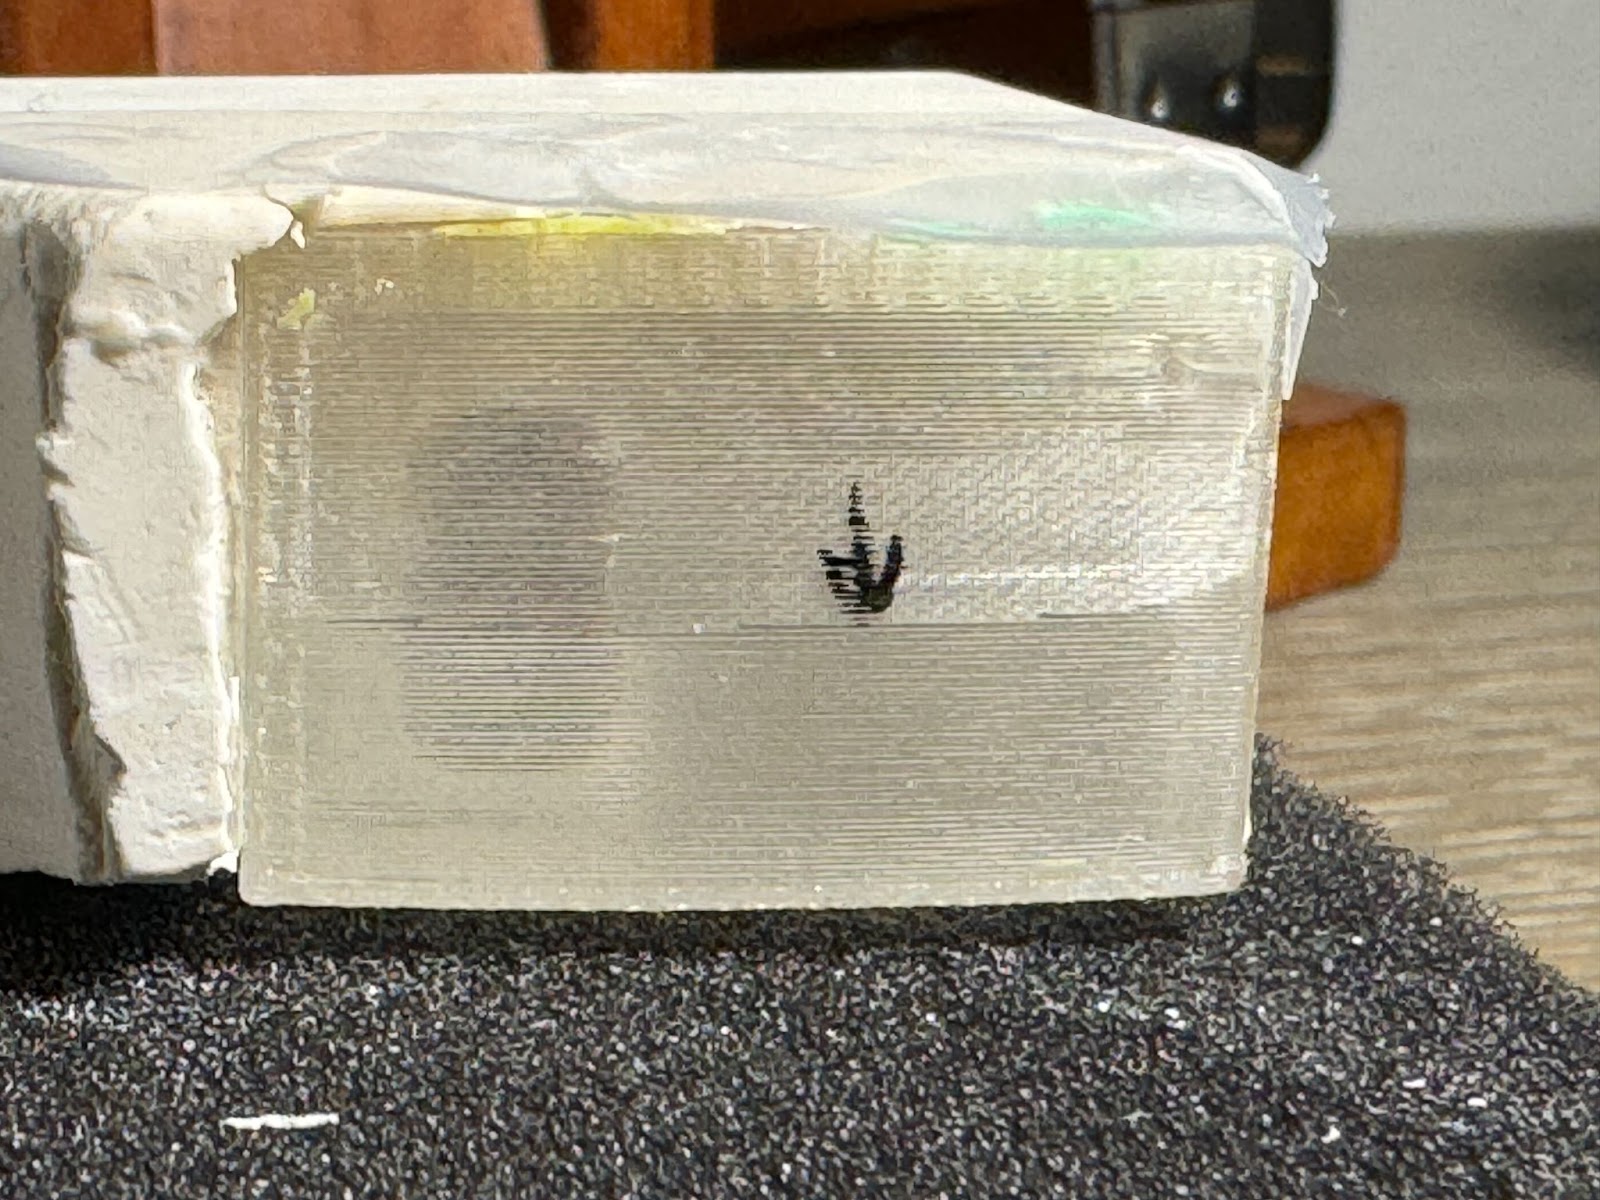
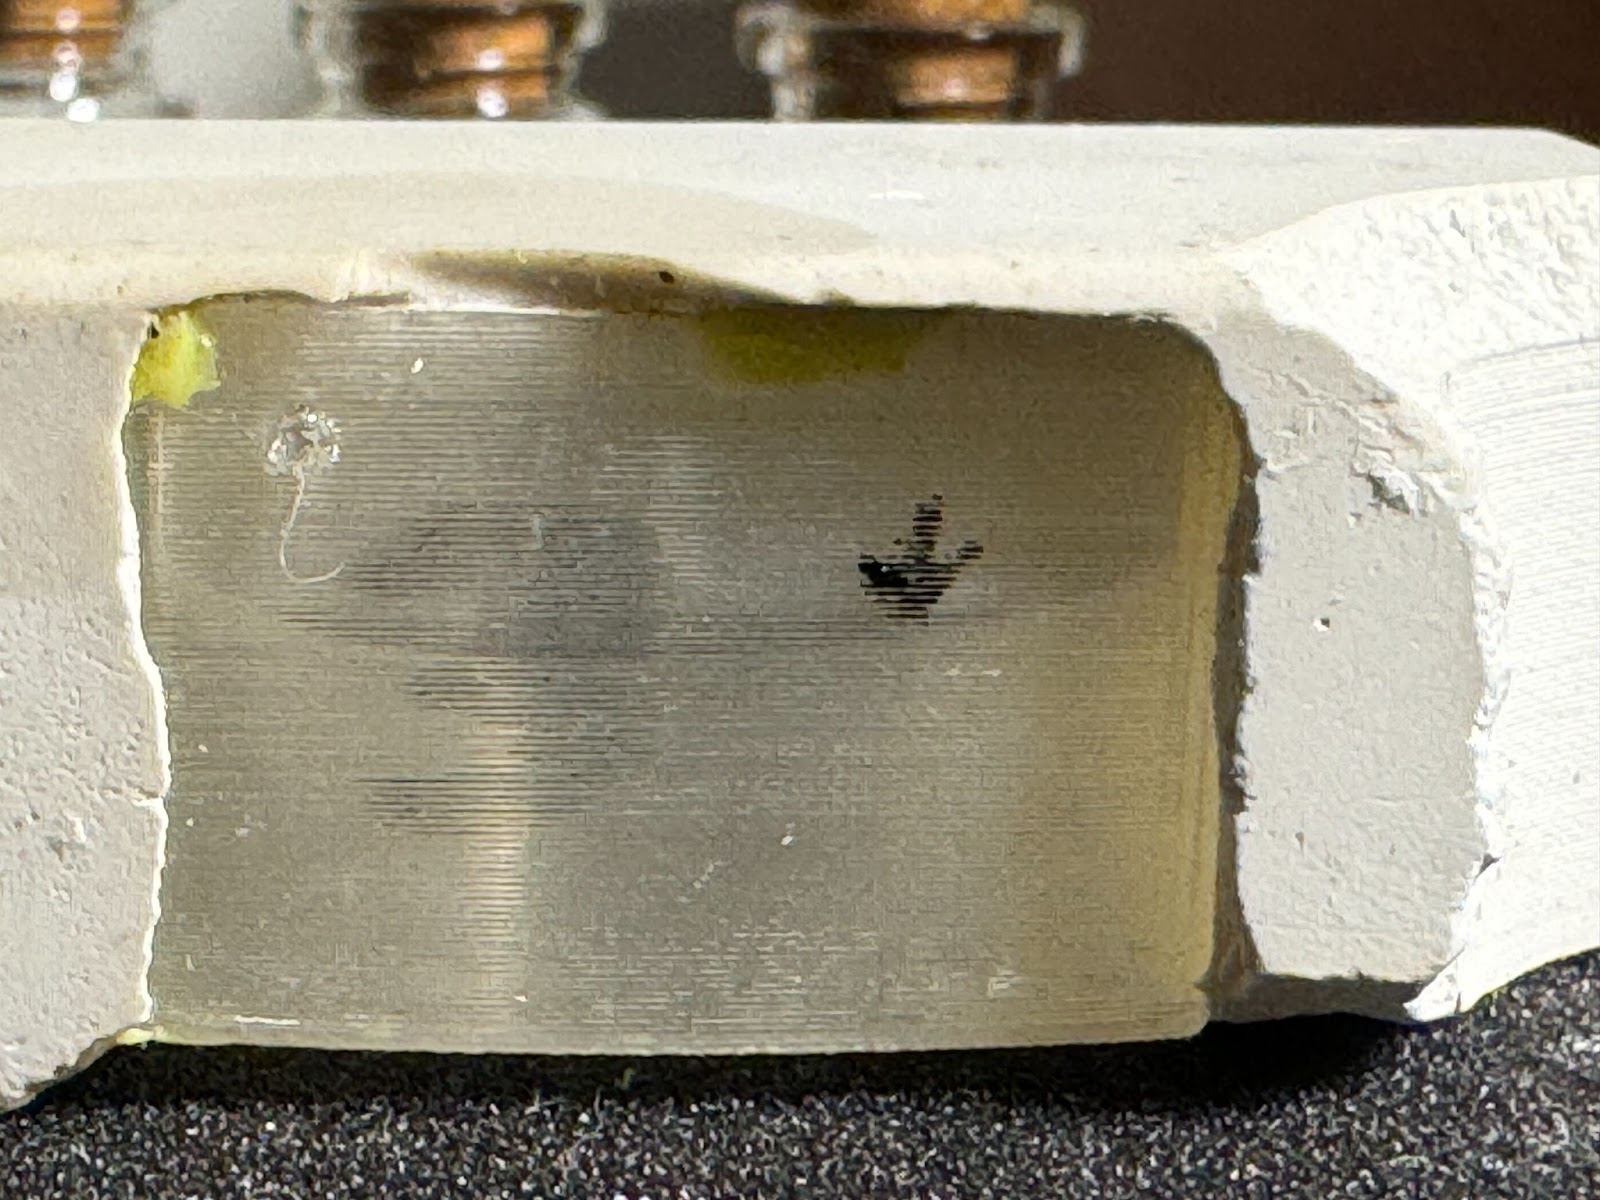
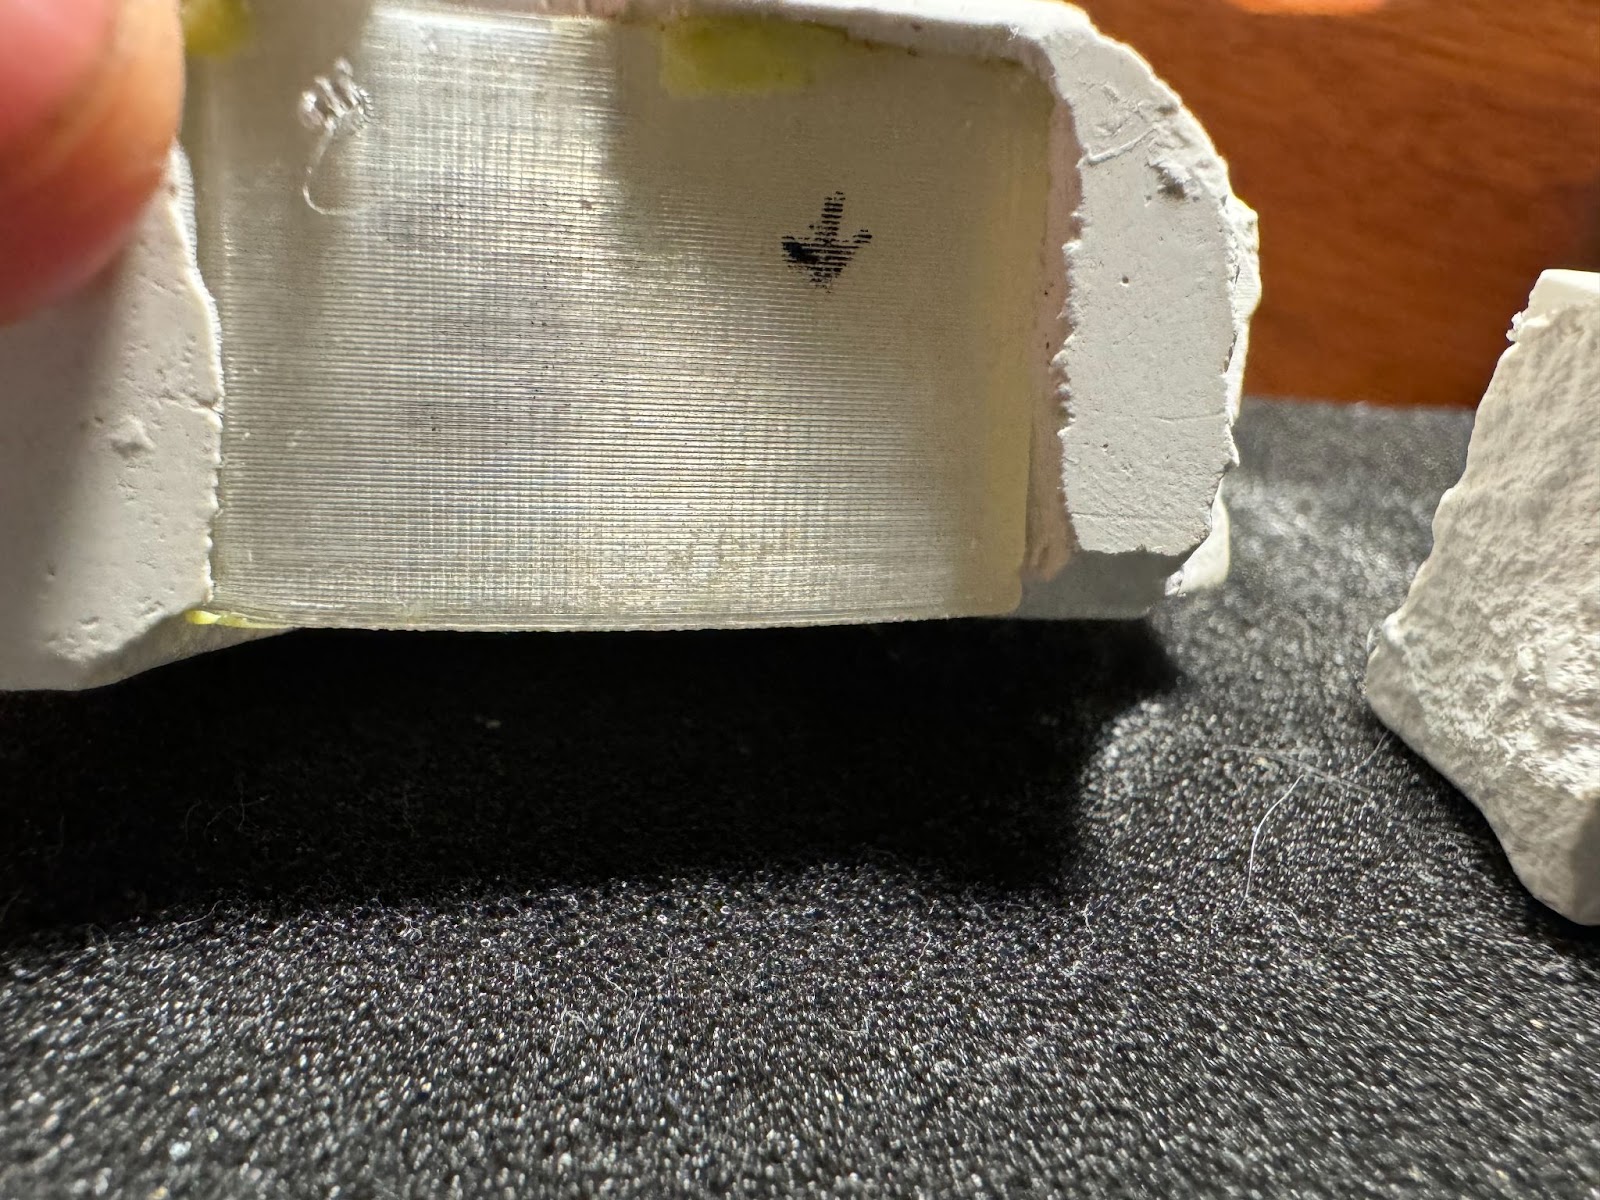
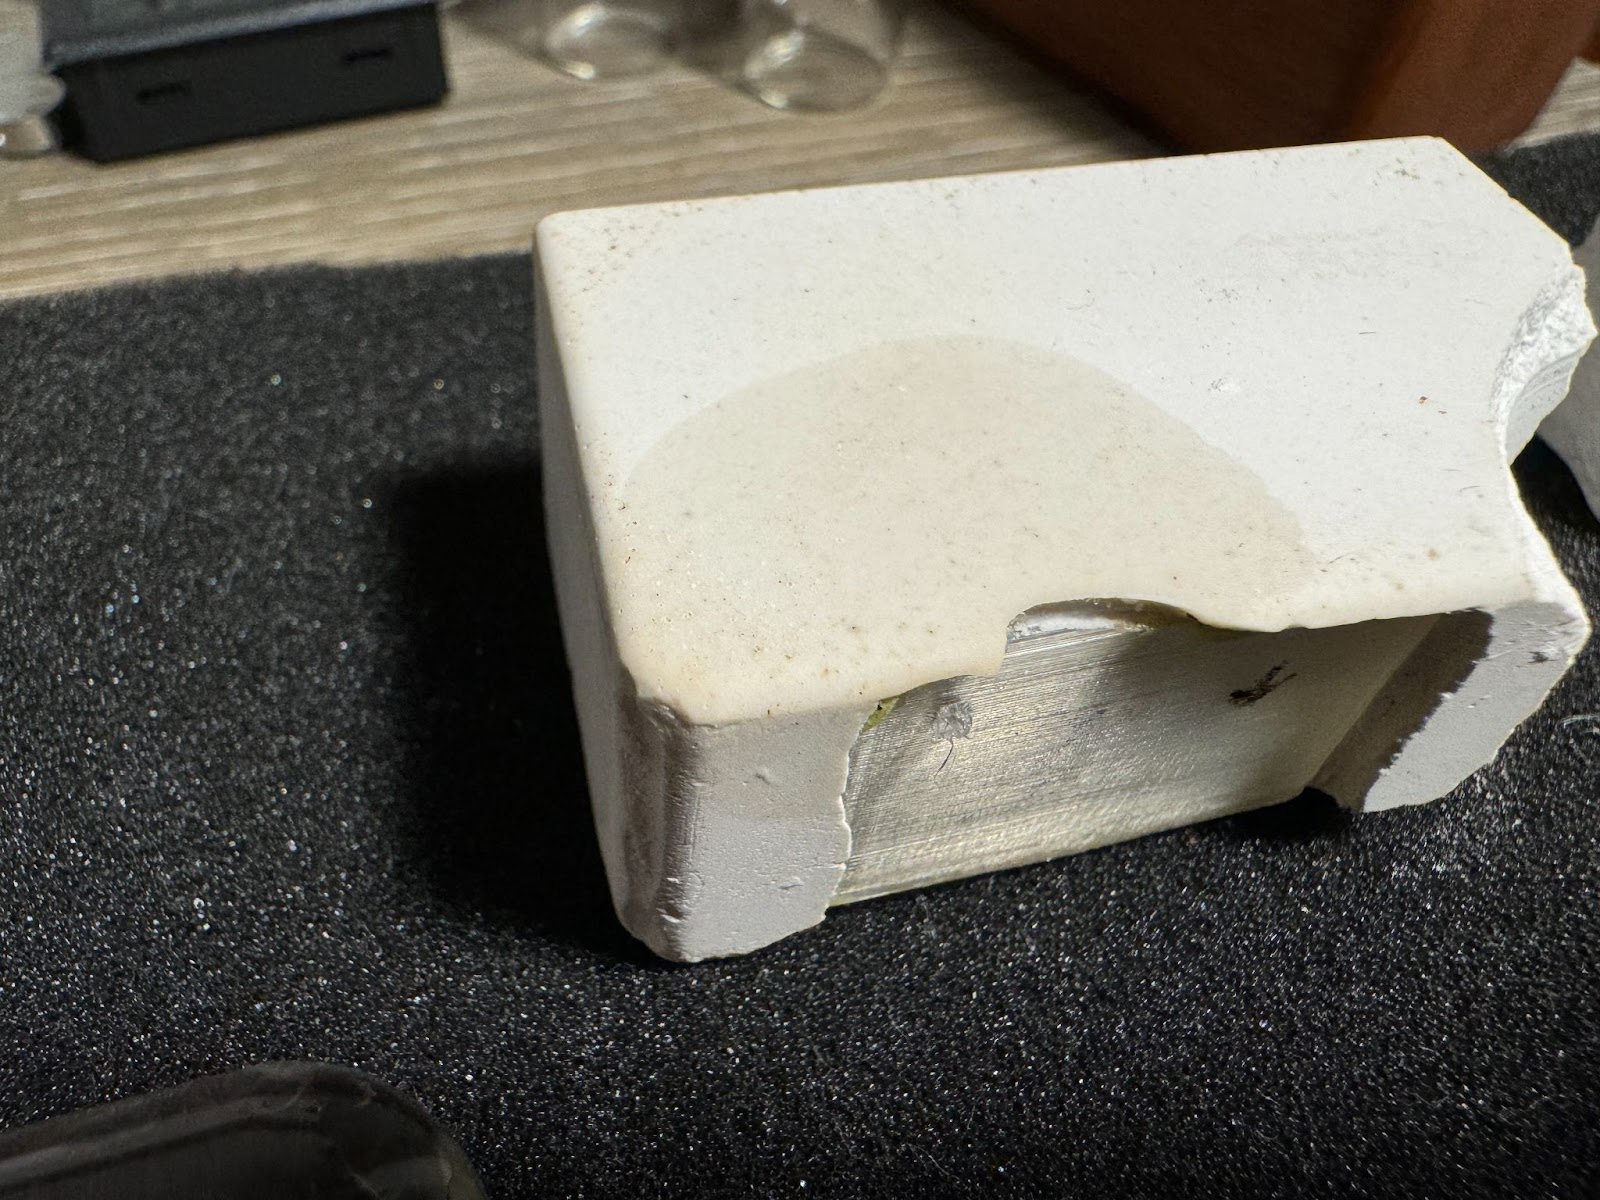
I continued this test for a week, and by the end of that period, the water tower container had hit 93% humidity. Also, it still had plenty of water in it as seen in the two photos below.
VI1X4UpzQRBpz9Lr5Yv2yiYw6nMzX6cNXziHfsI3AxOtx6xaihflb6lSgyV3VDsvY1rI5O2DofTlItDa
 
 
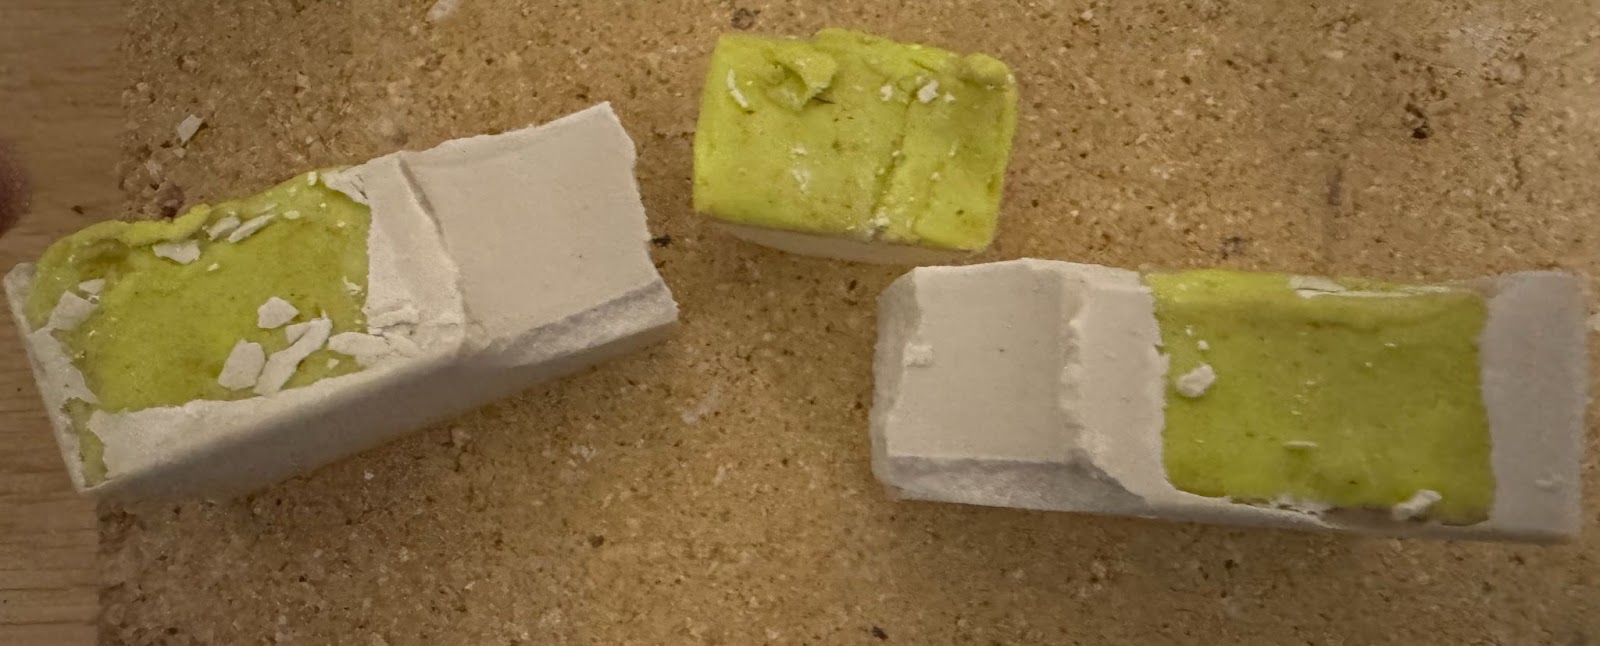
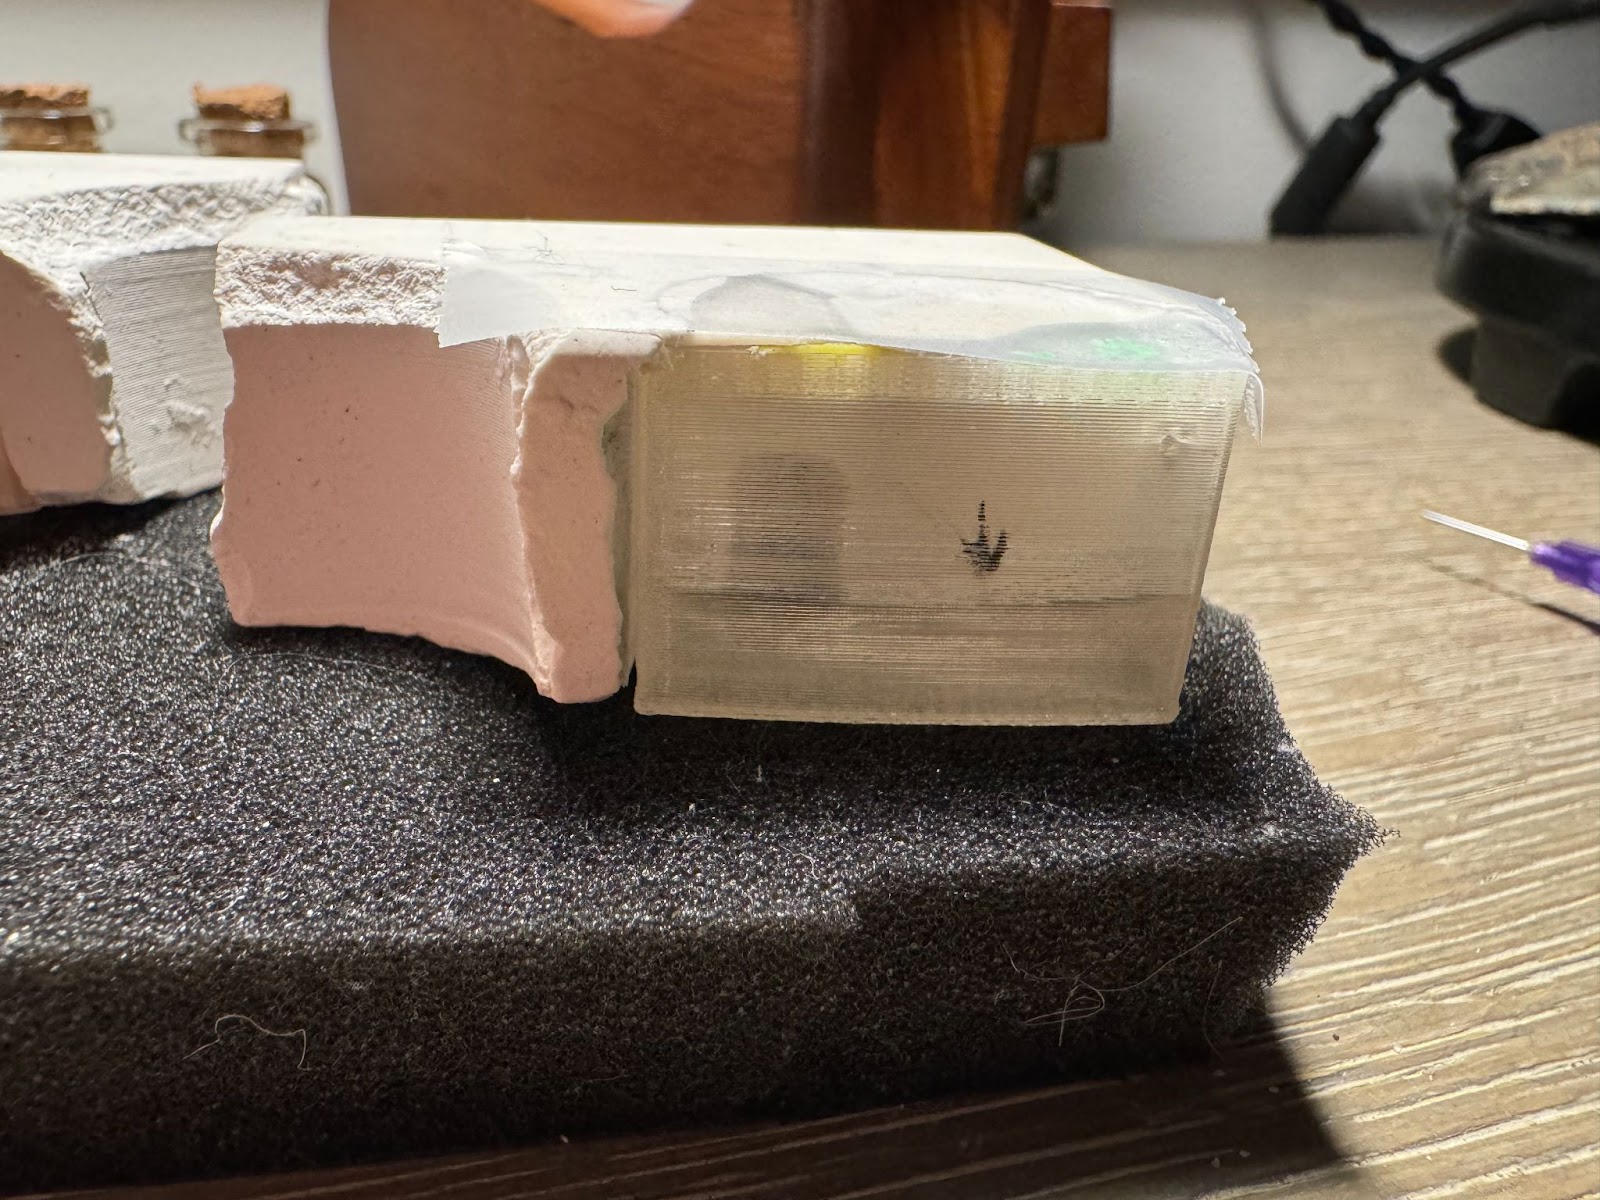
I've made three of these water towers so far, with the ones on the left looking a little different because I forgot to set the infill anchors to 0mm.
joR9KXJLh4FxWUTZ4YFHxhnRpL-sBvu80BvNnyr3
 
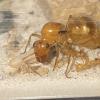
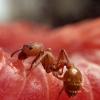
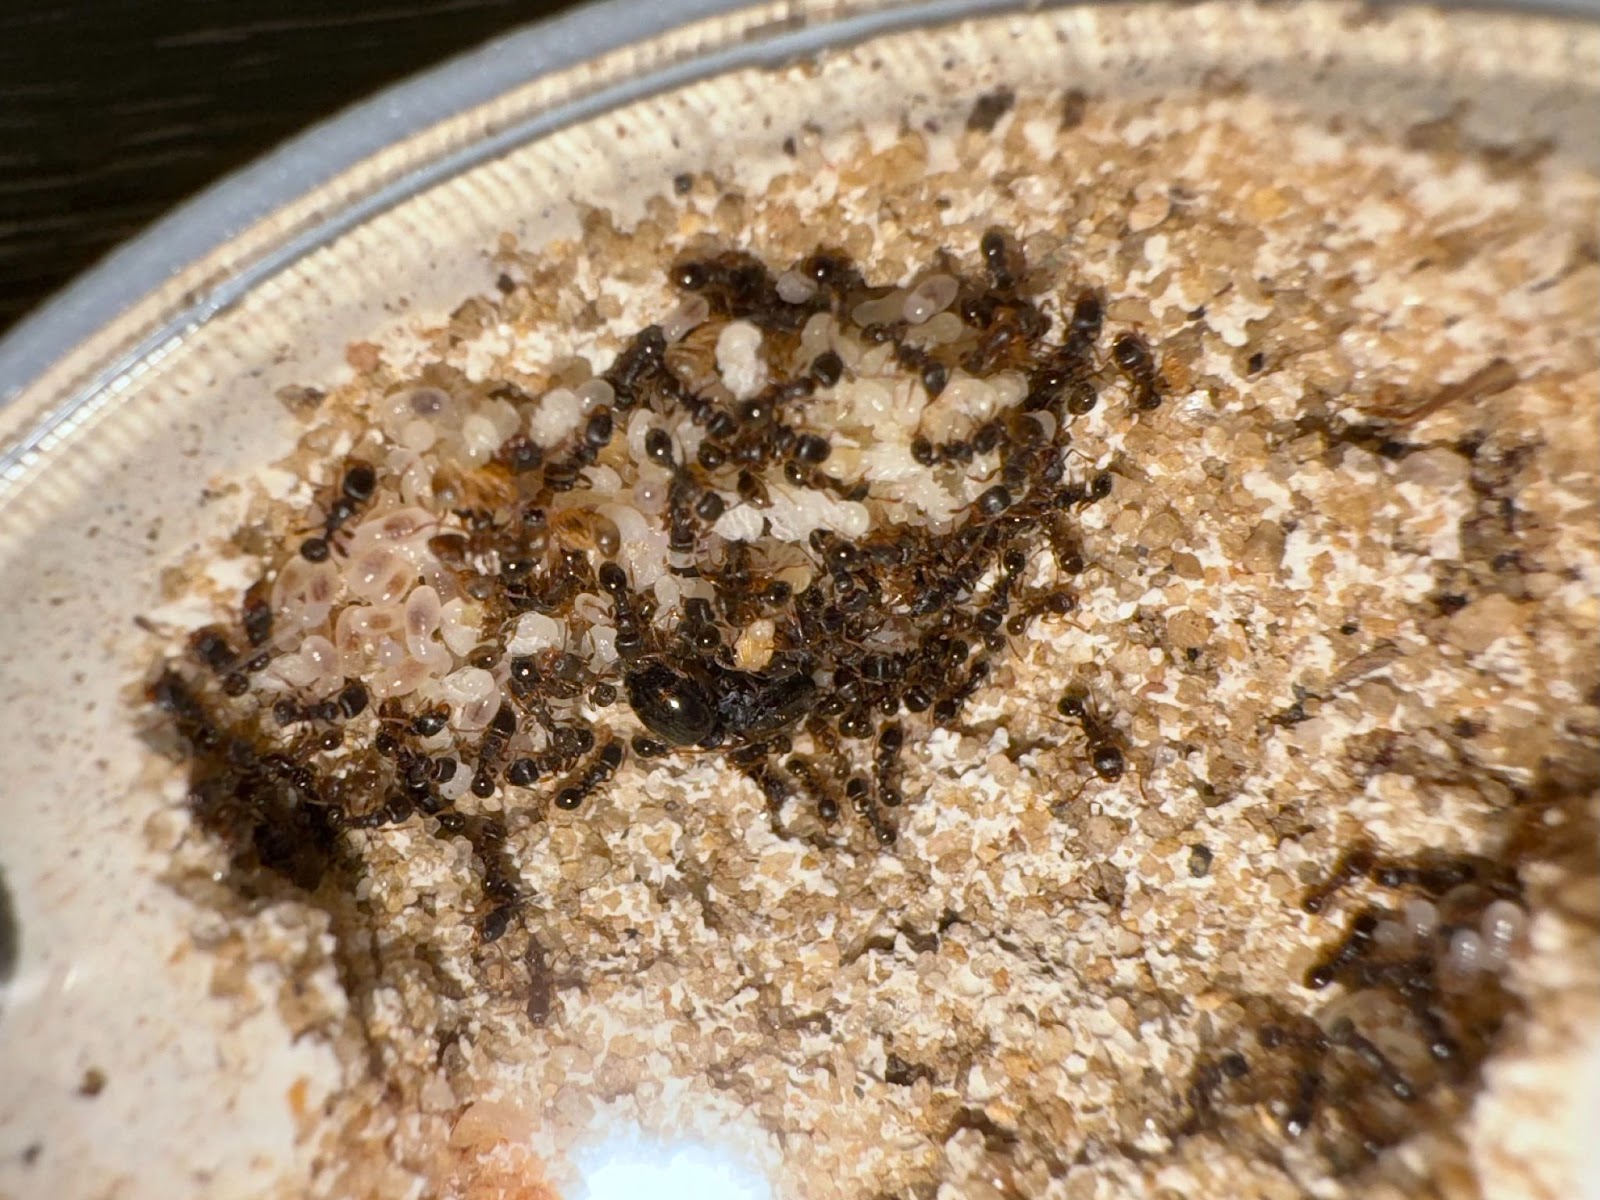
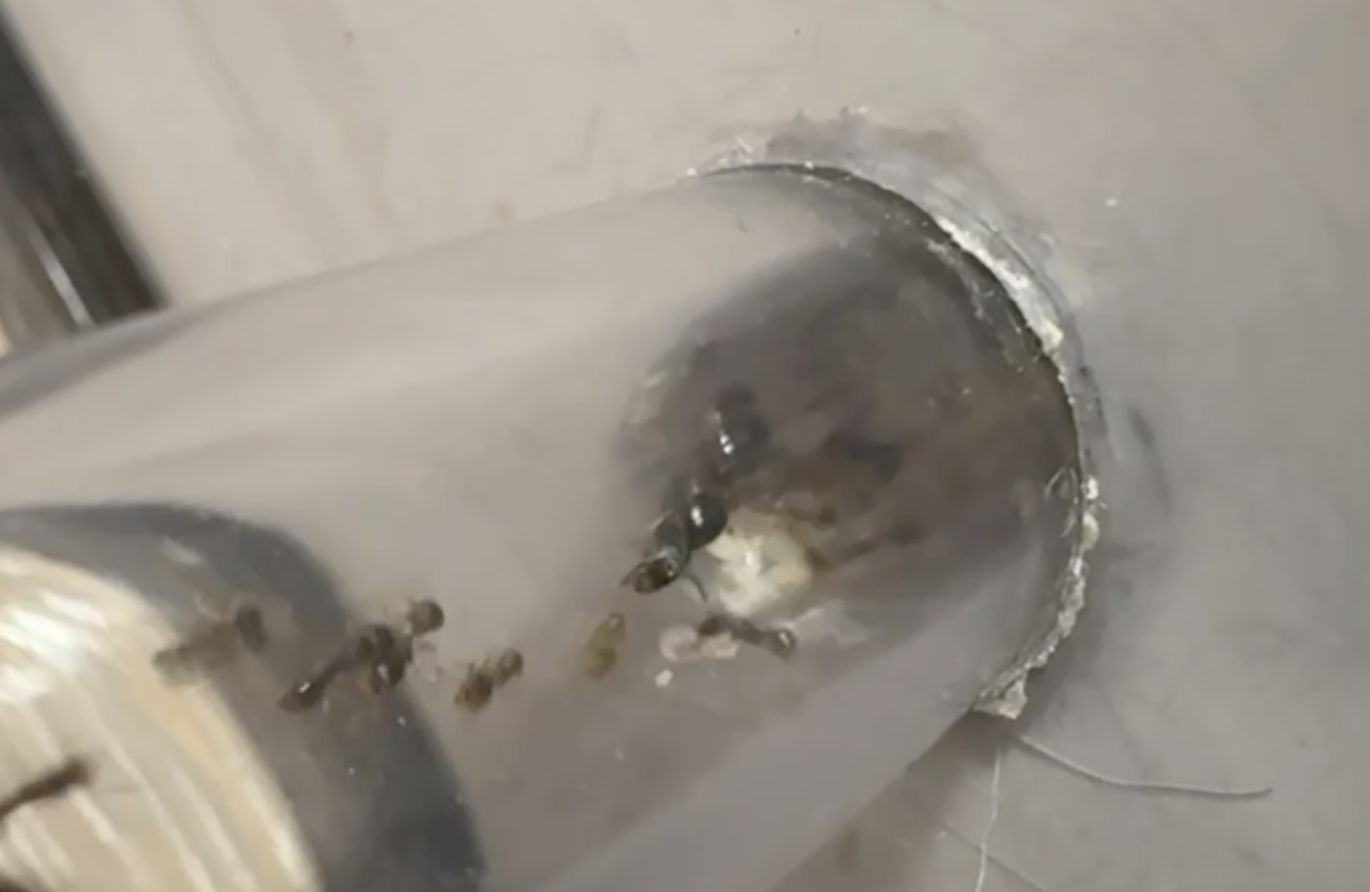
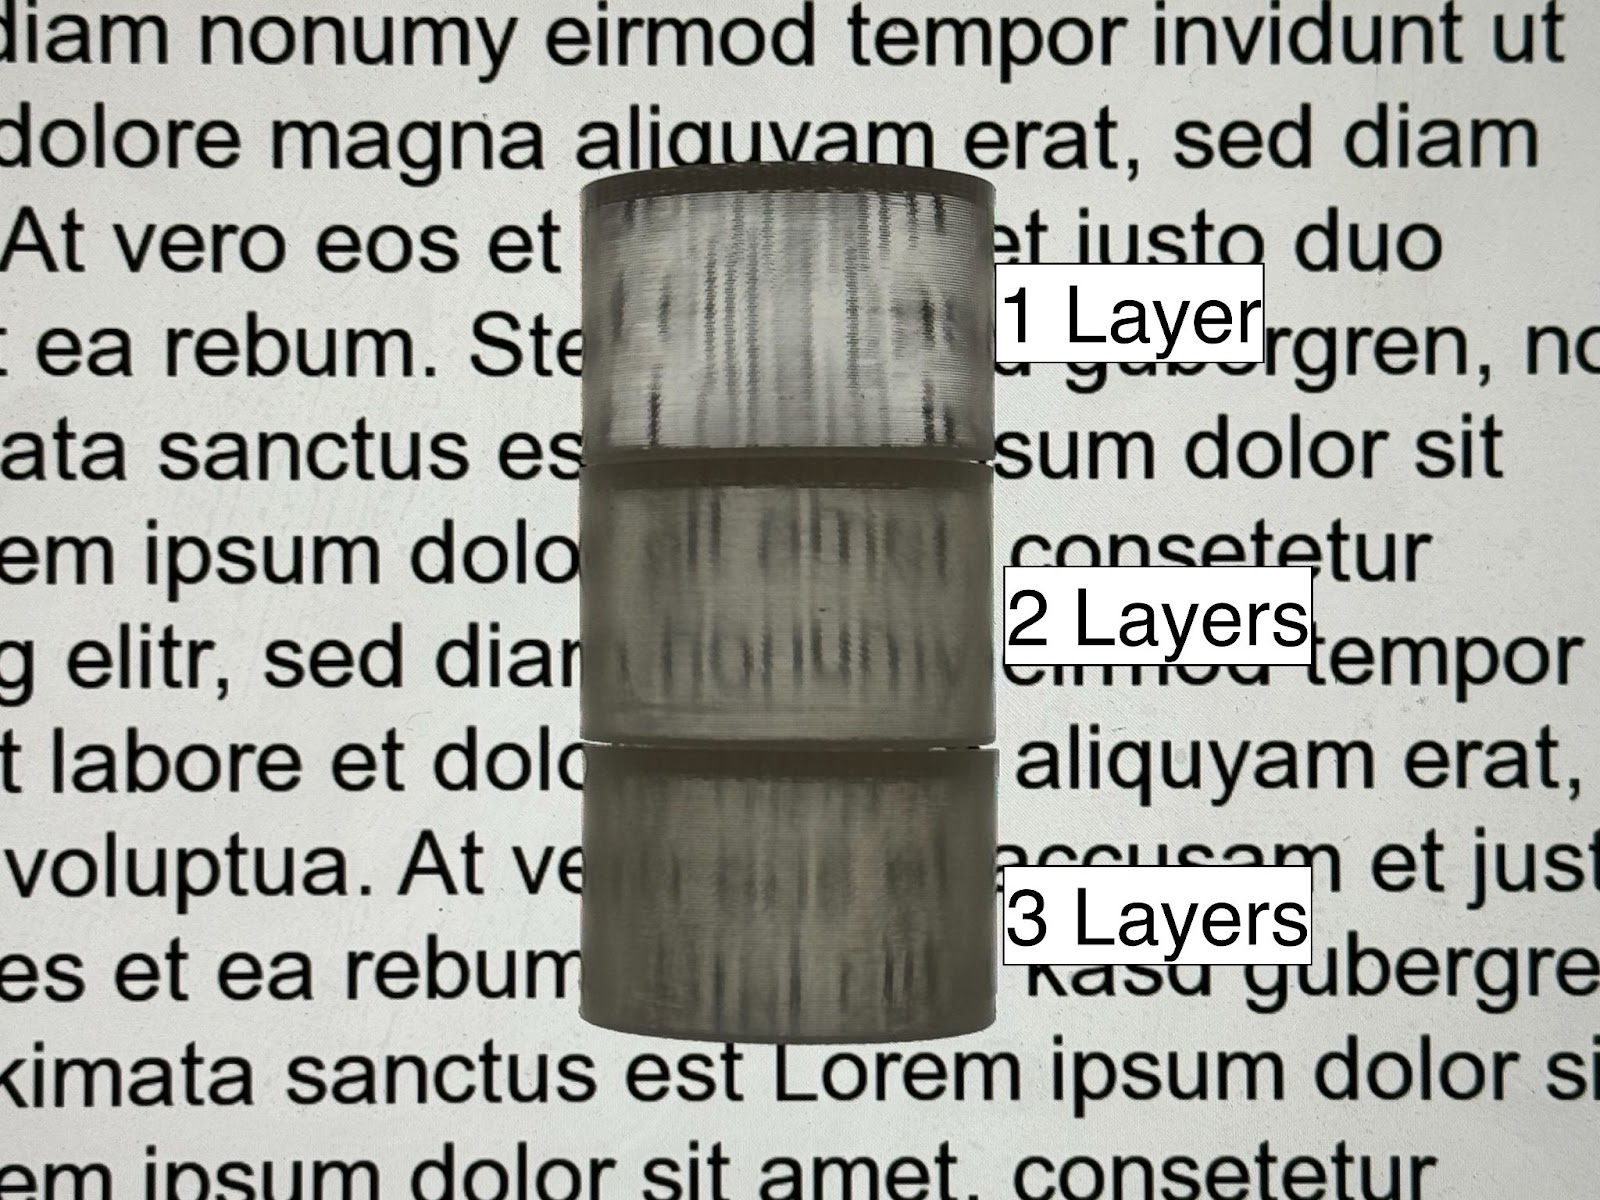
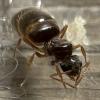
To give you an idea of the mesh density, here's a photo of a T. immigrans worker on top of one of these towers.
AzN65DUIkITui3HSxYBSe8MpbwcOdJ97SVfruECX
 
Future plans:
 
Now, I'm interested to hear your thoughts and advice on these water towers, especially if you see any potential issues. My main concerns are if the mesh density to big prevent ant eggs from falling through. I'm also worried the PLA material could have any drawbacks like if the ants can chew through the material. Feel free to offer any additional feedback, it is highly appreciated.
 
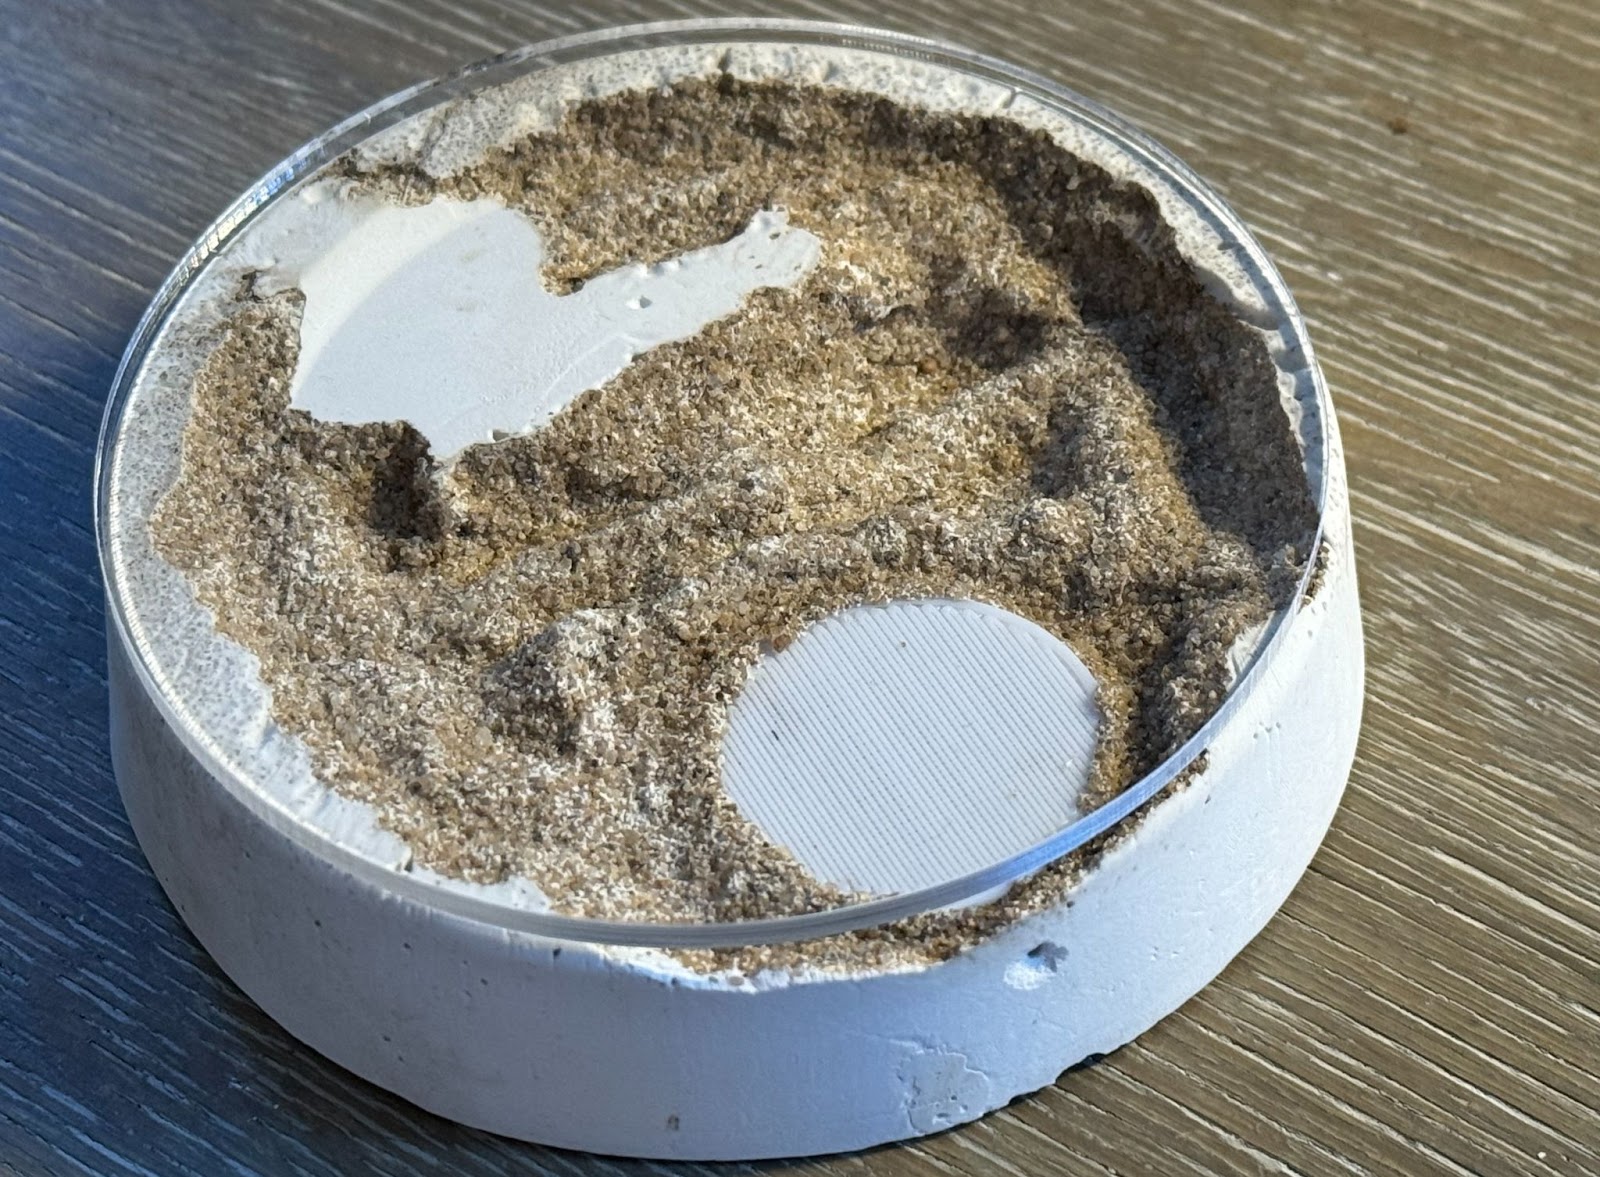
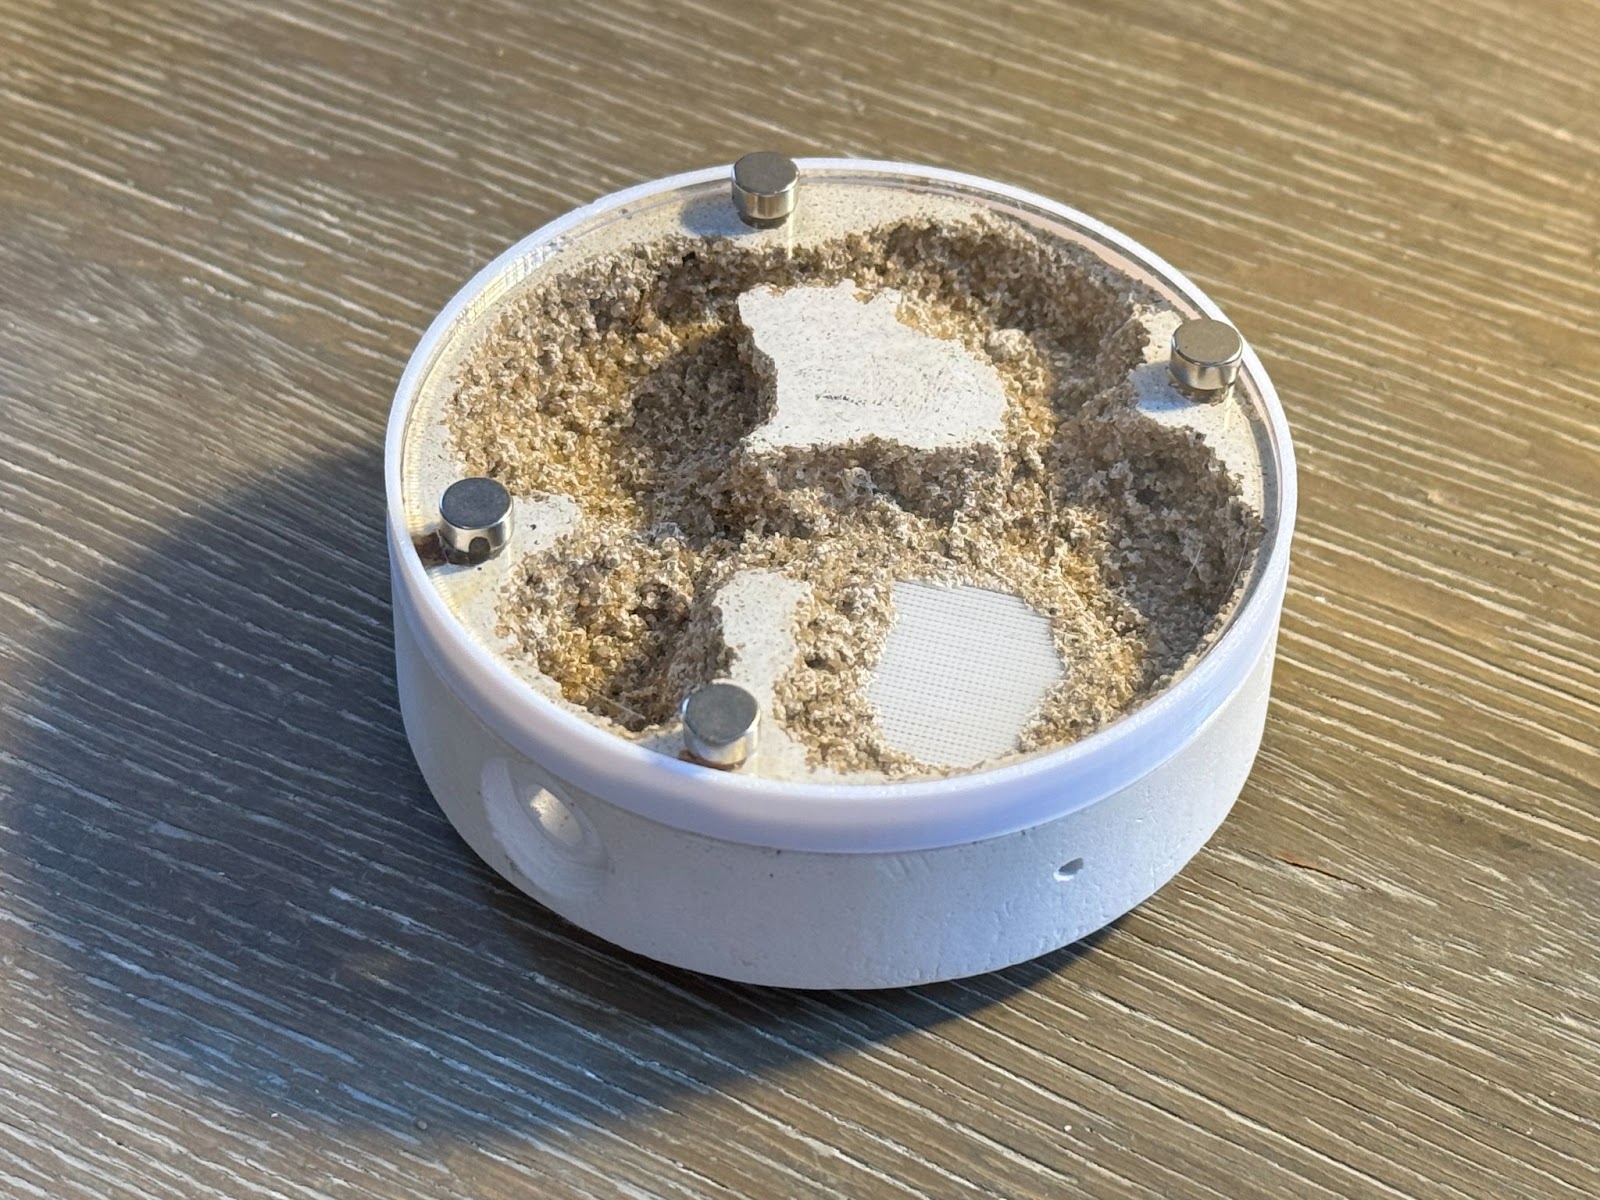
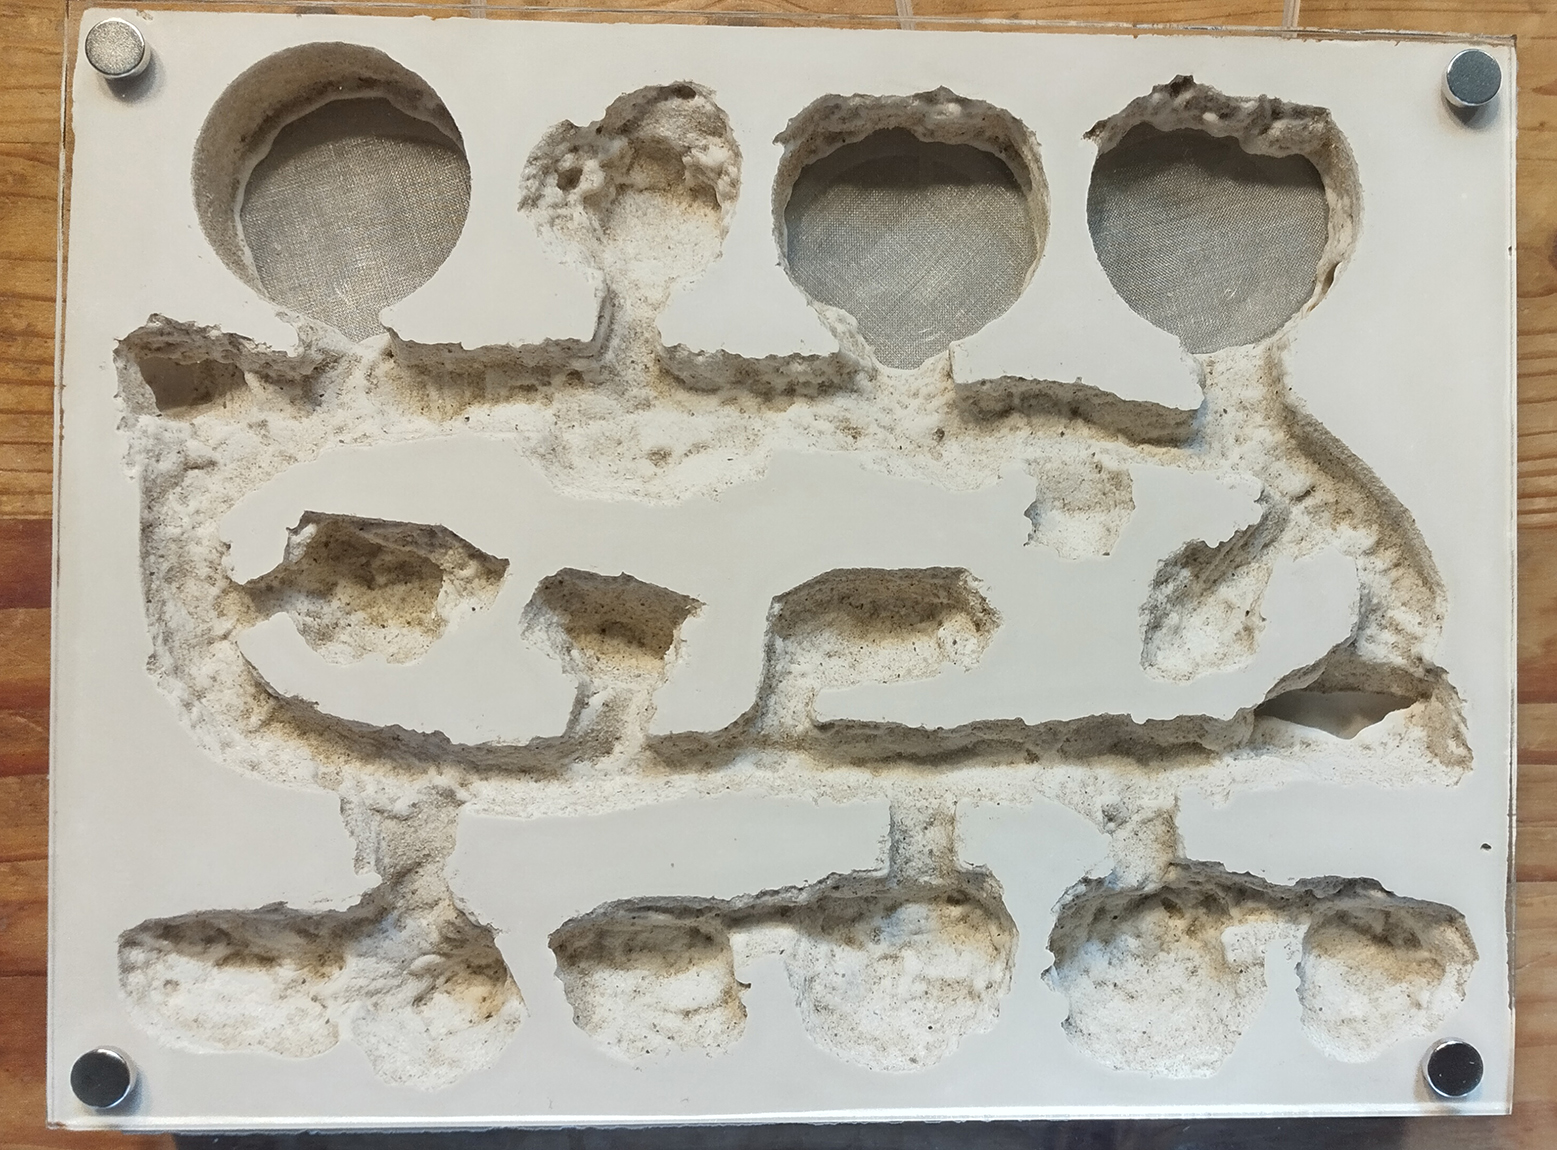
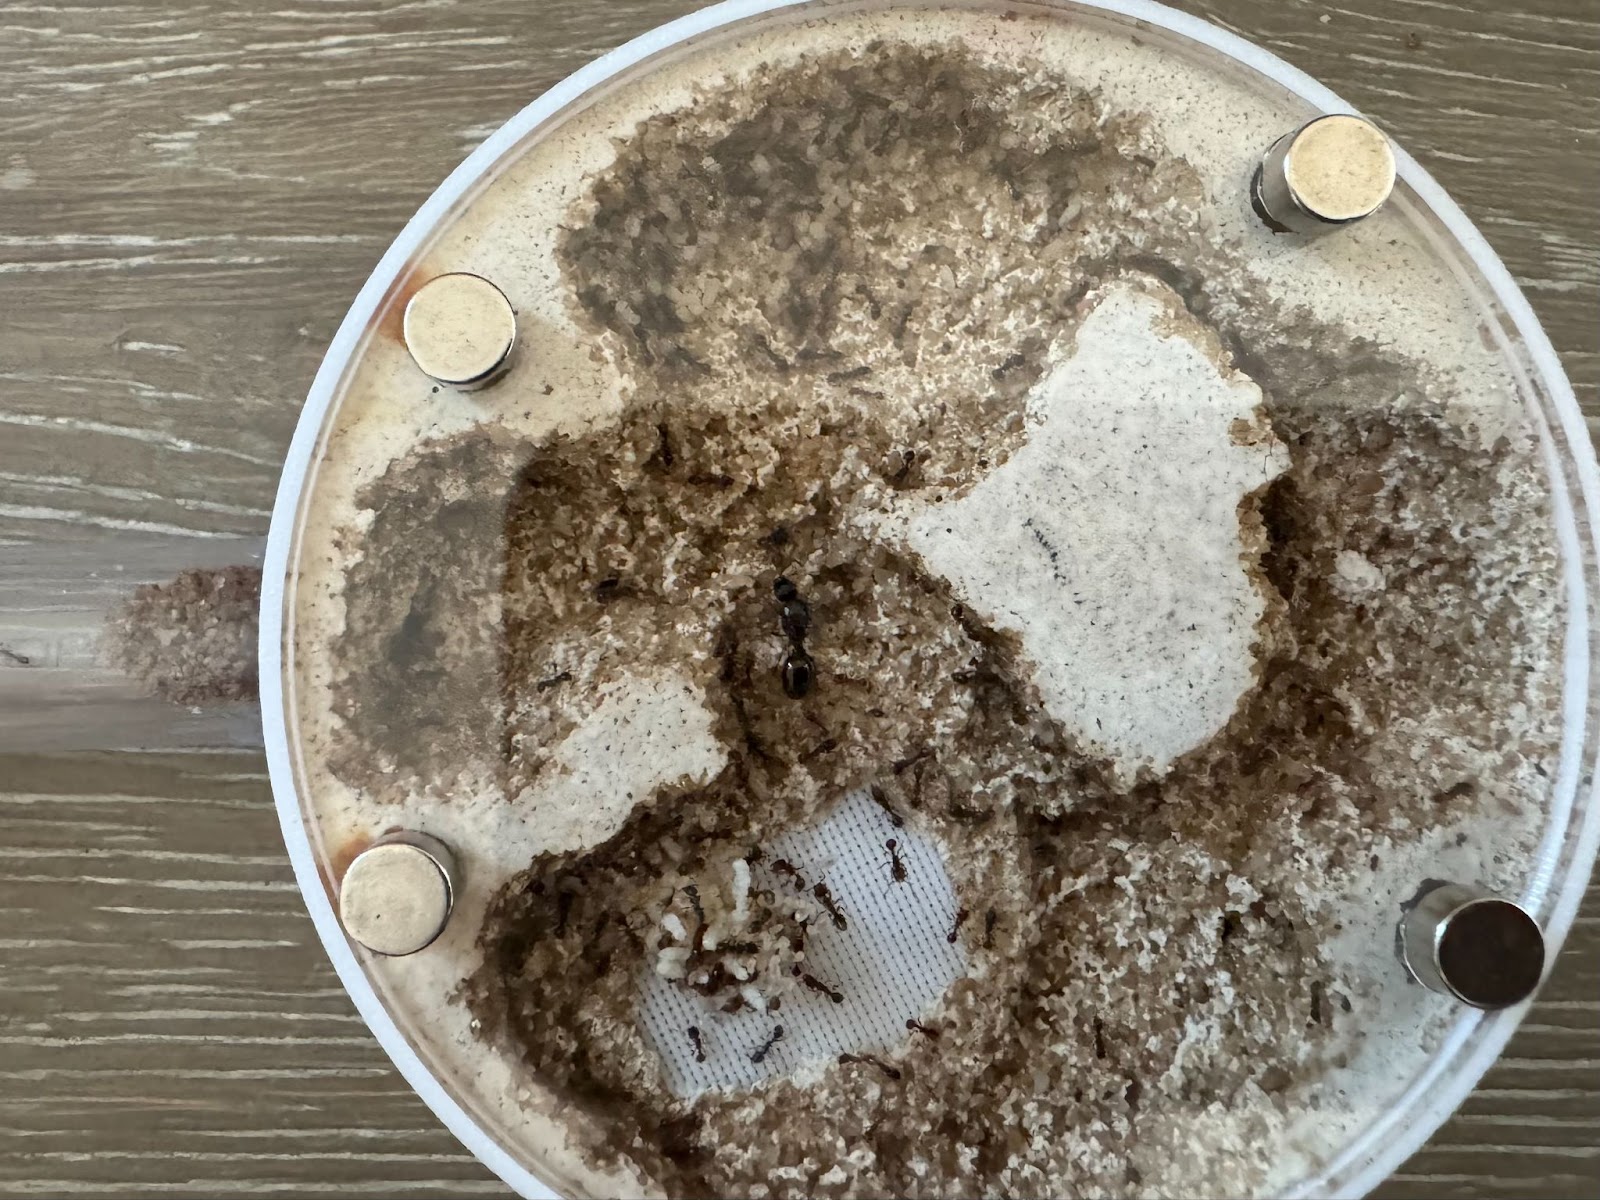
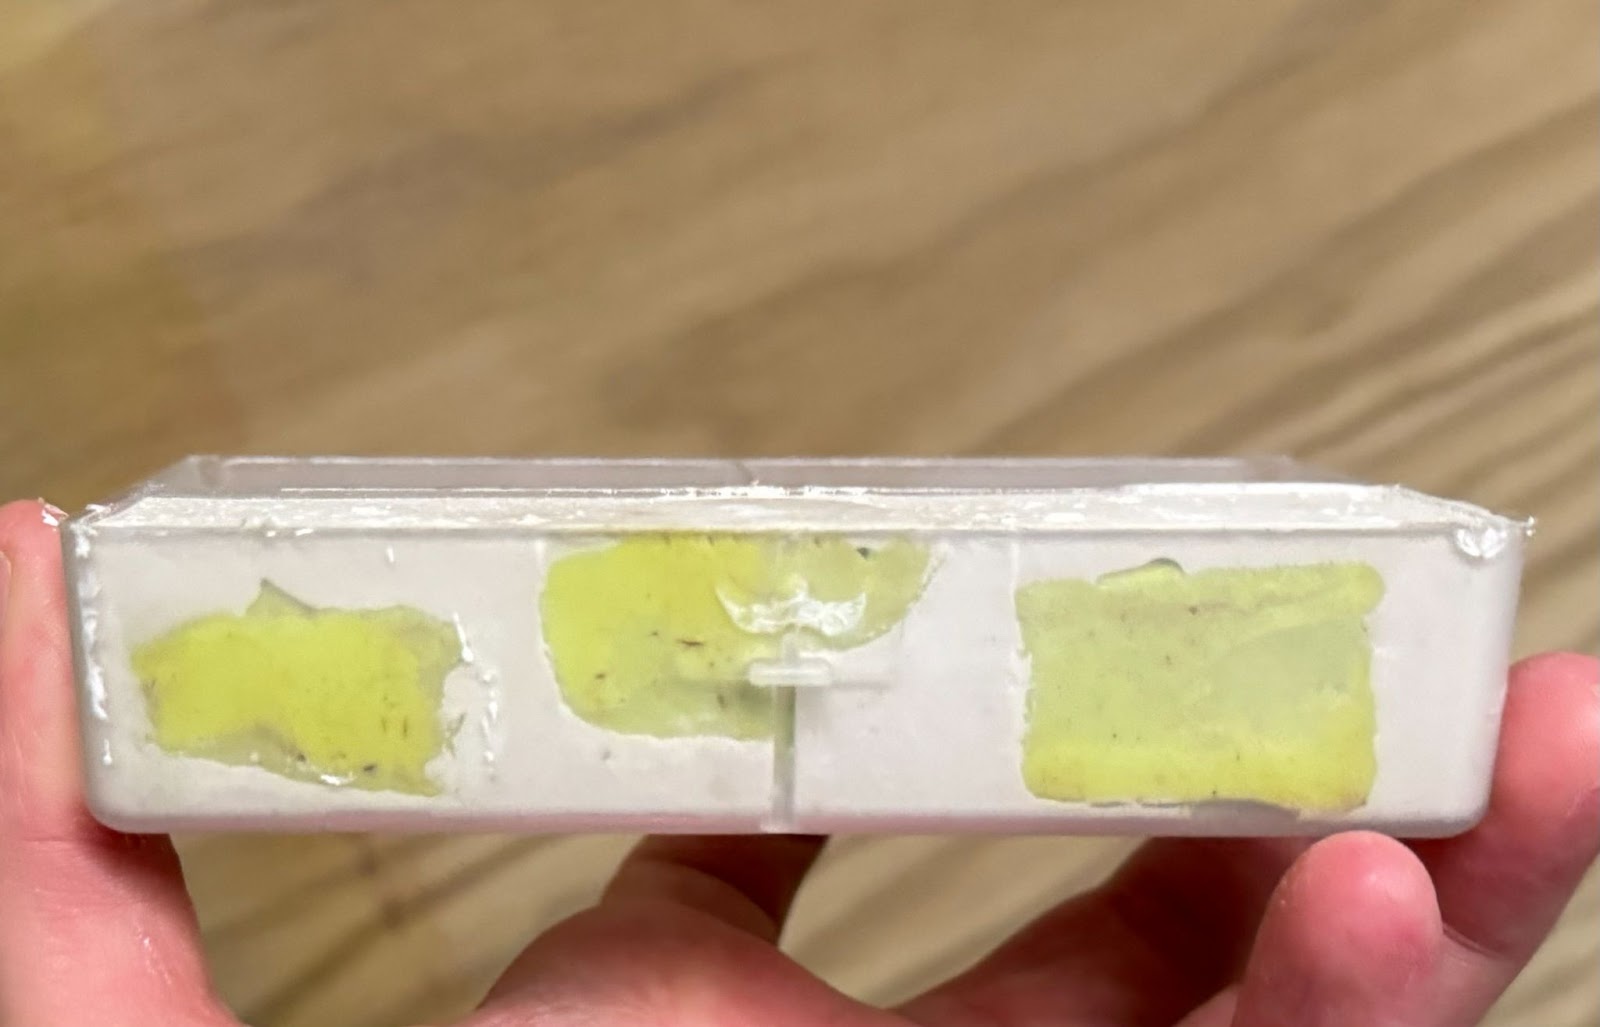
Tomorrow, I'm planning to create a perfect cast nest using these water towers to evaluate their durability, and I'll be sure to update this post with the results. There's still plenty of room for testing and enhancements with these water towers, I'm currently considering experimenting with different filaments and different slicer settings. Your input and insights will be invaluable as I continue to refine this project.


Thank you for reading this and I look forward to your feedback!


Edited by Voidley, December 2 2023 - 11:42 PM.

  • WealthyCow, ANTdrew, UtahAnts and 2 others like this

#2 Offline 100lols - Posted November 5 2023 - 12:40 AM

100lols

    Advanced Member

  • Members
  • PipPipPip
  • 412 posts
  • LocationSan Diego, CA
Sweet design. Interested to see them in the plaster nests. Hopefully some 3d print savy folks will chime in!
  • ANTdrew likes this

#3 Offline ANTdrew - Posted November 5 2023 - 2:48 AM

ANTdrew

    Advanced Member

  • Moderators
  • PipPipPip
  • 9,418 posts
  • LocationAlexandria, VA
Excellent tutorial. Thank you! I look forward to updates on their performance over time. This is how ant keeping progresses.
  • 100lols likes this
"The ants are a people not strong, yet they prepare their meat in the summer." Prov. 30:25
Keep ordinary ants in extraordinary ways.

#4 Offline Voidley - Posted November 15 2023 - 8:11 PM

Voidley

    Advanced Member

  • Members
  • PipPipPip
  • 62 posts
  • LocationNYC

Sorry for taking so long to update this. I did make the nests last weekend but it took a little while to get the lids from my school’s laser cutter. It was also just a pretty busy week in general, so sorry for the wait. Anyway, here are a few small updates I’d like to share.


First off, I just want to say that I’m really happy with these nests! I don’t think I mentioned it in my first post, but this is my first perfect cast nest, so I was sort of expecting the worst. That being said, one of the two actually turned out pretty decent. And I also made an outworks which I’m pretty happy with, too. I’ve got some pictures below where you can see how it looks.


Here’s the worse of the two nests. The sand was too wet so it didn’t have much height. The wet sand also spread to the side of the container so now there’s a big gap in the side. I figured that I could put it into an outworld for an all-in-one setup, but I’m not sure how I’ll fill the water tower. TBD I guess.

tA8_mvJEW8CA37-K0mp_zgLHcEsMQaGHHJ3hEnKA


The better nest. The container I used ended up leaving a little rabbet around the top so I 3D printed a little ring to seal the nest to the acrylic as you can see in the first photo. I also put some padded feet on the bottom to reduce vibrations in the nest. One tip is to use a flat drill bit to make the nest entrance. 

This way, they have a smaller hole for their nest but your vinyl tubing can still fit; it would probably work better if you leave more space around the chambers of your nest than I did.

CkW2X3DeP32CqF2y_d9M3-LMtwdG4pjTBEo8hRiQ

JvLHPGbiwgQ7Lj90lWdUlx7Uh7VJSxpkcFke6p3vimXGFVJ5KK49G9T-RId8w8CFx5HwFaSNQ63vmGT3


Here’s the outworld I made, nothing special but I’m pretty pleased with how it turned out. I’ll add wire mesh to the lid once I get some.

v_X2M80ga3FSwkgz5FD6SUak9CtK93REslg4dIIb

eQ6Tc4qoHm6ORUG90BBdaxOMRHNCmJqpmXTgJURO


My main takeaways for next time are that: a) I probably should have used finer sand or maybe even clay,  I should have left more space around the rim of the container, and c) I need to bury the water tower deeper into the sand so it pokes out a bit. I now understand why THA nests cost so much lol, there’s definitely an art to making these.


Anyways though, I did use the plastic water towers as I was making these. They pretty much acted like normal and I just put something heavy on them so they wouldn’t float during the pour. Unfortunately, the perfect cast made its way between the sand and the plastic so now I can’t see the side of the water tower—though I’m just glad that it didn’t completely cover the mesh. I’m pretty sure this was because my sand grains were too large. Even if I had used finer sand, though, I still probably should have buried the tower deeper into the sand so it would stick out more. I’ll have to remember that for when I try using clear filament to hopefully see the water level.


Aside from that issue, they seem to be working well. I’m keeping them under-filled so that they don’t flood, but something handy I’ve found about them is that they don’t slosh water. The mesh is fine enough that the surface tension keeps the water from getting out—even when I turn it upside down. (Note that water will still escape if you break the surface tension by touching it with something, so I doubt it will work like this with ant brood on top of it) I can’t measure the humidity inside, but I’m assuming it is pretty high like it was in the tupperware.


For my next step, I’m planning on testing the new nest with a T. immigrans colony I have. I know that they’ll grow out of it pretty quickly, but they’re the only ones not in hibernation right now. I am a little worried about accidentally overfilling the water tower and flooding them, or them chewing through the mesh, but I guess that is the point of doing this experiment. I'll update on them once they've moved in and also document if they like the water tower.


All that being said, I do have some other unfortunate news: my 3D printer broke. This is the other reason there haven’t been any updates so far. I’m trying to find the time to repair it but, hopefully, I’ll get it up and running sometime soon. Until then, don’t expect many more updates. I do have a cool idea to test out once it is fixed though so stay tuned!


Edited by Voidley, November 15 2023 - 8:18 PM.

  • UtahAnts, rptraut and 100lols like this

#5 Offline Full_Frontal_Yeti - Posted November 17 2023 - 10:08 AM

Full_Frontal_Yeti

    Advanced Member

  • Members
  • PipPipPip
  • 295 posts

I recently made my first perfect casts nests too. Made 6 got 2 i can use form it and i see a tip i can pass on for you here about sand use.


I bought this just to be really safe about the clean of the sand that i knew some of would stick and stay in the nest.

616-Y1VWqZL._AC_SL1500_.jpg


And it was just slightly moist. Not dry like hourglass sand, but just a bit moist not really wet.
It clumped up ok enogh to mold, but also wanted to break aprat real easy after wards.
I found trying to add water to get to the right wetness was hard and comonly had too wet a sand.


The trick that helped most was using the moist sand as is to mold with. And then using a small paintbrush to just paint a little water onto the molded sand.

these cheap ones, using some to sweep/clean sand off the glass, and others to paint water onto the modled sand.
716fmKzlC5L._AC_SL1500_.jpg


With this method i never had runny sand/too much water, but also not so dry that made parts would easily break up later before pour time.

highly roccomend both the bucket of sand and the paintbrush water method.

BUT keep in mind the wet painted sand will be smooth and the perfetcast will come out fairly smooth against it with little to no textture.
I see yours have a nice textture inside, if you want to keep that you need drier sand(at least on the outside) so the pour can get into the cracks.


Here's how mine came out using the paintbrush water method(image is big for details, other images are big caseu hotlink):
post-7513-0-23860300-1697823664.jpg


  • rptraut, 100lols and BleepingBleepers like this

#6 Offline WealthyCow - Posted November 25 2023 - 10:08 PM

WealthyCow

    Member

  • Members
  • PipPip
  • 25 posts
  • LocationOntario, Canada

I might start experimenting with this design too in 3d printed formicariums. I tested out a cylinder tower like you outlined in PLA, and it definitely was very effective in bringing up the humidity. My main concern is if ants chew through the filament top layer since it is so thin and only plastic.


#7 Offline Voidley - Posted December 2 2023 - 11:45 PM

Voidley

    Advanced Member

  • Members
  • PipPipPip
  • 62 posts
  • LocationNYC

Hey everyone,


Just a few updates on the latest developments with the Tetramorium colony and the ongoing water tower experiment.


I put the Tetramorium's test tube into the Outworld and covered the new nest, letting them gradually discover it. After just under a week, they had moved in. However, the water tower had some issues. Every time I filled it, it would drain quickly, and the ants weren't keeping brood on it, indicating that it was not providing much humidity. Fortunately, the Tetramorium are pretty tolerant of low humidity, so they're fine.


The ants right after the move. I had just filled up the water tower so they were keeping brood on it:

Ta5jU5dk7oeWPAMshjUJpE68tidrQuI6nUmR8koL

They soon moved to a different chamber of the nest:

SldnDkdd977AGIPBojd-7kPnoO6Kjfc-ea7z-UUR


The ants also seemed indecisive about staying in the nest and would often panic when exposed to light. They kept moving back and forth between the outworld and the formicarium, sometimes even staying in the PVC tube or under their feeding tray. I made a mistake when constructing the outworld by pouring sand onto the plaster before placing the rock. This created a pocket of loose sand underneath the rock, which the ants are currently excavating. They haven't moved there yet, but I'm worried they might. Currently, they're sitting at the mouth of the nest, right in the PVC tube. The silver lining to all this is that they can stay in the Outworld until I can replace the nest with a better design to address the leaking issue.


The ants nesting in the PVC tubing:

i3EssC17k-IZQoNHptIWA7LT-fwT_UZobOGodXXS

Their excavation underneath the rock:

fjPDxenEBsyvg-b_3dZSFxEacGC1lpJ_TIrmPiY1


This leads me to my next update about the water tower experiment. I printed three semi-circular water towers in clear filament with one, two, and three layers of thickness. The two-layer thick tower didn't stay in the plaster, so it was removed from the experiment. Although unfortunate, this was more of an observatory test than a quantitative one. My first note is that I strongly recommend printing these towers in clear filament with only one layer for optimal visibility. I also increased the mesh's thickness to two millimeters for extra durability. These changes have been included in the original post.


Visibility with different layer thicknesses:

gslQZFs734lVpPapnVtfBpSkGMIuhwnmKx5bCiZi

Build process where I lost the middle tower:

hgkZaWBwk9AJdBKfjfqqTojuUYyTY_8ZjM2bMMoK

m7YMUpz6_JsBMw3Xc96oUvMV9GZaYvm2QuNTM_6o

XFYY1ecMzqTQBi7PLm3onABQ-bwh7nGiTQOfkfAq


I filled the one-layer and three-layer thick towers with water to test if wall thickness affected water retention. I had a theory that water might be leaching through the layer lines, but this wasn't the case. The three-layer thick tower drained its water into the surrounding plaster within minutes, while the one-layer retained all its water perfectly. I’m not sure why the three-layer one lost its water. Refilling it after a few hours, it held water just like the one-layer and they have both been full for days. I suspect capillary action may be causing this, particularly when I accidentally sloshed the three-layer tower around during the initial filling. Maybe, once water touches the plaster initially, more water is then pulled up the layers like a ladder and sucked away. This might explain why the nest's water tower isn't holding water, although I'm unsure as I've replicated the sloshing without any issues.


The initial water level:

fzVlA45L1bDOVlI4T4xUa0R8cjUTLo8mk23KyjBn2TVqHAV5S85EMfzwSUEC4ohQJ4OEmLklSnPBXK-v

One day later the three is empty and the one has only dropped a little bit

6FlMHrKiG4sQ5aaIjTmLwqXbyGfS28za5uwsXwHS40kfHK6XX-SoXxVS9WMgdjKJWNeG5xgcYG_3FH4A

This was the capillary action that drained the three-layer. Even after the water settled the wet patch continued to grow.

PeTfigFu94VacDrSN1n9YUL2vvvrMNL6oXERmjXA


My only other theory for the nest's water tower not holding water is related to how I filled it. Since the hole I drilled through the plaster to get to the water tower is not lined with plastic, if any water touches the plaster through the hole, then all of it gets leached away through capillary action. I don't have any evidence for this theory, but right now it's the only thing that makes sense to me. I am going to try and design a new nest with this idea in mind. I'll also make sure no plaster ends up on top of the mesh. Hopefully, this addresses the issues. If anyone has ideas on why this might be happening, please explain; it's been driving me nuts.


  • rptraut and 100lols like this

#8 Offline dspdrew - Posted December 4 2023 - 3:30 AM

dspdrew
  • LocationSanta Ana, CA

3D printing is very difficult to make water tight. Liquids will usually find their way through the print somewhere. Also if PLA is in contact with water it will eventually crumble.


  • 100lols likes this

#9 Offline Voidley - Posted December 4 2023 - 9:24 AM

Voidley

    Advanced Member

  • Members
  • PipPipPip
  • 62 posts
  • LocationNYC
It really depends on how well tuned your printer is. I haven’t had any trouble with water leaking so far. Maybe bump up the perimeters if you’re dealing with small holes, just remember that it sacrifices visibility even when using clear filament.

I also haven’t seen any problems so far with the PLA, but mine haven’t been in use very long. You might see better success with PETG—it has better layer adhesion making it more water tight and it also would probably fare better in water.

Edited by Voidley, December 4 2023 - 9:25 AM.

  • rptraut and 100lols like this

#10 Offline dspdrew - Posted December 4 2023 - 7:50 PM

dspdrew
  • LocationSanta Ana, CA

It would be a miracle, if you do not end up with one microscopic leak in a 3D printed container. it might take a while for the liquid to make its way through. This is why I have had to coat the bottoms of many of my ByFormica liquid feeders with CA glue.


PETG is what I print almost every thing with. It's a much more durable material and water really has no effect on it. That's why they make water bottles with it. Biodegradable material is never going to age well when it's exposed to water. I think PLA is best used for prototyping or printing trinkets and nicnacs (the stuff most 3D printing enthusiasts like to print). Another thing about PLA, is it has a very low melting point, so simply washing parts in hot water can warp and destroy them.


  • ANTdrew, rptraut and 100lols like this

#11 Offline antsriondel - Posted December 5 2023 - 7:15 AM

antsriondel

    Advanced Member

  • Members
  • PipPipPip
  • 915 posts
  • LocationRiondel British Columbia Canada.

It would be a miracle, if you do not end up with one microscopic leak in a 3D printed container. it might take a while for the liquid to make its way through. This is why I have had to coat the bottoms of many of my ByFormica liquid feeders with CA glue.


PETG is what I print almost every thing with. It's a much more durable material and water really has no effect on it. That's why they make water bottles with it. Biodegradable material is never going to age well when it's exposed to water. I think PLA is best used for prototyping or printing trinkets and nicnacs (the stuff most 3D printing enthusiasts like to print). Another thing about PLA, is it has a very low melting point, so simply washing parts in hot water can warp and destroy them.

I actually disagree. I have been testing with PLA and PLA+ and both have not shown any signs of warping over three months of testing. I have soaked them in hot water, put water in their hydration hole, and have put PLA on a heat cable for the entire three months with no warping. I believe this is caused by the brand of PLA and not every PLA brand. This is just in my experience


Edited by antsriondel, December 5 2023 - 7:16 AM.


#12 Offline dspdrew - Posted December 5 2023 - 9:20 PM

dspdrew
  • LocationSanta Ana, CA


It would be a miracle, if you do not end up with one microscopic leak in a 3D printed container. it might take a while for the liquid to make its way through. This is why I have had to coat the bottoms of many of my ByFormica liquid feeders with CA glue.


PETG is what I print almost every thing with. It's a much more durable material and water really has no effect on it. That's why they make water bottles with it. Biodegradable material is never going to age well when it's exposed to water. I think PLA is best used for prototyping or printing trinkets and nicnacs (the stuff most 3D printing enthusiasts like to print). Another thing about PLA, is it has a very low melting point, so simply washing parts in hot water can warp and destroy them.

I actually disagree. I have been testing with PLA and PLA+ and both have not shown any signs of warping over three months of testing. I have soaked them in hot water, put water in their hydration hole, and have put PLA on a heat cable for the entire three months with no warping. I believe this is caused by the brand of PLA and not every PLA brand. This is just in my experience


I posted a video of what happens to PLA after being in contact with water for a long time. I've been doing this for many years not months. I would caution anyone about buying formicariums made from PLA. Melting points are not subjective.


  • rptraut and 100lols like this

#13 Offline ReignofRage - Posted December 5 2023 - 9:46 PM

ReignofRage

    Advanced Member

  • Members
  • PipPipPip
  • 671 posts
  • LocationCalif.

I second PLA being far inferior for holding water or just having an application with water. My PLA liquid feeders started to break and seep up some water due to soaking them for short periods in warm water when cleaning them. I haven't had warping, but the material physically breaking down does occur.


  • rptraut and 100lols like this

#14 Offline ANTdrew - Posted December 6 2023 - 3:10 AM

ANTdrew

    Advanced Member

  • Moderators
  • PipPipPip
  • 9,418 posts
  • LocationAlexandria, VA
It’s so easy and effective to make water towers by melting mesh onto a plastic cup. I say just skip the 3D printing for this application altogether.
  • 100lols likes this
"The ants are a people not strong, yet they prepare their meat in the summer." Prov. 30:25
Keep ordinary ants in extraordinary ways.

#15 Offline Voidley - Posted December 23 2023 - 1:22 PM

Voidley

    Advanced Member

  • Members
  • PipPipPip
  • 62 posts
  • LocationNYC

Alright, so I’ve been trying to come up with some way to make this design work and I think I’ve hit a dead end. One thing I tested was 3d printing just the mesh and it would go onto a tea light candle to solve the water leaking and make the water tower clear. The model looked like this (shown upside down):

Screenshot 2023-12-23 at 3.31.58 AM.png

My idea is to fill the channel with glue or silicone and then smush the candle holder into place. This would probably work, but it just feels sort of tedious and impractical and I might as well just buy a roll of wire mesh.


My other idea was to somehow incorporate the water tower into the nest, which would look something like this:

Screenshot 2023-12-23 at 3.58.51 AM.png

But this design is subject to the same issue of having the plaster absorb water through the 3d printed walls.


So, the next logical step is to avoid having the water come into contact with the plaster. I thought I could put the mesh on the floor of the nest, and then maybe use the base as the water reservoir. I was really liking this idea, but then I realized that I had just reinvented Esthetic Ants’ 3d printed nest…

Screenshot 2023-12-23 at 4.07.29 AM.png

So yeah. I might try to design my own version of this idea, but really it already exists. I’ll try to keep thinking of other applications for this method, so if anyone has any feel free to share.


  • 100lols likes this


0 user(s) are reading this topic

0 members, 0 guests, 0 anonymous users