webcam?
Yeah, it was linked in my Myrmecocystus mexicanus journal.
http://antcam.gyg.cc:8081/
I usually have it off between 5:00 pm and midnight because it slows my computer down too much
- Formiculture.com
- Forums
- Gallery
- Members
- Member Map
- Chat


Member

webcam?
Yeah, it was linked in my Myrmecocystus mexicanus journal.
http://antcam.gyg.cc:8081/
I usually have it off between 5:00 pm and midnight because it slows my computer down too much

Member
Member
webcam?
Yeah, it was linked in my Myrmecocystus mexicanus journal.
http://antcam.gyg.cc:8081/
I usually have it off between 5:00 pm and midnight because it slows my computer down too much.
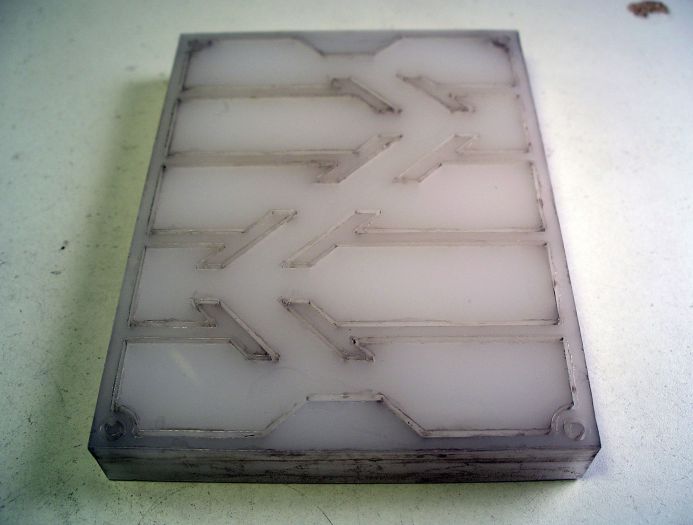
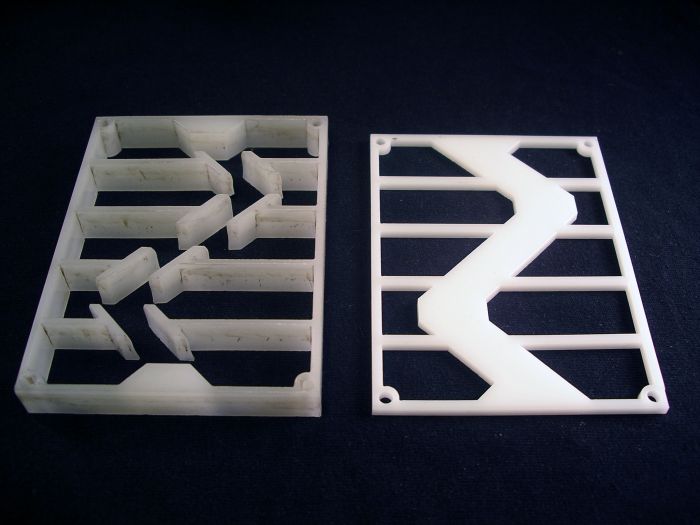
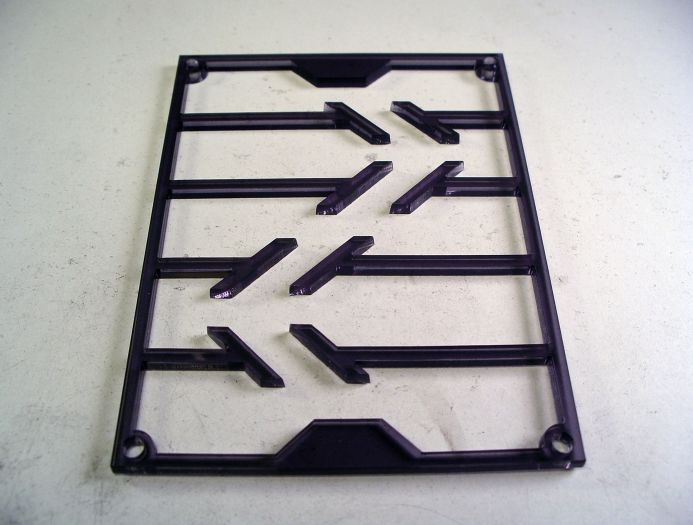
The other day, I got access to a laser cutter. I didn't actually run it myself, but I was about as close as you could get to running it. This was perfect for making a couple prototypes with some scrap pieces of acrylic I bought from the plastic store. Working this closely with the laser cutter made me realize what changes I could make to the specific design that's actually fed into the laser cutter, to help get much better results.
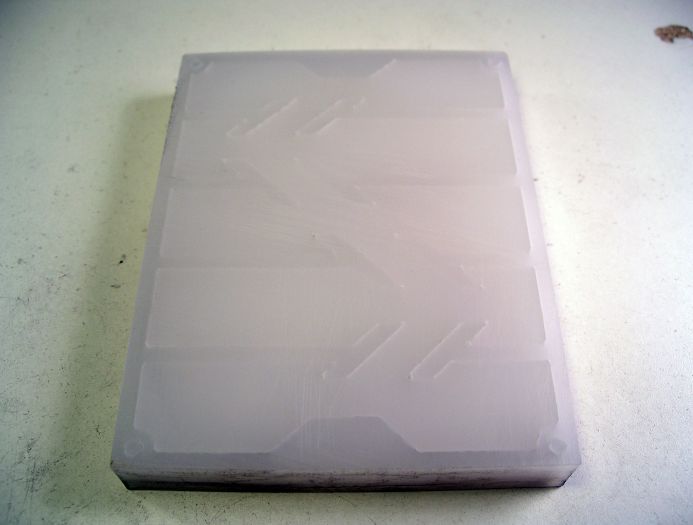
This laser cutter was 75 watt, which had a hard time cutting through the 12mm piece of acrylic. It took about four passes to get all the way through it. Here's what it looked like when it didn't make it all the way though.
Here's the one that we made it all the way through. along with one of the thinner chamber extension plates next to it. You can see how nicely it cuts much thinner pieces of acrylic.
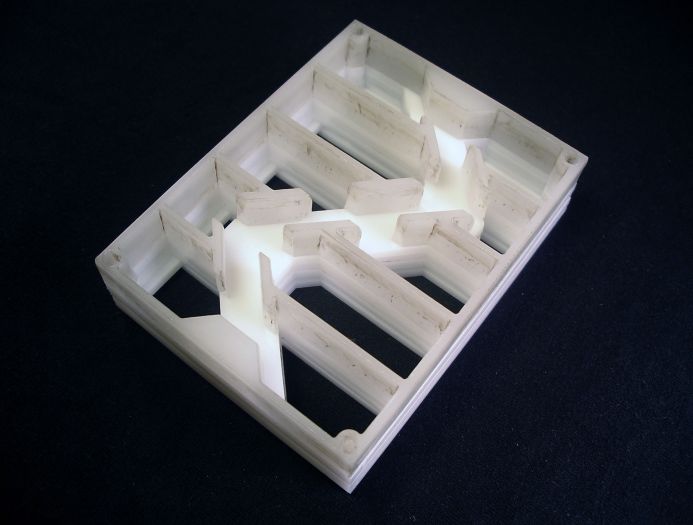
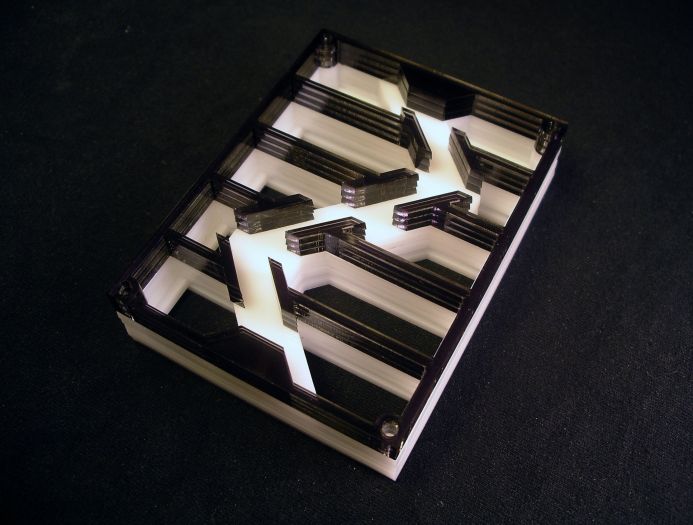
I also cut the main tunnel & chamber design out of a few 3mm smoked grey pieces of acrylic I found. I'll just weld all three of these together to create one much cleaner cut 9mm piece for now.
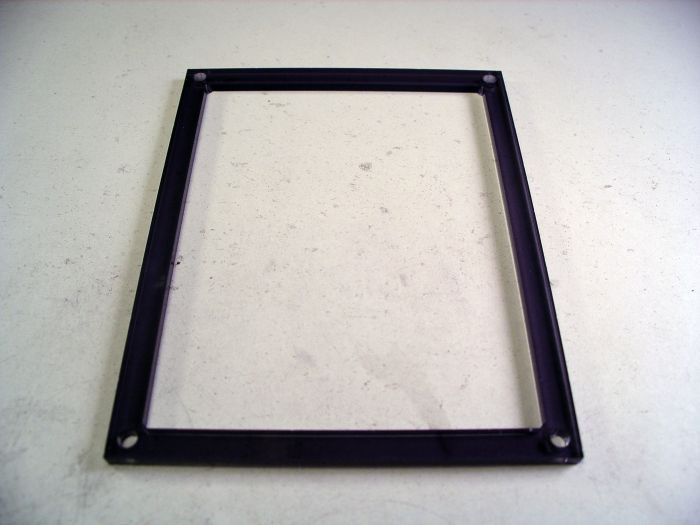
Here's the back brace that the bolts will screw into, holding all the pieces together tightly.
Finally, here's an idea of what the nest will look like, just without the block of Ytong in back. never mind all the random colors, and levels of opacity, these were just scraps I was working with for the prototype.
Advanced Member

Drew, how are you measuring humidity of the Yong? It's my understanding that the ideal humidity for Myrmecocystus Mexicanus is between 50%-70%. At what humidity have you had the most success at with this species?
I wasn't measuring humidity in Ytong. That was the humidity range in my apartment. I have not measured my success with this species based on humidity.
Springtails? Do the ants eat them? Are they good for the colony? What is your reasons for adding springtails?
webcam?
Yeah, it was linked in my Myrmecocystus mexicanus journal.
http://antcam.gyg.cc:8081/
I usually have it off between 5:00 pm and midnight because it slows my computer down too much.
Do you still have your antcam?
No.
Member
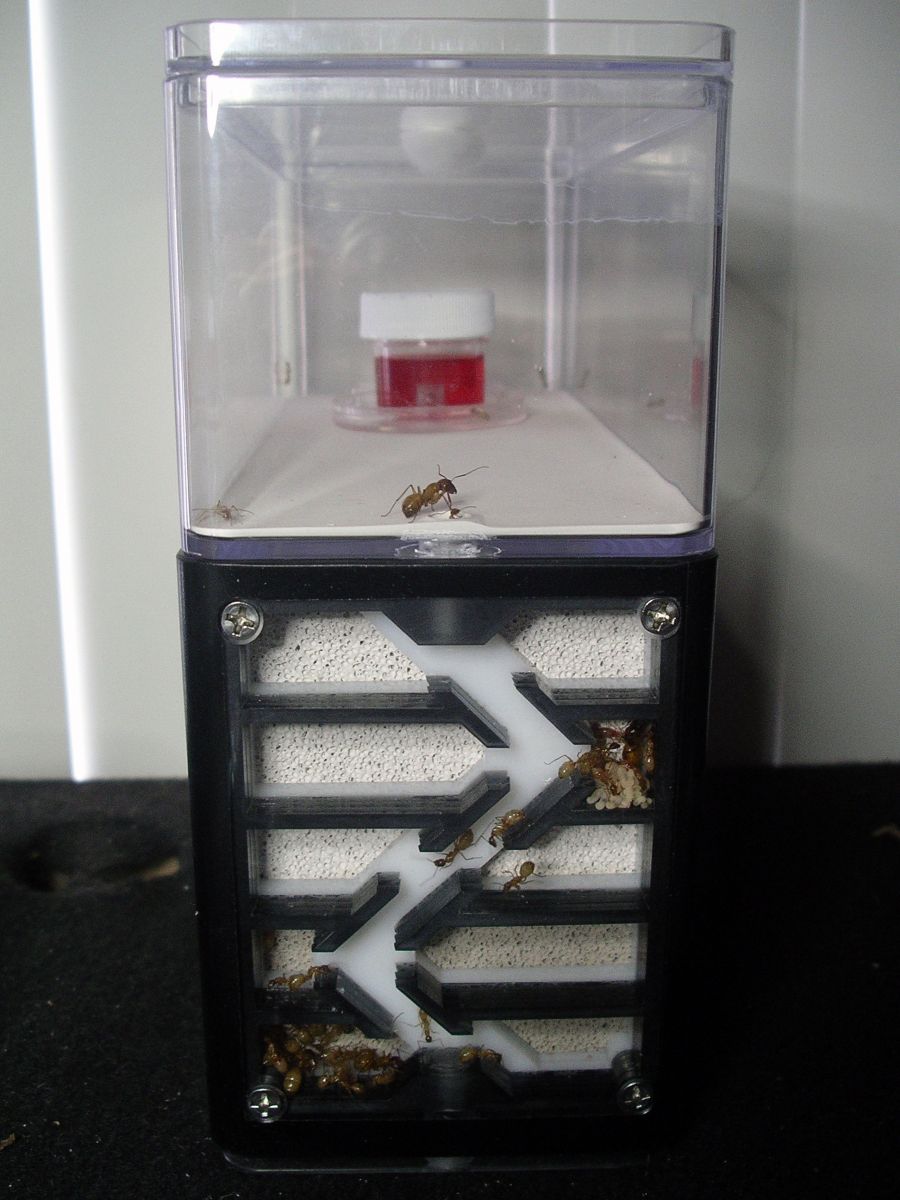
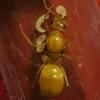
Here it is after moving my Camponotus semitestaceus colony into it. It's funny they moved the queen and all the brood into one of the smallest chambers.
Member
Drew, these are great journalsite, thanks. I keep reading a bit every day, thanks for all the great info. PS do keep the crickets live until you are ready to feed them to the ants? Then you make them lame or kill them, do the honeypots dip and then feed them to the ants?
I didn't completely understand the last part of your question, but I think the answer is yes.
Advanced Member

Great journals, it amazes me how much work you put into making formicariums perfect for your ants. I was wondering, do you use distilled water or tap water for your ants? I know some ant keepers like to use distilled water just to be on the safe side, but tap water should be fine. I was wondering what you did with your ants because it would take a lot of distilled water to support this many colonies, and that would be a little expensive. Also, did you ever find a replacement container for these or a different site that sells them?
Edited by AntsCalifornia, April 13 2018 - 5:14 PM.
I just use plain bottled water. No I have not found replacement containers. I have not worked on this design in a long time.
It's been about seven years since I last updated this thread. If I didn't mention it anywhere else, I actually sold one of these prototypes along with the Novomessor colony I had in it years ago. I had the two remaining prototypes of these laying around for a while and recently decided to make use of them again. The last time I used them, I know they had some problems.
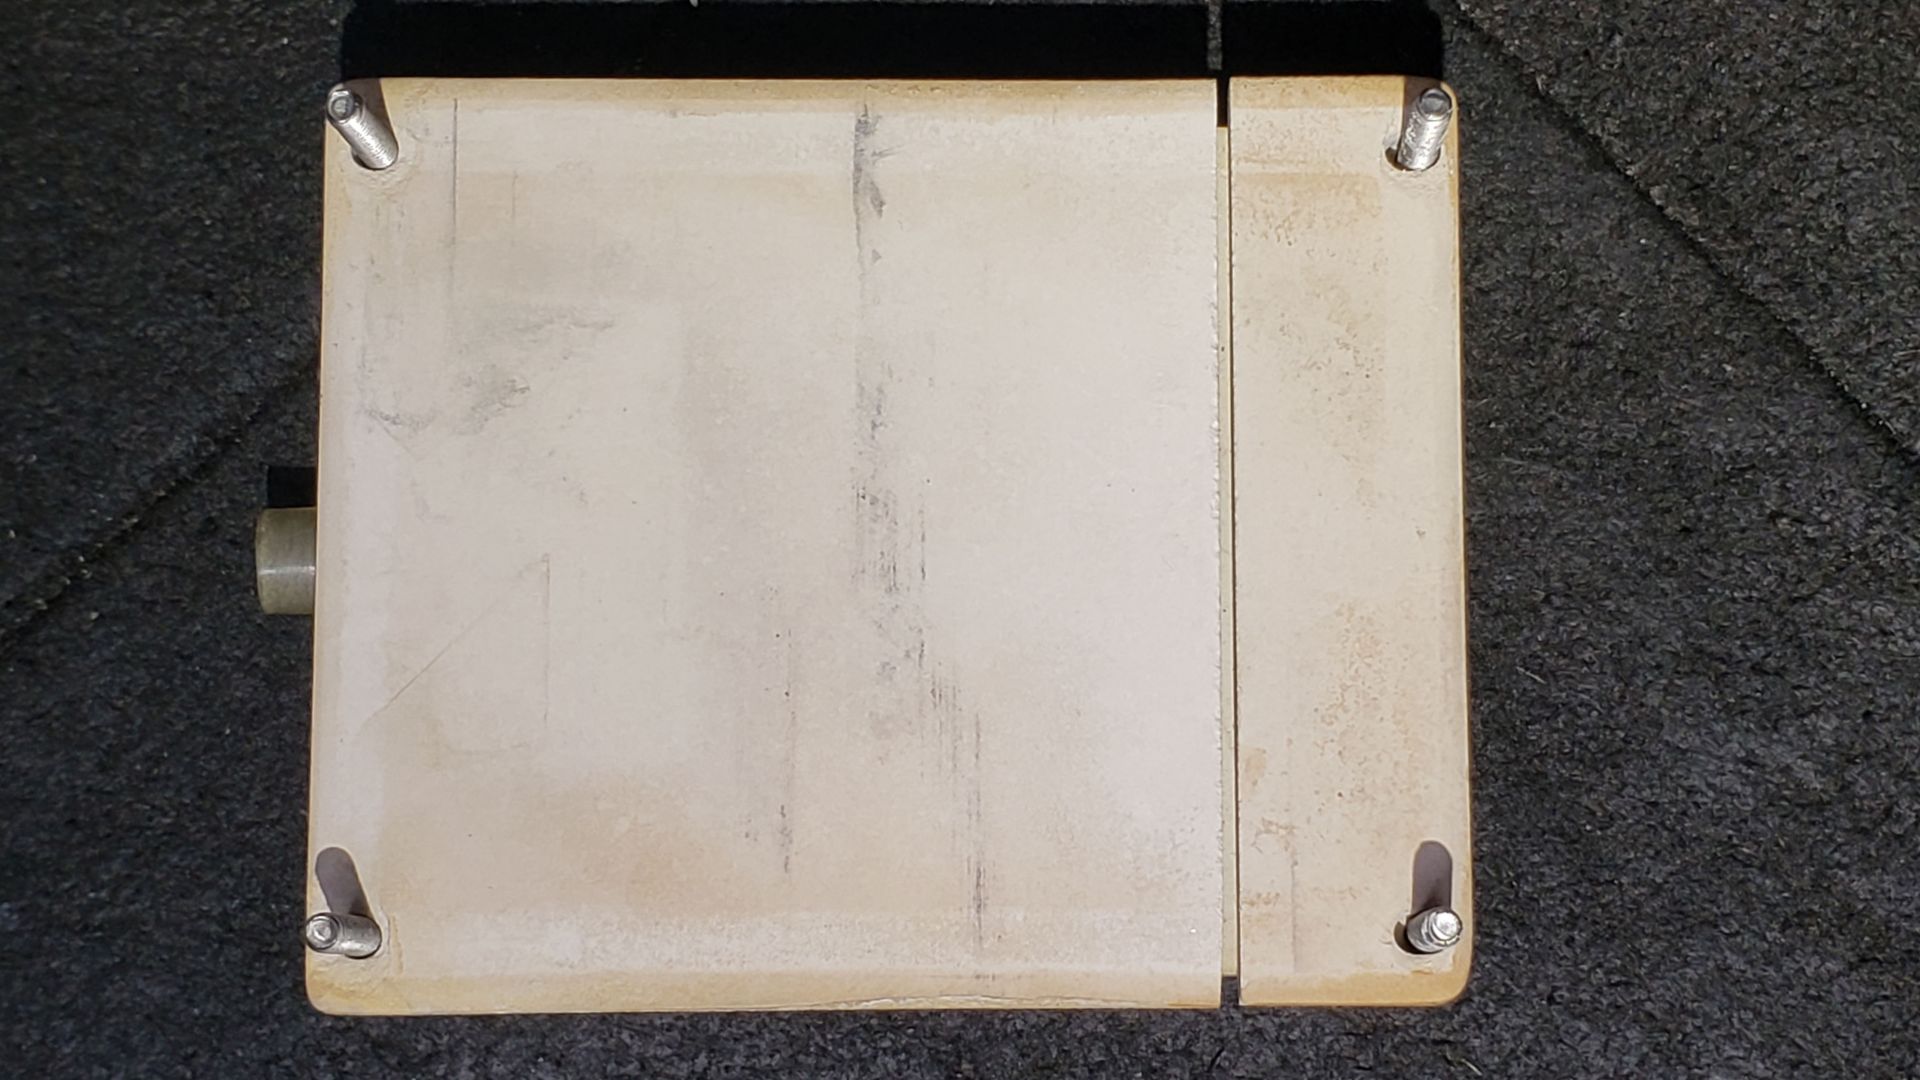
One of them was the one with the divided back plate. Somewhere along the way, I cut the very bottom segment off and used a slightly thicker tile for some reason. Unfortunately, I can't remember what the reason for this was.
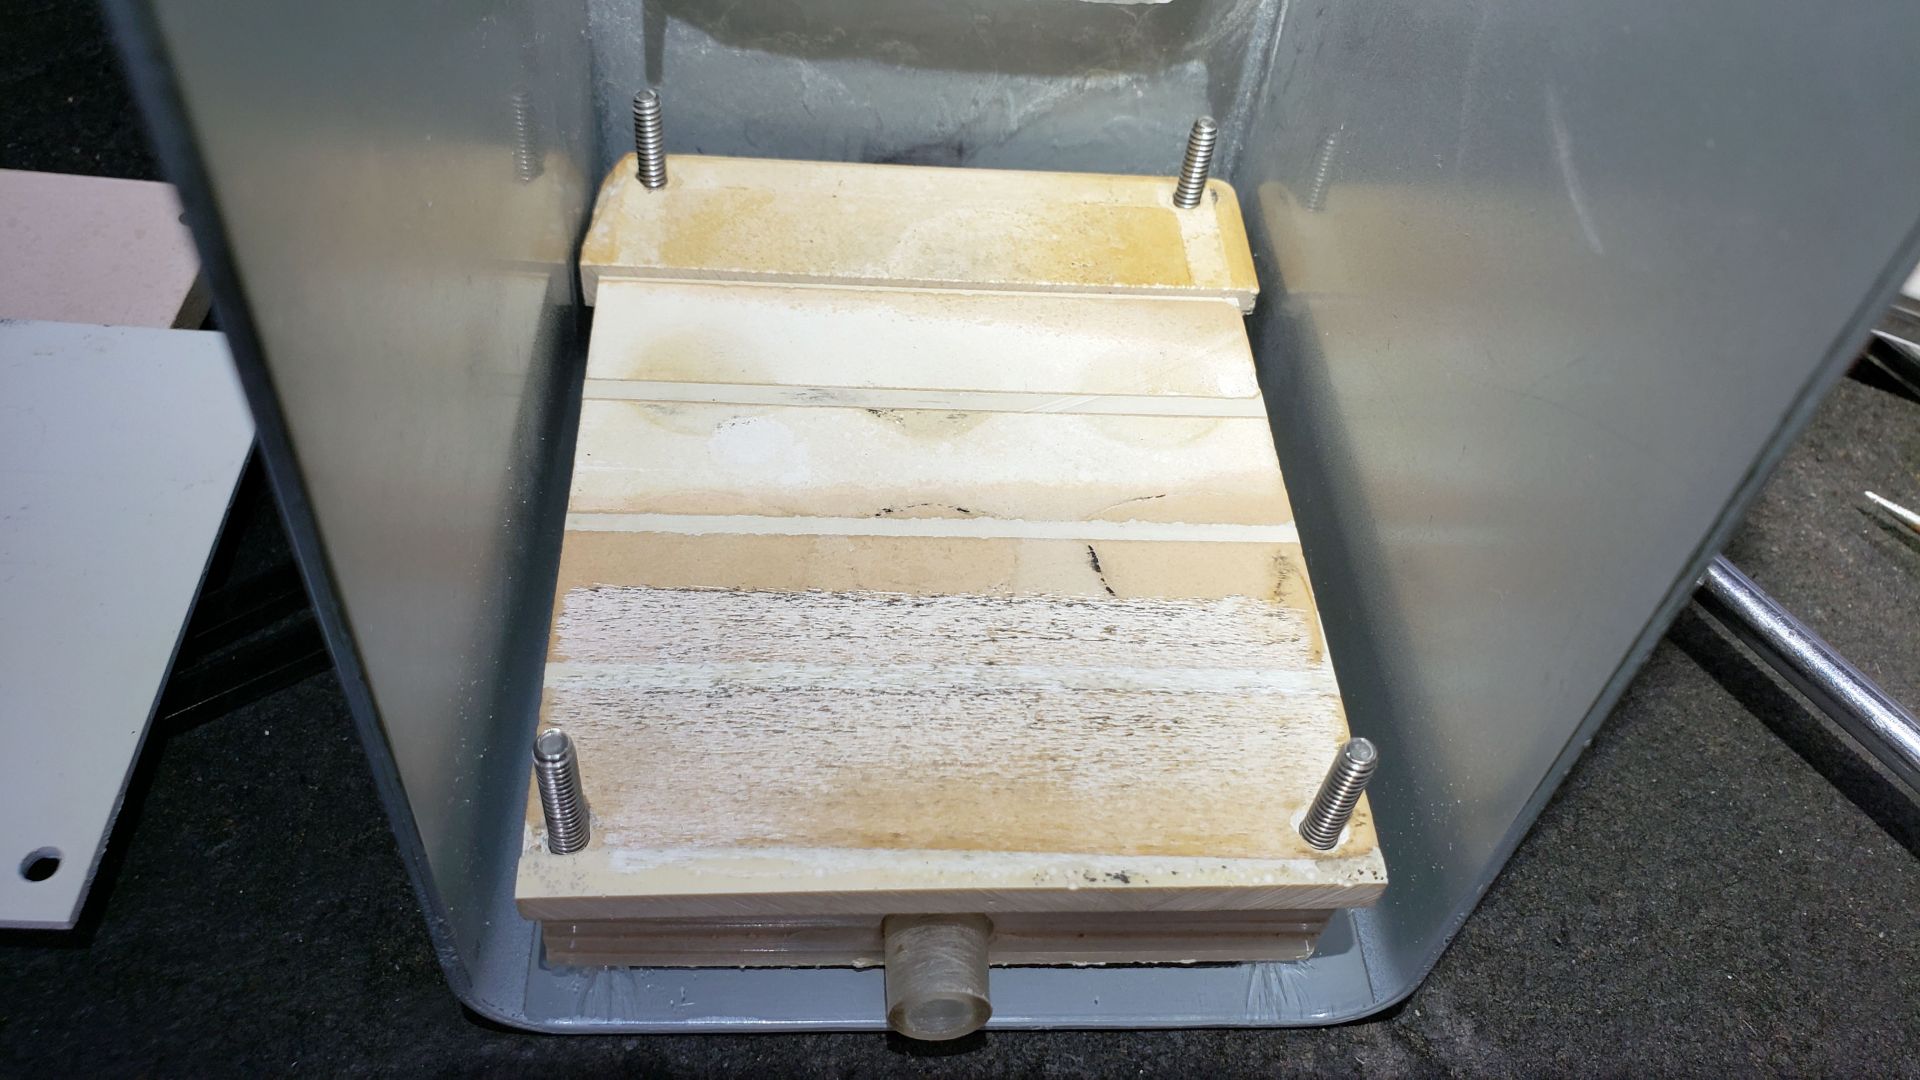
The mounting bracket on it was cracked, as you can see in the picture above, so I made a new one out of PVC instead of acrylic. I put my new Pheidole vistana colony in that formicarium, and it's been working great so far.
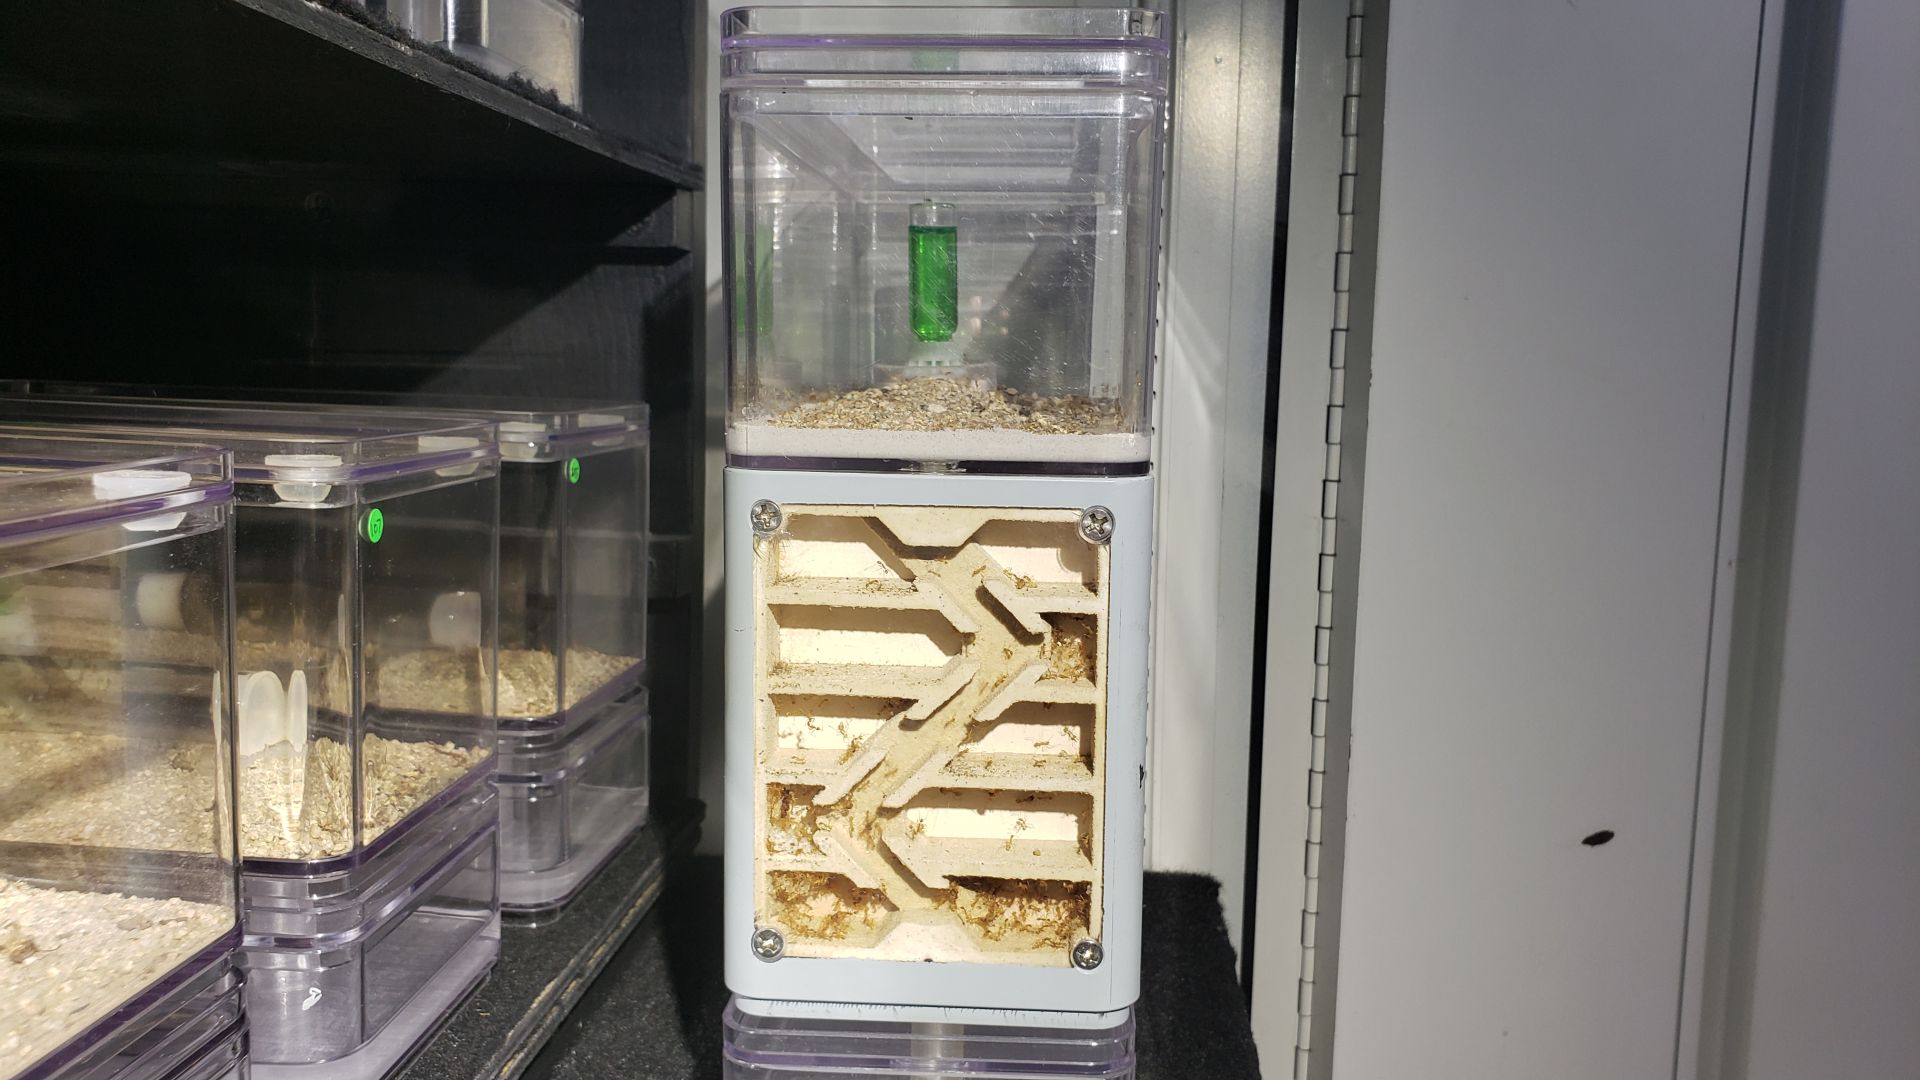
The other one still had a solid tile for the back plate, which results in the entire backing being saturated, which is just way too much moisture for the ants. That one also kept leaking until all the water in the tank was gone, and I didn't notice until my entire colony of Pheidole vistana I had in it was dead from desiccation.
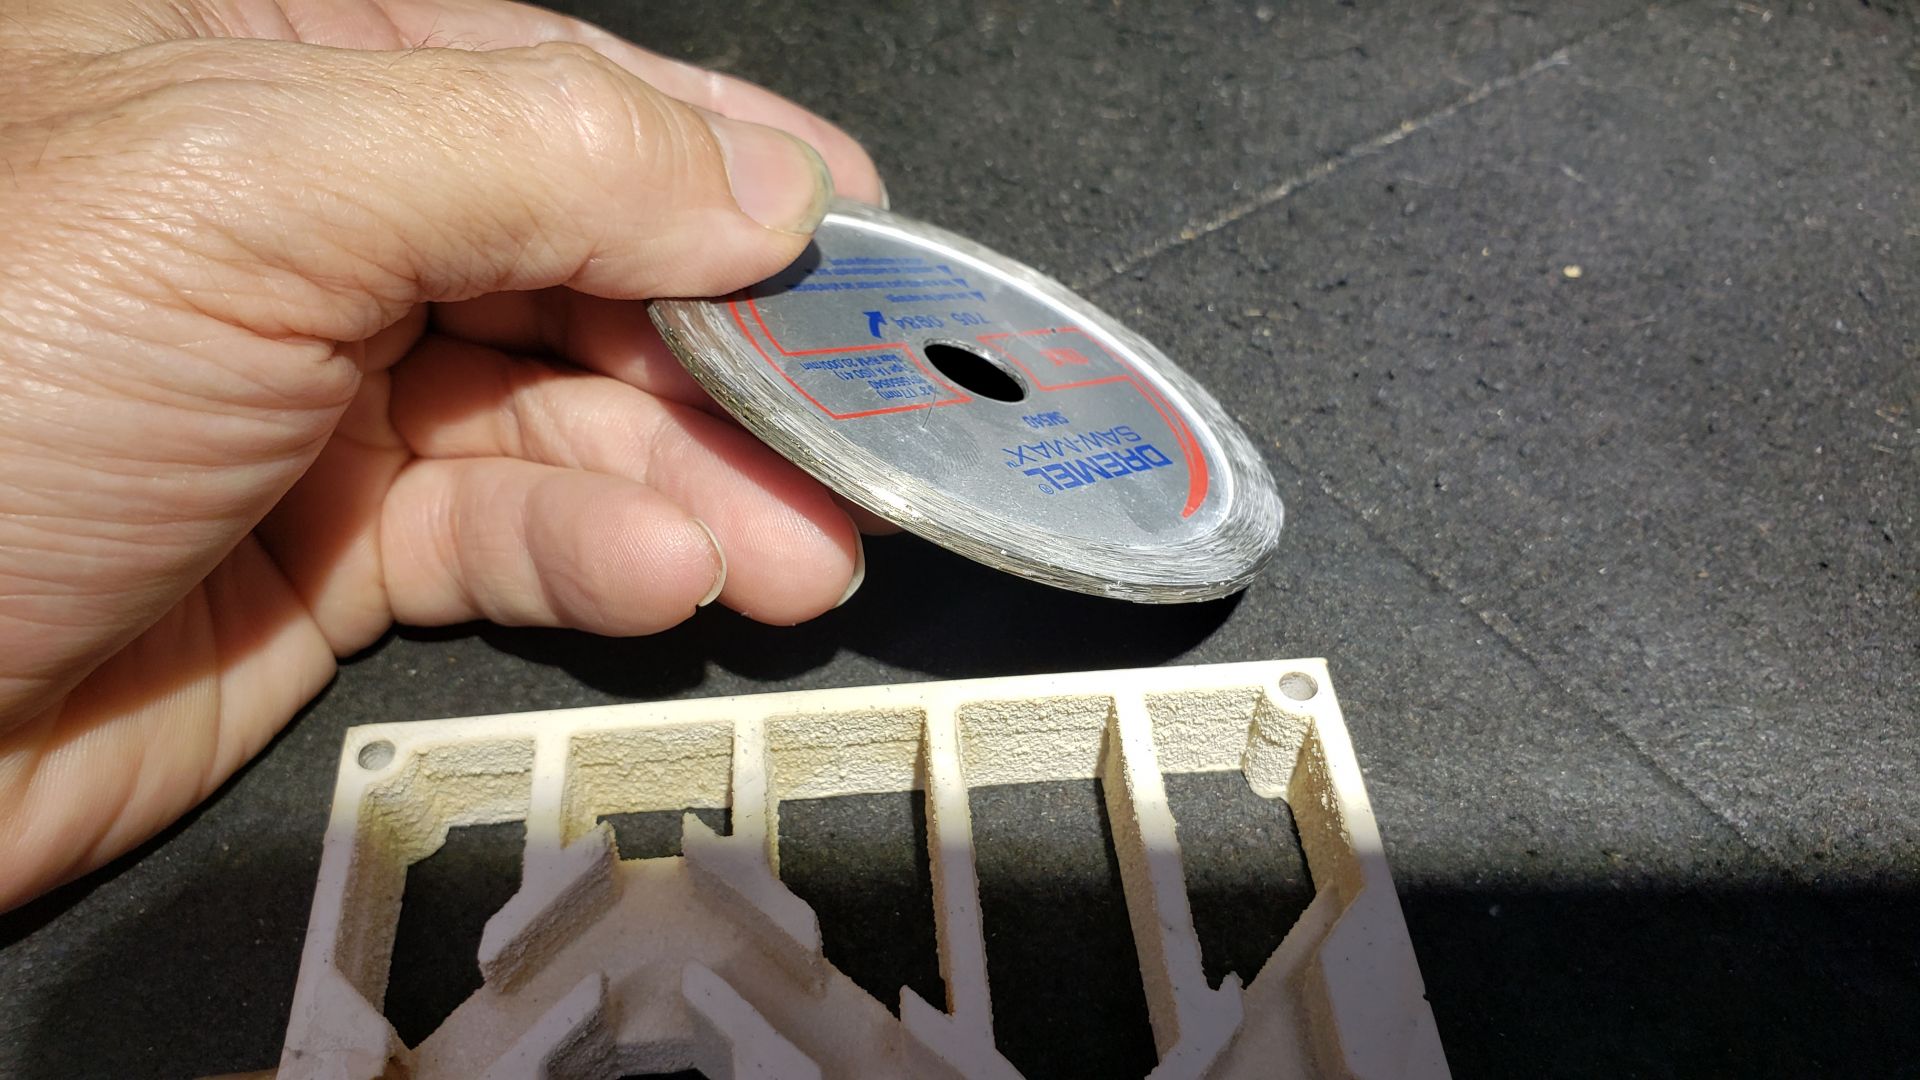
I decided I was going to cut the bottom off the tile to separate the bottom chamber backing from the rest. This will keep everything but the bottom chamber dry. My tile blade is about 2 mm thick, so I will have to get this cut as perfect as possible to avoid any tiny gaps at the edges of the chamber.
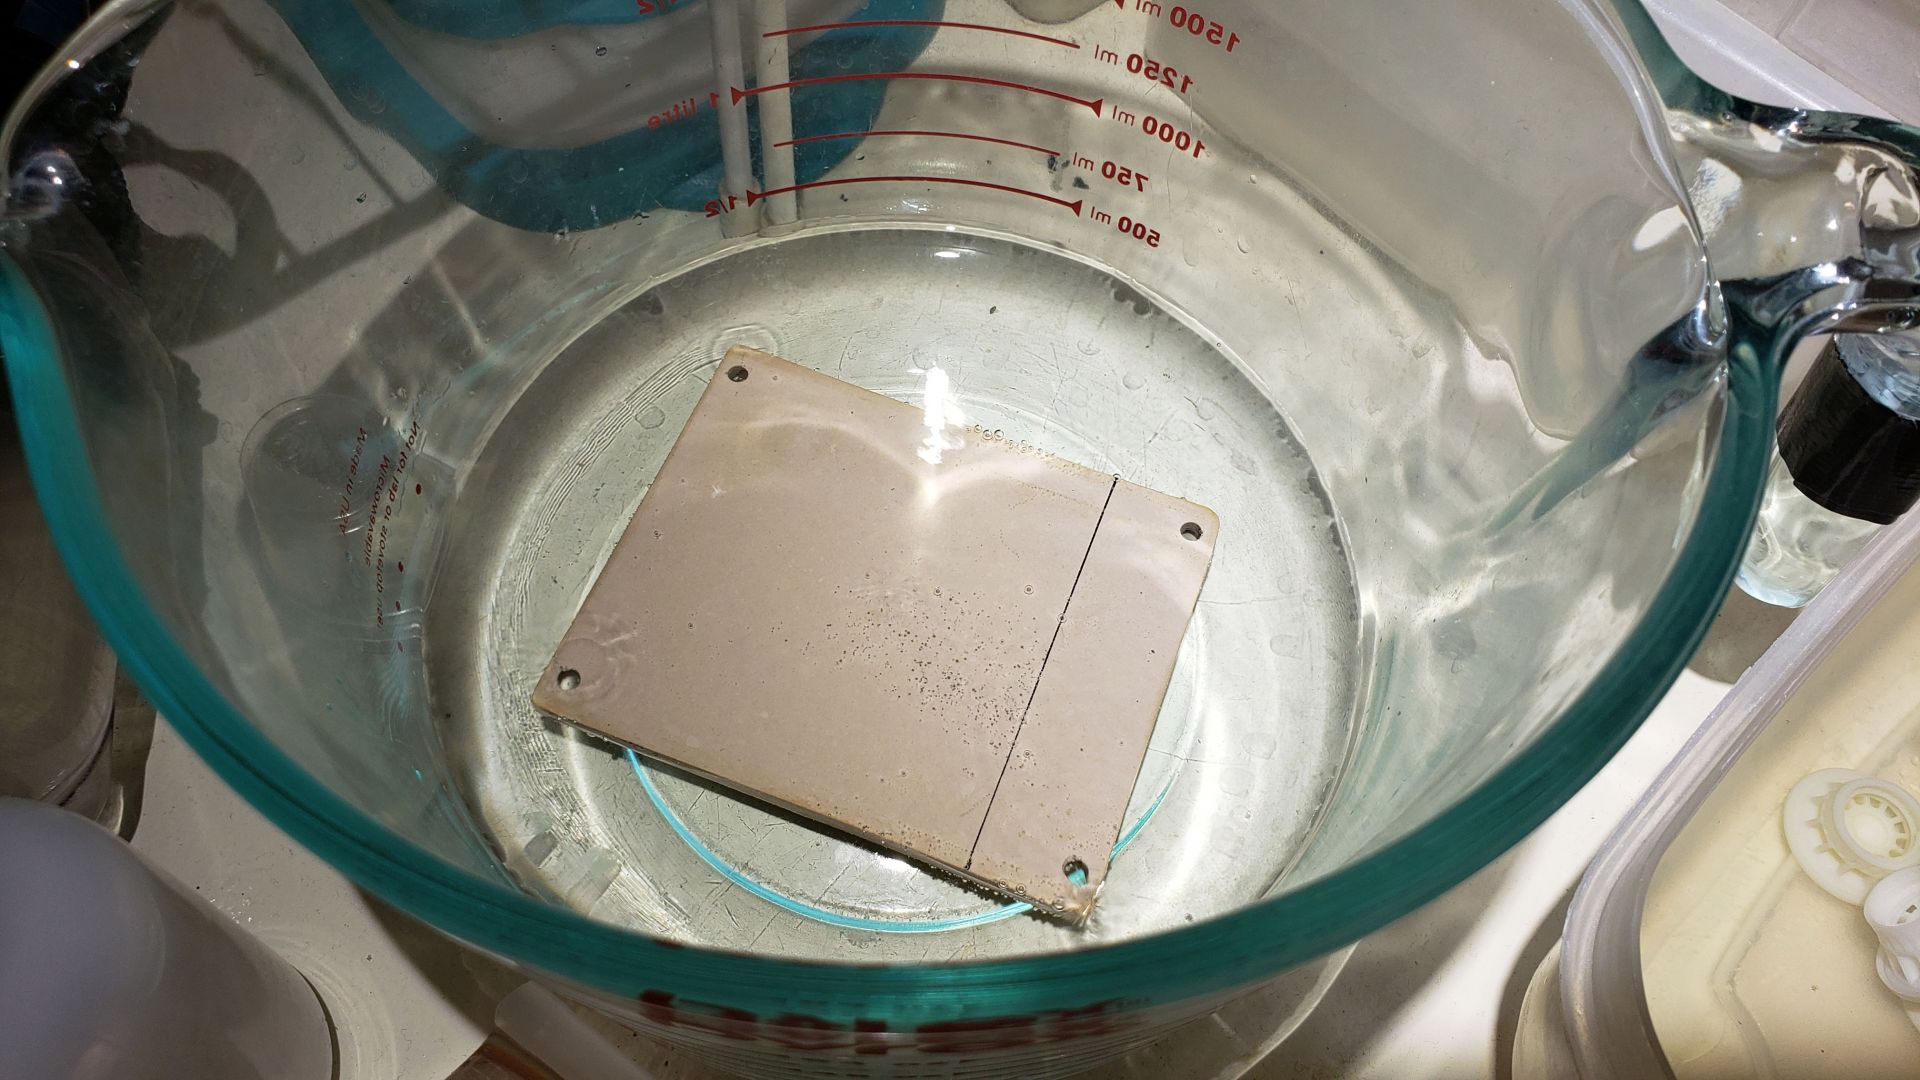
Marked and soaked the tile to prepare it for cutting.
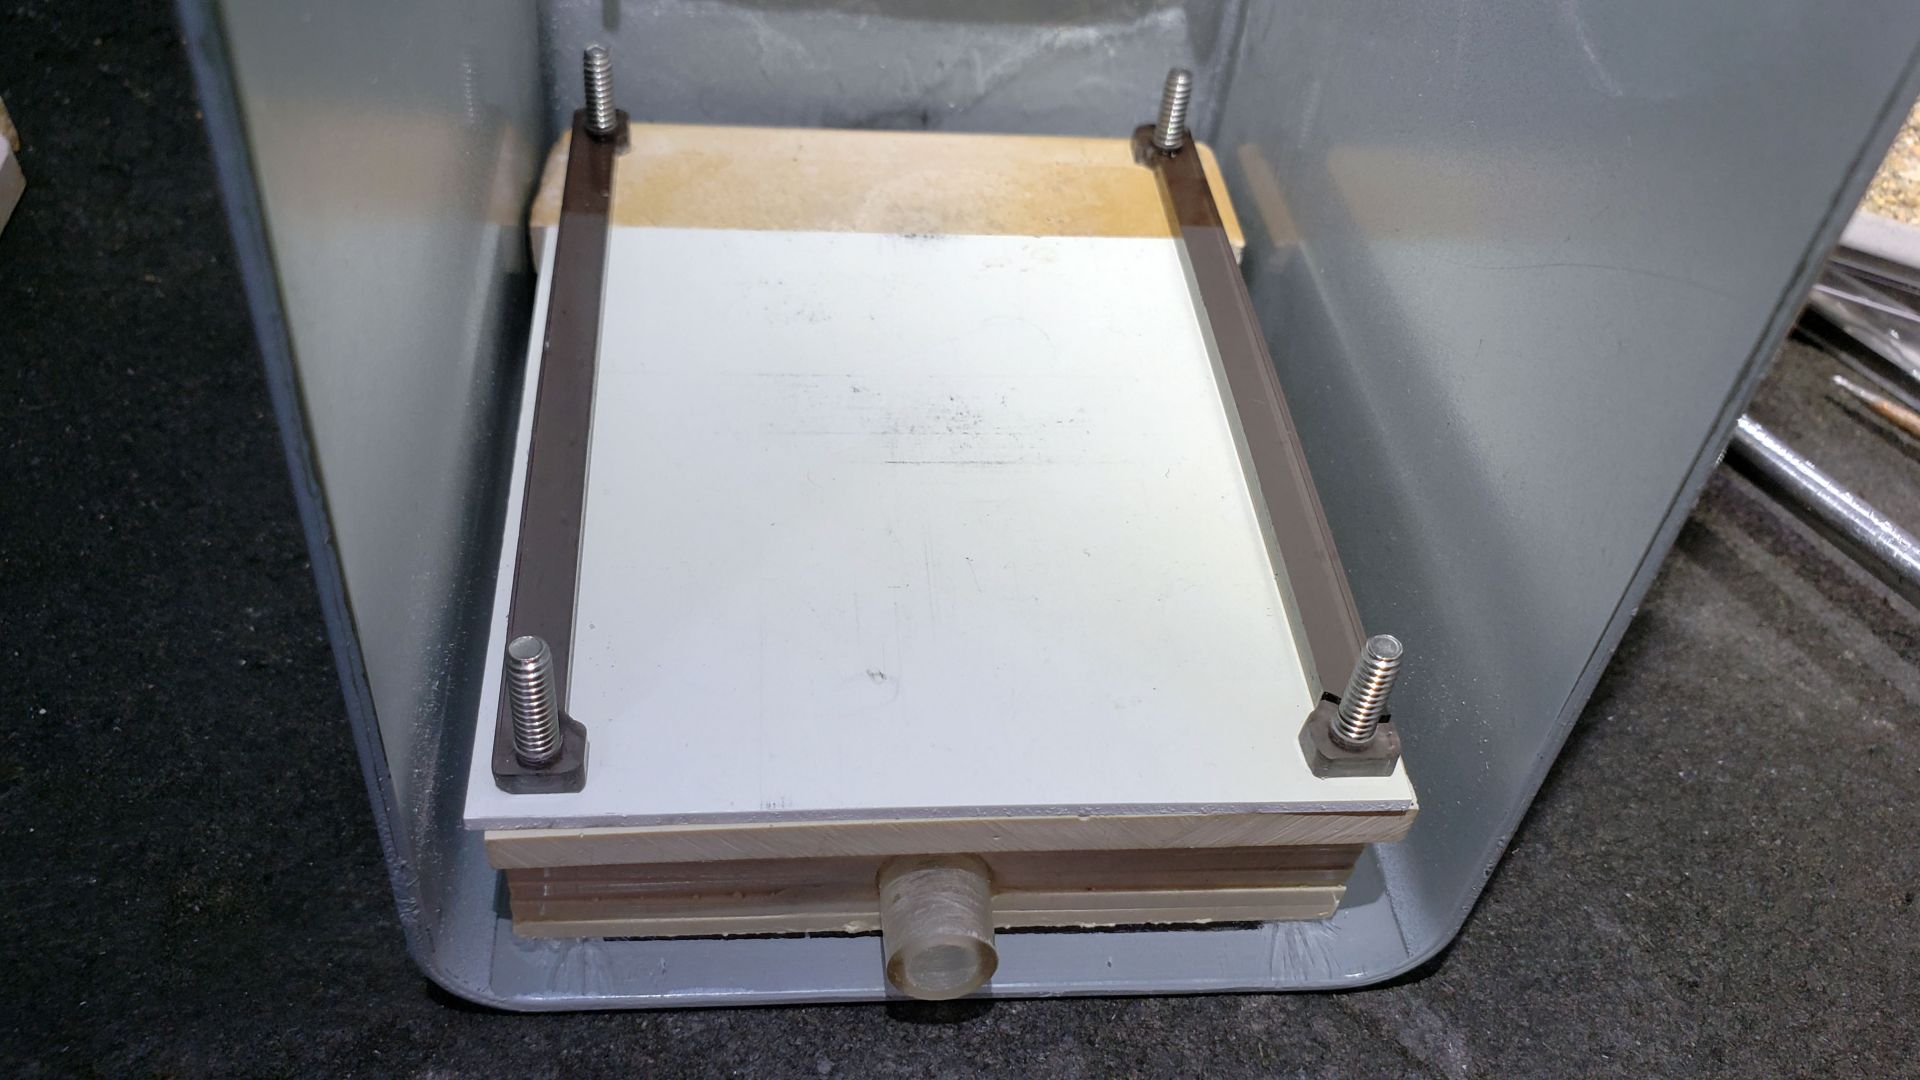
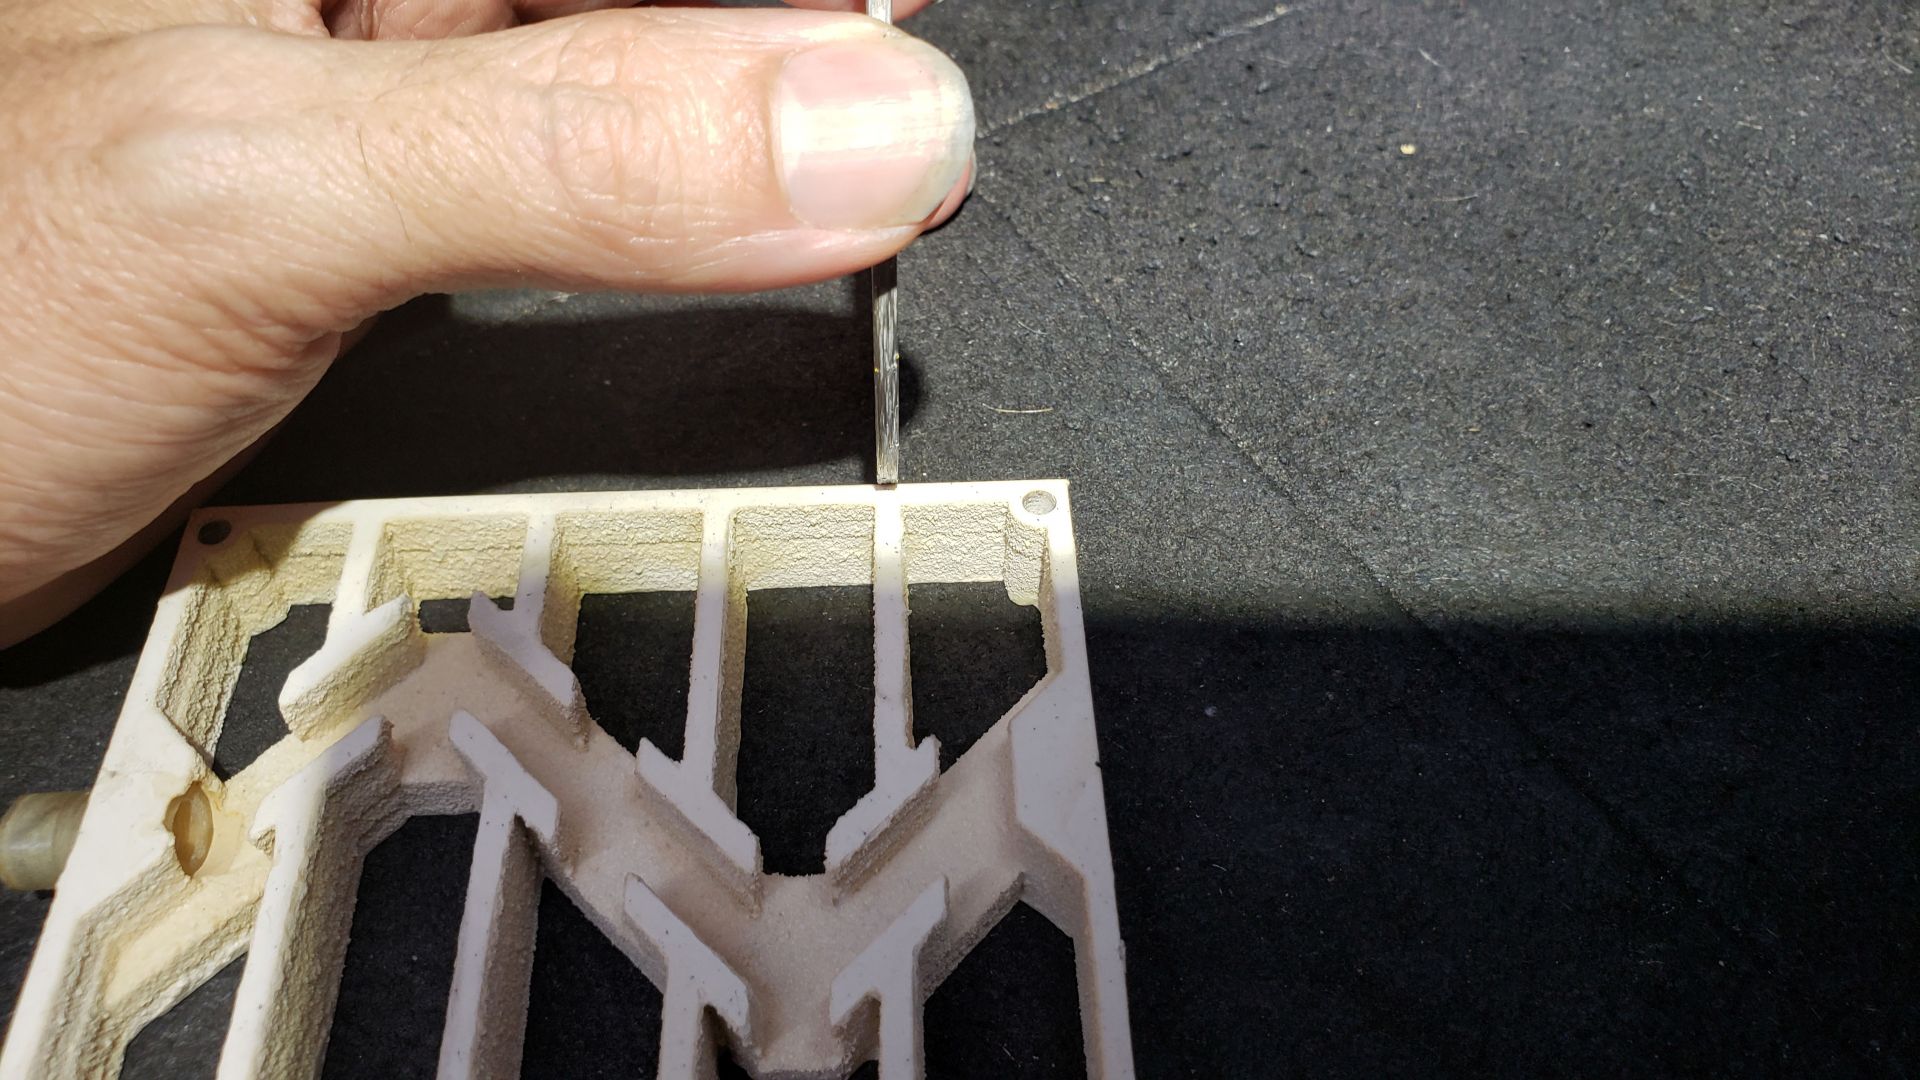
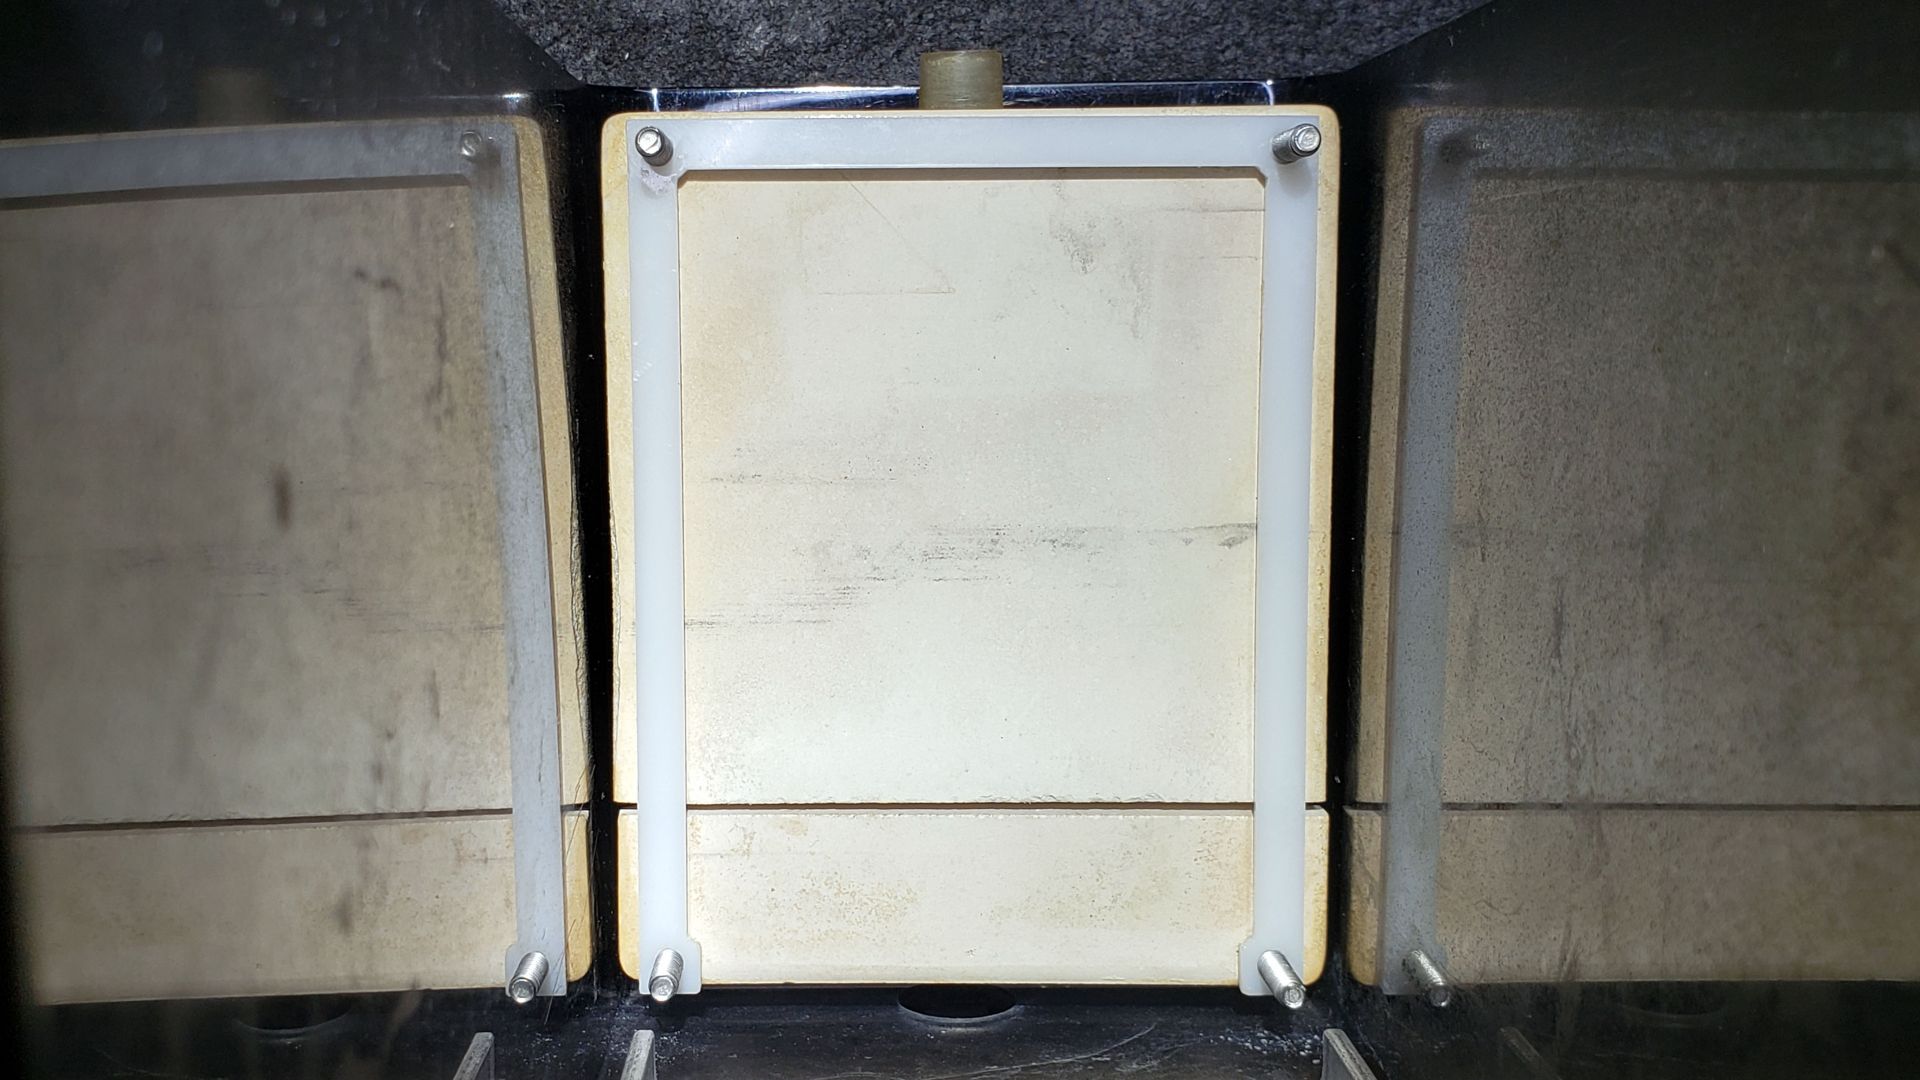
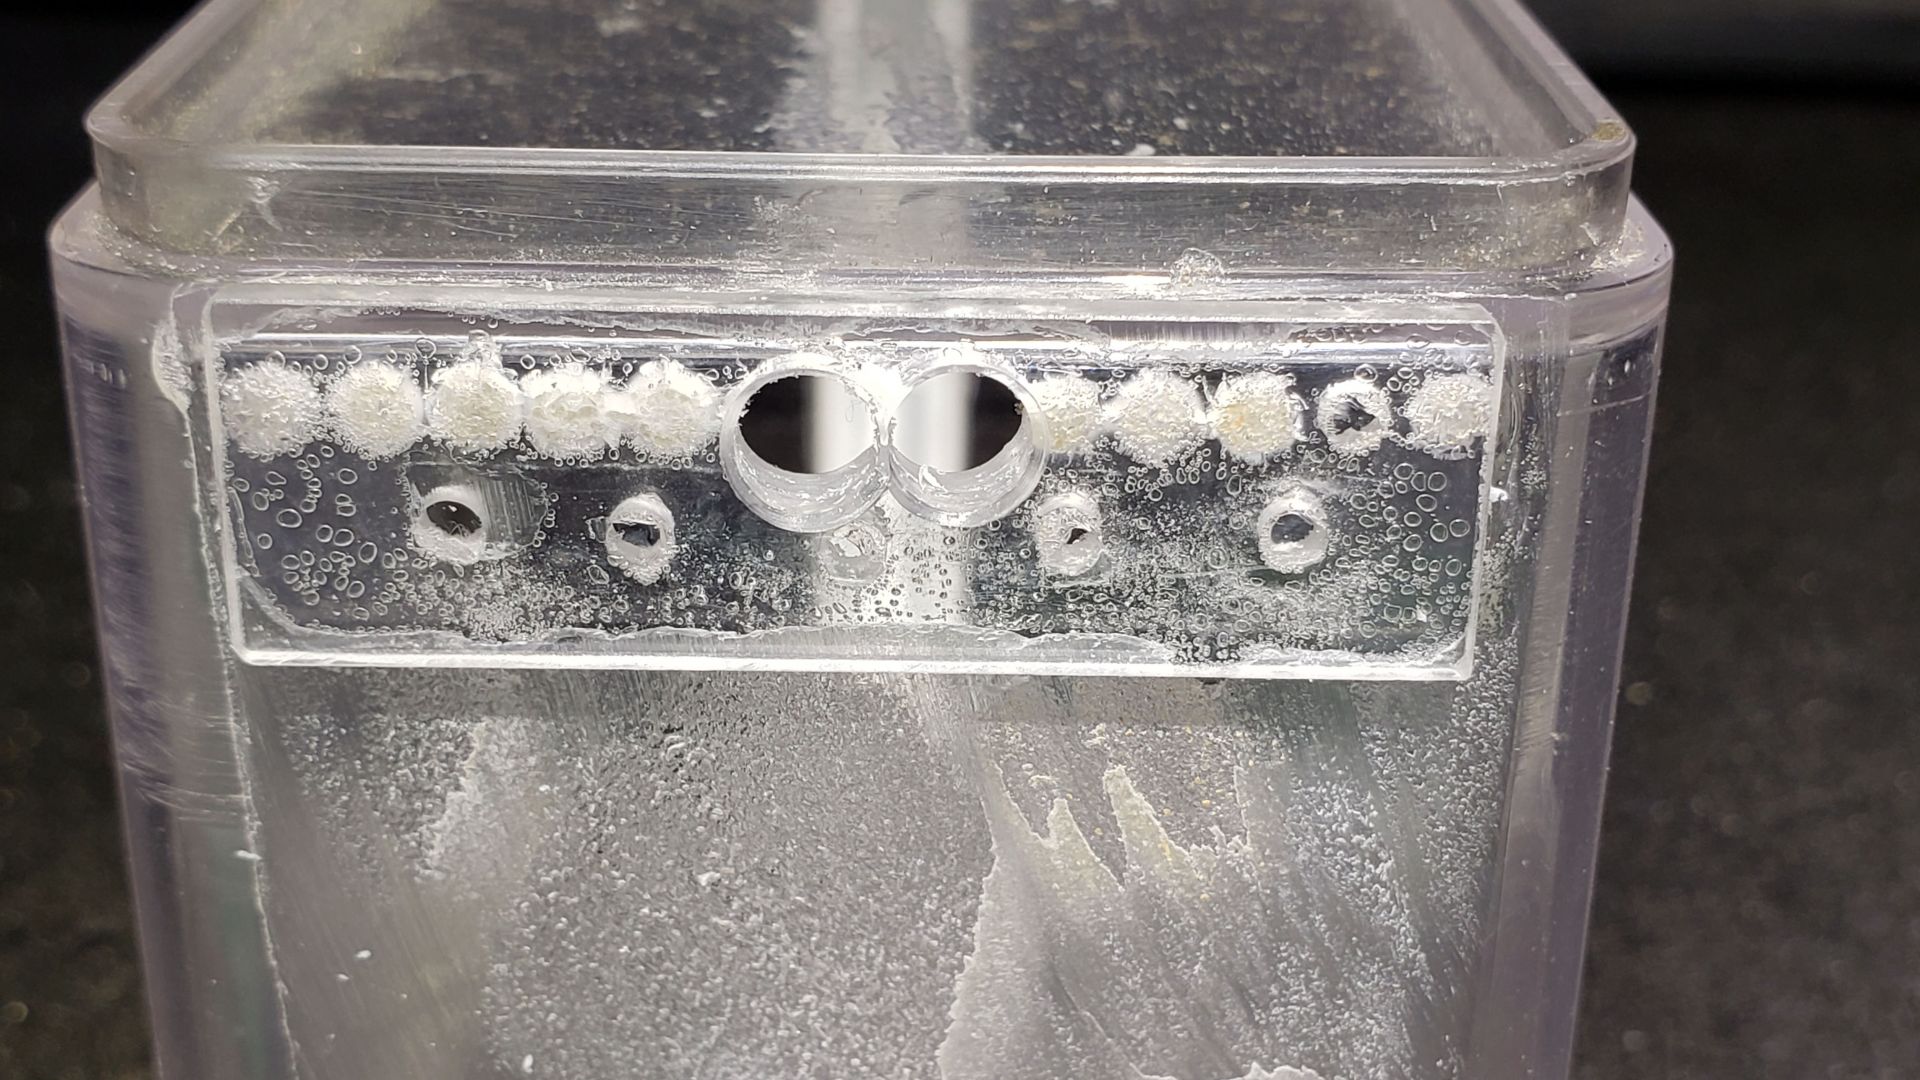
The tile edge were just too close to the chamber edges, so I adjusted the holes a bit as you can see. This allows me to move it slightly before tightening up the mounting bracket so that the tiles are overlapping the edges by a half a millimeter or so.
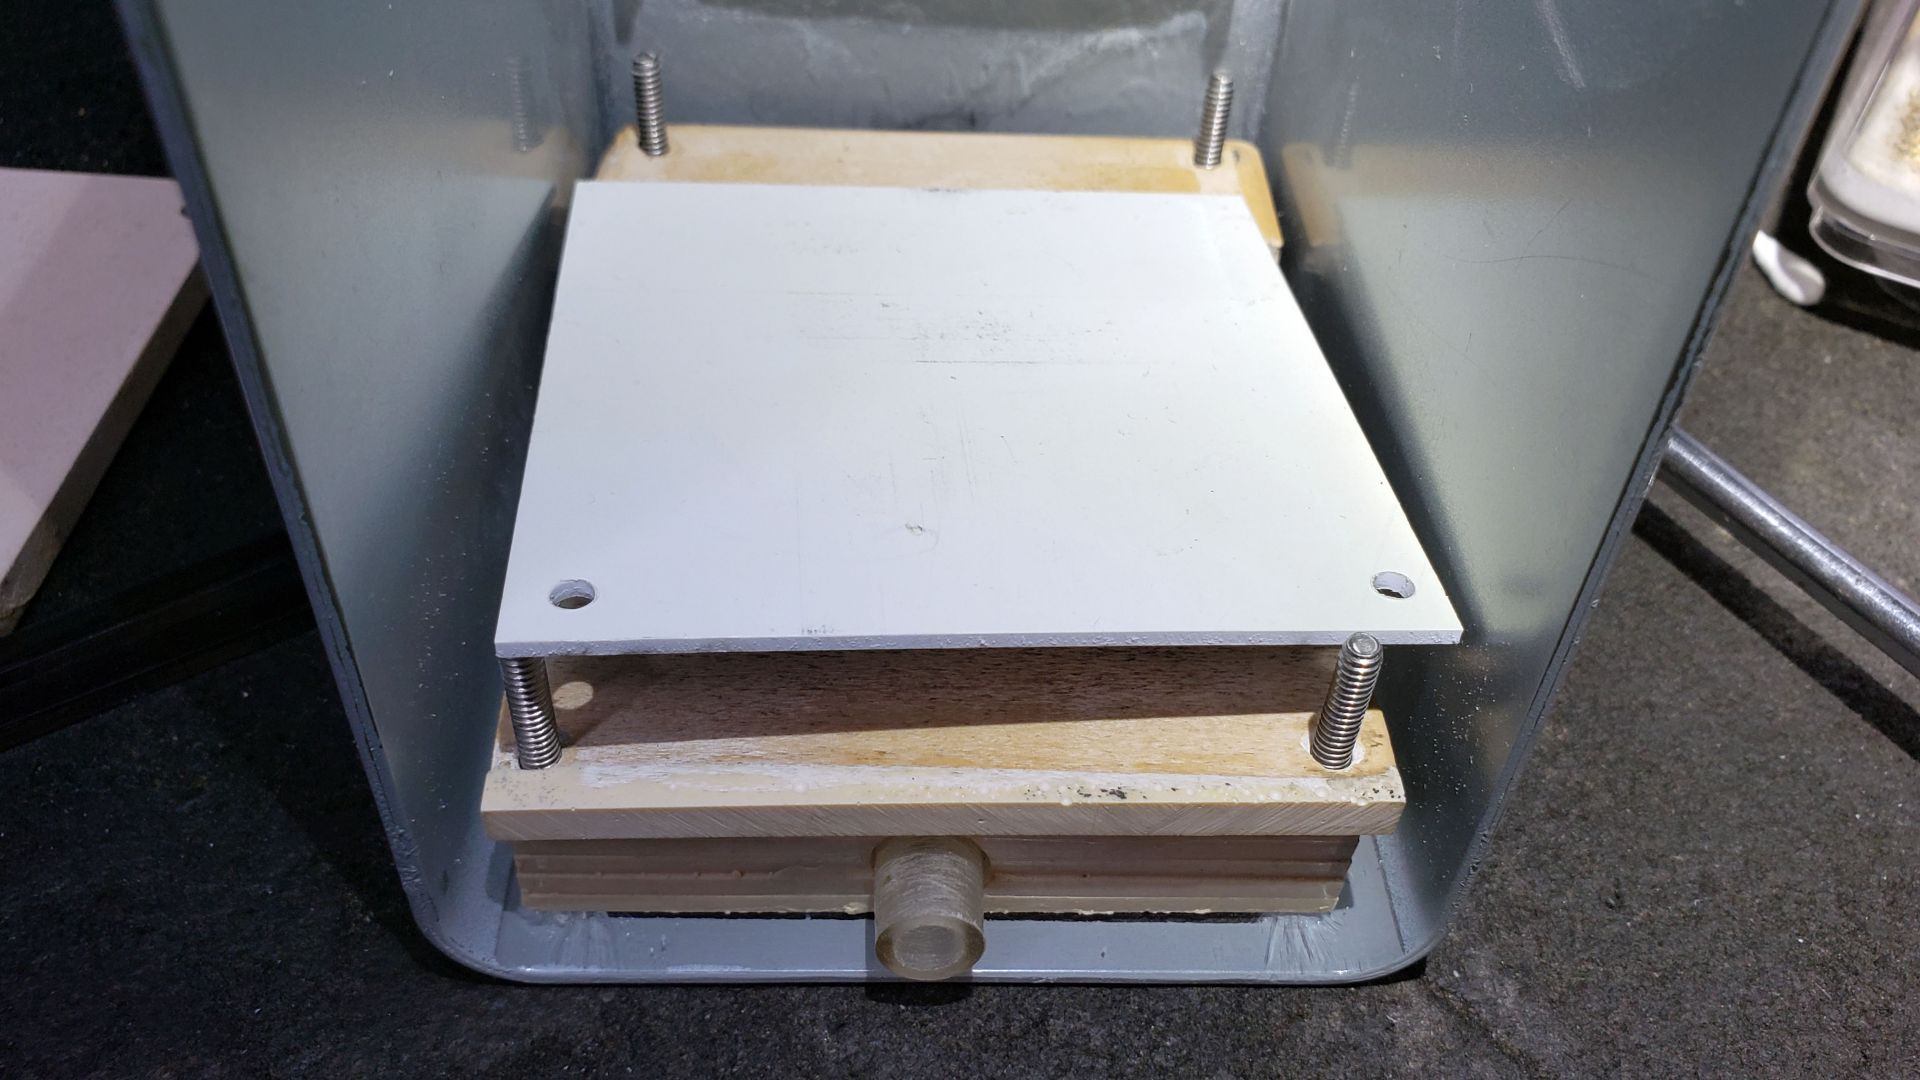
I was about to move another colony into this one when I realized the sponge on the water tank was too high, and would still soak both tiles. This meant I had to modify the water tank as well.
First I removed the sponge and sanded everything down flat.
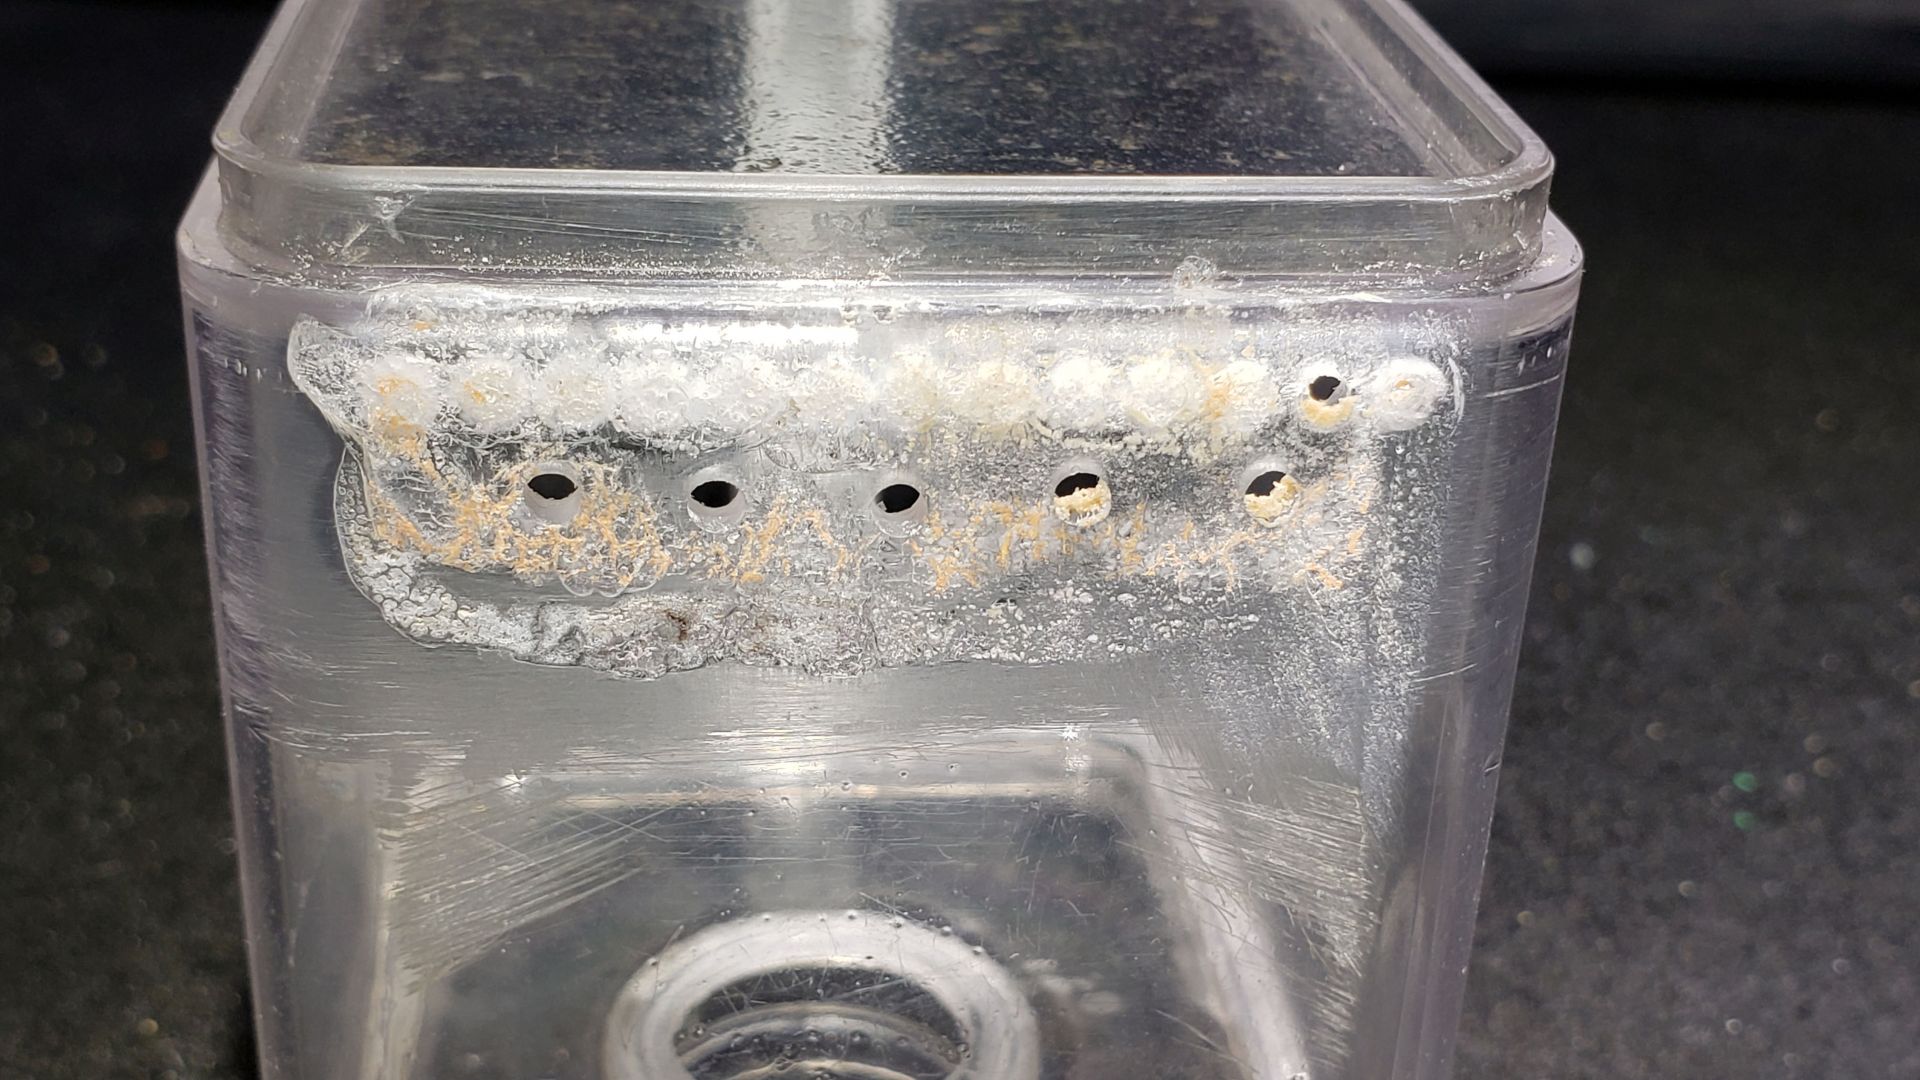
I then bonded another 2-mm-thick piece of acrylic onto it, sealing up the holes.
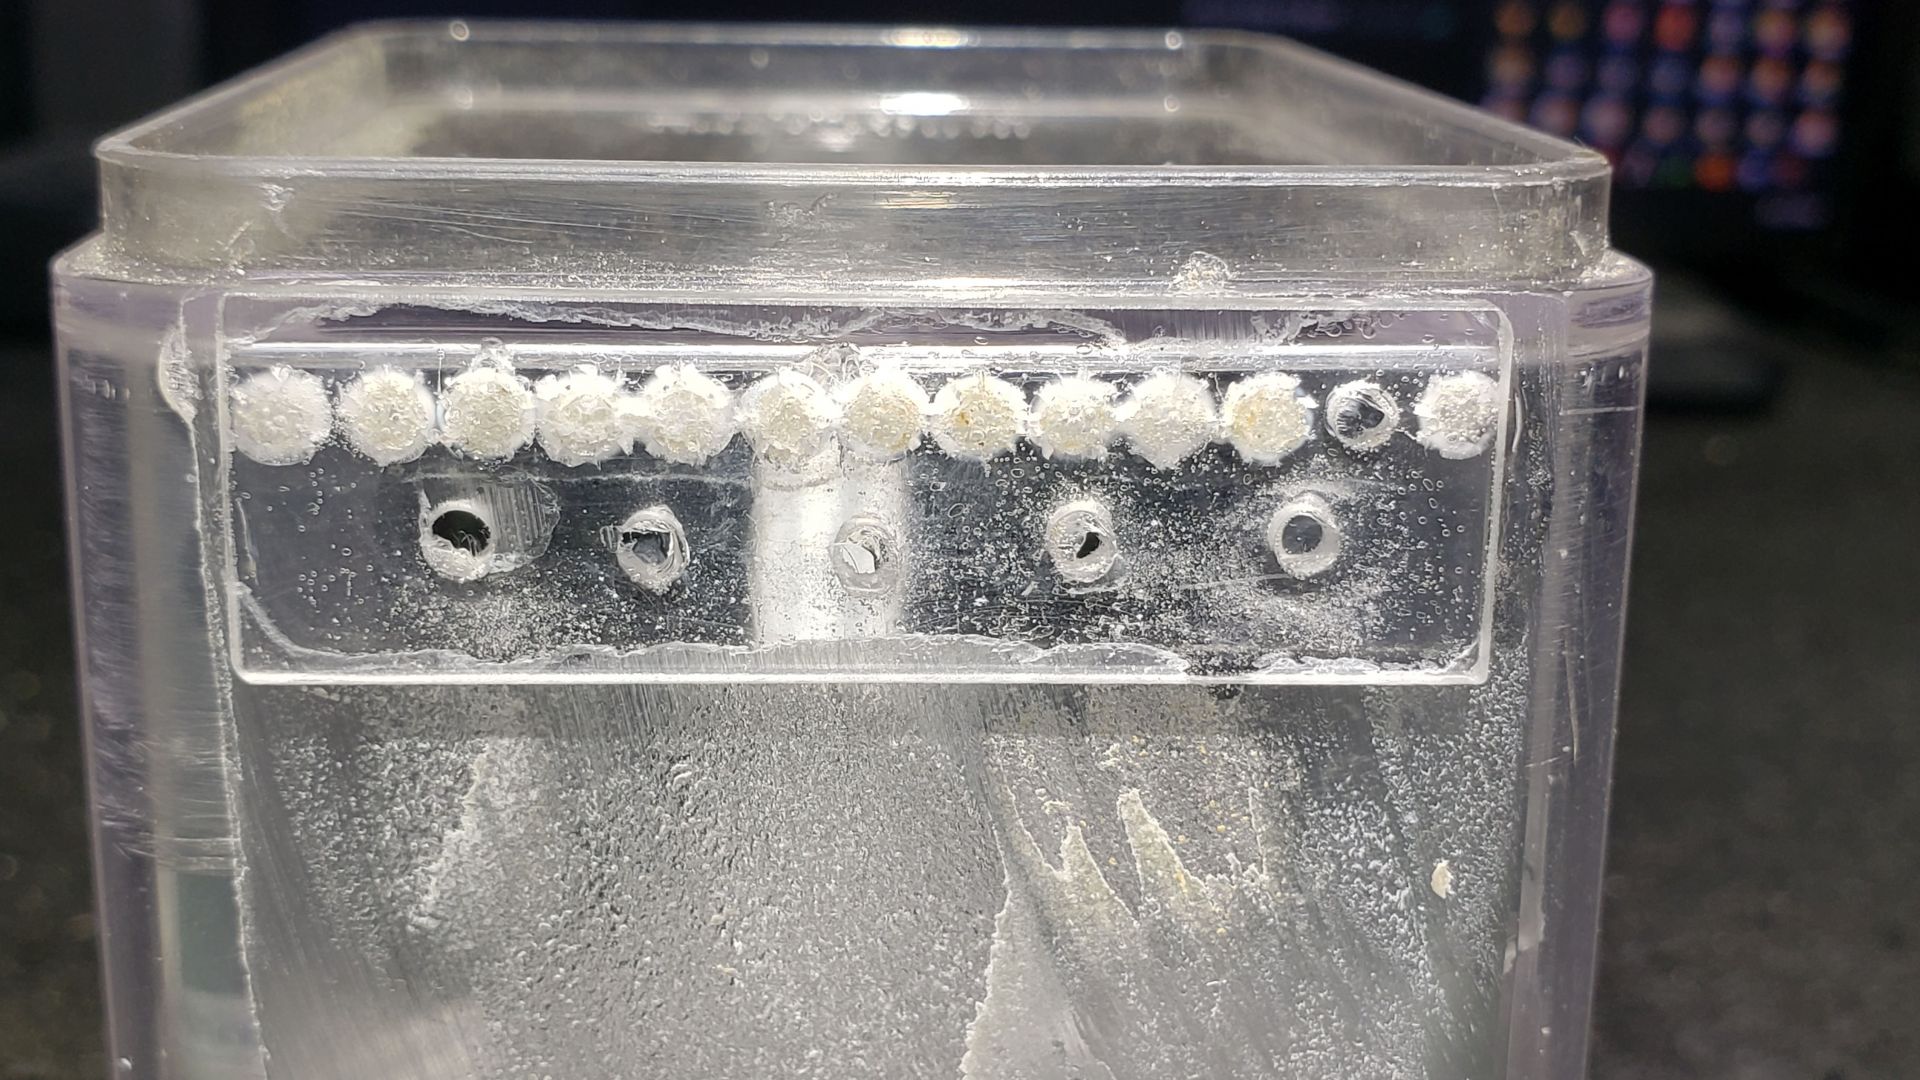
I drilled two new holes (larger, since the wall is twice as thick now) for the new sponge, which I plan on being much smaller, since there really is no reason for it to span the entire width of the tile. One tiny connection with the tile, and the entire piece will be soaked.
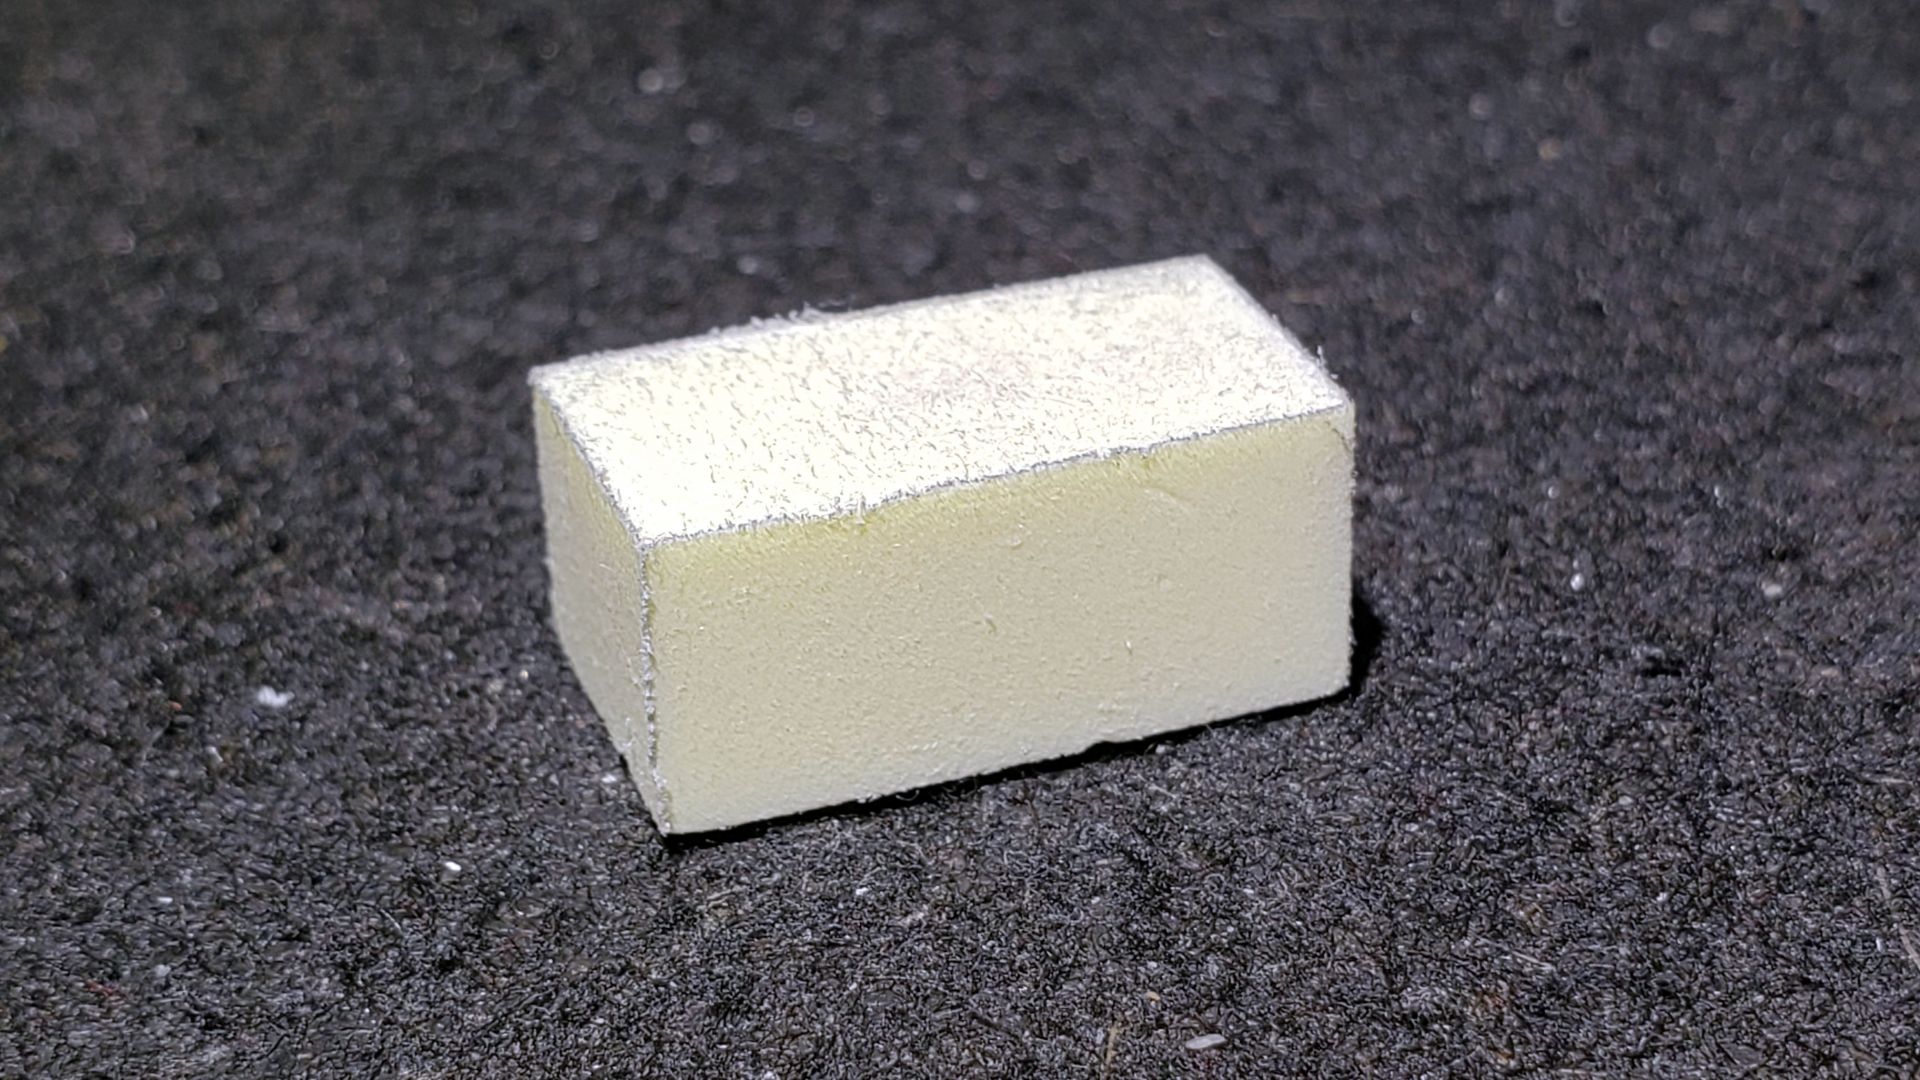
I also made it smaller because I decided to try using a PVA sponge again this time. PVA sponges are not as easy to compress, so a smaller one would make it require about the same amount of force.
I was using Weld-on 16 to bond the sponges to the tanks before, but I am out of that right now, and I am not even sure how well it would soak into a PVA sponge, so it might not even work anyway. I ordered some more since I need it anyway, and mounted the sponge with some epoxy instead. It seems to hold pretty well.
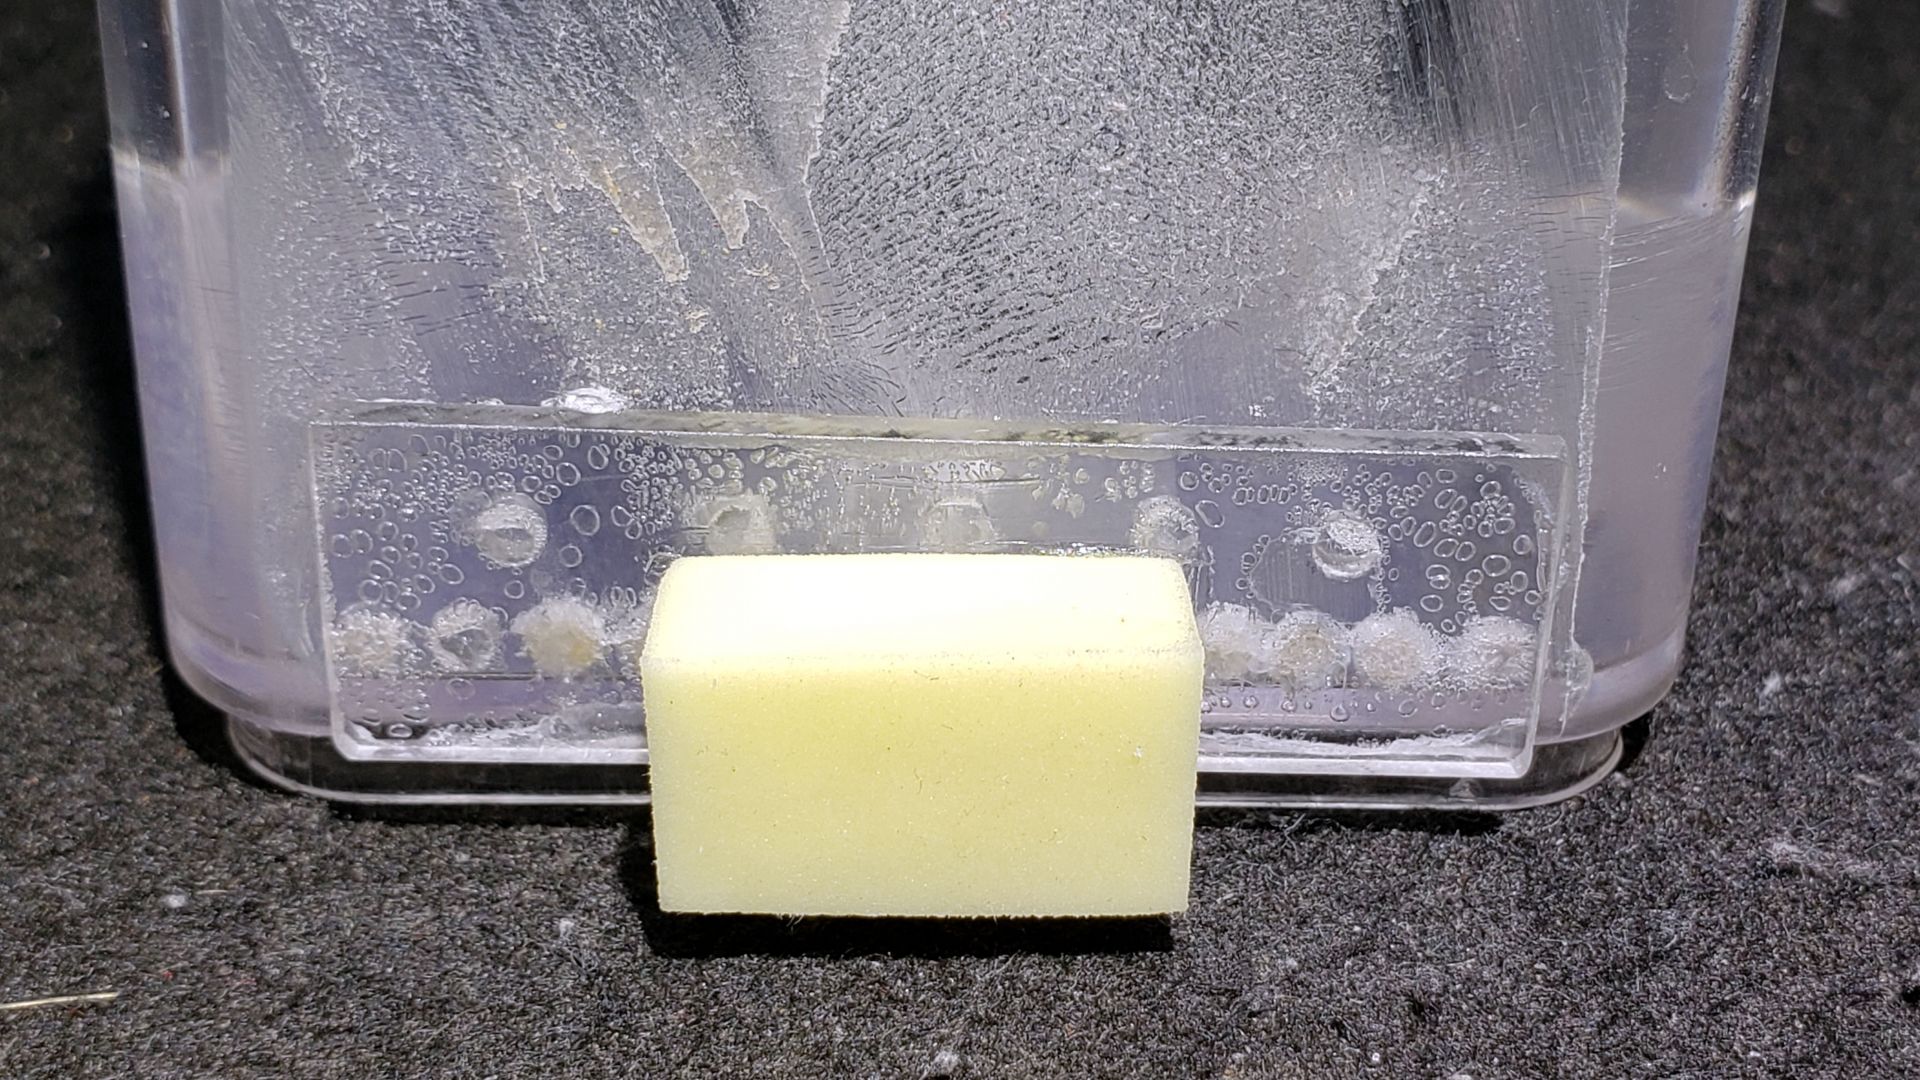
I filled the tank and set it up, and I am already seeing water drip from the bottom of the tile. With all the changes I made to the tank, I'm surprised this is still a problem. I really don't understand what the problem is with this formicarium, as the other ones did not do this. I'll leave it for a while and check again later, just in case the tank just hadn't built up enough of a vacuum to hold the water in. I guess it is entirely possible there's a tiny leak somewhere, which would cause exactly what I am seeing.
Advanced Member

Edited by 100lols, November 21 2023 - 3:48 PM.
Well, I'm not sure what is going on with that water tank. I thought for sure there must be some microscopic leak in it somewhere, but when I took it out and just let it sit there on my desk, nothing leaked out. I then put it back in the nest with slightly less force holding it against the tile backing, and for almost four days now, aside from the sponge and tile, every thing has remained bone dry.
I'm going to put as much force on it as I had before and see if that changes. I really have no idea how anything like that would make it drip. If that sponge is saturated, no air can get in. If no air gets in, a vacuum forms and no extra water will leak out.
So the water started dripping off the tile again, so I took it out and just strapped a tile onto it so I could get a better idea of what was happening and of course nothing dripped. I then put it back in the formicarium and still nothing dripped. I removed it and put it back in again, and still not one drip. It's a mystery. I guess as long as it's not dripping, it probably won't just start out of nowhere if it's not being messed with.
Advanced Member
Not sure what you mean by water tower. This is a water tank that basically works the same way liquid feeders or Sparklets water dispensers work.


Ant Keeping →
General Ant Keeping →
Best Nest Material for Myrmecia?Started by AntInSpaceFilms , Apr 6 2025 |
|
|
||
Ant Keeping →
General Ant Keeping →
A Nest IdeaStarted by cooIboyJ , Mar 22 2025 |
|
|
||
Market Place →
General Market Place →
Trade: 3D-Printing Service for your Queens/Colonies (Los Angeles, CA)Started by JonathanH , Mar 4 2025 |
|
|
||
Market Place →
General Market Place →
Ender Ants: Naturalistic Formicariums & MerchandiseStarted by Ender Ants , Feb 7 2025 |
|

|
||
Ants & Myrmecology →
General →
Starting off a shopStarted by OwlThatLikesAnts , Feb 3 2025 |
|
|
0 members, 2 guests, 0 anonymous users

Community Forum Software by IP.Board
Designed By skinod.com