

Vertical formicarium guide
Average supply cost per setup: $25
Nest-block build Time: About 15 minutes per level of chambers if using hobby lobby perfect cast. Other materials may take longer.
Total time: 2-3 hours.

This guide limits the number of power tools needed considering the number of readers who may not have access to such tools. For those with access to power tools, all tubing ports can be drilled in with a hand drill or drill press, eliminating the need for tubing molds.
Formicarium materials:
-
Casting material (Hobby Lobby Perfect Cast is used here - up to two bags will be enough for a 9x4x3.5 inch nest block) - Product Link Here
-
Reusable/disposable mixing container
-
Mold to hold the cast (Tile, glass, wood, etc.) along with any clamps needed
-
Neodymium Magnets - Amazon Bulk Pack Here (small 6x3 mm) - Also check out totalElement
-
Clean, wet sand (This guide features fine-grain white sand) along with tools to maneuver sand: Bamboo skewers, plastic spoons, etc. - Link to fine grain sand here
-
Mesh covered water tower with attached refill tubing, along with small weights to hold these towers down. (See other guides for more detail)
-
Glass or plexiglass, along with necessary tools to cut
-
Desired size of vinyl tubing (1/4 or 5/16 inch inner dimension is often used)
Optional:
-
Something to sand the nest block down (A random-orbital sander is often used)
-
LED lights with external power supply
-
Non-toxic paint - Acrylic paint
-
Non-toxic and reusable clay to seal tubing molds
-
Method to secure glass covering without magnets (clay/tack, epoxy, etc.)
Outworld materials:
-
Outworld container. Display cases for roughly 9x4x3.5 inch formciariums - Square edges here - Beveled edges here
-
Casting Material for the base (Plaster, perfect cast, etc.)
-
Method to cut tubing ports and ventilation holes in the outworld container. For softer plastics, a soldering iron or scissor can cut a decent hole. However with thicker materials, a stepped drill bit is recommended for best results - Stepped drill bit here
Optional:
-
Natural sand
-
Decor
-
Mesh over the ventilation ports
-
Magnetically attached feeding port covers
Step 1 - Formicarium
Assemble mold and other needed materials and place water towers.
In this guide I will be using wooden molds made from plywood. However tile, glass, and some plastic containers can all be used instead. The mold will need 5 flat sides: 4 vertical and 1 flat area for the entire mold to rest. The exact dimensions are up to you. Just remember the outworld and glass cover will need to fit. The image below shows some small molds for making multiple smaller vertical formicaria at once. Notice the optional use of holes drilled directly in the wood to hold sections of tubing which act as a mold for the tubing ports.

I use wood because I can easily drill holes to hold the external magnets in place. Notice the magnets on the inside of the mold where the casting material will be poured are flush against the side of the wood. The magnets on the outside are held in place in a hole drilled into the wood before-hand. This is not necessary, but the set holes will not allow the magnets to shift while pouring. The magnets should be placed about a centimeter away from the edge of the mold, and spaced equally.

Secure the sides of the mold tightly, using reusable clay when necessary to fill larger gaps.
Place the water towers as desired. Here they are placed to the side and near where the future glass panes will be (this was a double sided formicarium). Be sure the refill tubing is attached via clay seal to the side of the mold.

Optionally drill deep holes in the side of the mold beforehand where the tube will fit (see first image above), eliminating the need for clay seals which may be difficult to remove after casting. Attach the water towers to the bottom of the mold with clay or weigh them down with small glasses of water or other heavy items.
Once the mold, magnets, and water towers are all in place you are ready to pour the base layer.
Step 2
Pour base layer.
Mix enough casting material to cover the bottom layer of magnets. 1-2 cm in height is usually enough.

Step 3
Create chambers.
As soon as the layer below is hard enough to support sand, and retains an indent when pressed, sand should be applied. Place the slightly wet sand in the shape of chambers, being sure to build against the side of the mold with the magnets where the future glass will be placed.
I recommend chamber dimensions of ½ to ¾ of an inch at the highest, and about ¾ of an inch at the deepest. Your dimensions can vary depending on the size and habits of the species being housed.
To create stalactites, create wells in the sand using a skewer or something similar. Partially cover any water towers and cover the end of any tubing molds on the level.
To connect each level, use a series of 1 inch tubing segments. Place 1 to 2 vertically oriented segments per level of chambers, burying the bottom centimeter in the sand of the layer below it. The exposed segment will be high enough to reach the new layer, connecting the two.
Note: Instead of multiple segments, a single length of tubing can be used, reaching all the way up to the outworld tubing port.

Complete this step as quickly as possible, so that the base layer doesn’t completely harden. This is to ensure that both layers adhere to each other.
If you see that the base layer is hardening too quickly, create disturbances and holes in the base layer where the incoming top layer will be able to securely attach with the bottom layer, linking the two. See the holes poked in the casting material when it was still wet in the image below.
Optional - If using an internal LED system, attach the lights to the sand so that the bulb of the LED is buried in the sand as seen below. Conceal the wires in the next base layer.

Step 4
Pour another base layer. Repeat steps 2 and 3 as necessary.
Repeat the steps of pouring a layer and placing sand for chambers, and pouring a new layer, covering the previous level of chambers and acting as a new base layer. When covering the sand, be sure to pour slowly around the wells for stalactites, allowing any bubbles to escape.
Be sure not to cover the tubing connecting the levels to each other.
Repeat until the desired height or number of levels is reached.
When the final layer is poured, the vertical connecting tubing will be connecting directly to the outworld instead of a new level, so position the tubing where you want the outworld entrance to the nest will be.
Step 5
After casting material has hardened enough, remove outer mold, wash out any sand, and any tubing molds along with their clay seals.
Drill additional tubing holes as needed. Once the formicarium has dried, sand it down and paint, washing as necessary.
Step 6
Take measurements of the dimensions of the viewing port and cut the glass cover(s) accordingly.
If cutting panes of glass use a glass cutting wheel. To skip this step, design the dimensions of the formicarium around the dimensions of a glass pane from a picture frame.
If cutting thin Plexiglas, score the Plexiglas a few times along a straight guide and bend the Plexiglas back and forth along the cut until it breaks down the line. Remove any protective covers.

Step 7 - Outworld
Create tubing and ventilation ports in the container.
A soldering iron or scissors can be used here, but a stepped drill bit is recommended for safest and cleanest results. Line up the tubing port from the top of the formicarium with the bottom of the outworld centered on the top. Mark and drill the tubing port.
Keep in mind any ventilation ports and feeling ports will need to be covered with mesh, cotton, stoppers, or additional removable sections of glass
Step 8
Pour base layer and apply decor and sand as desired.
With a small section of tubing in the formicarium tubing port acting as a mold, pour about a centimeter of casting material. Apply sand and decor as desired.


Step 9
Attach glass covering. Attach the nest block to the outworld with tubing. Epoxy can be used to further secure the outworld to the top.
The setup is now finished!
Go celebrate or something! 
Note: The amount of time to wait before moving a colony into the formicarium due to the release of noxious gas depends on the casting material used. Hobby Lobby Perfect cast only needs a day or so, whereas materials like grout may need a longer time.
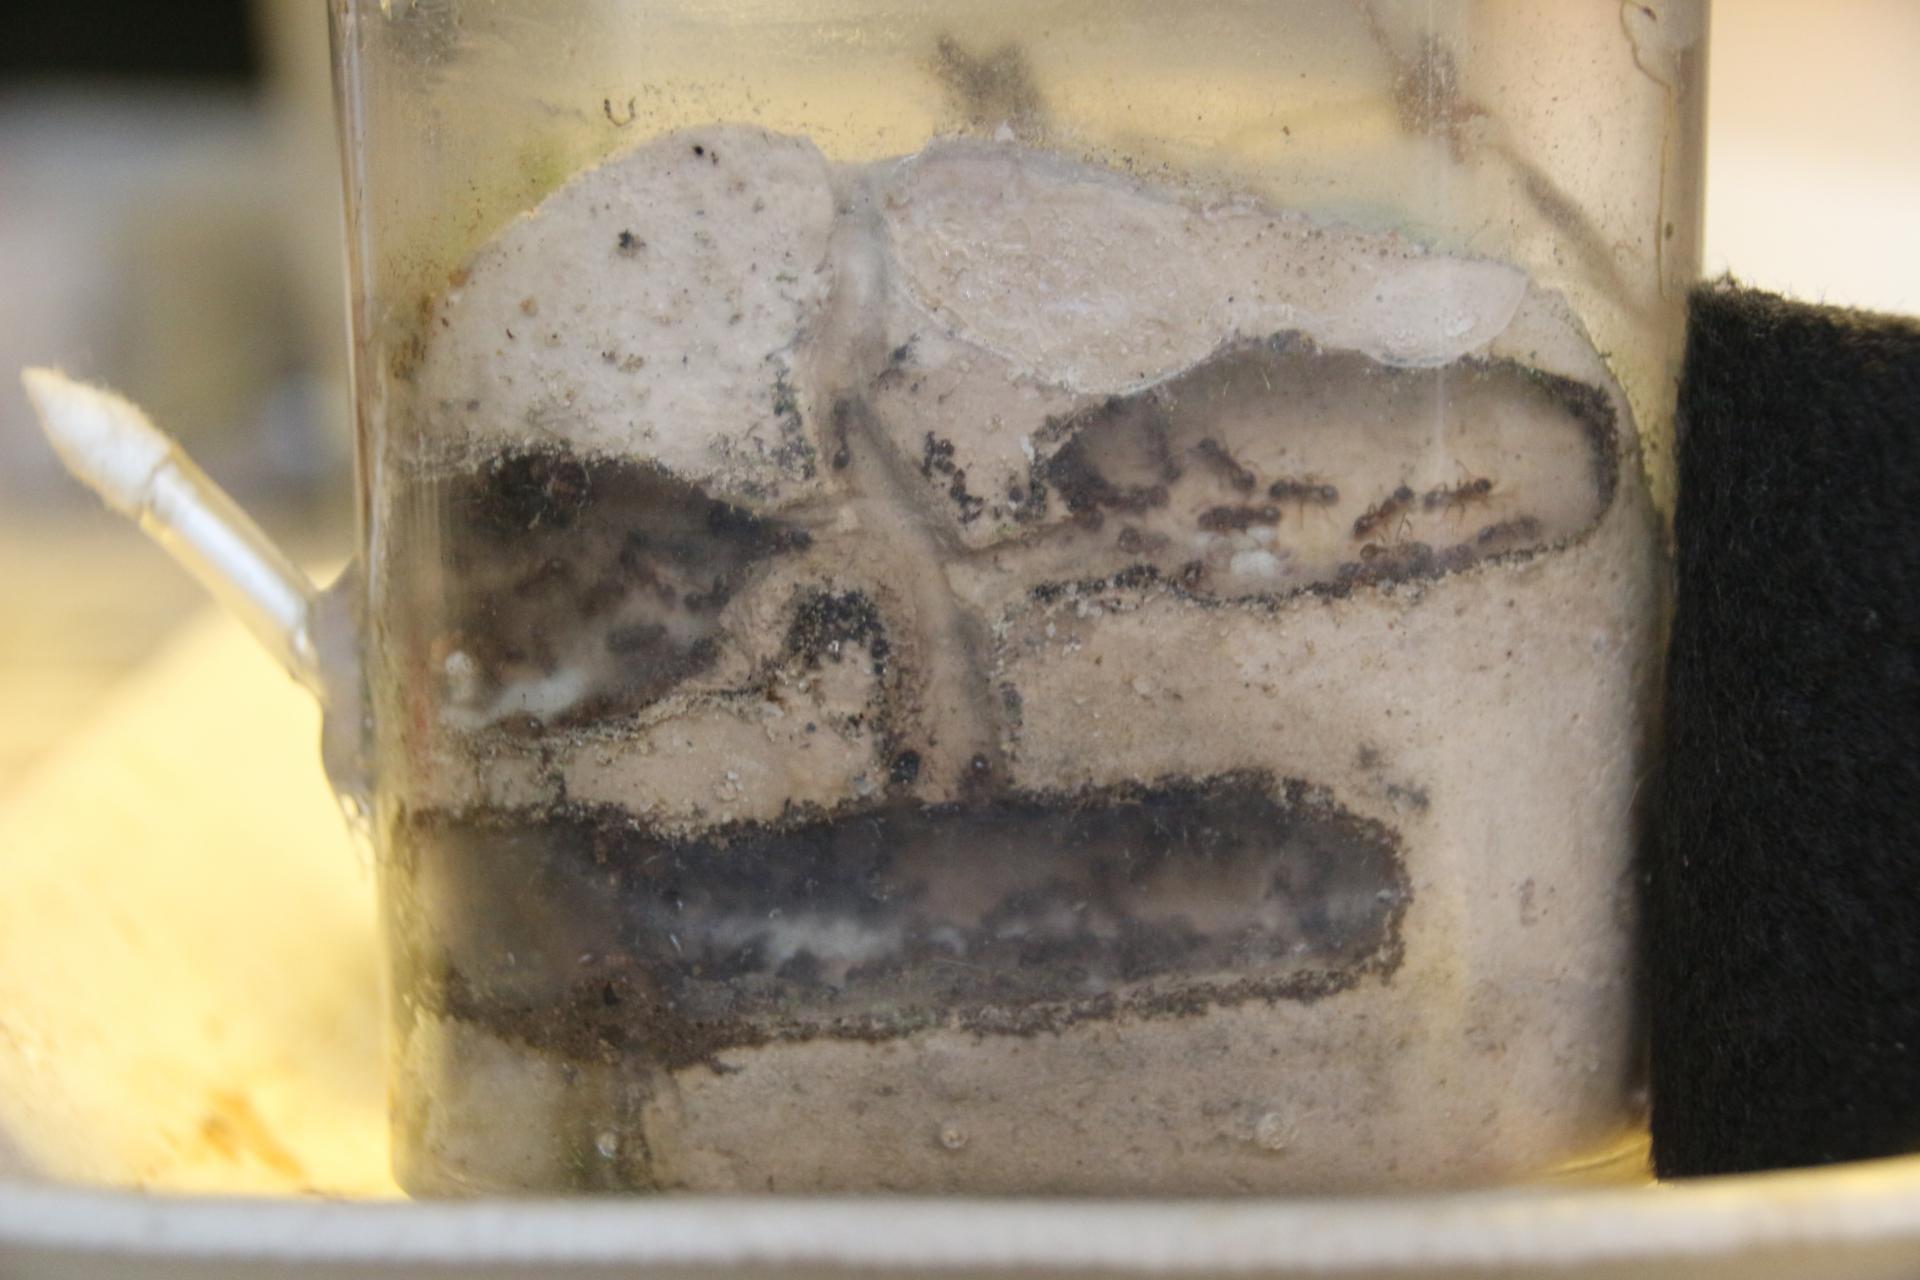
Images of example setups.
Single sided, four levels.


Single sided, thinner build.

Three levels, raised chambers for Myrmecocystus.


I hope this guide helps those who are just getting into making formicariums, or those who just need some inspiration. There are so many different methods and variables when making these vertical formicariums, many of which I was not able to mention in this guide. I hope you will explore these other methods. Building vertical formicariums is a very rewarding and exciting experience. Once you figure out the technique, it just takes a bit of practice quickly placing the sand and before you know it, designing chambers will become second nature to you!
Feel free to check out my main formicarium thread for other techniques and builds.
This thread is open to discussion and any questions regarding these setups, or formicariums in general - I'm always more than happy to answer. Feel free to post any images of your builds here as well, I'd love to see some! 
Edited by UtahAnts, December 28 2022 - 5:40 PM.