Jump to content

  • Chat
  •  
  •  

Welcome to Formiculture.com!

This is a website for anyone interested in Myrmecology and all aspects of finding, keeping, and studying ants. The site and forum are free to use. Register now to gain access to all of our features. Once registered and logged in, you will be able to create topics, post replies to existing threads, give reputation points to your fellow members, get your own private messenger, post status updates, manage your profile and so much more. If you already have an account, login here - otherwise create an account for free today!

Photo

You guys make formicarium building look easy


  • Please log in to reply
9 replies to this topic

#1 Offline spinyeti - Posted August 20 2015 - 5:31 AM

spinyeti

    Advanced Member

  • Members
  • PipPipPip
  • 49 posts
  • LocationConnecticut, USA
I attempted to build a grout formicarium last night, using both sanded and nonsanded grout per Crystals's walk-through.

I currently have a mess that I'm letting dry, hoping the front looks a lot better than the back.

I'm probably going to scrap it all and try again with just nonsanded grout.

My plans were too ambitious, too fancy for a first try.

#2 Offline Crystals - Posted August 20 2015 - 7:15 AM

Crystals

    Advanced Member

  • Moderators
  • PipPipPip
  • 2,048 posts
  • LocationAthabasca, AB (Canada)

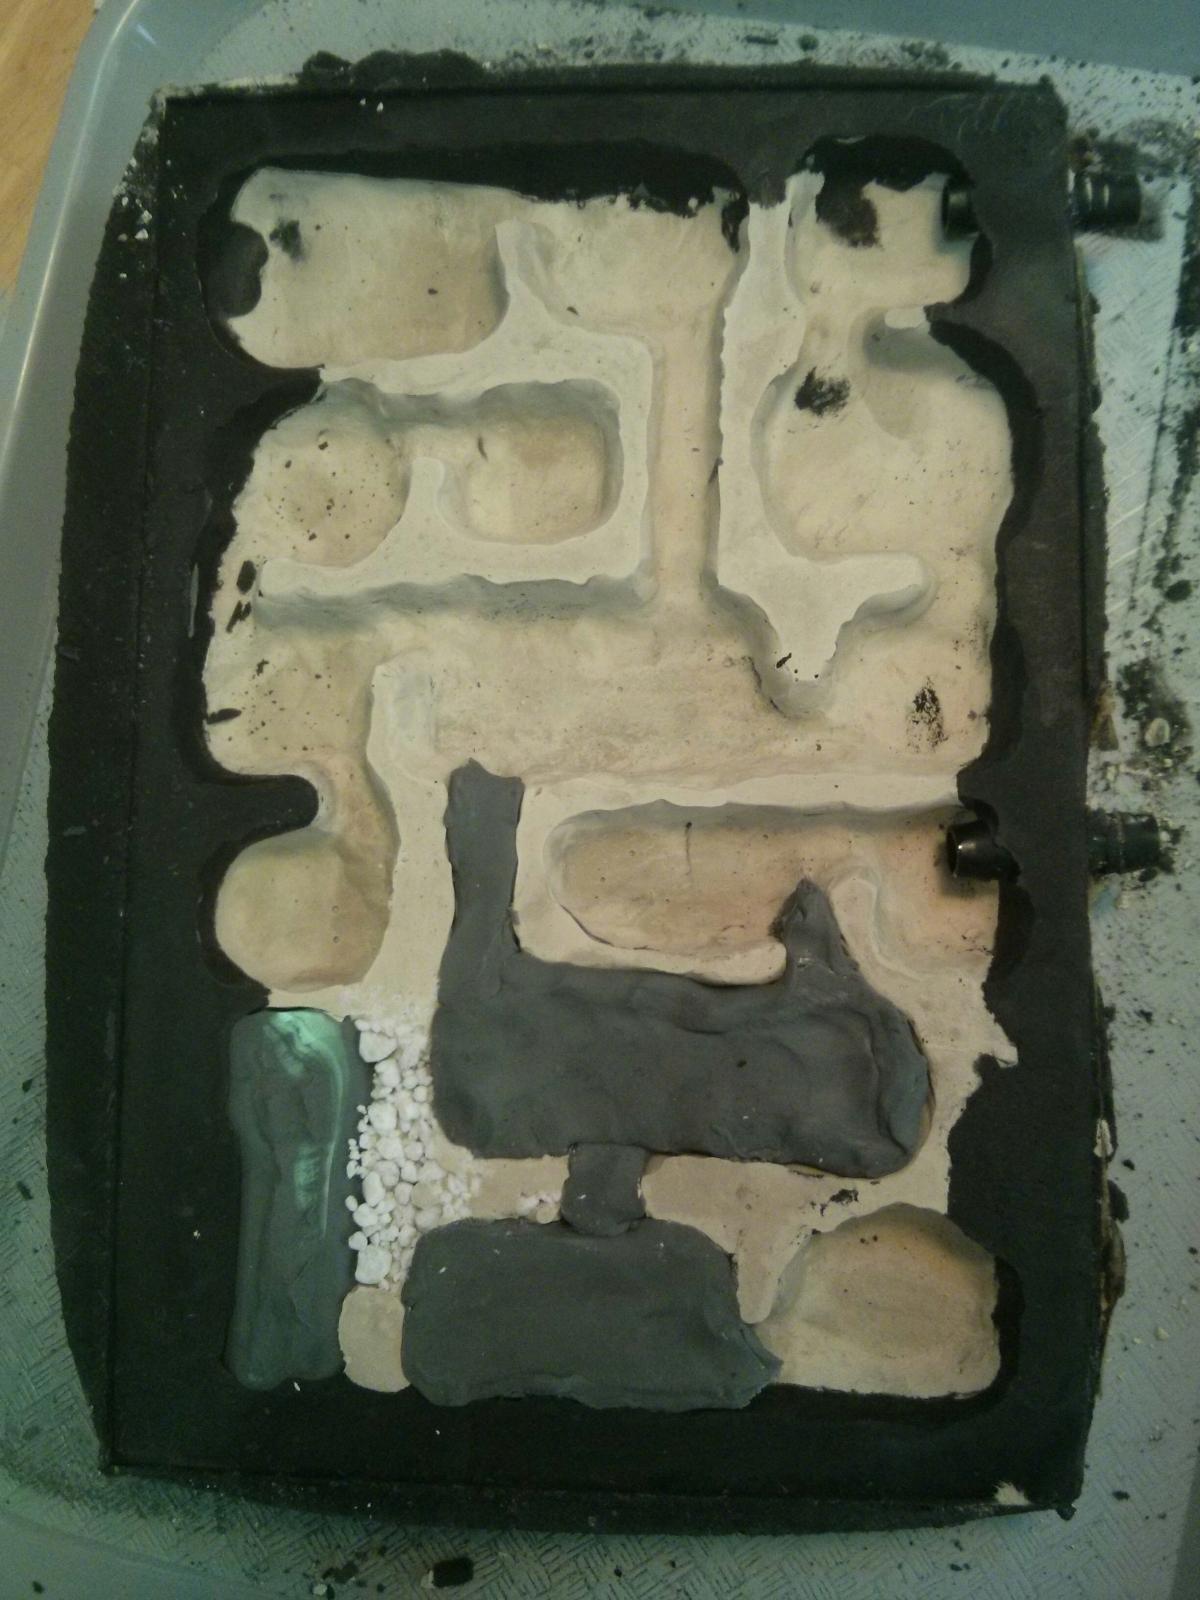
Luckily, the front always looks better (usually).


I never took pictures of my first dozen attempts - for good reason, as they went straight to the trash.  :D


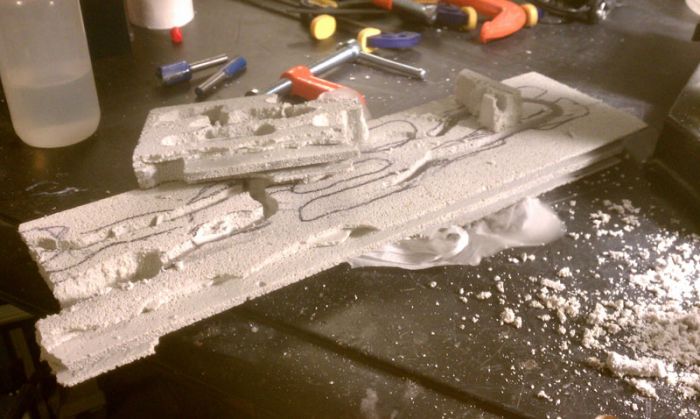
I found the ratios are actually quite flexible - it is the clay or mold material that is important.  Clay that can air dry does not work and causes the grout to crack.  Any oil based clay - or "never-drying" clay works fine. 

PS. don't even try homemade plasticine...  That was the absolute worse tunnel mold material I ever tried. There were so many cracks that it actually broke into a 35 piece puzzle. :D

Using all non-sanded grout also works fine, just add little rubber feet to the back to prevent any moisture from warping wood or damaging the surface it is set on.


My neighbor once saw me mixing grout and told me, "don't you read the instructions?  You aren't supposed to add that much water to grout."  I then explained that I was not using it on a tile floor, but making an ant nest.  He came over the next day to see it when I took it out of it's mold.


Post pictures of your completed piece, I love seeing how people do things differently and use different styles.


  • spinyeti likes this

"Always do right. This will gratify some people, and astound the rest." -- Samuel Clemens


List of Handy Links   (pinned in the General section)

My Colonies


#3 Offline dspdrew - Posted August 20 2015 - 7:22 AM

dspdrew
  • LocationSanta Ana, CA

Don't feel too bad. This is what my wonderful idea turned out like when I first got into this.


med_gallery_2_137_89254.jpg


  • spinyeti and nofuel11 like this

#4 Offline spinyeti - Posted August 20 2015 - 8:13 AM

spinyeti

    Advanced Member

  • Members
  • PipPipPip
  • 49 posts
  • LocationConnecticut, USA

Post pictures of your completed piece, I love seeing how people do things differently and use different styles.


I'll take a picture when I open it up this weekend. I'm hoping it's decent. If not, I've not lost much material and gained valuable experience.

#5 Offline BrittonLS - Posted August 20 2015 - 8:45 AM

BrittonLS

    Advanced Member

  • Members
  • PipPipPip
  • 284 posts
  • LocationFt. Worth, Texas

Yeah, the reason they look so good is practice. So much of the things you see people selling are very 'I could do that' but they've had lots of practice with the specific tools and materials they're using and have developed their own techniques and such. So definitely don't be discouraged. 


#6 Offline Nes187 - Posted August 20 2015 - 8:45 AM

Nes187

    Advanced Member

  • Members
  • PipPipPip
  • 31 posts
When the wife tried so couldn't wait long enough to let it harden and it kept breaking, after the pieces sat for a week they were so hard i couldn't break them if i tried and that was with sanded grout too so maybe try and let it dry for a week before touching it

#7 Offline spinyeti - Posted August 24 2015 - 4:18 AM

spinyeti

    Advanced Member

  • Members
  • PipPipPip
  • 49 posts
  • LocationConnecticut, USA
So the final result was much better than I had expected! Here you can see the front, mostly cleaned up and just prior to addressing the ungrouted perlite. I left some clay in the bottom to repair/cover up my perlite mistake, and my whole setup is undergoing initial heatpad testing tonight. I need to dial in the on/off settings for the timer I'm using to help with temperature regulation.

Attached Images

  • IMG_20150822_102152.jpg

Edited by spinyeti, August 24 2015 - 4:20 AM.


#8 Offline Crystals - Posted August 24 2015 - 6:03 AM

Crystals

    Advanced Member

  • Moderators
  • PipPipPip
  • 2,048 posts
  • LocationAthabasca, AB (Canada)

Pretty good, if time is not an issue, an alternative to fixing the mistake is to remove the clay and mix up a teaspoon of grout and patch it.  I use a kids paintbrush to apply it.


"Always do right. This will gratify some people, and astound the rest." -- Samuel Clemens


List of Handy Links   (pinned in the General section)

My Colonies


#9 Offline spinyeti - Posted August 24 2015 - 8:46 AM

spinyeti

    Advanced Member

  • Members
  • PipPipPip
  • 49 posts
  • LocationConnecticut, USA
Time was no issue. What I had done was mix up some grout and made sure it was quite loose. I poured it in from the front, and used a toothpick to coax it down into the loose perlite. I had left the clay temporarily to hold the shape I wanted. It doesn't look as smooth, but I think it will be fine, especially when I seal around that lower left water reservoir area with a bead of aquarium silicone.

#10 Offline William. T - Posted August 24 2015 - 11:51 AM

William. T

    Advanced Member

  • Members
  • PipPipPip
  • 725 posts
  • LocationWestern Maryland

Great work! I'm think of buying the "Ant Mine" plastic piece to use as a mold fory grout projects from now on. Look at how nice the mold is! Not my picture.


Species I keep:


1 Lasius cf. Neoniger 30 workers

1 Camponotus sp. 15 workers

20 Tetramorium SpE 30 workers

1 T. Sessile 200 workers


0 user(s) are reading this topic

0 members, 0 guests, 0 anonymous users