Jump to content

  • Chat
  •  
  •  

Welcome to Formiculture.com!

This is a website for anyone interested in Myrmecology and all aspects of finding, keeping, and studying ants. The site and forum are free to use. Register now to gain access to all of our features. Once registered and logged in, you will be able to create topics, post replies to existing threads, give reputation points to your fellow members, get your own private messenger, post status updates, manage your profile and so much more. If you already have an account, login here - otherwise create an account for free today!

Photo

Phasor's Lasius Journal (First Time Antkeeping!)


  • Please log in to reply
92 replies to this topic

#41 Offline PhasorShift - Posted January 15 2021 - 2:01 PM

PhasorShift

    Advanced Member

  • Members
  • PipPipPip
  • 117 posts
  • LocationMichigan

Did you mix it with water? Pure honey is often too thick for ants to drink, and they can get stuck in it. Better yet, get some Sunburst nectar from ByFormica. Don’t feed the queens anymore in any case.


I did not mix the honey with water, did not realize I had to do that. And I did get some Sunburst, but it didn't get delivered until a couple days later. I'll use that in the future.

#42 Offline PhasorShift - Posted January 15 2021 - 5:31 PM

PhasorShift

    Advanced Member

  • Members
  • PipPipPip
  • 117 posts
  • LocationMichigan
Welp, never mind. The queen that got stuck to the honey the other day has died. Don't know if it's because of the honey, but I suppose mistakes were made.

I just hope the last Crematogaster queen survives...

#43 Offline PhasorShift - Posted January 18 2021 - 5:31 PM

PhasorShift

    Advanced Member

  • Members
  • PipPipPip
  • 117 posts
  • LocationMichigan

Update 1/18/2021


Quick update today. I know I'm probably checking on them way too often, but today I noticed my first ever eggs! So exciting.


PXL_20210119_001614581._exported_1611019820759.jpg


Surprisingly it's the only remaining Crematogaster, and not one of the many Lasius queens who laid first. I hope the conditions are decent for them. And I need to remember to leave them be for more than a day at a time...


Now I'm thinking about nest designs again...


Edited by PhasorShift, January 18 2021 - 5:32 PM.


#44 Offline ANTdrew - Posted January 18 2021 - 6:12 PM

ANTdrew

    Advanced Member

  • Moderators
  • PipPipPip
  • 9,376 posts
  • LocationAlexandria, VA
You are checking them too much. Once a week should be the maximum. Your Crematogaster will produce way faster than the L. neonigers.
"The ants are a people not strong, yet they prepare their meat in the summer." Prov. 30:25
Keep ordinary ants in extraordinary ways.

#45 Offline PhasorShift - Posted January 18 2021 - 6:21 PM

PhasorShift

    Advanced Member

  • Members
  • PipPipPip
  • 117 posts
  • LocationMichigan
It's just so difficult to keep myself from peeking in every time I walk by... Which you think would be less often, since the ants are in my basement and I only go down there to do laundry, or ant related things. But yeah, I will leave them be now. I won't look. I promise. I'll go back to only checking on Saturdays. Probably.

#46 Offline ANTdrew - Posted January 18 2021 - 6:34 PM

ANTdrew

    Advanced Member

  • Moderators
  • PipPipPip
  • 9,376 posts
  • LocationAlexandria, VA
Yeah, just don’t. There’s nothing to see honestly.
"The ants are a people not strong, yet they prepare their meat in the summer." Prov. 30:25
Keep ordinary ants in extraordinary ways.

#47 Offline PhasorShift - Posted January 23 2021 - 3:43 PM

PhasorShift

    Advanced Member

  • Members
  • PipPipPip
  • 117 posts
  • LocationMichigan

Update 1/23/2021


Took a glance at my queens today. Crematogaster still has her eggs, and there are two Lasius tubes with eggs now! Somewhat surprisingly, it's the two with multiple queens. Maybe not so surprising, I dunno. None of the single Lasius queens have laid yet, but they do seem to all still be alive at least.


PXL_20210123_170146835._exported_1611444406716.jpg


PXL_20210123_170016018._exported_1611444417865.jpg


PXL_20210123_165939985._exported_1611444446550.jpg


Pretty hard to take good pics with just a phone and a clip on lens...


In other news, I finally tried my hand at DIY nest making. I have some ultracal 30 and a few containers, and I just got some various sand, gravel, pebbles, and plastic plants for decoration. I made a test nest to see how easy it was to work with, and it came out alright, I think.


PXL_20210123_030955645.jpg


PXL_20210123_041918161.jpg


PXL_20210123_041946086.jpg


I carved a chamber on the side for a sponge for hydration. I'm trying to test this to see how well it works, but honestly I have no idea if it is or not... plus, a few people have told me that this isn't a great way to do it, as ultracal can deteriorate quickly when in constant contact with water. 


PXL_20210123_041926811.jpg


This was just a test, and a smaller sponge than planned. If this doesn't work, I'm not really sure what to do as I've kind of banked on the ultracal nests being good. 


The other issue I'm contemplating that with the containers I got with intent to use as a nest/outworld combo, it would use a lot of plaster for not very much nest space. I planned to fill the 6"Lx5"Wx4.5"H acrylic container about halfway with ultracal, and carve out some chambers against the front wall. That would mean only about 2x6 inches of area, including space for a sponge. Again, not sure if that's a good method for hydration anymore. Tempted to try it anyway, and keep it moistened without ants for a while, since I'm still weeks if not months away from actually needing anything other than a tube. 

If you've got suggestions for nest building materials and techniques though, I'd love to hear it. Especially ways to help me with what I have been planning. Is it a good idea? Is it not? I just don't know.


#48 Offline ANTdrew - Posted January 23 2021 - 5:13 PM

ANTdrew

    Advanced Member

  • Moderators
  • PipPipPip
  • 9,376 posts
  • LocationAlexandria, VA
Ultracal is great. You should try making water towers, though. Read Sleepy’s guide:
https://www.formicul...y/?fromsearch=1
"The ants are a people not strong, yet they prepare their meat in the summer." Prov. 30:25
Keep ordinary ants in extraordinary ways.

#49 Offline PhasorShift - Posted January 23 2021 - 6:50 PM

PhasorShift

    Advanced Member

  • Members
  • PipPipPip
  • 117 posts
  • LocationMichigan
I did read that guide already. Good stuff, but I don't have sand for molding and honestly, I'm not really a fan of that style nest, or of water towers. I know, I know, it's not important what I like, but what the ants like. But I really do prefer the network of tunnels and chambers over one big chamber.

However, I did get some containers that can probably be used for water towers, even though I didn't realize there designed to screw on to each other.

PXL_20210123_221906960.jpg

I might still be able to work something out.

#50 Offline ANTdrew - Posted January 23 2021 - 7:39 PM

ANTdrew

    Advanced Member

  • Moderators
  • PipPipPip
  • 9,376 posts
  • LocationAlexandria, VA
You can mold any kind of tunnels you want with clay. Why don’t you like water towers? They provide a much more consistent level of humidity.
  • TennesseeAnts likes this
"The ants are a people not strong, yet they prepare their meat in the summer." Prov. 30:25
Keep ordinary ants in extraordinary ways.

#51 Offline PhasorShift - Posted January 23 2021 - 10:30 PM

PhasorShift

    Advanced Member

  • Members
  • PipPipPip
  • 117 posts
  • LocationMichigan
I don't have clay, either.

And I dunno exactly. Maybe because they're so intrusive to the nest design, like you have to actually include it in the chambers, where a sponge just passively hydrates everything nearby. It also seems like it really dictates a single main chamber design, I don't think I've ever seen a water tower in a nest with a tunnel network. Plus it seems really annoying to create and get in place without completely screwing up somehow. Most likely though, I just got the idea of sponge chambers stuck in my head and I'm being stubborn.
To be honest I don't even remember what I saw that said to do that.

Edit: weird double post o.O

Edited by PhasorShift, January 23 2021 - 10:30 PM.


#52 Offline PhasorShift - Posted January 23 2021 - 10:31 PM

PhasorShift

    Advanced Member

  • Members
  • PipPipPip
  • 117 posts
  • LocationMichigan
What kind of clay works for molding tunnels? Regular modeling clay? Play doh? I'll go out and get some soon, or order.

#53 Offline ANTdrew - Posted January 24 2021 - 3:54 AM

ANTdrew

    Advanced Member

  • Moderators
  • PipPipPip
  • 9,376 posts
  • LocationAlexandria, VA
Modeling clay is what want.
"The ants are a people not strong, yet they prepare their meat in the summer." Prov. 30:25
Keep ordinary ants in extraordinary ways.

#54 Offline PhasorShift - Posted January 24 2021 - 10:45 AM

PhasorShift

    Advanced Member

  • Members
  • PipPipPip
  • 117 posts
  • LocationMichigan
Alright, ordered some clay, better containers for water towers (I never even thought of using tea light cups), and some plexiglass sheets so I can try making nests that aren't inside a container. Oh, and magnets. Gonna try not limiting myself to the first nest design I decided I liked.
If I start going full tilt into the DIY, I'll make a new thread for that.
  • ANTdrew likes this

#55 Offline NickAnter - Posted January 24 2021 - 12:56 PM

NickAnter

    Advanced Member

  • Members
  • PipPipPip
  • 3,307 posts
  • LocationOrange County, California

For me, in my limited experience, sand molding worked well. It also coated the chambers in sand, which, for many species is a desirable thing.


Hi there! I went on a 6 month or so hiatus, in part due, and in part cause of the death of my colonies. 

However, I went back to the Sierras, and restarted my collection, which is now as follows:

Aphaenogaster uinta, Camponotus vicinus, Camponotus modoc, Formica cf. aserva, Formica cf. micropthalma, Formica cf. manni, Formica subpolita, Formica cf. subaenescens, Lasius americanus, Manica invidia, Pogonomyrmex salinus, Pogonomyrmex sp. 1, Solenopsis validiuscula, & Solenopsis sp. 3 (new Sierra variant). 


#56 Offline PhasorShift - Posted January 30 2021 - 2:43 PM

PhasorShift

    Advanced Member

  • Members
  • PipPipPip
  • 117 posts
  • LocationMichigan

Update 1/30/2021


Brood! and lots of it!


I did my usual Saturday check today, and there's more brood! The Crematogaster has quite a few more, and some are already larvae. The Lasius multi-queen tubes have some pretty big piles, and two of the single Lasius queens have started laying as well! That makes only three out of the eight test tube setups I have that do not have eggs yet.


Here are some pics of them all, with my regular phone camera. Can see quite a bit of the brood!

AF1QipOL1Kfv98BYR9kHzP1TIzX5ozCQhjPuglZd


-AJYXkfbn5stokP3lpSyAgr8DHuSnGY1_kmMjOQ9

9iFw8FJIUXSWv5aSkBEMaLI_5eEWMo8OfGiIWr-D

pdHs6WNW2ssiZn9W-TAXjav_MXrVuinrlOf5Vuq7

vwIBNklxqMRh2jrhVgrfRjtIdEXgBj0RwH1AiVW_

kzxmw2pr_tUnaFXgkiW6mJdoLH2Re6F11TiNeD7l

iB99gWMf2dp95_jeU_uTv2YLngSuAhPr7uW5QyzX

1NMi_YkadpT3AvFAXMuWPSPnzHed1QHkGqYQVOmb

yskmWboFeLxJ30b6axzIYVgR8i7QKhFEIKWNgSYL


also got a new toy, a USB Microscope that plugs into my phone, and can take much closer pictures than I can with the clip on macro lens. Unfortunately it can only do 480p, so the quality isn't as good as I was hoping, but many still turned out pretty good!

-YHQjmNVjbPezNVAnmYtCRqOimnORx5WY3OzSkv6

hqYjW9Z7HbJQW3dXvf6mly5Pz7McBEu1CmSYCZ9g

nuF8Ke45_GamR49u_Xq4U5wIsFEGtMTyOtHgsceA

SljjxGBMpwKygEwnoqfmOCAn252mHMd-KUfhUX--

sotLPgFXNkl30fEiGJSRf-Tz8hkXM1C7b-Pf2f4l

xOu172HaUtQFEG4newO2oRh3jfQ5oc7lpRtiXWEN(some of these came out worse than I thought...)

The Creamy again, because she's the only one that's different~

TY-nM8LtNuAU4PgQiJIfmT8yJ-vIVzeCAlkdYeTb

cuWtUUgxP4wzhx0OaAjlLJjeh3ZgwHVW1SjSMdsy


I also took some videos, which I converted to gifs, which hopefully I can add to the post.

LUMD0XSp60Mhx9Afwf076iFfm6lC1uHl9MEvJBv9

_bhHi1Pw7cy5edlSyV1B9ElDFjMCWIVEep1zDnM_


Look at them moving around that brood!! It's interesting to see where they place them, too. All of the Lasius are tucked right up against the water cotton, but the Crematogaster is out towards the end of the tube near the heating cable. I don't know if she wants to be warmer or less humid, but it is neat to see them regulate.


I also created two new formicariums for them, mostly just testing though. I'll make another post to talk about those.


I'm so excited to be getting brood! I can't wait to get nanitics and actually be able to feed them! I need to start thinking about feeder insects, don't I...


#57 Offline PhasorShift - Posted January 30 2021 - 3:36 PM

PhasorShift

    Advanced Member

  • Members
  • PipPipPip
  • 117 posts
  • LocationMichigan

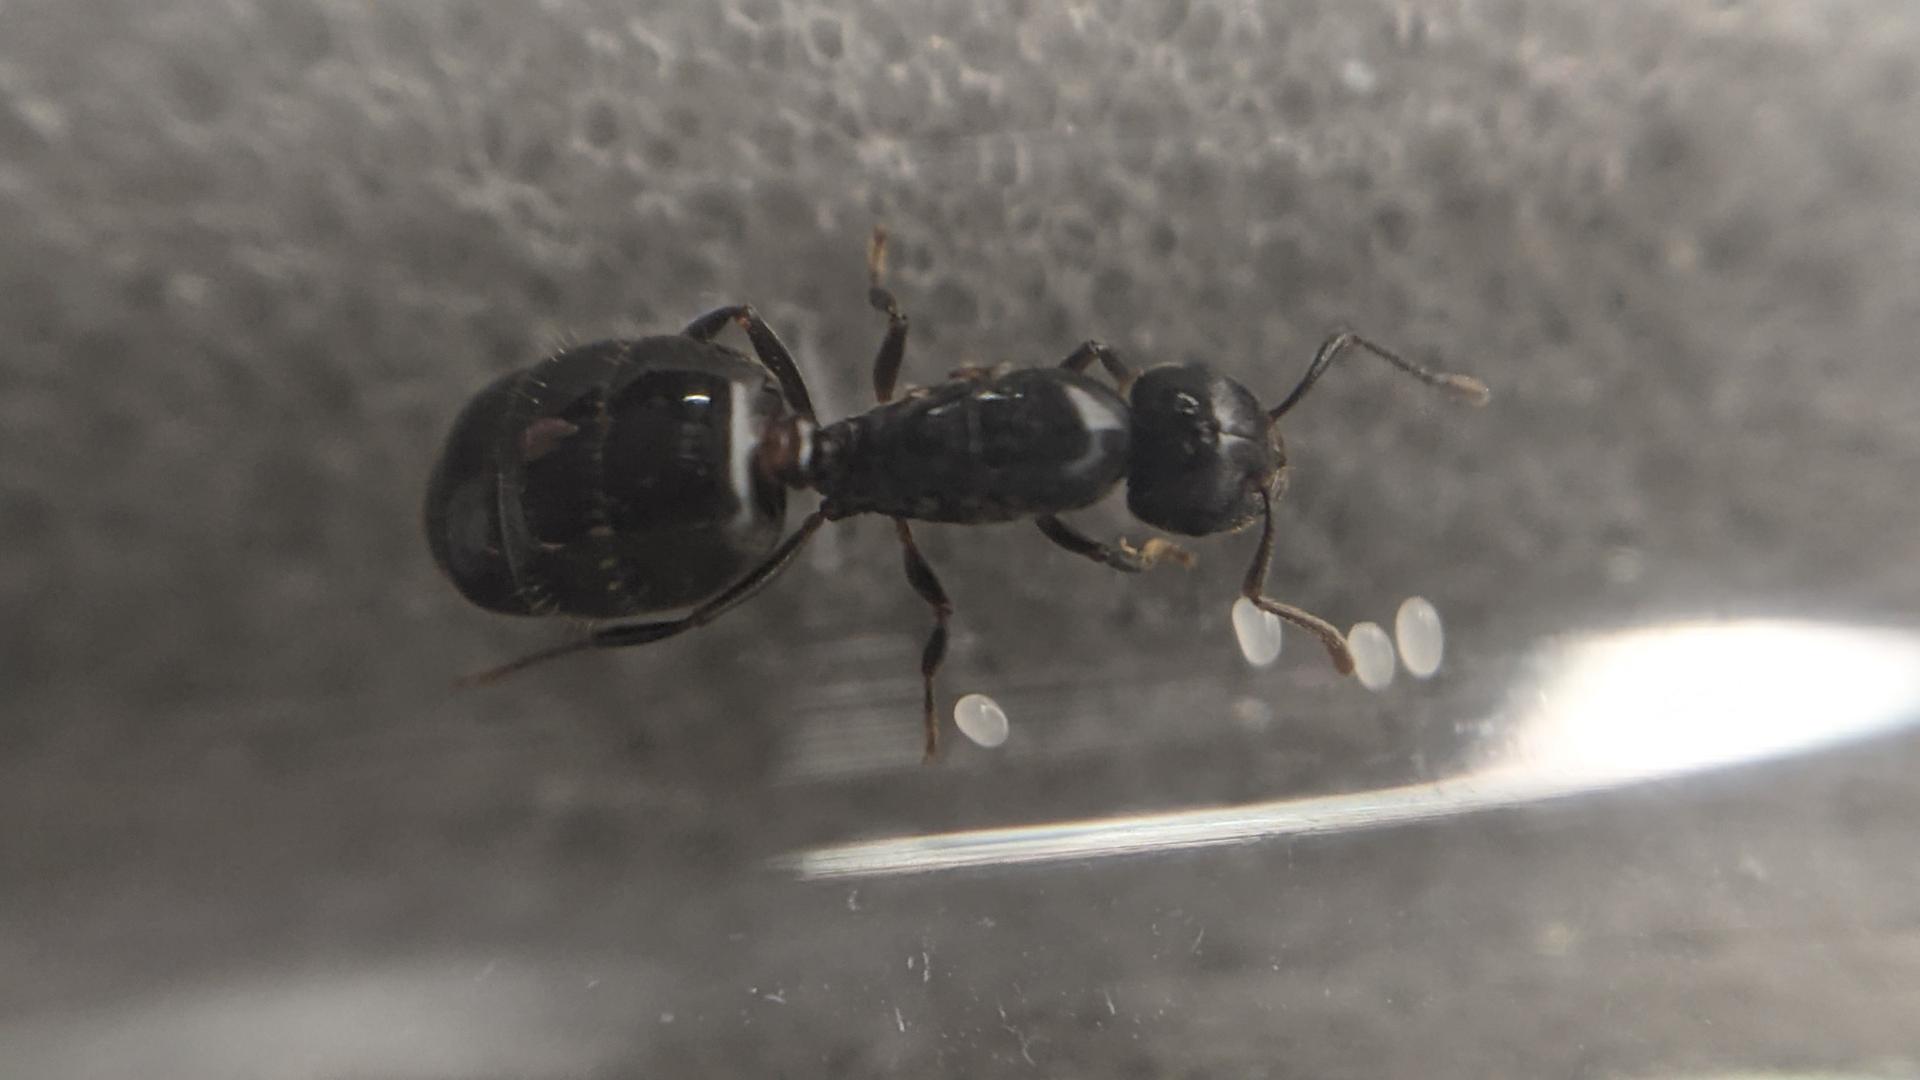
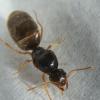
(first image in the previous post seems to be broken, so here it is again)

-AJYXkfbn5stokP3lpSyAgr8DHuSnGY1_kmMjOQ9


Anyway, here's the little DIY update this week!


I created two new formicariums this week, one by carving chambers into a block of Ultracal, making an all in one setup like the test I did before, and another one made by molding chambers out of clay and then pouring the Ultracal over it. Both turned out pretty good imo, especially for first attempts. I didn't take pics of every step of the process, but I'll upload those I did take.


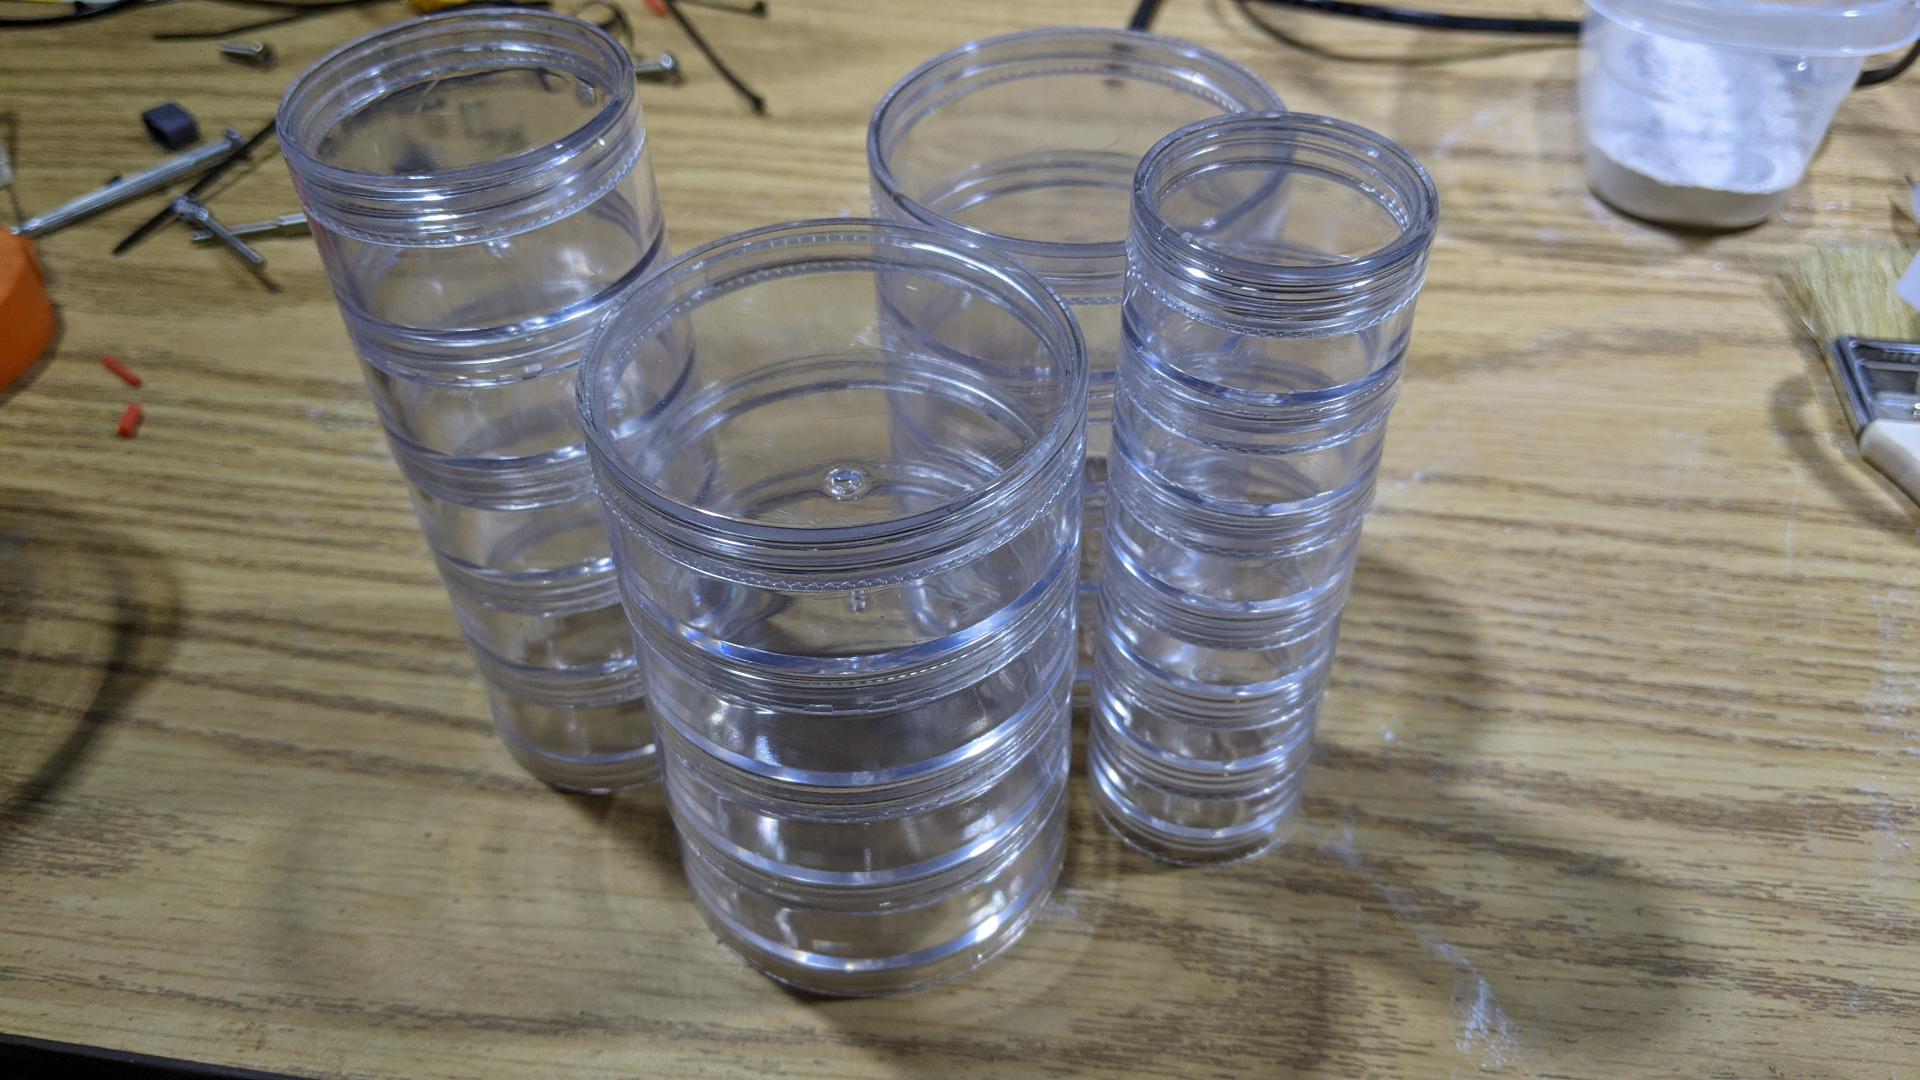
Here's how I made the first one. I started with this container, an mDesign something or other off Amazon. I got a four pack, so I can experiment if I want.

2yQb5niZaOjC0EBnpKXSE_gpgGX1yEWMWp53iEMS

(I really need to clean up my workspace...)


Then I mixed up my plaster and poured it in. I didn't fill as much as I wanted to, so I had to quickly mix up more and add it. I still used a ton of Ultracal for this nest though. In the future, I might want to fill the unused volume with a box or something, just to cut down on how much is needed. I coated the inside of the plastic box with a little bit of vegetable oil before this, to hopefully make removing easier.


Anyway, once it was poured, I added some fake plants and stones to the top. I was worried that the stones would just sink down, but it seemed I made it thick enough to support them... if only just. I was also worried the plant was too big and would create an escape route, but I think it'll be okay.

g9fDBvMokp3XtgPvazJTxo8hTTeait3tpqe1BOIp


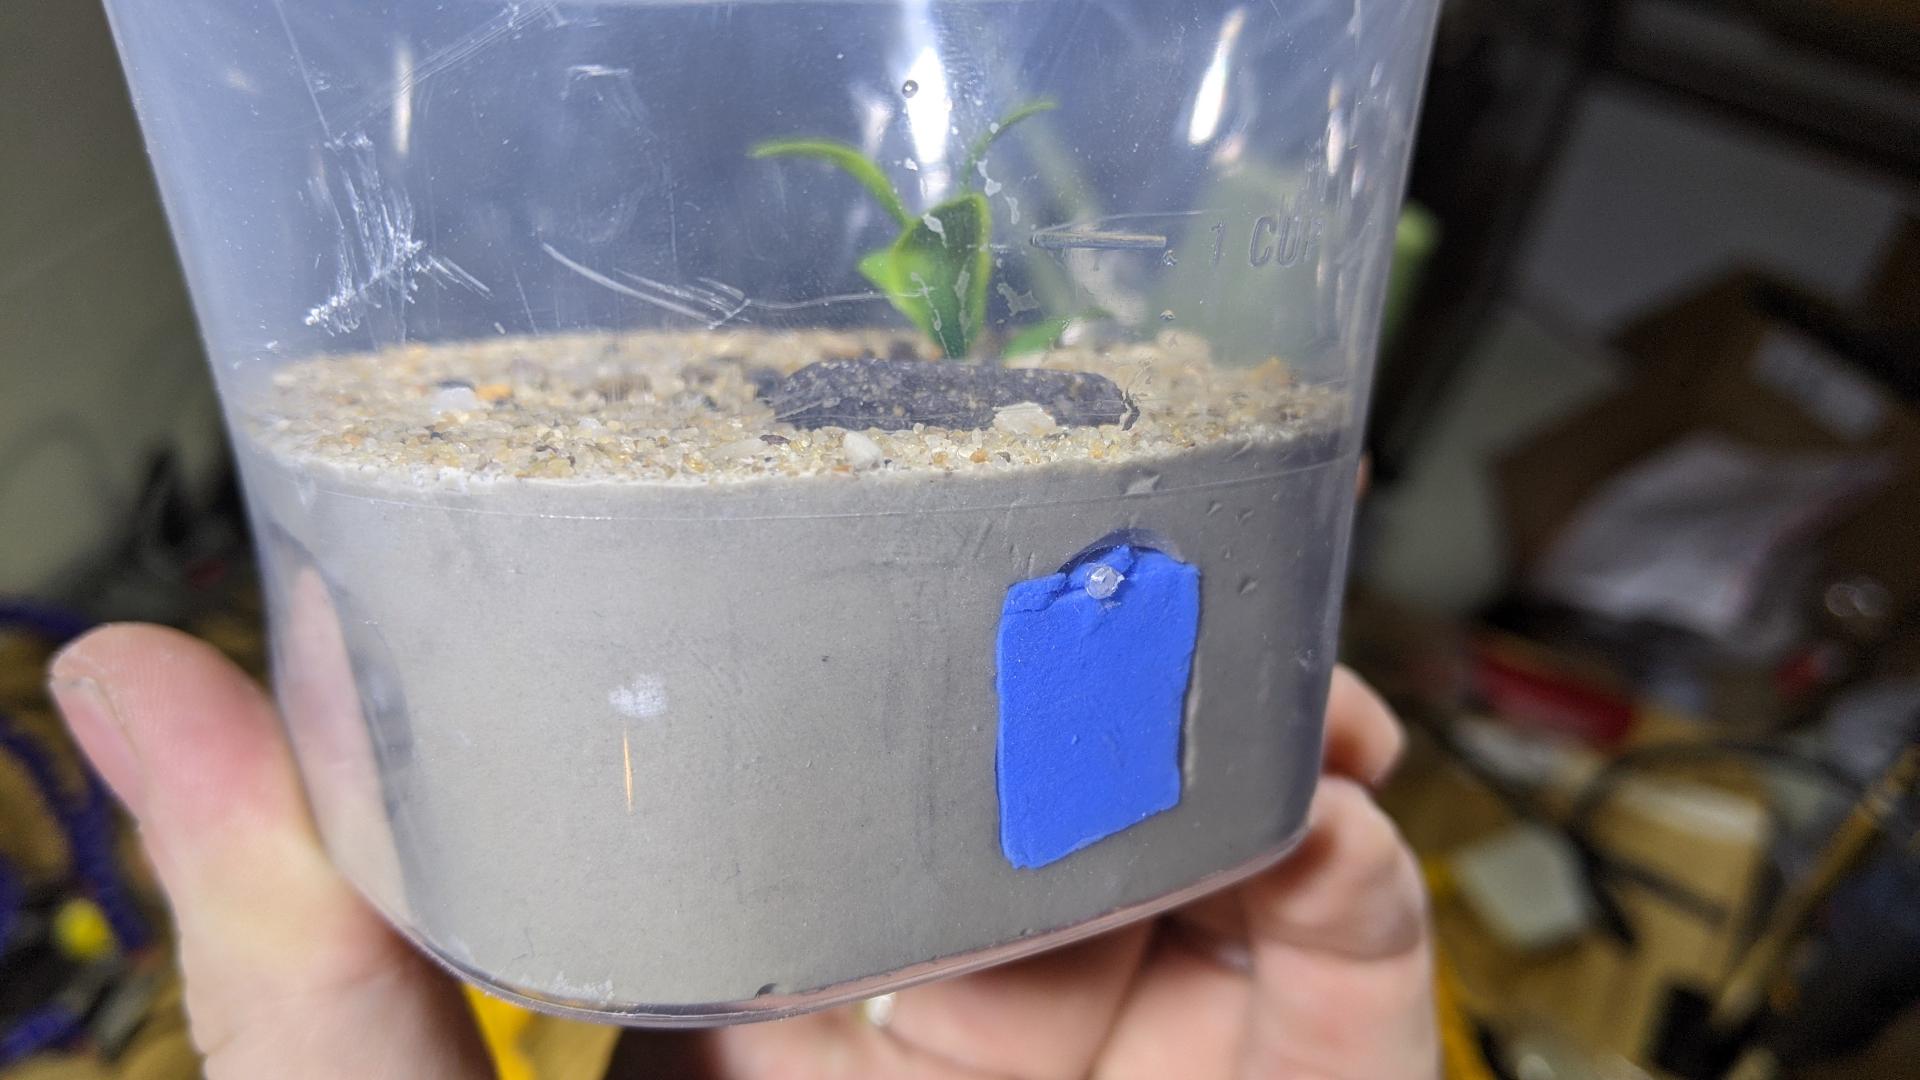
Next, I sprinkled some crushed gravel, and then some coarse sand over top. I went from biggest objects to smallest, so it would fill in the spaces between and everything would be securely stuck.

sdZHFXu1l1FdFMm85QQs3npZN0YEUbm8H6QLJy2T


Here's how it looked at this point. I do wish the container was taller, as I feel like I didn't have a lot of space for the nest, and the walls of the outworld were pretty short as well. I left this to set overnight.

BLpazBfgzthDj2VWYxvg1ZSsGECjjWxsGKXgY8-M


The next day I removed the solid Ultracal. It was not easy,

wtCwITIOZ0y9GyeyfTYR7HA3KSy3BydZ731634Wh


but after a few solid thwacks it came out.

1tOE7QMKTaWZvGXlKCoWWPj1Dd6X455s5iyctlJ4


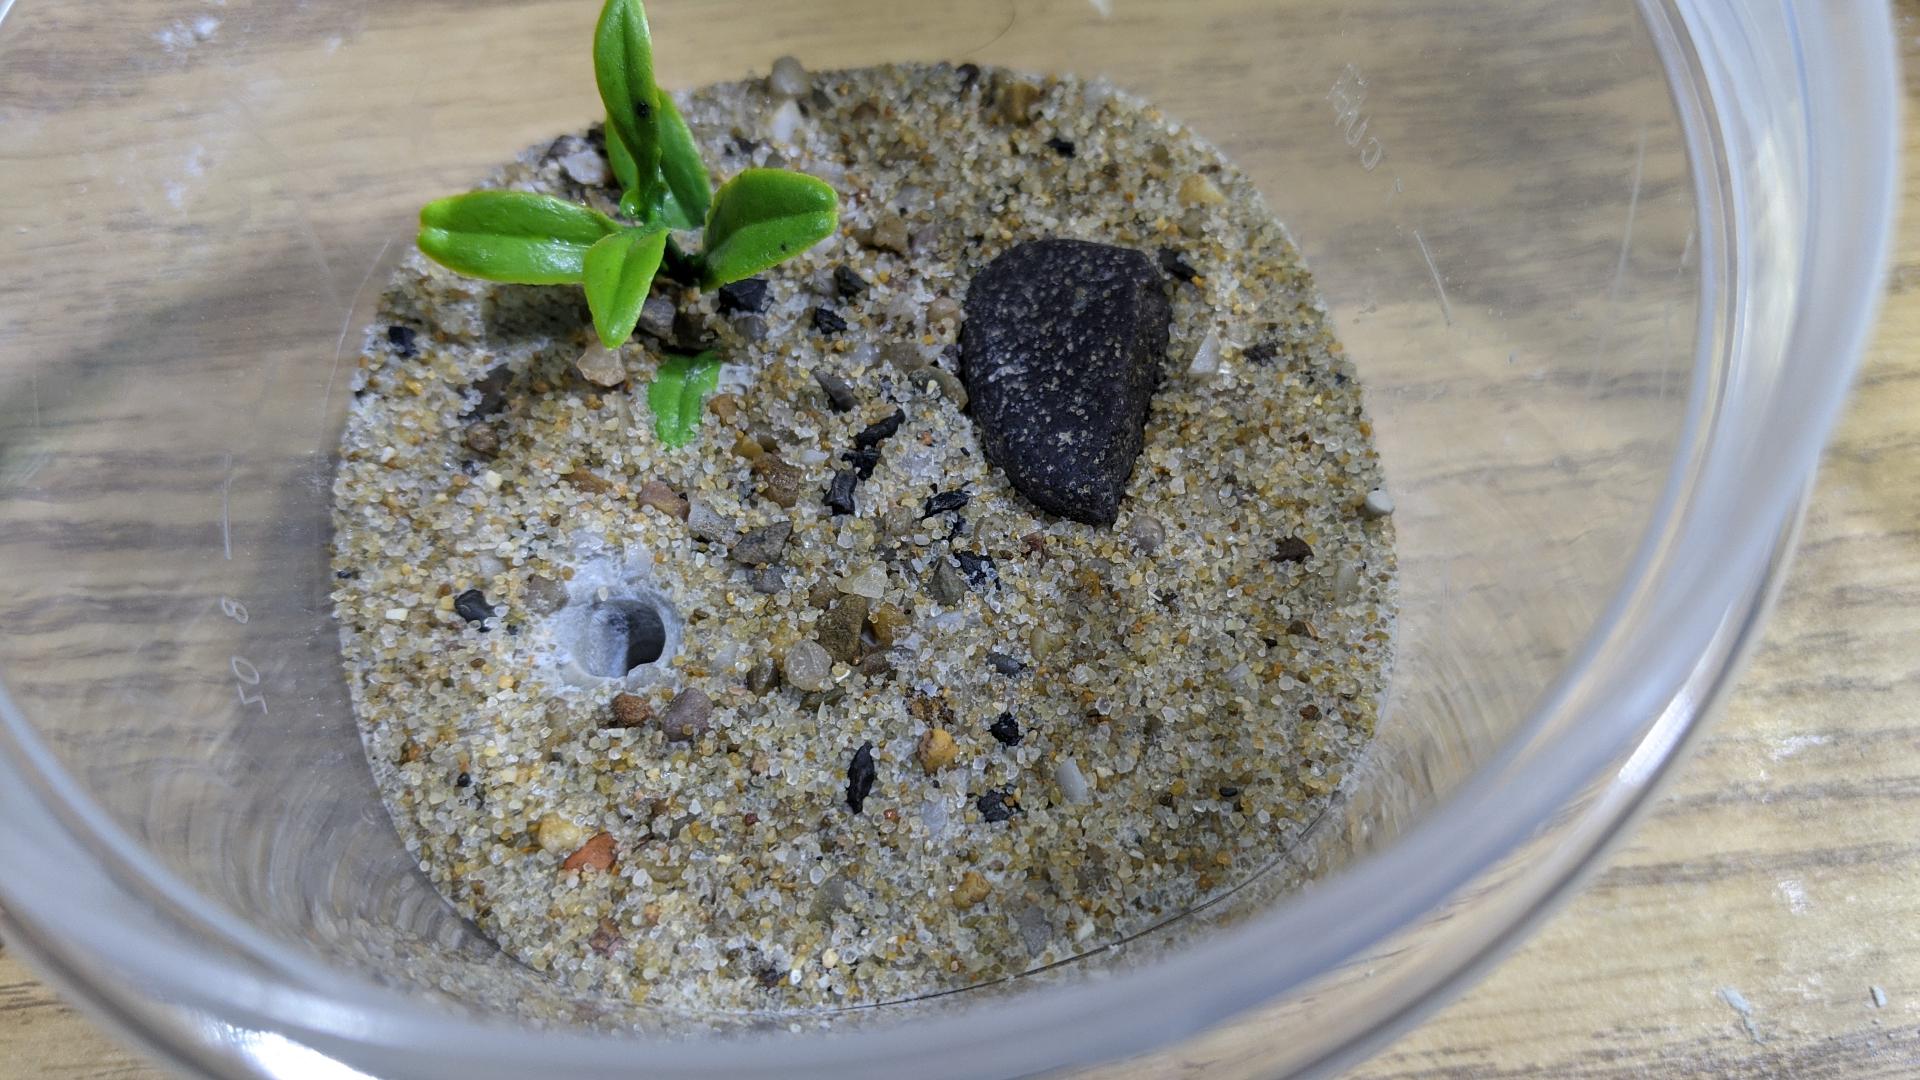
I had dumped all the loose gravel and sand off the top, leaving only the stuff stuck in. This was now a natural looking diorama.


Next I sketched out a design and began to carve. I started by drilling holes with a large bit to remove most of the material, which did not go as smoothly as I hoped. My drill would never quite go where I wanted, and if it were too close to the next hole over, it would just slide to follow that one. So my rectangular hole for the sponge ended up looking like... this. After drilling, I would remove the remaining plaster and shape the chamber using a rotary carving tool.

5eK3bqWATk5Rf5prt1-1Xv23pKbiZ5VLluCjGS9L


It was very dusty. 


After a little while, I got most of the main chambers and tunnels carved out. I had a little more planning to do, so I took a break at this point. Again, not perfect, but going pretty well~

bFnPJVqpqJFH7EFZa_2bNZFJfettIskm_wg_abTC


Next, I drilled holes in the lid of the container using the largest size step drill I had, and cut out circles of my steel mesh to cover them. I used a soldering iron to melt the mesh into the plastic, which worked like a charm. Burned the plastic a little bit so it discolored, so next time I'll turn the heat down.

Uj5jL3SRQckWLD9fTuNq-yOtcOT2KesDPSydzCgt


Then I finished up the carving, including drilling the entrance holes to the surface. As you can see, the idea for this nest is in two parts. The section on the right is what will hold the ants first, while the section on the left is blocked off. Once the colony grows enough to fill those two chambers, I'll unplug the left side to allow them to expand. This way I won't need to connect a bunch of nests together in a network of tubes, or continuously move the colony as they grow. I'll still need to expand at some point, but they'll be able to stay in this nest for longer.

J7GUvKWLs2dMvYdDIBQWh4CRueWw7q2qxahsEOtI

Sn3HBrFa3dfYTRXco7RSyo_al0zKTvnxh06hDuh2


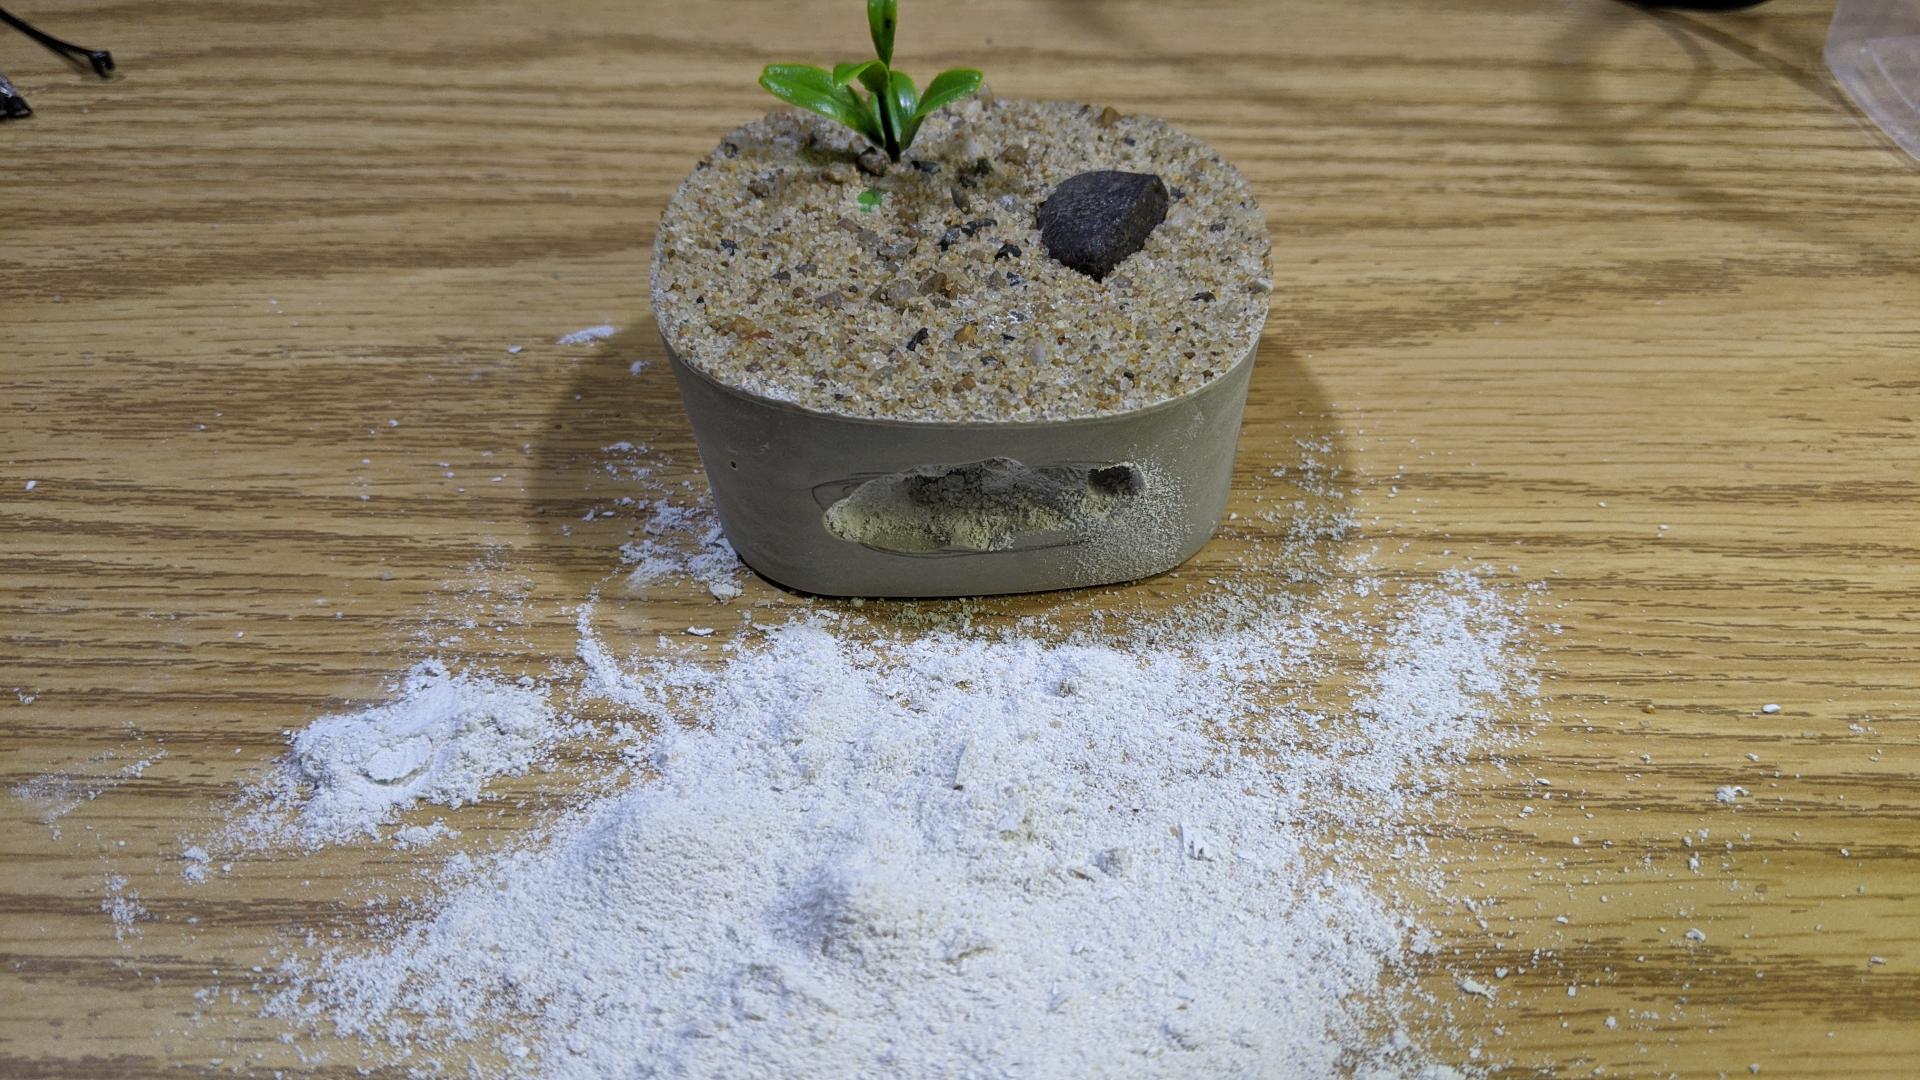
I don't have any pictures of this part, but next I attempted to paint the inside of the chambers with liquid Ultracal, and stick sand to it so the chambers had texture and were more natural. This didn't work so well, as the Ultracal became a thick, dry paste almost immediately and the sand wouldn't stick. Some did though, and I guess I'll live with it. I suppose the ants will probably be able to pull some sand off and have a bit of substrate to play with, which isn't a bad thing.


I cut a PVA sponge to fit the chamber and slid the whole thing back into the container. It was almost as hard to put in as it was to take out. I'm still not sure if I got it all the way to the bottom, but at least it's stuck pretty securely. I drilled a couple holes into the outworld section and added sections of tube for future connections, if needed. Then I drilled a hole to the sponge chamber and filled 'er up. Here is the completed nest. A little messy, but it turned out alright.

ZJ1CTsZfyvKCyaZ6RfmznEqSZJkpfFucKAOfl4vh


On to the second nest I made this week! Some of it was between the steps of the last nest, but I separated them out. I took fewer progress pictures of this one, so it'll be less image heavy.


I got some modeling clay, plexiglass sheets, and this conveniently sized container, and I molded out some chambers, sticking it right to the glass. Not entirely happy with the design, but it'll do.

Sbyw1qwiDQrwpwbNYcvLOx474qgwUN8OvtYevZXe


I also made a water tower by melting some of that steel mesh onto a tea light cup, and poking a tube into the side for easier filling.

xInwAznTadST0-Ka1M-z5zg5FZ7CV03Zdr8mFmNe


I stuck this mesh side down into the clay, and got the tube against the side. I tried to stick it there with hot glue to keep it from filling with plaster, but it didn't work so I just let it be.

1YEsXsXP2ISNPUHb3gaCmnonnc4xLx5uZ9m-pyCq


Now we were ready for the pour! I put six magnets around the edges of the plexiglass, held in place with magnets under the container. Then I mixed up some more ultracal and carefully poured it over. Again, I didn't quite make enough, so I quickly had to mix more to cover up the bottom of the water tower.

LFjSutuOVGEd4Gacl8SJkeDV_E6RmqOTkJx0C7w_


and I let that set overnight.


Some of the plaster did get underneath the glass which I hoped to avoid, but it wasn't much.

E_0Cq2-gGZhEZcvmlUi48zgtRxmZKeavbiHnx6cB


I popped the plaster out of the mold and pried out the plexiglass. It was in there pretty good, which was kind of the intention. Next I had to pull the clay out, which was slightly difficult, but once I got it started it was a lot easier.

l5G5GZSndTS3bt2VhA57qWSjJNV0JcdD8q-AgaCg


Once the clay was out, it looked like a proper nest! the screen of the water tower was a bit dirty with stuck clay and plaster, but I think it'll be okay. There were a couple small bubbles, but nothing bad. Success!

mlxZ0Owrnq_UNT2-Aa3DGcFXTiOcr6T-ZNLsh8T6


Finally, I smoothed out some of the sharp edges with the rotary, and was good to call it done! Almost. I debated for a long time on whether to put the entrance on the sides or the end... Eventually I settled on the end, because that would give me three flat sides to set the nest next to something, instead of just the two.

yKrqwg2j4ZDYgKT-TUBCyzS6uOnBxsrHQQiAKnuZ


I also put some sections of tubing in to those for connecters. A very tight fit.


And that's it, two nests finished! I put a temperature/humidity probe into each of them (at least as far as I could) to test how they would be, if they worked well enough for ants to move in. I've still got a few weeks or even months yet before any of my colonies will be even close to big enough to need either of these nests, so I've got plenty of time to see how their conditions settle and redo as needed. I'm not entirely sure how I should heat these either, so that's being tested as well.

2nNmCpi_YUTbMHYJMgmvA05XBskJ8AbaTQNoeHTv


And there we have it! My two first official home made formicariums! Certainly not my last. I put this in my journal thread because it was going to be a one-off post, but if you think I should make a new thread somewhere else for these, let me know!


See you next week!


#58 Offline PhasorShift - Posted January 30 2021 - 3:47 PM

PhasorShift

    Advanced Member

  • Members
  • PipPipPip
  • 117 posts
  • LocationMichigan
(ah rip. Many of the images in this one seem to be broken as well. This is why we can't have nice things!)

It looks like the hyperlinks still work though, so you can click to see the pictures.

#59 Offline antsandmore - Posted January 30 2021 - 6:14 PM

antsandmore

    Advanced Member

  • Members
  • PipPipPip
  • 705 posts
  • LocationSan Diego California

oops. can't see images:(


Ants I am keeping:

 none for now, planning on being more active this year


#60 Offline PhasorShift - Posted January 30 2021 - 6:16 PM

PhasorShift

    Advanced Member

  • Members
  • PipPipPip
  • 117 posts
  • LocationMichigan
Yeah. Dunno what happened. Maybe I tried putting too many pics in one? Maybe I should embed from imgur or something.


0 user(s) are reading this topic

0 members, 0 guests, 0 anonymous users