I wouldn't do molding with sand, I think it would be too hard, just make a second batch of plaster or grout or whatever your using, paint the chambers with it, and coat it in sand.
- Formiculture.com
- Forums
- Gallery
- Members
- Member Map
- Chat

Advanced Member


I wouldn't do molding with sand, I think it would be too hard, just make a second batch of plaster or grout or whatever your using, paint the chambers with it, and coat it in sand.
Advanced Member
^ did you paint the plaster nest in the second pic?
should be able to pull the other nest out when the time comes
I didn't paint it I just think I over hydrated it, while figuring out how the hydration works. lol
Advanced Member

Out of curiosity, would anyone know how to go about making a formicarium along the same principles as the "Mini Hearth" design that TarHeelAnts has? I love the design(s) but I've had bad experience when ordering from him. Not to mention when he messed up my order and a friends order, he had no intentions on making it right...id rather try and make them myself. I get the concept but the sand texture on the inside of them...how? Wet sand shaped instead of using clay for the chamber(s)? Fantastic design as said before but again, I'd love to make these myself...or something along the same principle.
I made some, heres a thread I made about it. http://www.formicult...ri-dish-update/
Advanced Member

Edited by Guy_Fieri, December 13 2018 - 6:38 AM.
Advanced Member


POPULAR
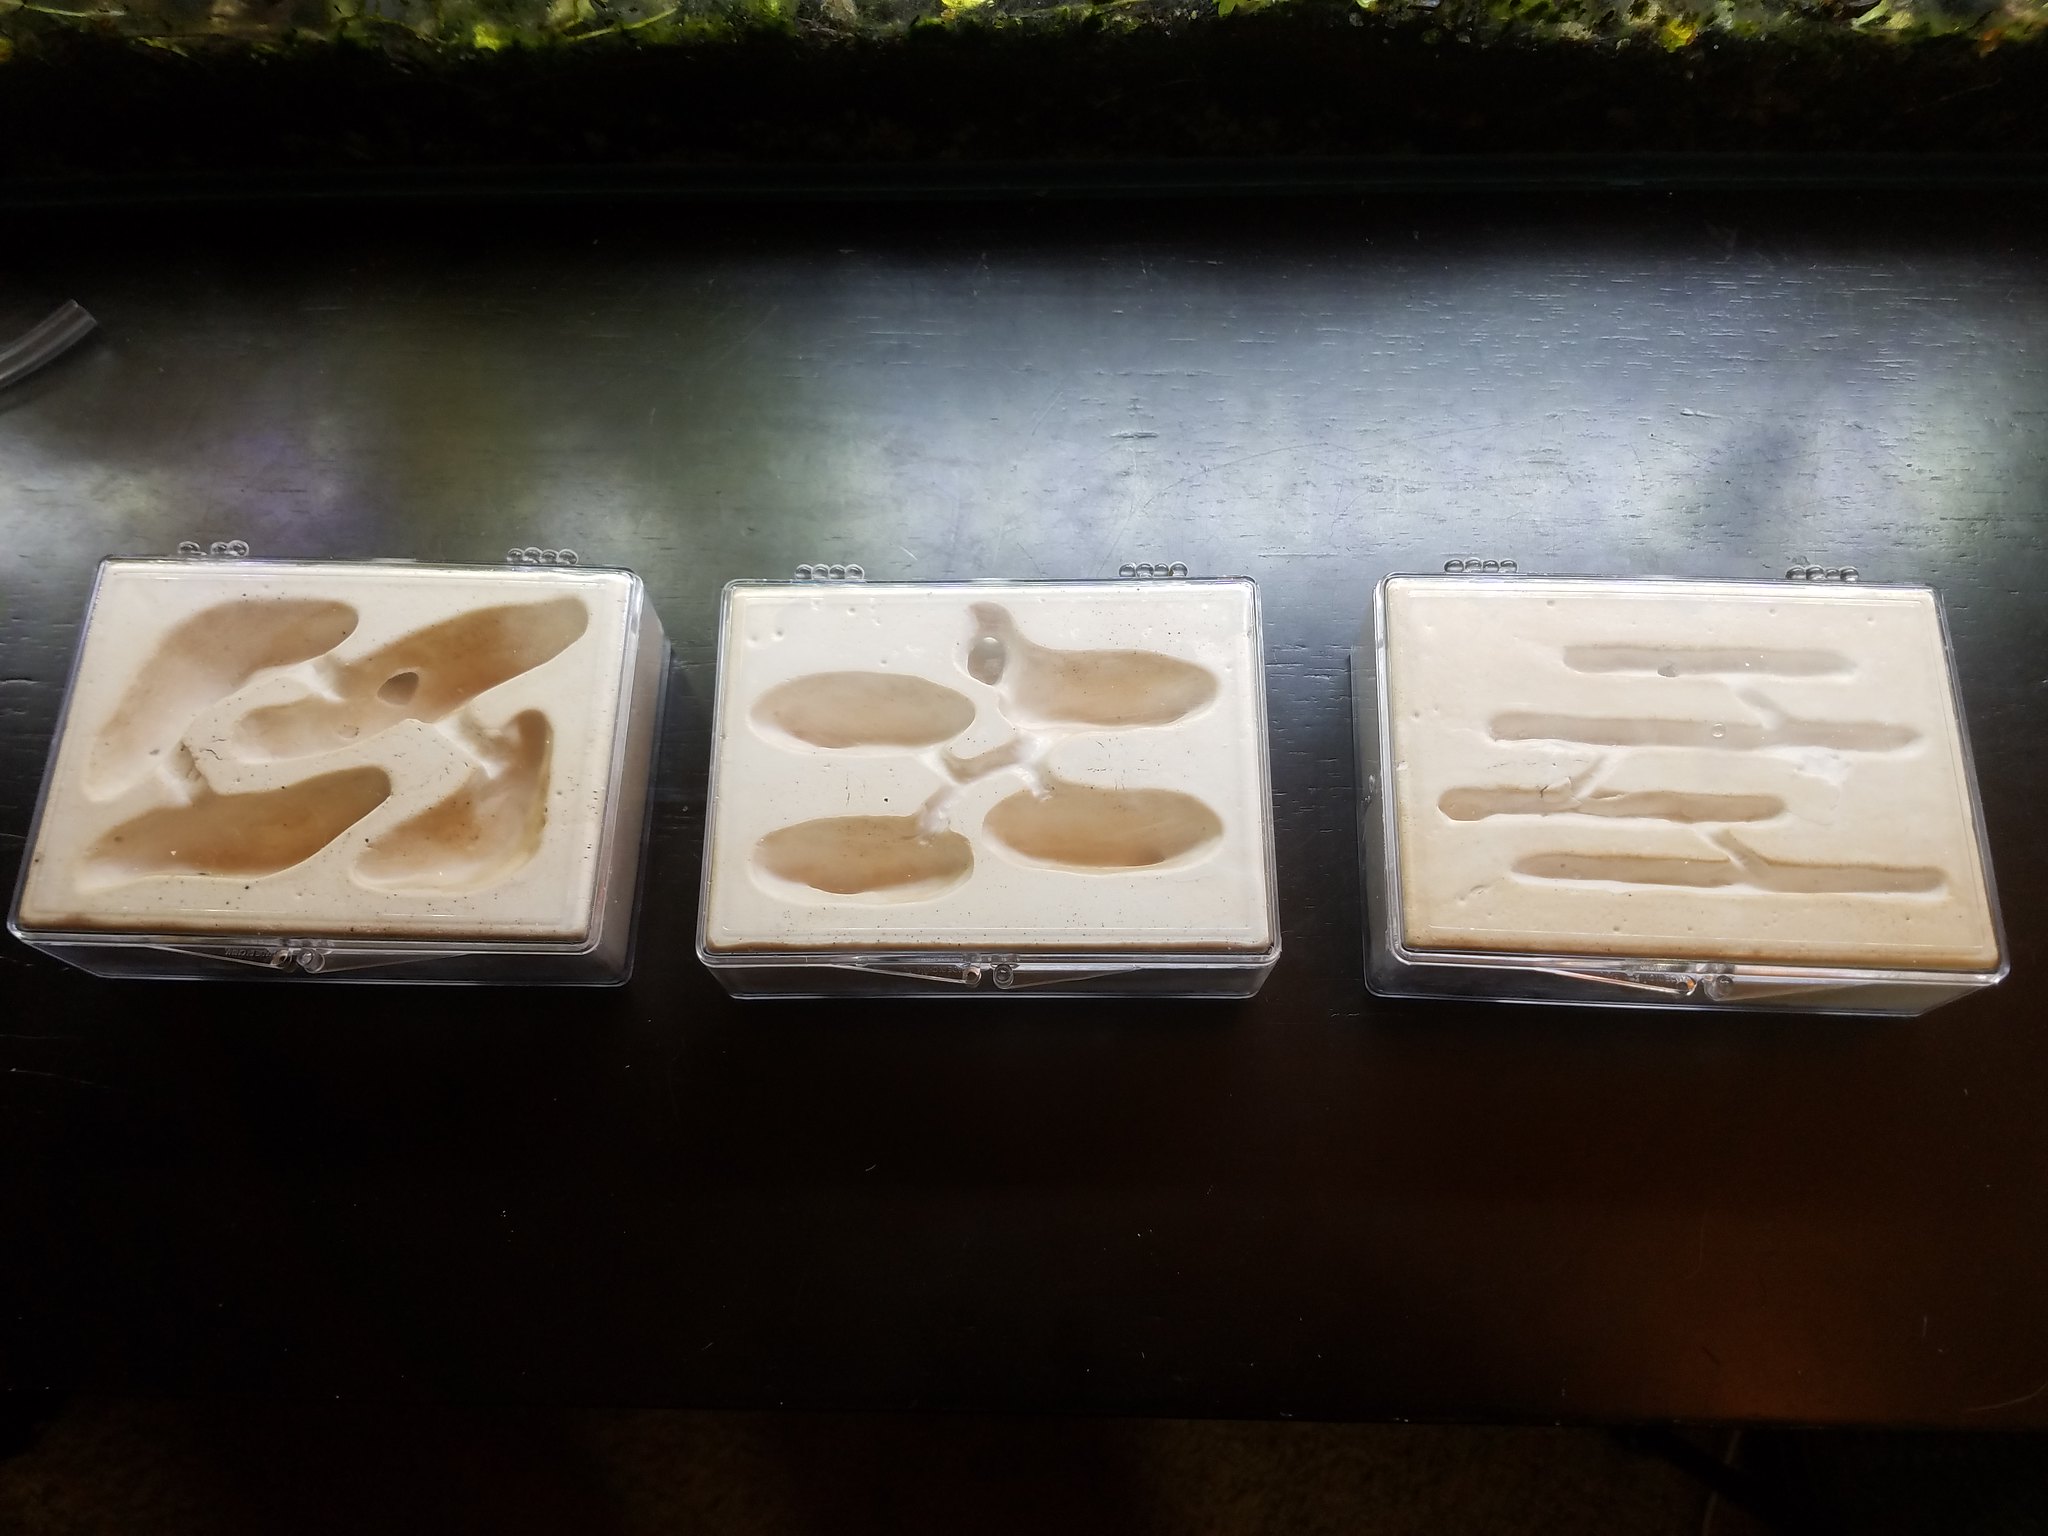
So here is a quick run through of how I started making plaster nests out of old card cases for some of my smaller ants and colonies.
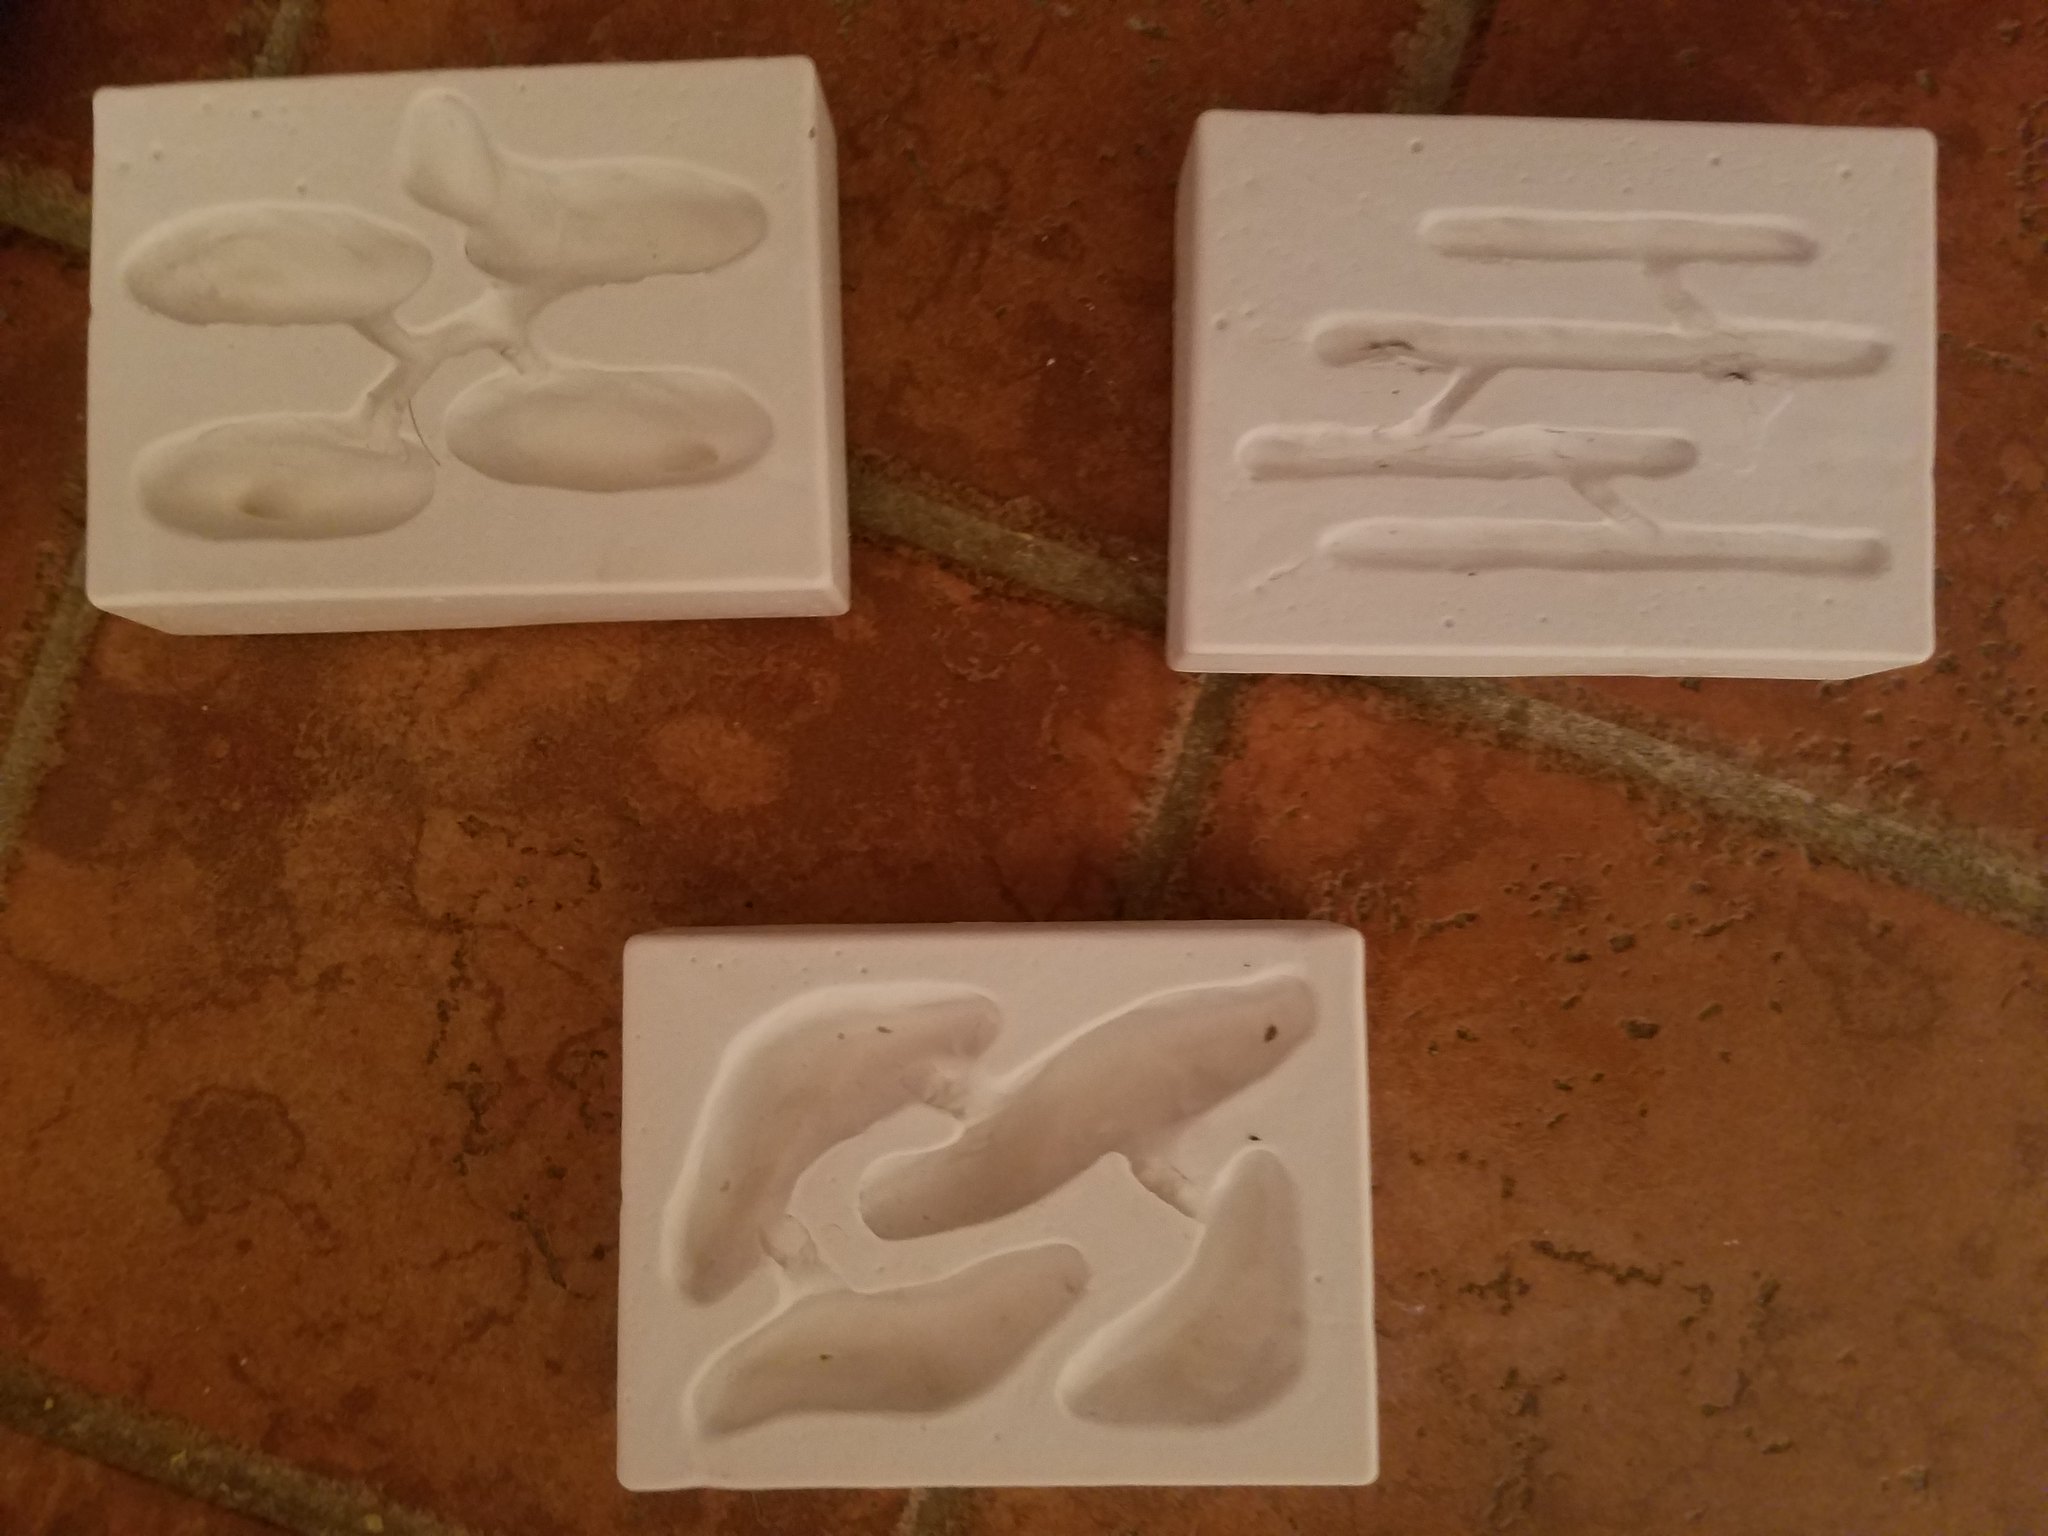
I start by sculpting the design directly onto the bottom of the card case using clay. (I tried using playdough at first but the results were not very good as it actually seemed to bond a bit with the plaster and slid around as I was pouring.)
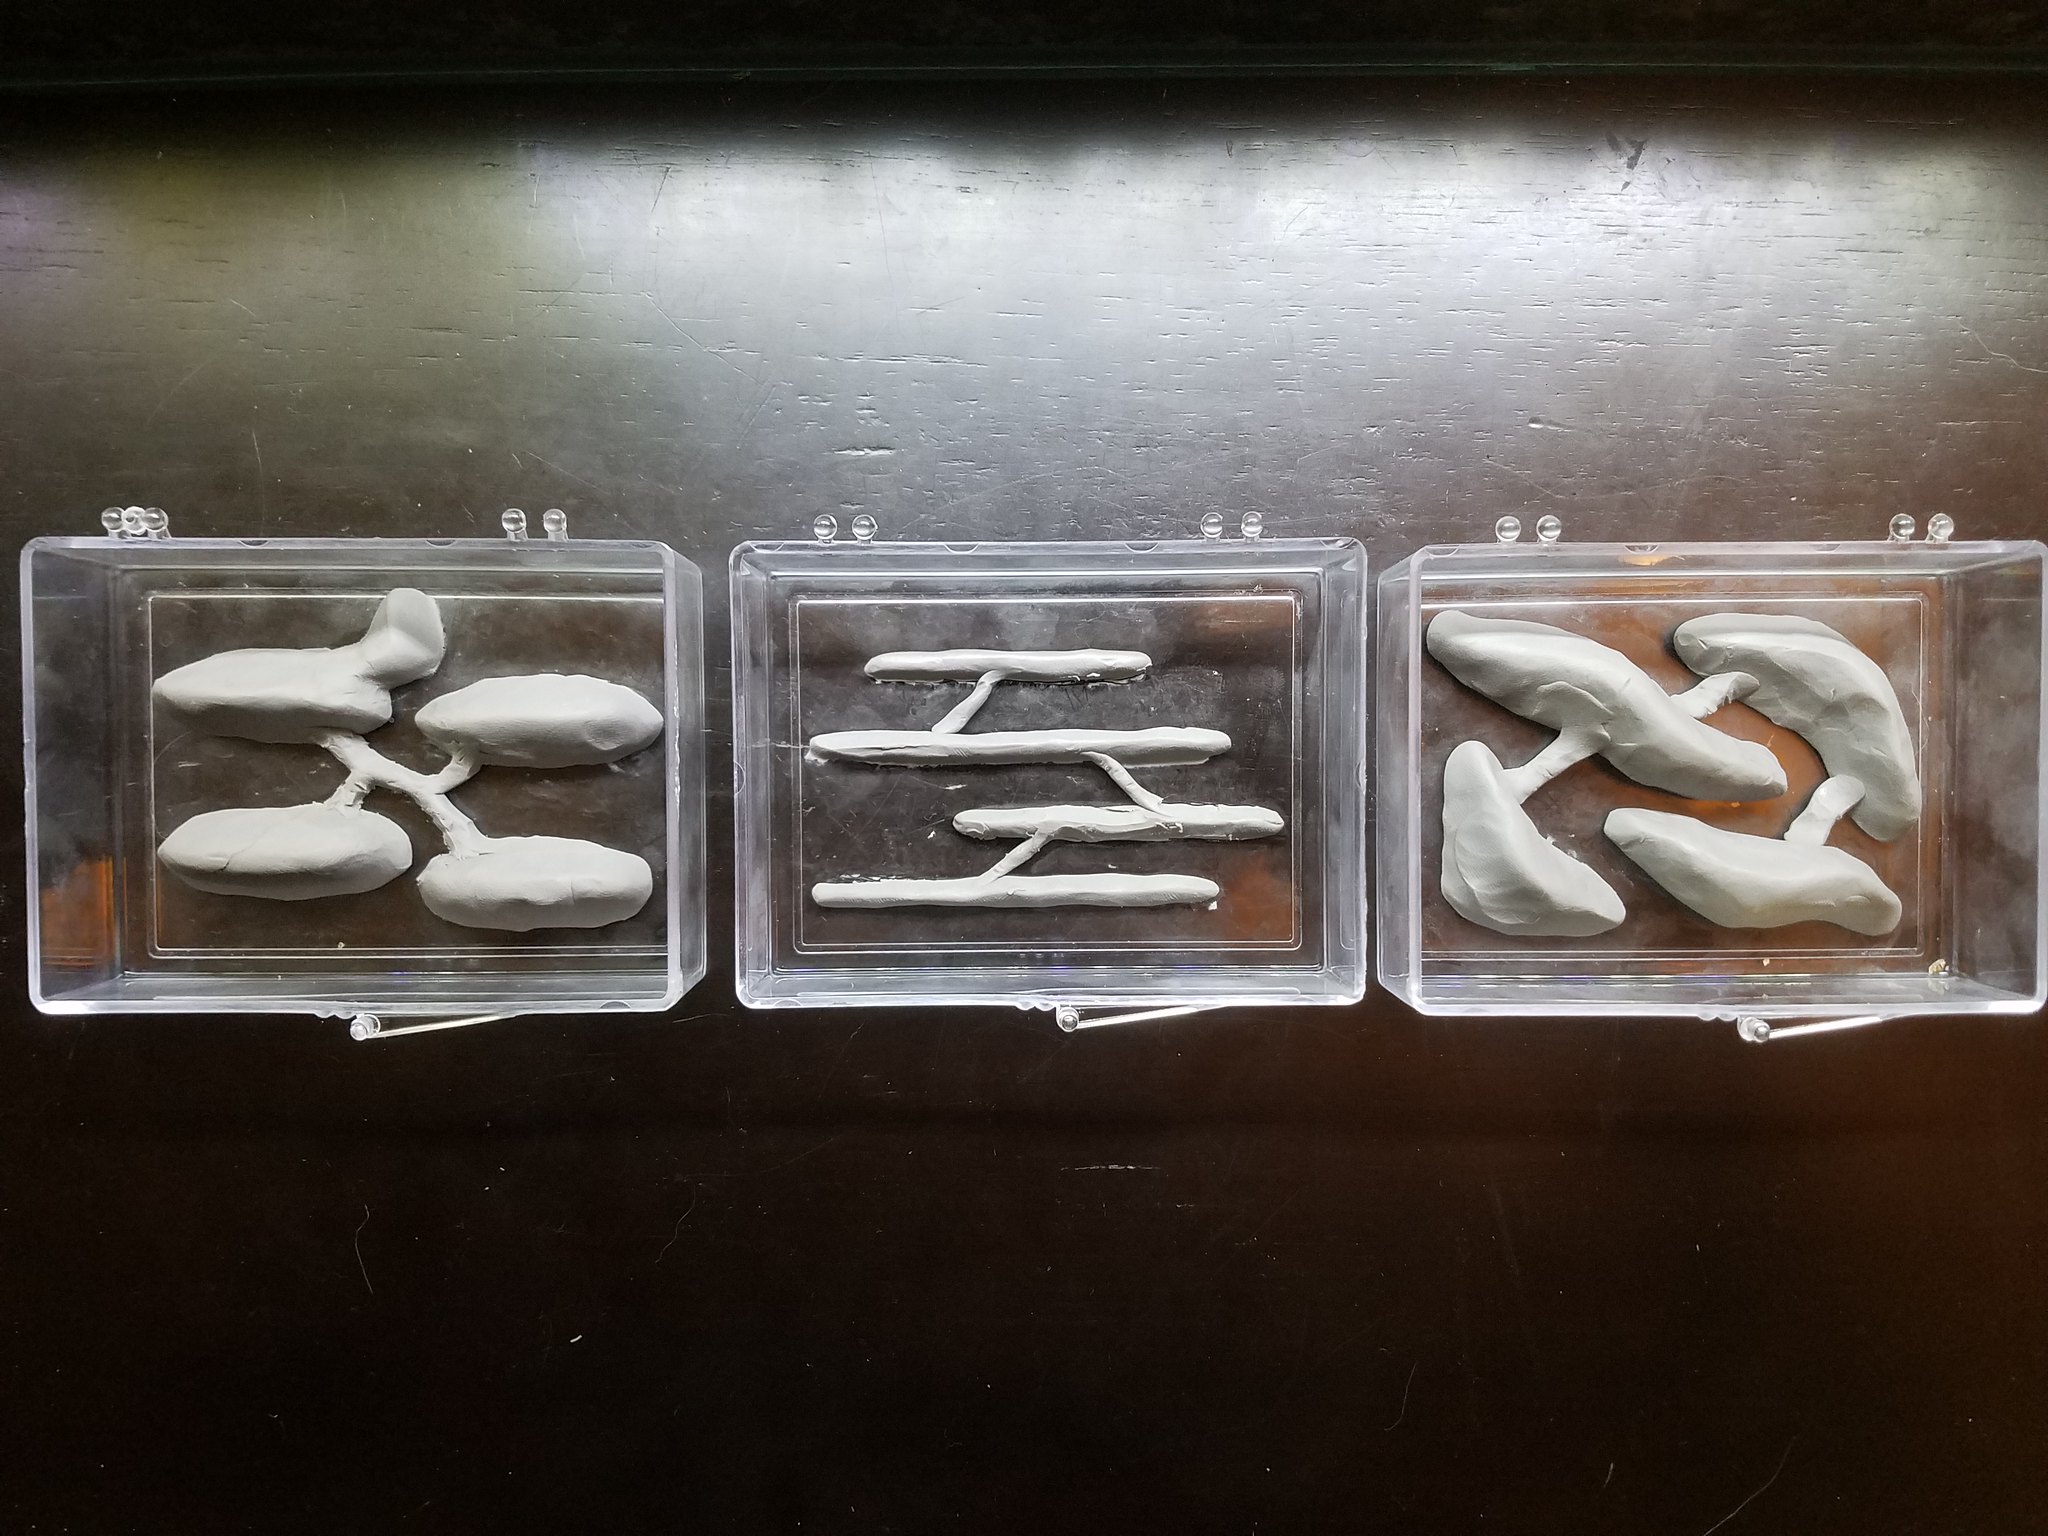 20190109_200504 by William Rivera, on Flickr
I then used a paintbrush to coat the inside of the container with oil to help the plaster nest slide out of the mold. The pictures are from the attempt with playdough but the clay was the same.
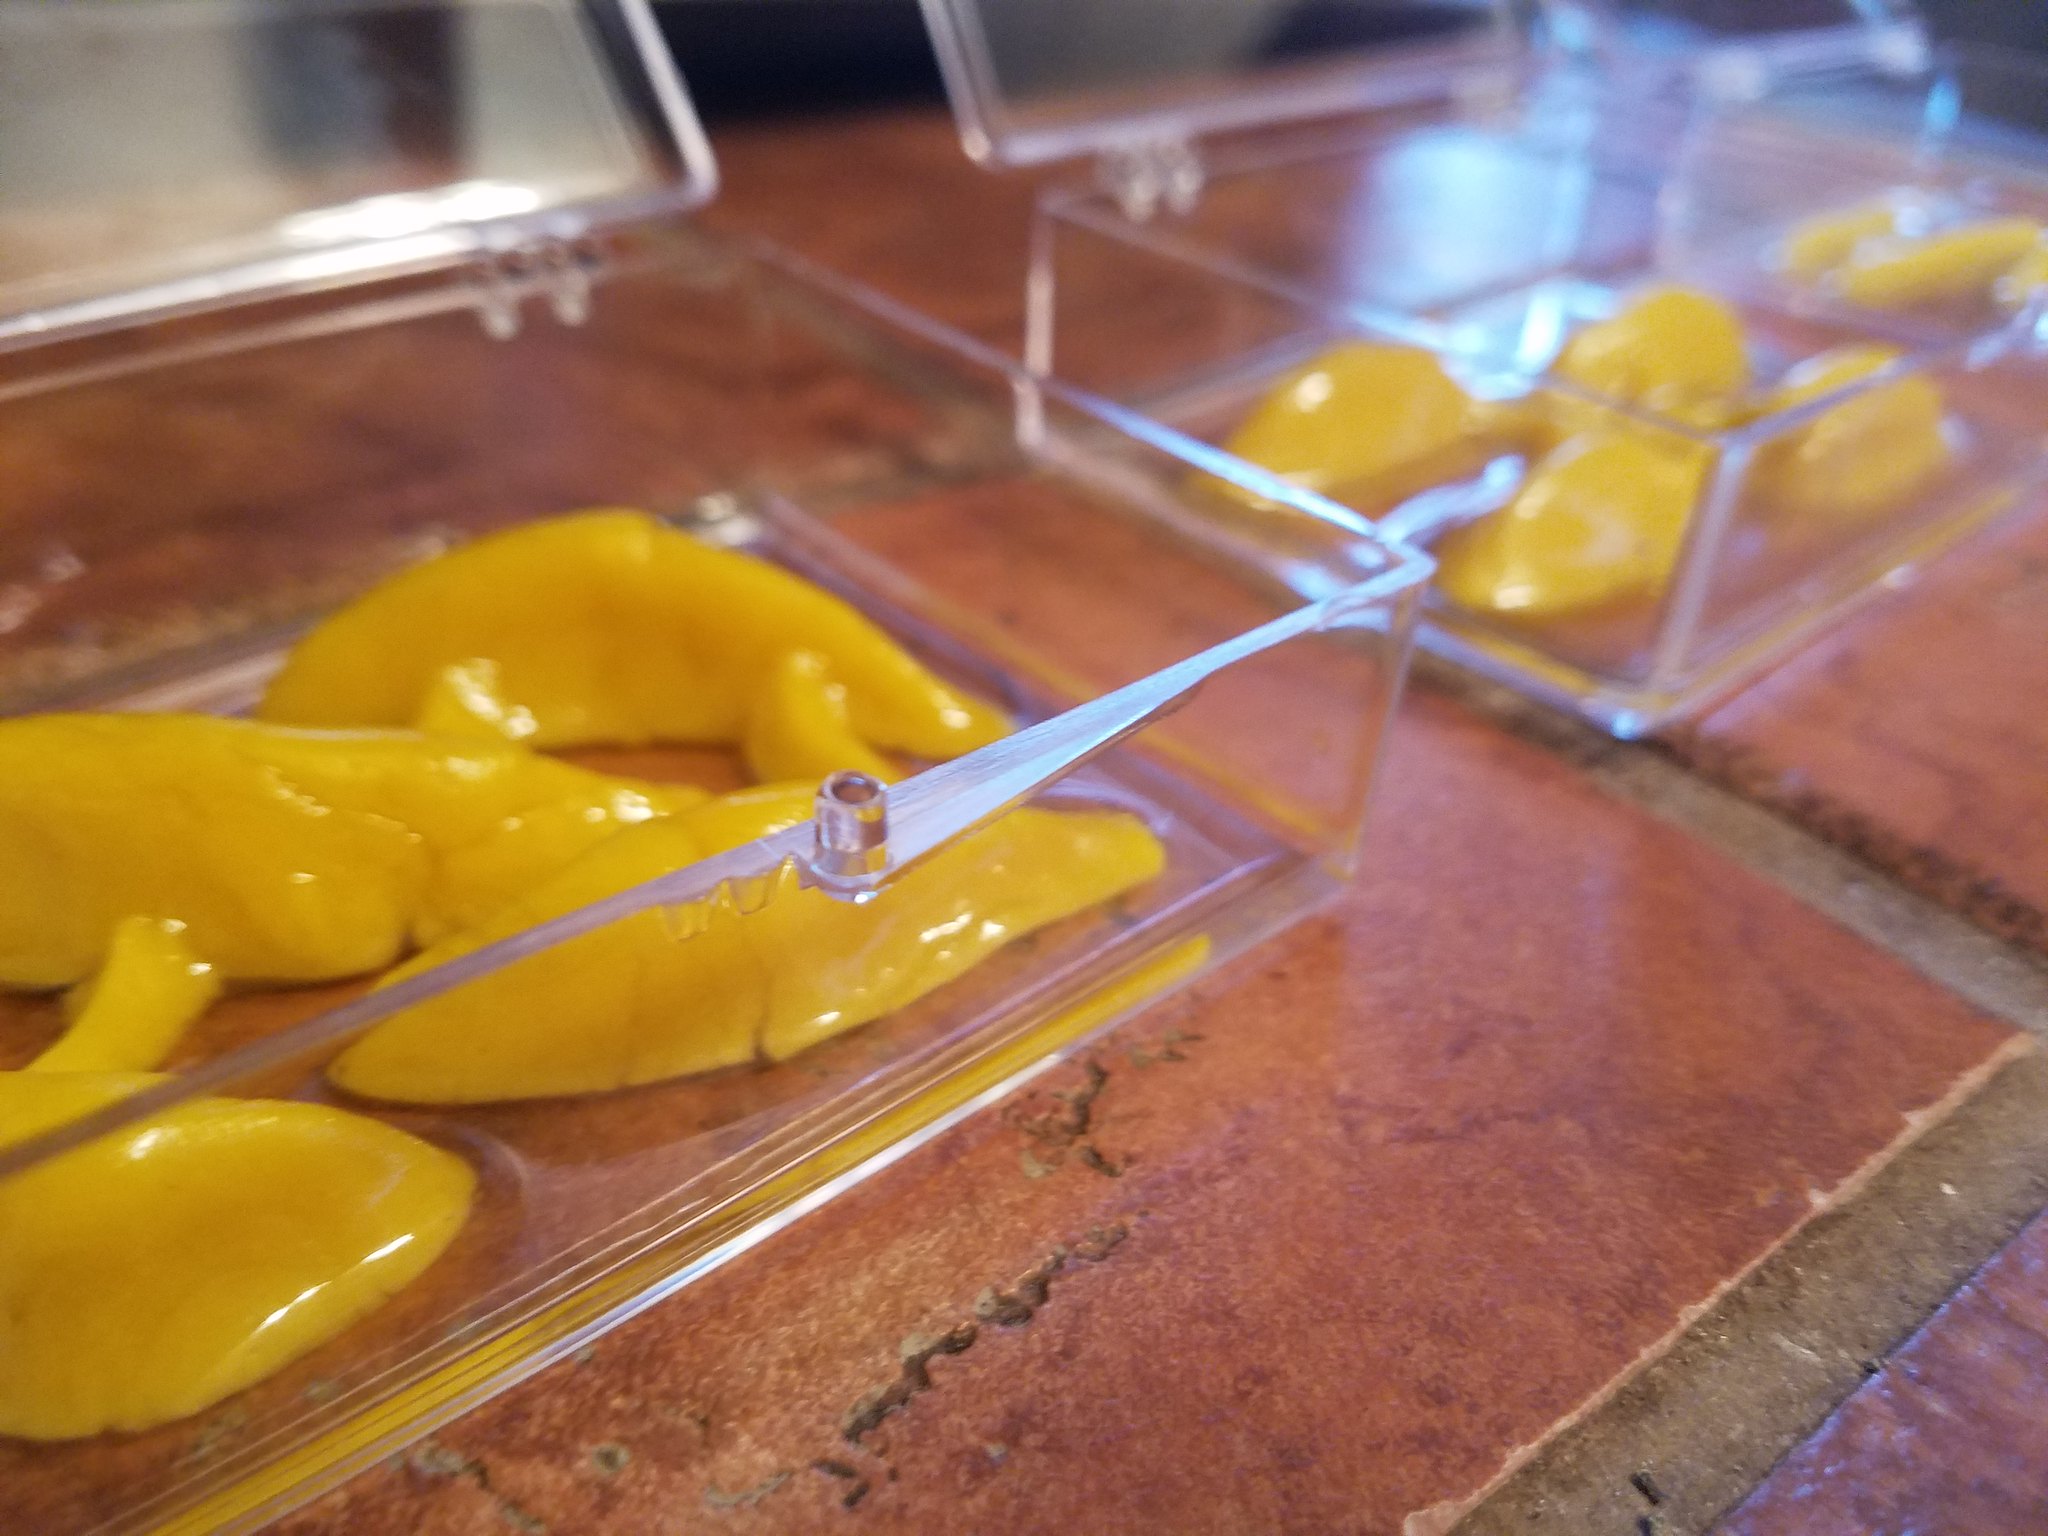 20190109_172142 by William Rivera, on Flickr
Once it is thoroughly coated make up your batch of plaster and pour it into the mold. Because of the small size of the container it is difficult to remove the nest without some difficulty so I insert two screws into the plaster while it is setting to give me something to hold onto to help pry it out later.
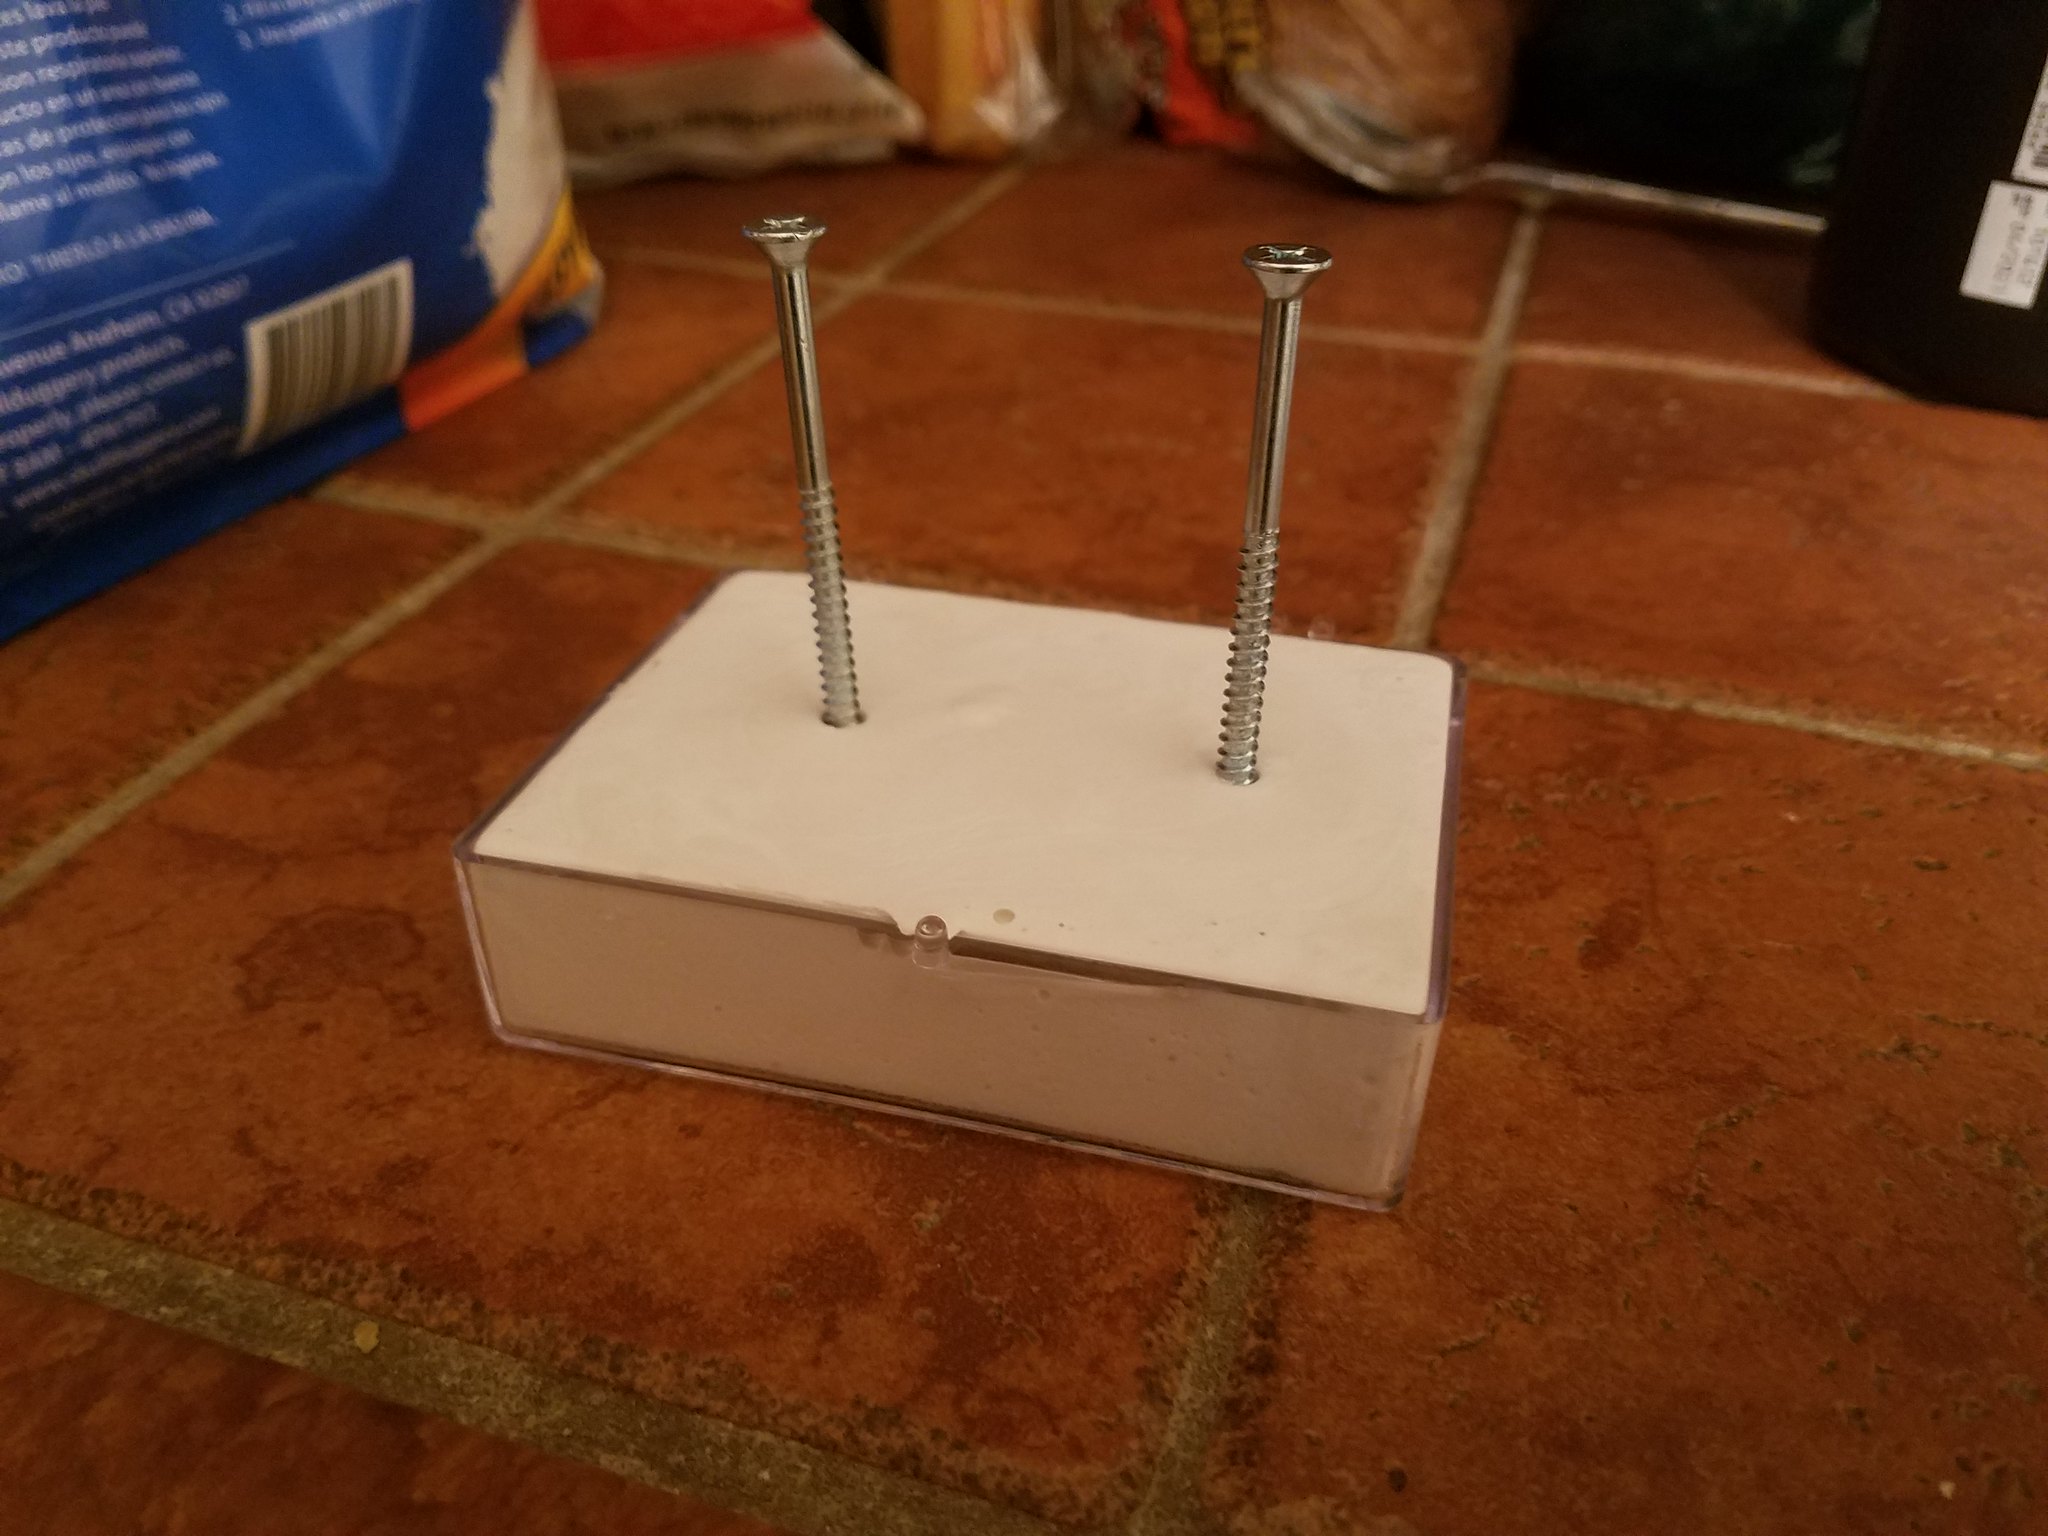 20190109_204135 by William Rivera, on Flickr
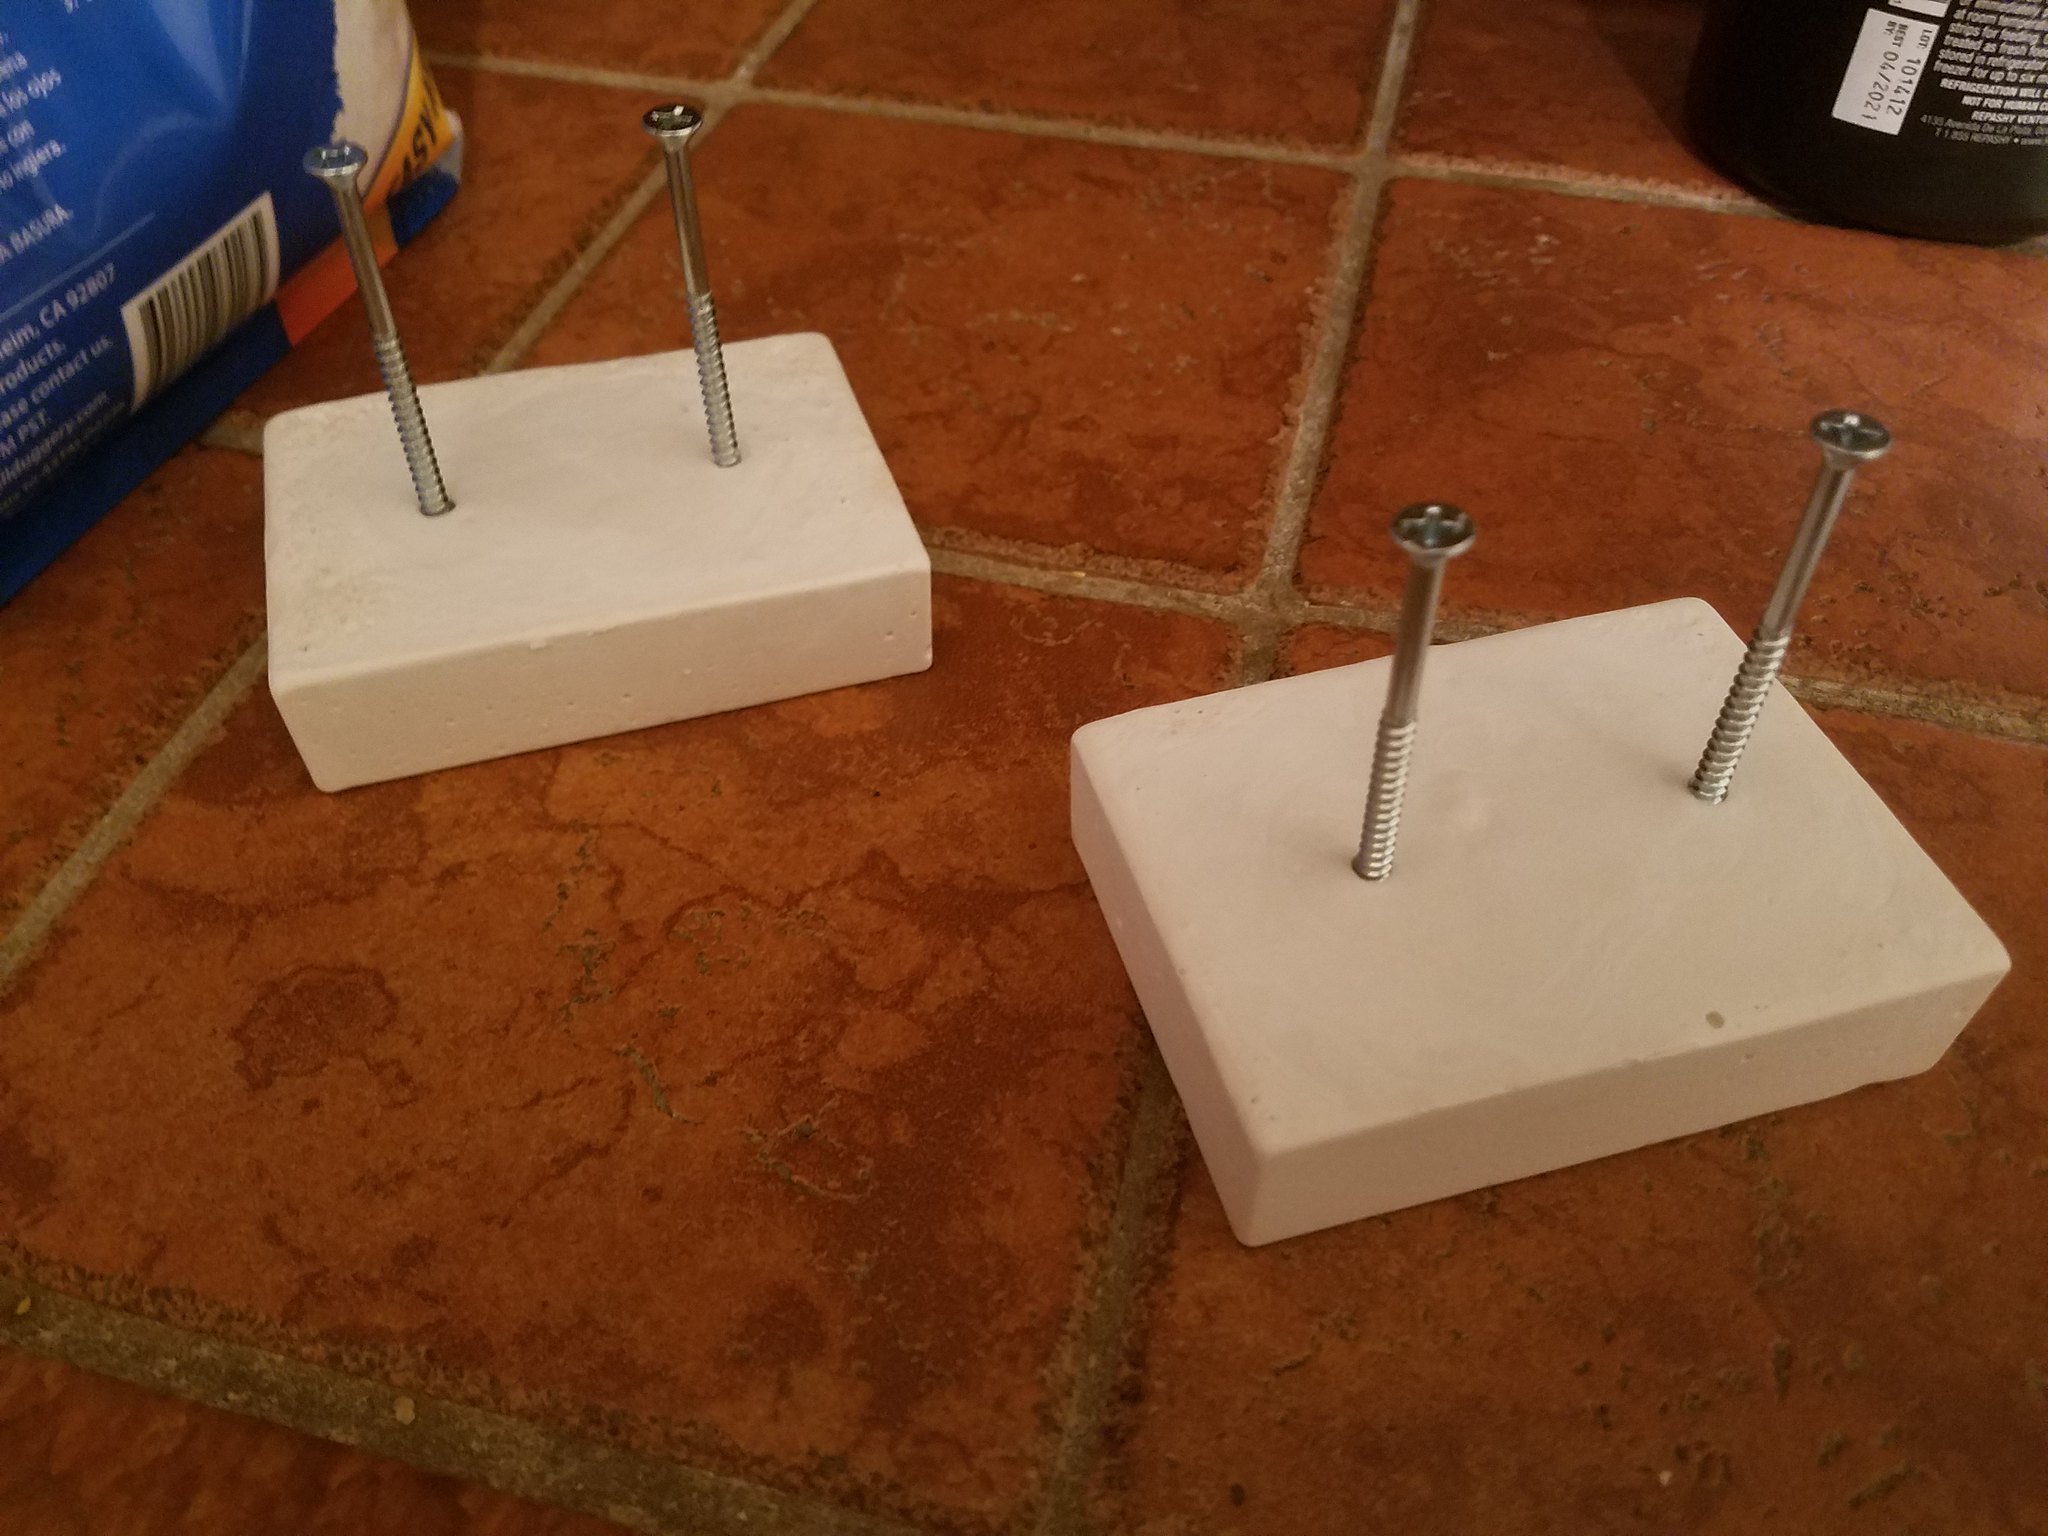 20190109_205410 by William Rivera, on Flickr
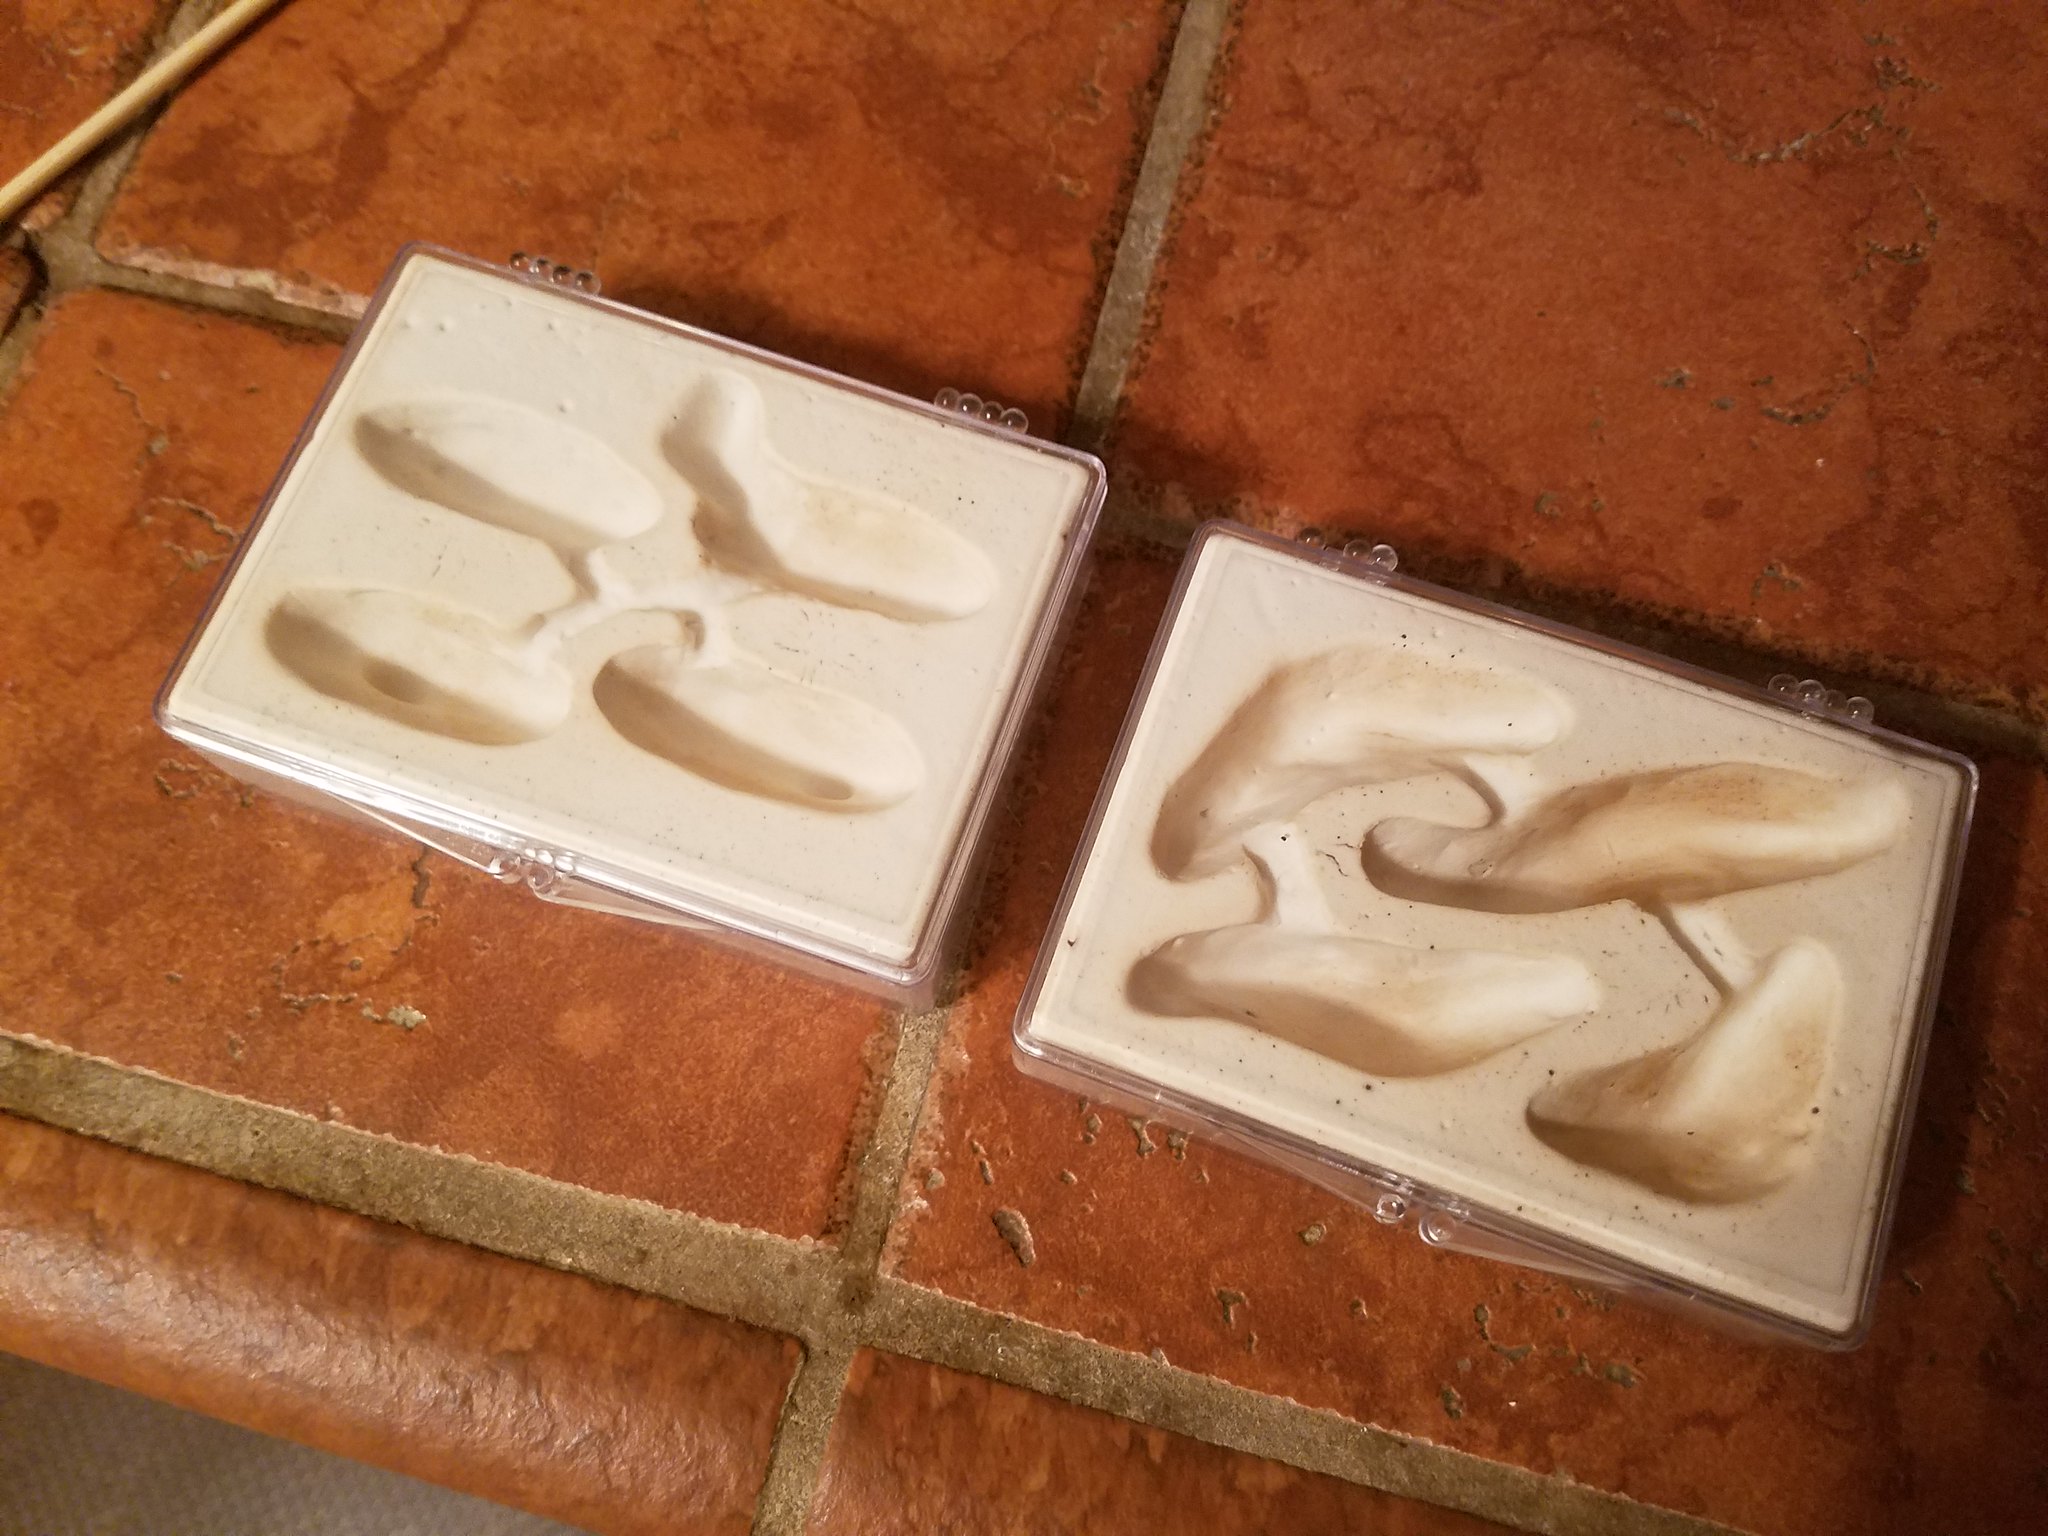
Once the cured nests are out, I remove the screws and invert them. Sometimes the clay sticks with the plaster and some times it stays stuck to the plastic but either way you can remove it to use again later or discard if it has become too messy. The nests will later be slipped back into the card box so that the chambers and tunnels are facing upwards.
 20190109_205656 by William Rivera, on Flickr
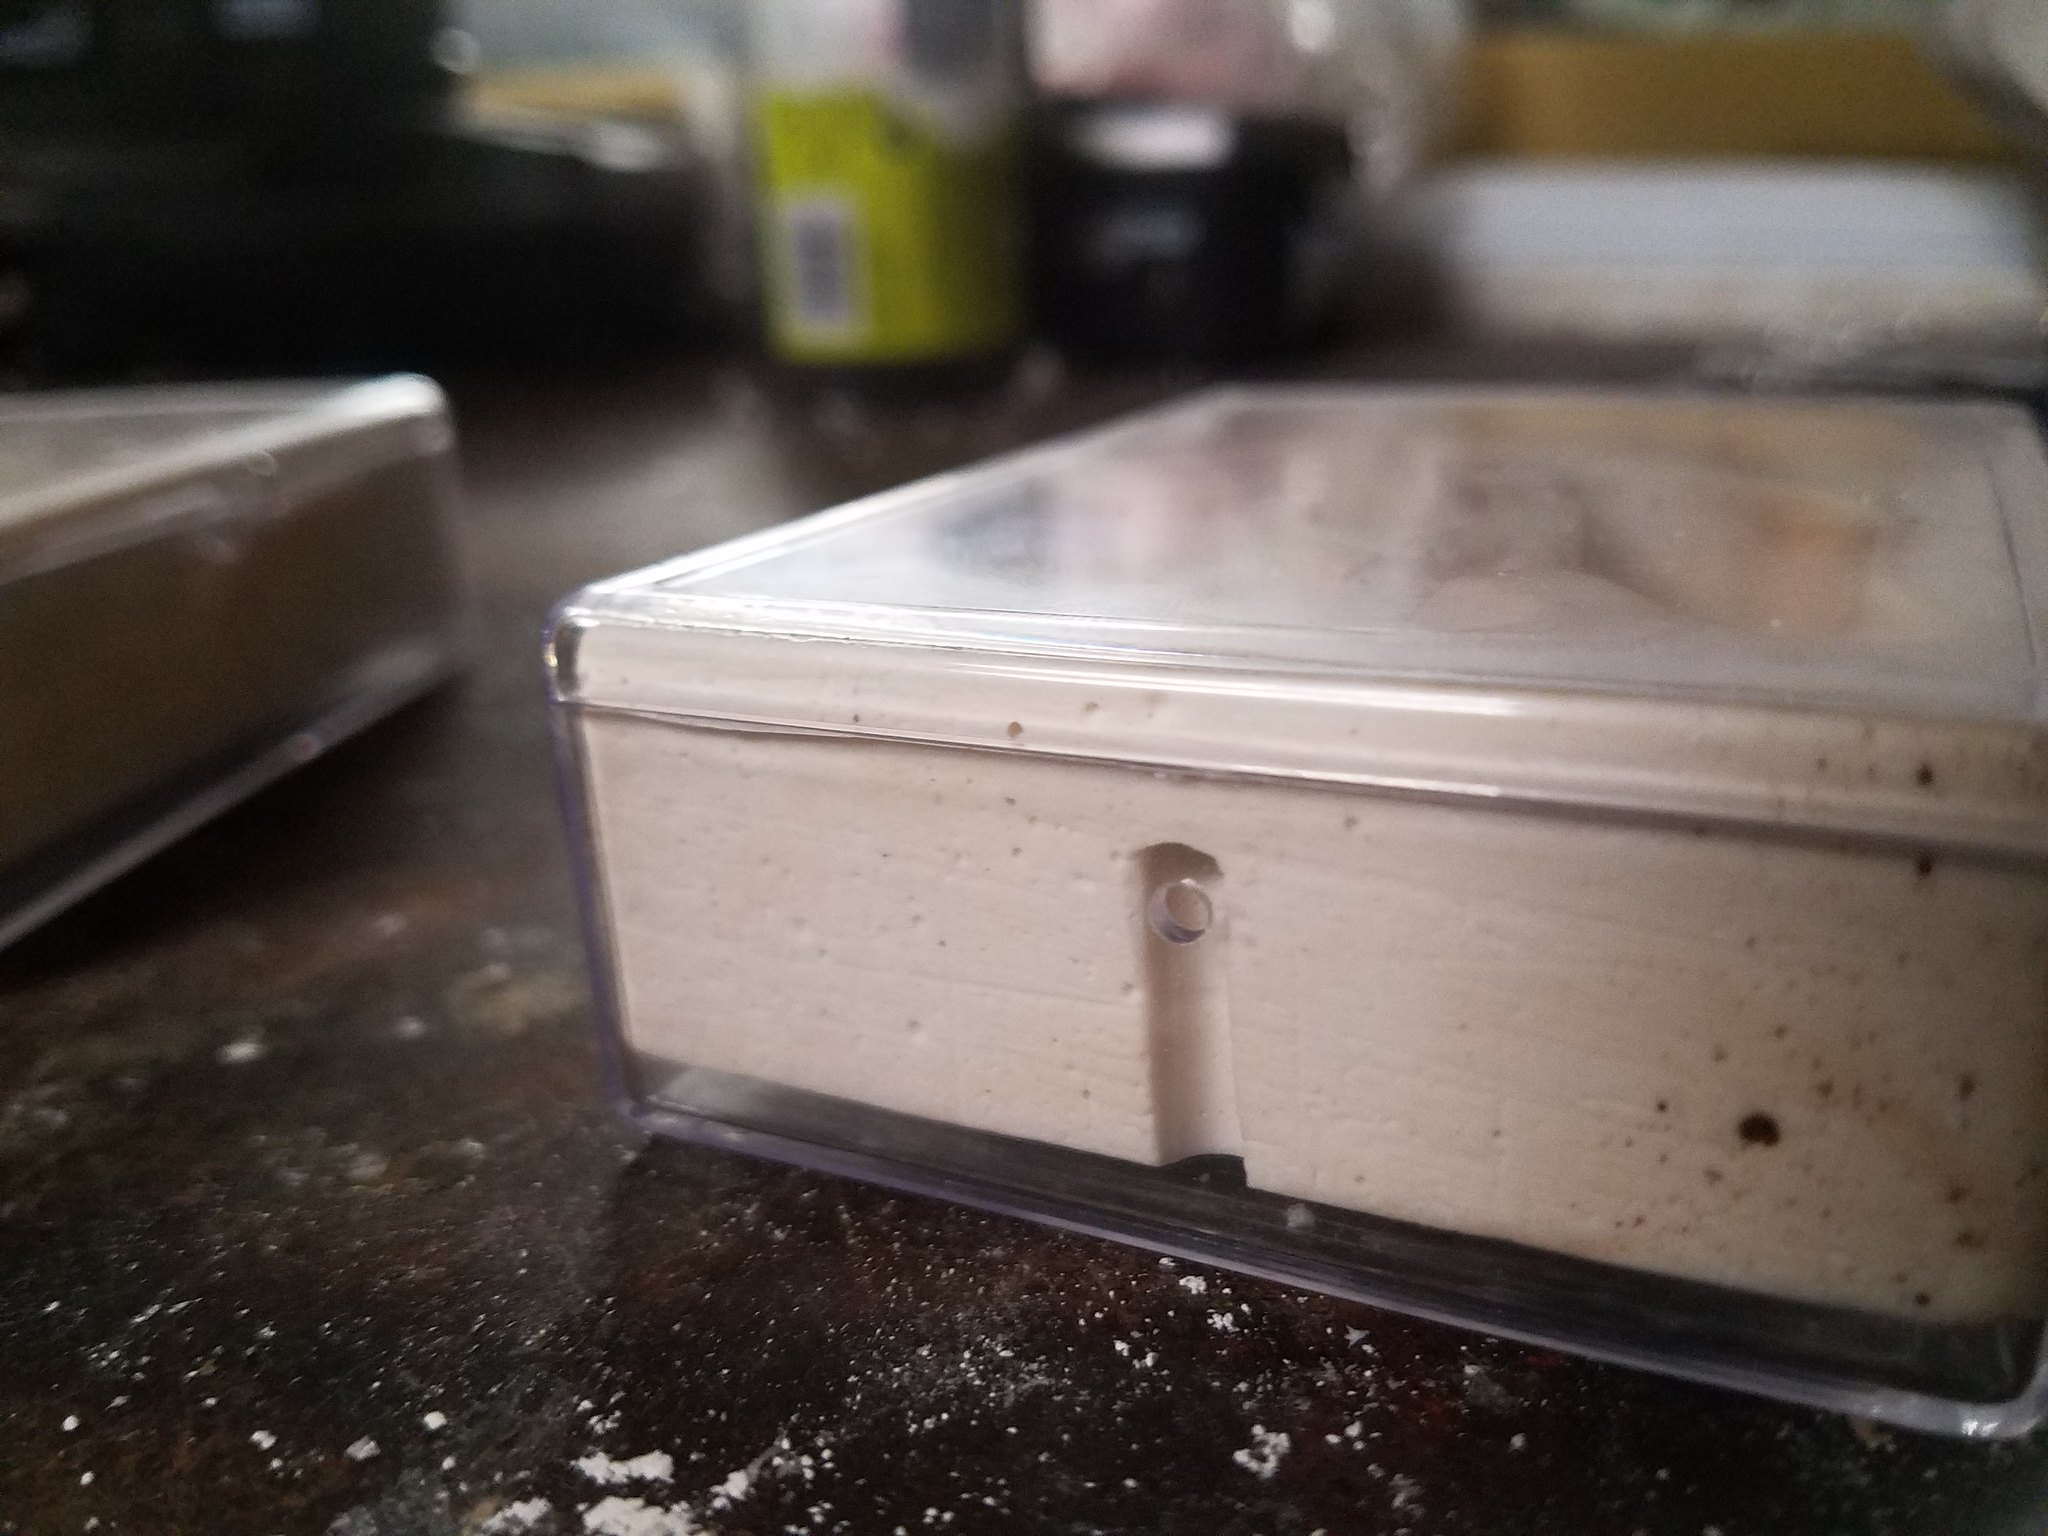
But first, because the card box has the slightest taper to it you first have to sand down the edges a bit so it will slide in easier without cracking the box. It does not take much so be careful you don't over do it. I just run it a few times on each side over a piece of an old cinder block.
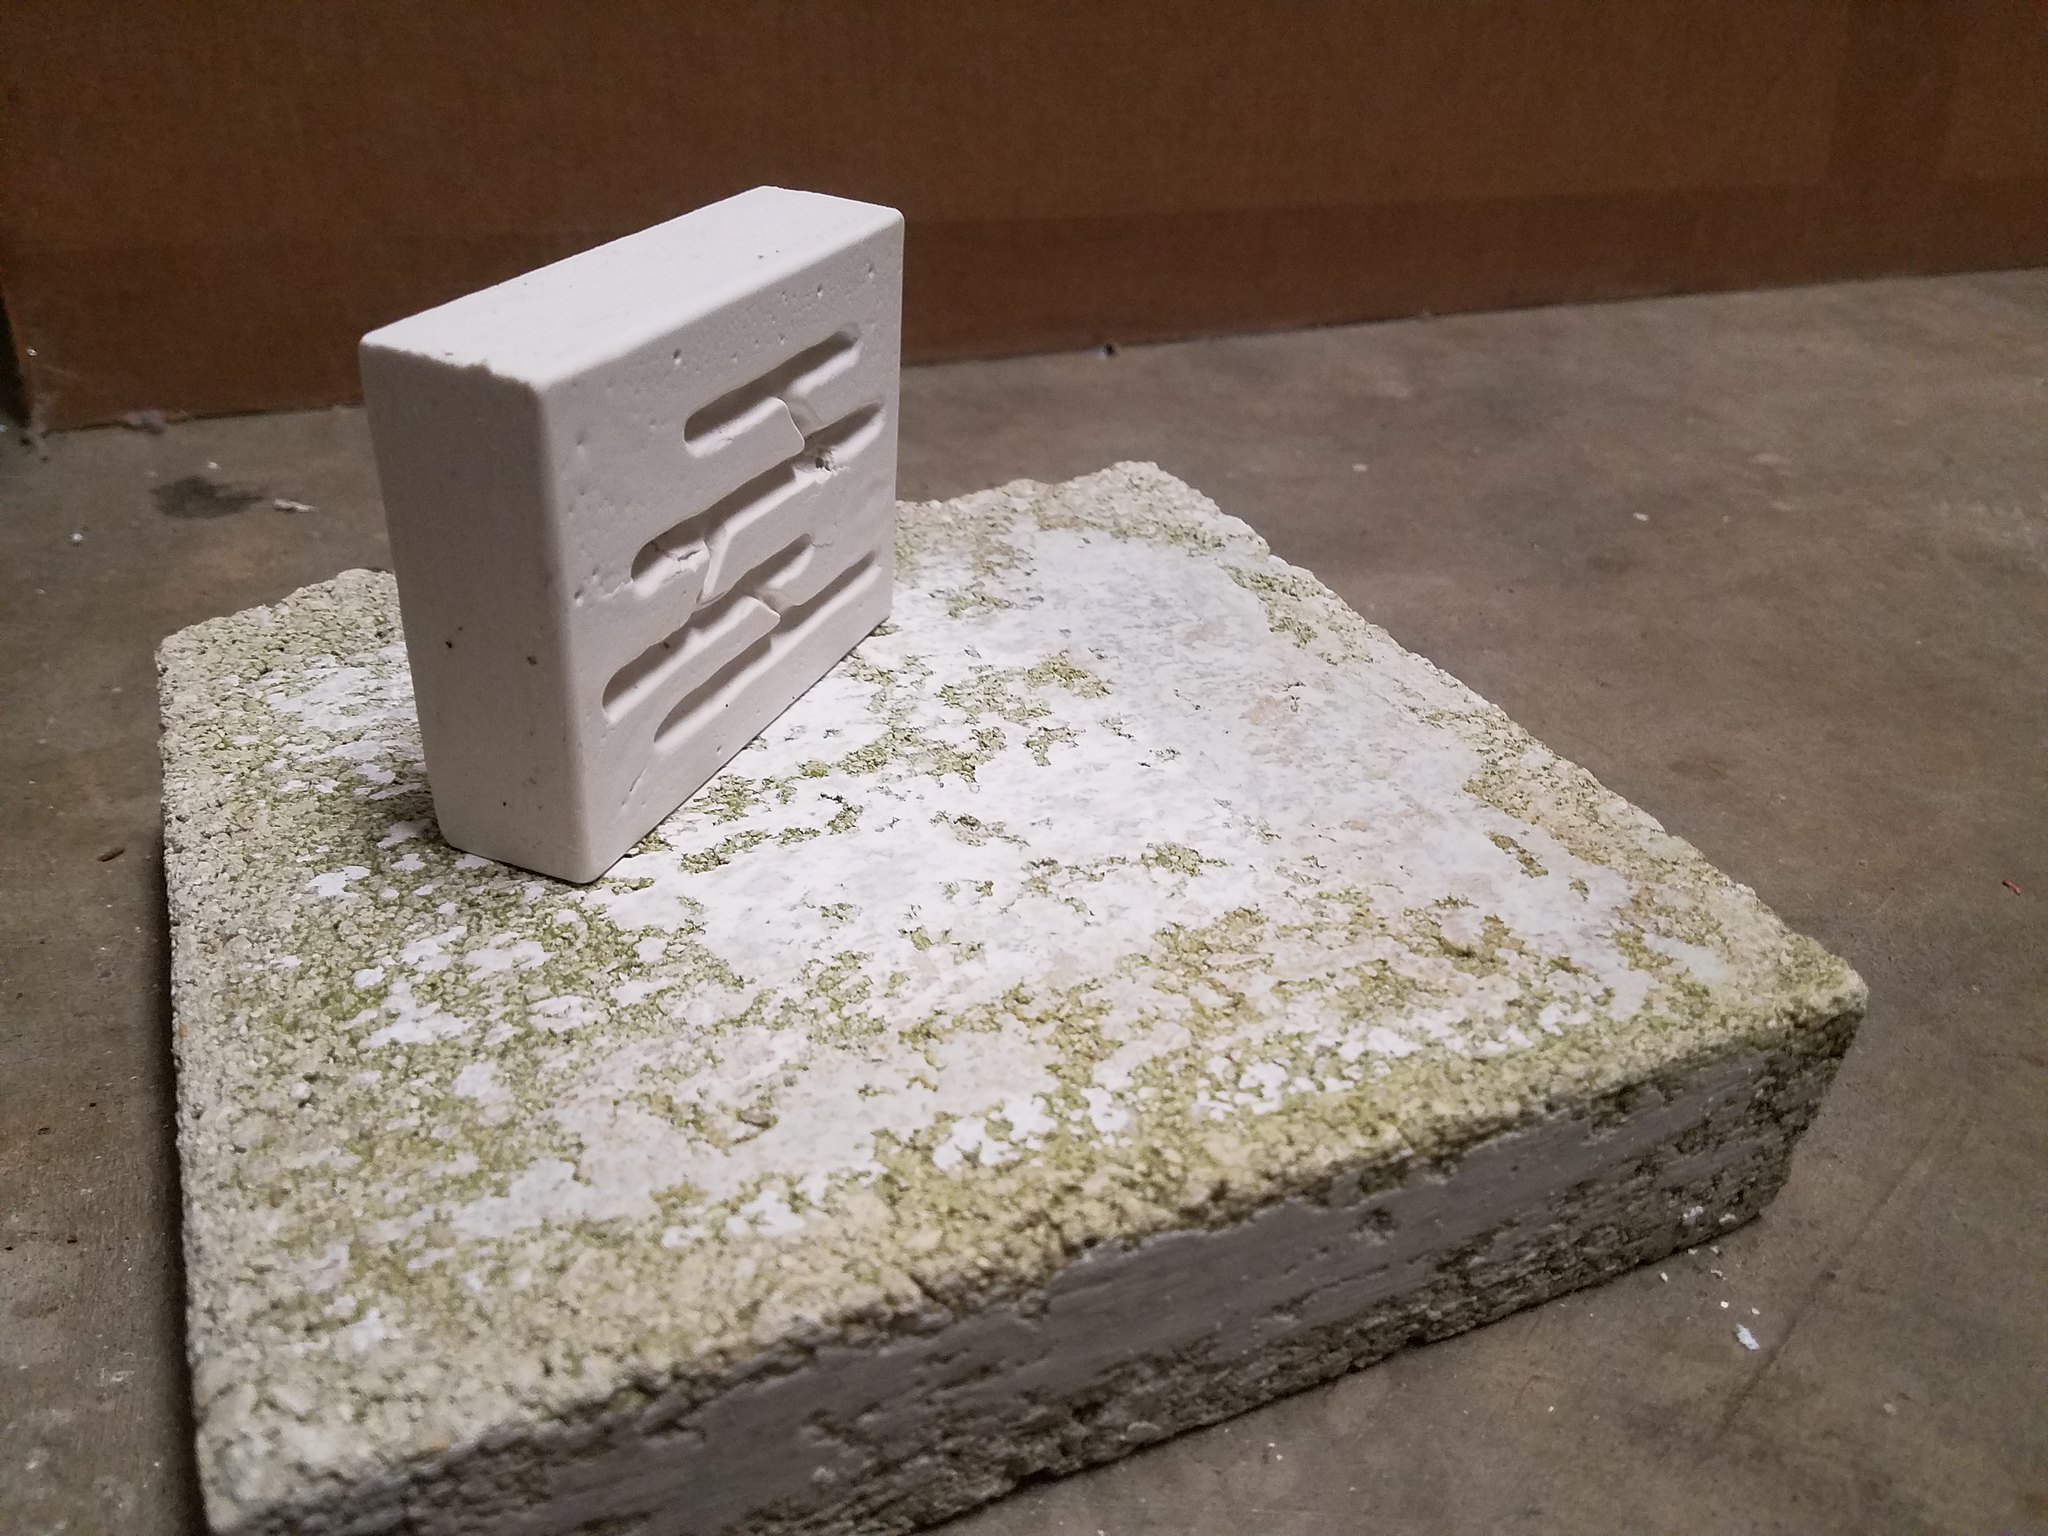 20190109_210904 by William Rivera, on Flickr
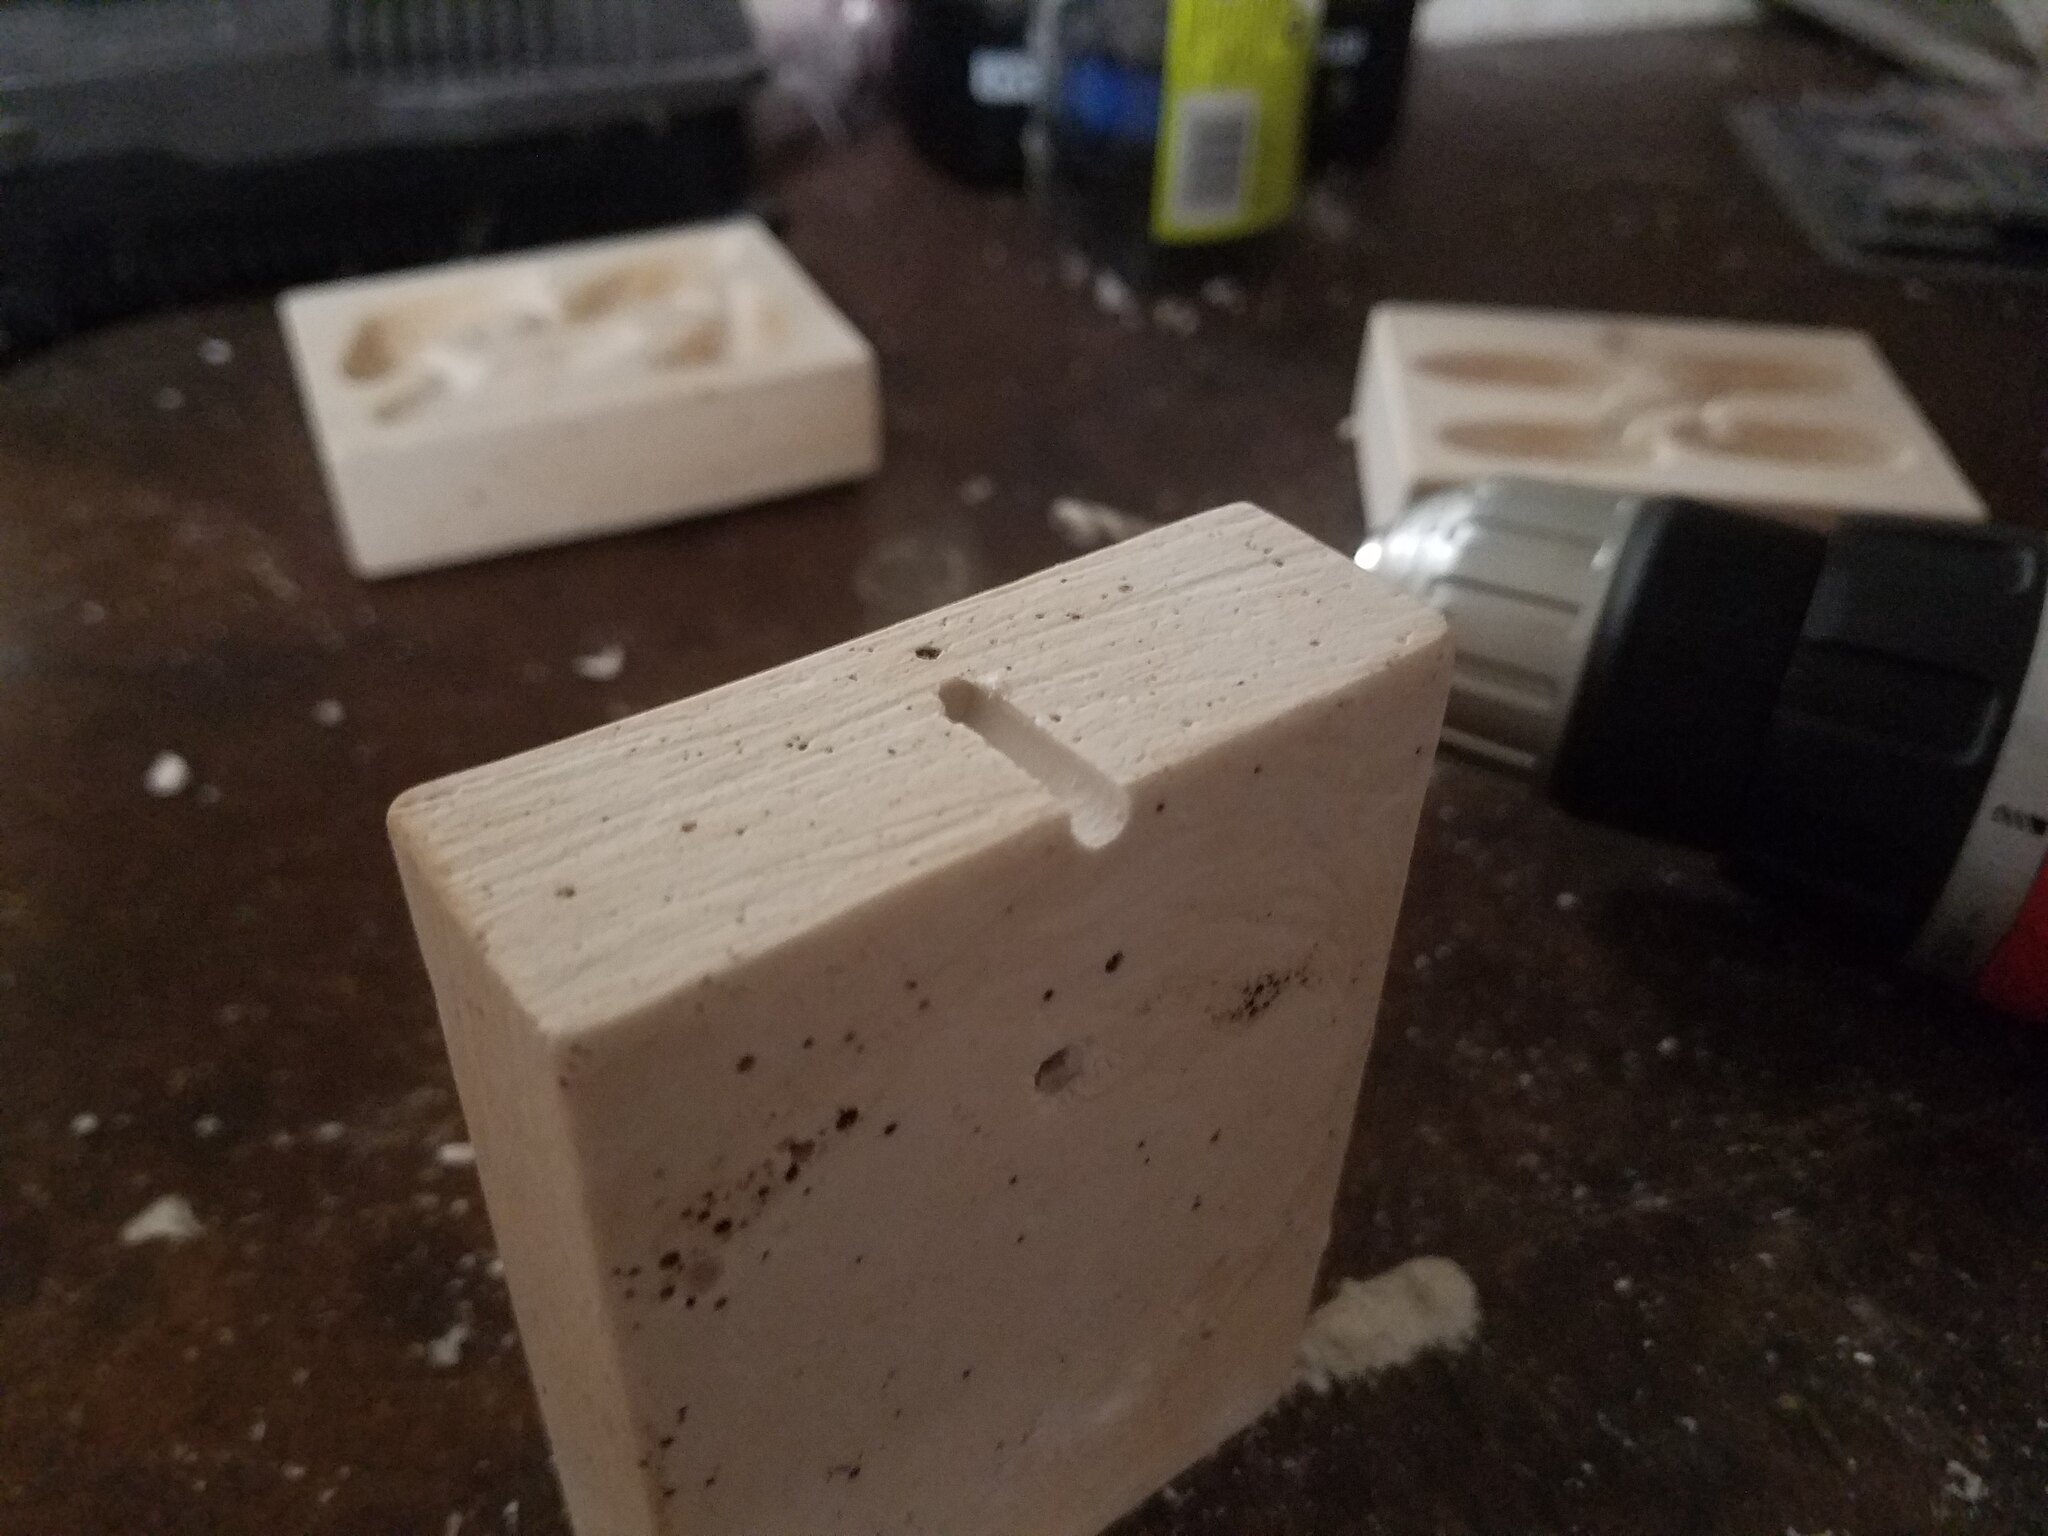
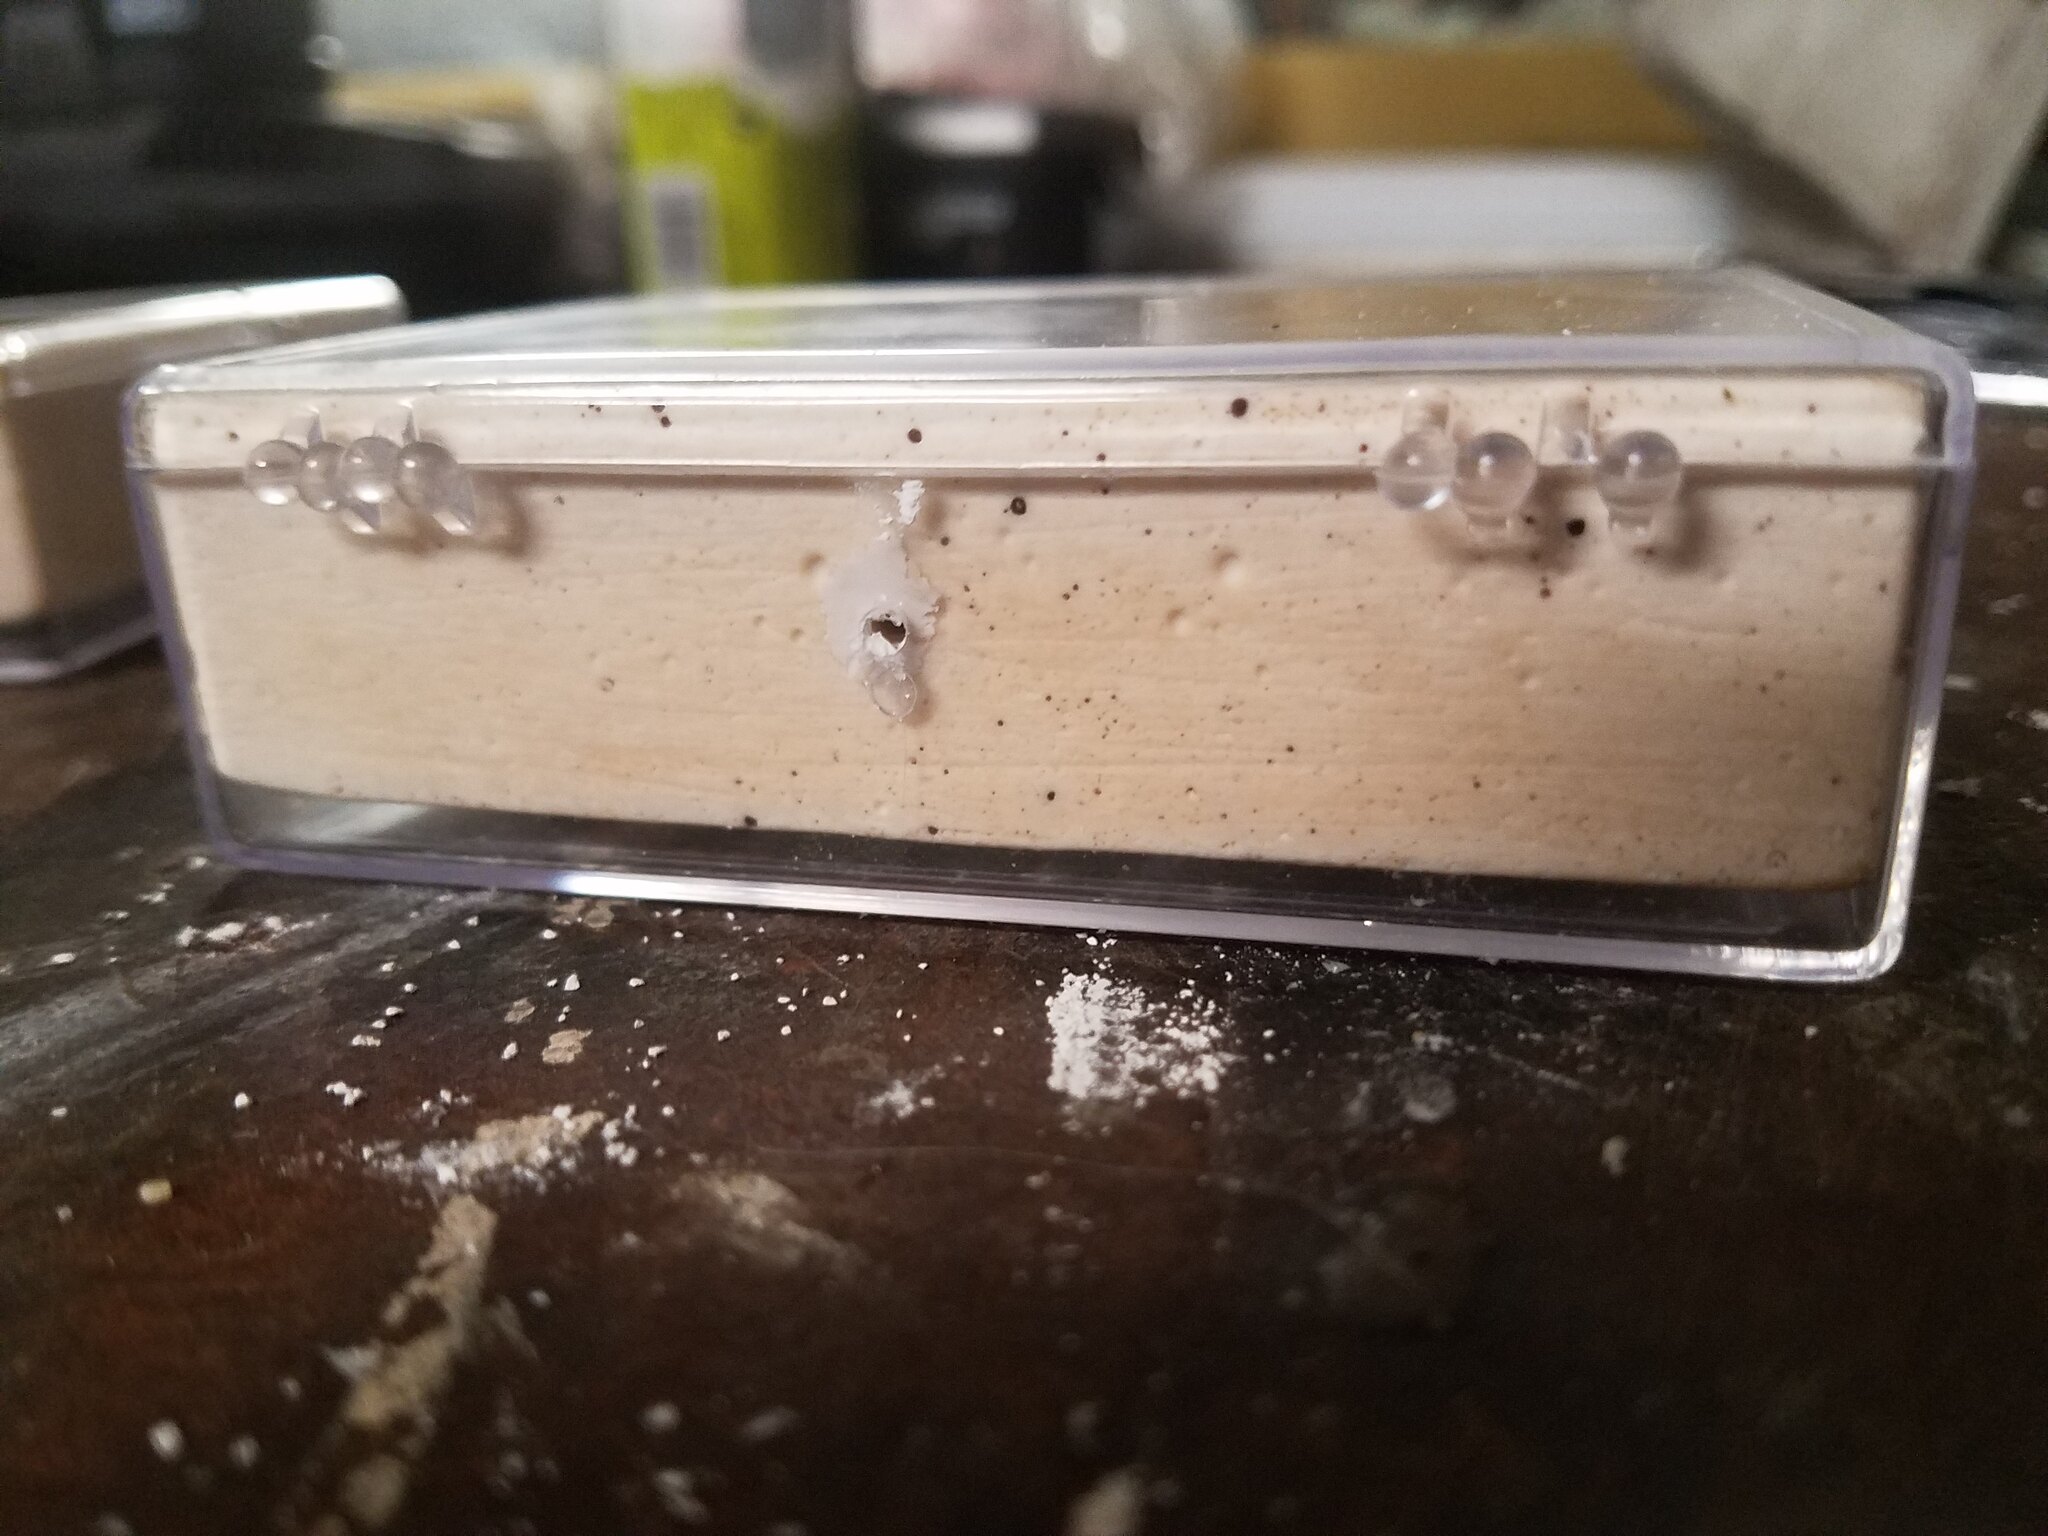
I also drill a channel into the nest at this point that will serve as a port to add water later.
 20190109_220151 by William Rivera, on Flickr
After this I soak the nests for about 30 minutes in hot water for two reasons. First, to wash all the excess plaster dust off from sanding and drilling, and second, to help remove any residual oil in the nest that was absorbed into the plaster. You can see oil sitting on the top of the water after this process.
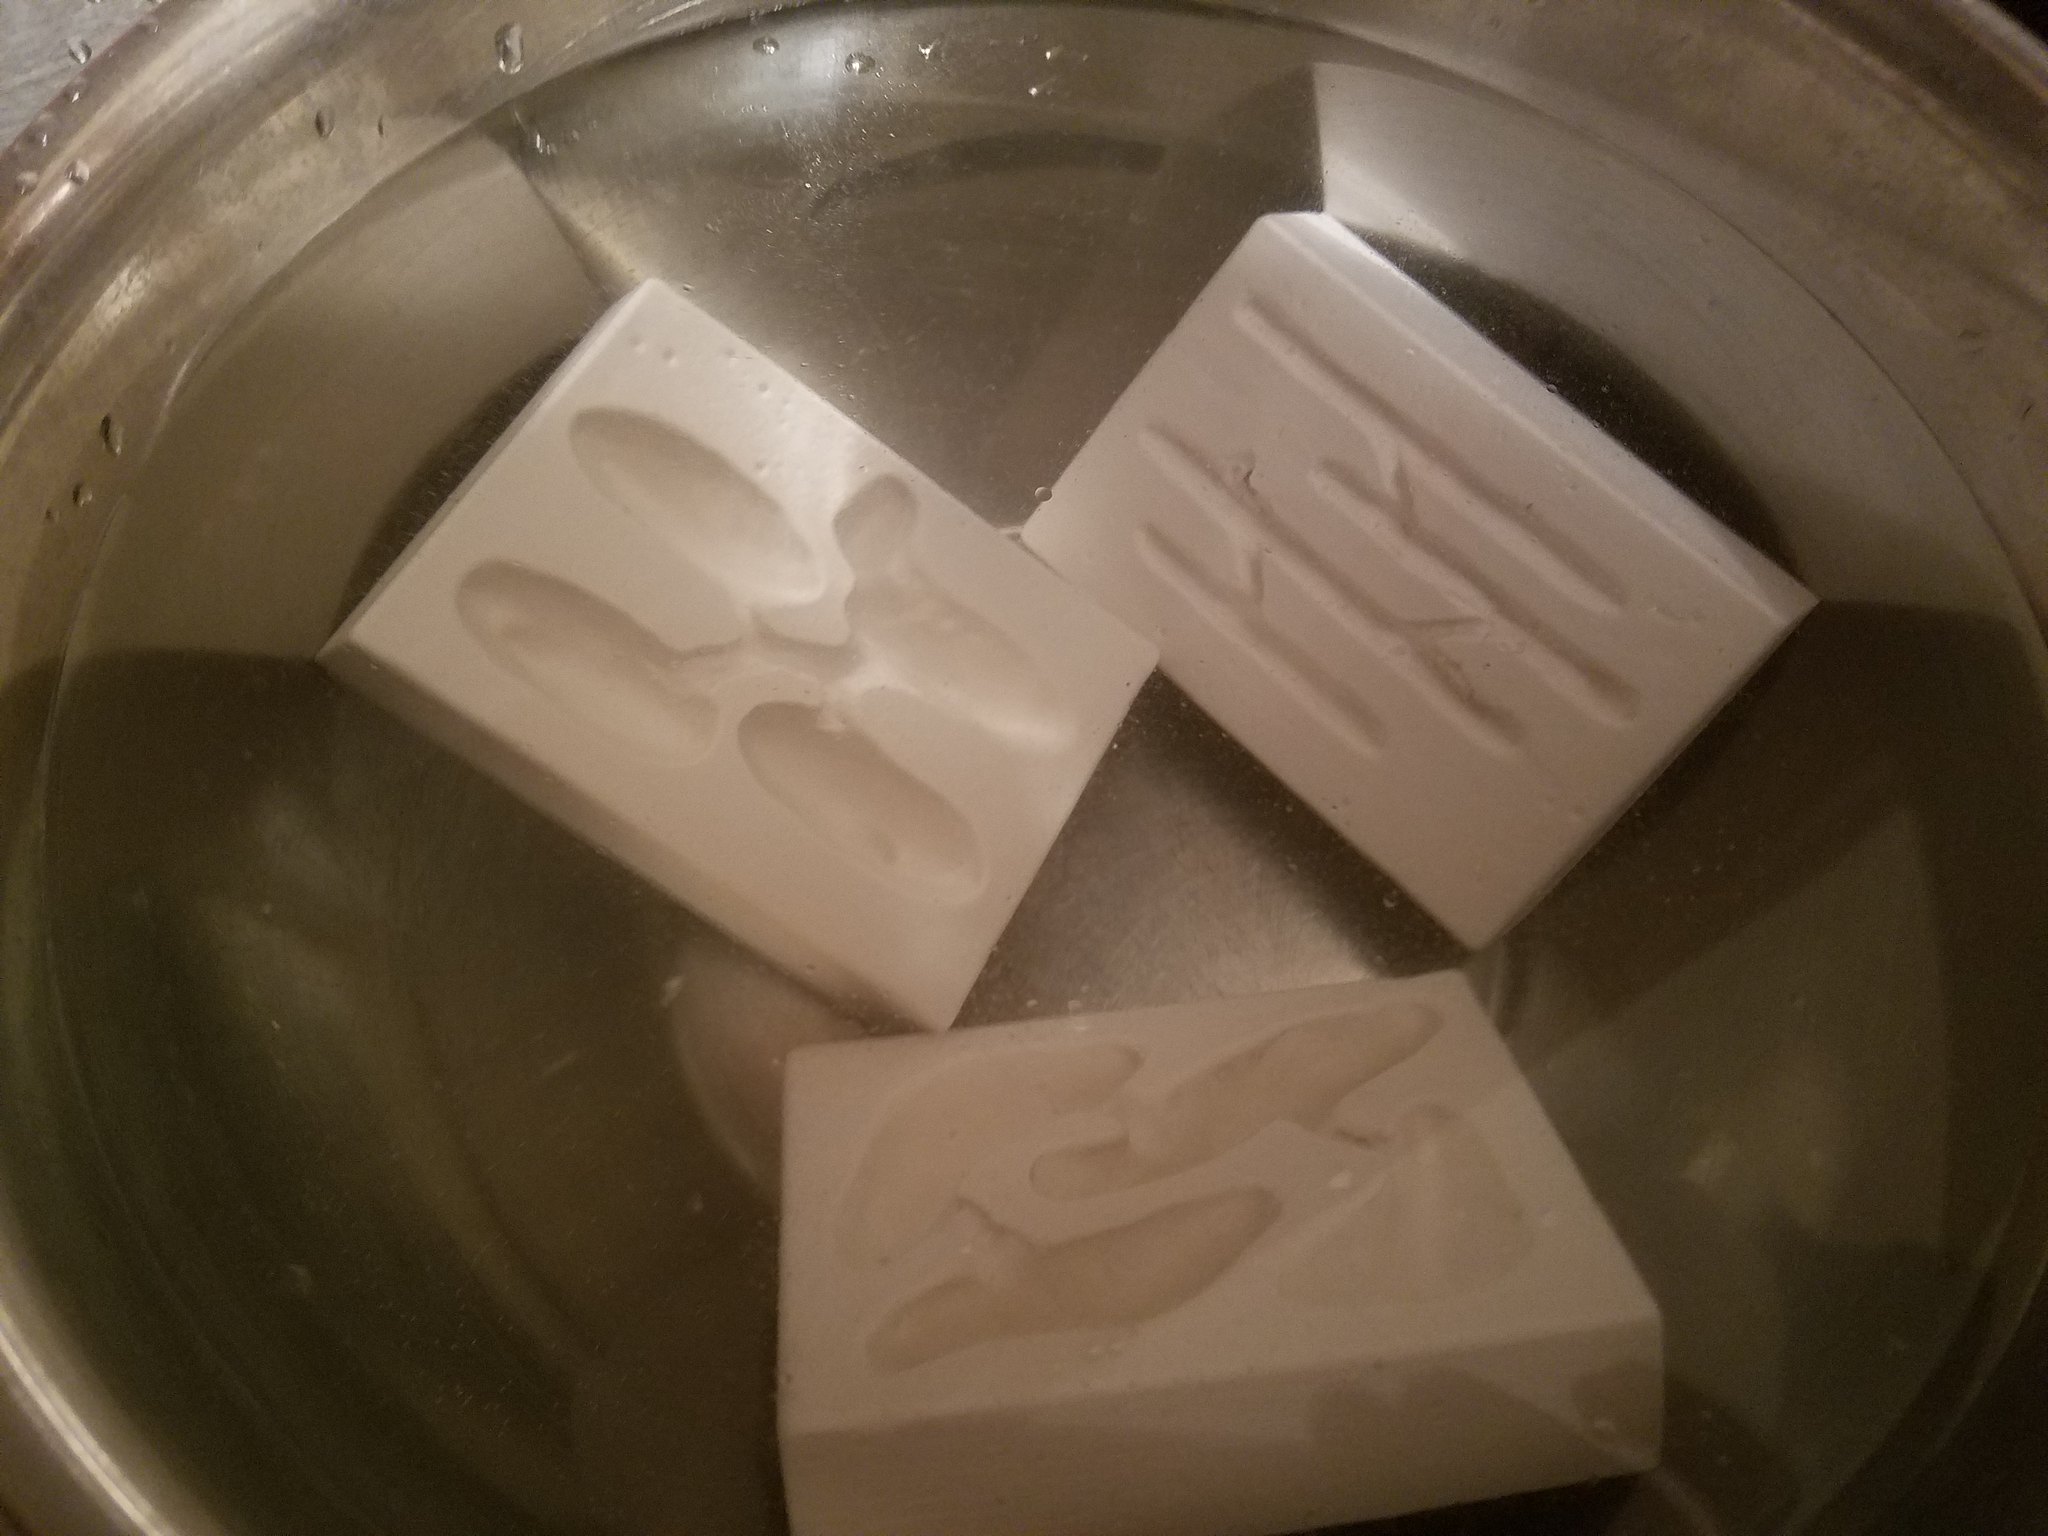 20190109_212820 by William Rivera, on Flickr
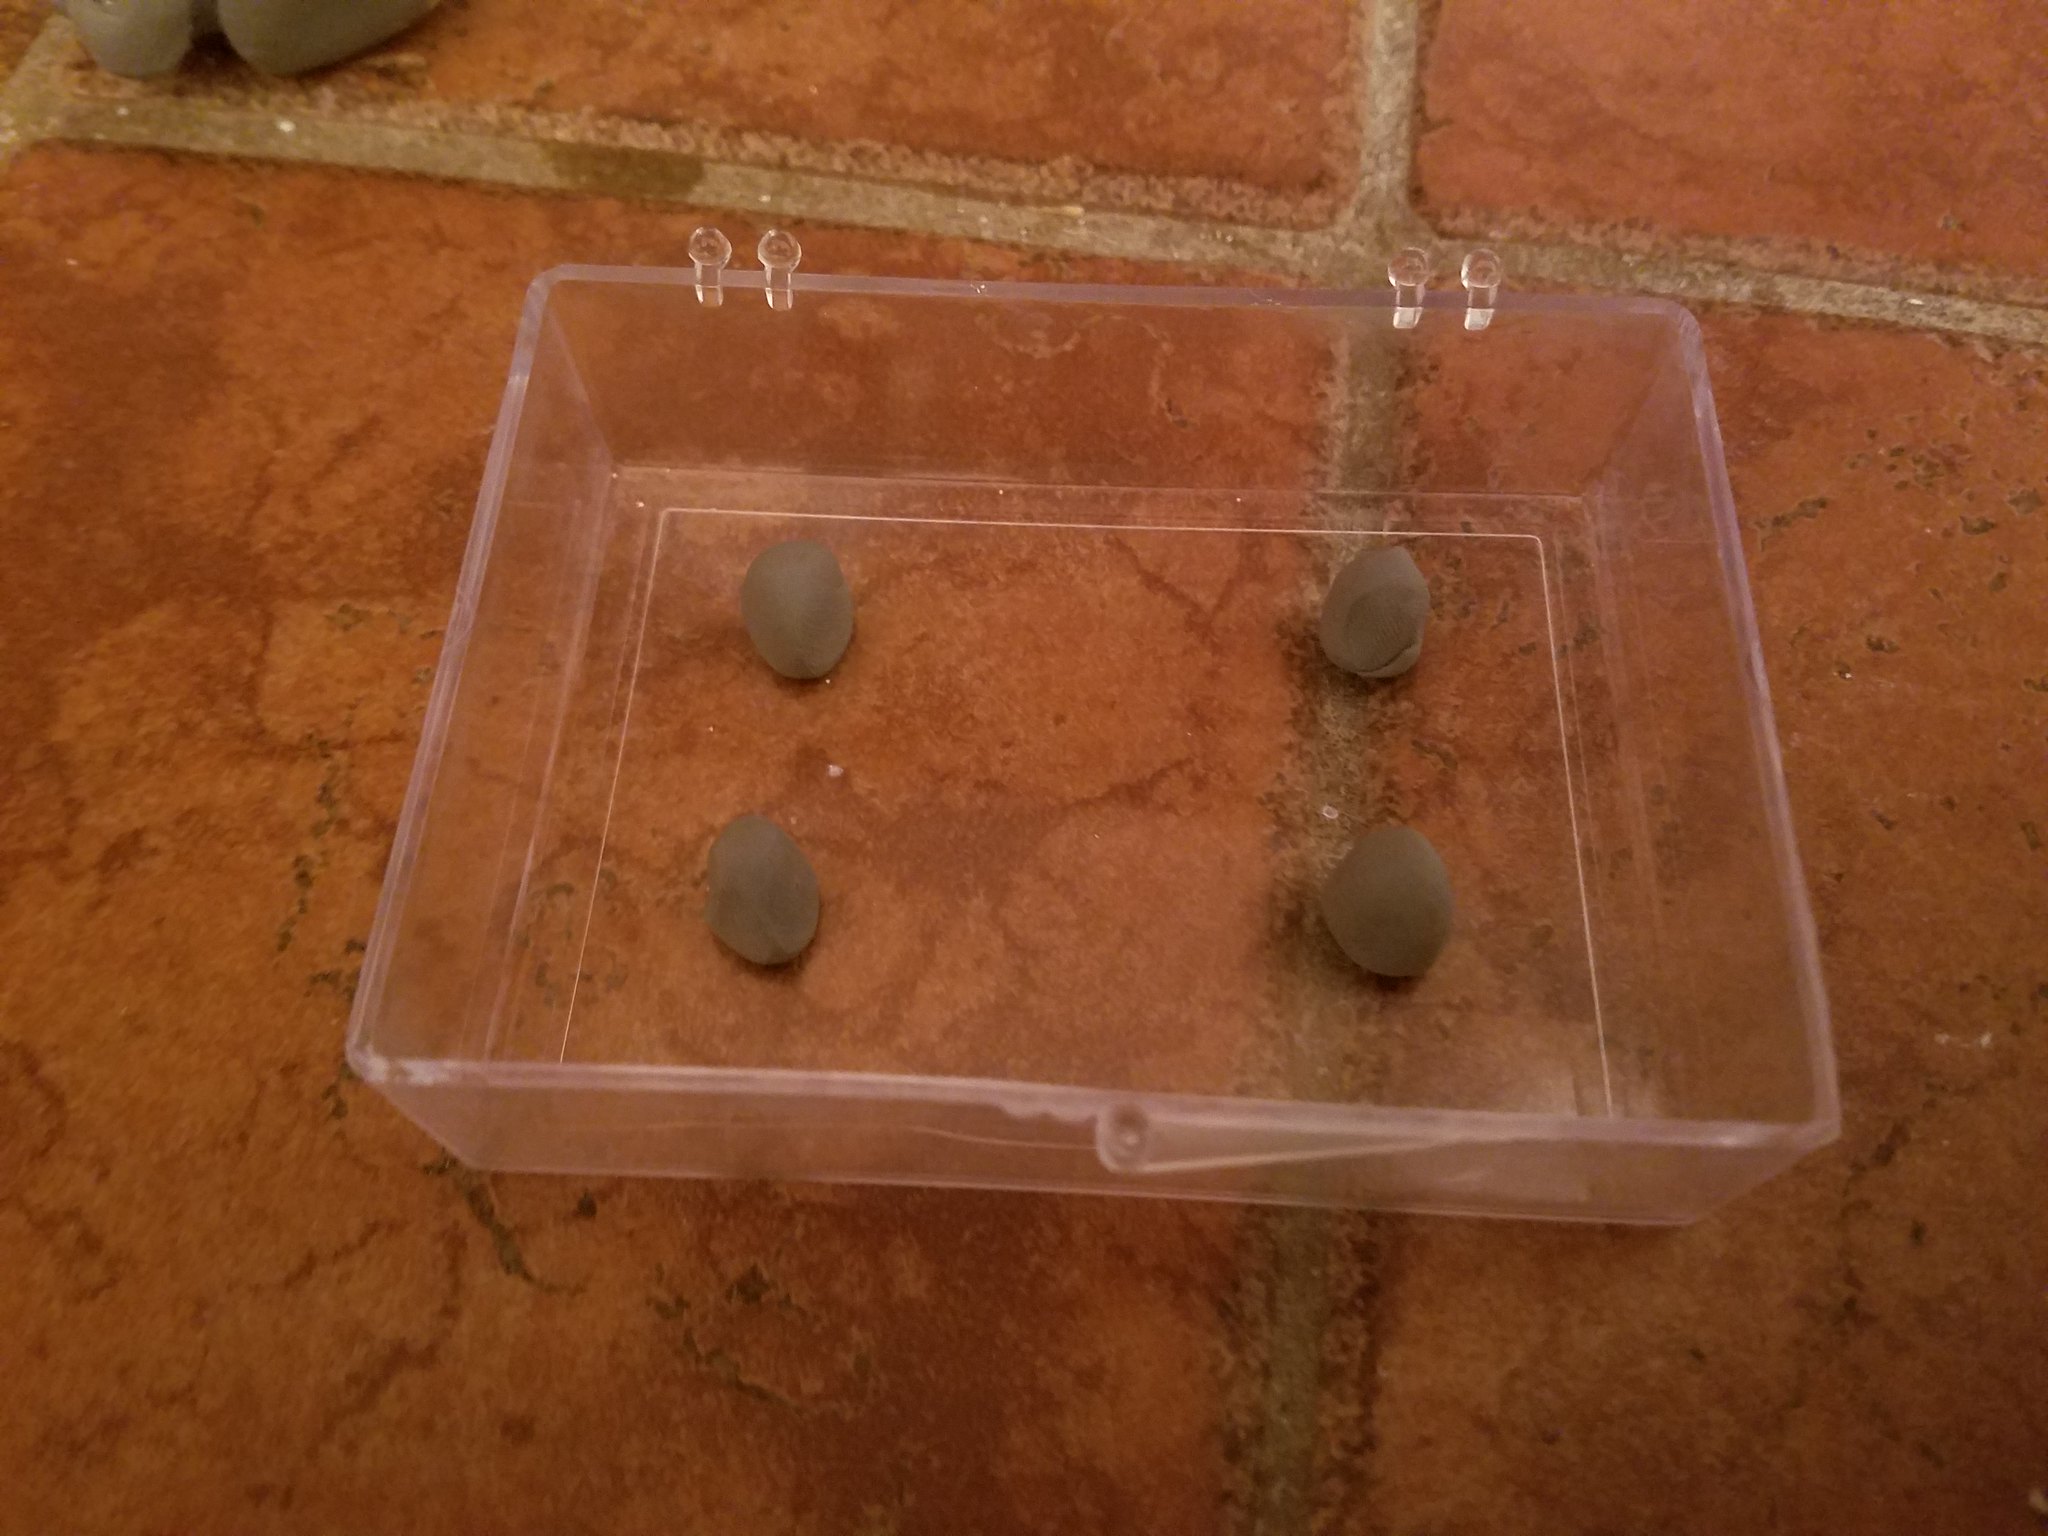
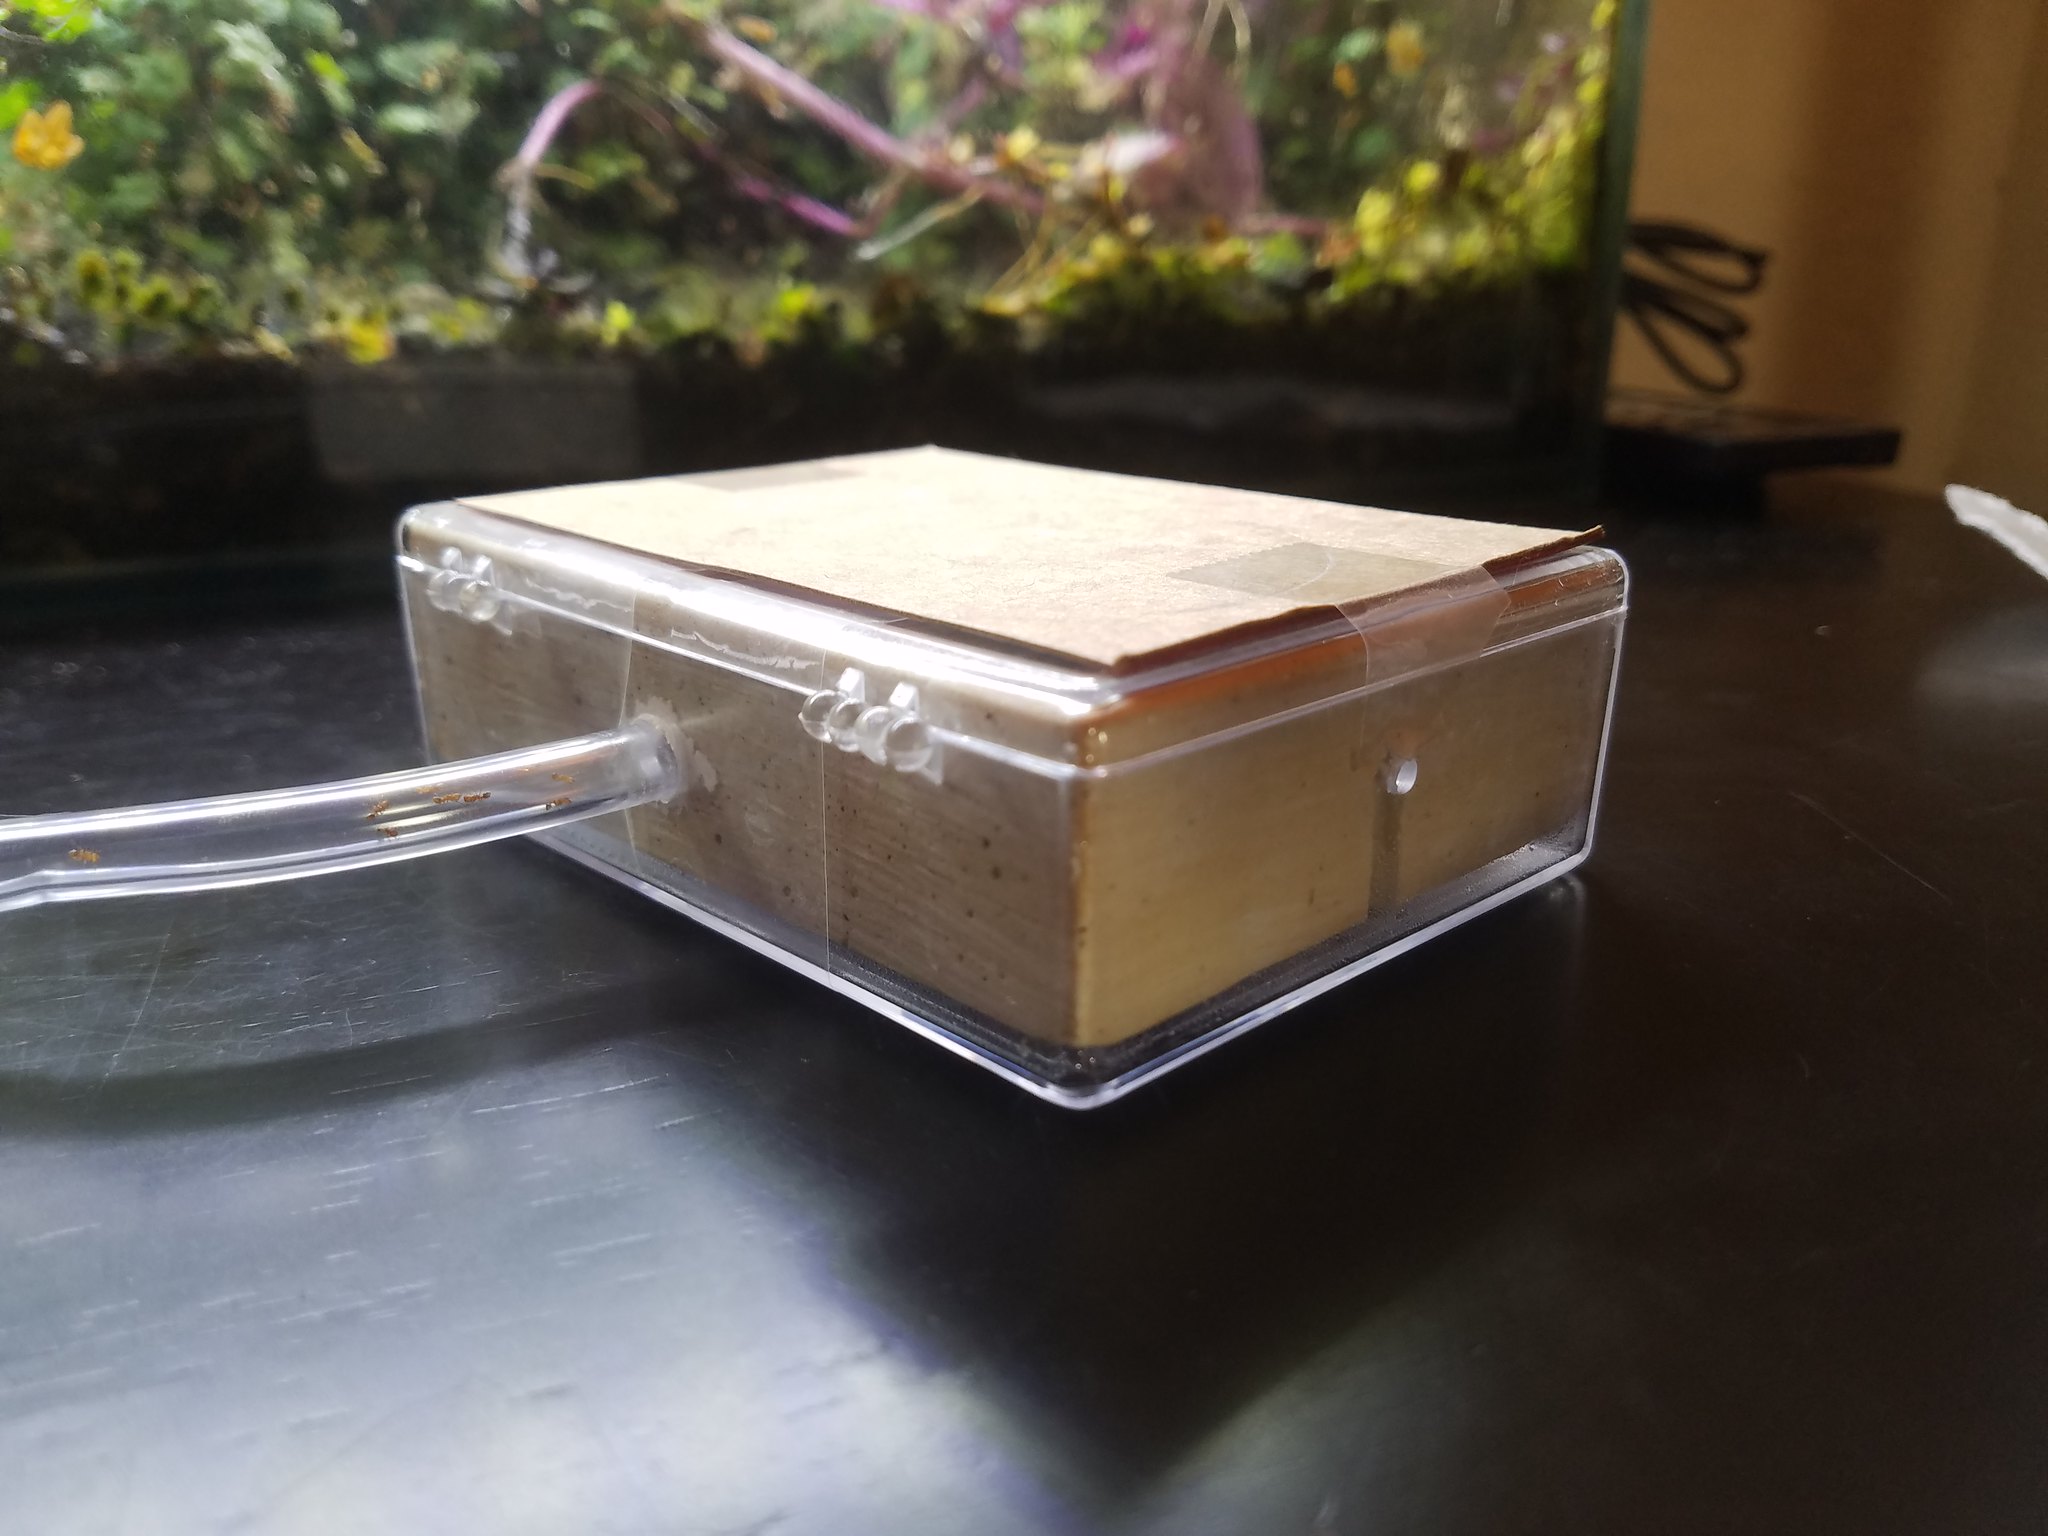
After about 30 minutes I take the plaster nests out of the water and dry them off before I put them into the plastic cases. On the bottom of the case I place four pieces of clay to help act as spacers for the water reservoir that will be on the bottom. This will also keep the top of the nest sticking out of the bottom portion of the container a bit. This portion will then nicely fit into the lid and create the barrier to prevent ants from passing between chambers.
 20190109_222310 by William Rivera, on Flickr
 20190109_222619 by William Rivera, on Flickr
I then take it back out to the garage to add the final touches. I drill a small hole on the side directly above the channel I made earlier as a port to add water with a syringe.
 20190109_223152 by William Rivera, on Flickr
I then go ahead and drill starter hole for the nest entry port using the same drill bit. The bigger drill bit I have tends to want to slip on this plastic and it makes it easier to have a guide hole to help get it started.
 20190109_223246 by William Rivera, on Flickr
It's real easy then to go back with a bigger drill bit and widen the hole for whatever size tubing you want.
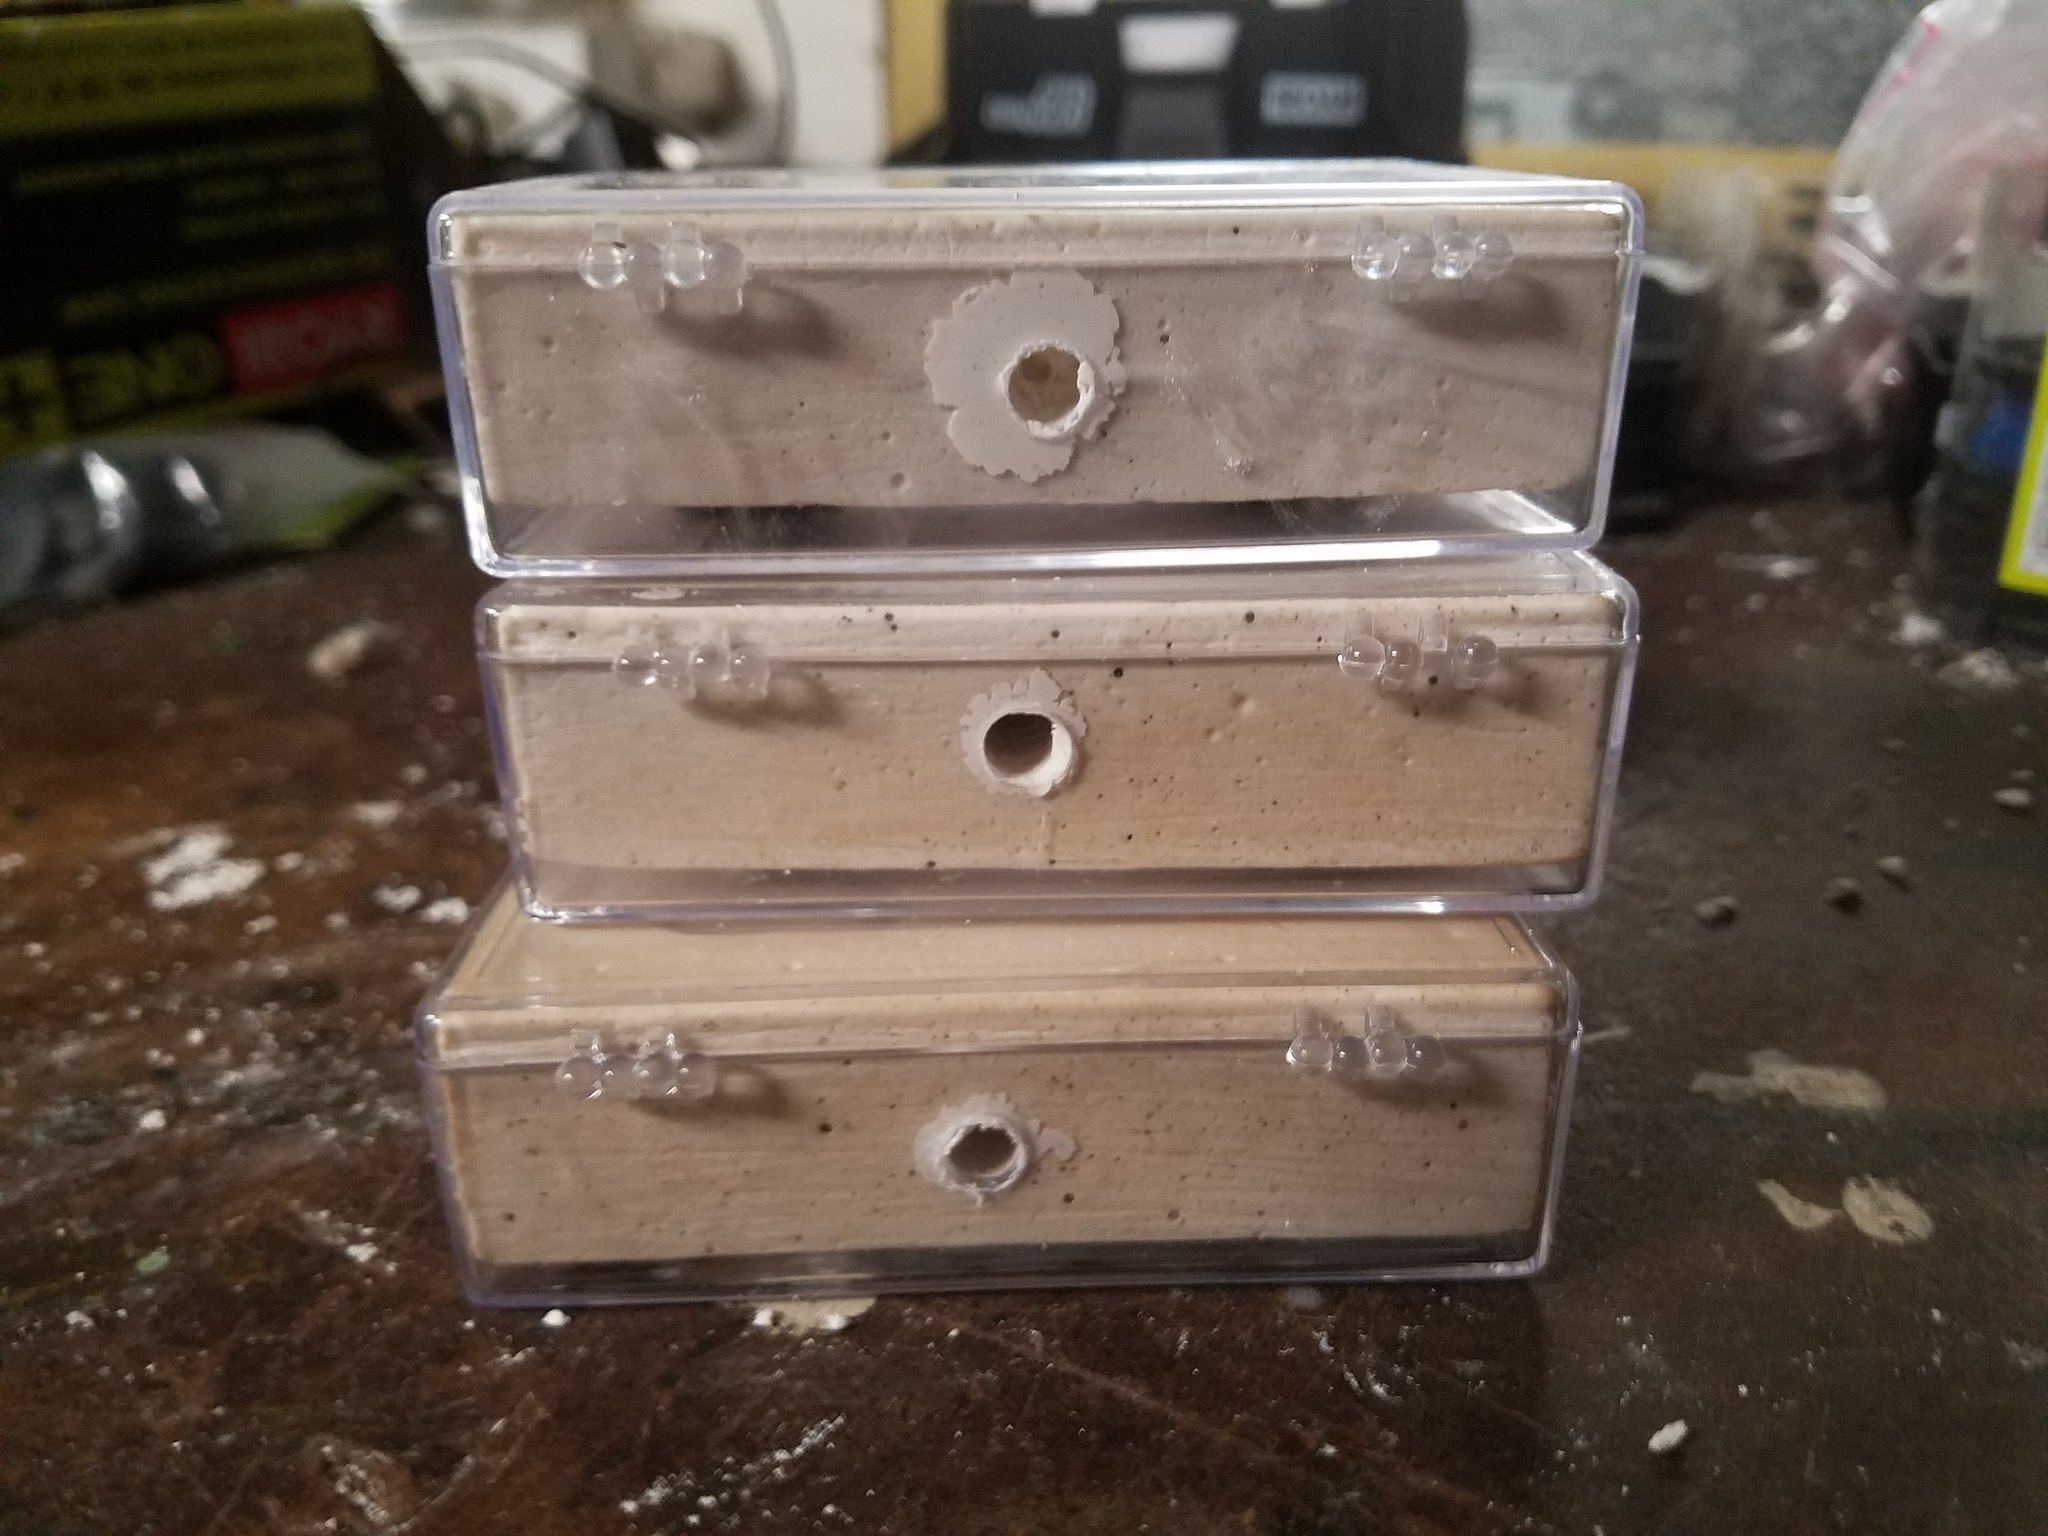 20190109_224445 by William Rivera, on Flickr
You have to make sure the hole you drill in actually connects with chambers of the nest, but for the most part that is pretty much it.
 20190109_225522 by William Rivera, on Flickr
 20190110_122638 by William Rivera, on Flickr
 20190110_122727 by William Rivera, on Flickr
Here are a few pictures of my Cardiocondyla emeryi moving in.
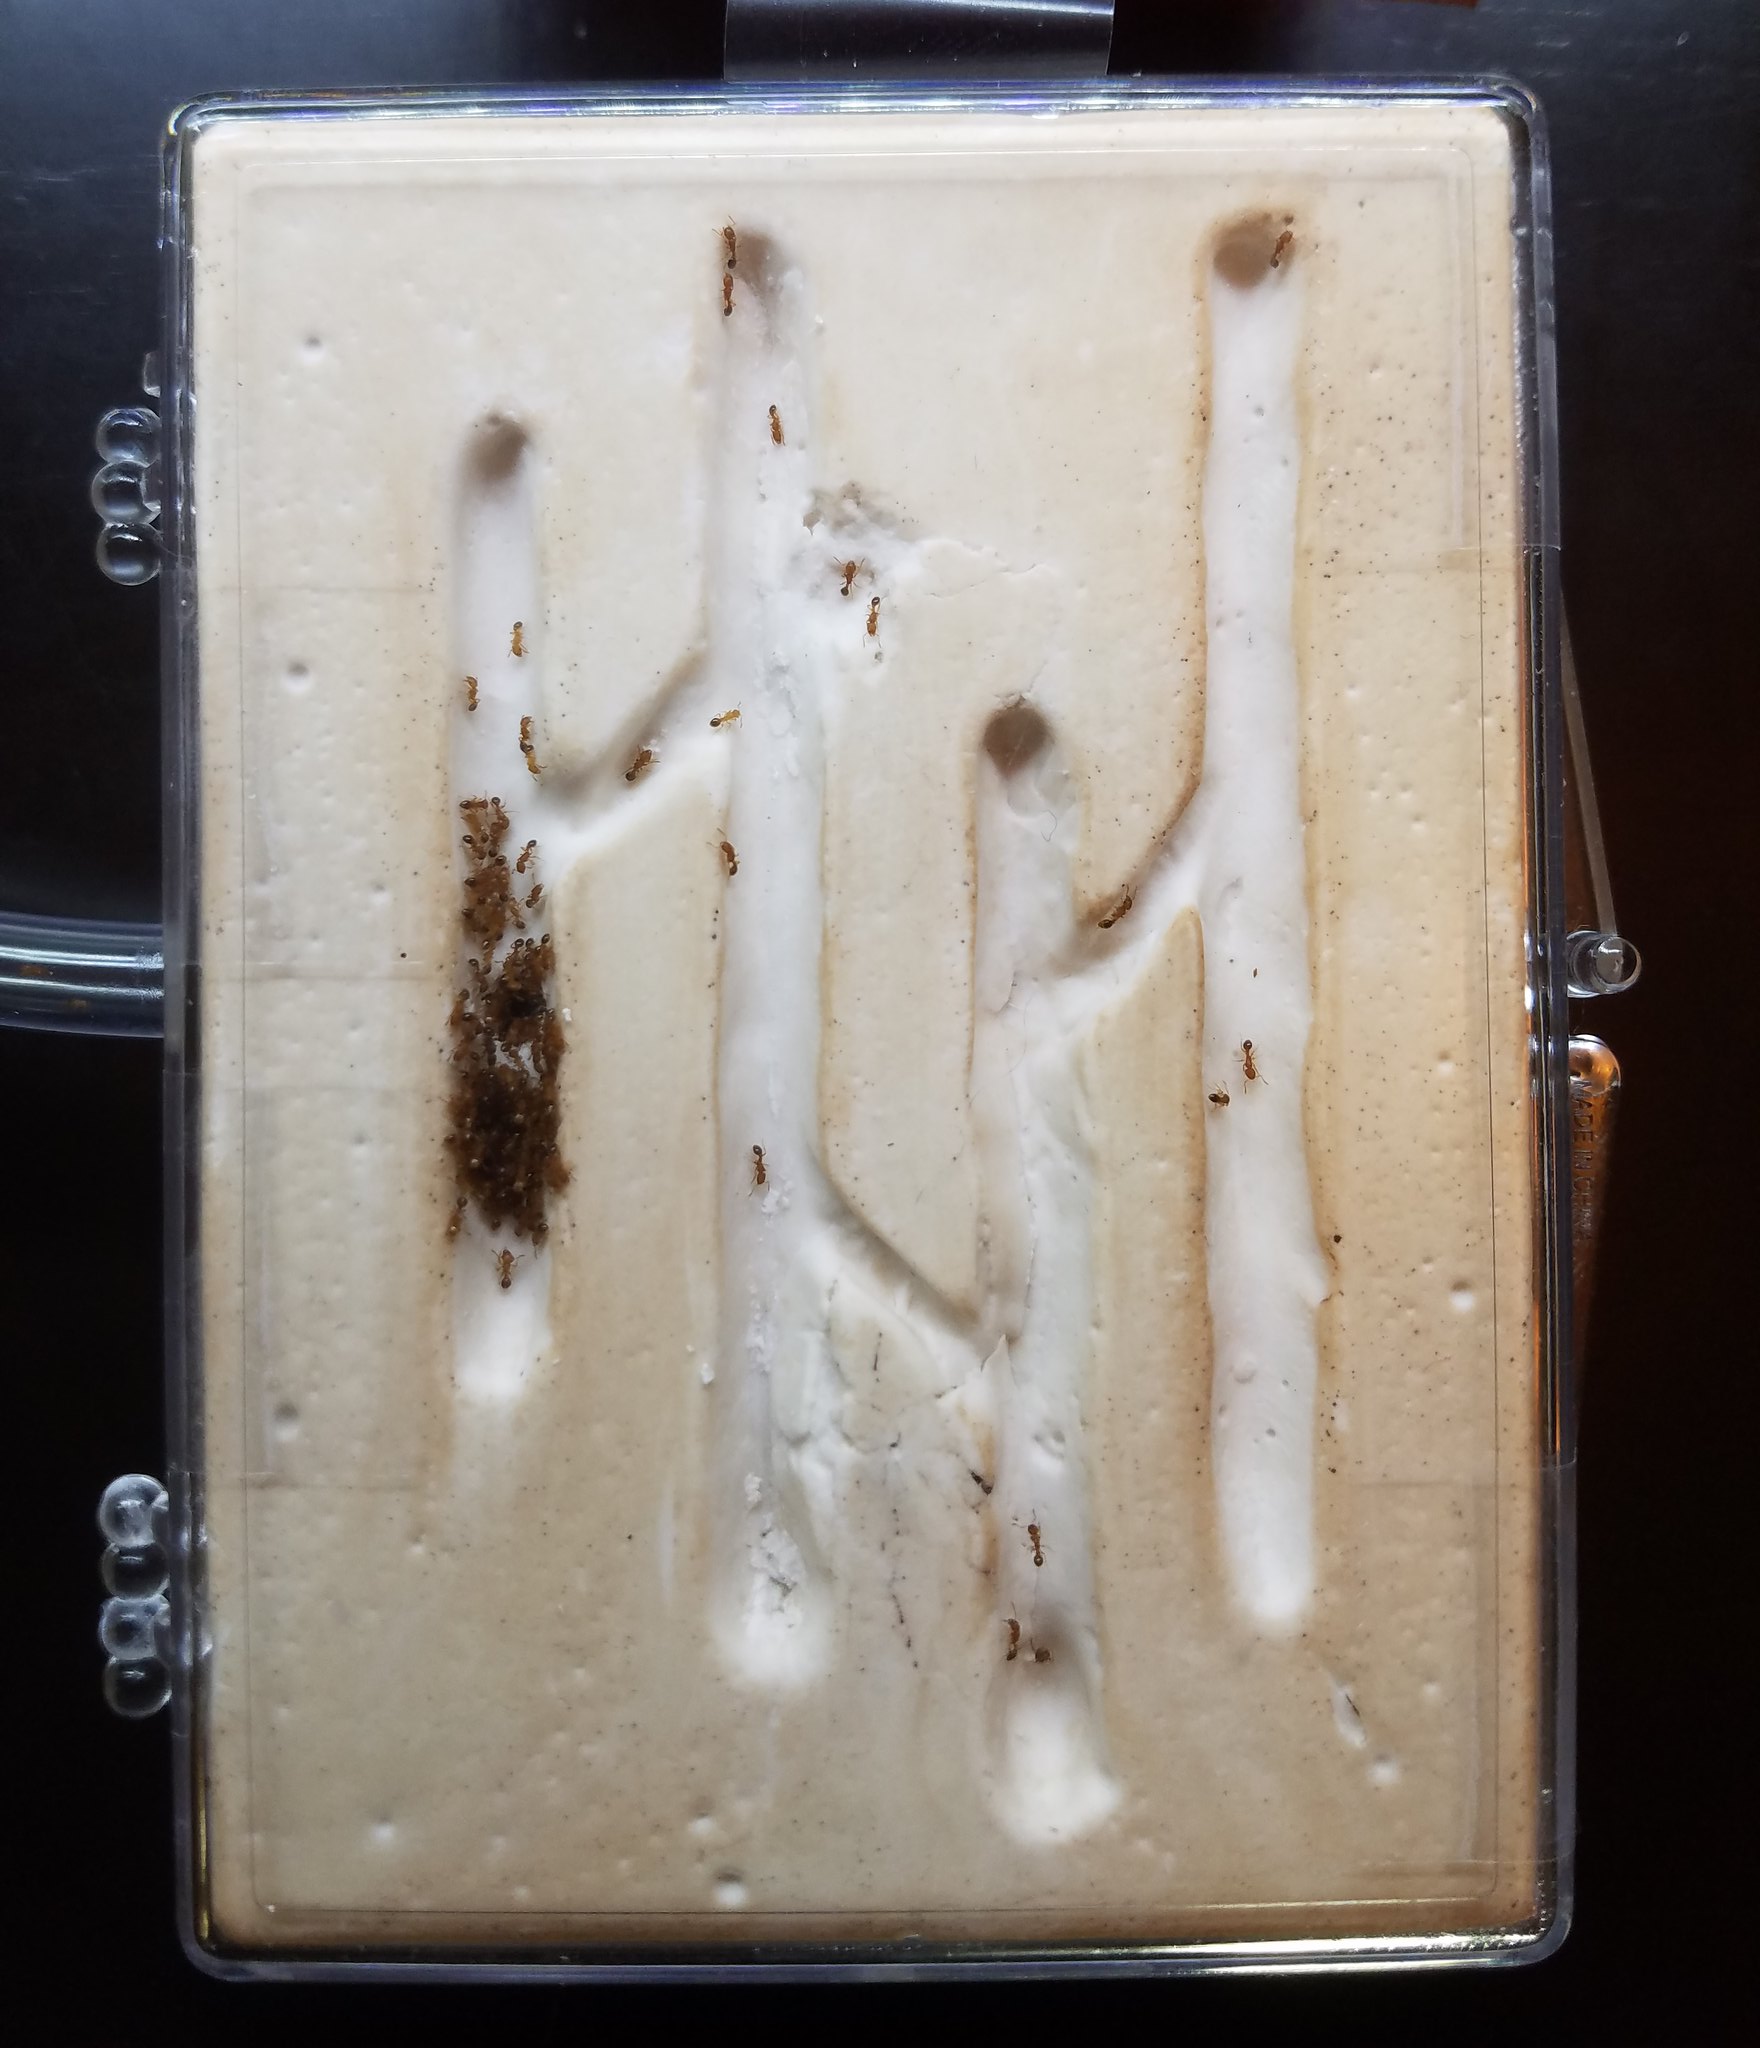 20190110_122946 by William Rivera, on Flickr
 20190110_122825 by William Rivera, on Flickr
Current Colonies:
Camponotus festinatus, Camponotus sansabaenus, Camponotus sayi, Camponotus texanus, Camponotus vicinus, Leptogenys elongata, Monomorium minimum, Pachycondyla harpax, Pheidole dentata, Pheidole floridana,
Advanced Member
Some one should cast a small ant nest with some degradable material, put it in an oiled plastic box, fill it with acrylic, and remove and clean out to make a 3D ant nest. Visibility won't be the best, but it would be an interesting design.
Advanced Member


Advanced Member

Current ant colonies -
1) Opisthopsis Rufithorax (strobe ant), Melophorus sp2. black and orange, Pheidole species, Pheidole antipodum
Journal = http://www.formicult...ra-iridomyrmex/
Heterotermes cf brevicatena termite pet/feeder journal = http://www.formicult...feeder-journal/
Advanced Member


Edited by Jamiesname, February 19 2019 - 3:33 PM.
Advanced Member
I picked up 3D printing in spring of 2018. My first functioning formicariums were simple clay tile hydration designs.
I then started thinking of new designs based on my previous works then improved on them.
I improved on them by adding thicker walls, controllable mesh hydration system (on the 2 larger sizes), attachable test tube ports, sanded floors, and a watering tank for multiple formicariums.
I'm unable to cut the Plexiglass till i buy a new saw. 

80/60mm small design.

90/130mm medium design.


180/180mm large design.

The multiple formicarium tank should support 8-12 colonies making hydration easy and less stressful to the ants.


http://www.formicult...achusetts-only/
Youtube. https://www.youtube....Hbsk2xiarcfGTmw
Keeper of...
Aphaenogaster sp
Camponotus americanus, castaneus, chromaiodes, novaeboracensis, pennsylvanicus.
Crematogaster sp
tetramorium immigrans
Formica sp
Advanced Member
Advanced Member

Advanced Member

By the time I'm completely done with it they won't be able to lol. I am making a custom acrylic lid that is pressure fit for it as well as an upside down fluon barrier. It will have 100 micron stainless mesh for the air hole in the lid as well and they aren't getting through that either.
That looks really nice! What kind of ants are you putting in it?
I'm actually using it for a colony of Formica francoeuri
Advanced Member
By the time I'm completely done with it they won't be able to lol. I am making a custom acrylic lid that is pressure fit for it as well as an upside down fluon barrier. It will have 100 micron stainless mesh for the air hole in the lid as well and they aren't getting through that either.
I'm actually using it for a colony of Formica francoeuriThat looks really nice! What kind of ants are you putting in it?
Advanced Member

Whatever colony you put, the ants can walk right out of that, no matter what escape barriers you put. The ants will walk over the silicone.
I had no idea.
Plants r cool
Advanced Member
By the time I'm completely done with it they won't be able to lol. I am making a custom acrylic lid that is pressure fit for it as well as an upside down fluon barrier. It will have 100 micron stainless mesh for the air hole in the lid as well and they aren't getting through that either.
I'm actually using it for a colony of Formica francoeuriThat looks really nice! What kind of ants are you putting in it?
Ok, kind of like what Crystals did?
None too sure of whom that is.
Advanced Member
Whatever colony you put, the ants can walk right out of that, no matter what escape barriers you put. The ants will walk over the silicone.
Advanced Member
None too sure of whom that is.By the time I'm completely done with it they won't be able to lol. I am making a custom acrylic lid that is pressure fit for it as well as an upside down fluon barrier. It will have 100 micron stainless mesh for the air hole in the lid as well and they aren't getting through that either.
I'm actually using it for a colony of Formica francoeuriThat looks really nice! What kind of ants are you putting in it?
Ok, kind of like what Crystals did?


0 members, 3 guests, 0 anonymous users

Community Forum Software by IP.Board
Designed By skinod.com