Jump to content

  • Chat
  •  
  •  

Welcome to Formiculture.com!

This is a website for anyone interested in Myrmecology and all aspects of finding, keeping, and studying ants. The site and forum are free to use. Register now to gain access to all of our features. Once registered and logged in, you will be able to create topics, post replies to existing threads, give reputation points to your fellow members, get your own private messenger, post status updates, manage your profile and so much more. If you already have an account, login here - otherwise create an account for free today!

Photo

Securing heat cable to plexiglass


  • Please log in to reply
18 replies to this topic

#1 Offline FelixTheAnter - Posted May 28 2025 - 9:25 AM

FelixTheAnter

    Advanced Member

  • Members
  • PipPipPip
  • 178 posts
Hi all. I have a large 100+ queen Tapinoma Erraticum colony (still working on getting them all moved into the nest) that is highly thermophillic, these guys will set brood directly on top of a heat cable with only a thin layer of plastic separating them.

I made them a nest that had holes in the back for a heat cable, but unfortunately it just made a bunch of condensation form on the (plexi)glass. So I attached the cable to the glass with cable clips, but this is preventing the cable from touching the glass, so they're losing a lot of the potential heat. The adhesives for the cable clips also seem to be failing a bit from the heat.

In the past I've tried tape, and that always fails because of the heat.

How can I attach this cable to the front of the nest? Any ideas would be much appreciated!

20250528_191854.jpg
20250528_191846.jpg
  • AntsGodzilla likes this

#2 Offline FelixTheAnter - Posted May 28 2025 - 9:27 AM

FelixTheAnter

    Advanced Member

  • Members
  • PipPipPip
  • 178 posts
Sorry the photos are sideways. It does this regularly, even though they are oriented normally when viewed on my phone.

#3 Online OwlThatLikesAnts - Posted May 28 2025 - 11:24 AM

OwlThatLikesAnts

    Advanced Member

  • Members
  • PipPipPip
  • 517 posts
  • LocationMontreal, CA

Sorry the photos are sideways. It does this regularly, even though they are oriented normally when viewed on my phone.

For some reason I remember FullFrontalYeti using blue tack, I’m not sure but when he comes (hopefully) he’ll give you some advice. He has one of the best heating setups known to the forum.


Currently keeping:


1x Formica subsericea, 35-40 workers +  BIG brood pile + 10 pupa.

1x Crematogaster cerasi, 1 workers + finally some bigger brood (The worker that was dying died  :facepalm:)

1x Myrmica ruba sp around 10 workers

*New* 1x  founding Camponotus pennsylvanicus + eggs that die (probably infertile)

*New* 2x Camponotus nova, one is infertile

*As you watch your ants march, remember that every thing begins with a small step and continued by diligence and shared dreams*

-A.T (which is Me)


#4 Offline Full_Frontal_Yeti - Posted May 29 2025 - 7:29 AM

Full_Frontal_Yeti

    Advanced Member

  • Members
  • PipPipPip
  • 436 posts

yeah i would totally use Blue-tack/Loctite to hold the heat cable in place.

Couple notes on heat cable use in general:

Plexi is not as heat conductive as glass, so you are correct that lacking direct contact will significantly reduce heat penetration into the nest.

I work hard on my heat cable placement to avoid applying heat too close/direct to any water towers, but i still get a little bit of condensation in spots and place a little bit of heat cable on the glass to remove/prevent condensation as needed.


With humidity on one side, dry on the other and fairly regular heat applied, plexi will want to warp/bend. But with the bolts you've got i don't imagine it'll be gaping on you.
But after a first use and gaping problme, i keep to glass covers on all my nests. Avoids warping, and has better heat transfer properties.

The Loctite I use (called mounting putty generically) will stretch and lose shape if the heat cable is applying enough tension pressure (how the cable wants to bend in it's own way).
Set it up and then notice over the next many hours to couple days where the cable is getting loose.
See if you can set it up with the least amount of twist/flex pressure as possible around the curves to reduce this possibility as best you can.
And just might need to use an additional piece to help hold it down better in spots, or make minor adjustments in placement to ward off condensation spots.

You can use it as an over the cable hold down, making little lengths (snakes) and pressing the tips into the glass on either side of a cable to hold it down.

You can also use the cable tension and make little stops with the mounting putty to keep it in place. The tension method works well, but as described, if the tension is strong enough, you'll need a fair decent sized bit of blutack to resist the pressure and heat to stay in place. In the image below the cable wants to be unwound and straighter. The places it touches the putty, it's just the cable's own tension pressure holding it there. I didn't press the cable into the putty tightly or anything. This would work on a vertical setup too, but will take a lot of fiddling to get right.  The few that have a little putty over the the cable are helping press more into the glass but not part of keeping it in place, that's the side tension pressing into the putty. 
Because it is glass it transfers the heat a bit better so little air gaps here and there don't really matter much.post-7513-0-69533400-1698166165.jpg


Special note on this nest:
On the lower left and right you can see a bit of heat cable disappear into the nest wall.
It is passing through a bit of copper tube embedded in the nest. And the tube is placed on the far side of the nest from the watertowers.
You can see the pile of pupae in the lower left, the heat pipe runs under all those lower chambers about .5 cm or less under the surface.

I read you had a similar situation in your nest but got too much condensation. Likely without the water tower to control evaporation rates, the water and heat going direct into the stone is causing it to evaporate much too fast leading to higher condensation rates.


2nd option.
looking at the image it seems like if you placed the cable clips on the sides of the nest, and farther back from the front edge. Then the cbale could be

pulled tighter to the plexi. You'd likely need ot use some kind of specialty adhesive like liqudnails or something to attach the plastic holds to the y-tong material.

But with the cable clips placed back on the nest sides they would not themselevs be creating the air gap. If the cable was pulled fairly tight with the clips on the nest side instead of front face it should snug the cable closer to the plexi.


Edited by Full_Frontal_Yeti, May 29 2025 - 7:53 AM.

  • AntsGodzilla and OwlThatLikesAnts like this

#5 Offline FelixTheAnter - Posted May 29 2025 - 9:25 AM

FelixTheAnter

    Advanced Member

  • Members
  • PipPipPip
  • 178 posts
Thank you so much for the advice!! I just skimmed it and will re-read in a little bit, I'm just winding down after a busy day.

One thing I was wondering though - any thoughts on a nest with a heat cable channel embedded into the front of it?

This piece of ytong has some damage so I'm just using it as a sort of sketch/idea template.

I was thinking something like this:20250529_191715.jpg 20250529_191621.jpg

Then carve in the nest chambers as usual, and use a small diameter tubing to connect the sections that are blocked off by the cable. Large enough tubing that they can move queens through it, but small enough that they won't try to nest in it. For this species probably something like 6mm.

This would solve the problem of condensation and heat loss, since the cable is embedded in the nest and in direct contact with the glass.

The only problem I can see is that the cable becomes a permanent part of the nest, but that's fine with me. Any other problems I'm not thinking of?
  • AntsGodzilla likes this

#6 Offline ANTdrew - Posted May 29 2025 - 9:43 AM

ANTdrew

    Advanced Member

  • Moderators
  • PipPipPip
  • 10,234 posts
  • LocationAlexandria, VA

According to Myrmy's Law, there is no way you can prevent ants from nesting somewhere by restricting tubing size. They'll probably chew at the tubing until it's big enough for them to nest, or else just start dumping trash or causing some other mischief. A permanently embedded cable doesn't seem like a good idea to me. 


  • RushmoreAnts and Mushu like this
"The ants are a people not strong, yet they prepare their meat in the summer." Prov. 30:25
Keep ordinary ants in extraordinary ways.

#7 Offline Full_Frontal_Yeti - Posted May 29 2025 - 11:17 AM

Full_Frontal_Yeti

    Advanced Member

  • Members
  • PipPipPip
  • 436 posts

As said there ^, i'd not assume to prevent them from nesting in any tubes, they gonna do what they want.

On the embedded wire idea, that is something i am planning to do on my next nest which will be a vertical one.
But to easily accommodate an embedded wire the design will be open space on one side only like this
embeded wire.png


Where the red line is the heat cable and the black around it is the plaster material of the nest.
Still working this out and won't be pouring for several months still(i pour rather than carve). But that is my current plan to try and do better with the aesthetics of heating.

If you are carving it all out, you can first carve the nest chambers you want(without connecting them all yet), then work out where to run the cable around the chambers.
Then you can carve "halls" between chambers where the cable is not blocking. And drill/carve a tunnel under the cable to allow ants to move between chambers where the cable had to go but then blocks between chambers.

But this is also more complicated by trying to both heat the nest and warm the plexi enough to prevent condensation like that.
Consider that if the cable is like that on the back side of the nest for heating, that would be plenty of nest heat for the ants.
Then you could likely just drape the remaining cable letting it hang over the plexi from the top of the nest. If you are not heating the nest through the plexi, but just preventing condensation. You need very little cable contact to the plexi, and just letting hang lose over the plexi form the top likely keeps the condensation at bay.


Summary:
Now that i seen those pics that's what i'd do. I'd have that switchback heat cable channel be the backside top part of the nest. And add water for humidity somewhere low on the nest below the heat cable line.
Then the extra cable length would hang from the top of the nest over the front of the plexi to fight any condensation.


  • AntsGodzilla likes this

#8 Offline ANTdrew - Posted May 29 2025 - 1:46 PM

ANTdrew

    Advanced Member

  • Moderators
  • PipPipPip
  • 10,234 posts
  • LocationAlexandria, VA
FFY is now officially the Heat Cable Master.
"The ants are a people not strong, yet they prepare their meat in the summer." Prov. 30:25
Keep ordinary ants in extraordinary ways.

#9 Offline FelixTheAnter - Posted May 30 2025 - 1:15 AM

FelixTheAnter

    Advanced Member

  • Members
  • PipPipPip
  • 178 posts

I'm afraid that having it embedded in the back side of the nest will leave me with the same condensation issue I had before - this nest technically has an embedded heat cable channel, three holes that go behind the nest chambers. But I didn't try perhaps wrapping the cable around the front of the nest as well, maybe that will be enough to keep the condensation away. I will try that before toying further with the idea of an embedded cable on the front.

One of my main issues is that I absolutely hate the look of a heat cable on the front of a nest, it just looks so...I don't know. Not nice. I'm honestly surprised there aren't more options available to purchase pre-made nests that have slots for heat cables built in, considering this seems to be an issue for a lot of people.


And you guys are right - I should've said that a small diameter tube (or tunnel) to connect portions of the nest will only allow them to shove a small percentage of their brood into the tubes, not that it will prevent them from nesting in the tube! haha


#10 Offline FelixTheAnter - Posted May 30 2025 - 1:29 AM

FelixTheAnter

    Advanced Member

  • Members
  • PipPipPip
  • 178 posts
What would be the reason for putting the water source below the heat cables?

I'm wondering how that could work with ytong. Right now I just have a big empty chamber in the top of the nest that I can pour water into. This stuff sucks up a ton of water, I'm not sure how you'd make a good sized reservoir work in a ytong nest. Would love ideas tho! This stuff is cheap and I get huge blocks of it, so I can set aside some pieces for practicing and trying ideas

#11 Offline ANTdrew - Posted May 30 2025 - 1:57 AM

ANTdrew

    Advanced Member

  • Moderators
  • PipPipPip
  • 10,234 posts
  • LocationAlexandria, VA
I only heat my ants a few weeks in late winter/early spring before my local climate turns hotter than you know where. I run minimal AC and keep my ants in my kitchen, so they are naturally warmed. If these are native ants, surely there is a way to keep them warm without heat cables using the natural heat of summer?
"The ants are a people not strong, yet they prepare their meat in the summer." Prov. 30:25
Keep ordinary ants in extraordinary ways.

#12 Offline FelixTheAnter - Posted May 30 2025 - 3:36 AM

FelixTheAnter

    Advanced Member

  • Members
  • PipPipPip
  • 178 posts
My husband is ALWAYS hot, so we got an AC this year and keep the apartment much cooler than the ants would like. Unless I put them outside it's just too cool in here for them. This species also LOVE heat, when I found my first colony of them they were in a bunch of gravel that was almost uncomfortably hot to touch.

It's actually quite funny to watch how much they love the heat. I forgot to plug the heating cable back in last night, so I plugged it in this morning. As soon as they feel the heat they start getting jittery, grabbing brood, and setting them on top of the cable 😂

If it was something like L. Niger I probably wouldn't worry so much about the heat, but this species seems extremely obsessed with it.

#13 Offline Full_Frontal_Yeti - Posted May 30 2025 - 8:07 AM

Full_Frontal_Yeti

    Advanced Member

  • Members
  • PipPipPip
  • 436 posts

I'm afraid that having it embedded in the back side of the nest will leave me with the same condensation issue I had before - this nest technically has an embedded heat cable channel, three holes that go behind the nest chambers. But I didn't try perhaps wrapping the cable around the front of the nest as well, maybe that will be enough to keep the condensation away. I will try that before toying further with the idea of an embedded cable on the front.

One of my main issues is that I absolutely hate the look of a heat cable on the front of a nest, it just looks so...I don't know. Not nice. I'm honestly surprised there aren't more options available to purchase pre-made nests that have slots for heat cables built in, considering this seems to be an issue for a lot of people.


And you guys are right - I should've said that a small diameter tube (or tunnel) to connect portions of the nest will only allow them to shove a small percentage of their brood into the tubes, not that it will prevent them from nesting in the tube! haha

I am on this page about nest aesthetics and heating, I have spent a good bit of my time working on that particular front.

In the end i discovered that if the nest is going to be high enough humidity on the inside, then there will always the conditions for condensation to from on the plexi/glass.
I found the only way to have none is to apply some amount of heating directly to the glass. However importantly, if we are not heating the nest through the glass, but using direct contact to the nest instead. Then the amount of heat we need to apply to the plexi/glass to keep the condensation from forming is A: very little and B: likely specific spot locations only.

The condensation forms when the temperature of the glass is cool enough relative to the internal temps of the nest. The glass does not need to be the same temps as inside just not too far off from it. So once we got a good heat applied to the nest directly, we should only need to place a little bit of the heat cable on the plexi itself to prevent the condensation.

In my larger nests, there's a little condensation that forms in a small spot overnight while ambient room temps get fairly low, but it dries out in short order as the room warms up in the morning. it's just the ratio of heat in/heat out. I use a little enough amount of heat cable on the glass it can only fight off so much cold, but it's enough that this only happens on the overnight, and only when temps get low enough.

So when we apply the heat direct to the glass/plexi, it's just auto doing the job of keeping the plexi dry at the same time. If we apply the heat somewhere else, then we'll get condensation. And the only way to really stop the condensation from forming is apply either all or at least a little of the heat to the glass.

This is also why i did the copper tube heat pipe. Copper is a good conductor of heat and embedded into the nest from end to end should warm the nest very efficiently. It's not on all the time, i use a thermostat to keep things at 81/82f in the main nest, but only need a little bit of heat cable on it to do so. Here's a current pic(used an older image in last post to better show use of blutak and tension holding).
here's the same nest as it is today:
post-7513-0-42041600-1746201442.jpg

I just need that one long U run over the glass and it keeps condensation from forming except in one small spot when overnight ambient gets low enough. but it dries up shortly in the morning anyway.

The small nest far left you can see the black line where the heating starts. The only place the heat touches the nest is on the back side we can't see, and the two runs going over the top do not even directly contact the glass, and are placed to not cover any actual ant viewing. And that little bit of warm just over the glass is all it takes to stop condensation from forming in that smaller nest.
 These nests are heated to simulate going deeper underground. 
Big nest = top of the mound, max heat
middle 2 nest = little underground, temps are less controlled here with no thermostat, leaching heat from the top of the mound cable mostly.
last nest = 6+ feet under ground thermostat keeps this a constant 71/72f(the queen lives here most of the time)

But not securing the cable to the glass i can just lift it off for pics whenever i want. And using a minimal amount on glass just to fight condensation, while heating the nest direct elsewhere keeps it more open/viewable all the time. It's the best balance i can find of not having a lot of condensation you can't see though vs. havng a lot of heating wire on the viewing face that looks kind of ugly.


What would be the reason for putting the water source below the heat cables?

I'm wondering how that could work with ytong. Right now I just have a big empty chamber in the top of the nest that I can pour water into. This stuff sucks up a ton of water, I'm not sure how you'd make a good sized reservoir work in a ytong nest. Would love ideas tho! This stuff is cheap and I get huge blocks of it, so I can set aside some pieces for practicing and trying ideas

The goal is getting the humidity water and the applied heat, as far apart as possible. The more we heat the water the faster it evaporates. If we evaporate too fast, then the air will become supersaturated with humidity(100%+) and condensation will form on everything with no way to prevent it.
And as heat rises, if we apply heat low but add water high, they will wind up mixing as the water falls down and the heat rises to meet it. But if we apply heat form the top, while keeping the water input nearer the bottom this will maximize the separation you could obtain in such a nest as Y-tong with no plastic reservoir tray.
I saw the image of the water chamber and figured such a thing could be carved on the side of the nest lower down instead of on the top.

In my nests the water tower is a little plastic tealight try with a mesh screen over it. This gives the water a slower evaporation rate than when it is all just soaked into the stone material directly, which is then evaporating water from it on all of its surface area both inside and out. That too is a contributing factor to condensation when water is going to vapor at such a higher rate.

The image of the heat cable switchback i pictured as the top of the nest, so figured to get the water chamber as low below that as i could for better heat/water separation to keep condensation down.
And then the extra cable length i figured to just drape over the top hanging down in front of the plexi. And use some bluetak or cable holds to ensure it drapes in the right places once i spot where any condensation wants to form. 
That last step takes a couple days of just monitoring to see if any spots are forming and gettign cable placement right to dry them up and prevent more.
like i said it's kind of a chocie about cable for heat on glass = looks ugly but auto stops any condensation, or heat not on glass, but then will still need a little heat on glass to keep the condensation at bay.


Oh and yes i say drew is rigth there. If possible just let ambient temps be their temps. I happen to live in a place with the thermal properties of a paper bag,. no climate control options, and signifficnt day/night ambient temp changes. So i gotta provide enviroment contorls for them that my house cannot.


Edited by Full_Frontal_Yeti, May 30 2025 - 8:16 AM.


#14 Offline FelixTheAnter - Posted May 30 2025 - 9:21 AM

FelixTheAnter

    Advanced Member

  • Members
  • PipPipPip
  • 178 posts
I have to agree with Drew that you are definitely the certified expert on heat cables!!

I'm surprised that your experience has been only a small amount of the cable on the glass is enough to clear the condensation, because I'm having the opposite experience. Threaded the cable through the holes in the nest, with it pressed against the glass in a couple spots in front:

20250530_113155.jpg

And this was the result:
20250530_170543.jpg

20250530_170546.jpg

Sorry for the sideways pictures. They're completely fine when viewed anywhere else, I don't know why they turn when uploaded here.

Anyways, the condensation was super thick - maybe the nest was just a bit too warm with the cables inside the ytong block. The ants had also moved upwards away from the heat, first time I've ever seen them do that.

It doesn't look like we can get Blu Tack here without ordering it online, but I did find some adhesive putty at the hardware store that I'm hoping will work the same. I'm going to try using that to hold the cable to the front of the plexiglass, will report back how it works!

And thanks again for all the information, it's nice to be able to refer back to this, especially if I decide to make a nest with integrated channels for the cable.

#15 Offline Full_Frontal_Yeti - Posted May 30 2025 - 11:30 AM

Full_Frontal_Yeti

    Advanced Member

  • Members
  • PipPipPip
  • 436 posts

Seeing the pics you got i think the answer is the difference between water towers and moisture added direct to the nest materiel.

Basically it's going to be evaporating so fast from the Y-tong, keeping condensation at bay is going to be very hard maybe impossible i might guess.

The tealight cups slow the evaporation rate enough it makes a huge difference. There was a time with a different nest where the water port was a little off and a lot of the water could be spilling out into the stone material directly. I would get a similar looking condensation on the glass that the cable would not prevent, and only went away after the plaster dried out enough.

Additionally plastics are not as good at absorbing heat as glass, so the heat likely spreads out far less over the surface of the plexi as it will the glass i use. Which might mean you'd need to use a higher ratio of cable/plexi than i do with cable/glass.

And all mounting putty should more or less be the same stuff, i just happen to have bluetak and Locktite as the brand names on hand at local stores that i use. It's the same stuff college freshmen use to  put posters up on their cinder block dorm room walls.

Maybe in a fresh carve nest you can make spots for drop in tealight cups or other form of plastic container to help control evaporation rates better. I know y-tong is liked for specific reasons but i do notice that a lot of the pics i seen posted of it, tend to show a bit of condensation commonly enough. Might just be a part of the deal with y-tong. i've not used it yet myself to say from xp, been doing perfect cast poured nests instead.


#16 Offline FelixTheAnter - Posted May 30 2025 - 2:02 PM

FelixTheAnter

    Advanced Member

  • Members
  • PipPipPip
  • 178 posts
Interesting, I think you're right about the ytong just being much wetter overall.

I've done plaster nests before, but ended up really preferring ytong. I'm curious though, how do you cast yours?

The condensation in the nest seems to be slowly but surely clearing, the adhesive putty is holding up well so far. And the ants have moved all their babies back down to the bottom of the nest near the cable :)

I love being able to watch them. I have them right next to my favorite spot on the couch.

I'll remove the adhesive cable clips soon, it was too much work to bother with today.

I tried rotating the picture before uploading it...nope, it still uploads sideways. I give up lol

20250530_211924.jpg
20250530_211936.jpg VideoCapture_20250530-235121.jpg

#17 Offline Full_Frontal_Yeti - Posted May 31 2025 - 8:42 AM

Full_Frontal_Yeti

    Advanced Member

  • Members
  • PipPipPip
  • 436 posts

I too keep the ants right next to my common place in the house, just here to my left as i use the computer. Making them a center piece of home decor basically.

I use perfect cast to pour my own nests.


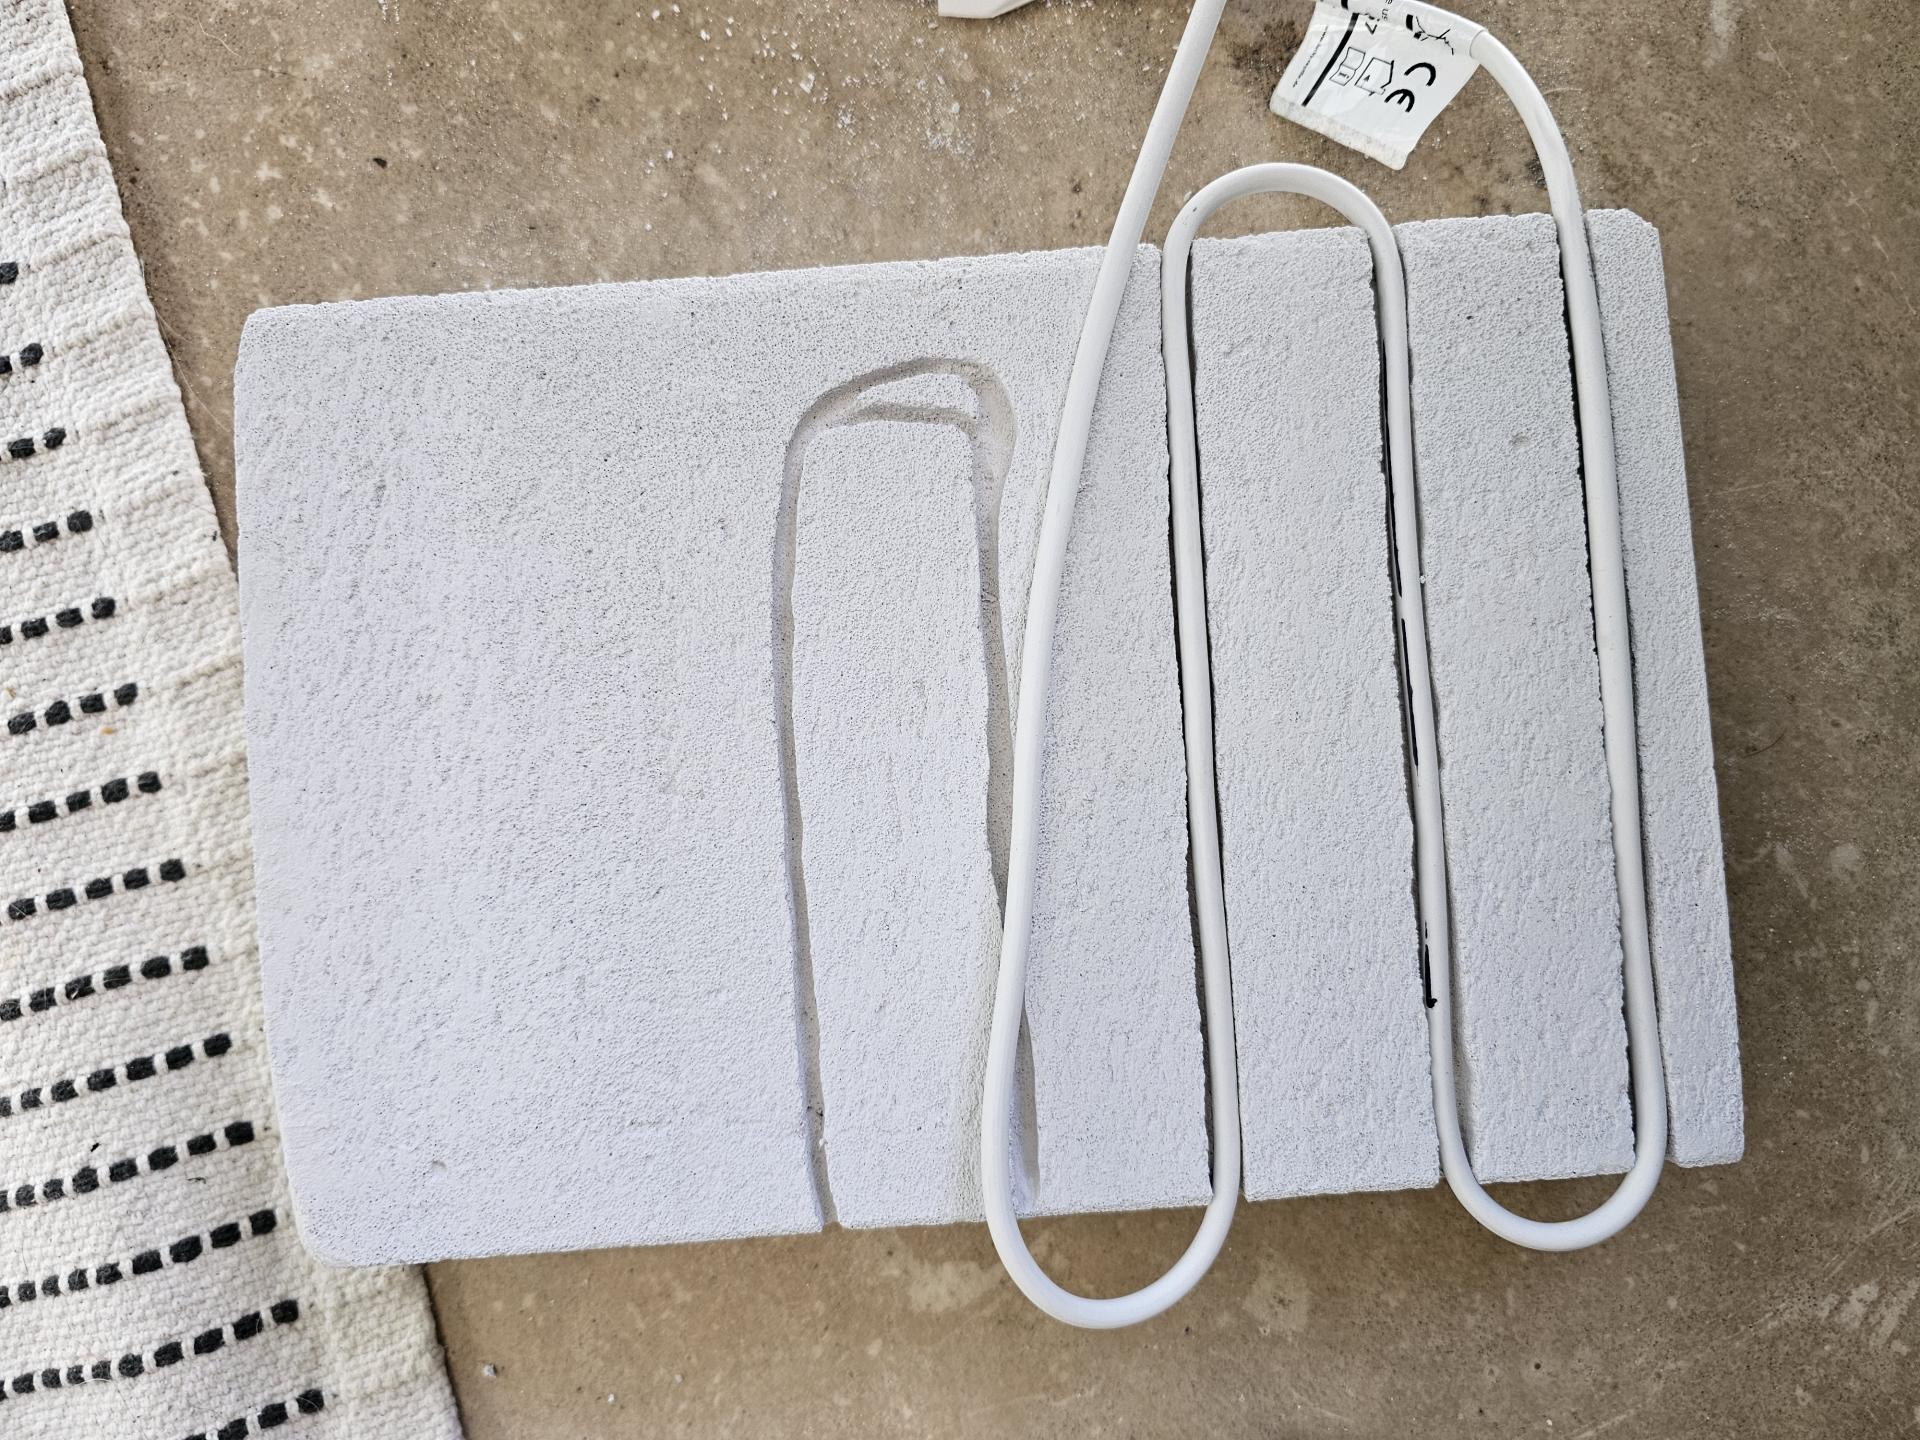
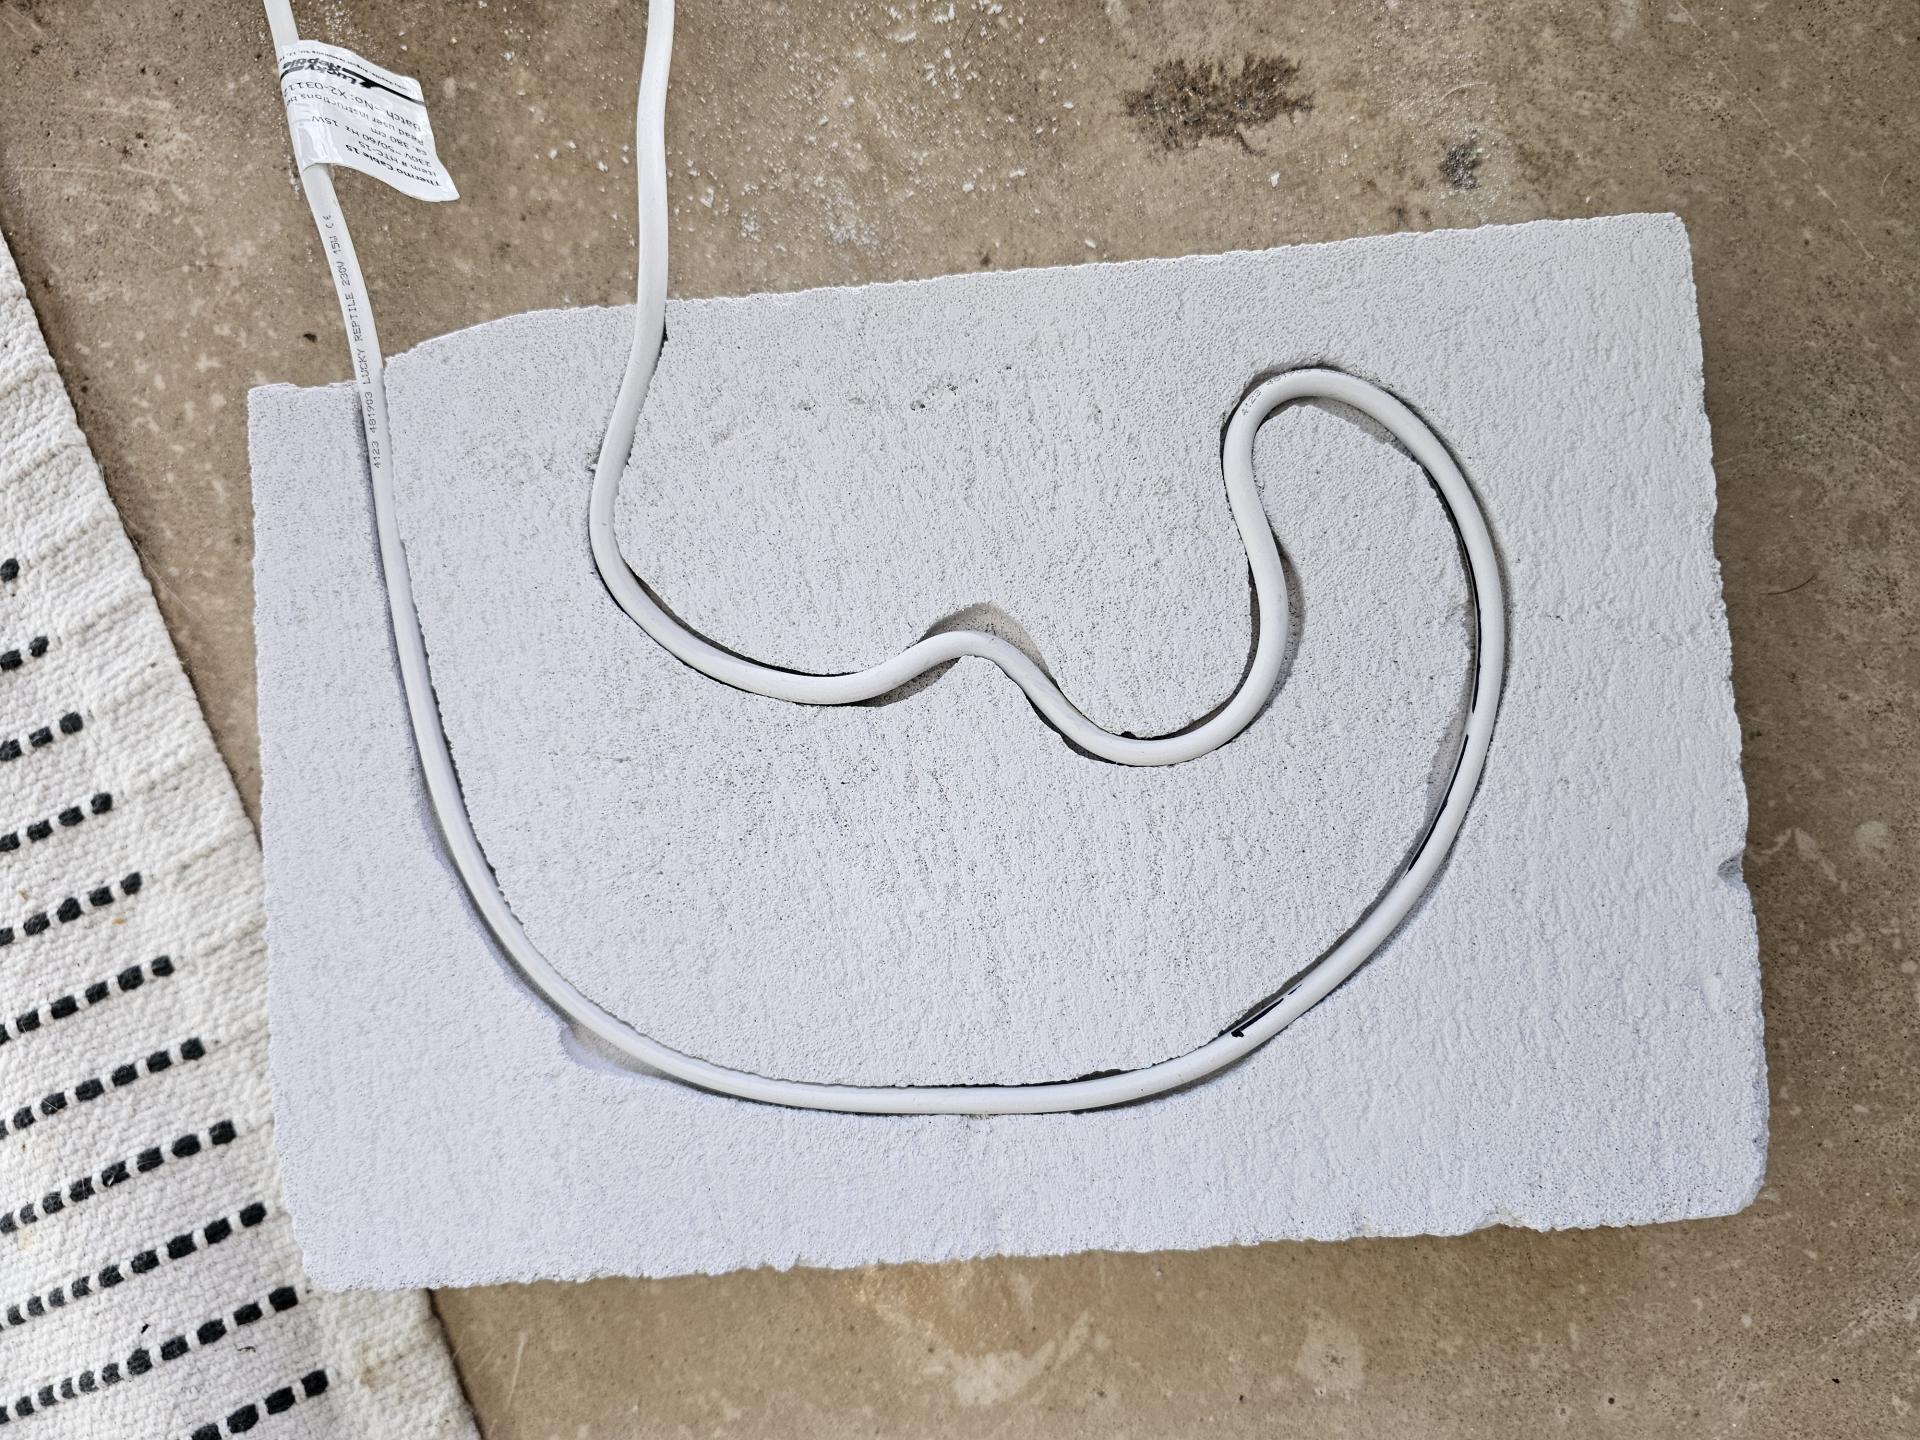
the basic work is to lay it all out in sand/clay/tubes, rather than carve the spaces out later.
 

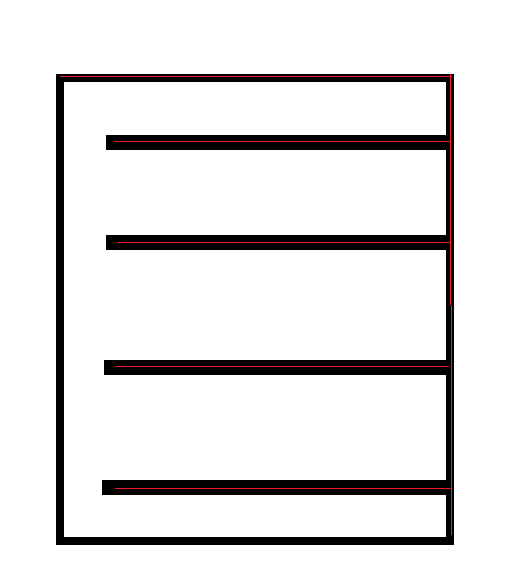
1: On a level pane of clean glass larger than the nest will be, layout the nest chambers and tunnels in sand/modeling clay.
2: Place water towers where wanted and route the fill tubing. The towers go upside down on top of a sand pile(will become a chamber with tower mesh top as the chamber floor)
3: Cut the foam board to size and hot glue it to the glass and each other to prevent any leaking, making a little box around the sand nest chambers on the glass.
4: Figure out entrance/exit port locaitons, and use a bit of tube going through the mold wall and in good contact with sand/clay(this avoids any drilling/carving of ports later by creating them in the pour directly, the tube will just slide right out once dry).
5: Place a bit of clay as weight on top of the water towers so they do not float up when we pour the liquid plaster in.
6: Mix and pour the plaster into the mold, being sure to pour slow so as to not move any of the sand around.
 

It's all fairly slow going and fiddly to work in sand. Too wet and it won't hold a shape, too dry and it won't hold shape. I tend to get it in shape just a little moist, and then use a paintbrush to wet it a little more once it is in the shape i want, as  it helps keep it that way.
Clay works too but gives much smoother looking "man made" visual to the walls, and can also color the nest a little if has is a strong color of some kind. I tend to use the kids modeling clay as added mold sealer around the port holes and such. Or as under fill for larger chambers where i put sand over a clay core.
 

The drier the sand when you pour the more texture you get and the more sand may be left behind embedded in the plaster. While fairly wet sand will give a smooth surface look with very little left behind in the plaster later.
 

5+ hours later, tear off the mold, washout the sand/remove any clay and tubes, then we're all done, no drilling/cutting/carving needed.
Get a piece of glass/plexi custom cut to size at any standard framing shop.

The hardest part of it all, is the inverse visualizing. Piles of sand on the glass, become open chambers and tunnels in the nest. And the whole thing is also upside down, so you got to keep the flip direction right if it is connecting in specific places in an already defined space. Do i flip this on one axis so what is the front to me during fabrication becomes the back when in use or on the other axis so the left side during fabrication becomes the right side while in use.
 

NOTE ON FOAM BOARD: matte will let liquid plaster seep in a little and leave behind a some color/residue, wasn't an issue for me but just FYI, glossy likely resist the wetness better than matte.

At first I made molds out of thin wood, like off wine boxes with C clamps holding them together. These days i'm using foam core board instead with hot glue holding he edges as well as hot glue sealing the mold to the glass bottom. the foam core is just way easier to work with, and i do not wind up reusing the wood molds anyway.
post-7513-0-15258100-1695754069.jpg
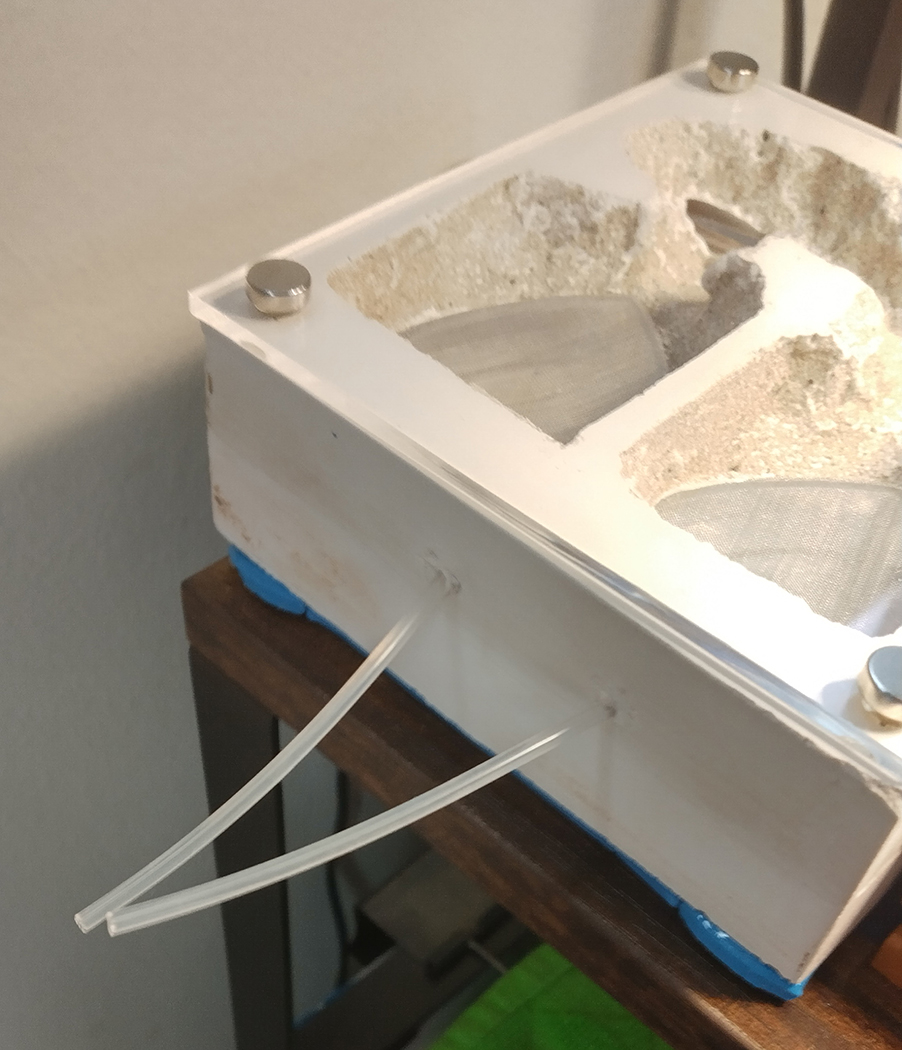
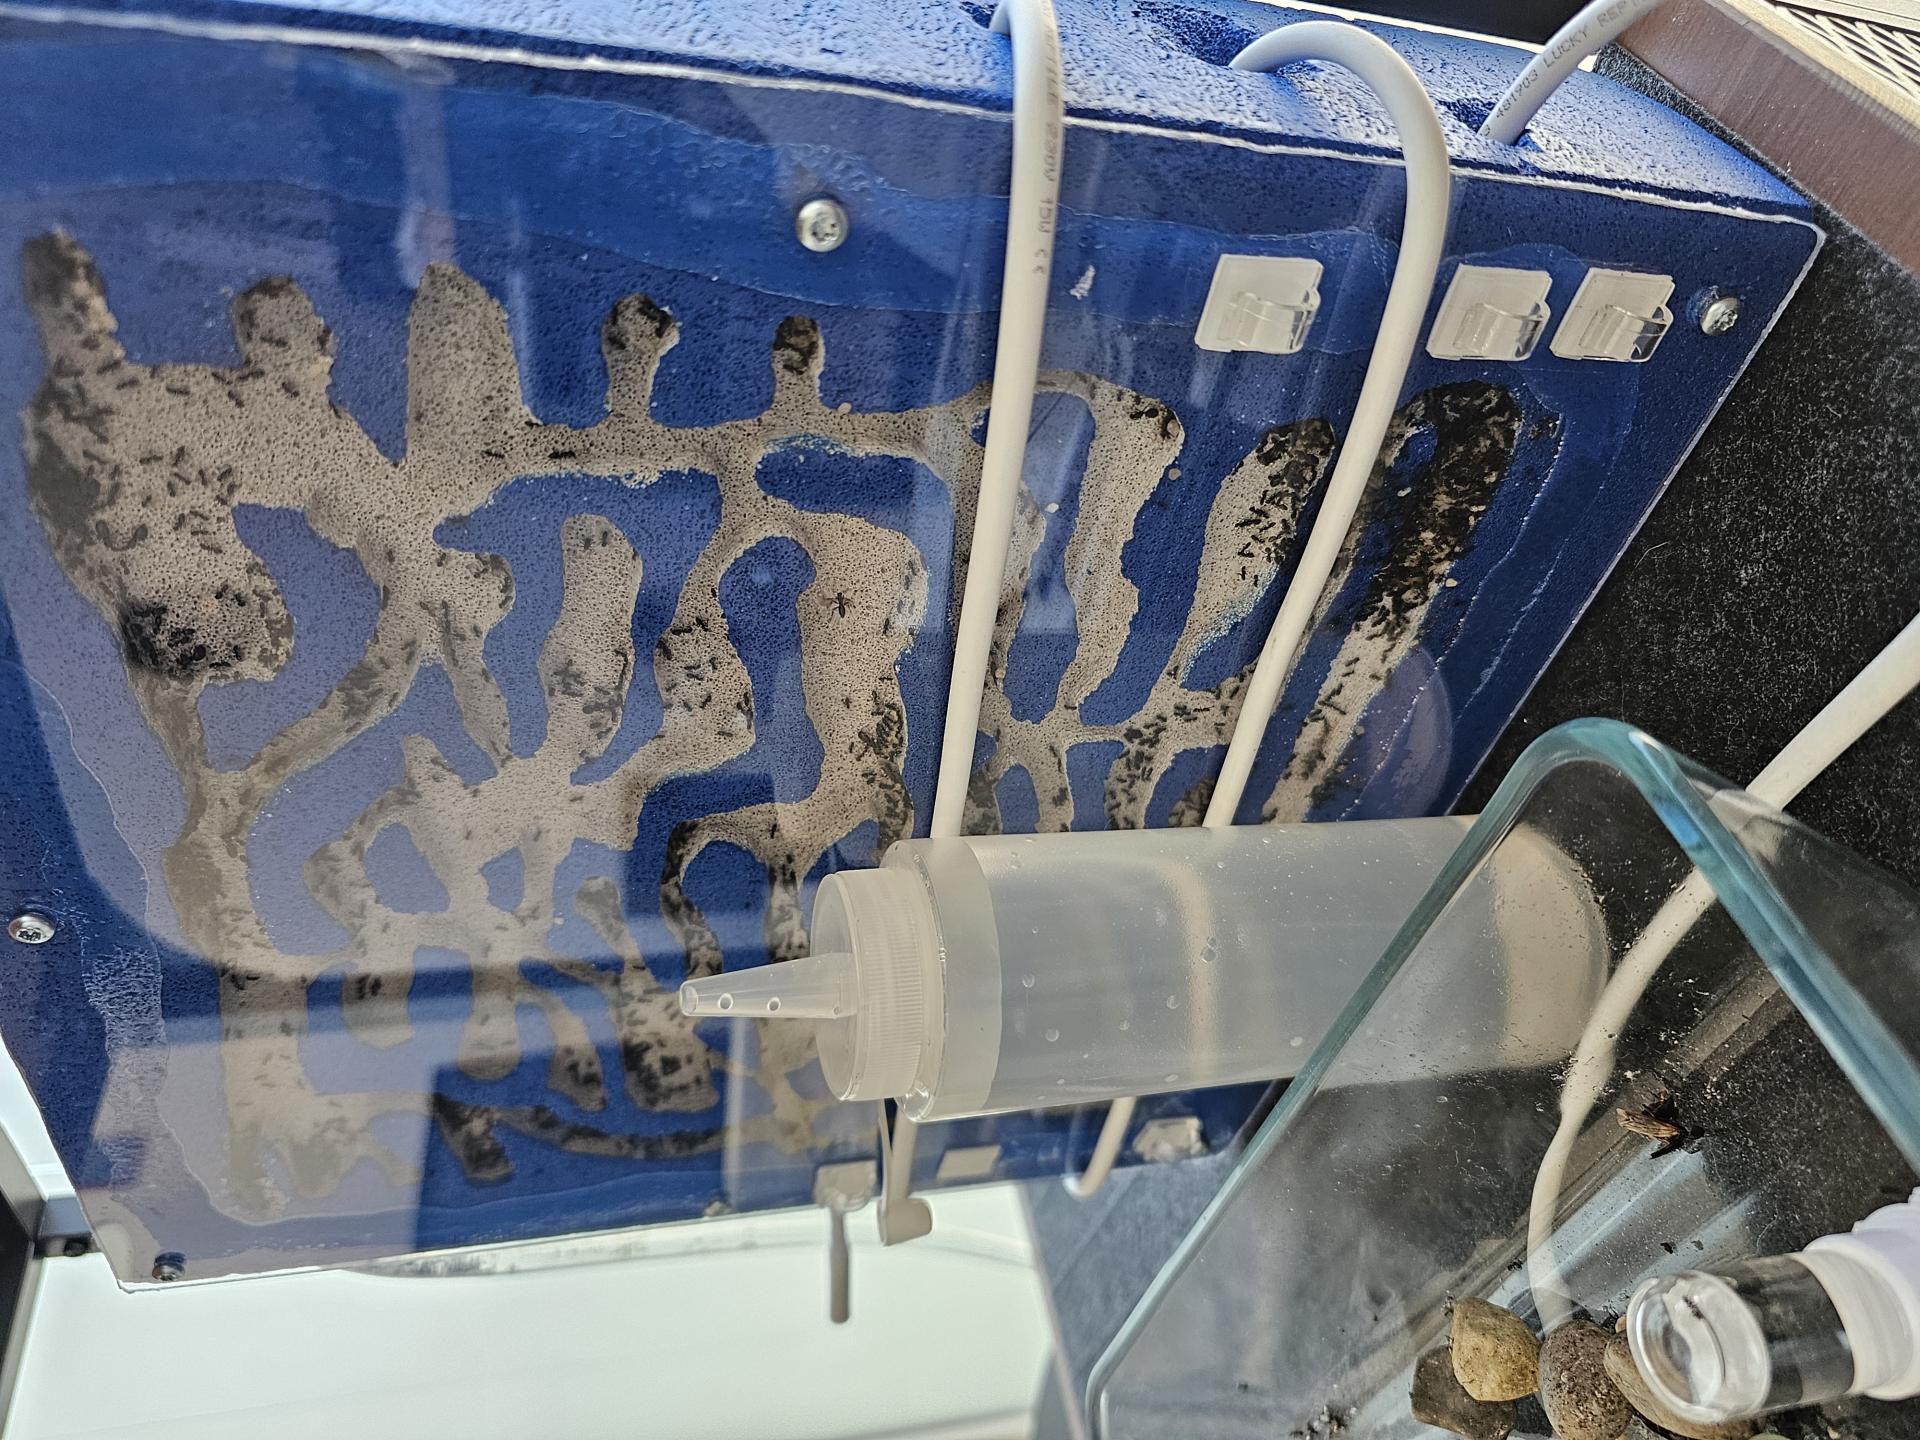
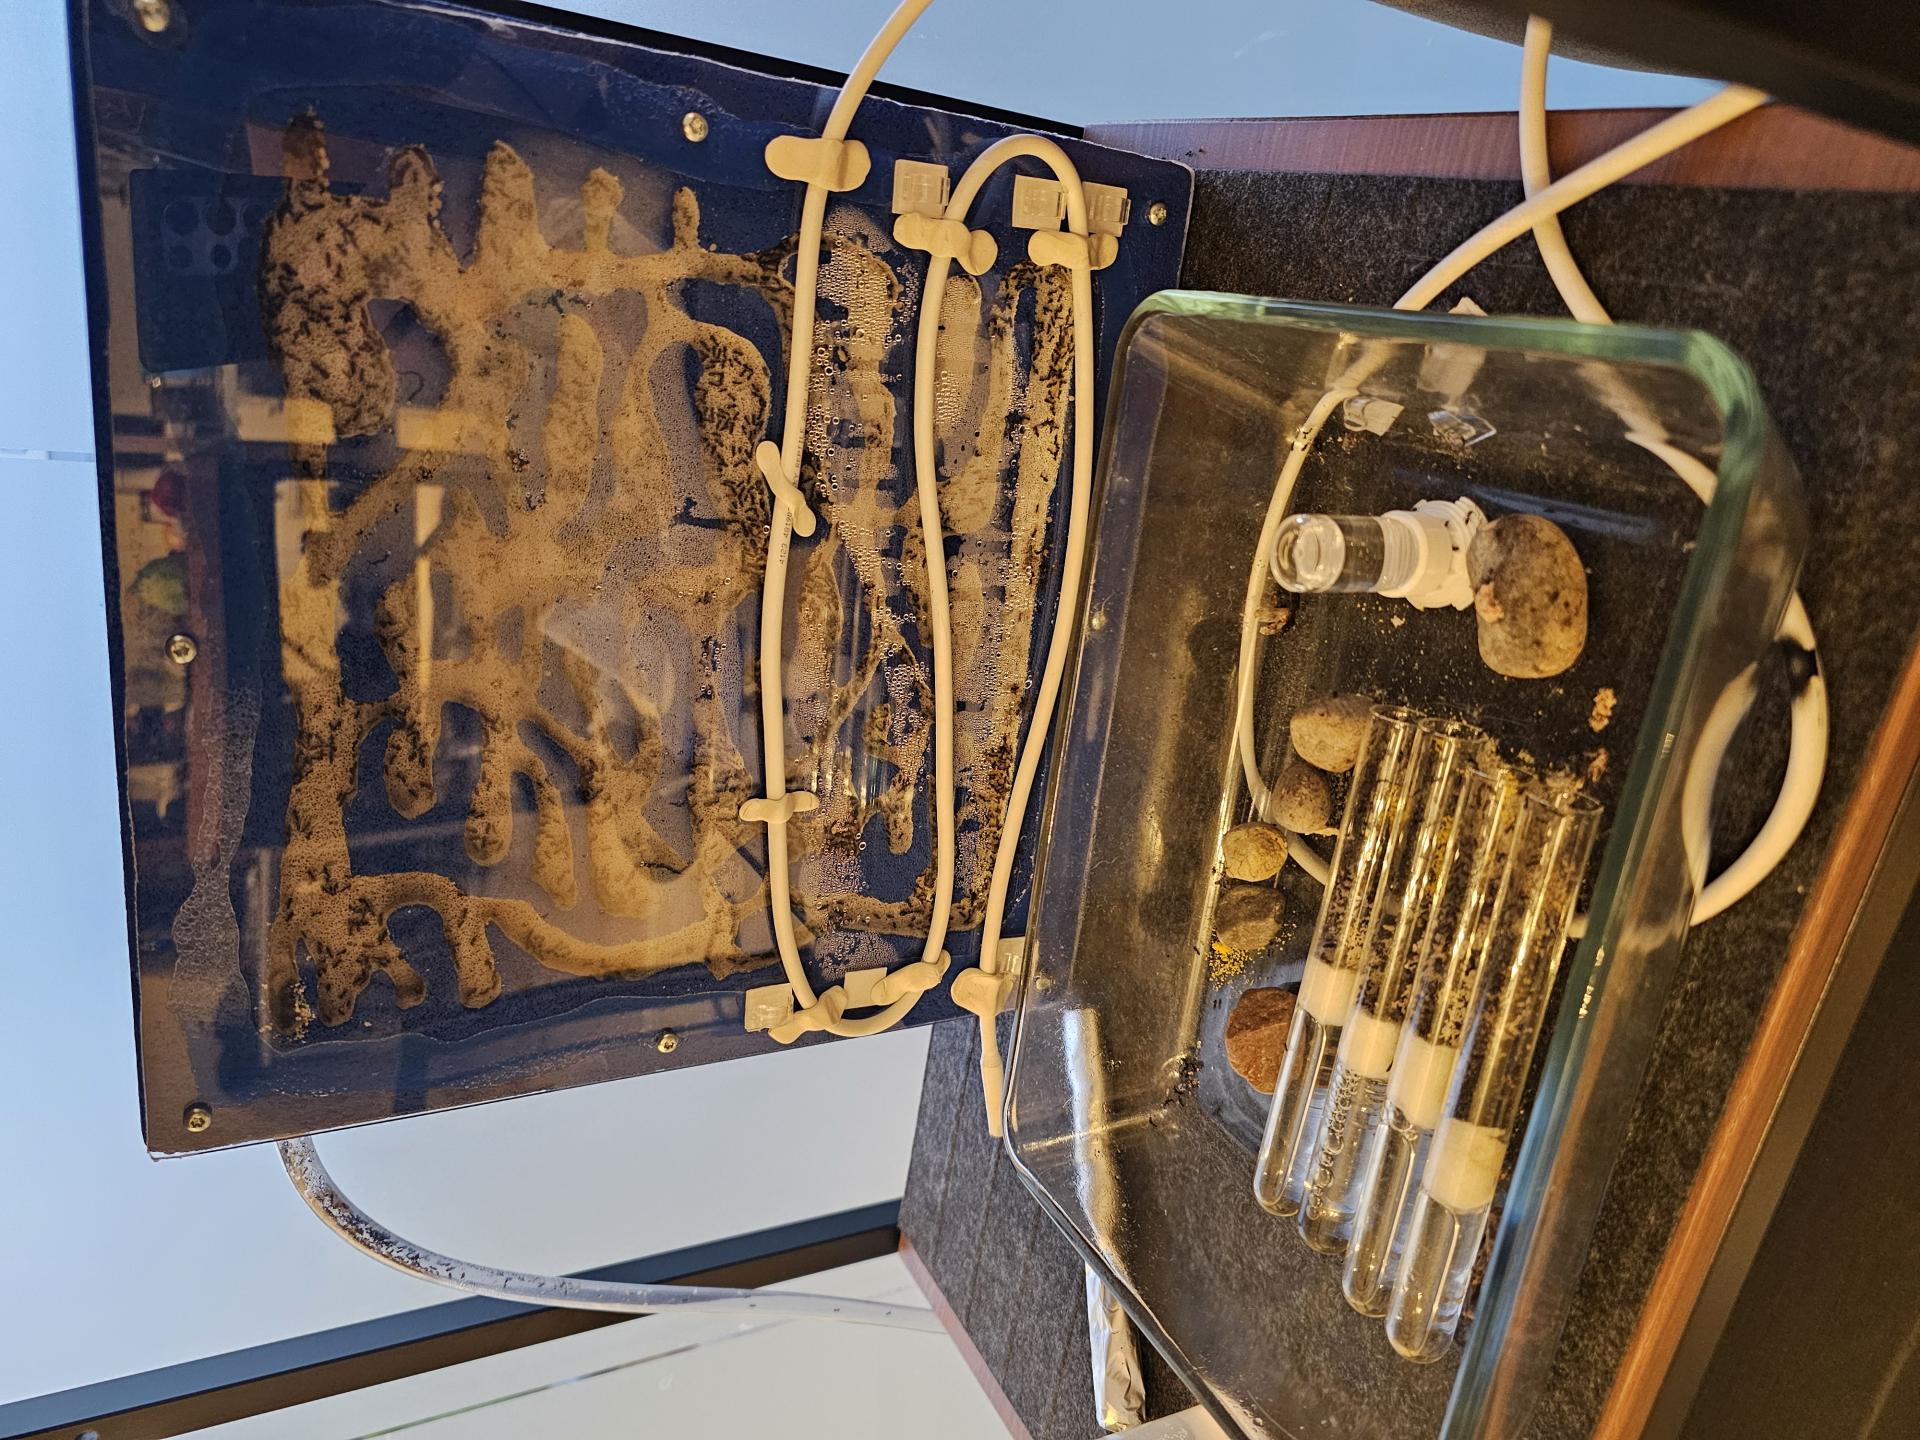
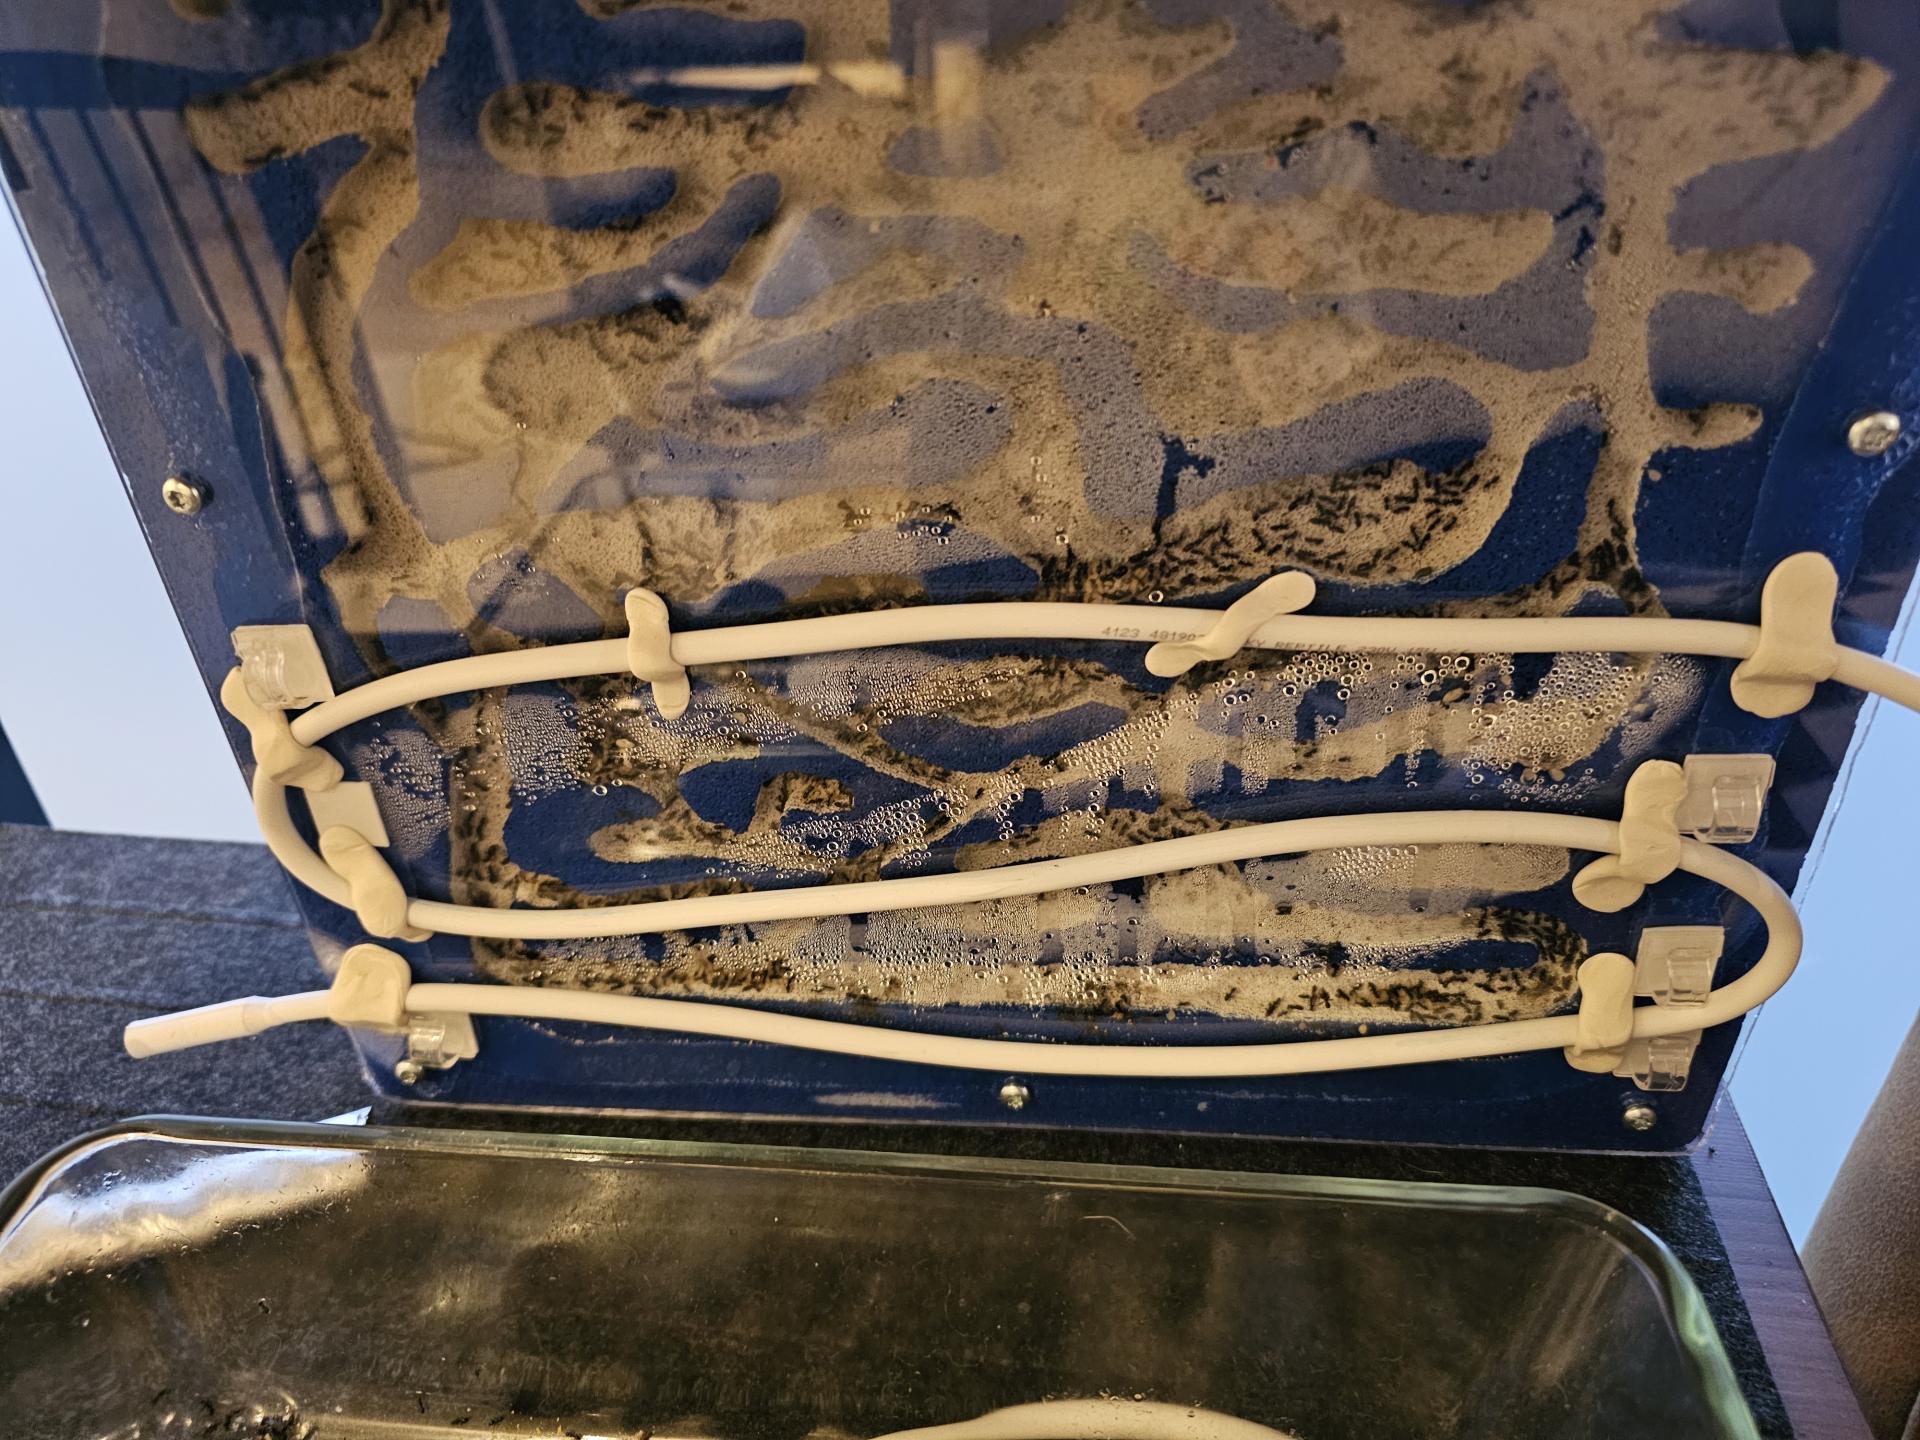
All of the nests get tealight watertower chambers, and in the big nest they get a fairly wide humidity gradient with one side being much drier than the other. 

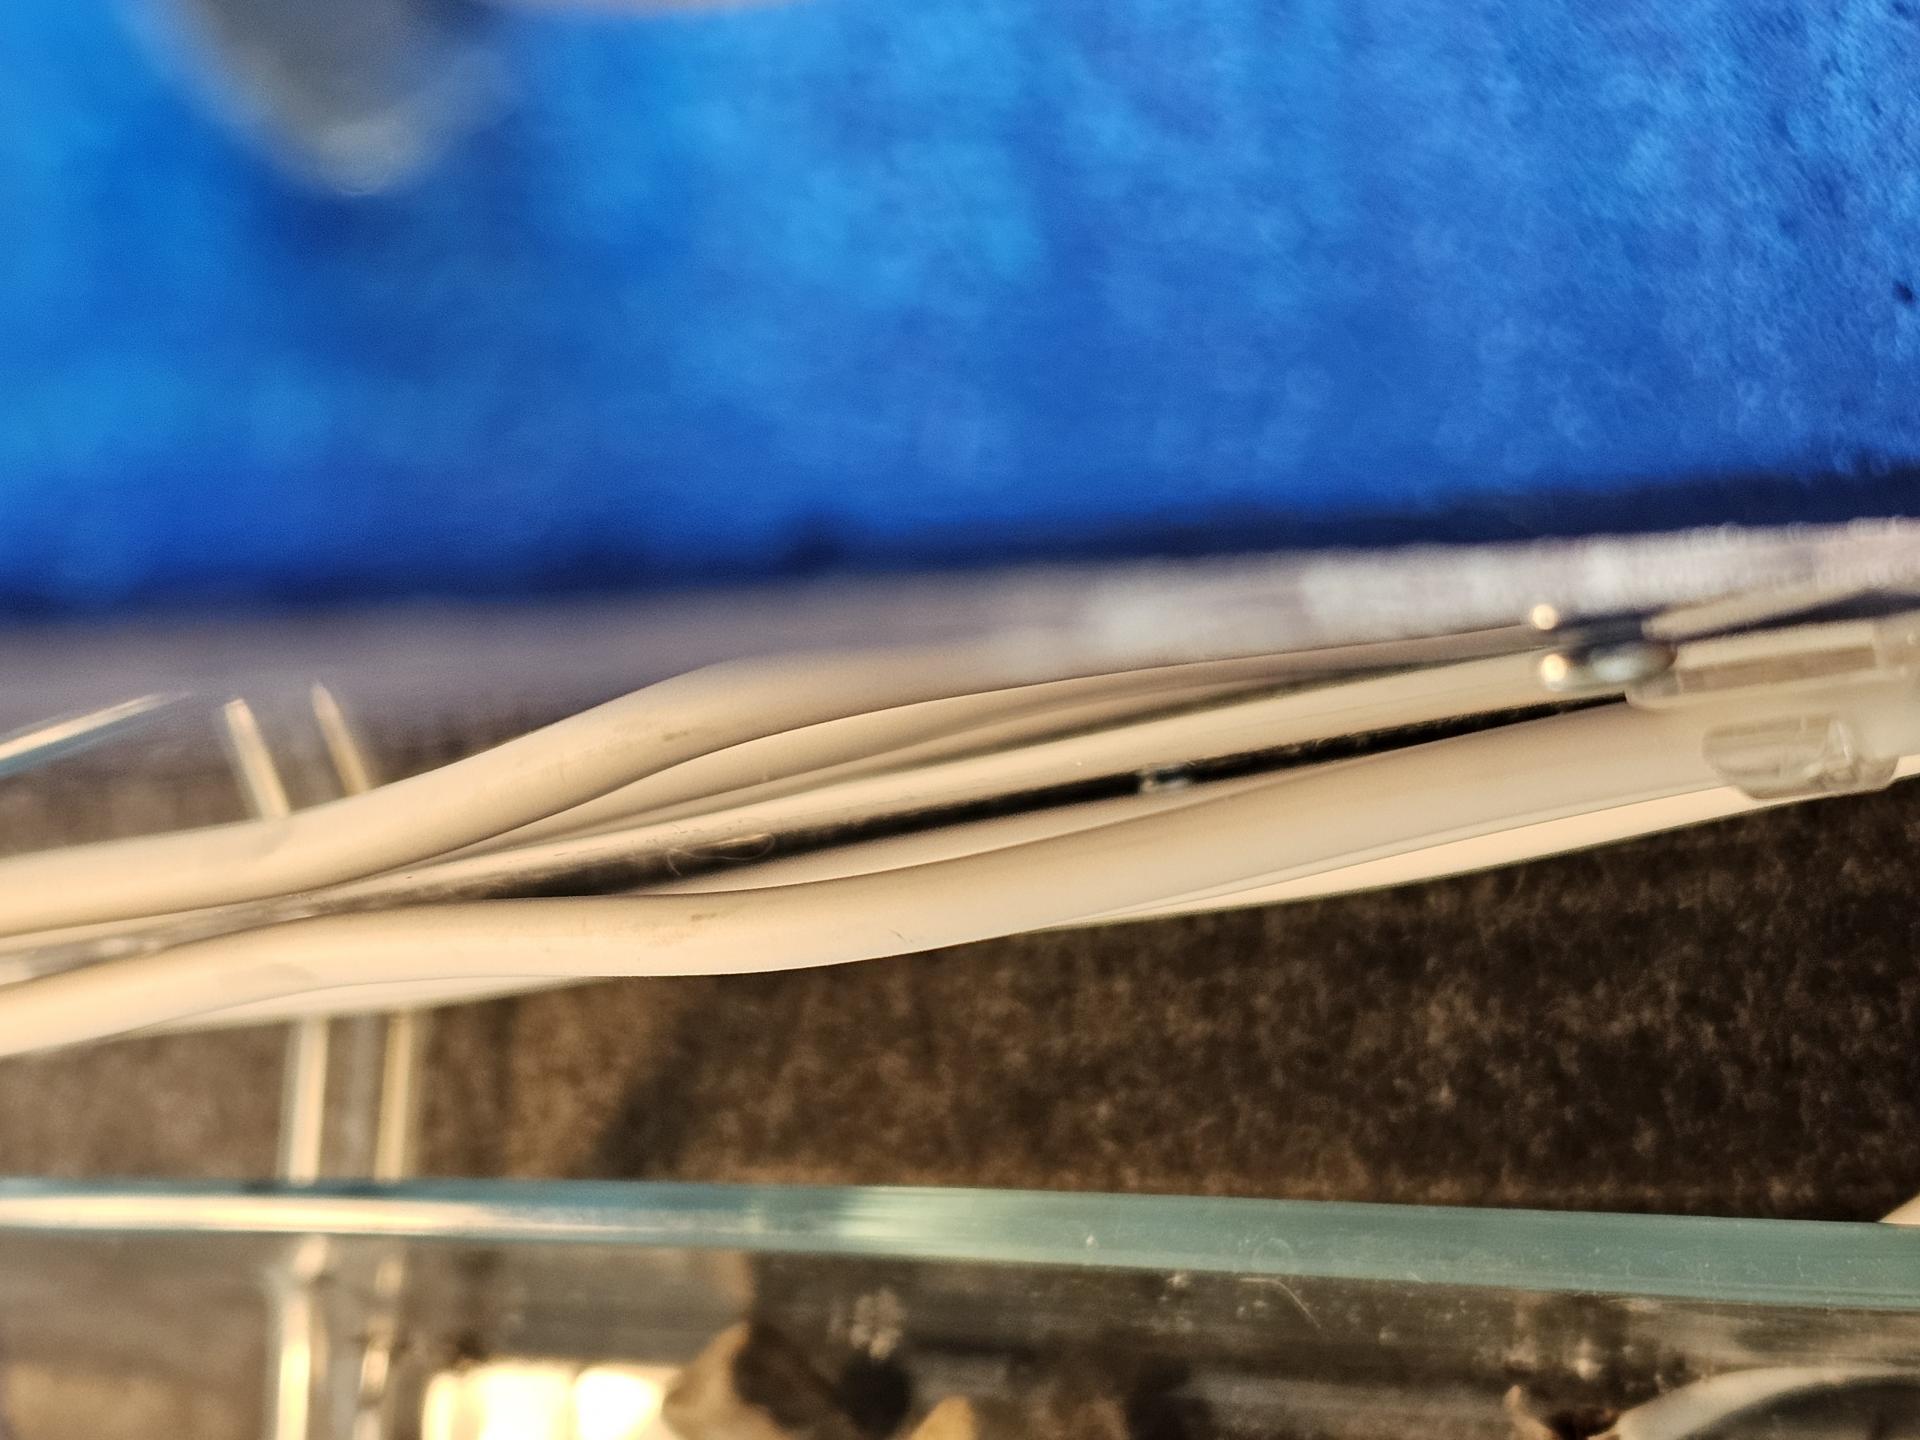
In the image above you can see two .05mm silicone tubes, a perfect fit to the blunt tip syringes used for filling watertowers. With these flexible tiny tubes I can route them inside the nest into the watertowers before pouring. This gives a lot of flexibility in placement and the tube being so tight a fit to the blunt tip, it can push the water through the tube no matter the up/down bends it may take to reach the tower. You can place a water tower chamber in the middle of a nest and route this .05mm tube however to it. 

Additionally the long flexi nature these type of fill tubes allows use without any nest disturbances. I noticed on the towers with short little holes on the nest side, it is easy to bump/scratch the nest with the blunt tip a bit and send the ants into a freakout.
And due to their nature it is possible to get the tip of the tube perfectly pressed into the very bottom of the tower. Which lets you inject air to hear the bubbles and know if the tower needs more water added. The bubbles change pitch as they rise through less water or no bubble sounds at all if total empty. As i find it hard to visually see the water line or tell if it has any at all sometimes, this method has been very useful.


Edited by Full_Frontal_Yeti, May 31 2025 - 8:51 AM.


#18 Offline Mushu - Posted June 2 2025 - 11:32 AM

Mushu

    Advanced Member

  • Members
  • PipPipPip
  • 180 posts
  • LocationAlhambra, California

Ventilation is also another way to reduce condensation if the temperature difference of the cover/ambient air is not the issue,  but is not practical as that would just mean you'd need water more. That's why I prefer water tower design. It provides a area of high humidity while not evaporating so fast compared to watering the nest and provide a humidity gradient. 


@Full_Frontal_Yeti


I've thought about using clay(for more stable shape) as the base for the chambers and then put sand to cover the clay  to provide the texture. I plan to make my own nucleus type formicarium myself but have been contemplating how to make a detachable water tower to be able to clean the mesh as I can see the mesh clogging up from the ants processing protein and other stuff over time. 


#19 Offline Full_Frontal_Yeti - Posted June 3 2025 - 7:32 AM

Full_Frontal_Yeti

    Advanced Member

  • Members
  • PipPipPip
  • 436 posts

^ as said, an empty uncapped nestmate in the nest can help reduce humidity levels. And upward aimed tube will vent humidity faster, than sideways or downward aimed with warm air rising.


I've had this colony for a little over two years now. I find i do not worry about that situation. Maybe the mesh i use is fine enough, but it's not seen any clogging so far in any of the nests. They do keep the majority of feeding brood on the watertowers, and i feed them things like cat food. That surely would have done some clogging by now if it were going to. I'd bet that any potential clogging of the watertower, is unlikely to occur before the nest itself ought to be replaced fully anyway.


But in design terms i'd imagine using just a bit of mesh to create the screen floor, but not attach it to the tower directly. Then use a bit of clay or sand to create a chamber larger than the watertower, where it would have normally been. This chamber should have an open side to it. Now we can use a tealight tray as normal, but instead of it being set into the plaster, it will sit in a small chamber just below the screen mesh. Allowing the evaporation to still find its way into the nest, while allowing us to access the underside of the mesh to clean it off with like a little bendy wire handle brush or whatever.
I'd use a bit of painters tape or something to seal the open side wall of the water chamber so the humidity goes into the nest rather than vents out the side.

here's a chity 2d side cut of what i'm describing:
the red line is the embedded mesh screen not attached to a tower.
blue square is a water cup/tealight tray of some kind.
green line is whatever you work out to seal the chamber's outside access
2dsidecut.jpg


  • ANTdrew and Mushu like this


2 user(s) are reading this topic

0 members, 2 guests, 0 anonymous users