Jump to content

  • Chat
  •  
  •  

Welcome to Formiculture.com!

This is a website for anyone interested in Myrmecology and all aspects of finding, keeping, and studying ants. The site and forum are free to use. Register now to gain access to all of our features. Once registered and logged in, you will be able to create topics, post replies to existing threads, give reputation points to your fellow members, get your own private messenger, post status updates, manage your profile and so much more. If you already have an account, login here - otherwise create an account for free today!

Photo

Boog's Bug Builds: DIY Formicaria & Outworlds (Updated 03/31/22 Video Update at Reddit)

formicarium outworld diy

  • Please log in to reply
69 replies to this topic

#21 Offline Boog - Posted January 17 2020 - 12:31 AM

Boog

    Advanced Member

  • Members
  • PipPipPip
  • 123 posts
  • LocationNew Jersey

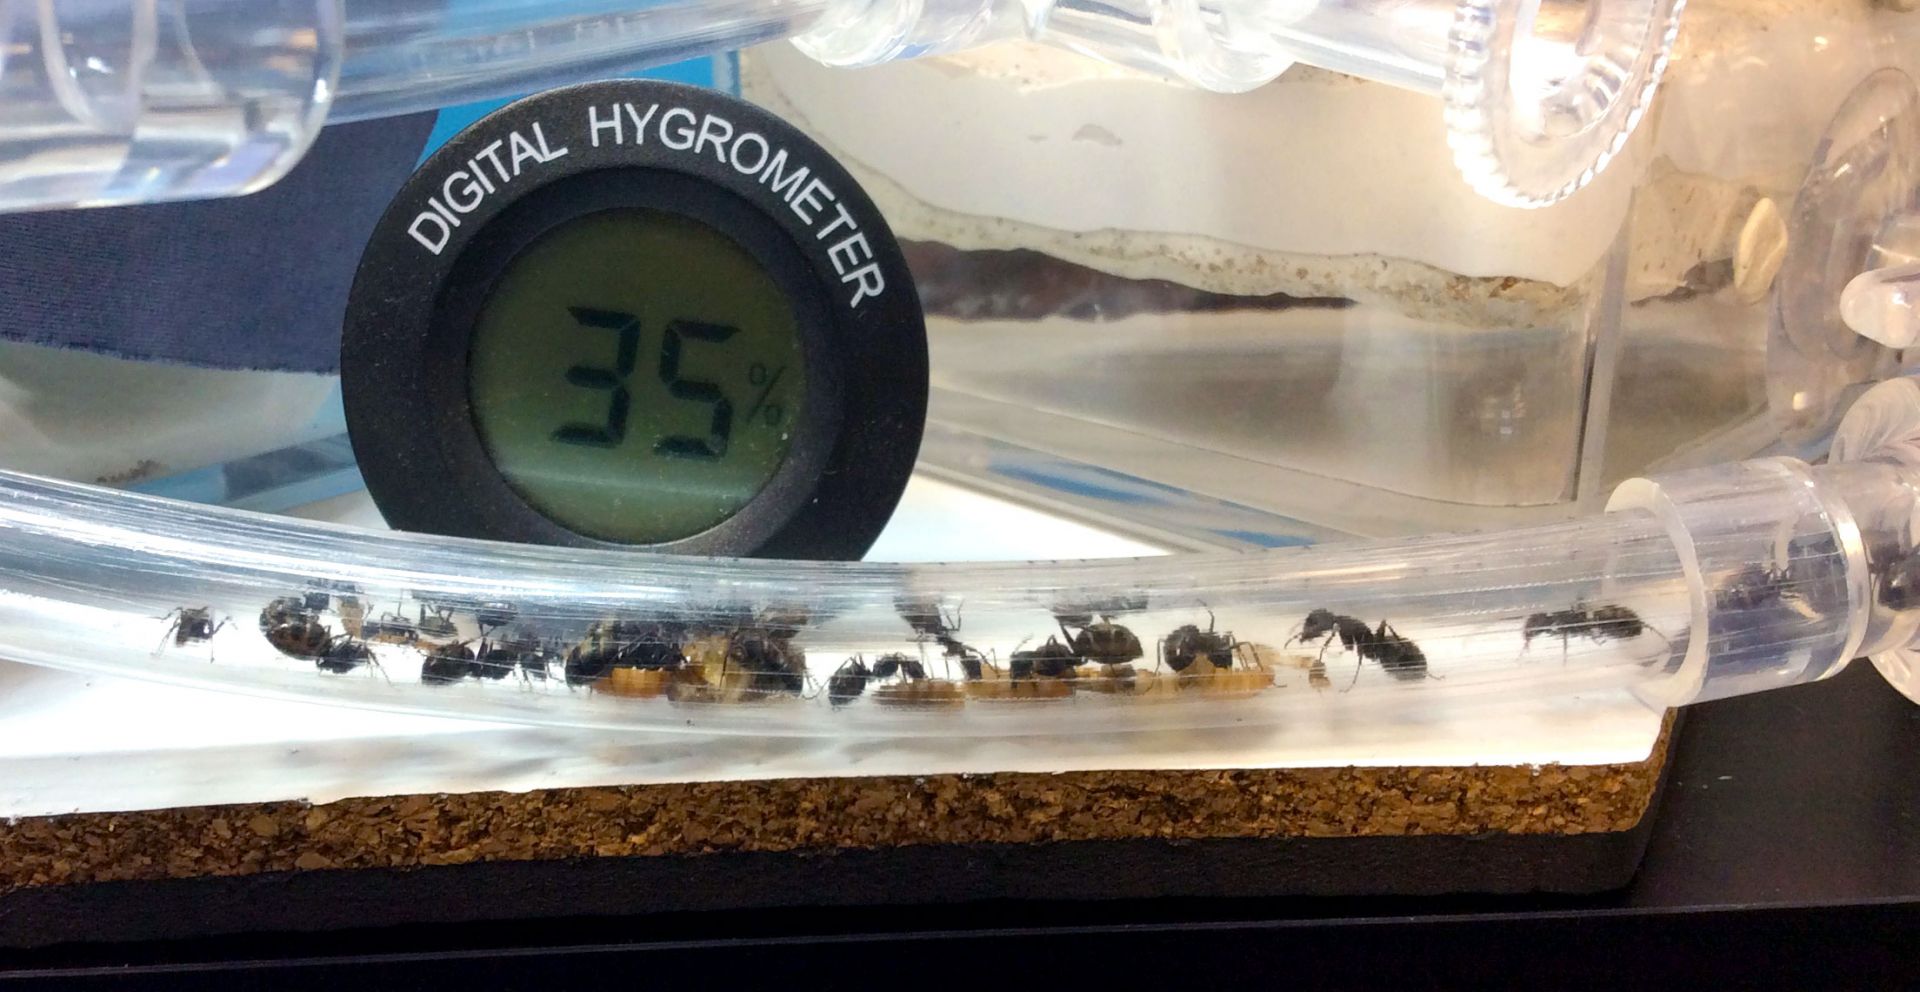
While we welcome a new year of ant-keeping enthusiasm let’s hope those of us with our ants stored away are having a peaceful and restful diapause. Keep your colonies hydrated during this vulnerable time, folks!

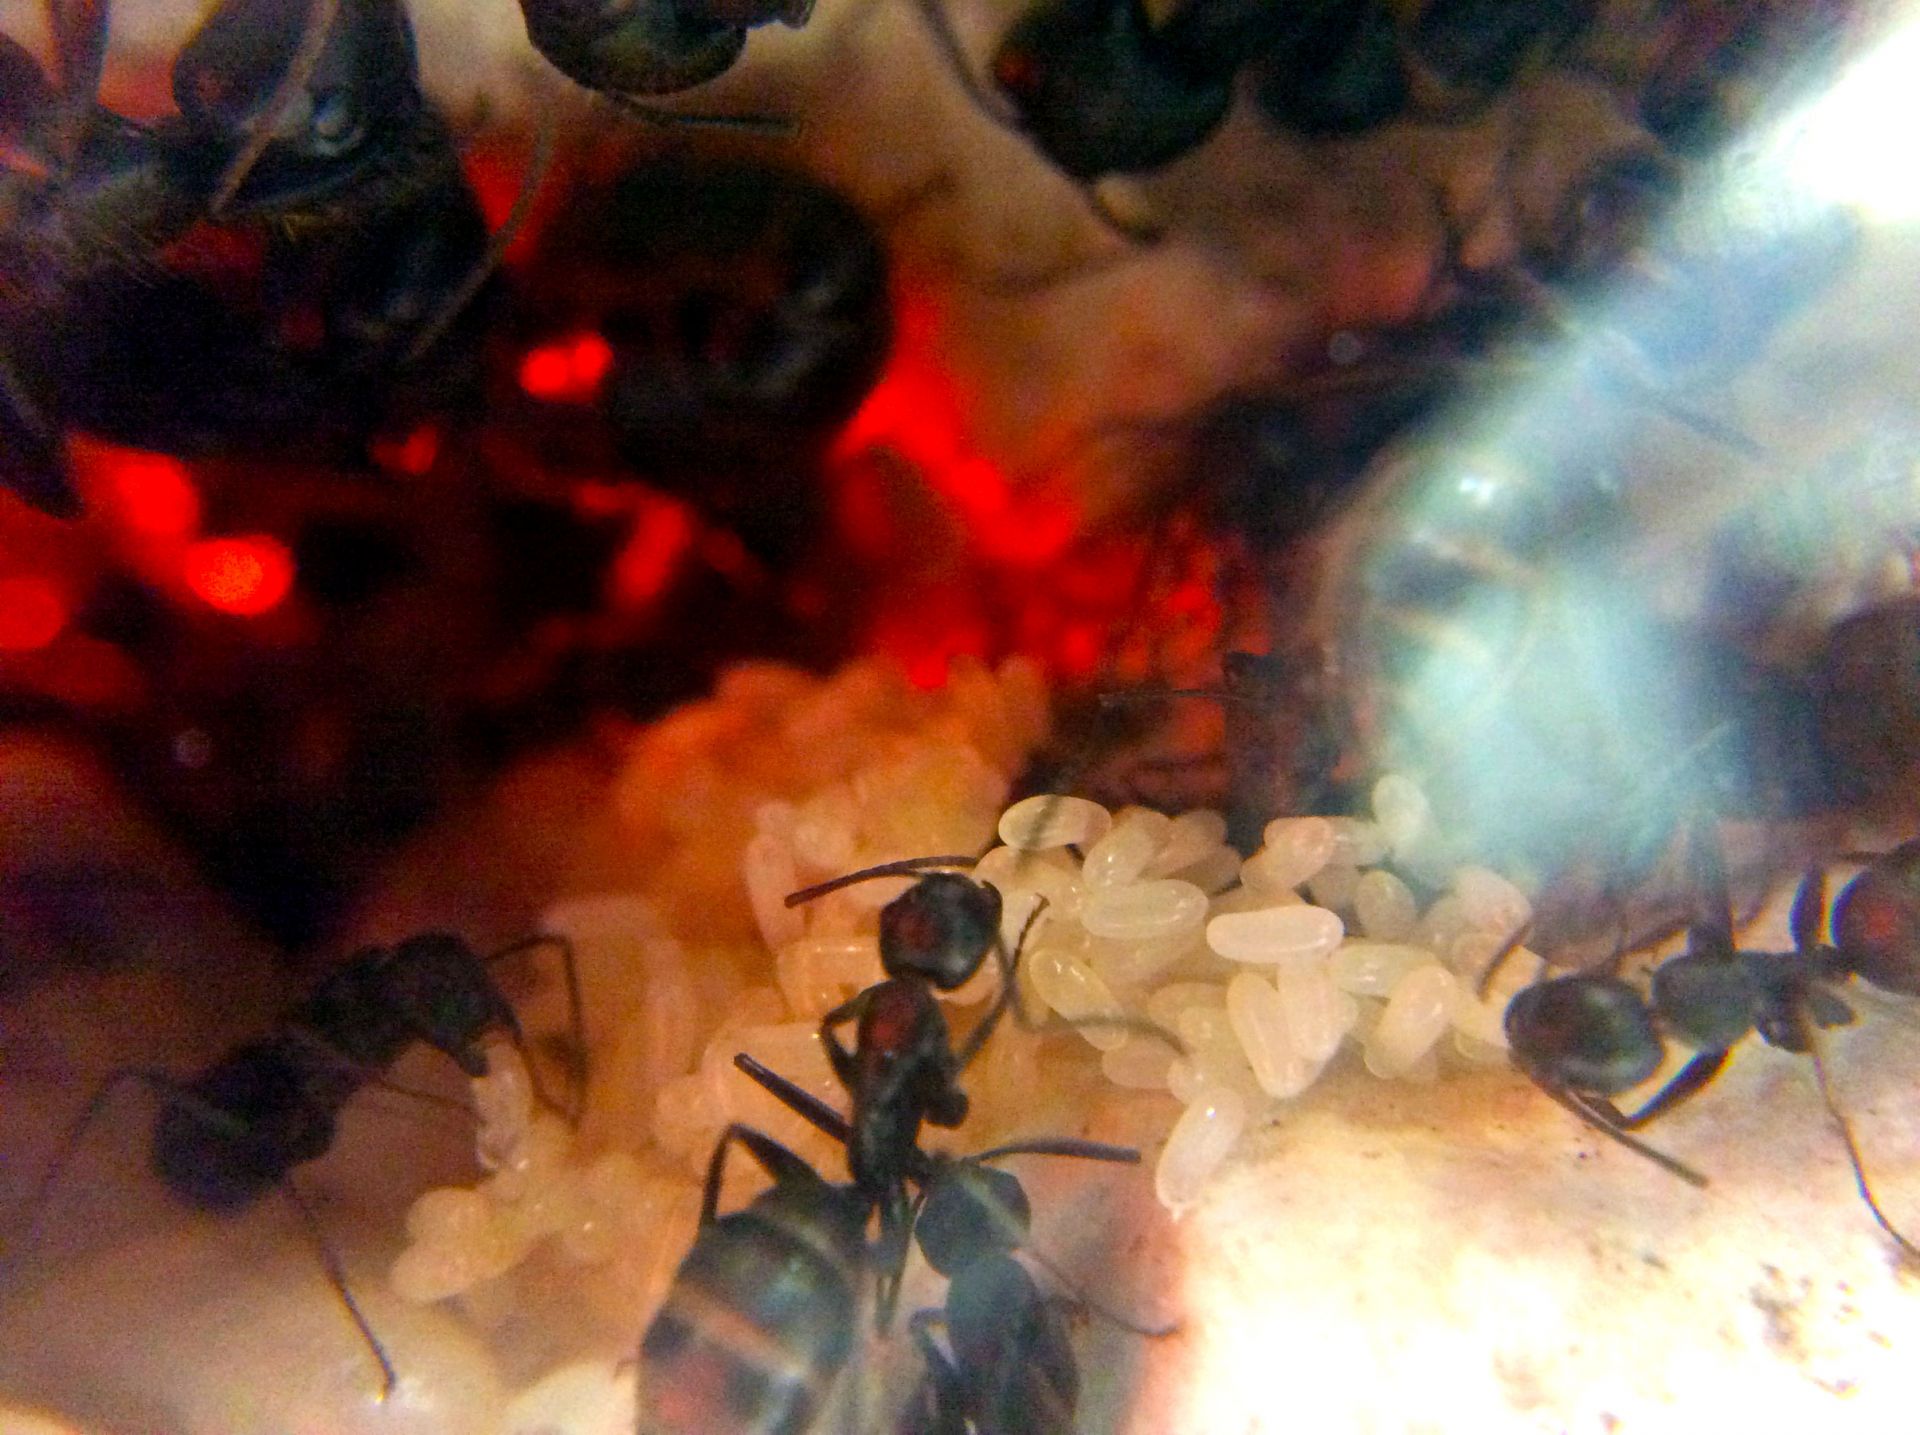
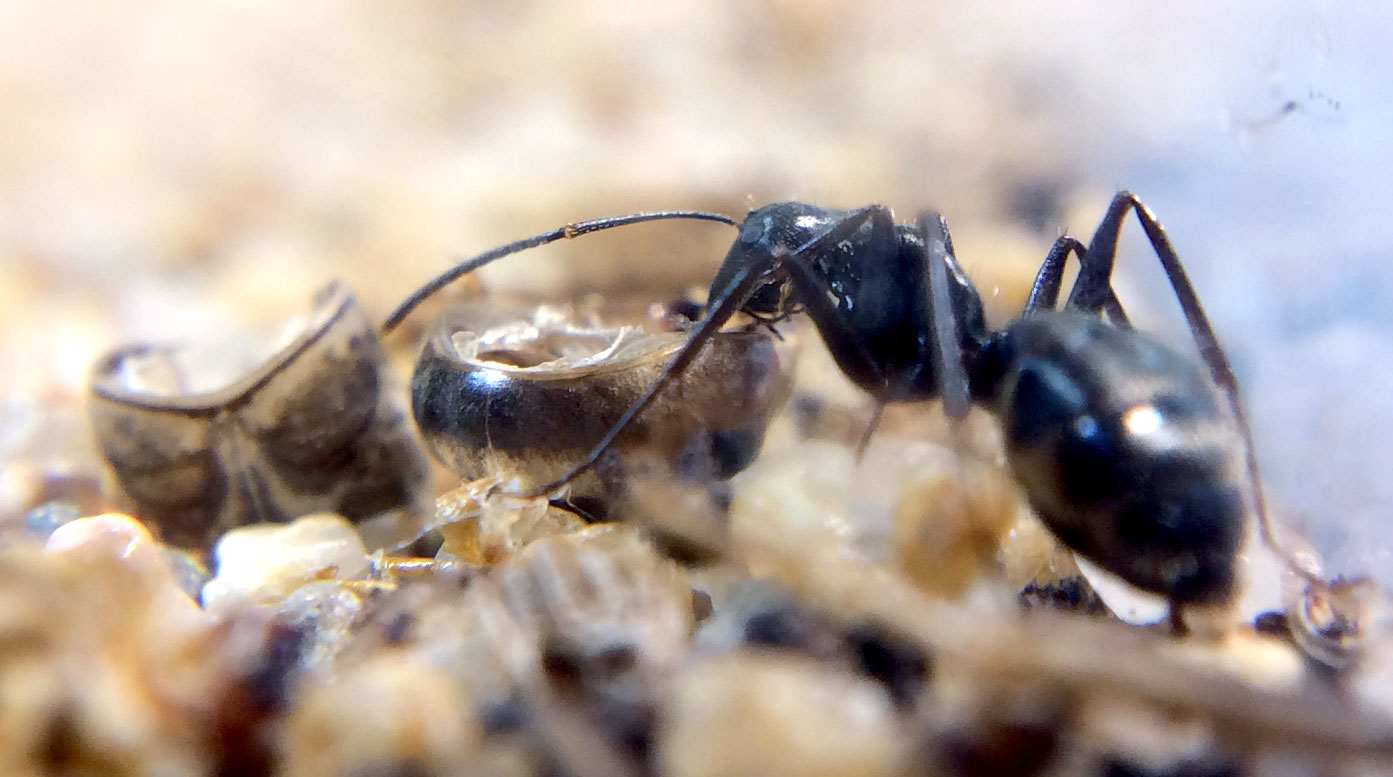
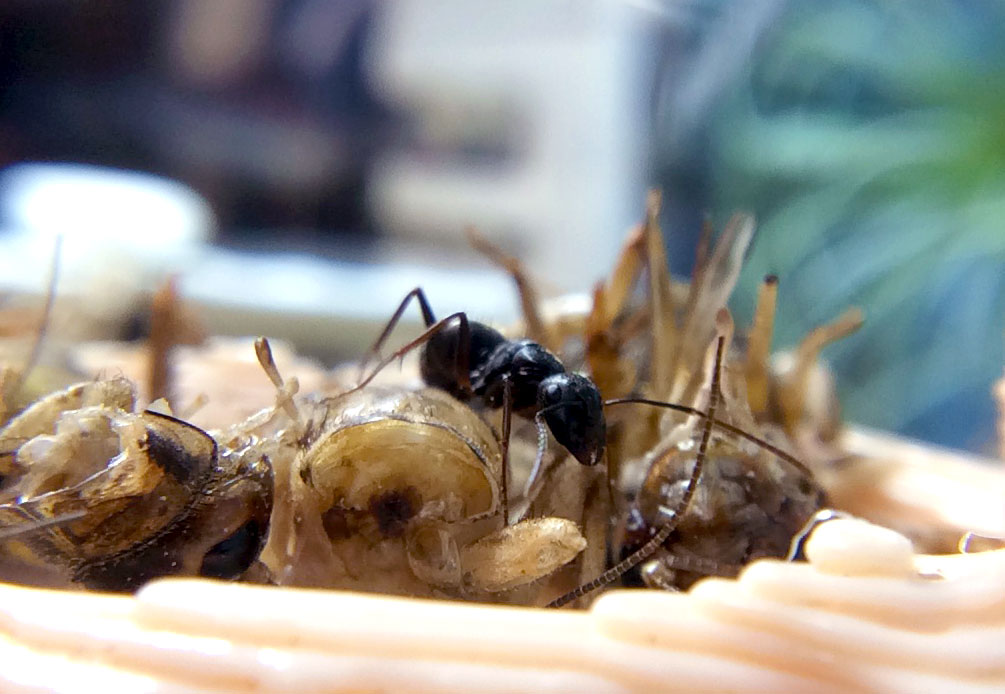
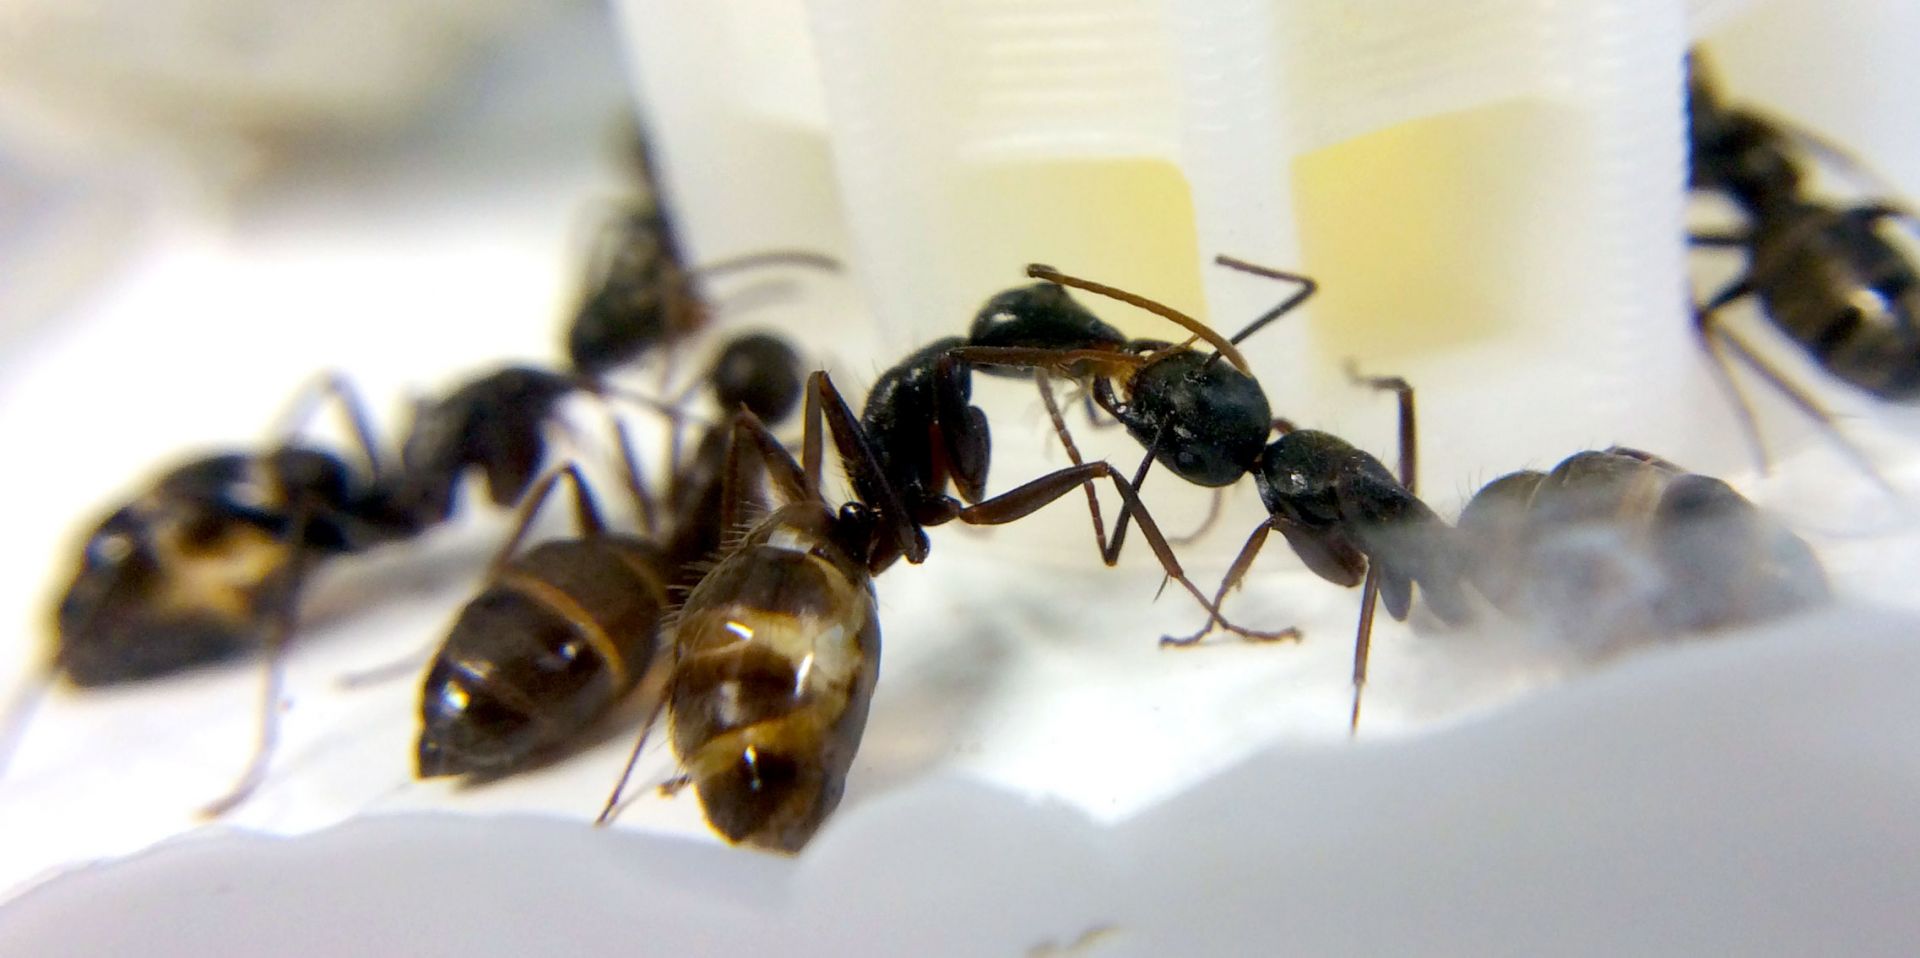
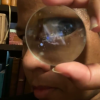
My two Tapinoma sessile colonies, queens Sansa and Arya’s, are doing okay in their respective setups. Their brood is all larvae and not growing much, so I think they’re in a sort of diapause despite being in warm temperatures with less foraging and general activity. I have dropped my phone so many times that the the camera’s focus is now stuck so am dealing with blurry pics. I need to invest in some good equipment and would like to film my setups and builds but want to get some more ant-keeping experience first.

gallery_4140_1524_93943.jpg

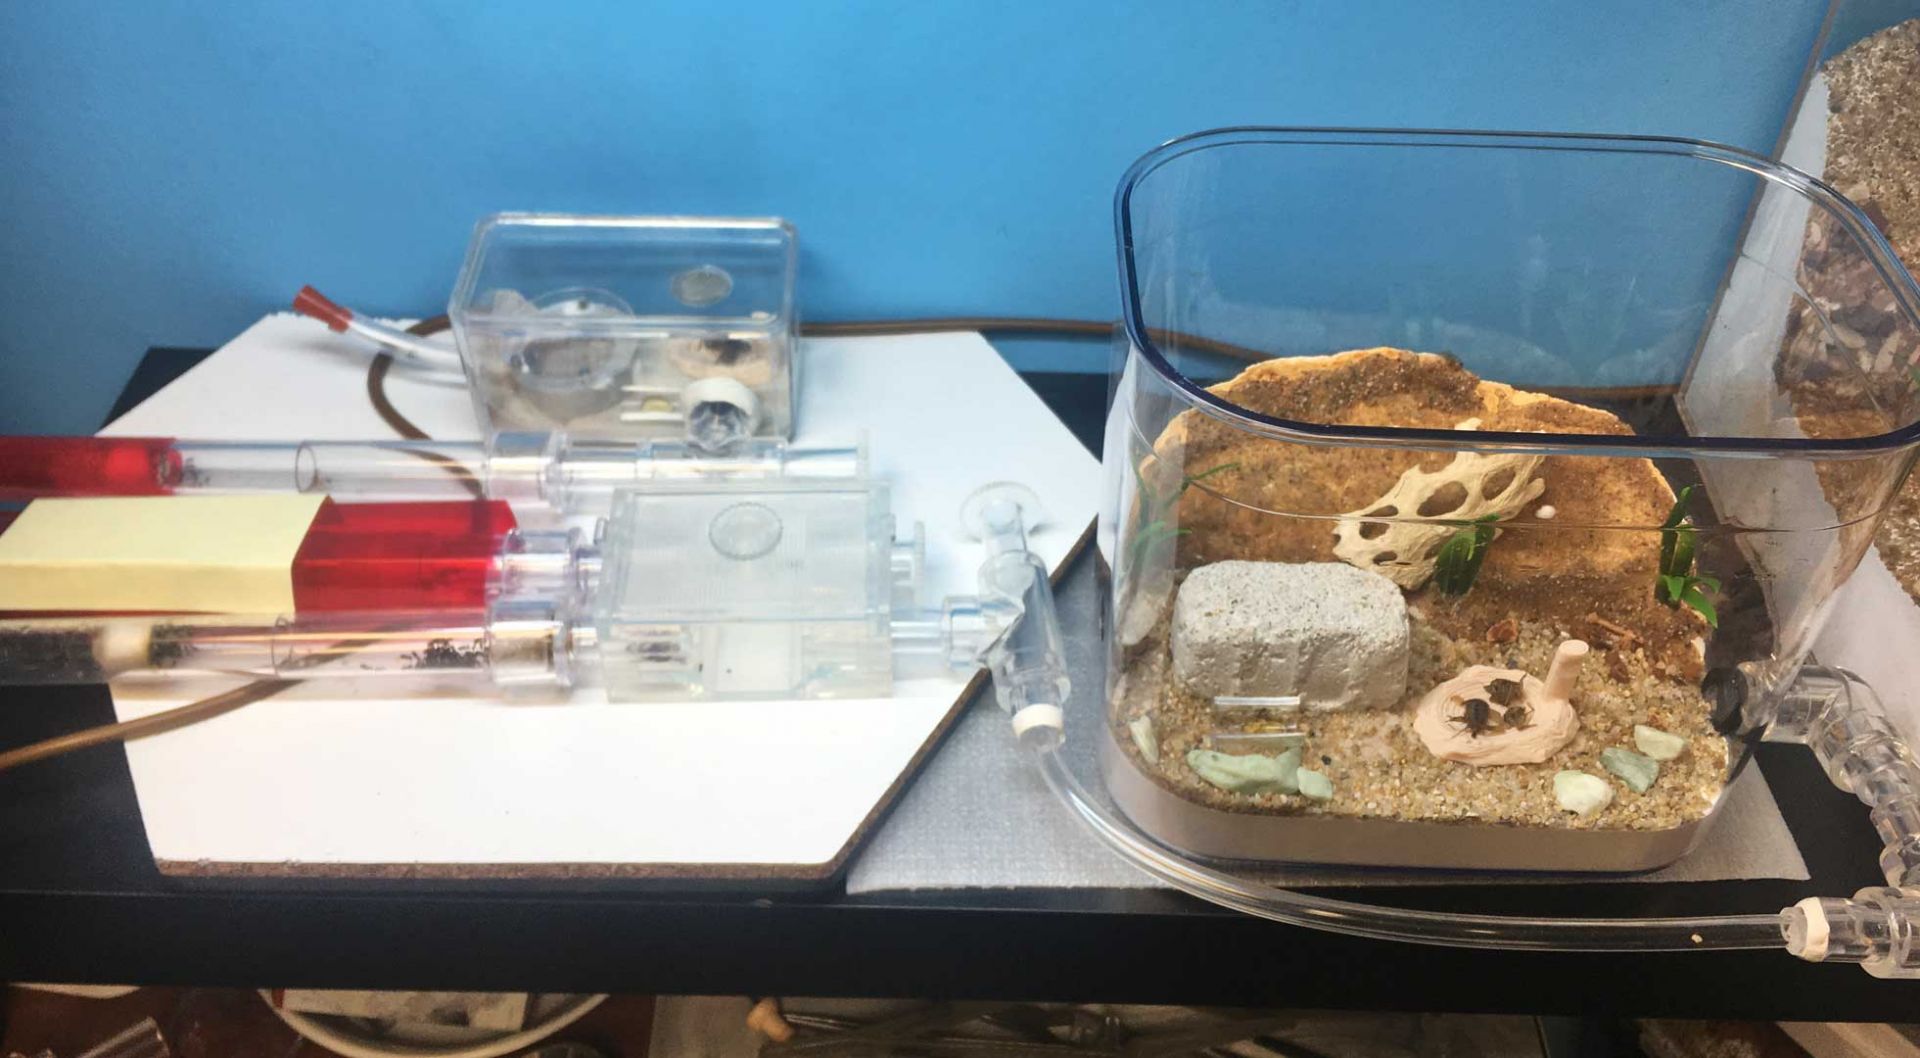
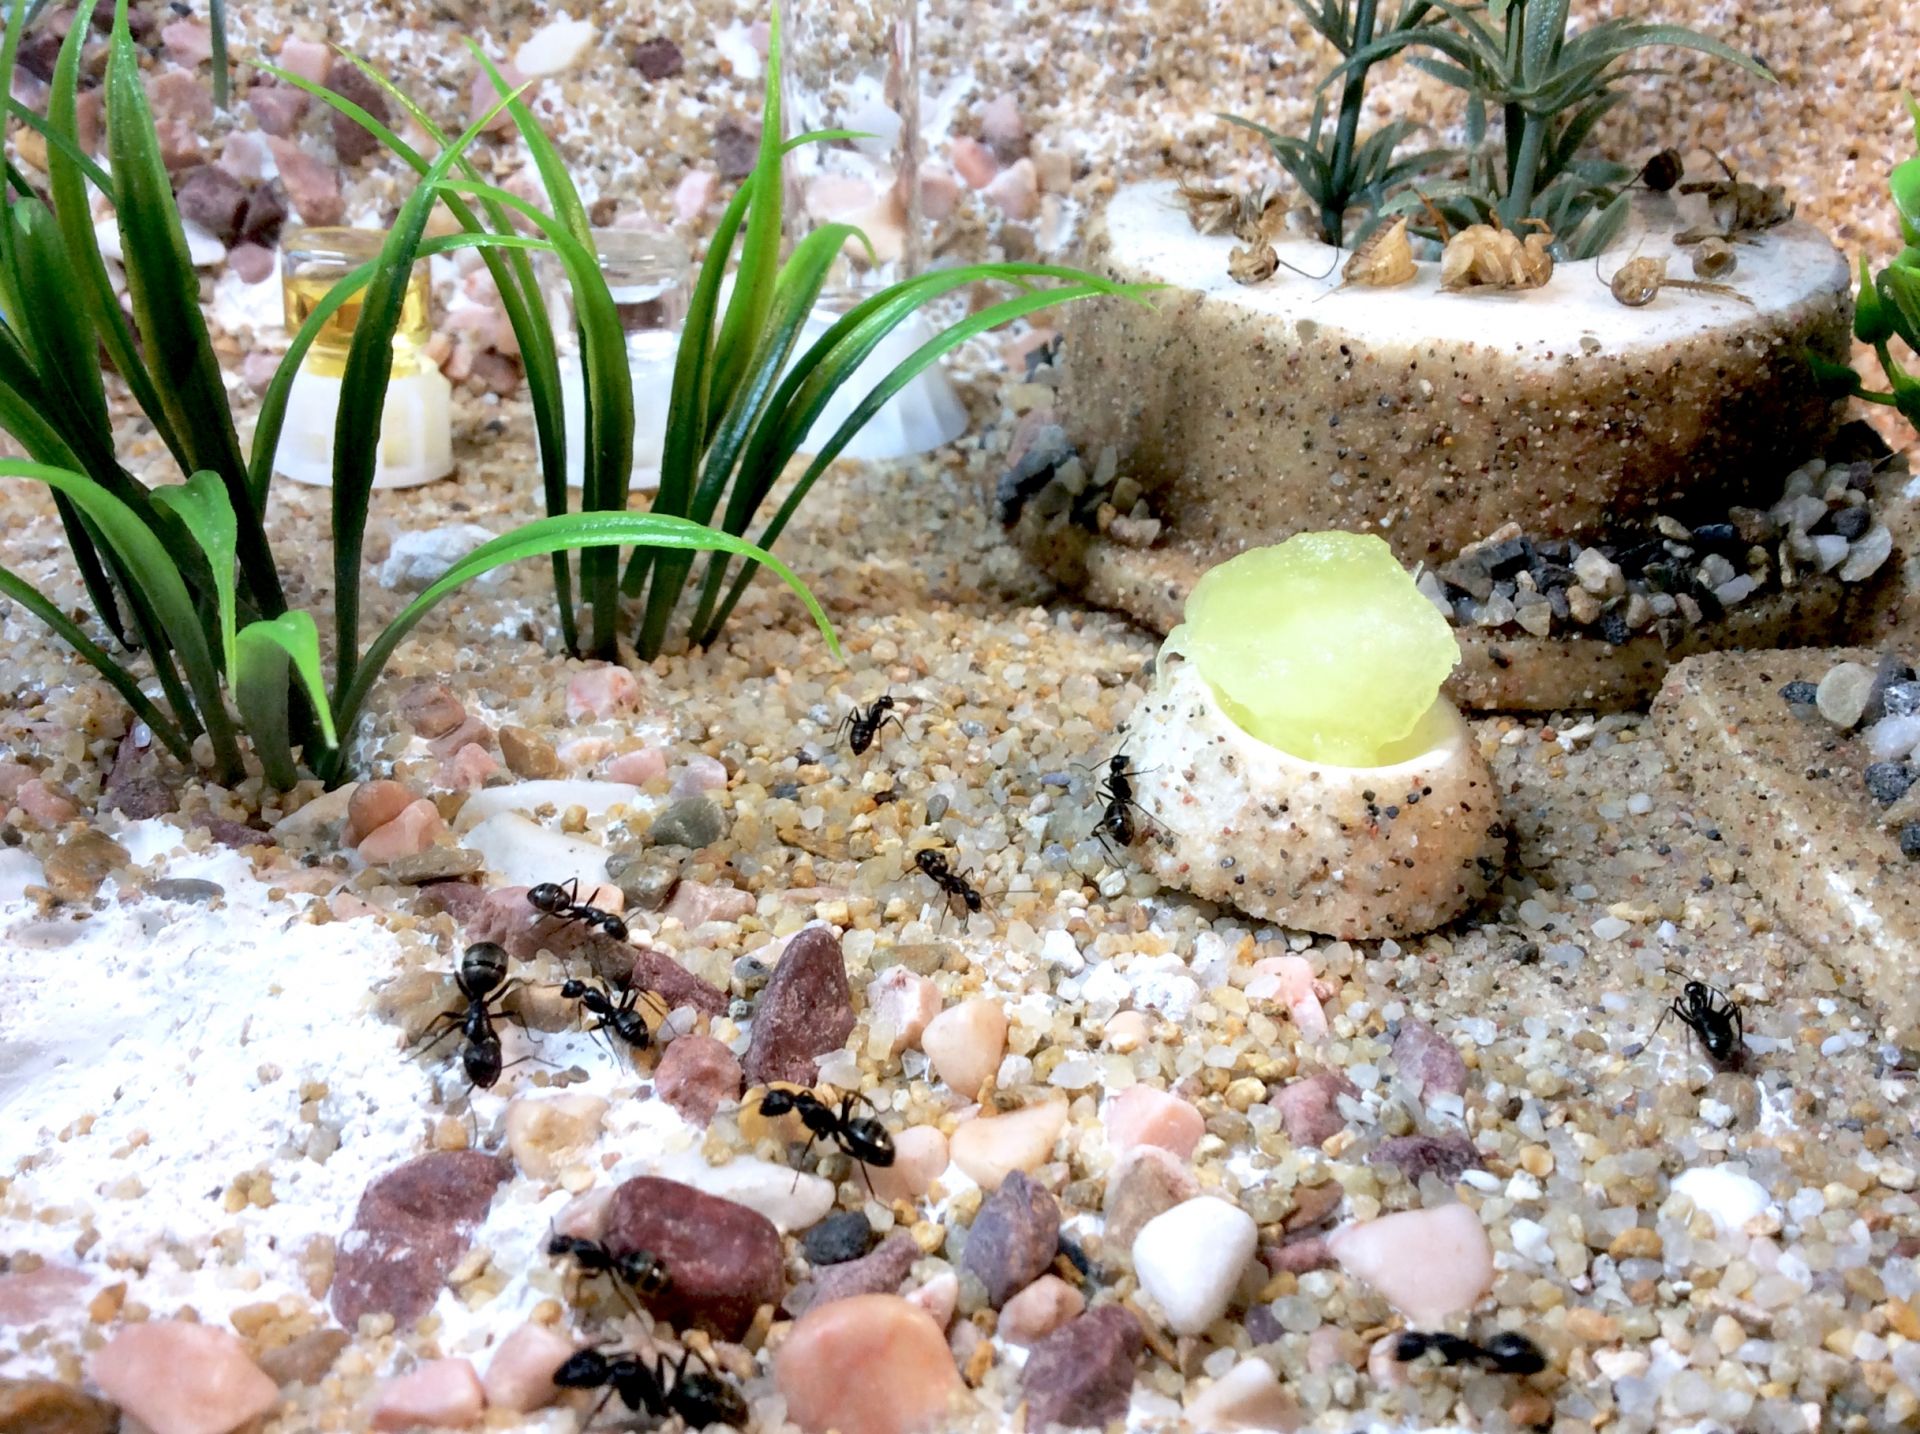
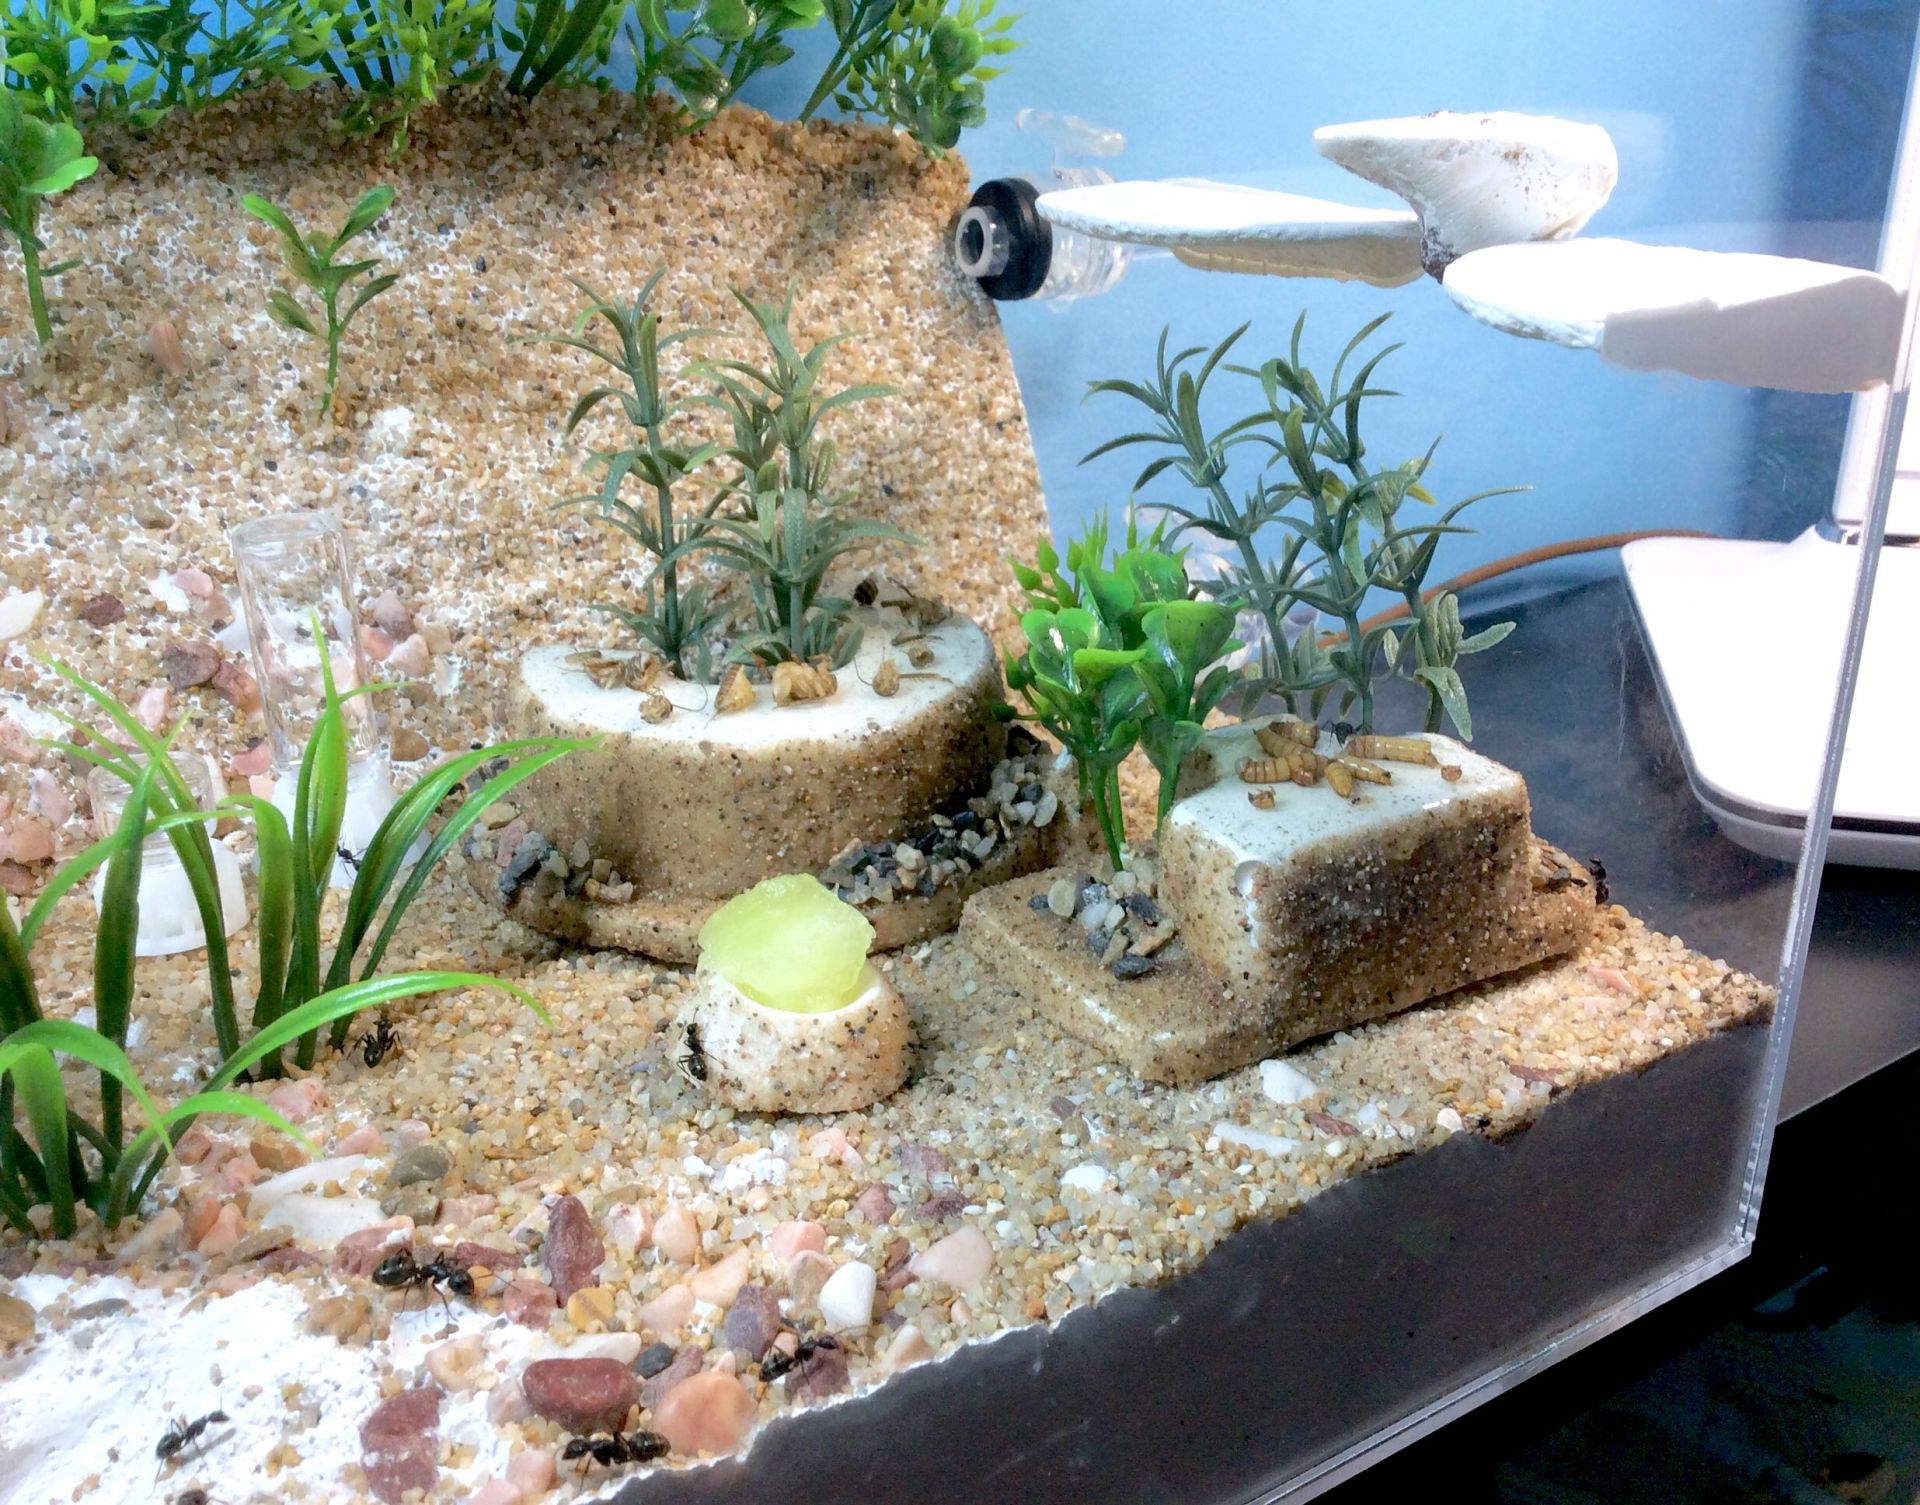
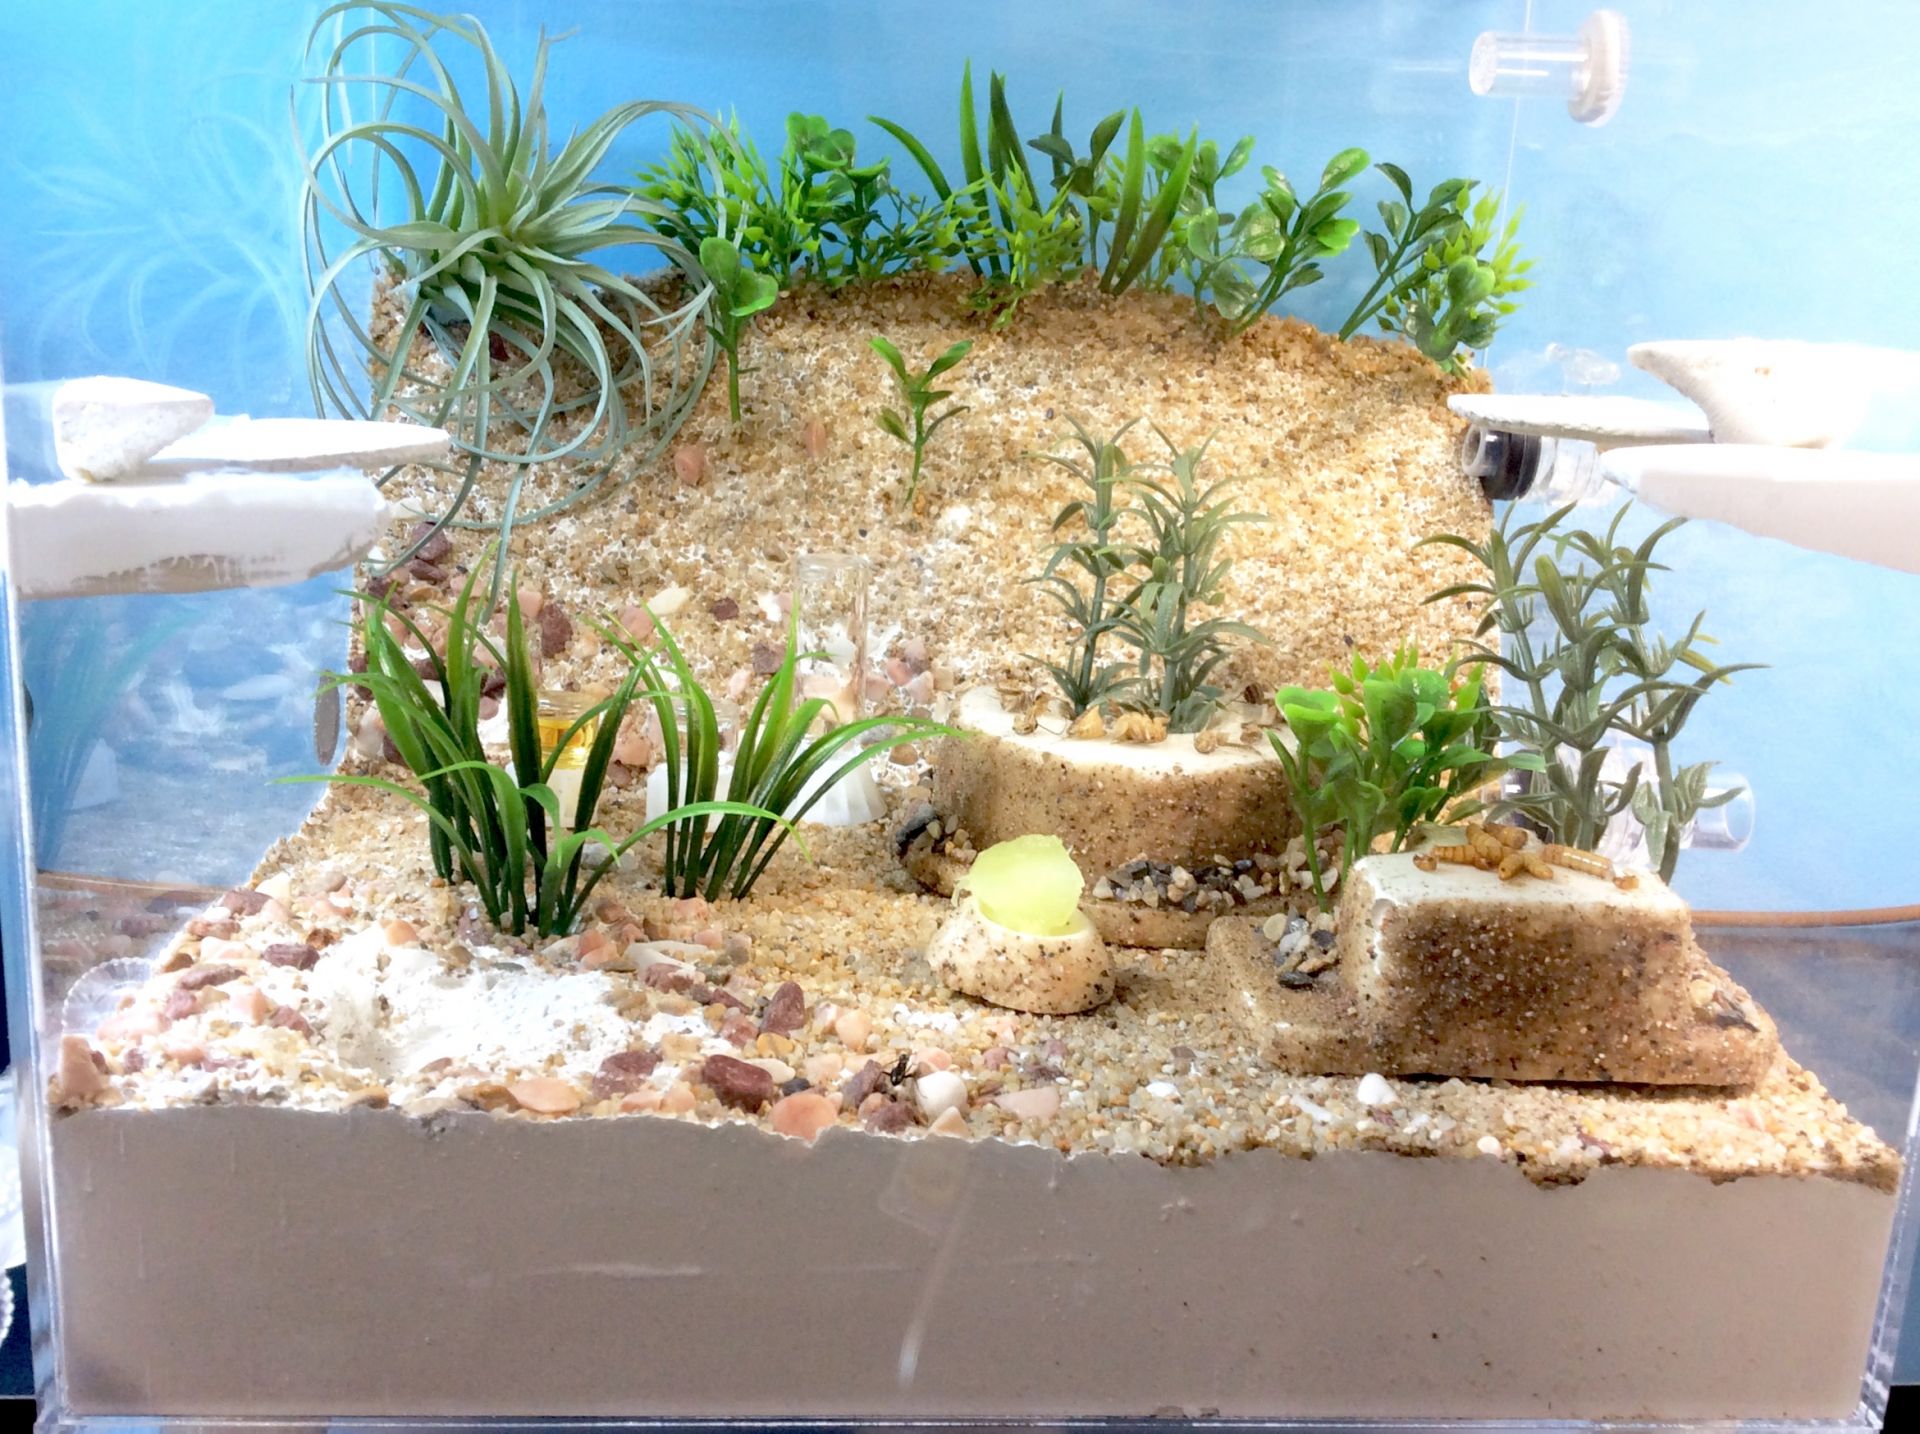
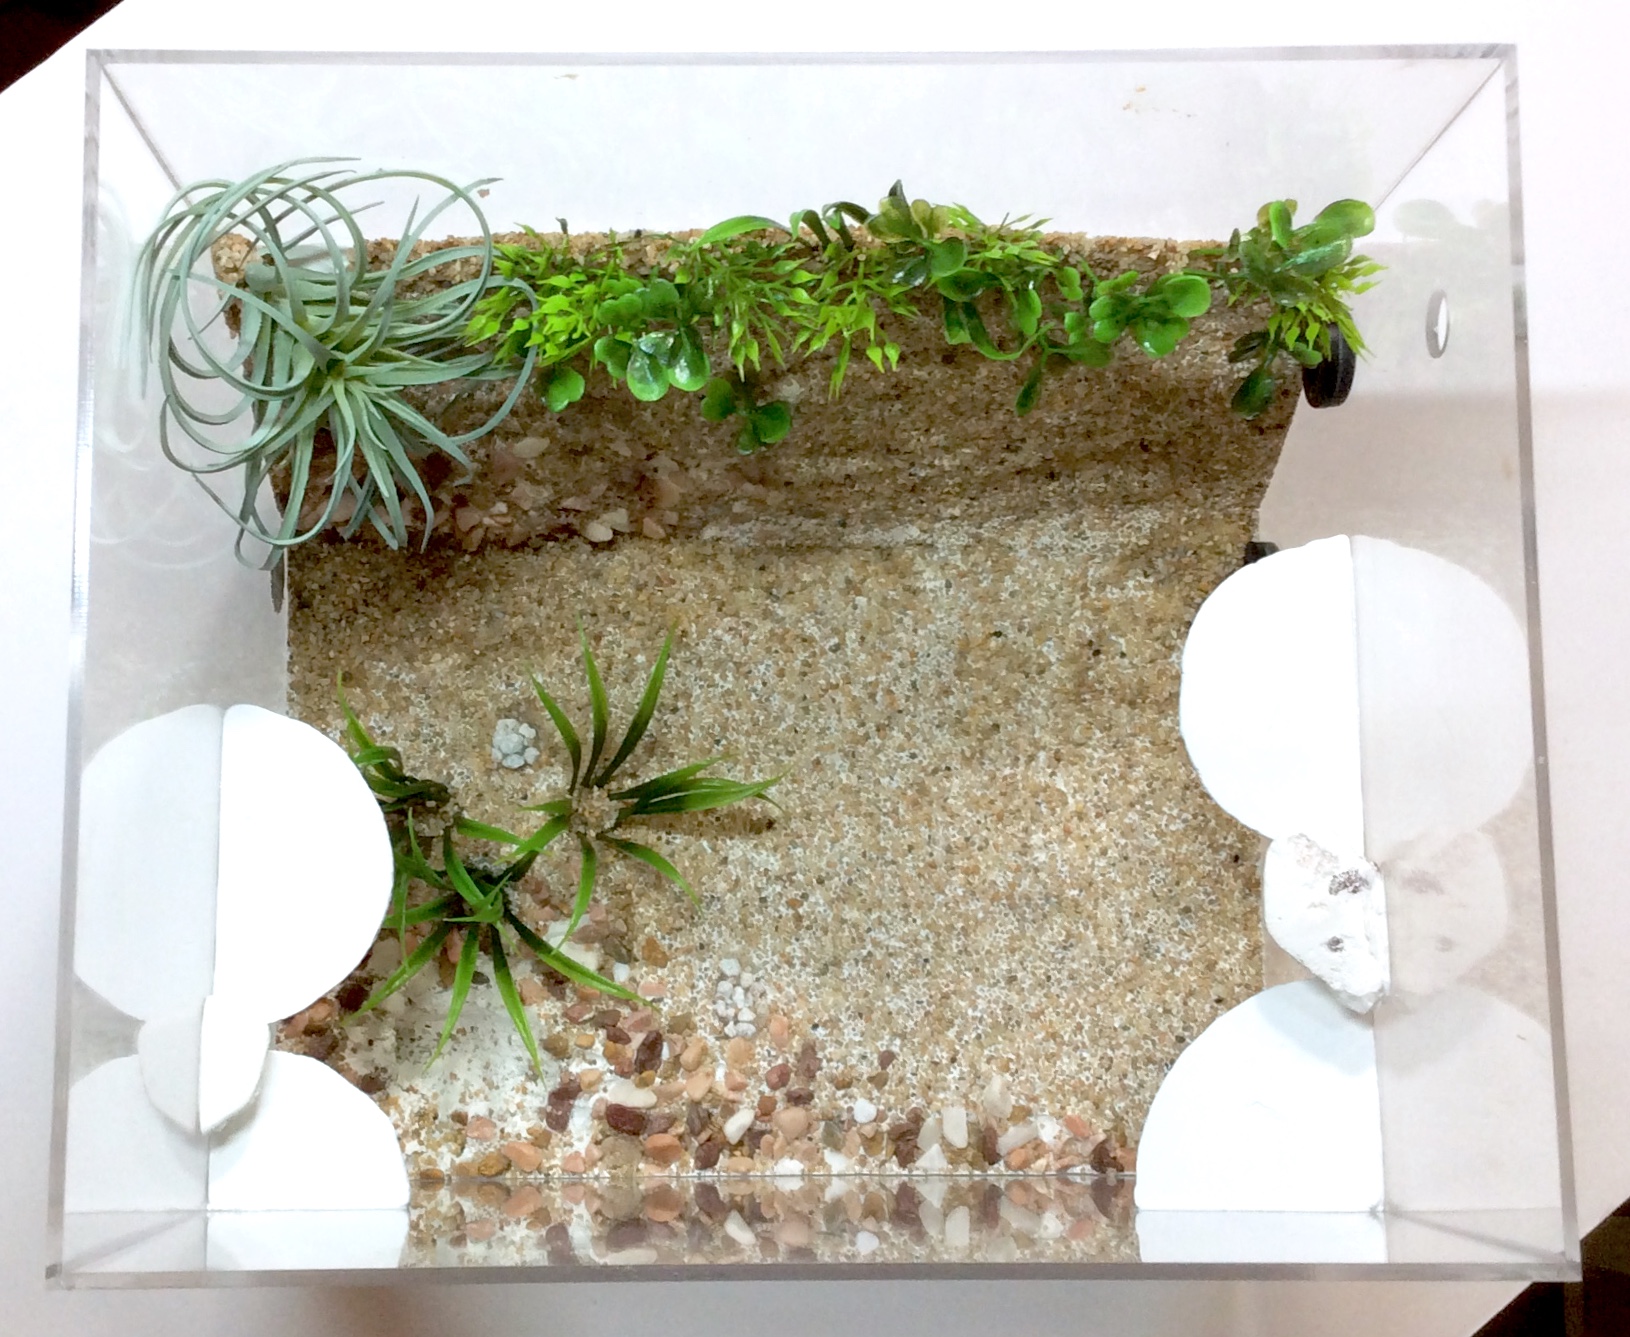
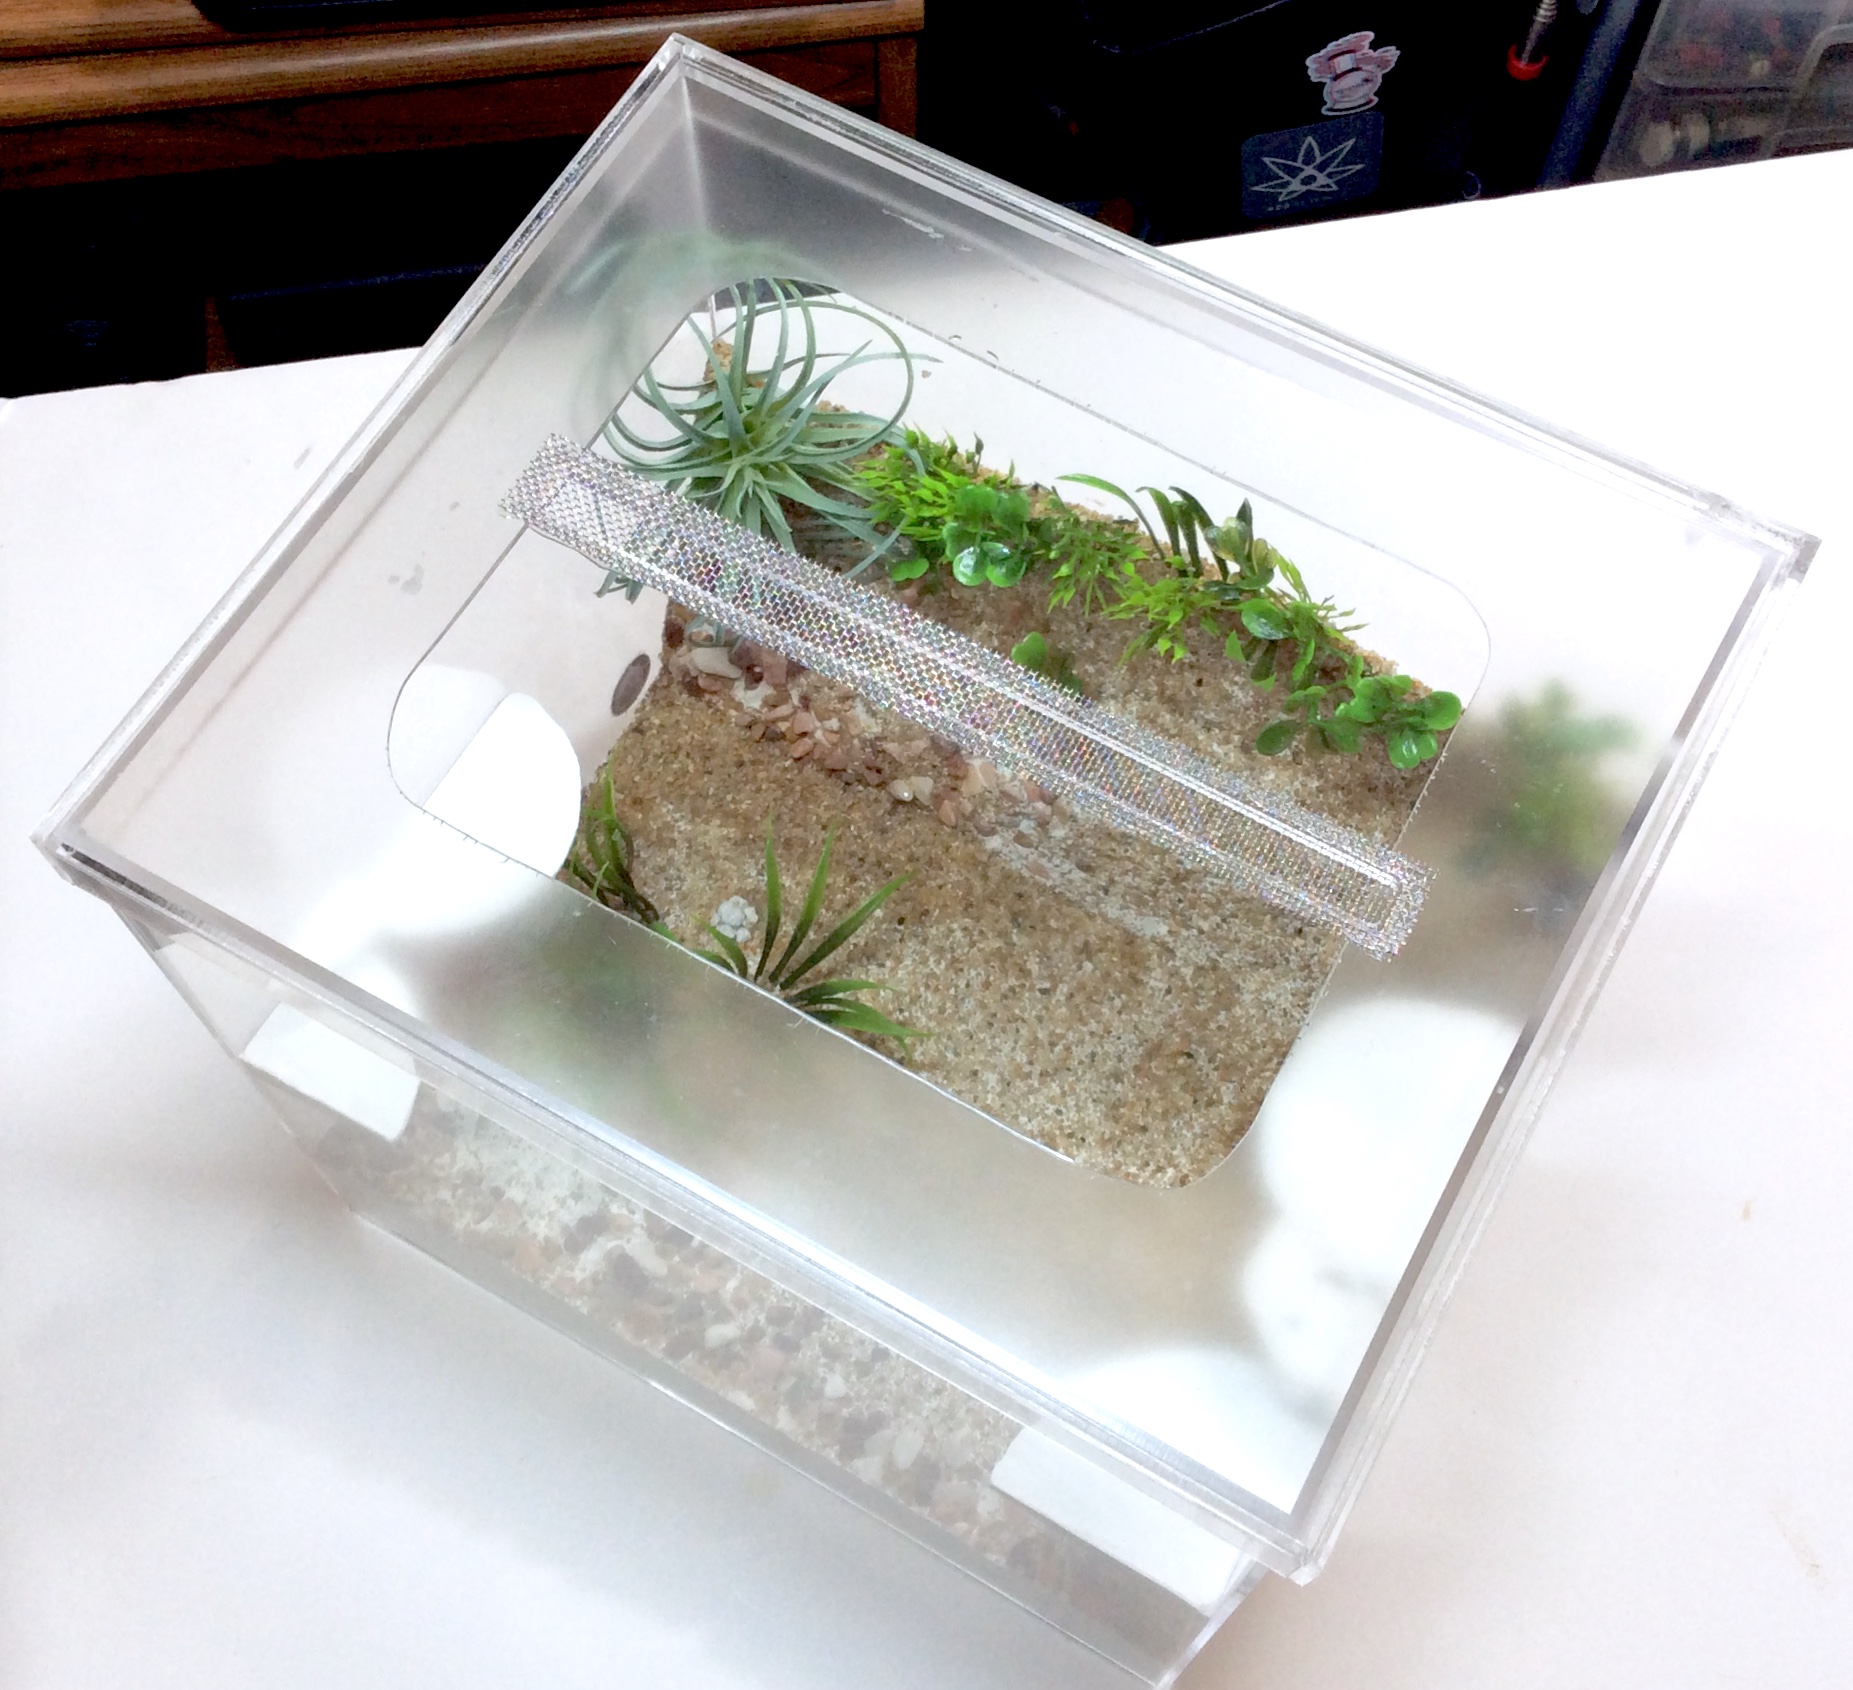
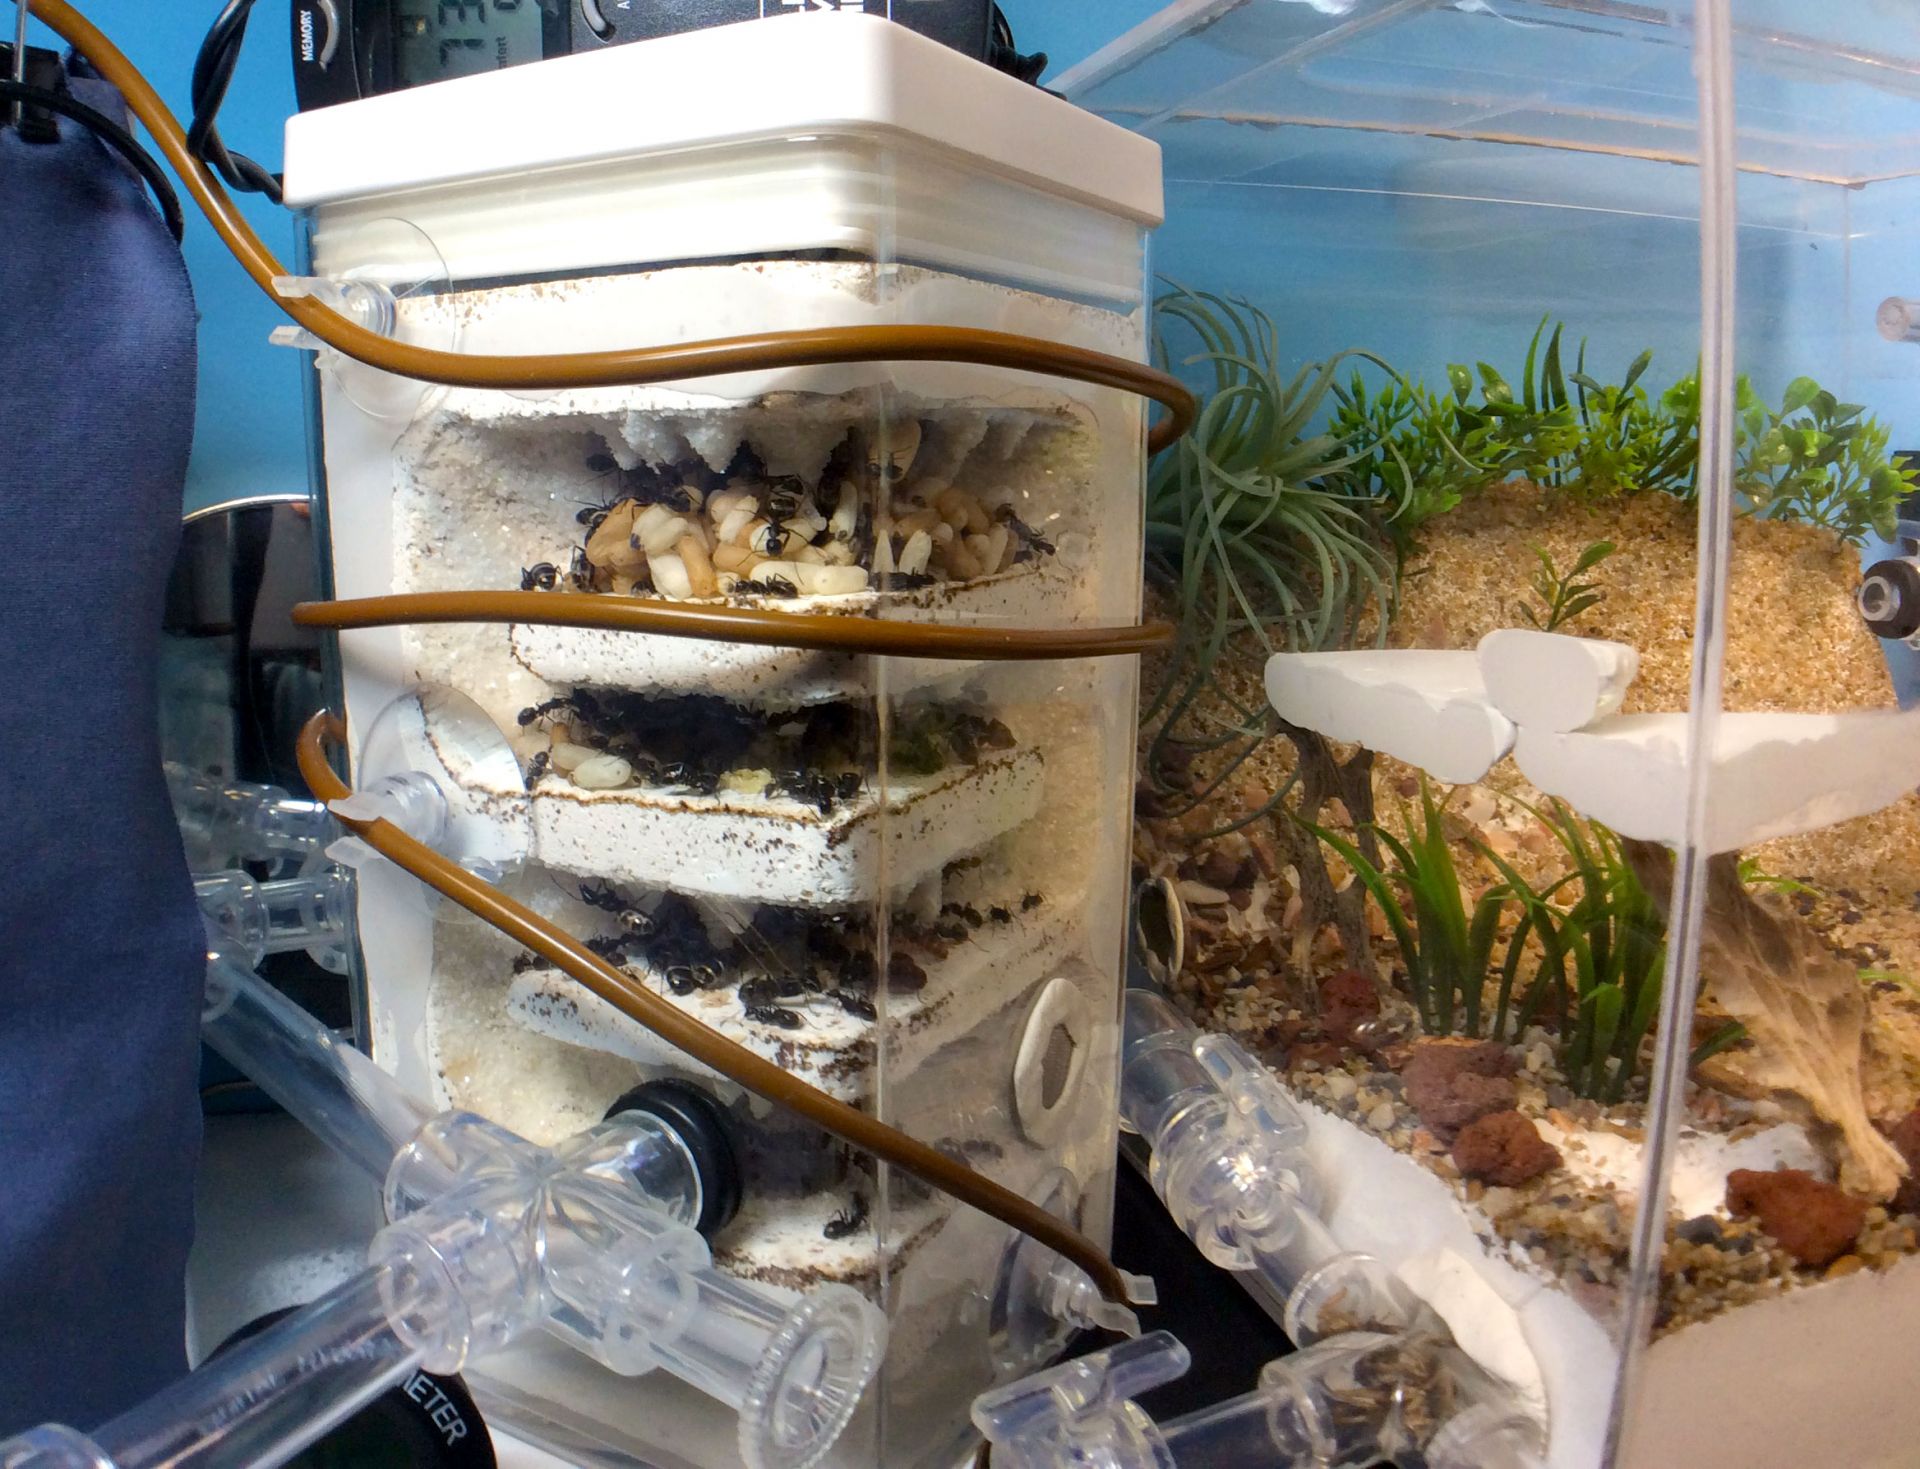
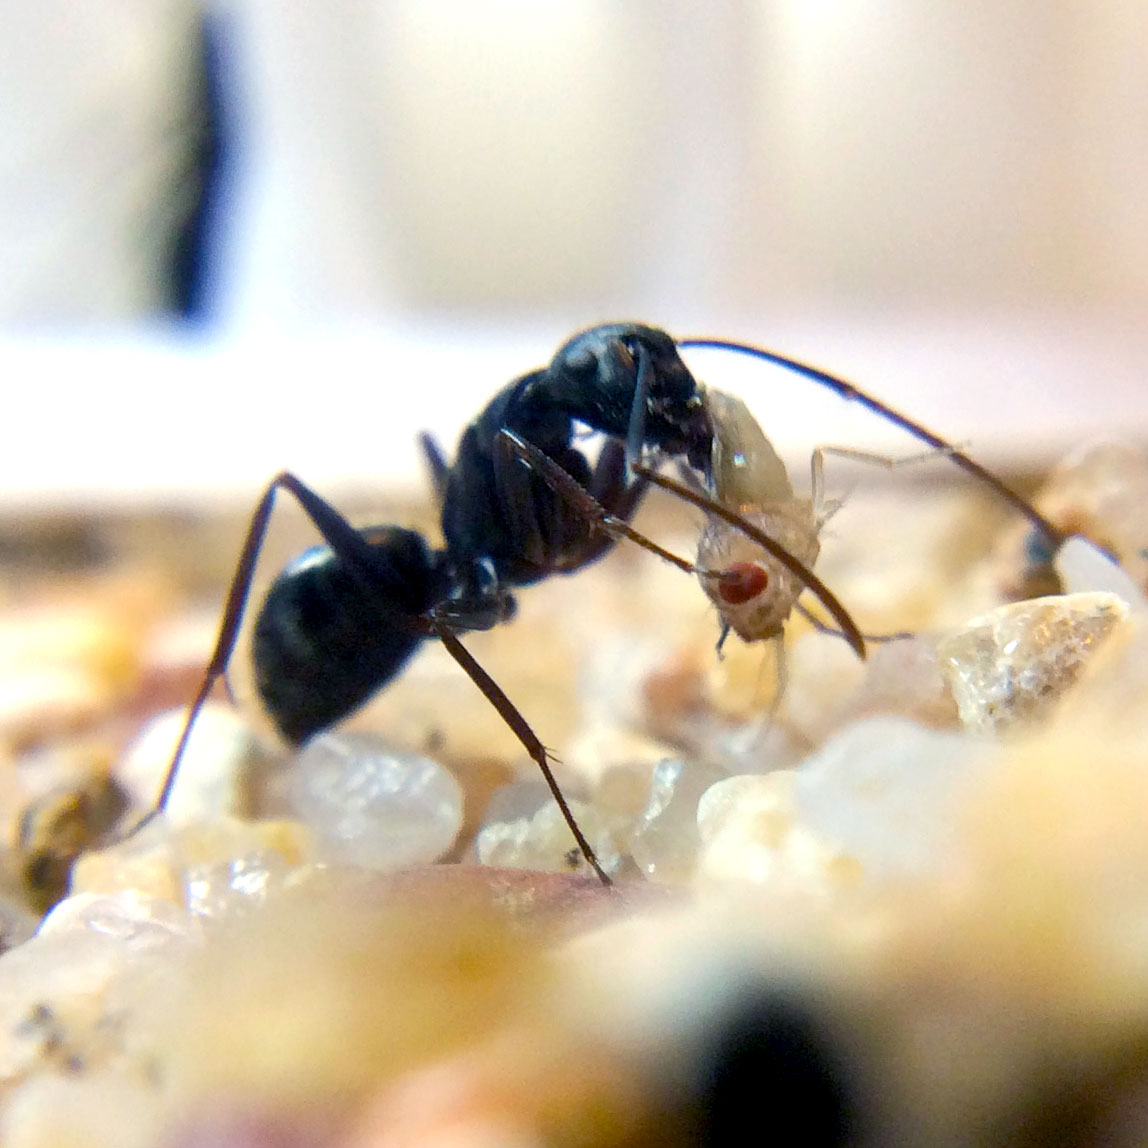
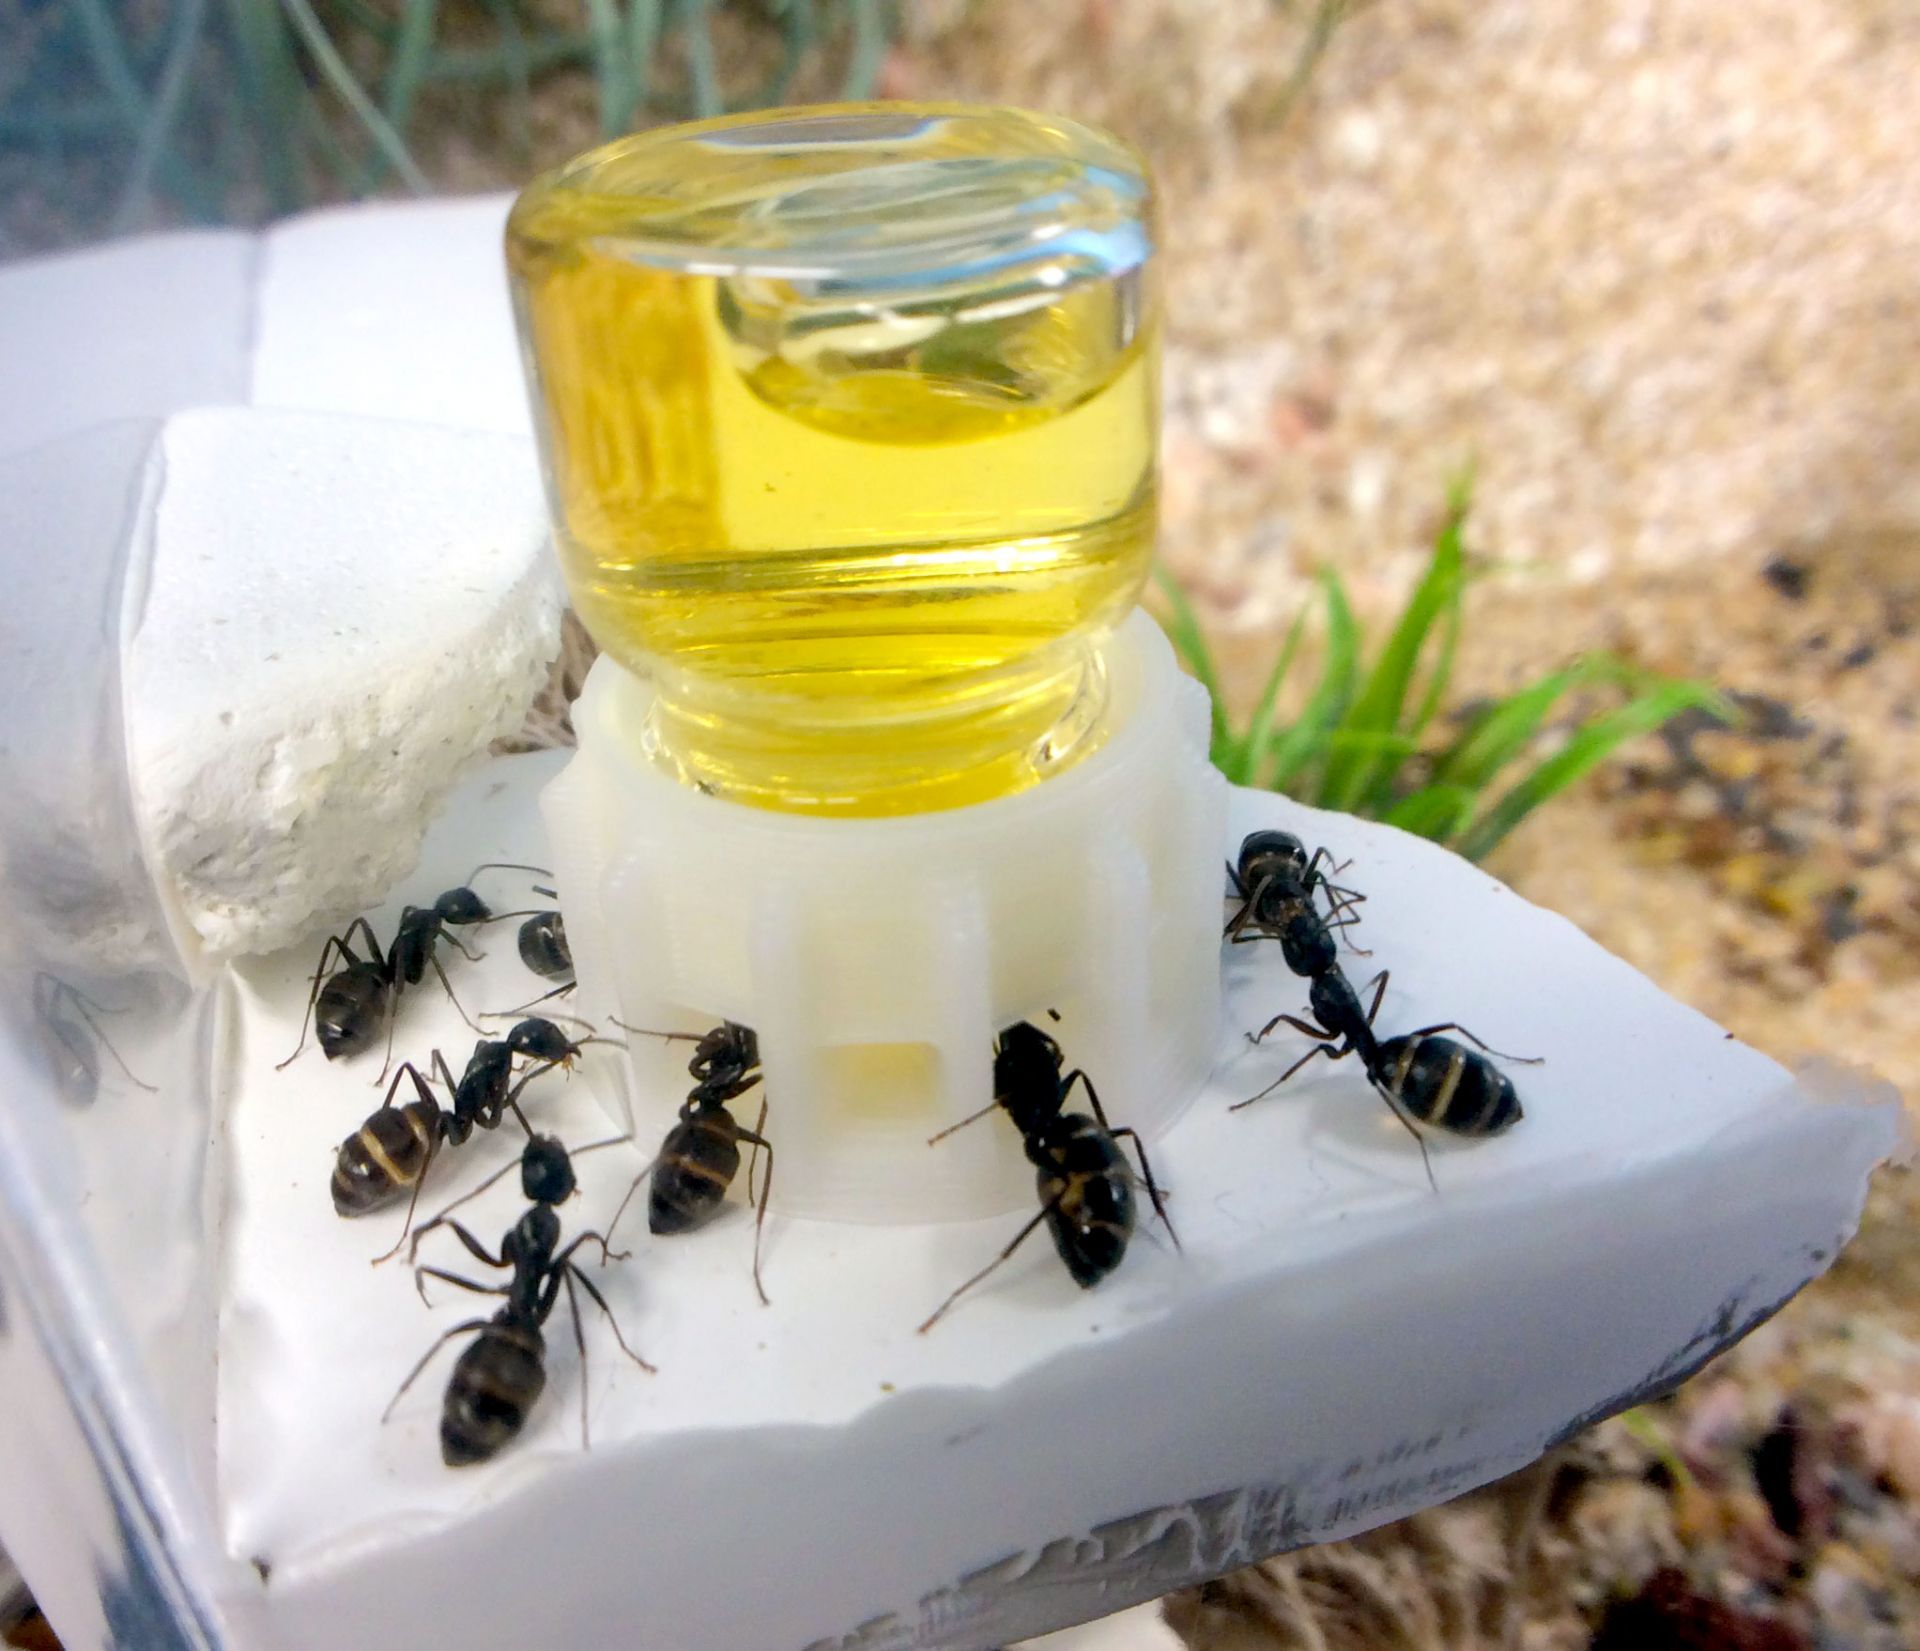
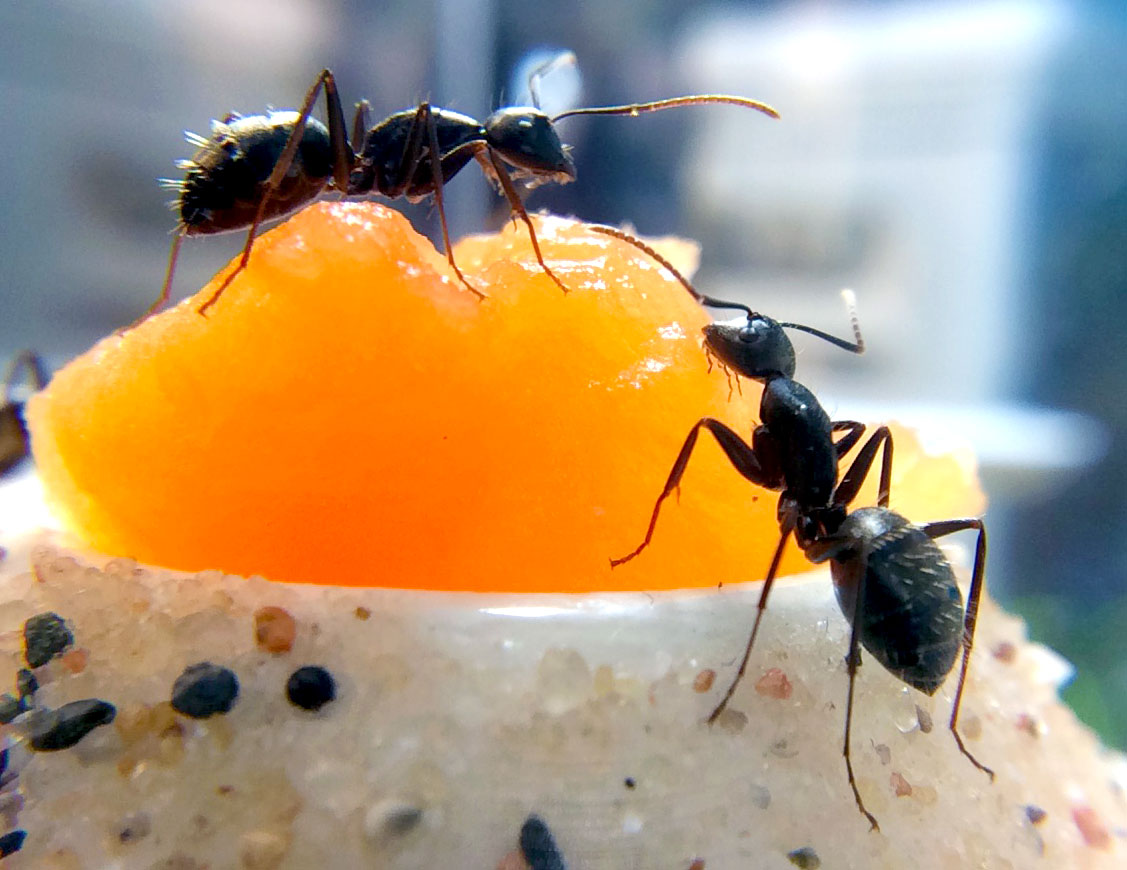
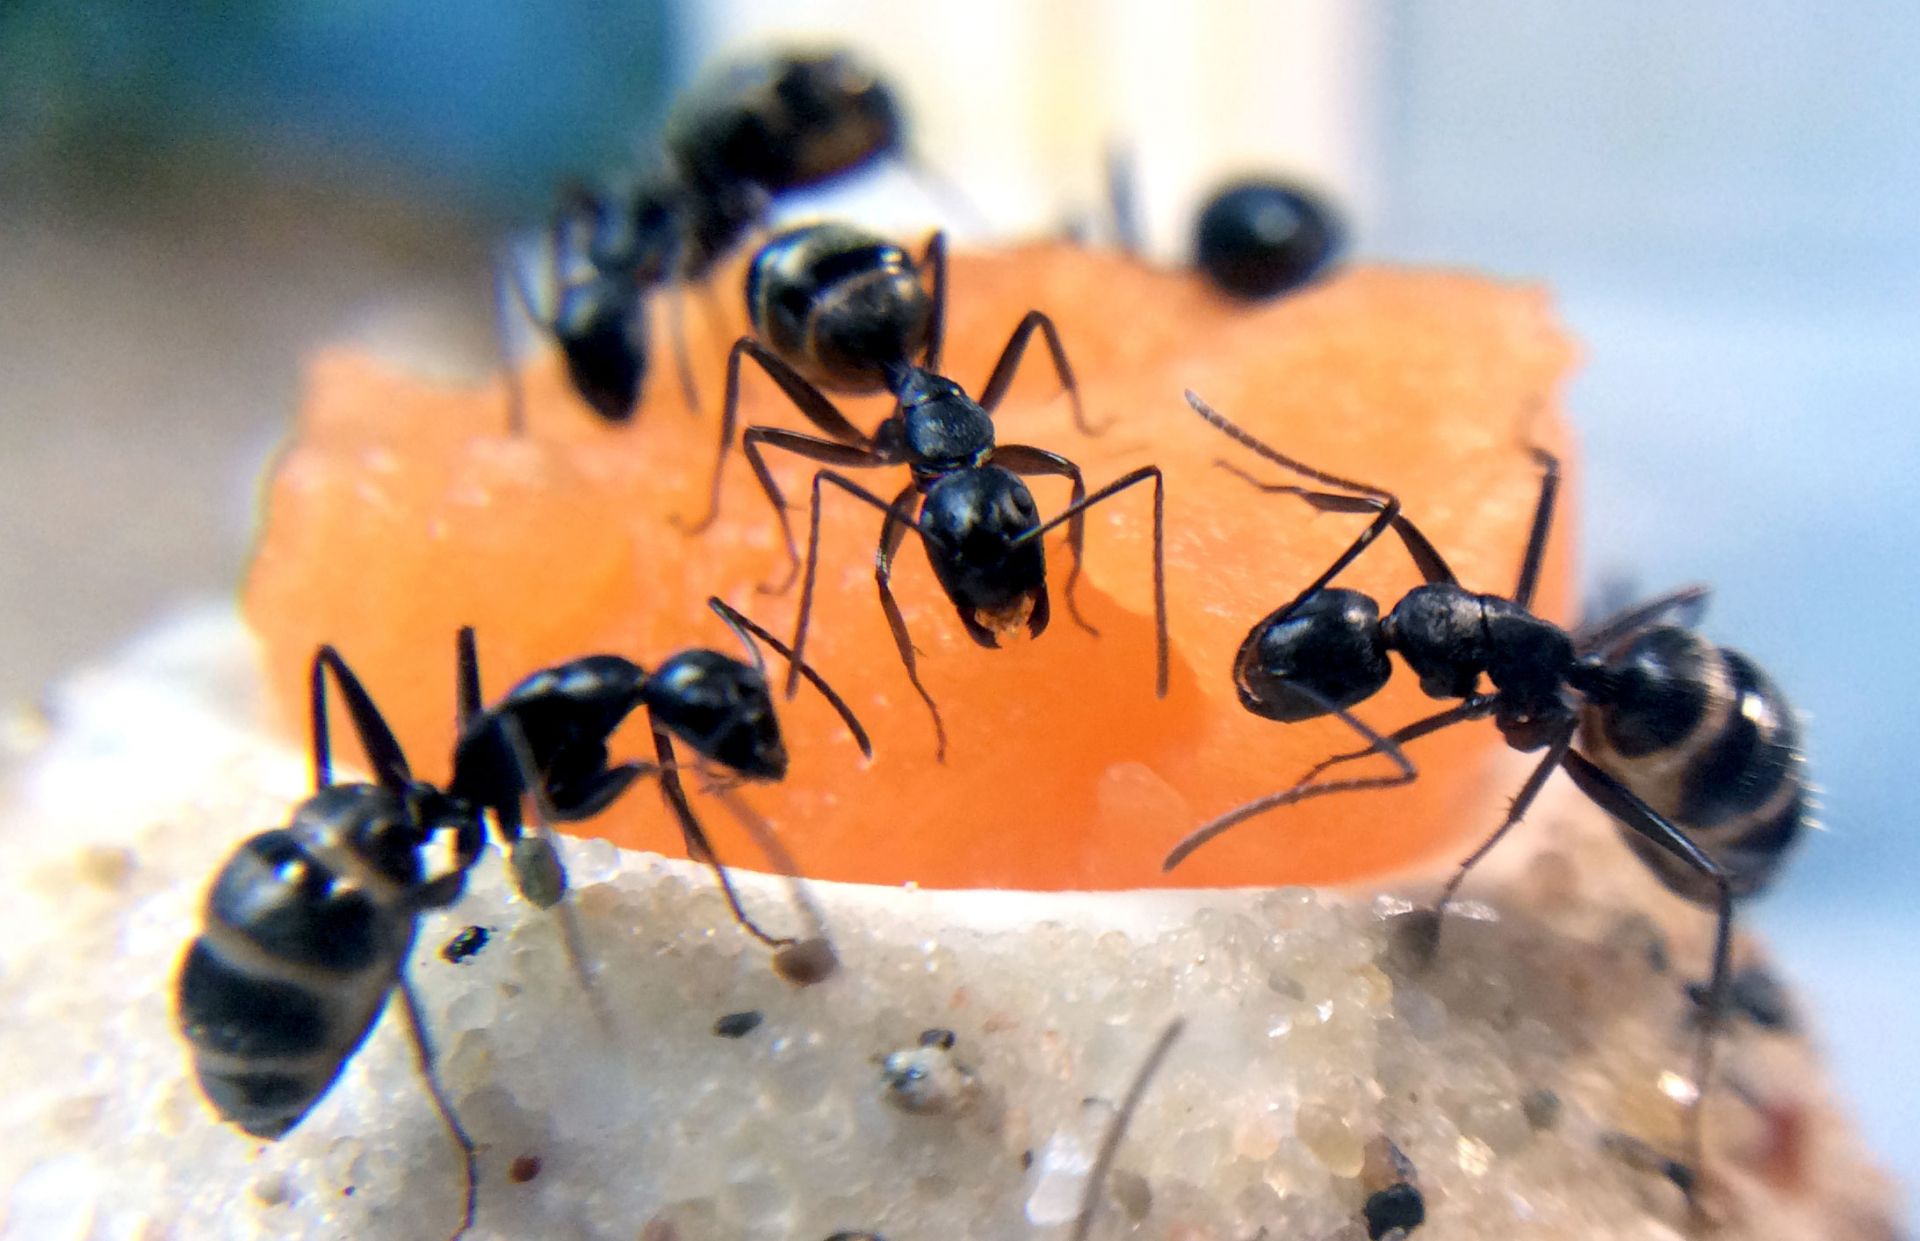
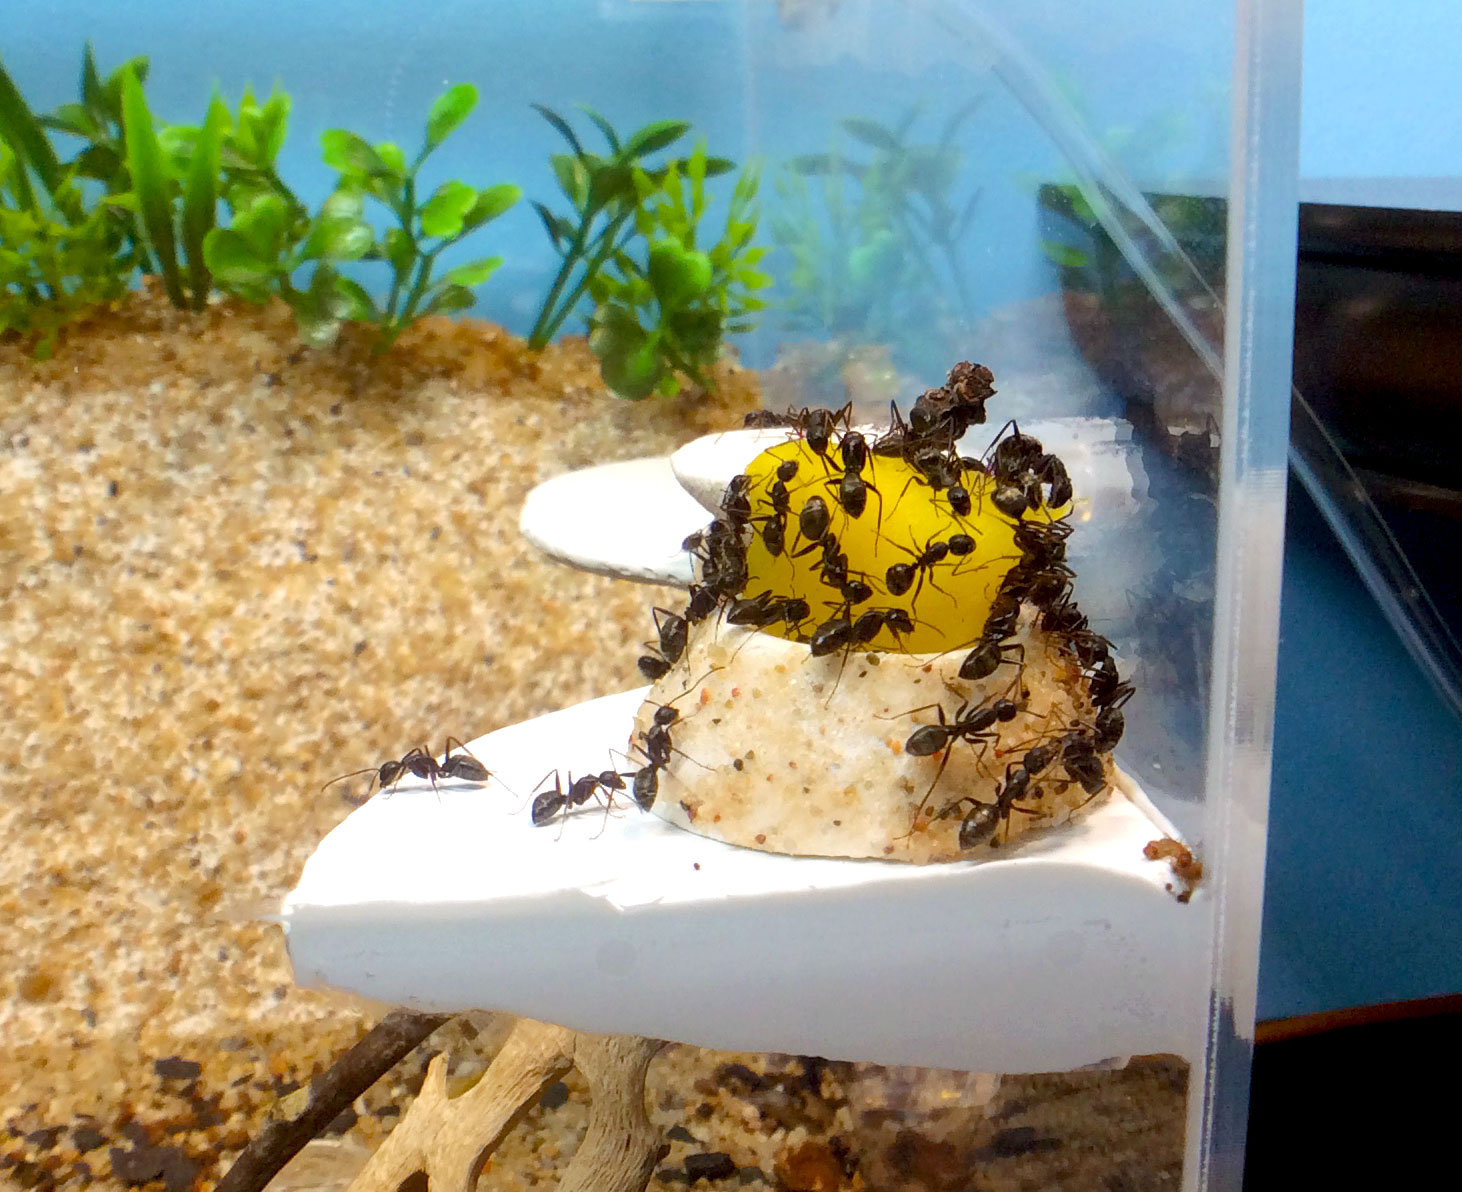
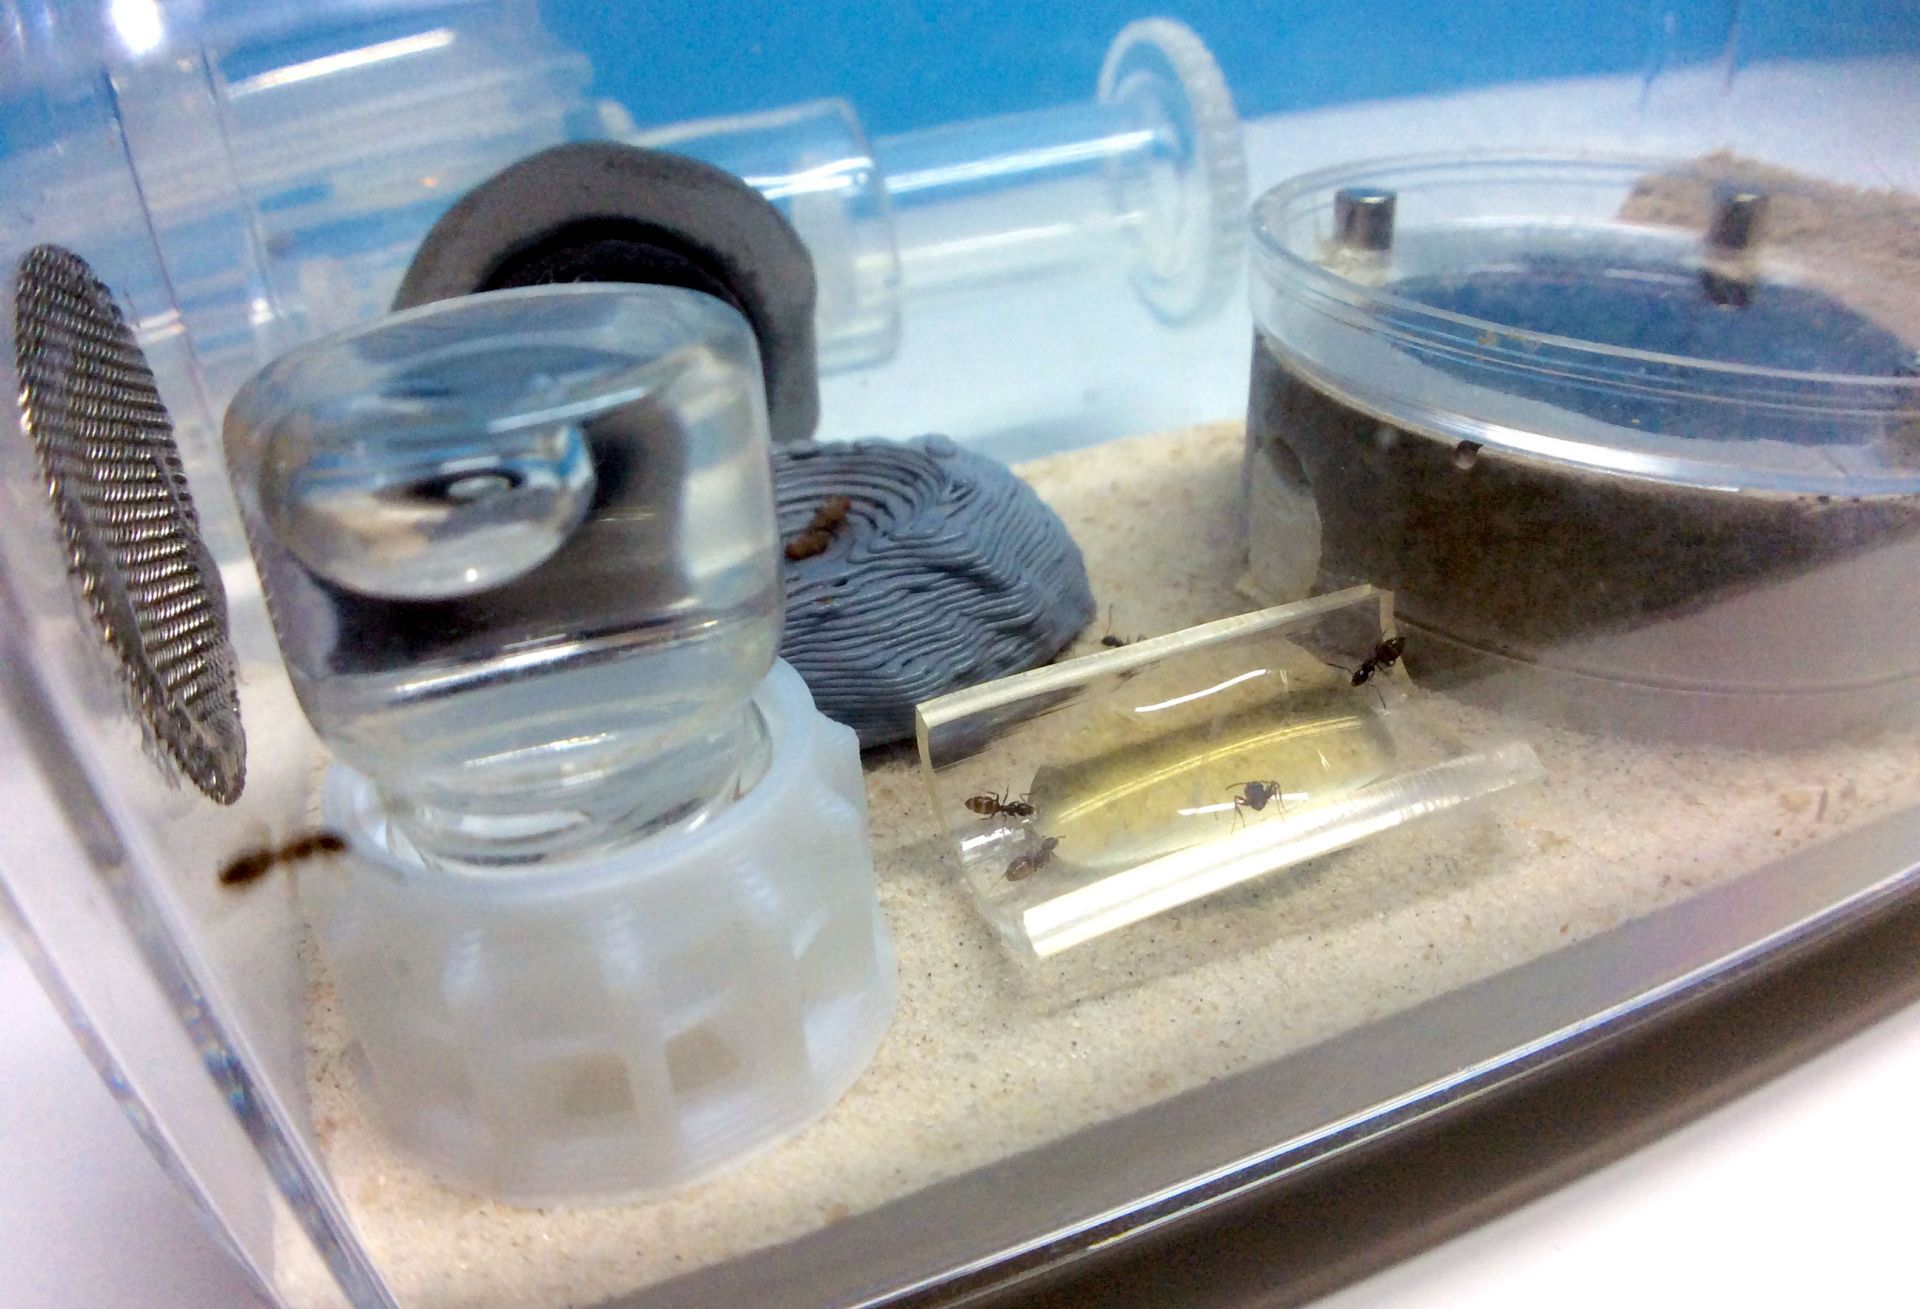
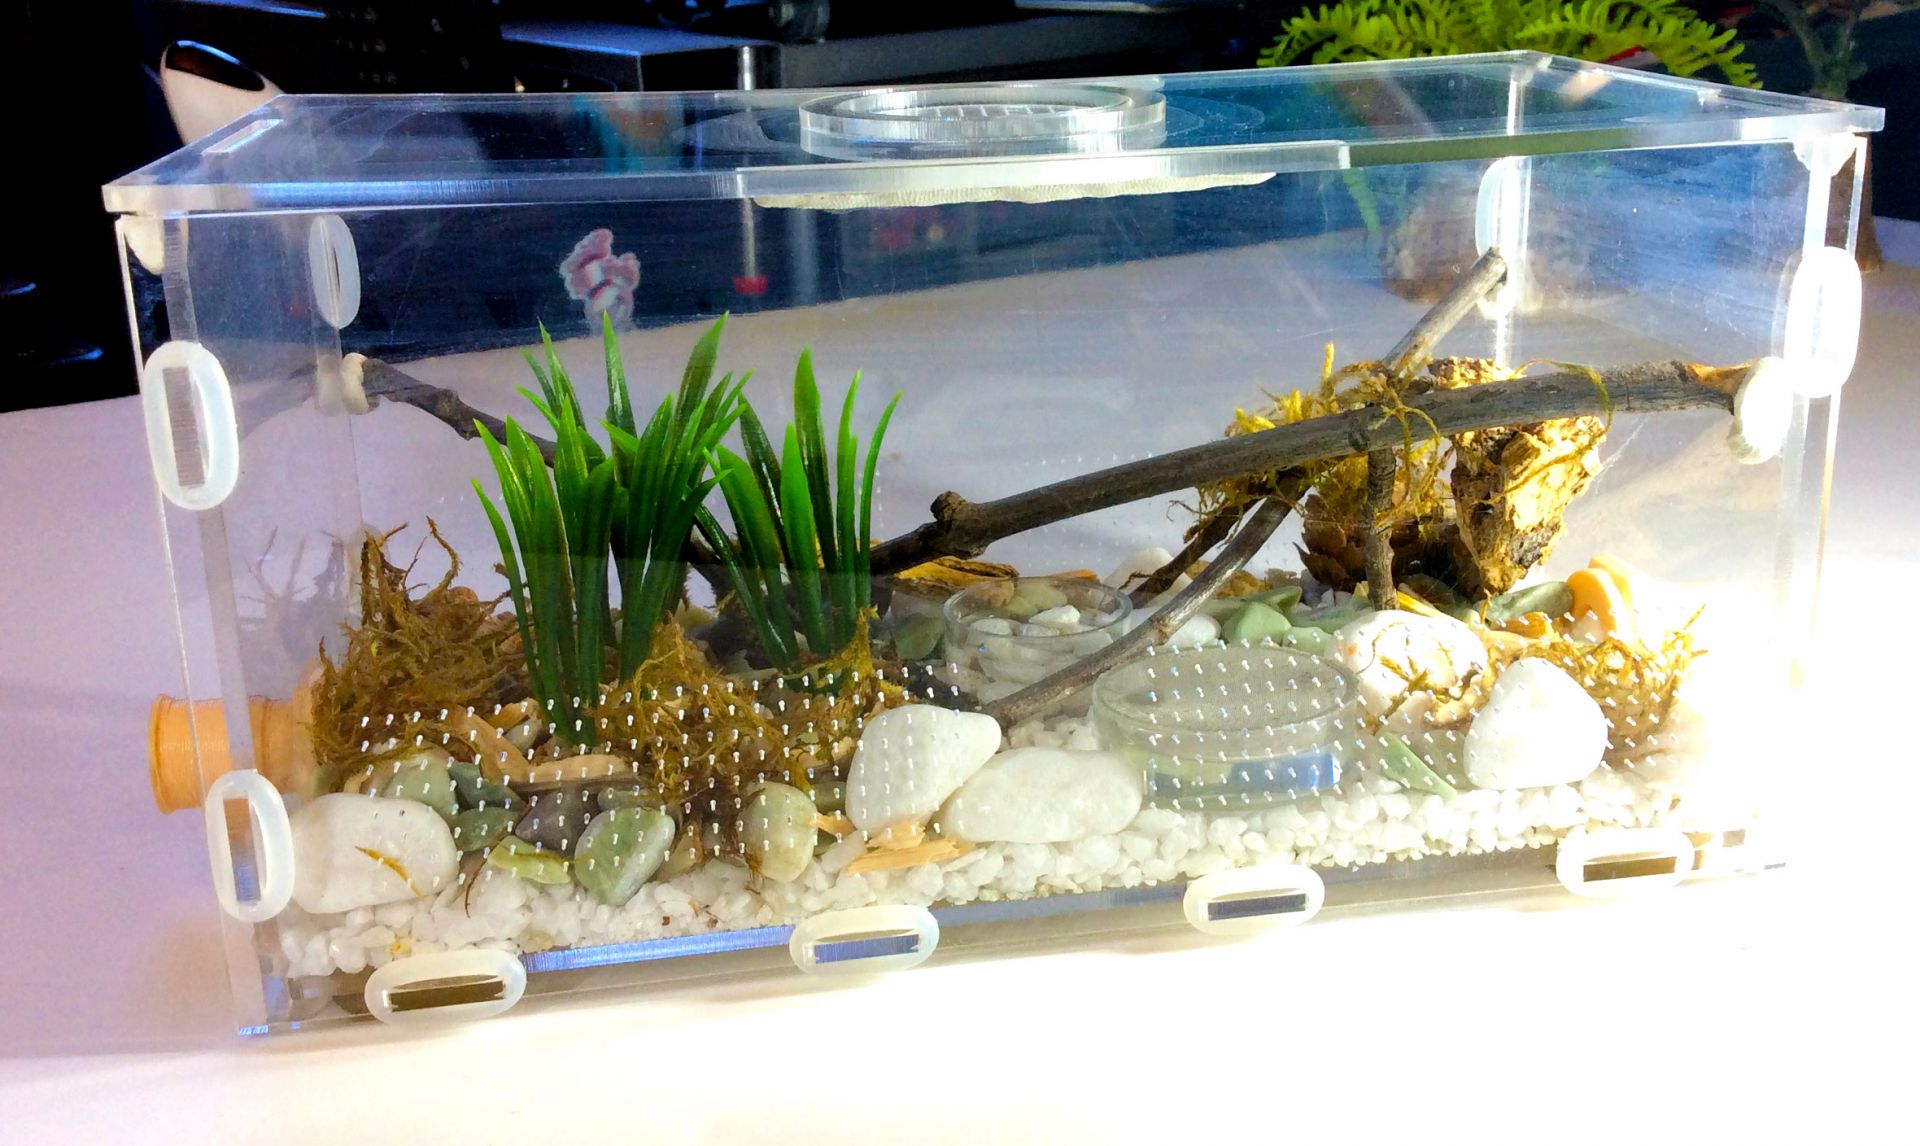
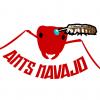
I have the one outworld lid open here during feeding, I sometime leave it open for several hours to air out any food smells or just to watch. Hot pepper infused olive oil is a great barrier, it’s been effective at keeping the ants at bay except the few that end up drowning in the thicker applications that collect and drip. I always have to wipe up excess oil to get a good barrier so I have to keep an eye on that. I’ve been reapplying the oil once a month by wiping away the older application with an alcohol wipe and using cotton swabs. Also the ants have been carrying sand throughout the formicarium, nearly covering up the entrance of both the nest and outworld.

I decided to go with Tar Heel Ants gear for my gals as I’ve finally acquired some of their products and felt them in hand; they’re good quality builds! I ordered from three ant stores and splurged on some ant goods that I’ll be saving for years to come, some of which will probably be popping up throughout my journal here.

gallery_4140_1524_9767.jpg

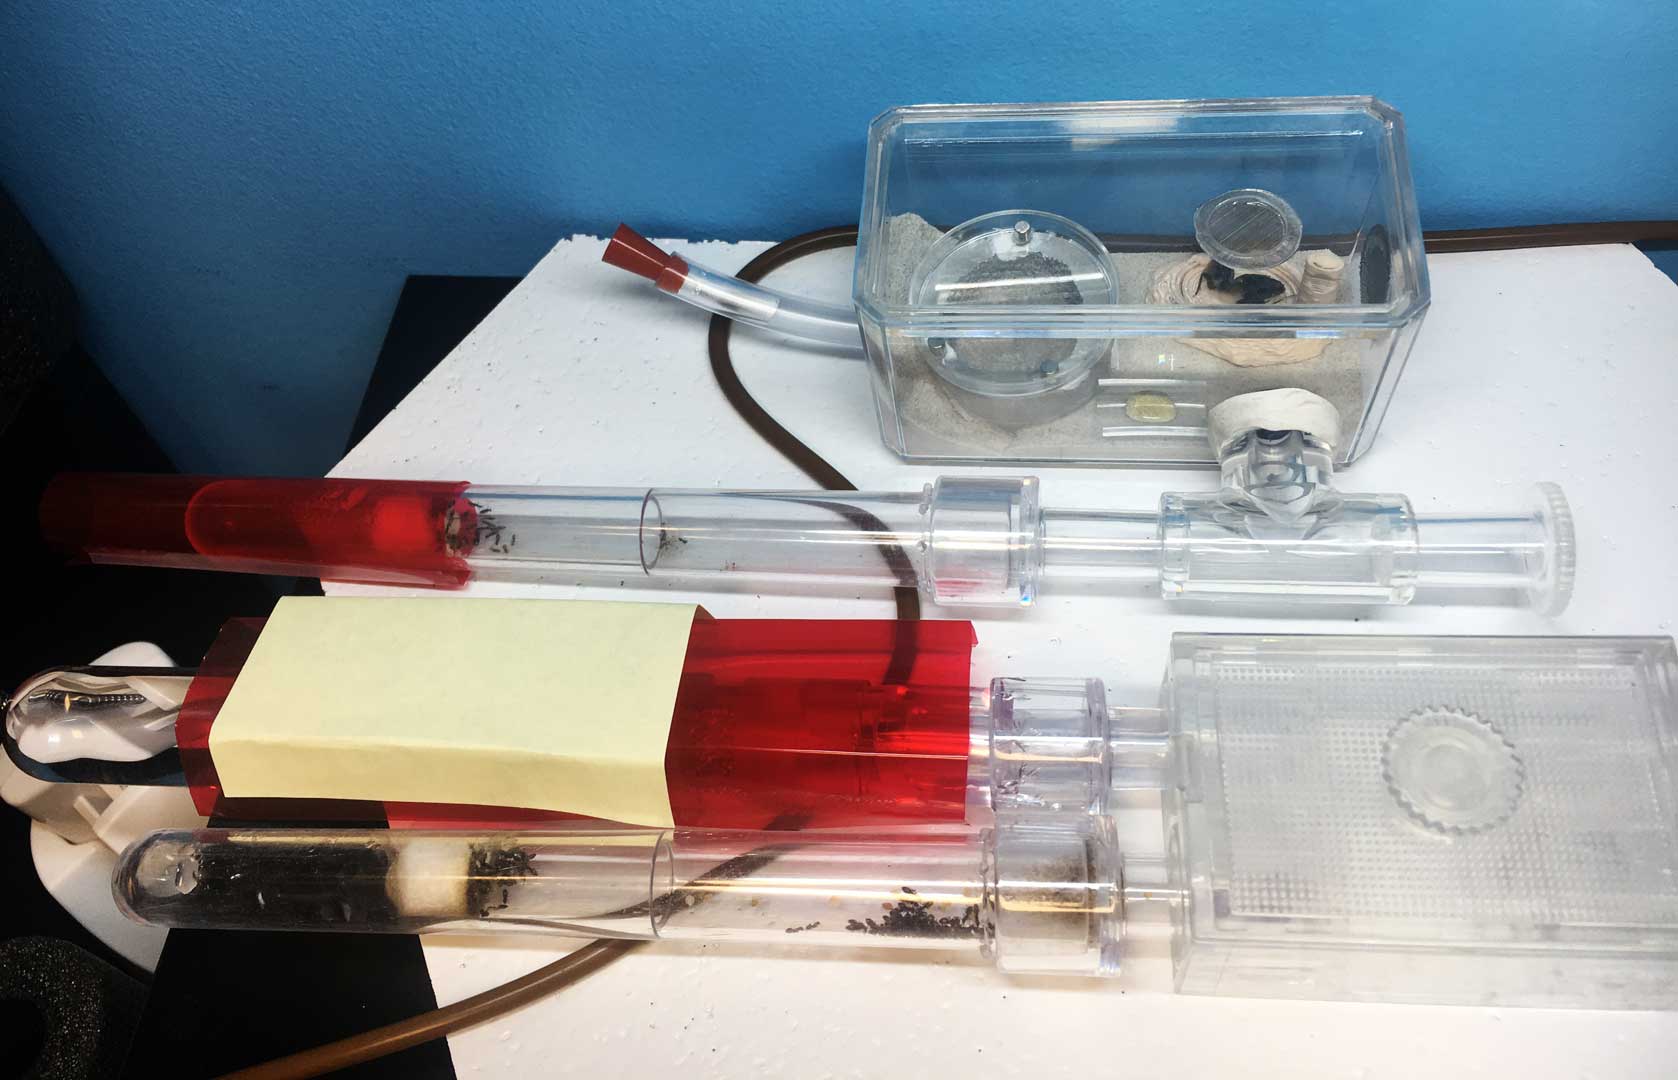
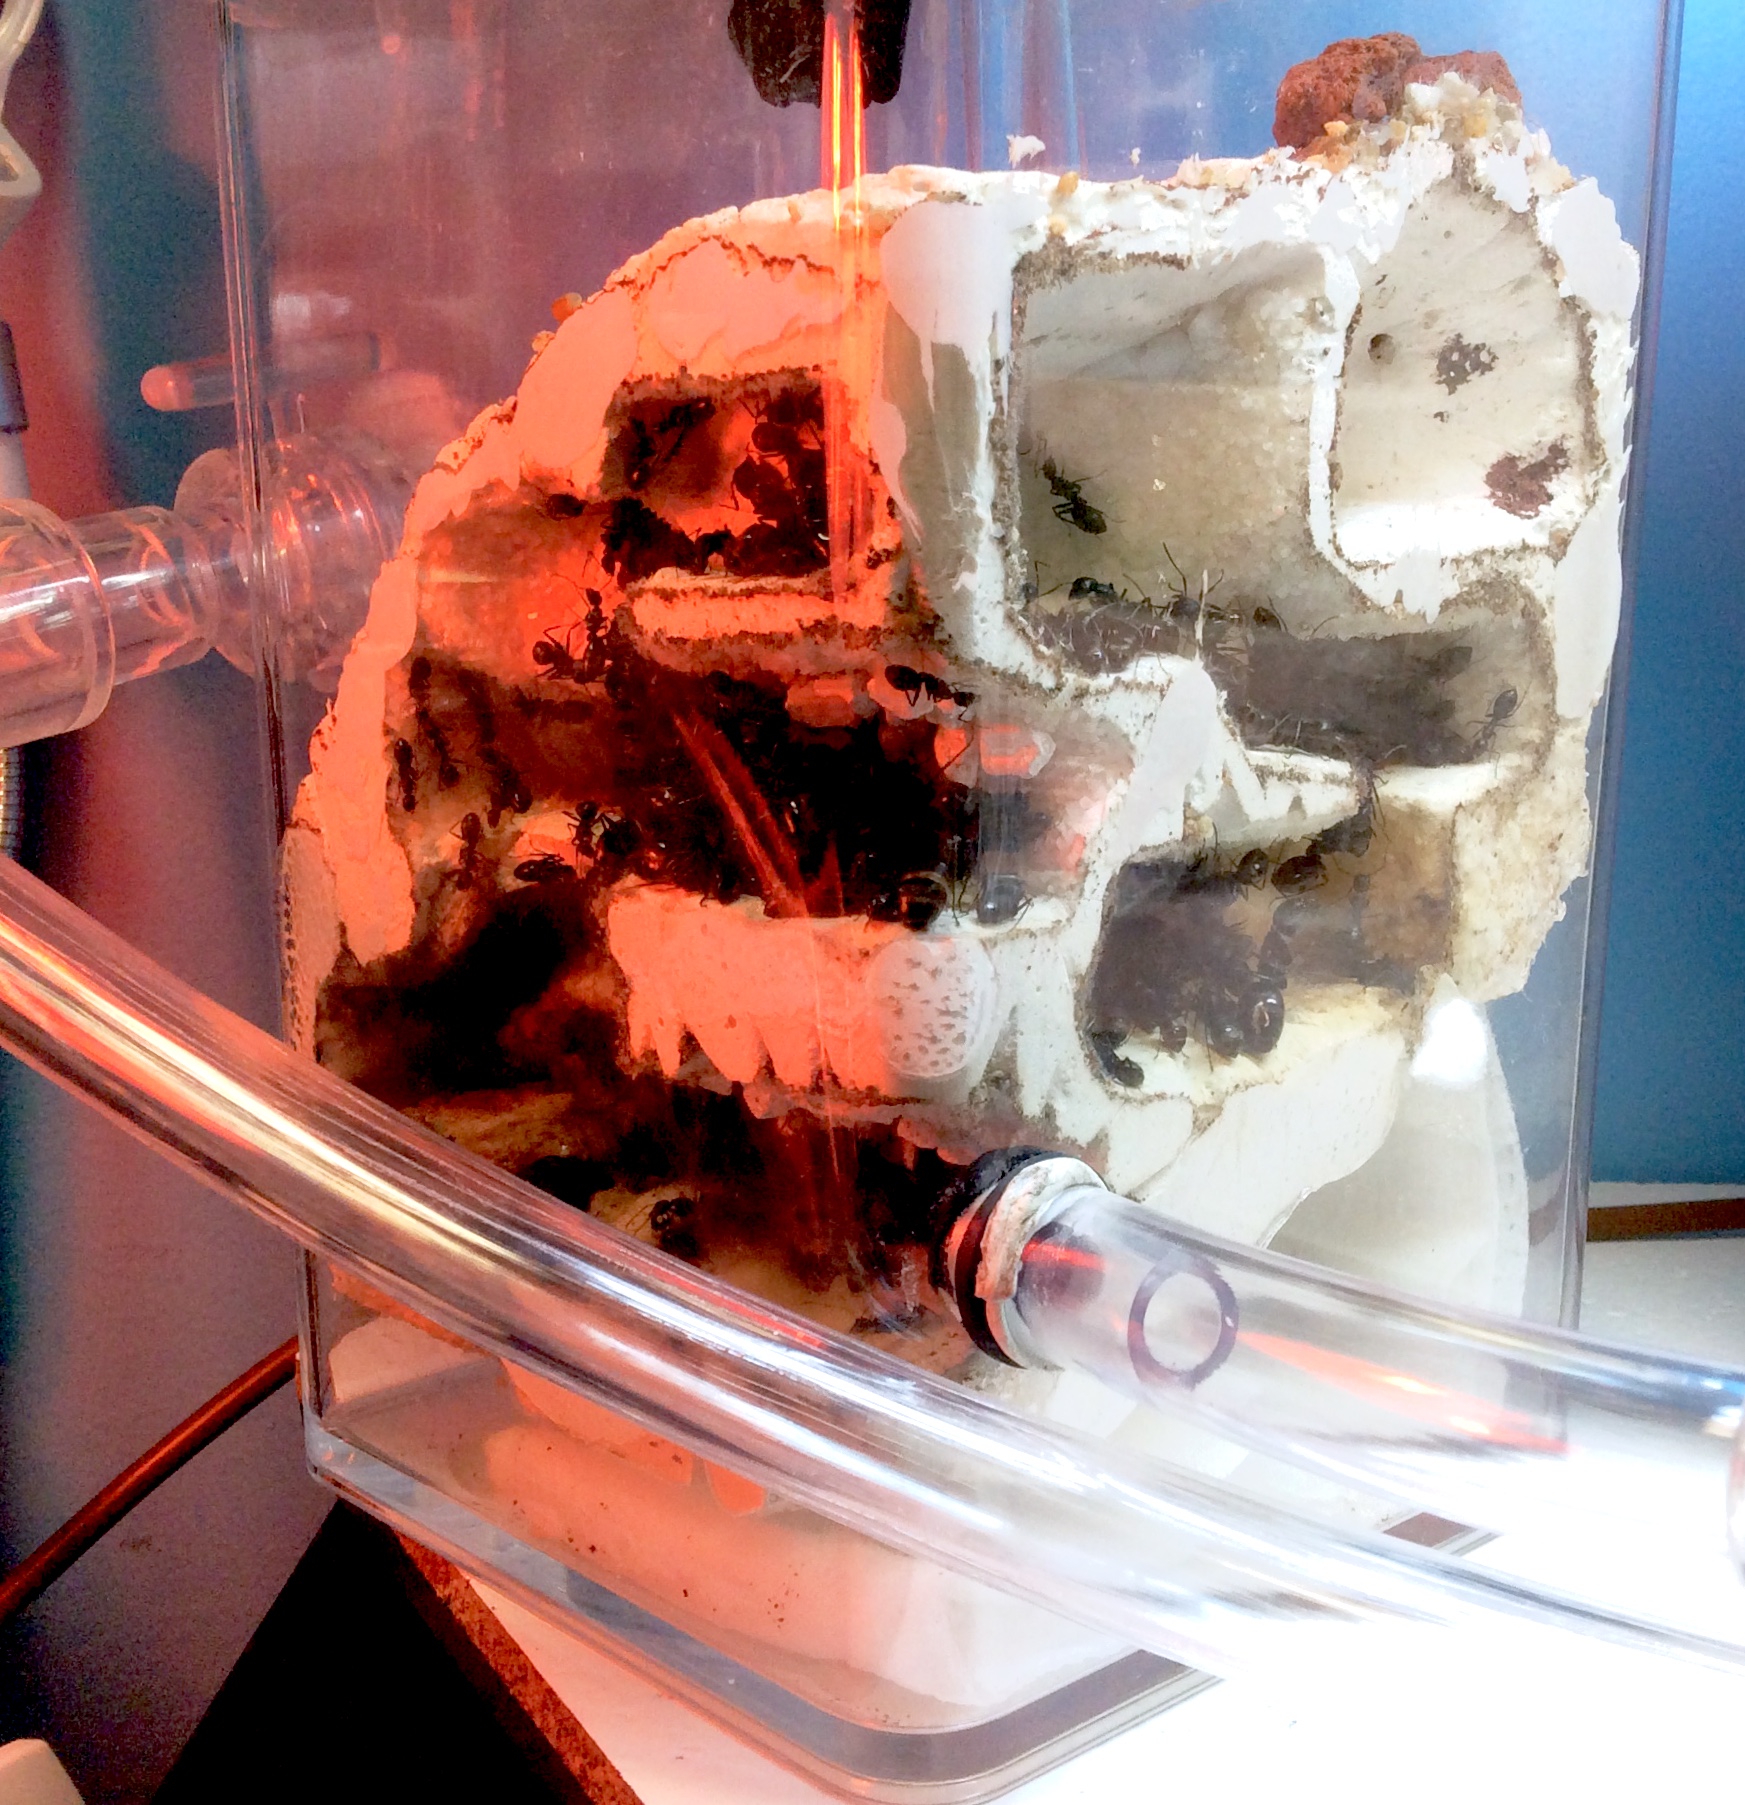
My smaller colony, Queen Arya’s, is connected to an Atom Nest that I modified with Milliput two part epoxy, a hole with pipe screen for extra ventilation and another one for tubing entrance via a rubber grommet. The nest area had fairly wide gaps between the lid and where the magnets were embedded which I had to shore up with Milliput and also sculpted the entrance of the hydrostone nest which had a hole too large for these ants to something fit for their tiny size. I’ve observed them scouting the nest and nestmate but they haven’t moved out of their test tube. The cotton ball is still moist and there’s a few drops of water in there but I’m just waiting for them to decide to move. I hope the Atom’s nestmate provides enough humidity and hydration for their needs. Queen Sansa’s colony is also in an empty test tube with a damp cotton ball and not moving. I decided to try out the Genesis Test Tube System and have that covered up with red film and a post-it and have seen ants visit it for water but I’ve been awaiting their move for a month. I have the heating cable close to the cotton ball in hopes that they move but nothing yet and I don’t want to toast their brood. The only water the colonies have access to is where I want them to move and its just been a waiting game.

gallery_4140_1524_25995.jpg

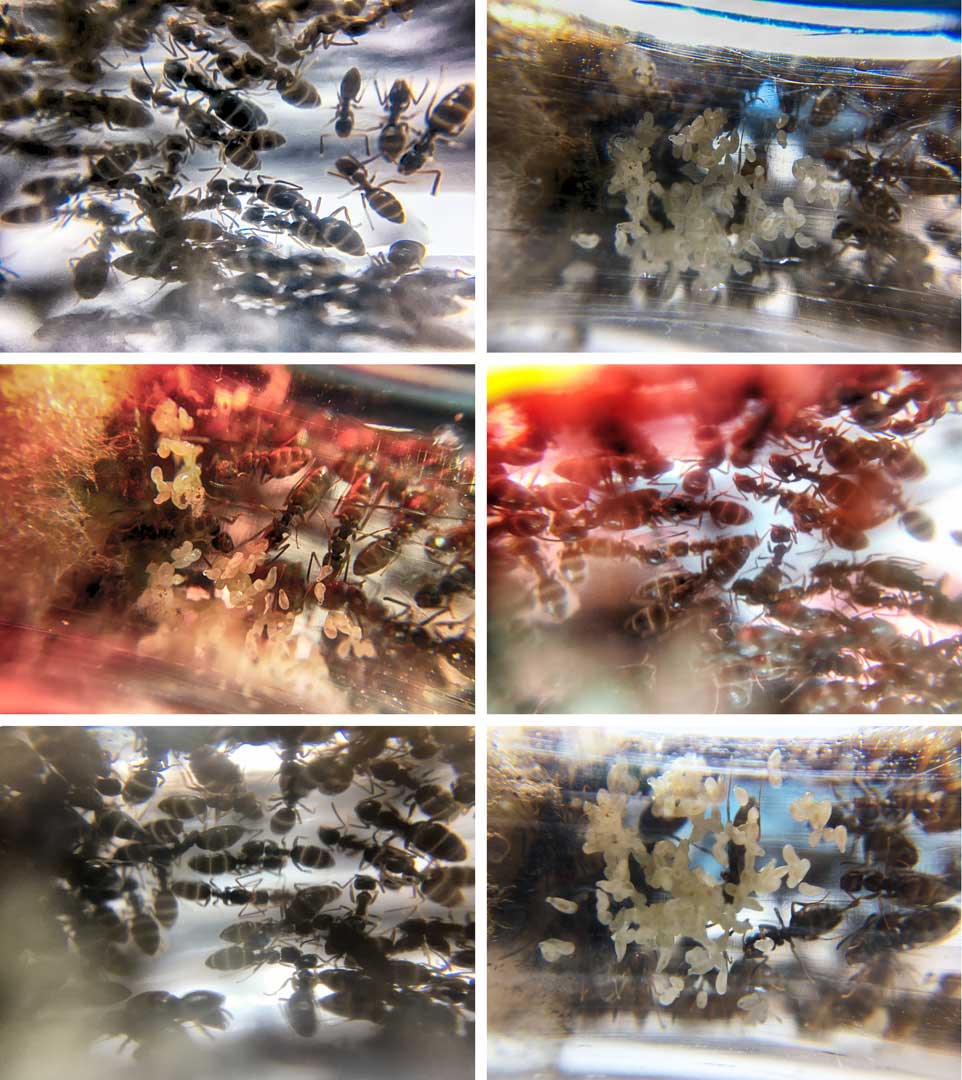
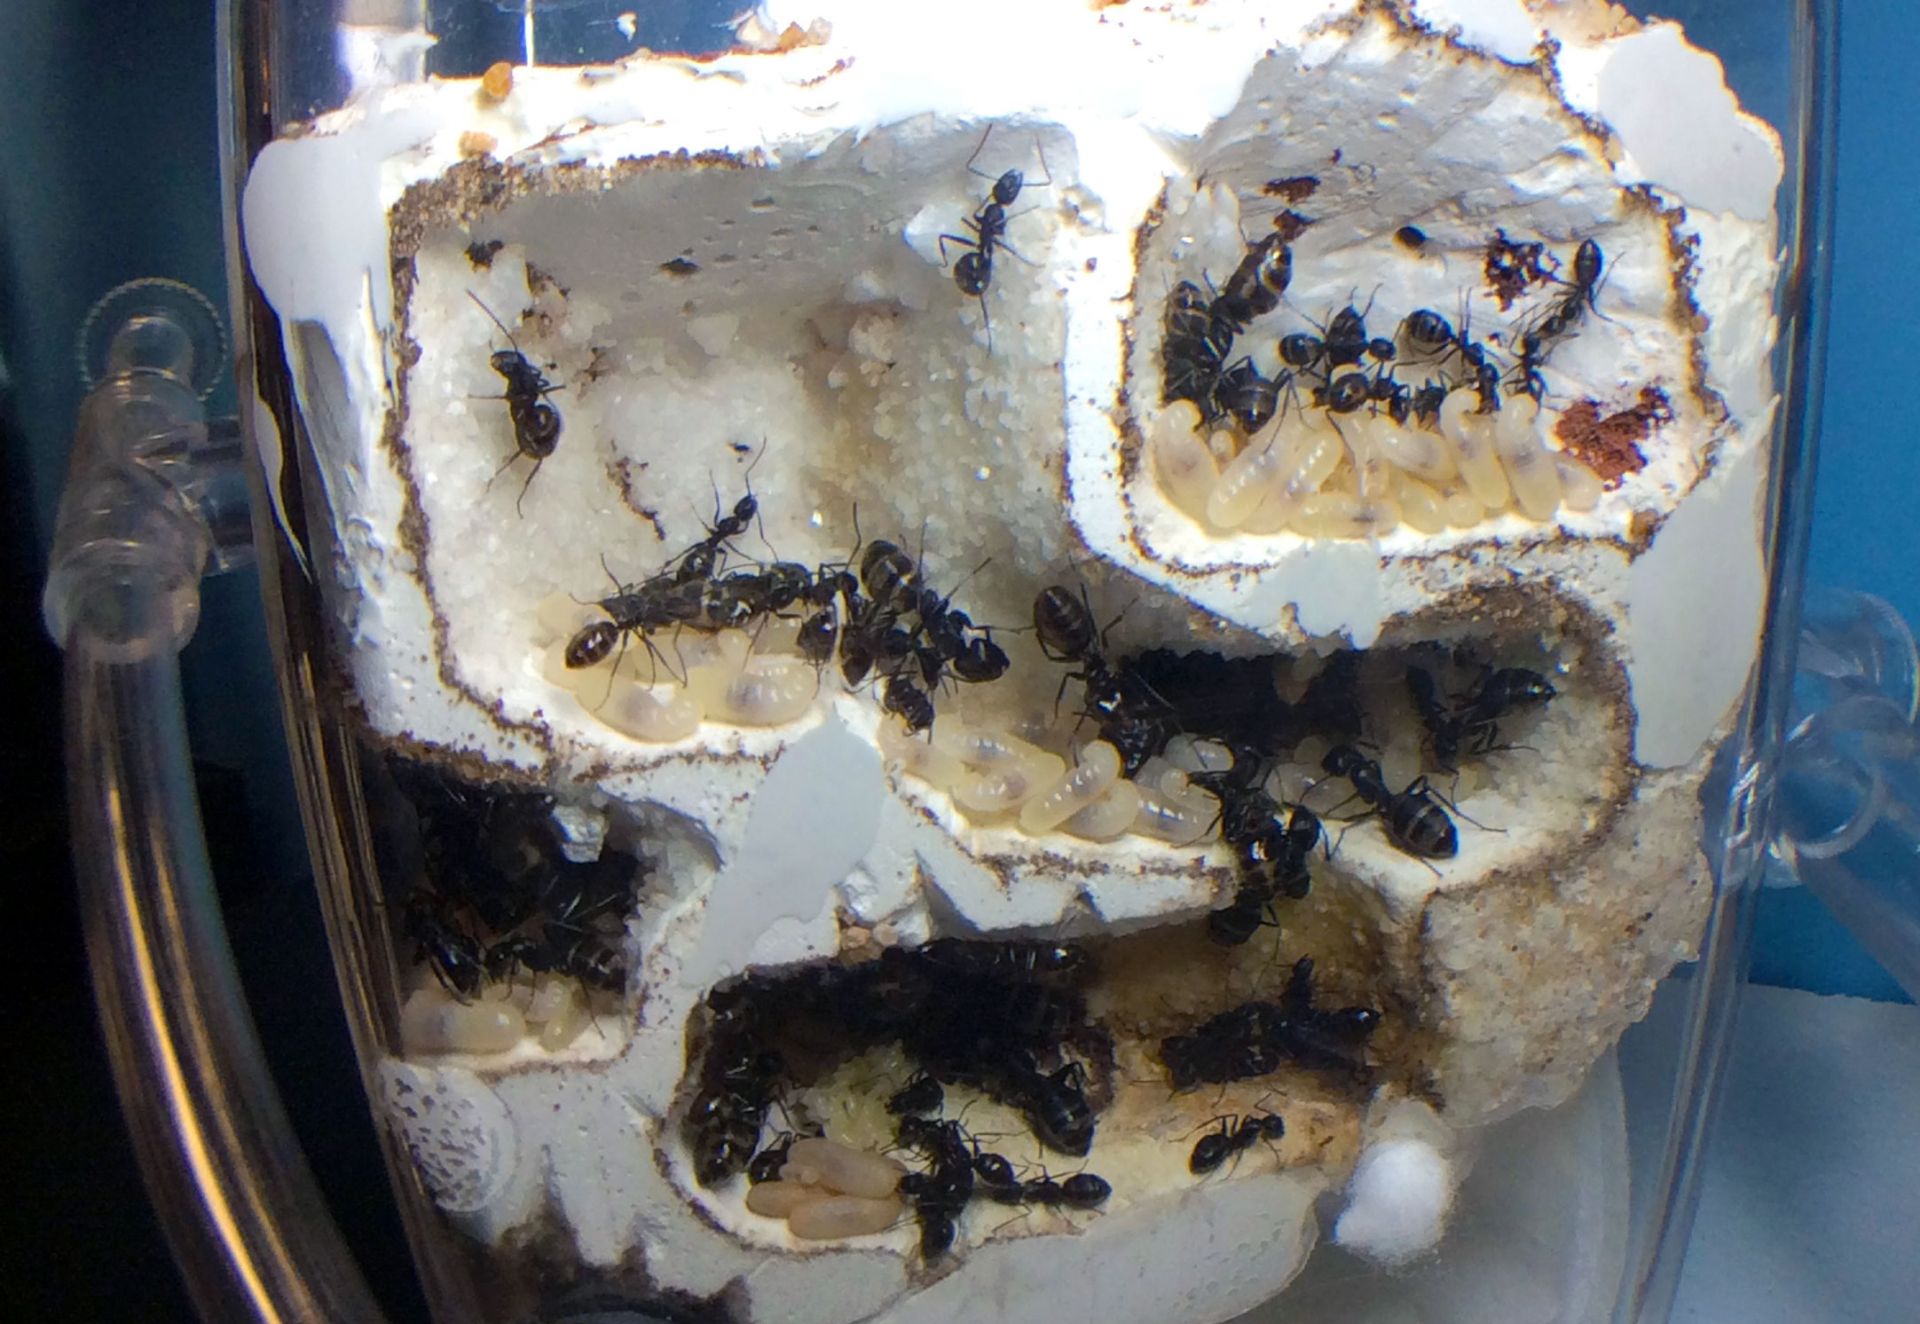
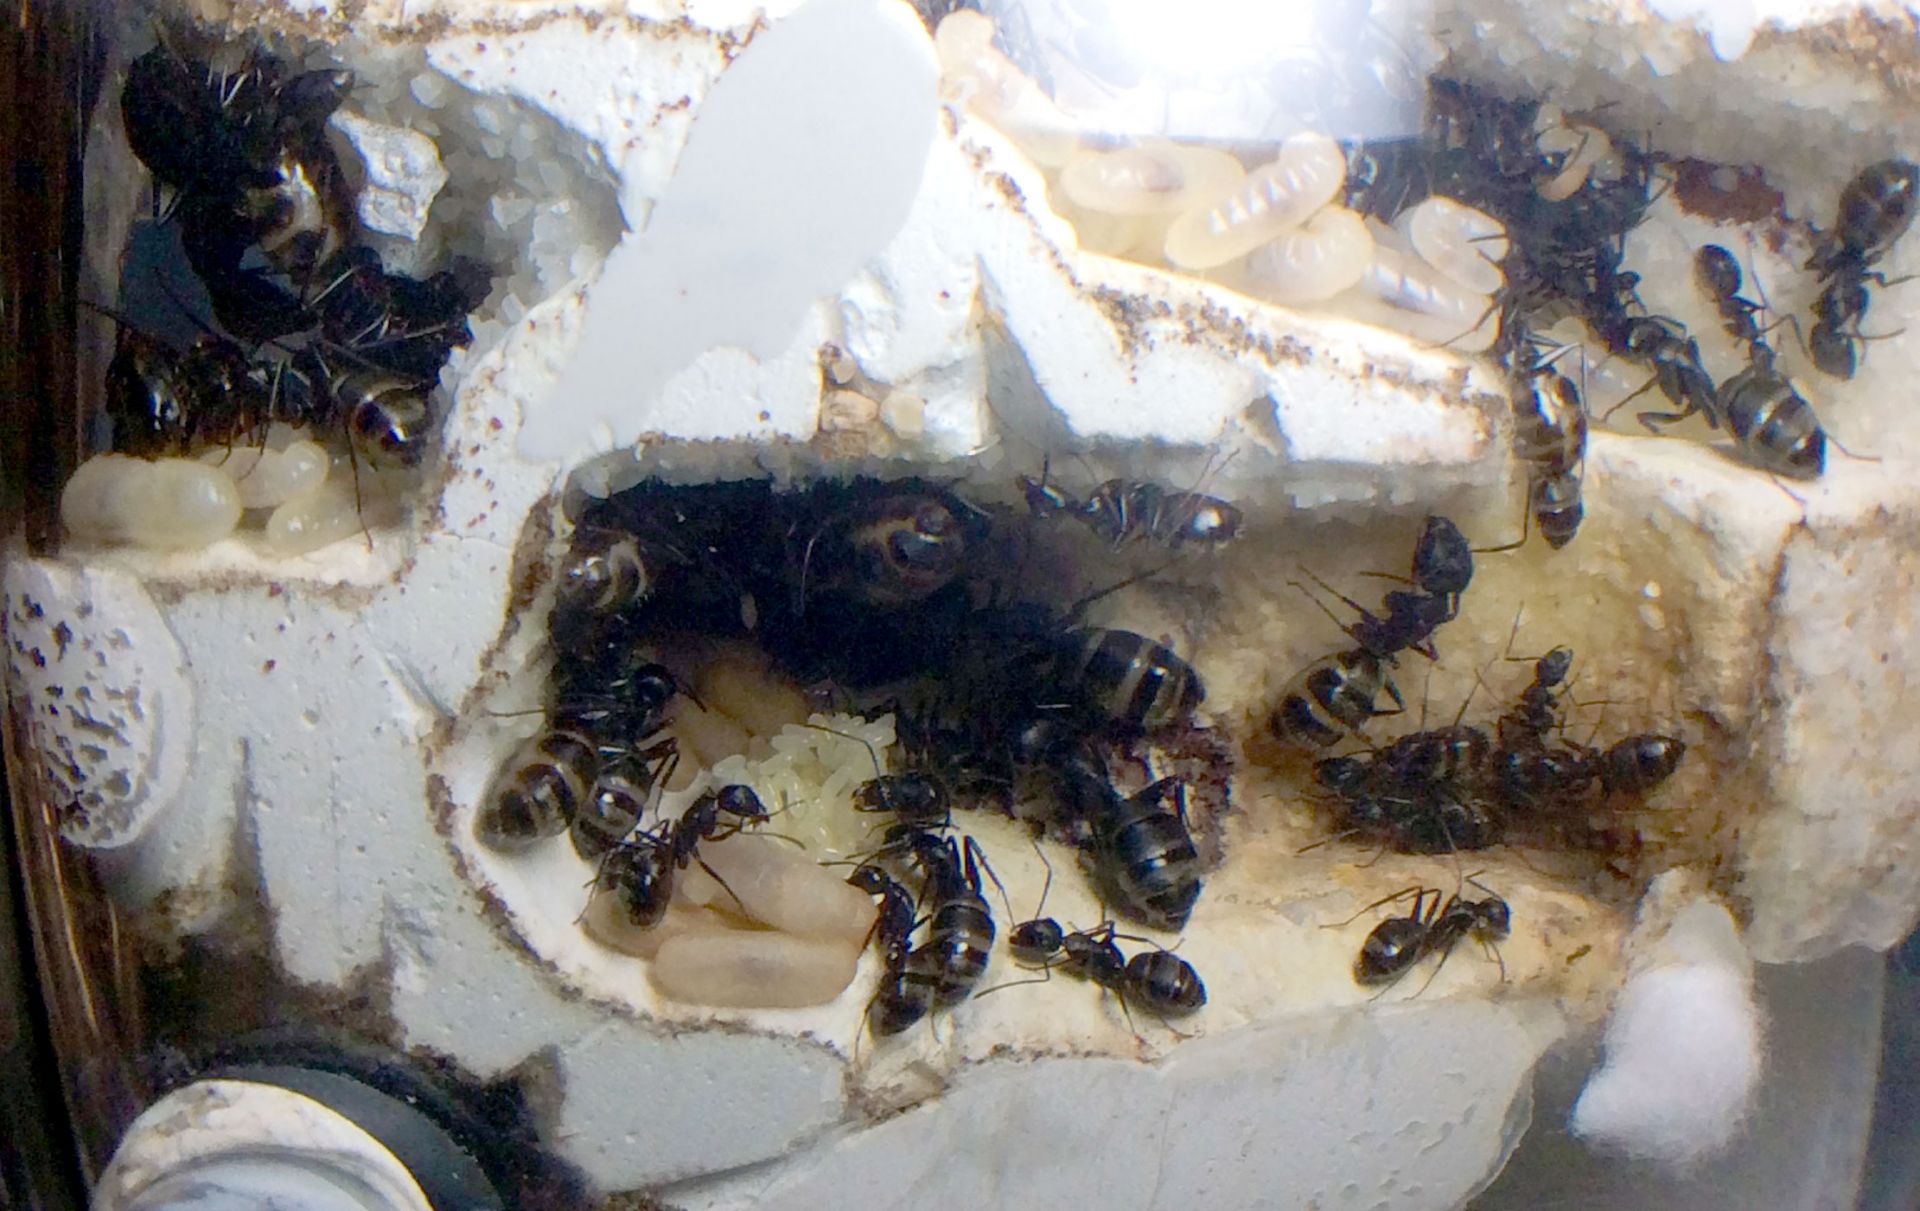
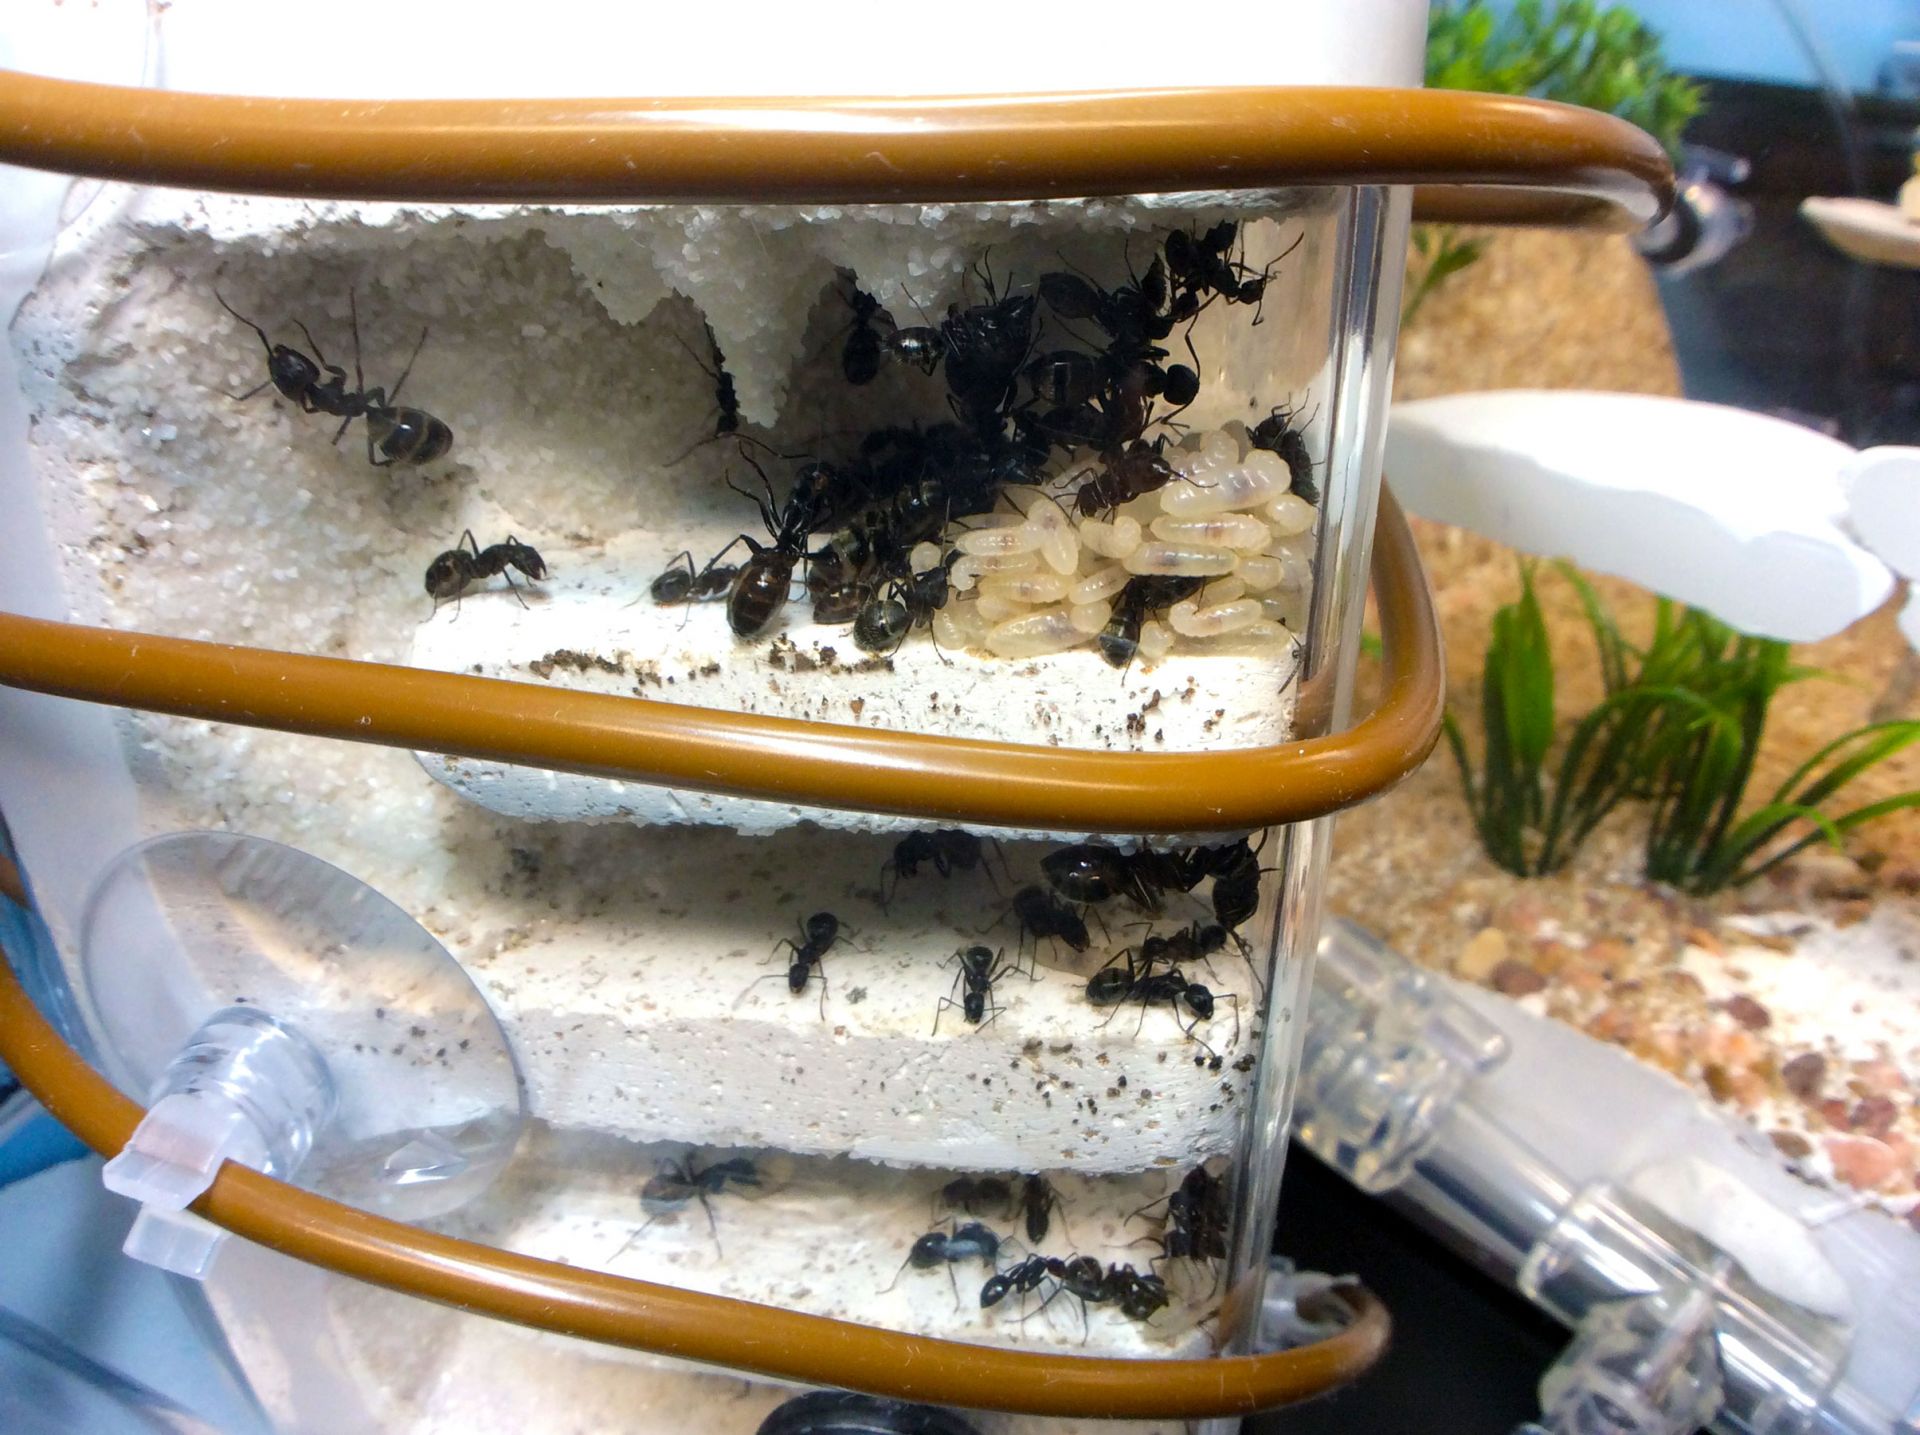
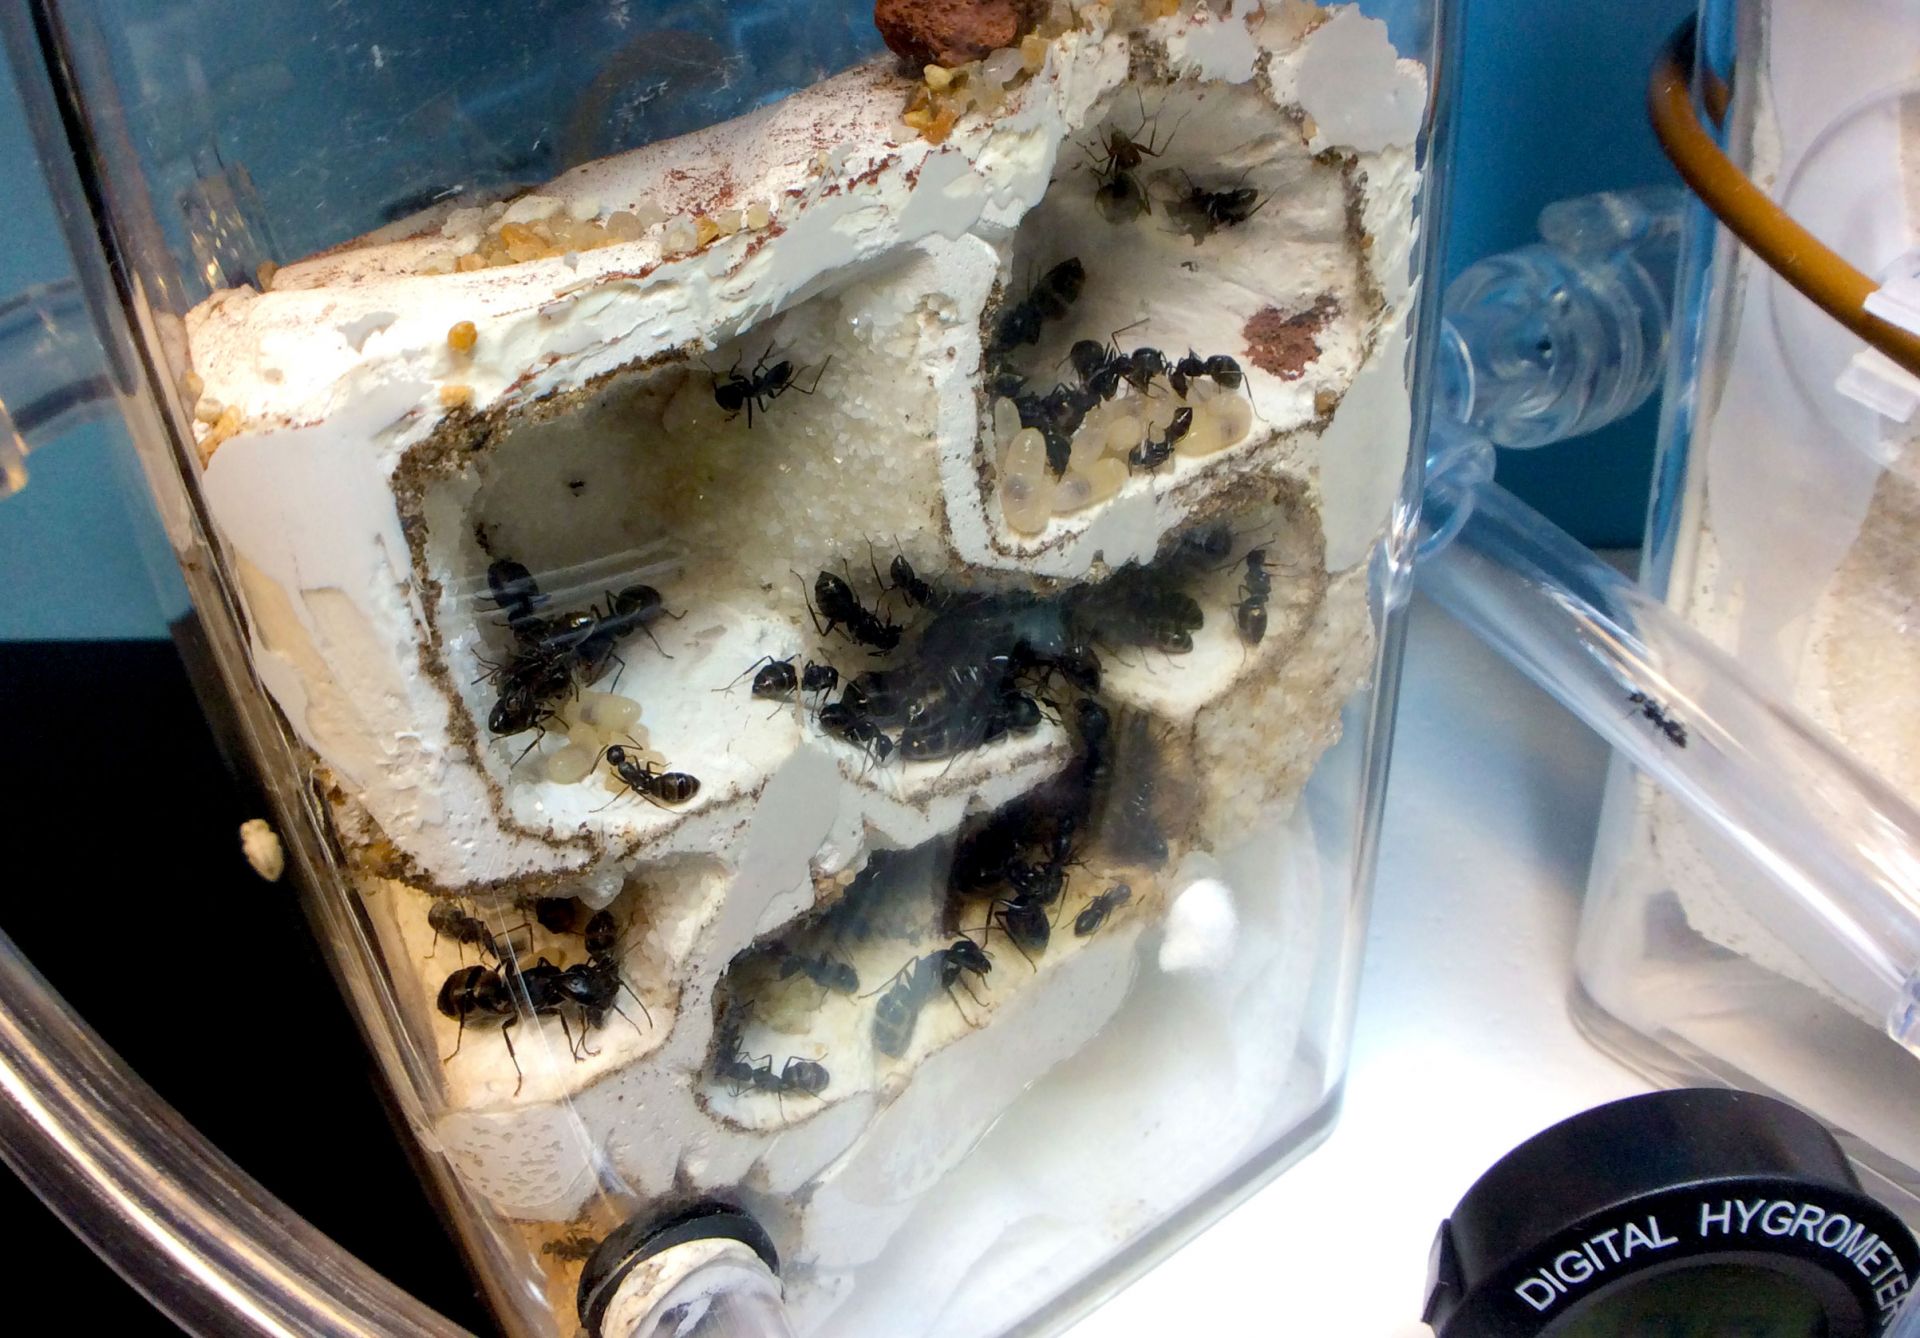
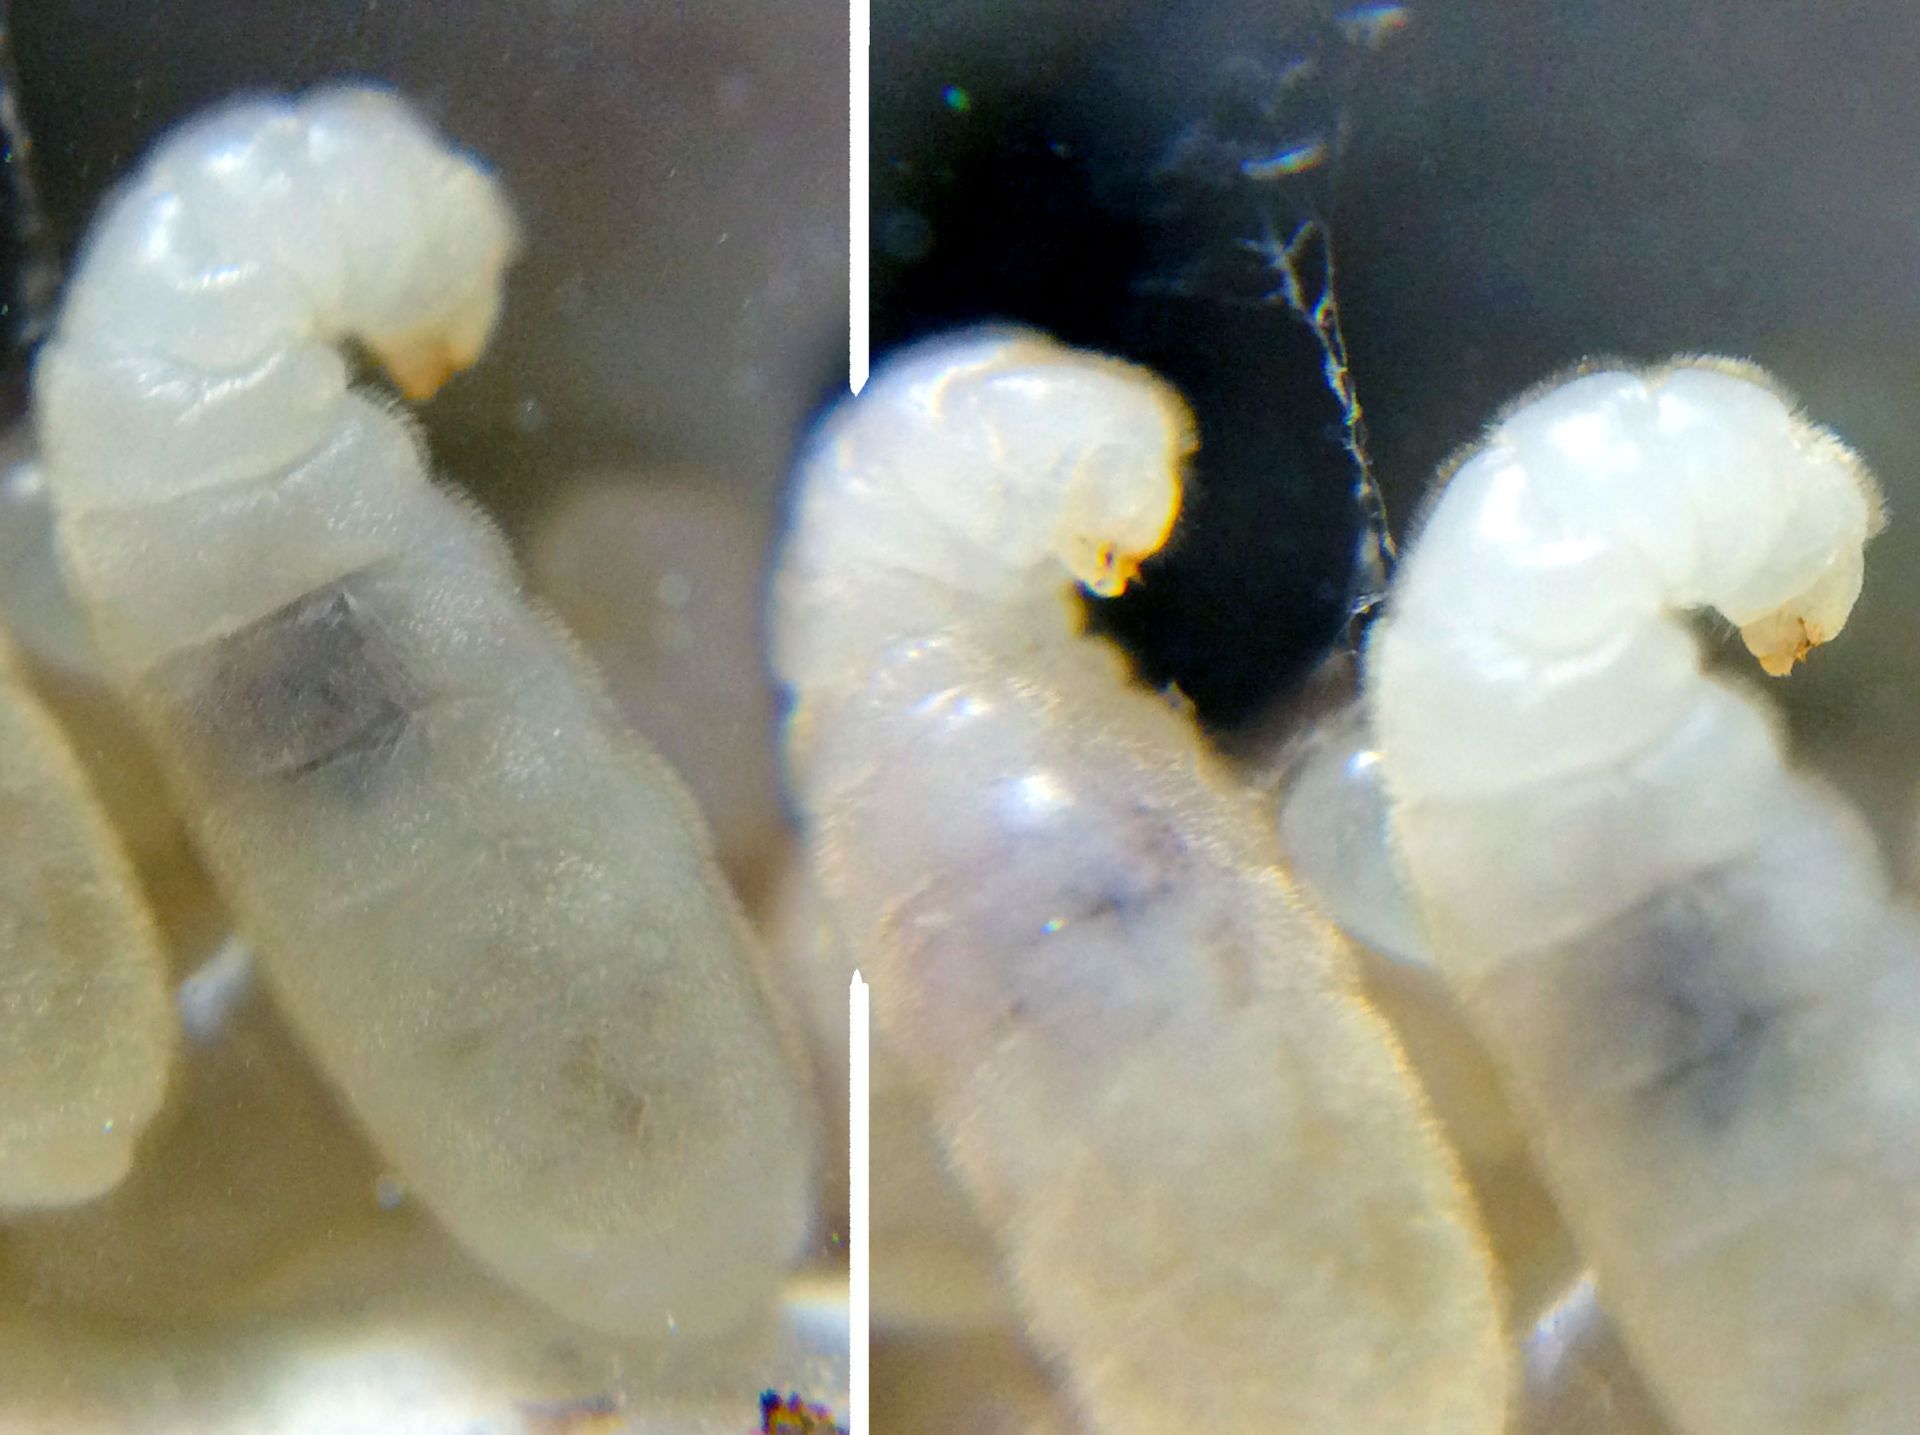
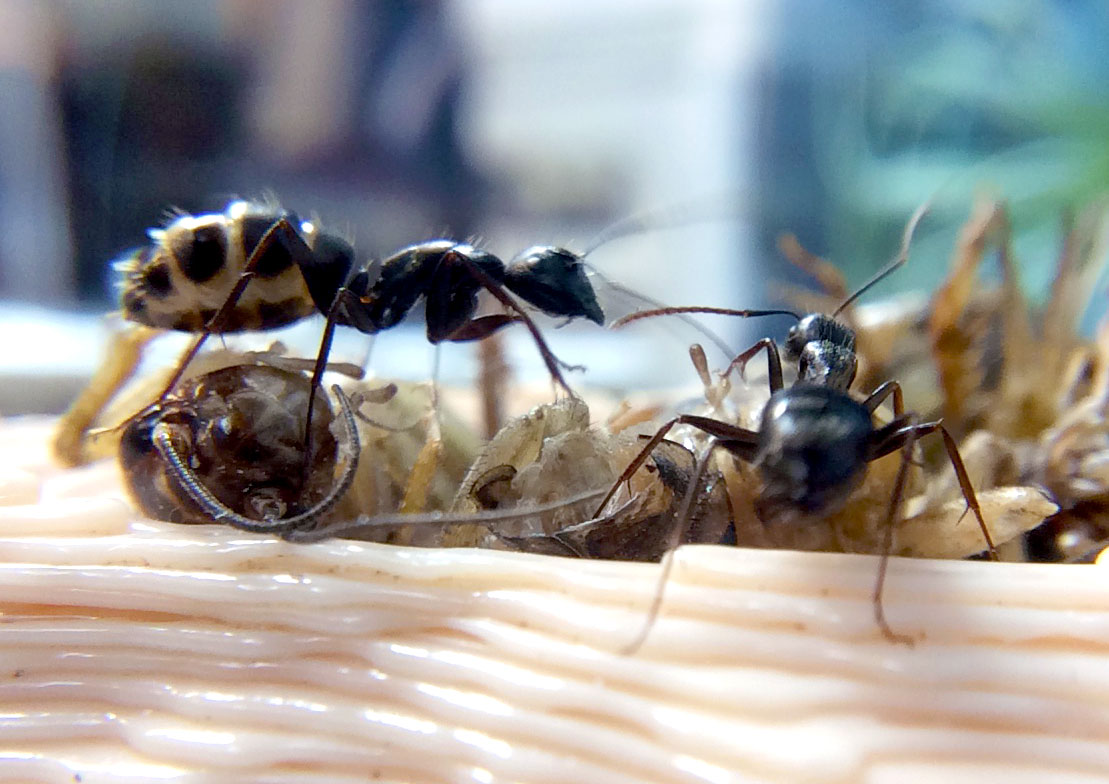
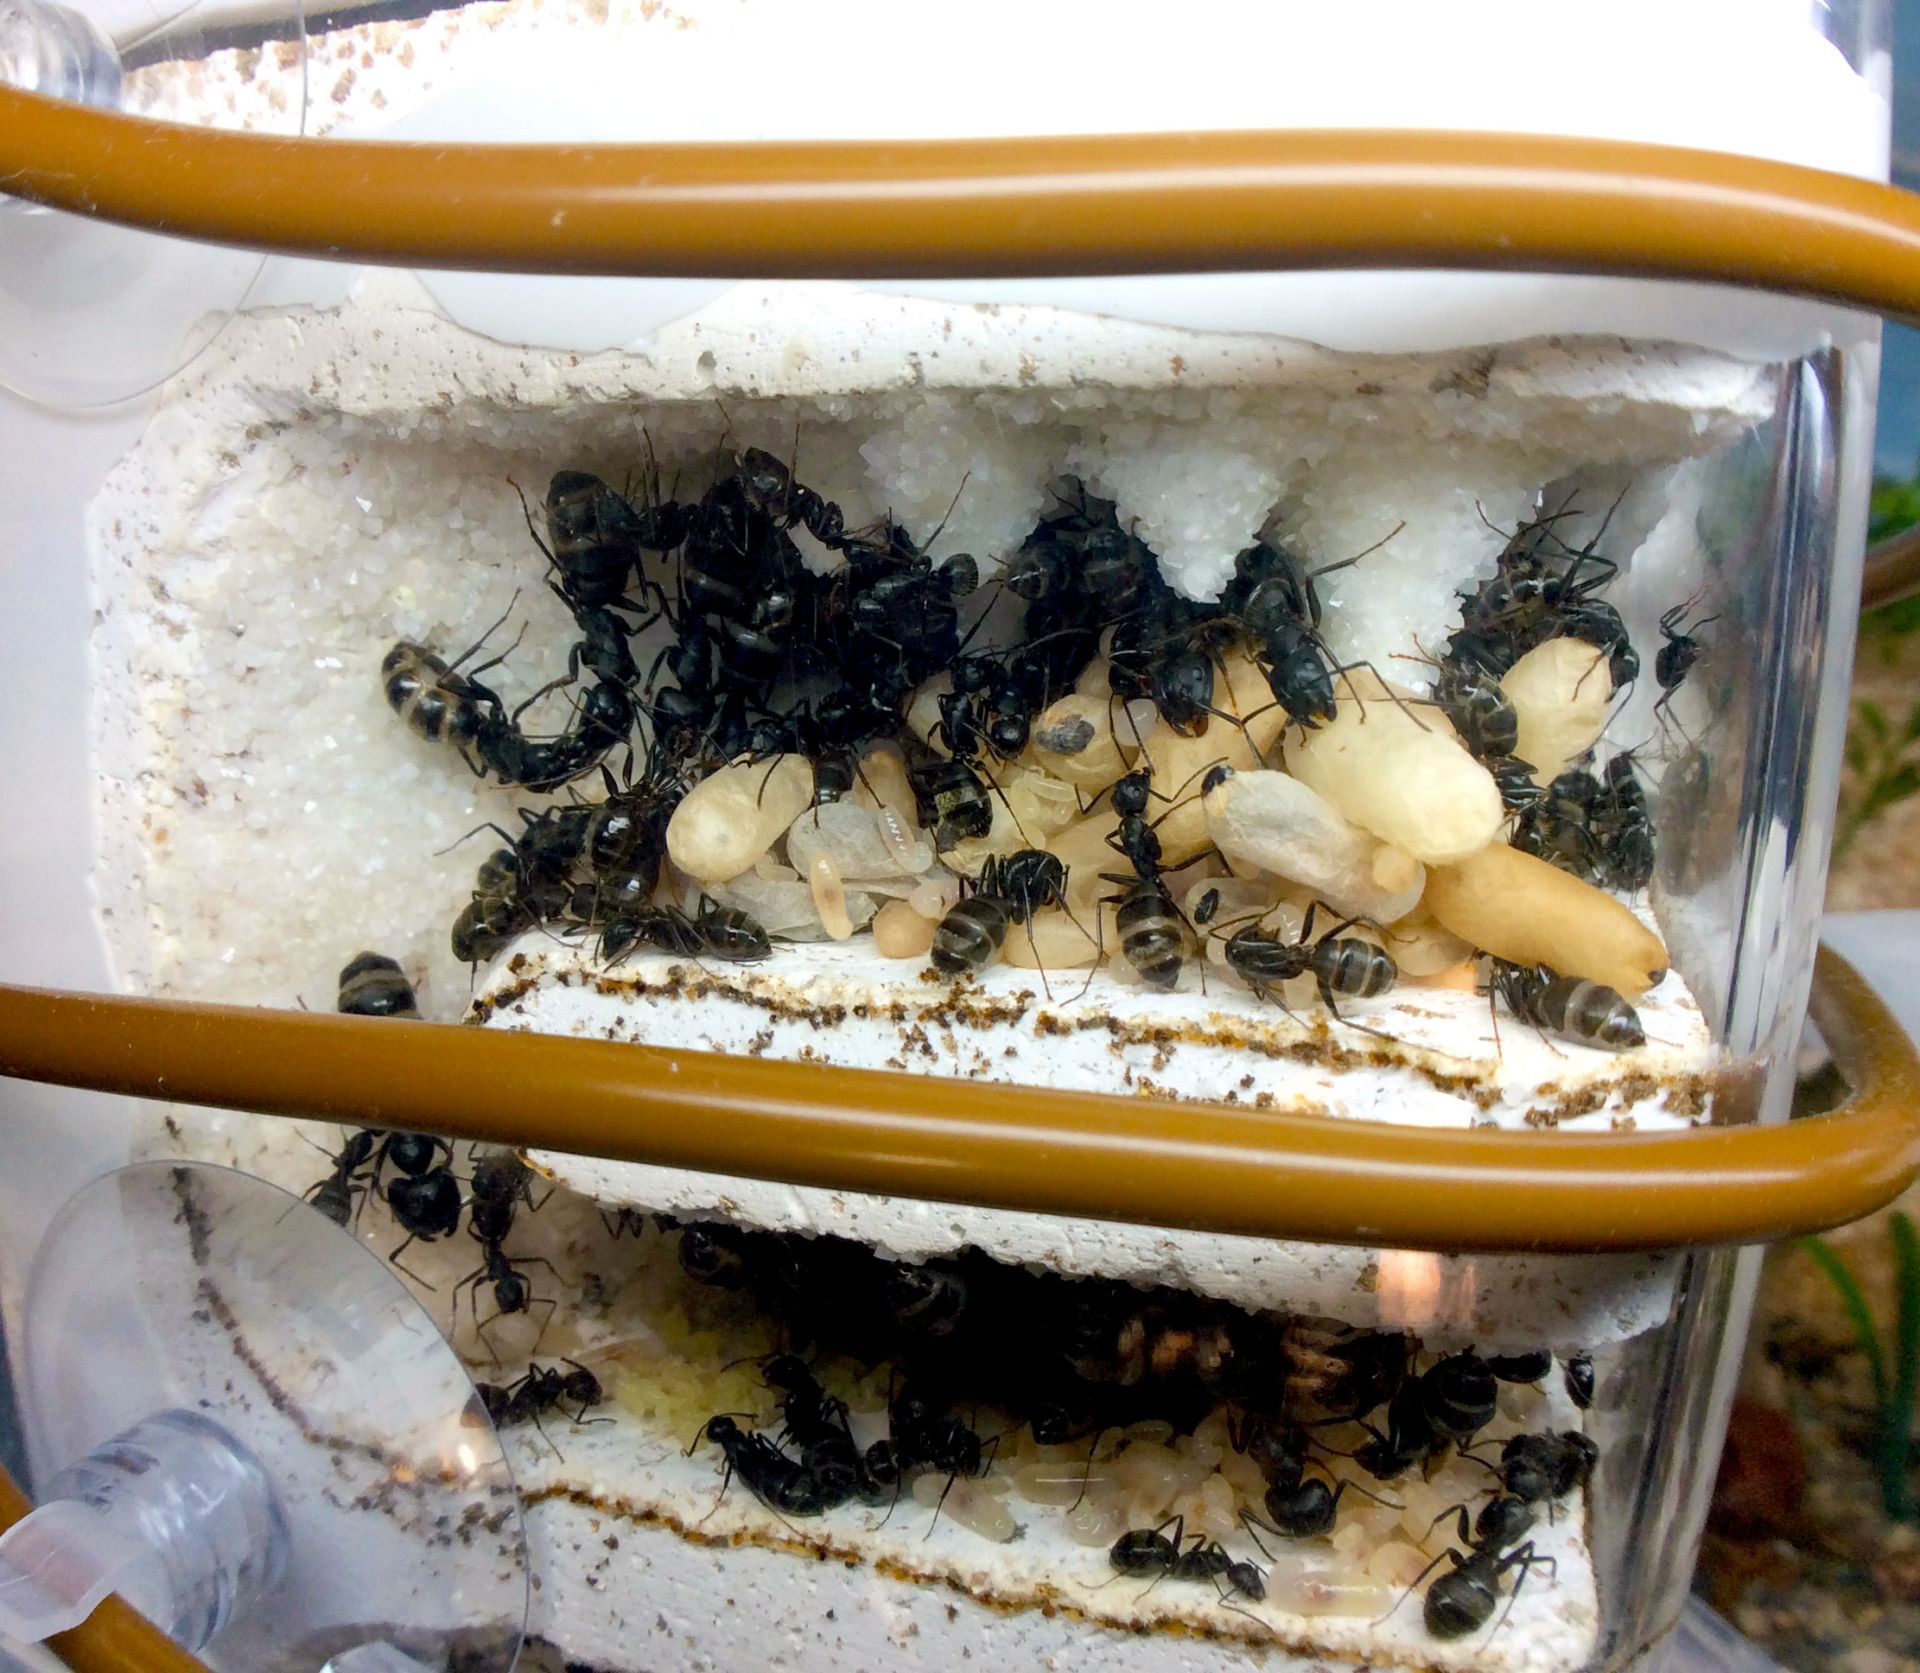
Their larvae have been fairly uniform, no noticeable growth or pupae yet. Also been losing a few ants every few weeks, it seems like normal die-offs as their bodies are found anywhere outside the nest like they died on that spot. Some of them are piled in thrash but most of the bodies are randomly strewn about and I clean up the ones I can. I’m anticipating fast growth this year though so am planning another move later in the year into larger nests.

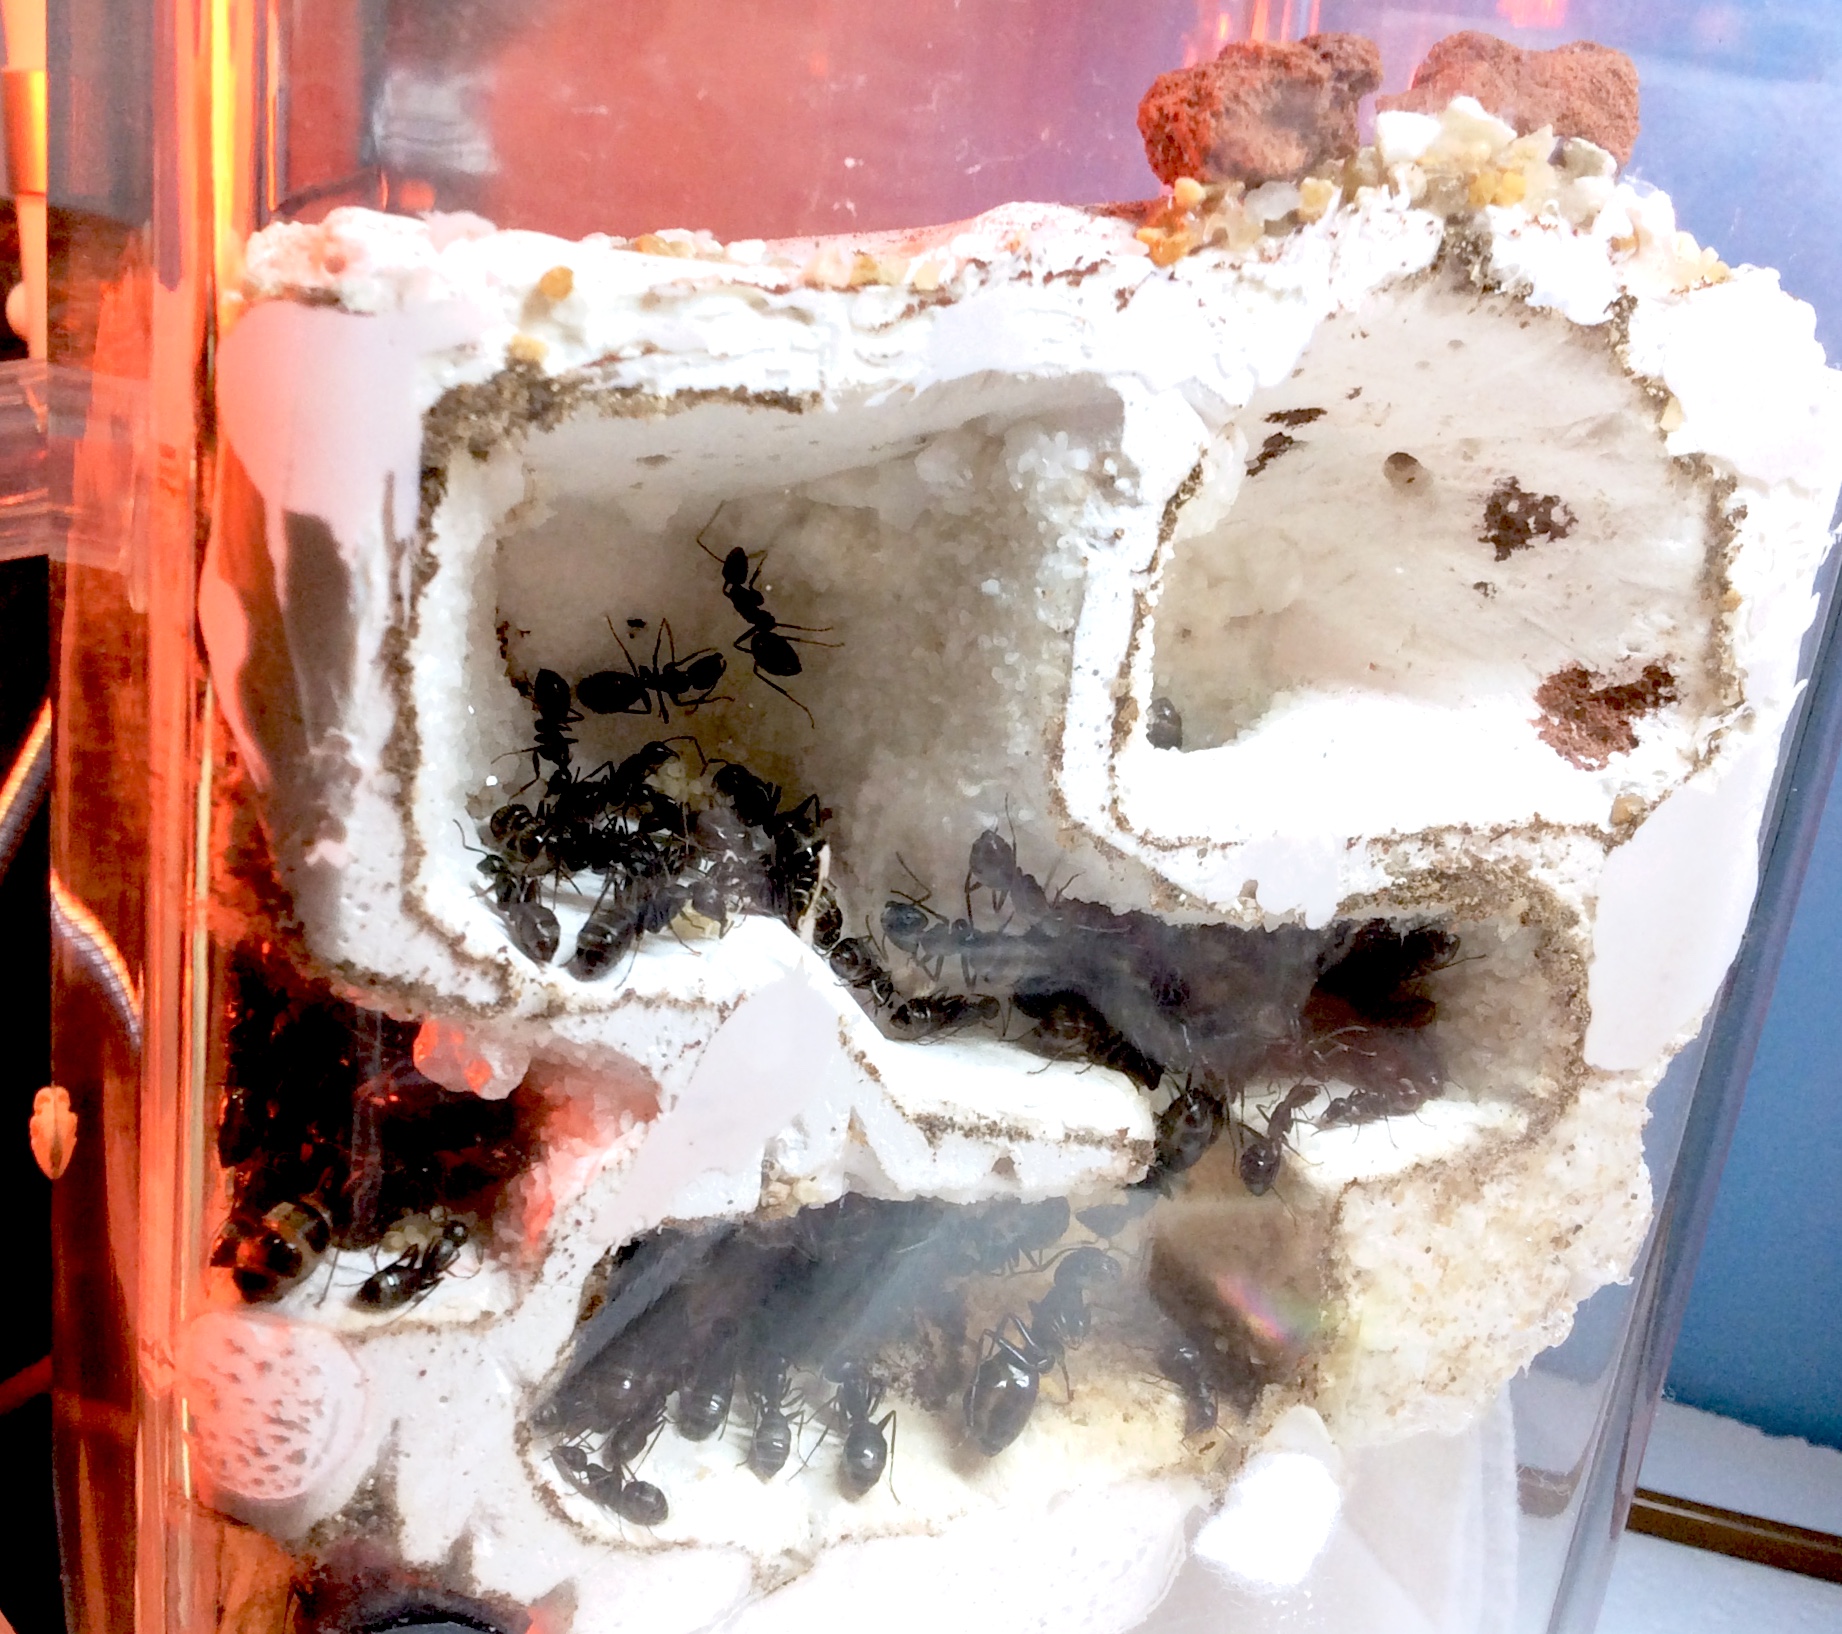
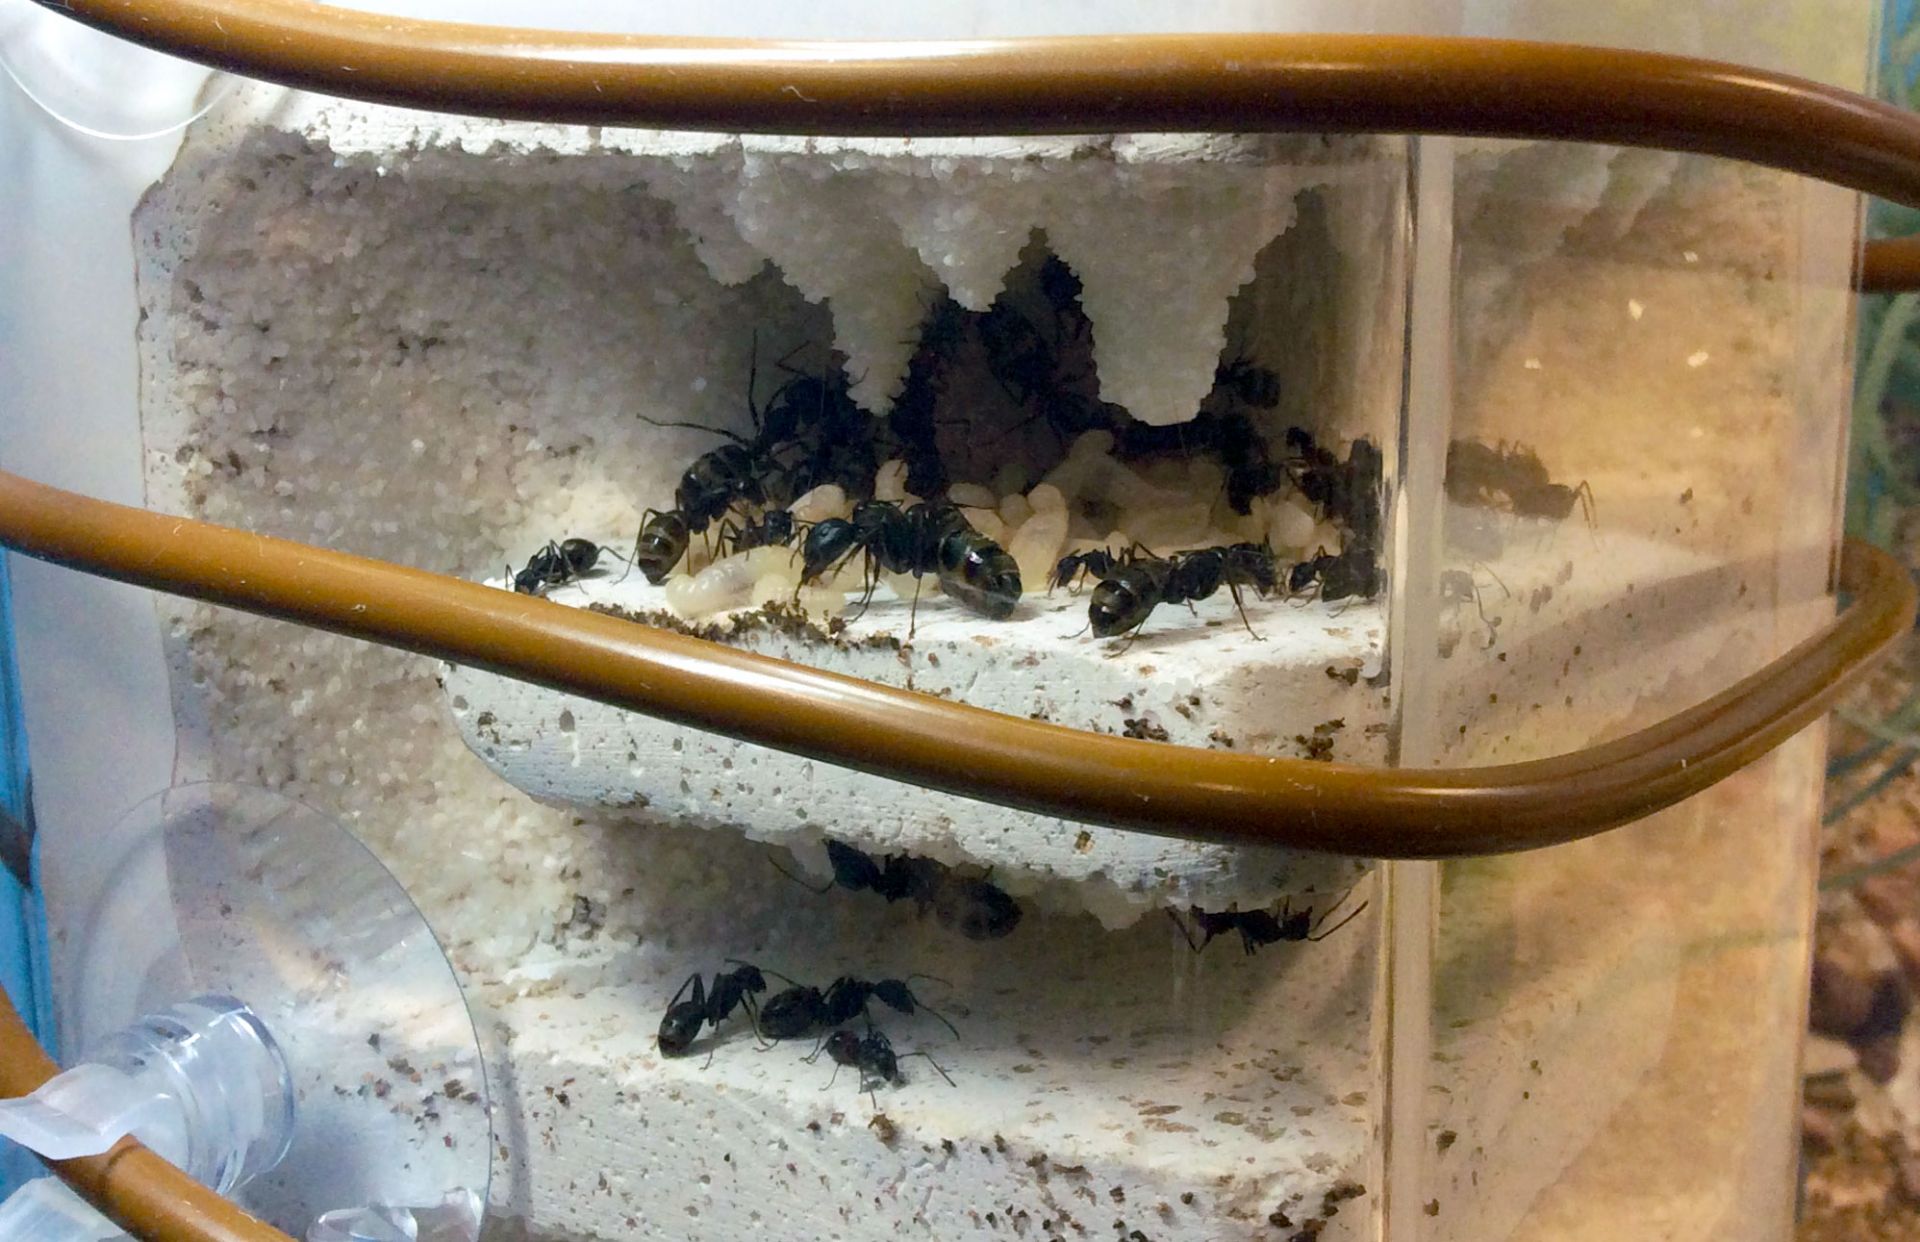
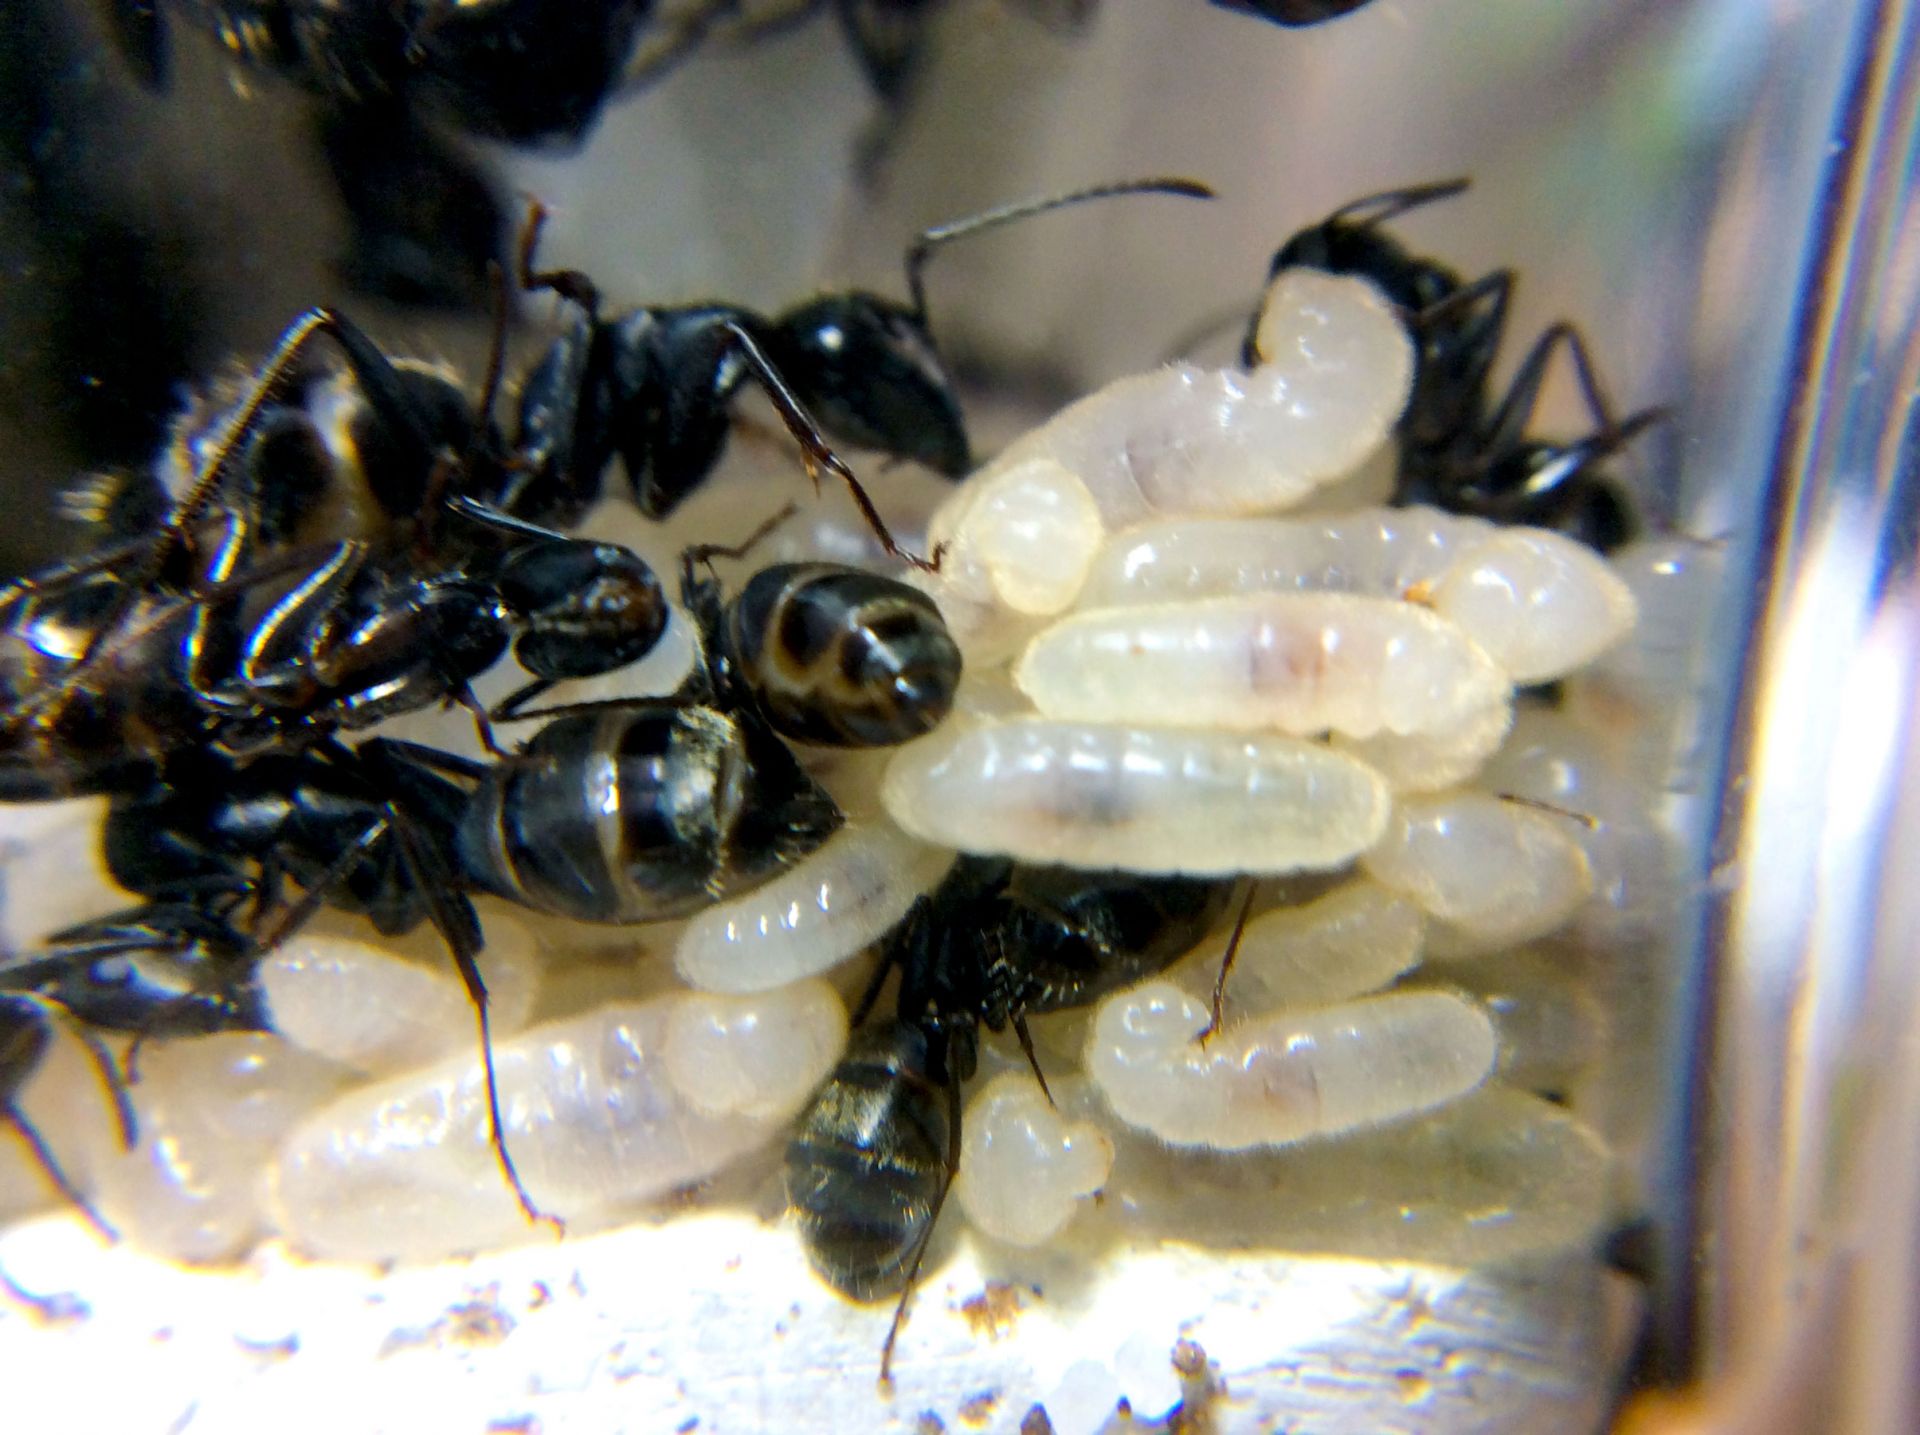
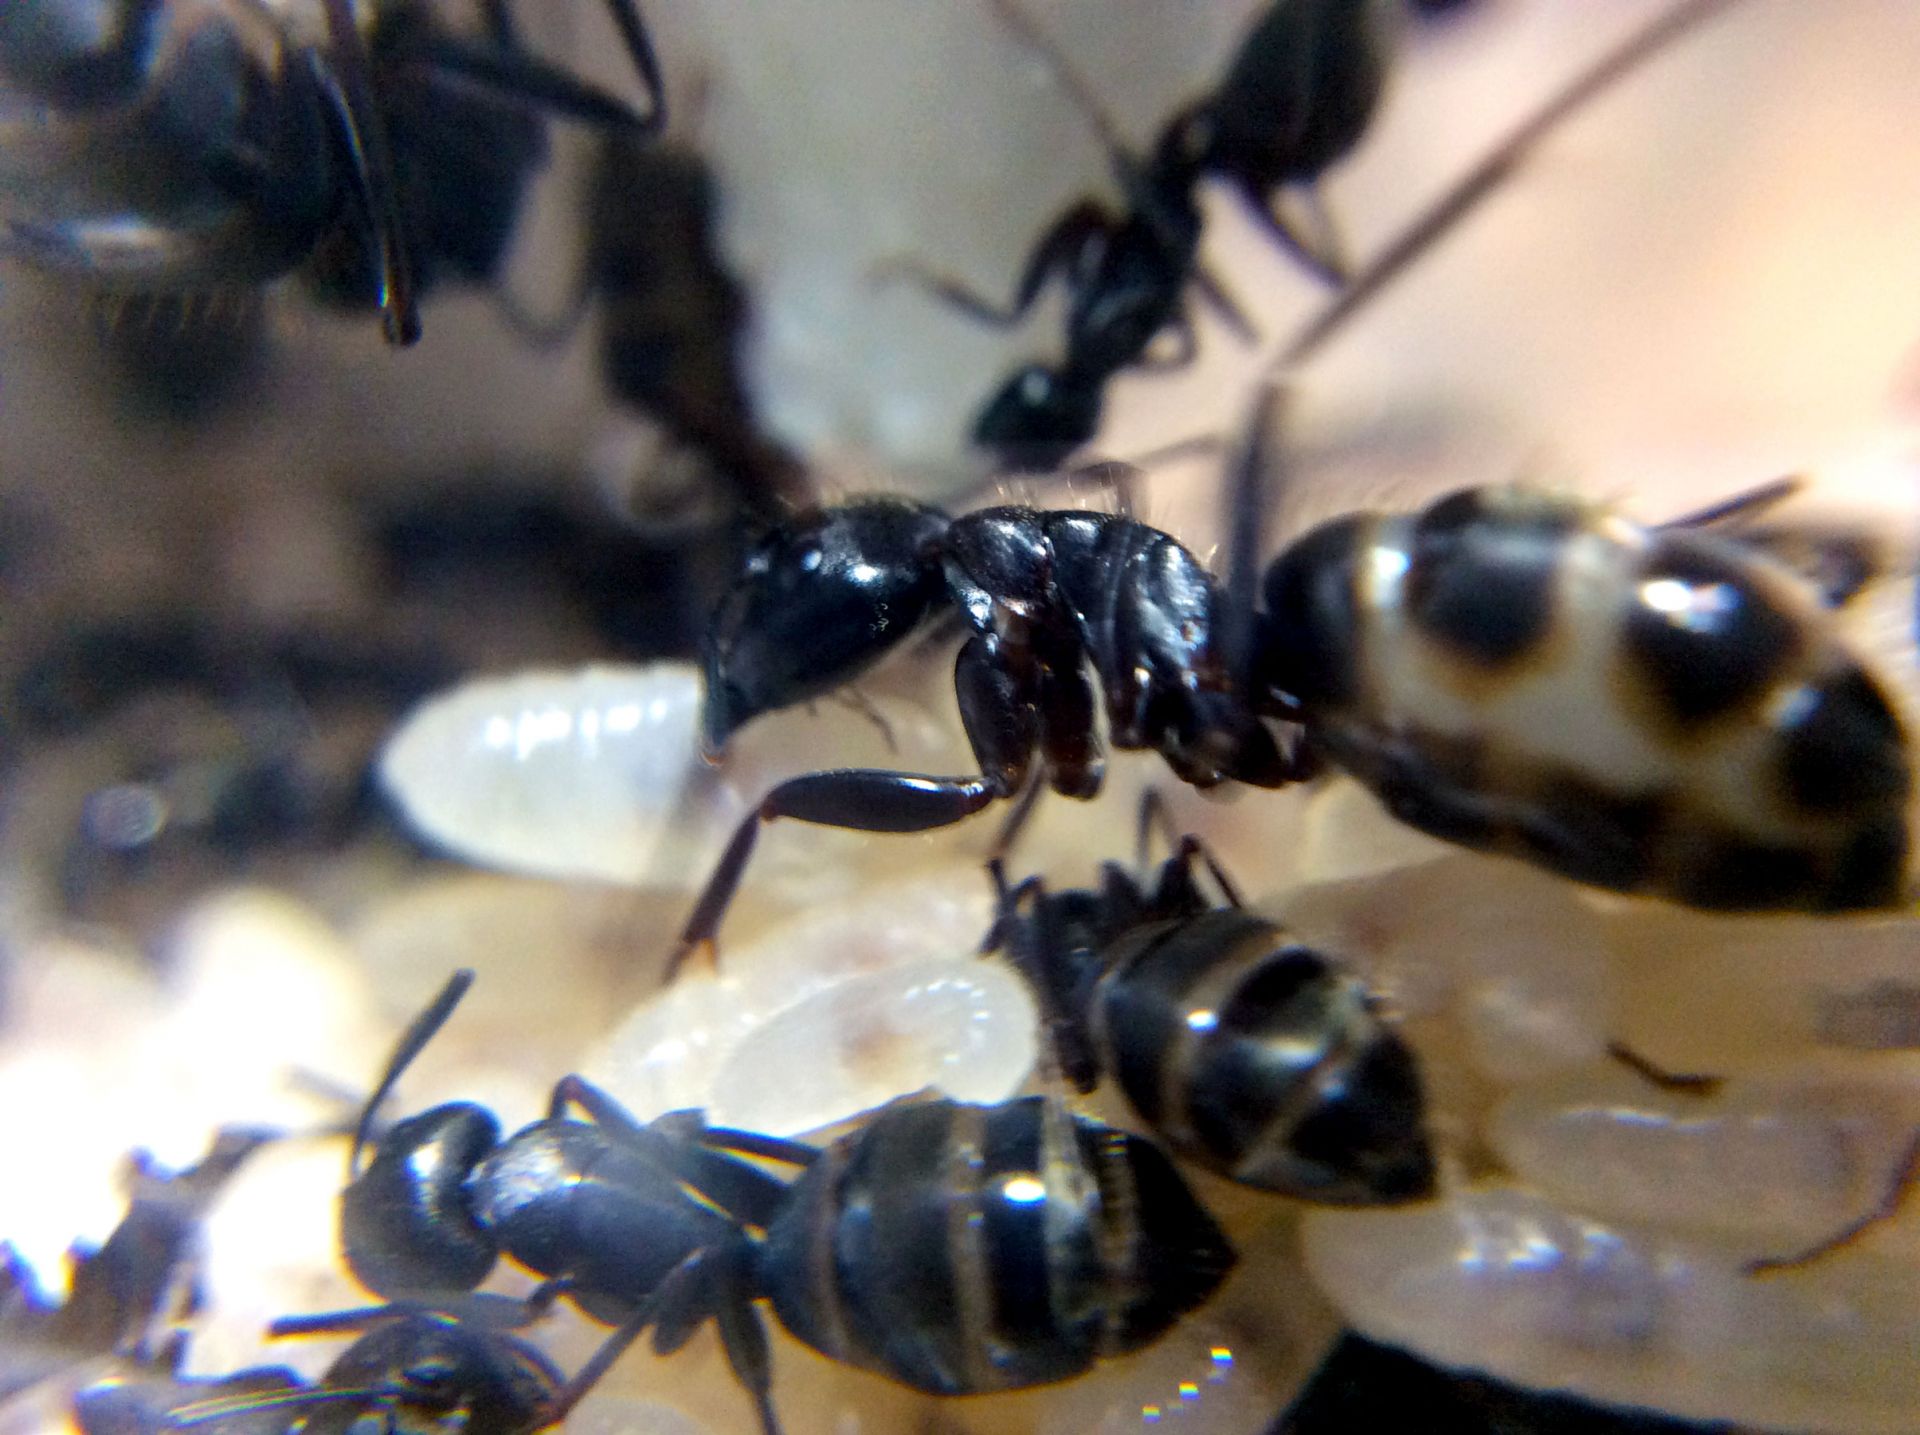
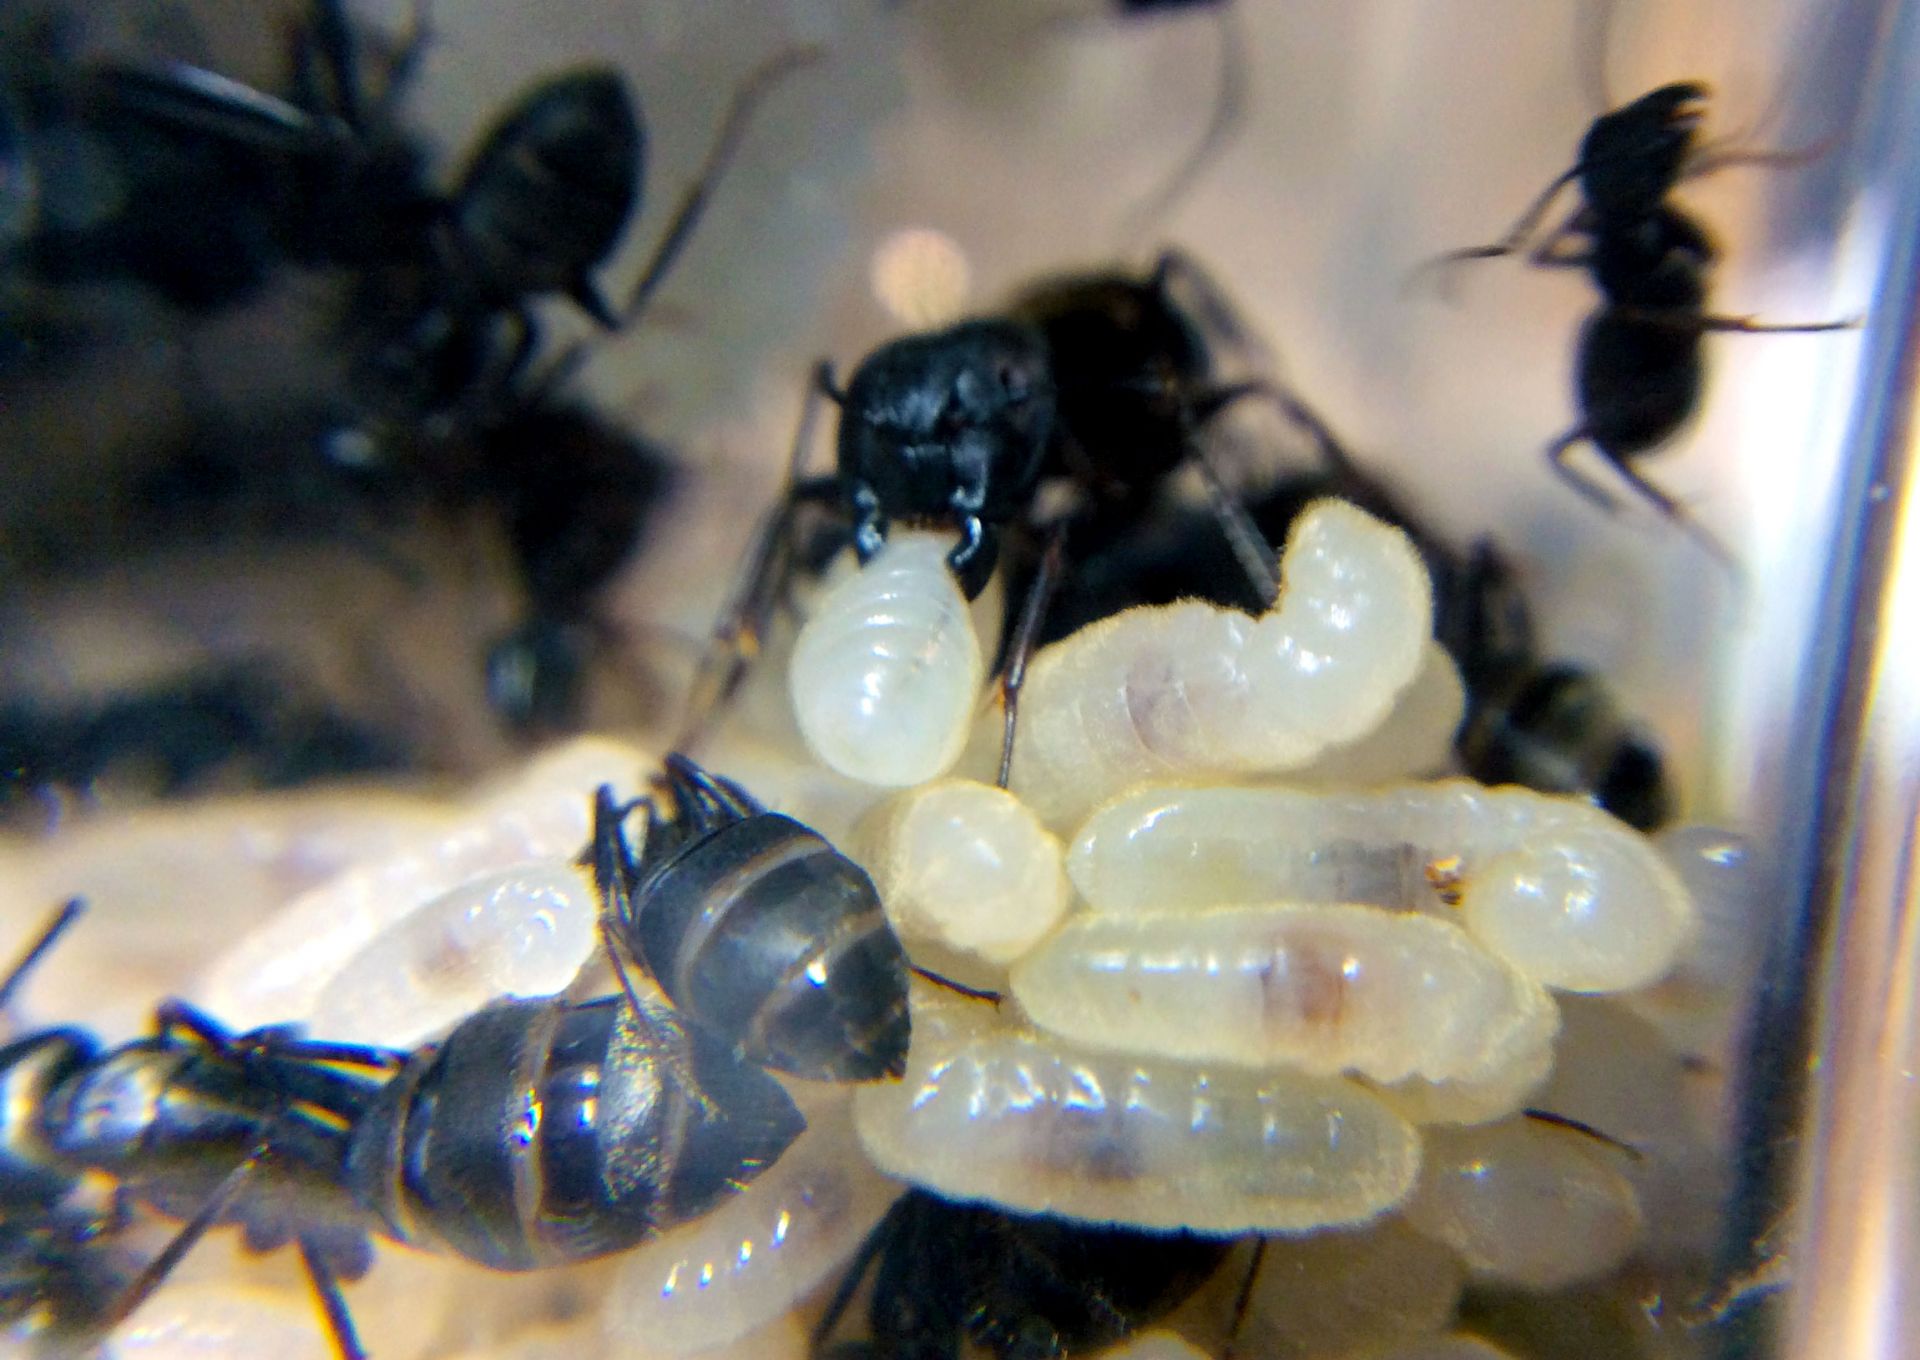
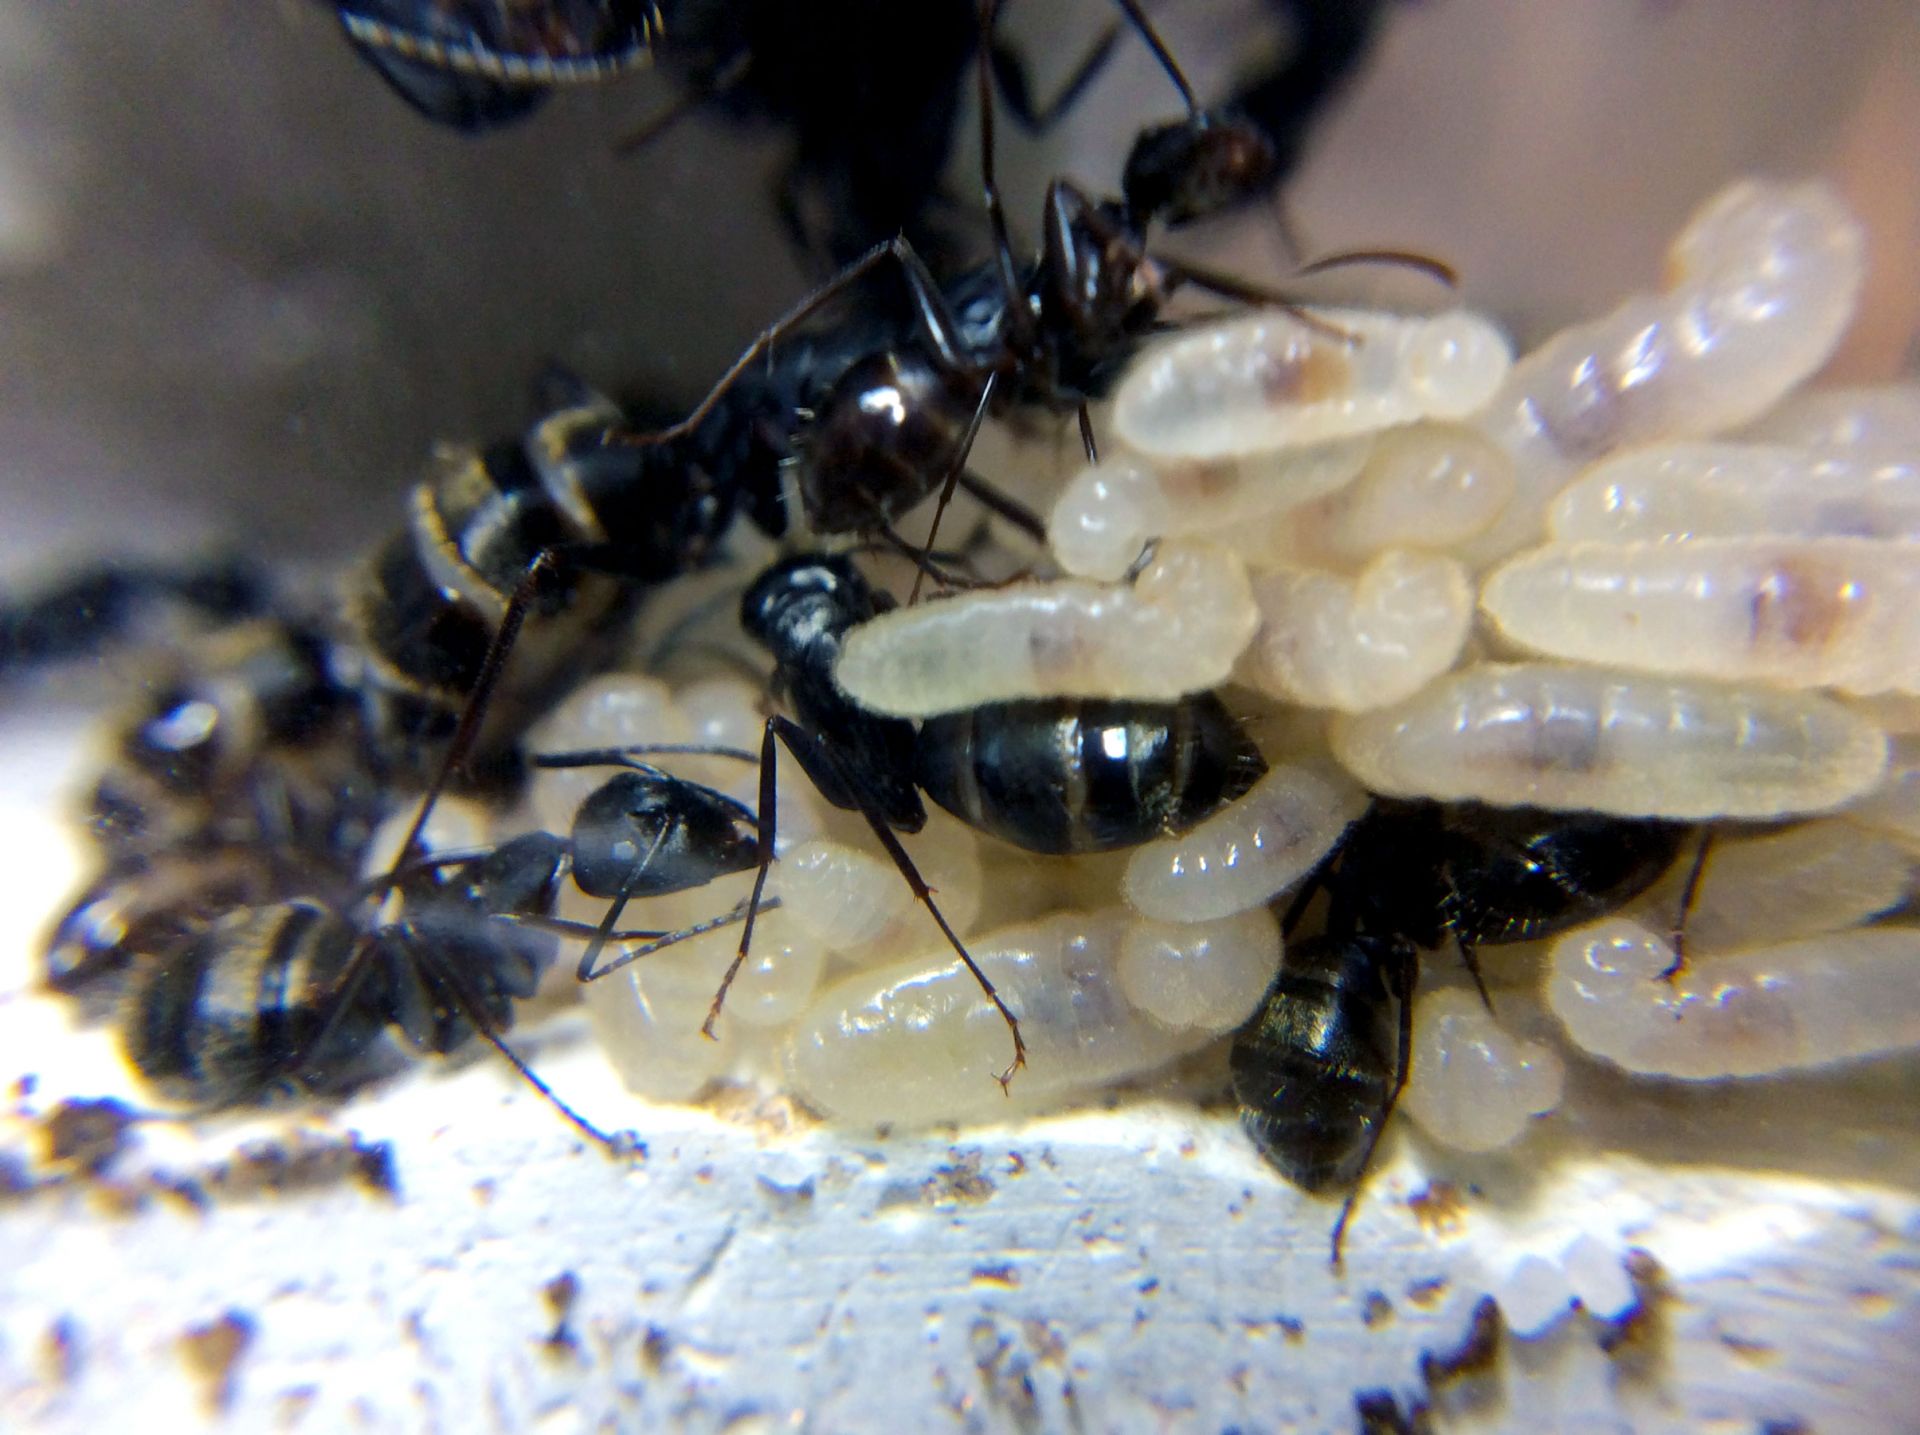
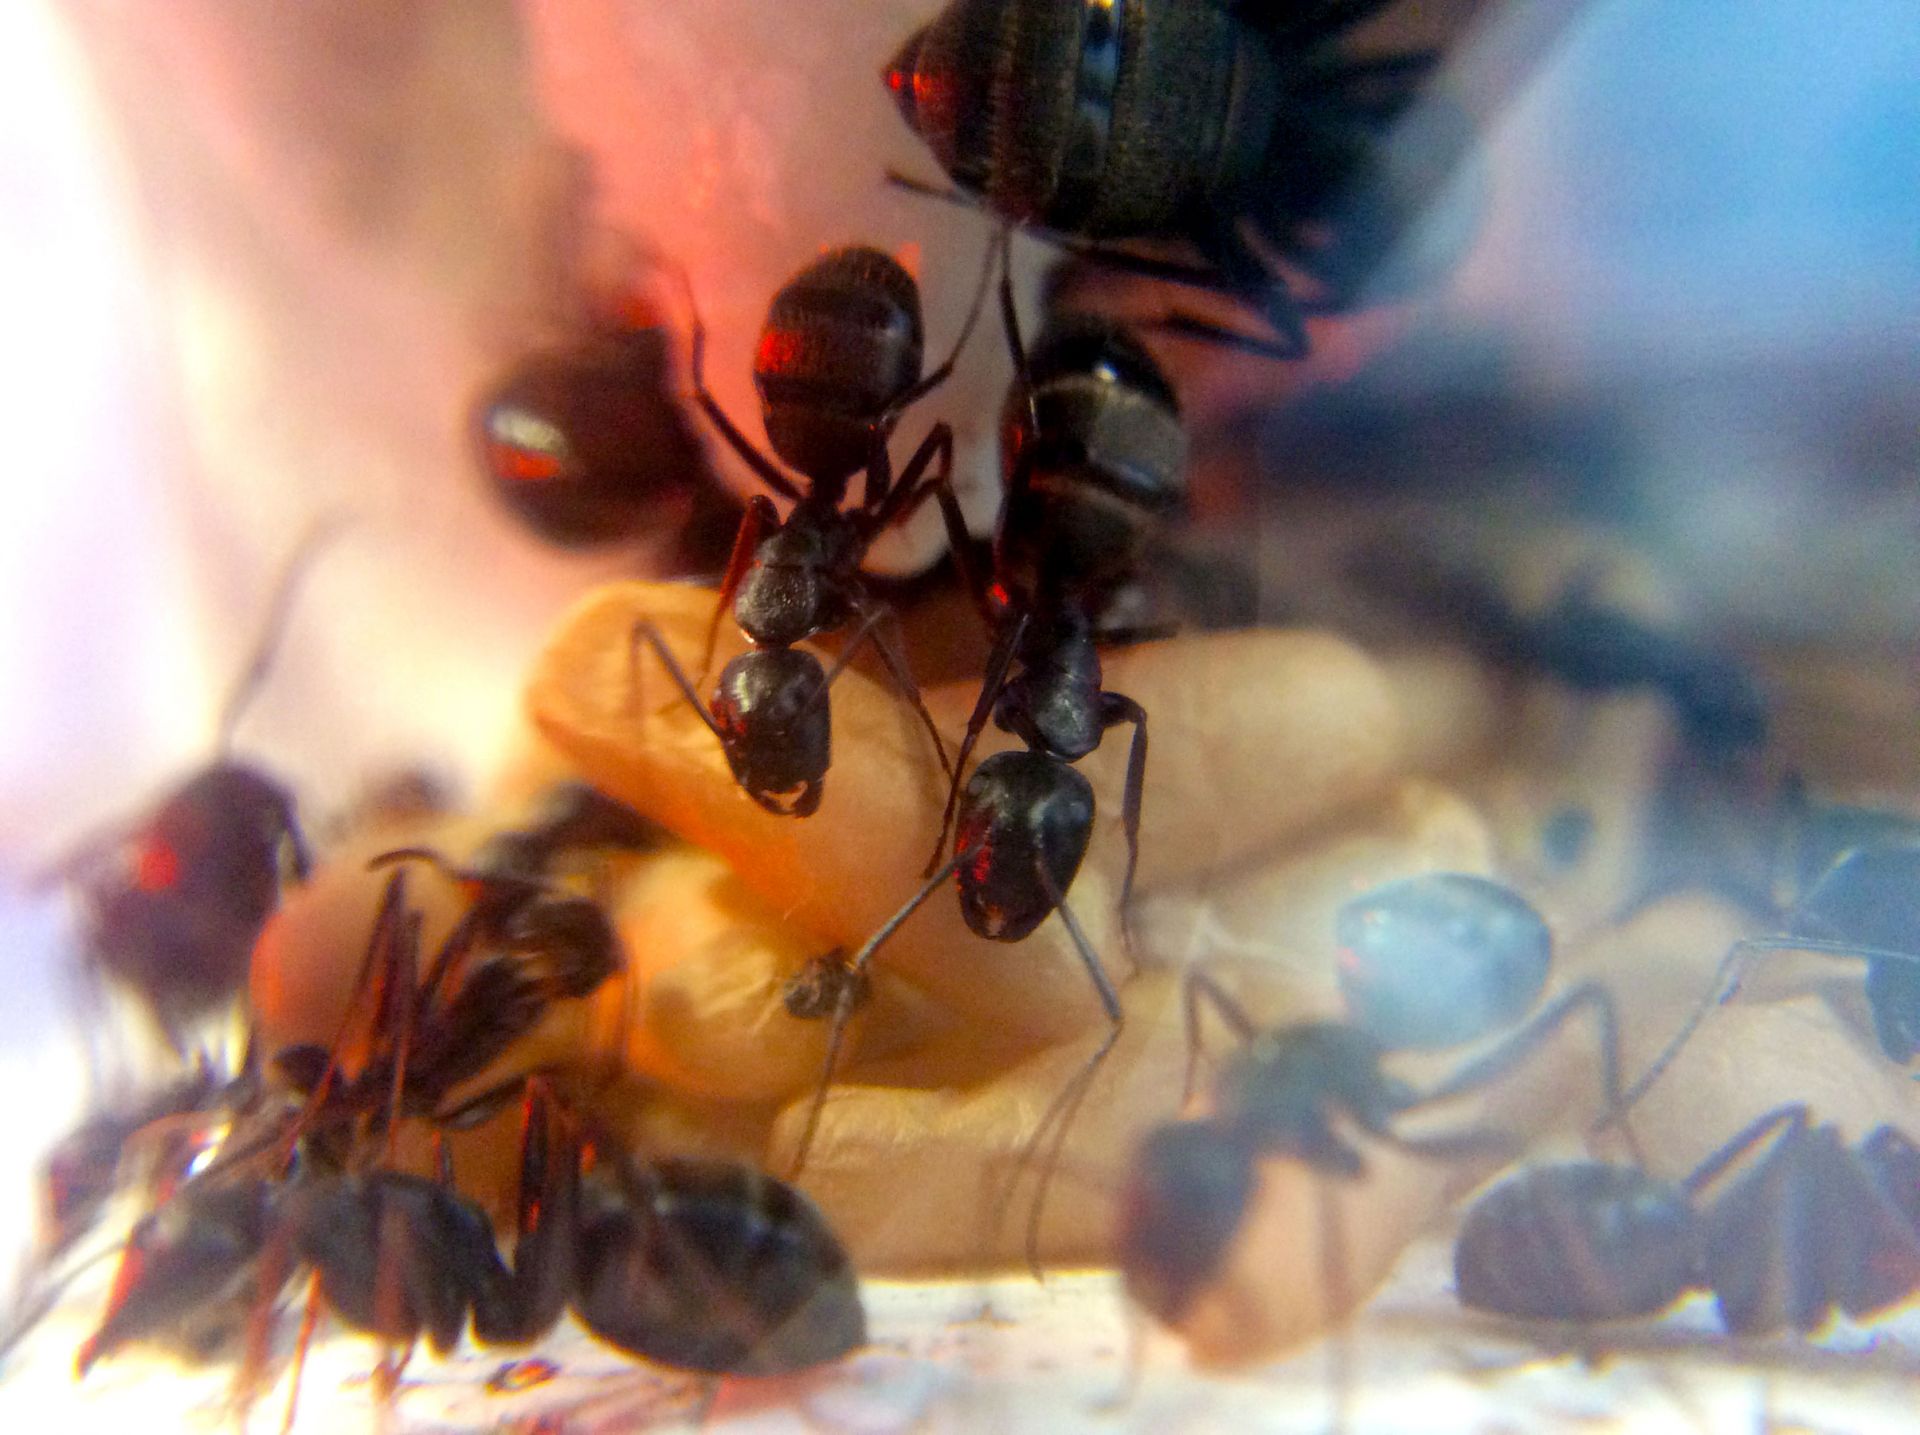
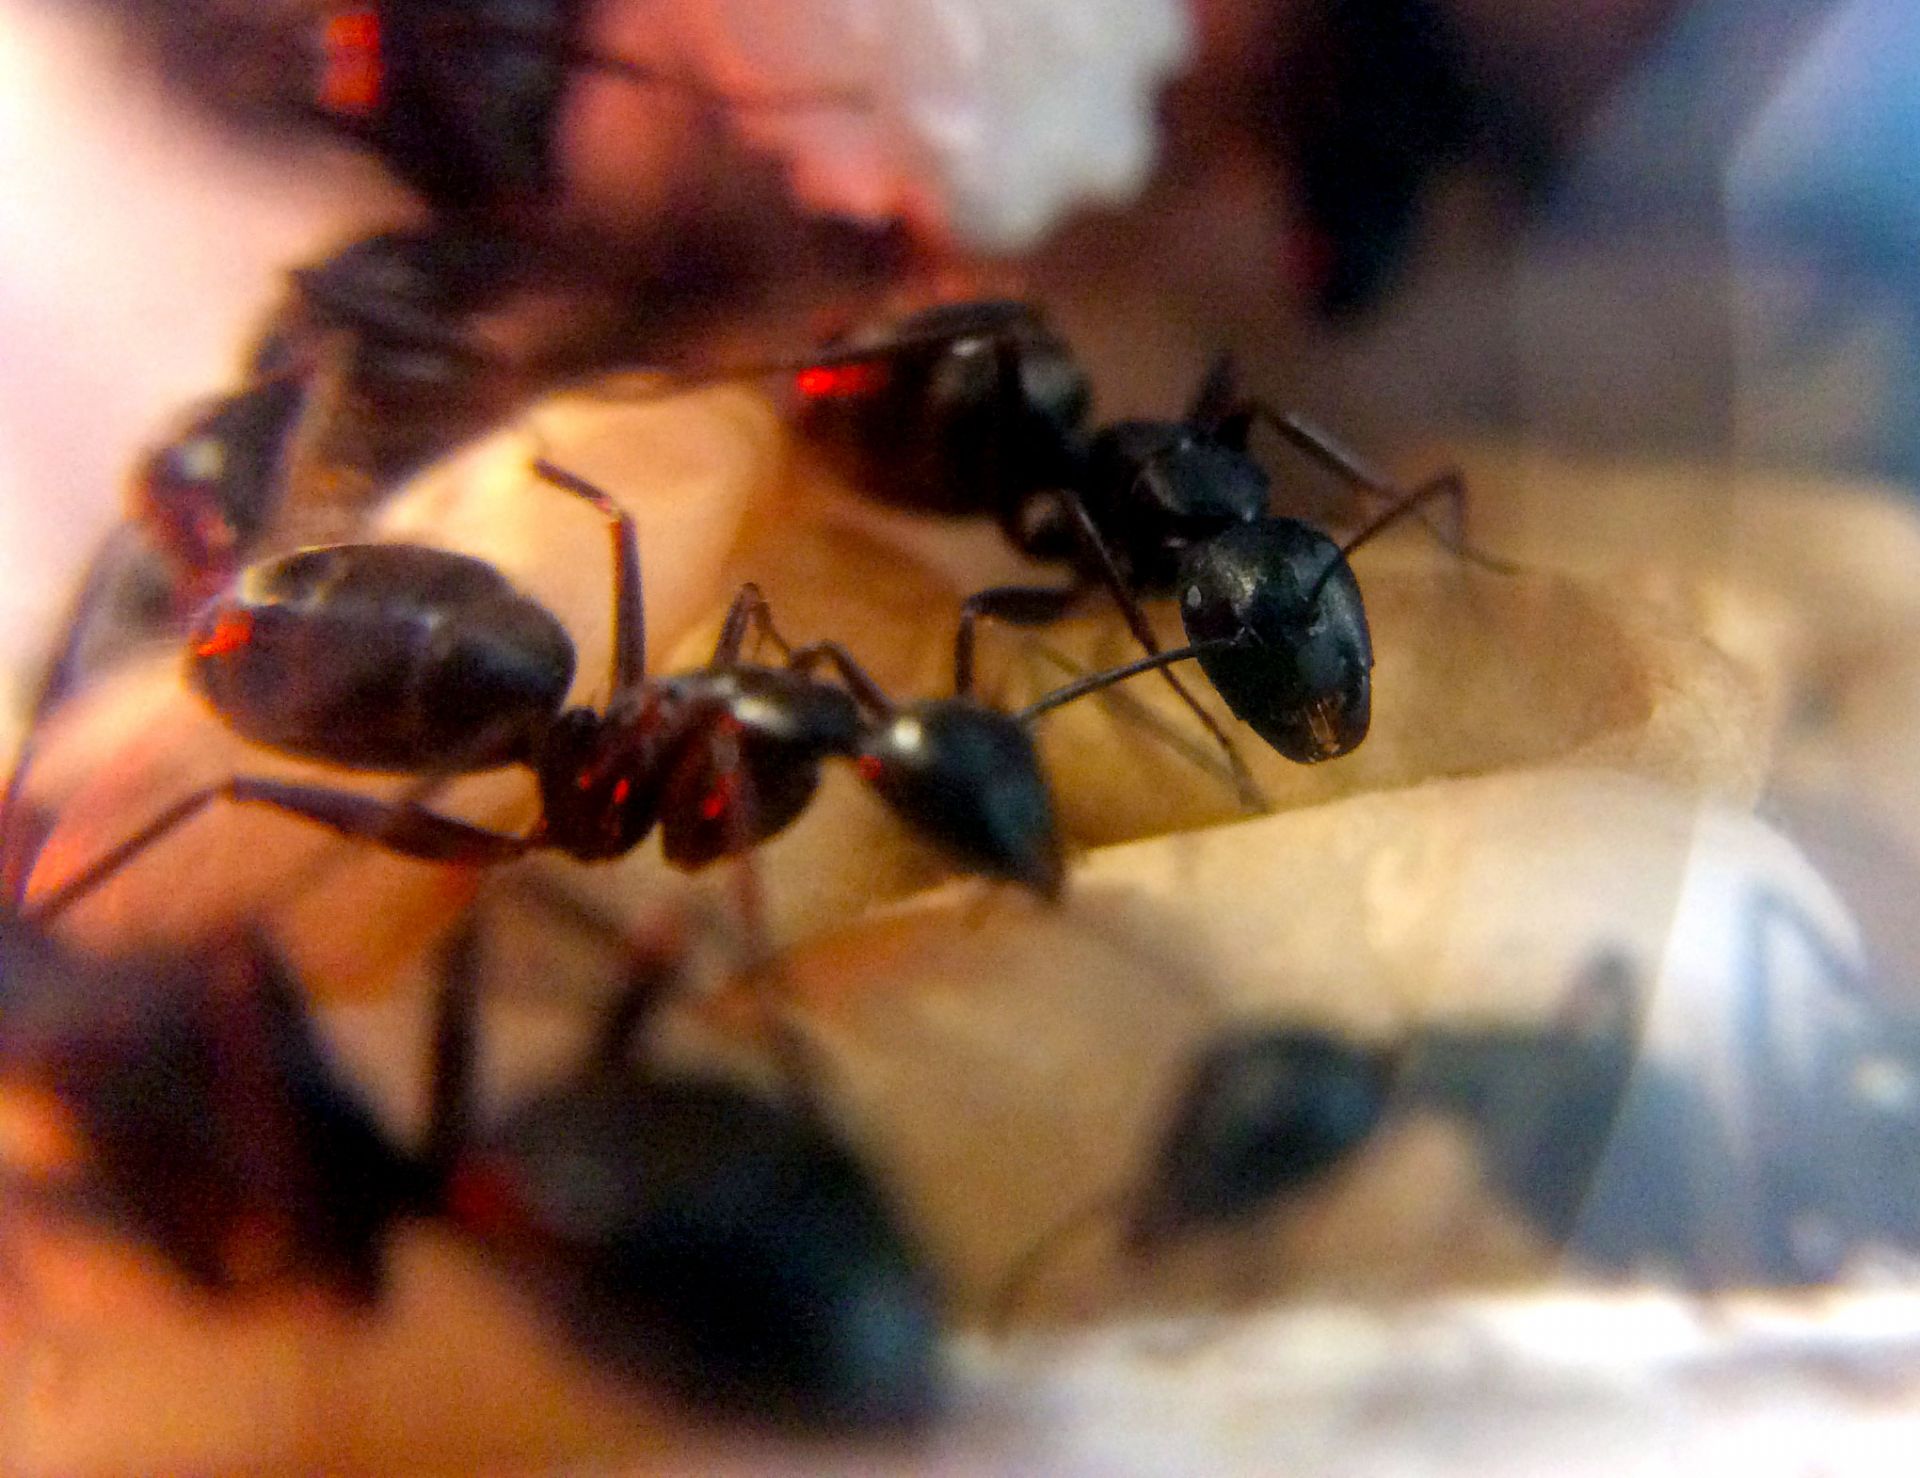
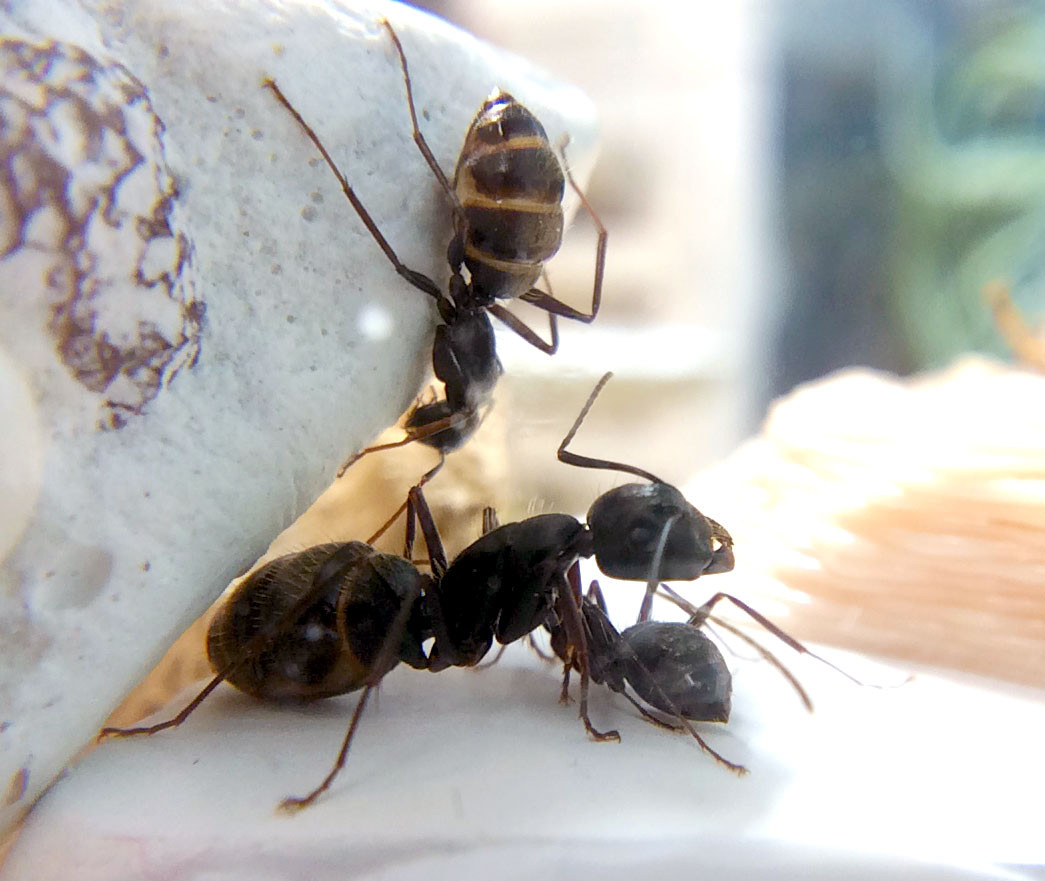
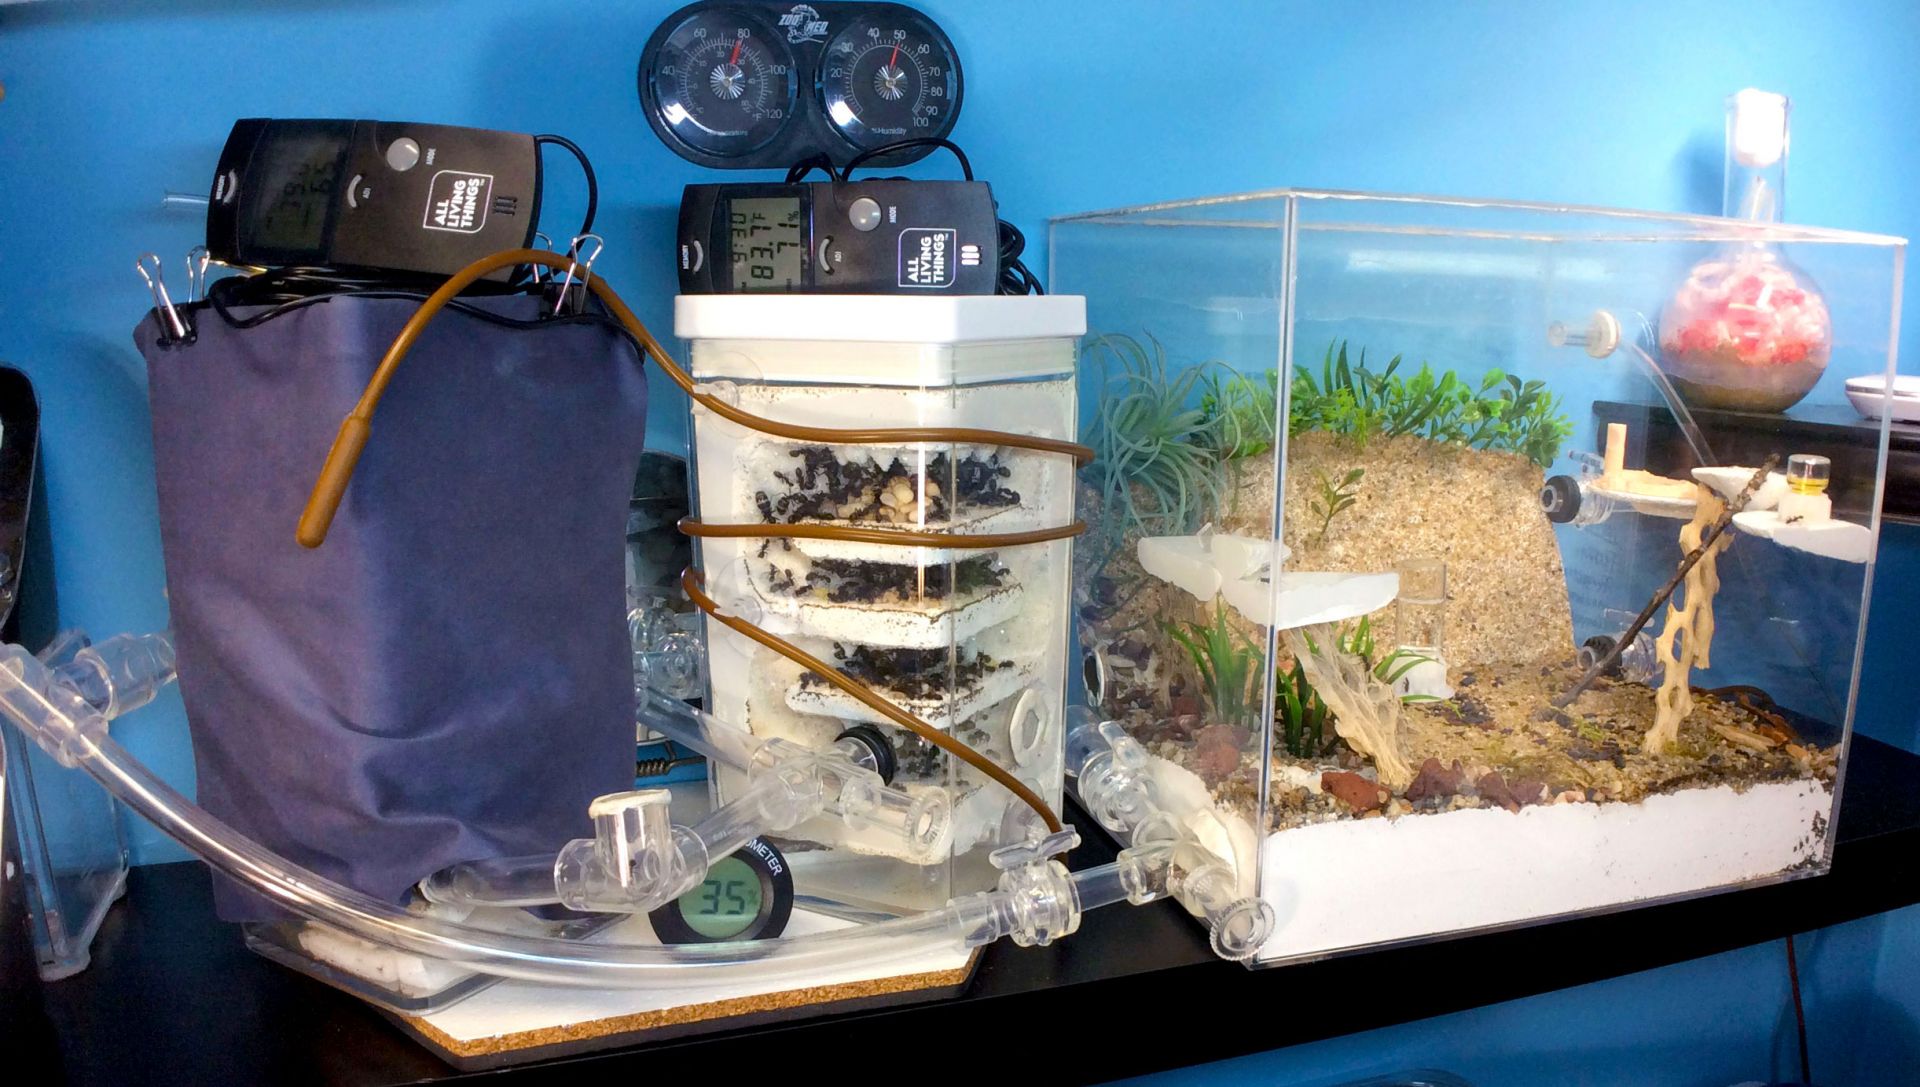
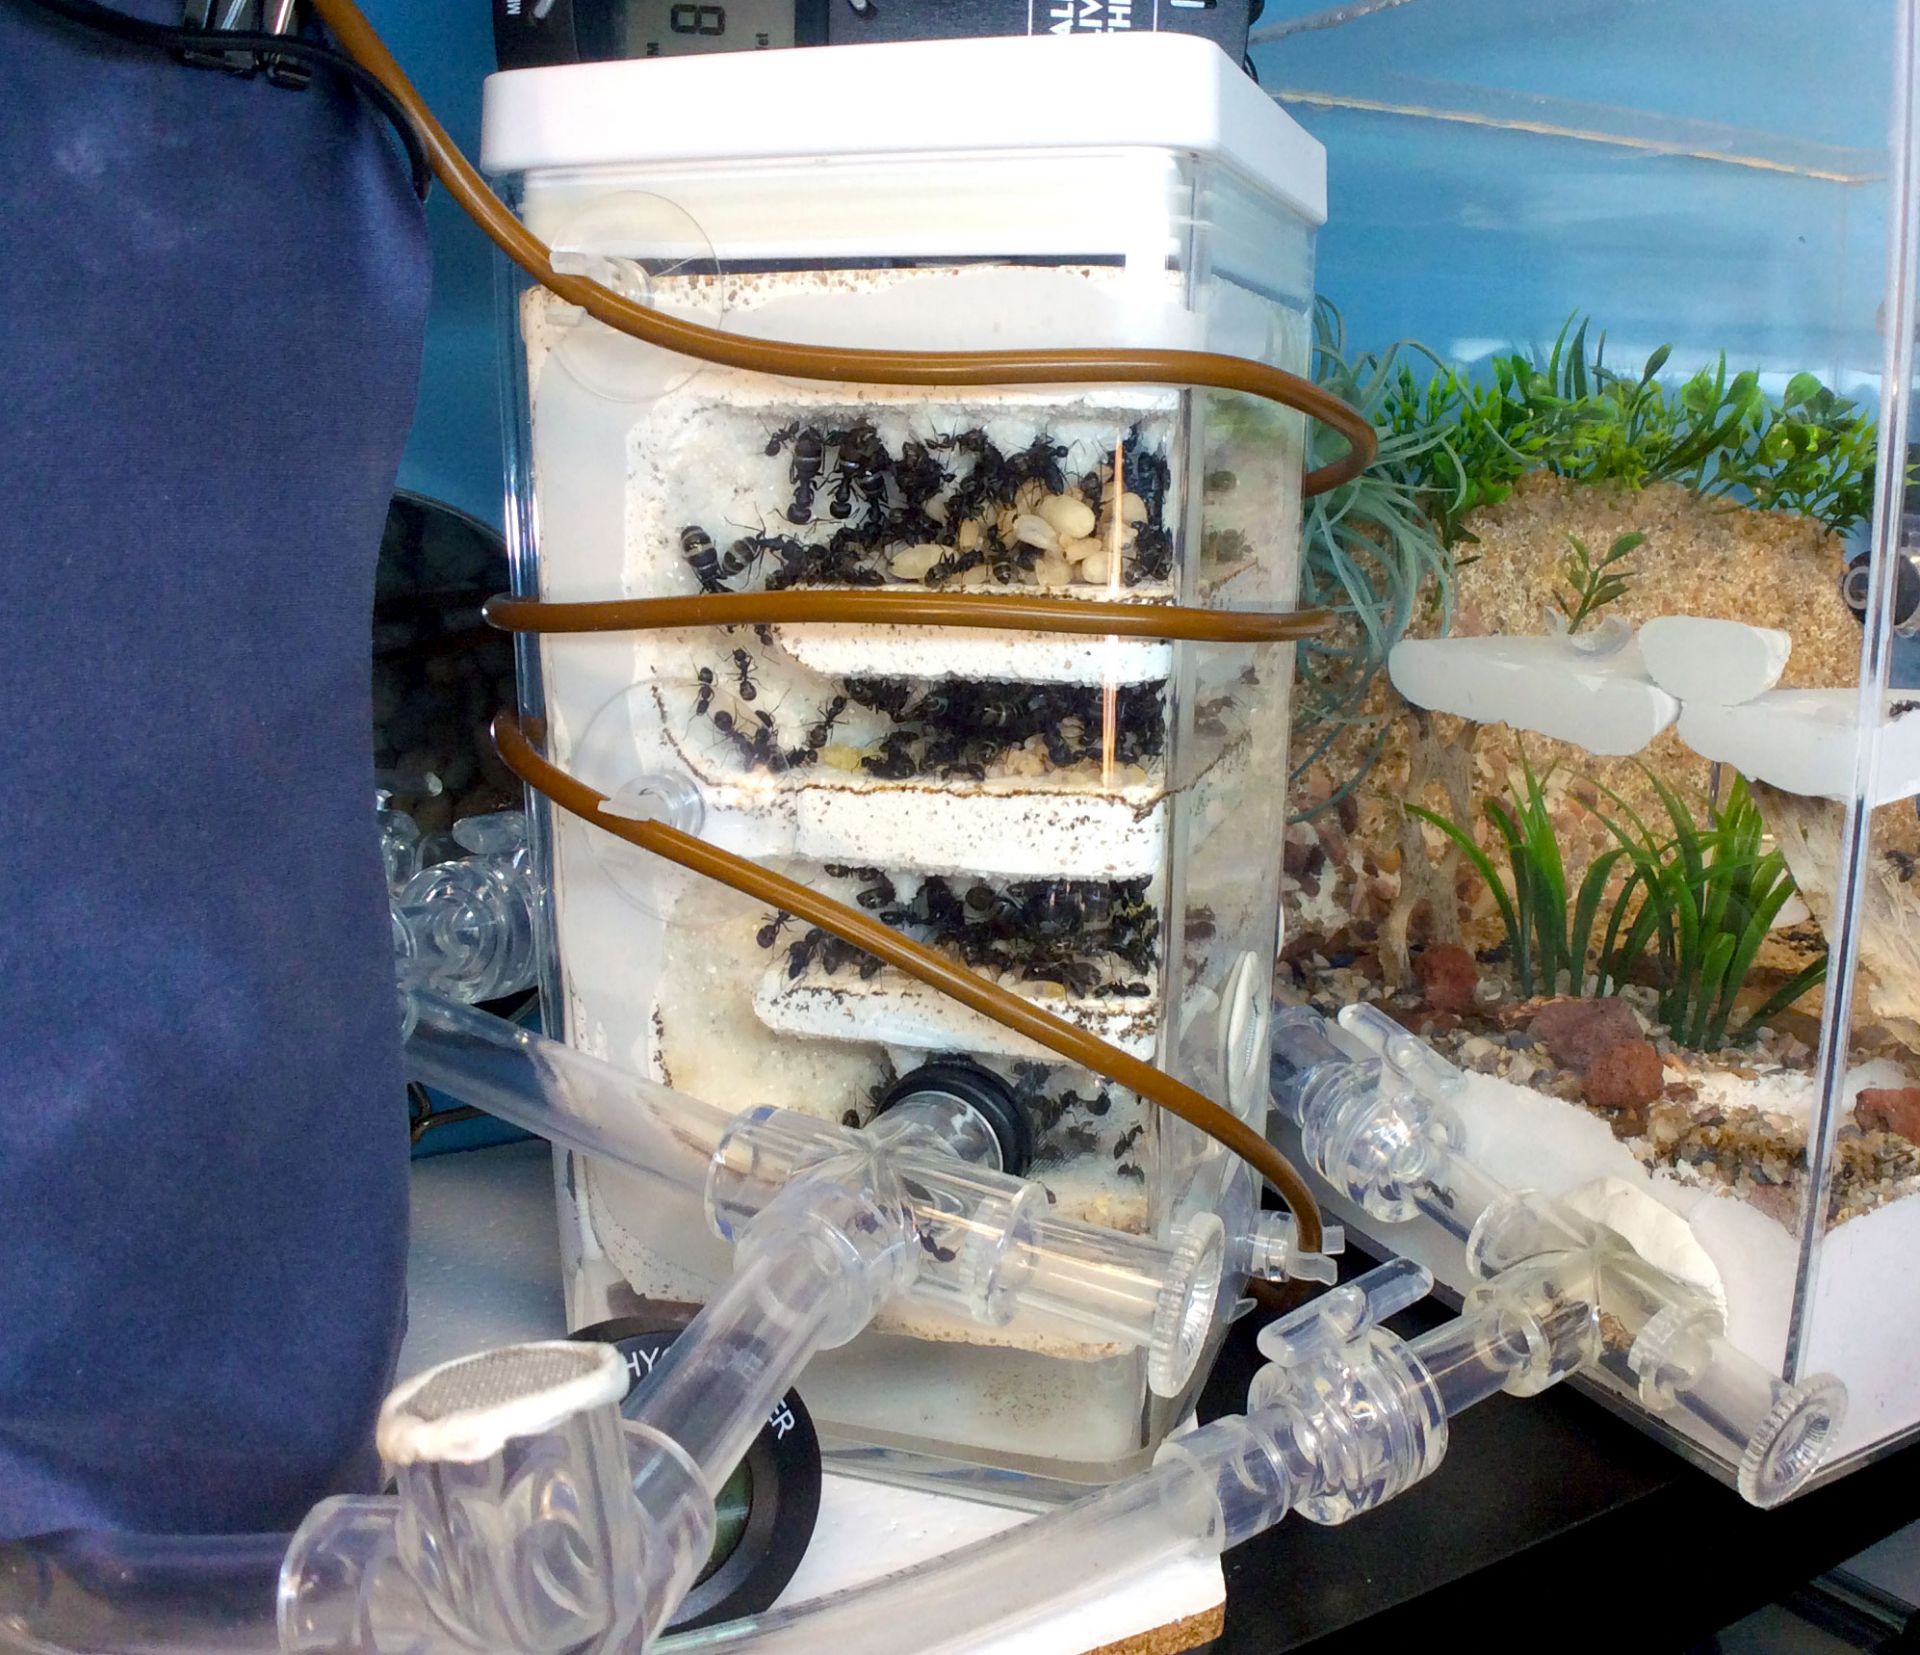
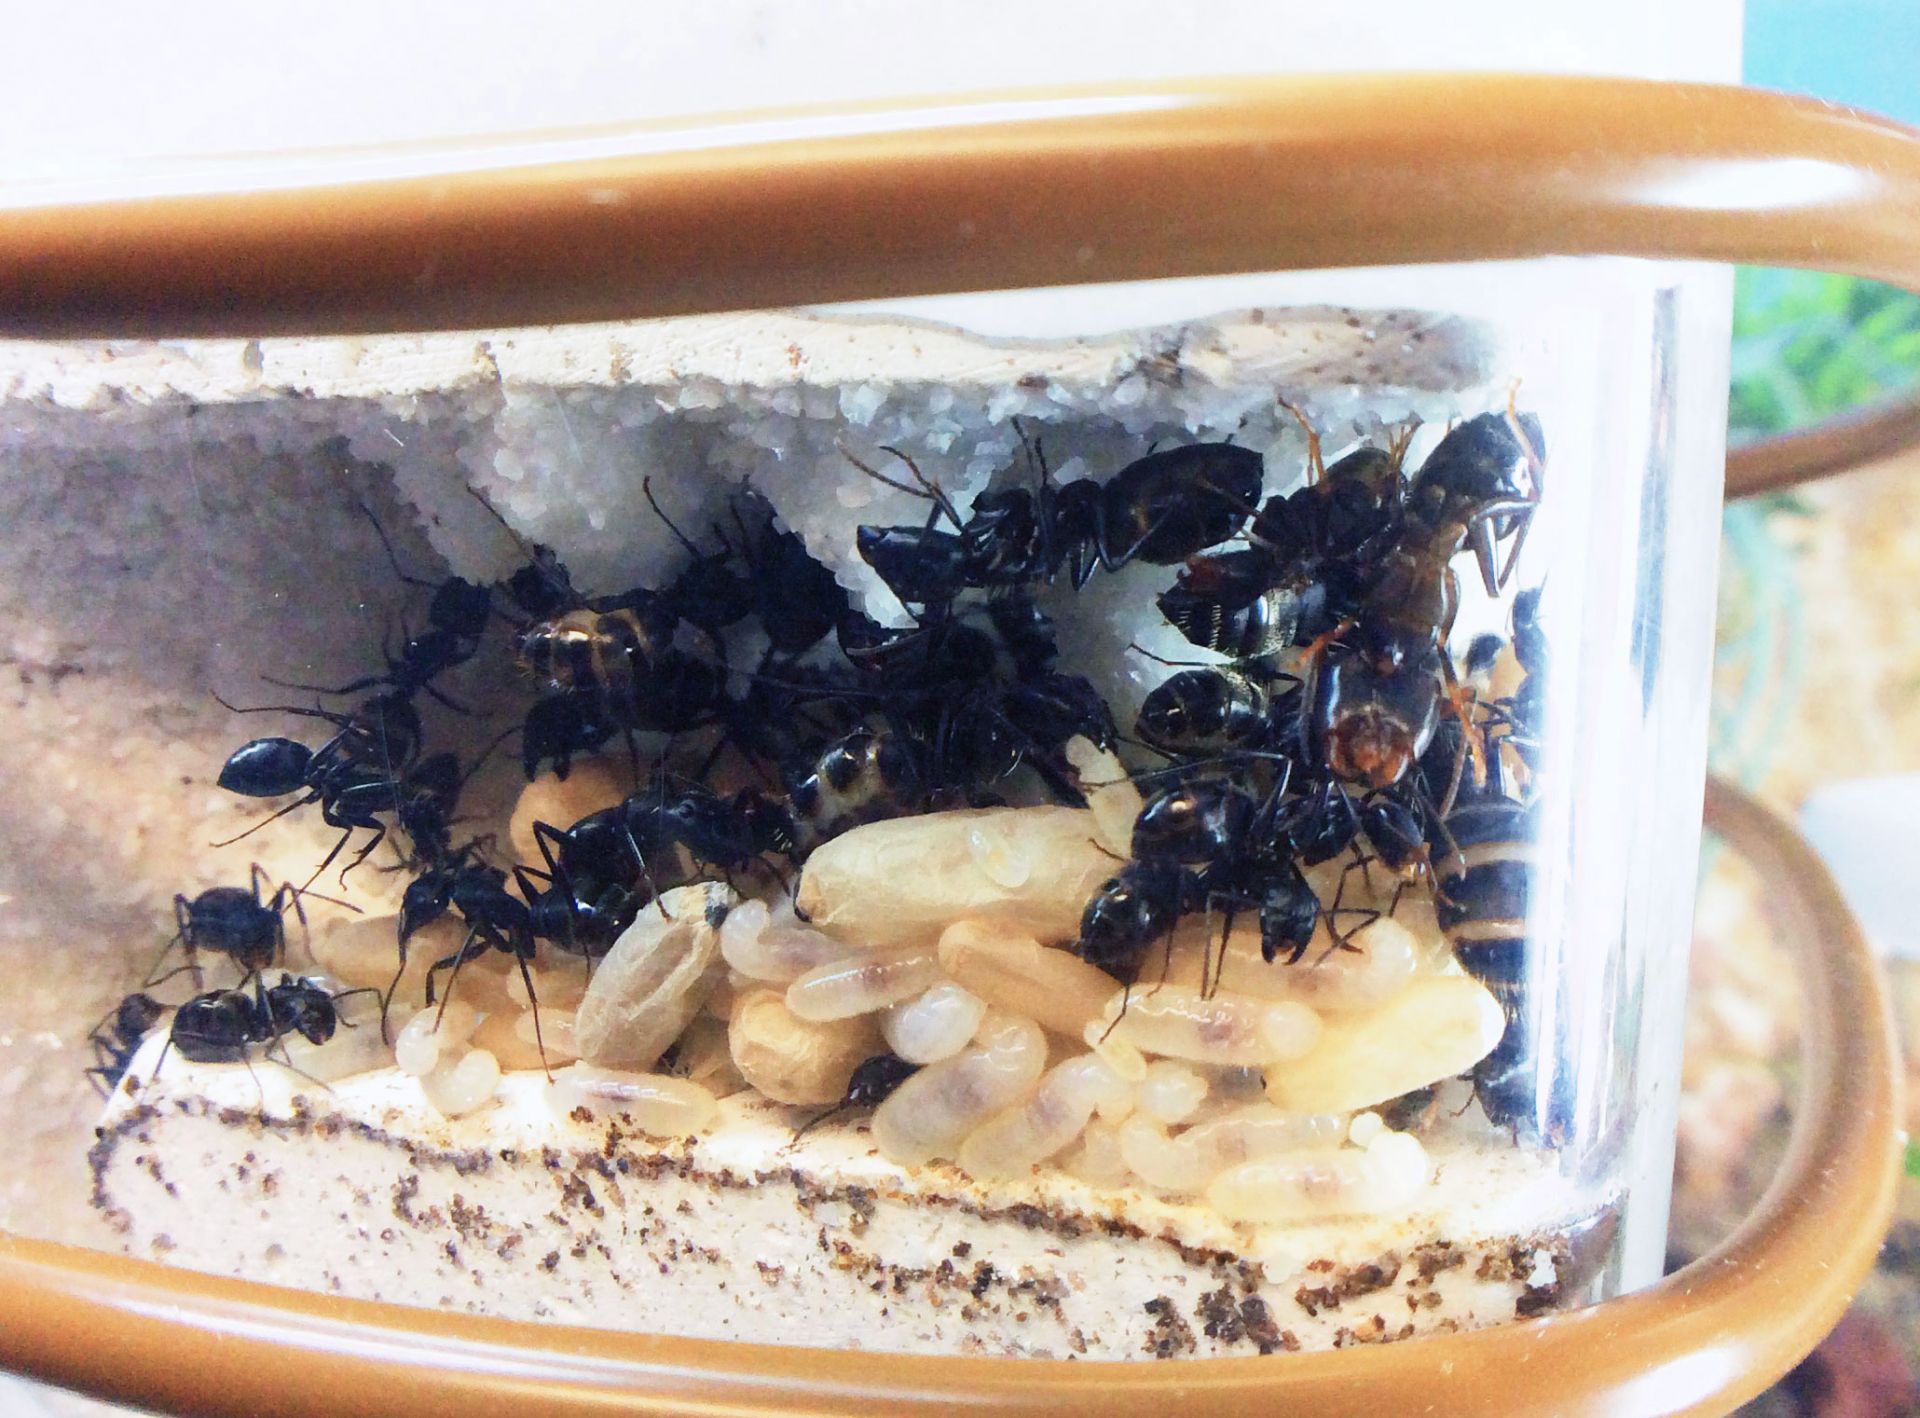
Queen Elizabeth’s Camponotus pennsylvanicus colony is currently in a cabinet situated in a corner of a garage. I check up on them almost every night since the winter is warmer this year and was wondering if they’d exhibit any different behavior than last year which was colder.

gallery_4140_1524_41781.jpg

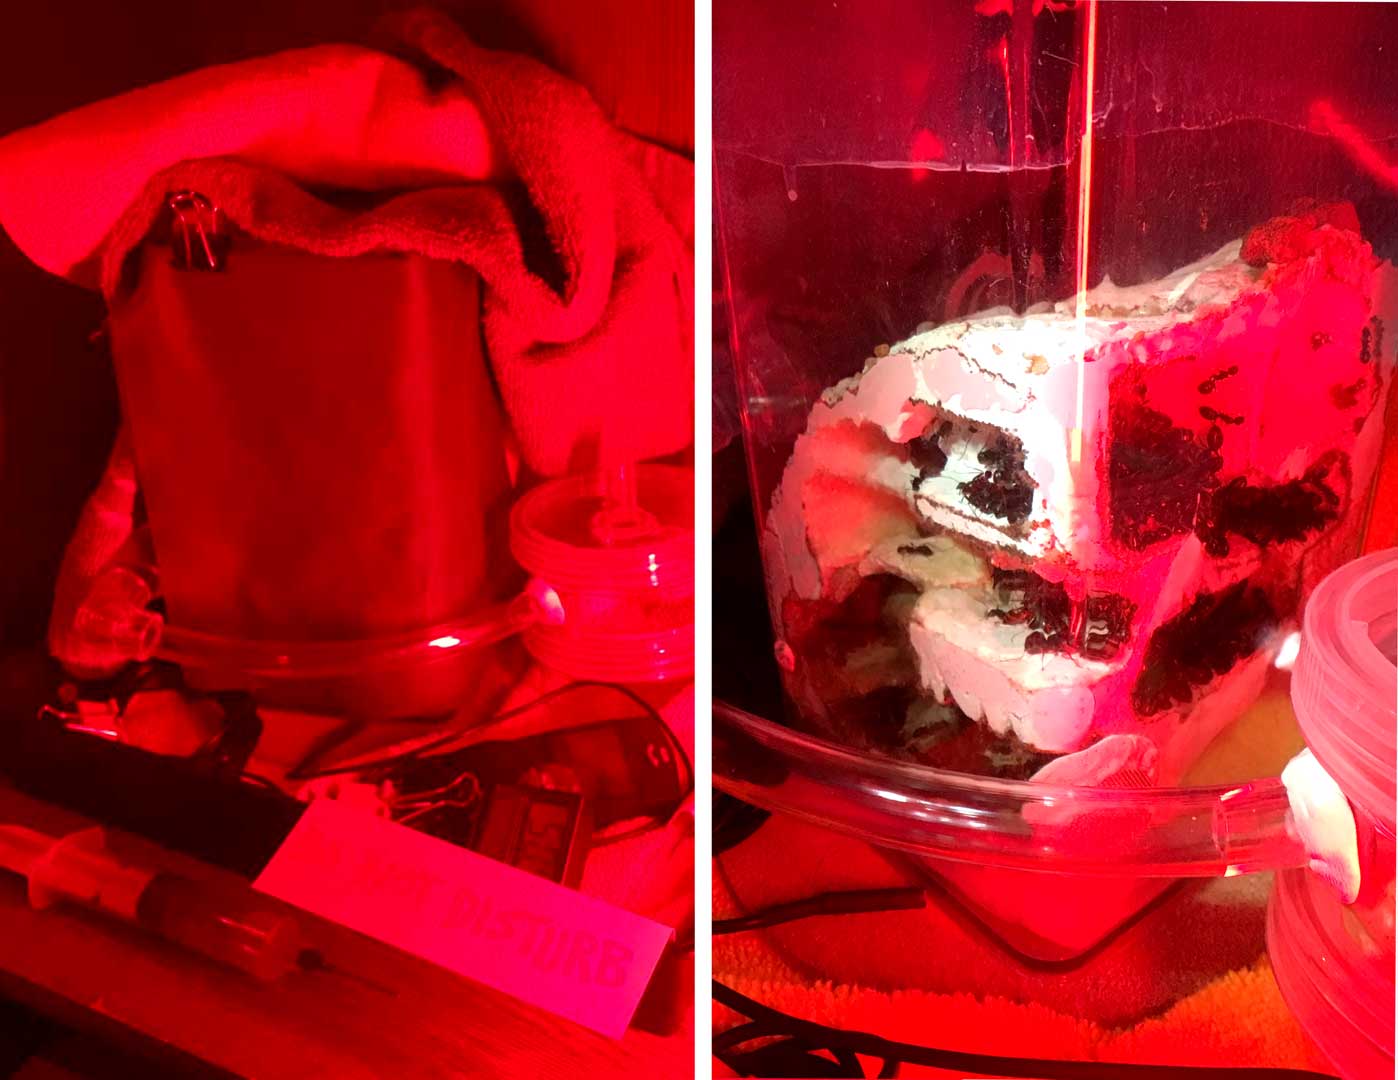
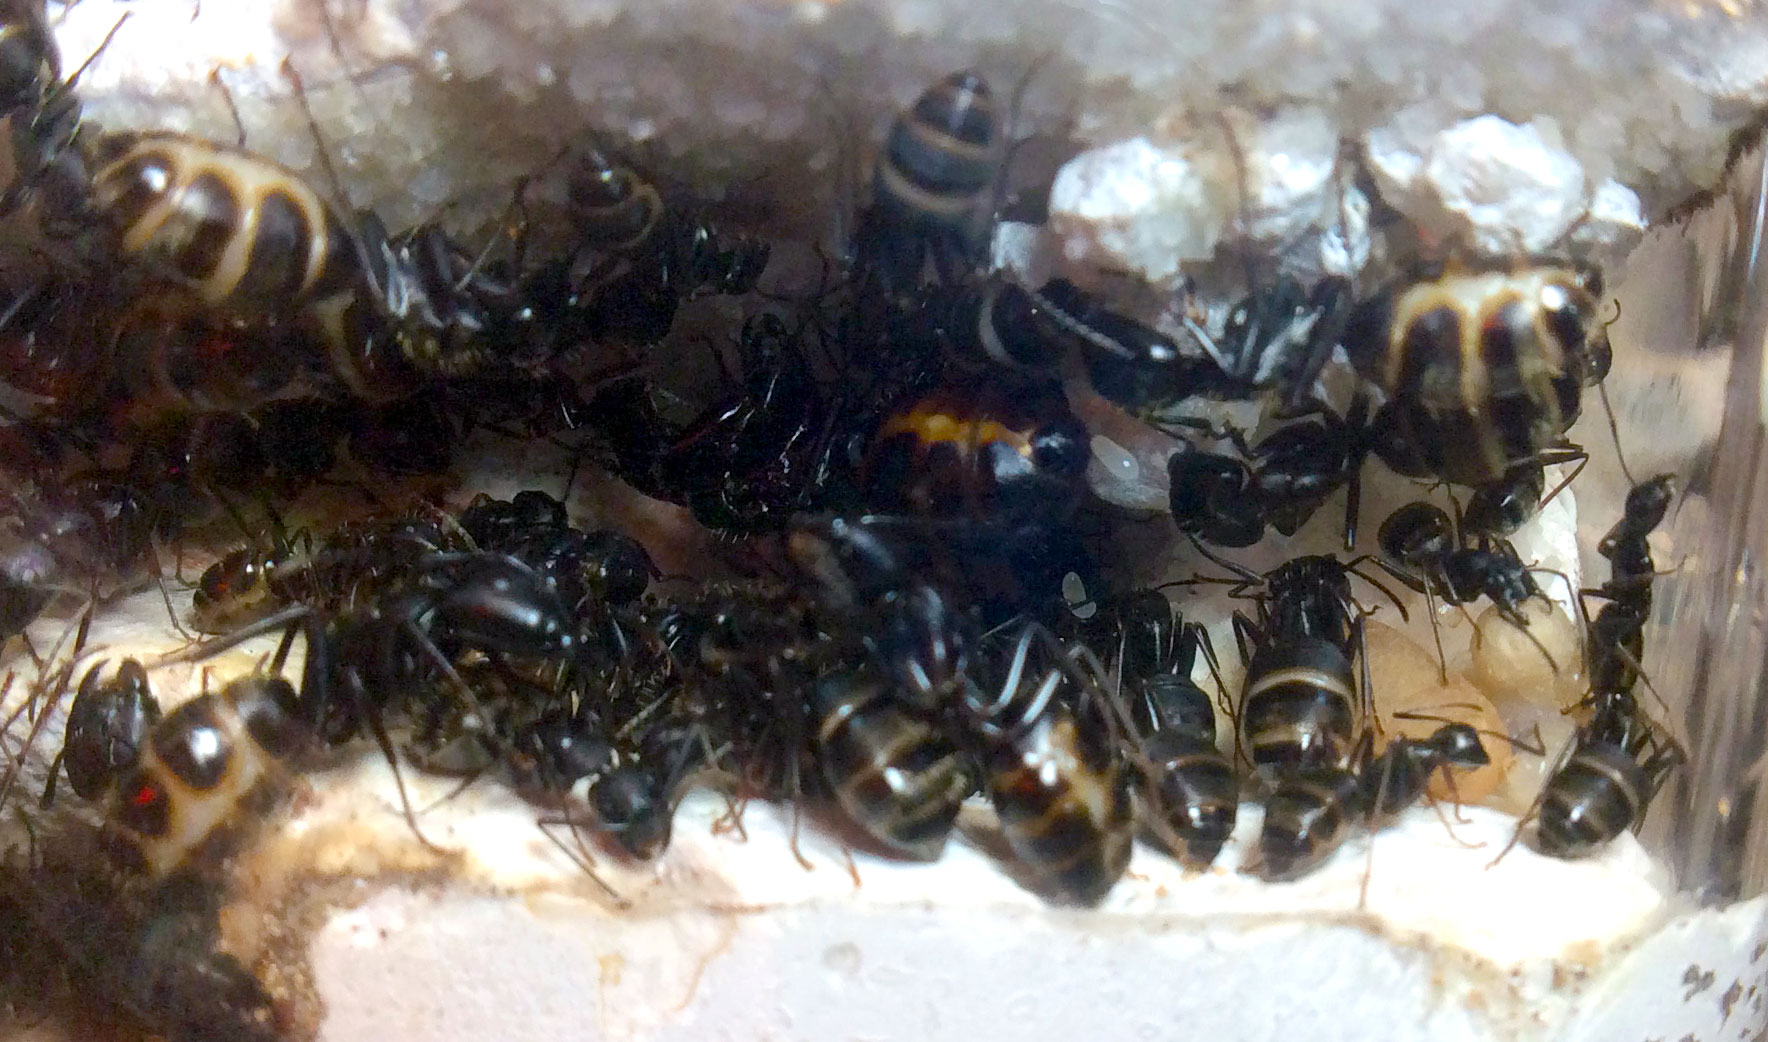
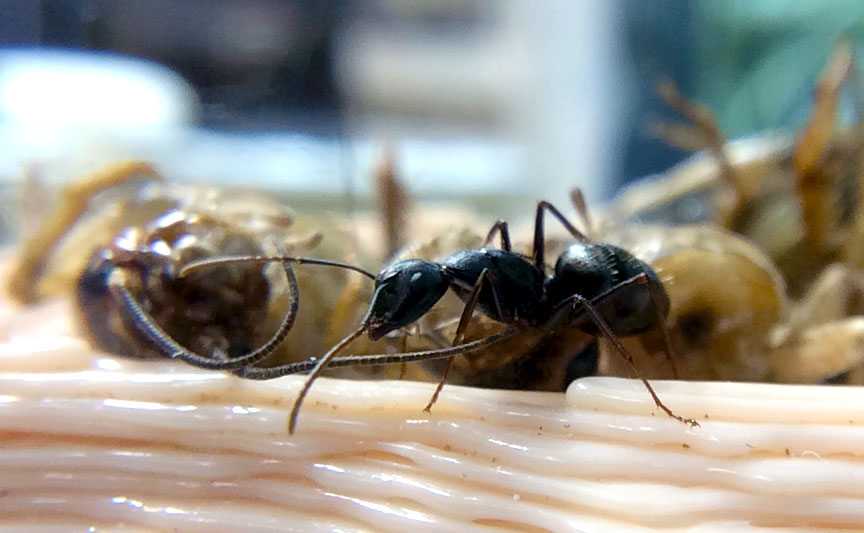
Half the colony seems active whenever I peek in, so it seems they hadn’t all gone into full diapause mode and I wonder if that’s due to the warm fluctuating temperatures here in the NE this season. Last year the whole colony seemed inactive but I had far less numbers then. I need to keep observations to compare to next year’s diapause. Because of warm weather last week, I decided to give them a small byFormica feeder of Sunburst Ant Nectar along with the usual water refill and half is gone so far. The lowest temperature readings I’ve gotten is 39 degrees F, the highest was 63 degrees F as of this week since I put them away in November. Last year, lowest was in the mid 30s but we still got some winter time I guess. I imagine climate change will benefit some ant species and not others; us Camponotus keepers need to observe how they handle warmer winters and their subsequent brood growth.

gallery_4140_1524_68125.jpg

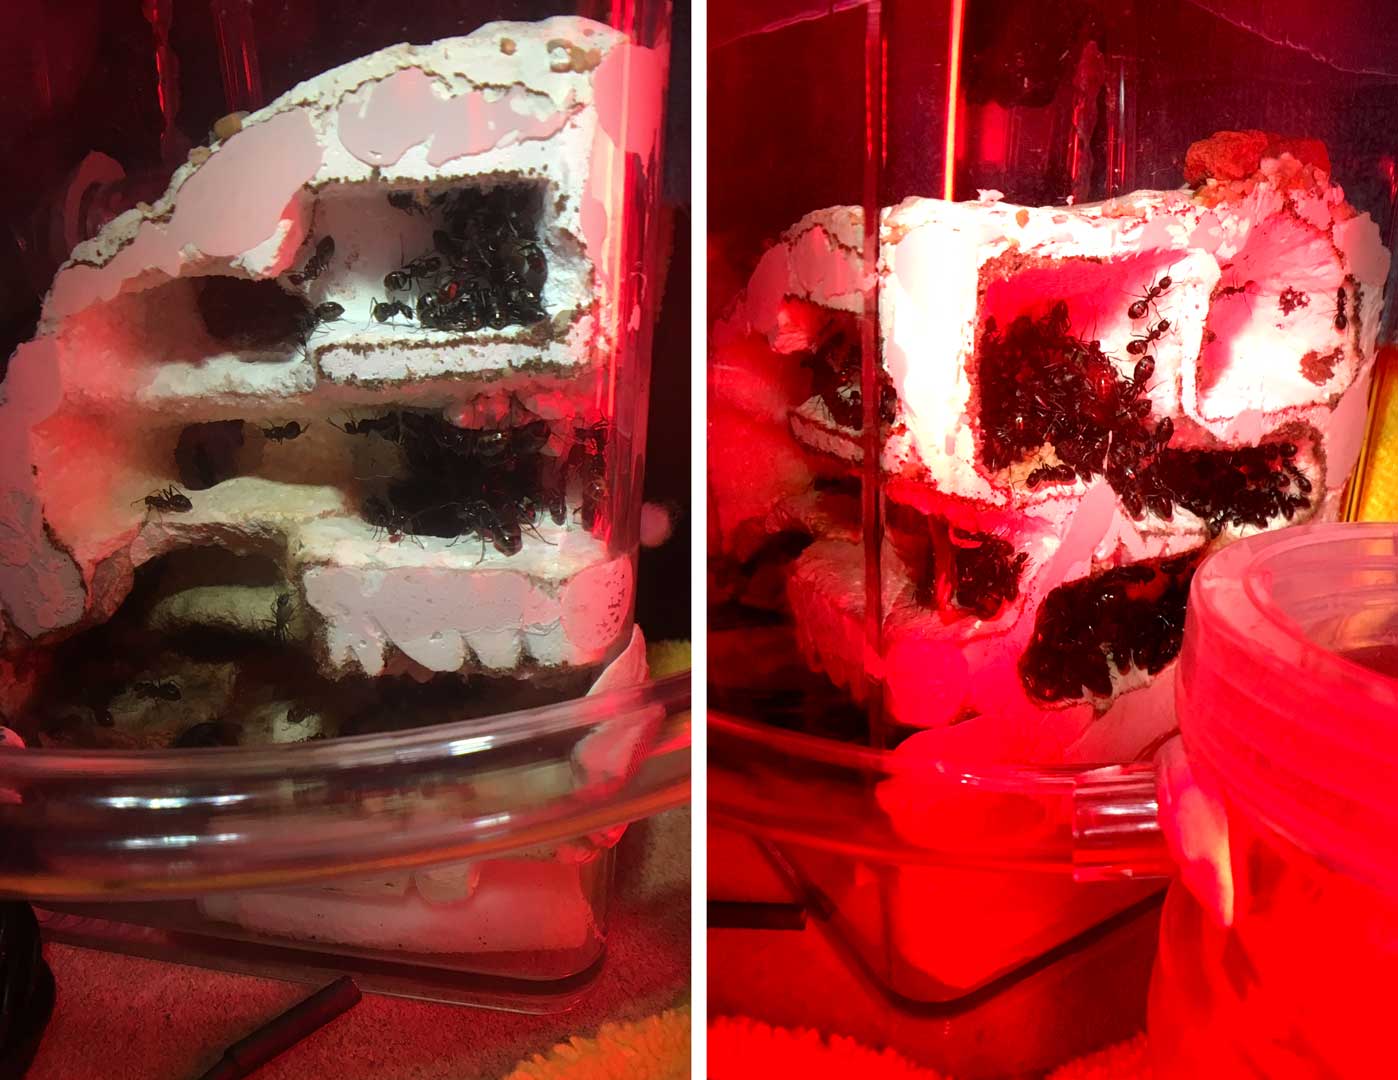
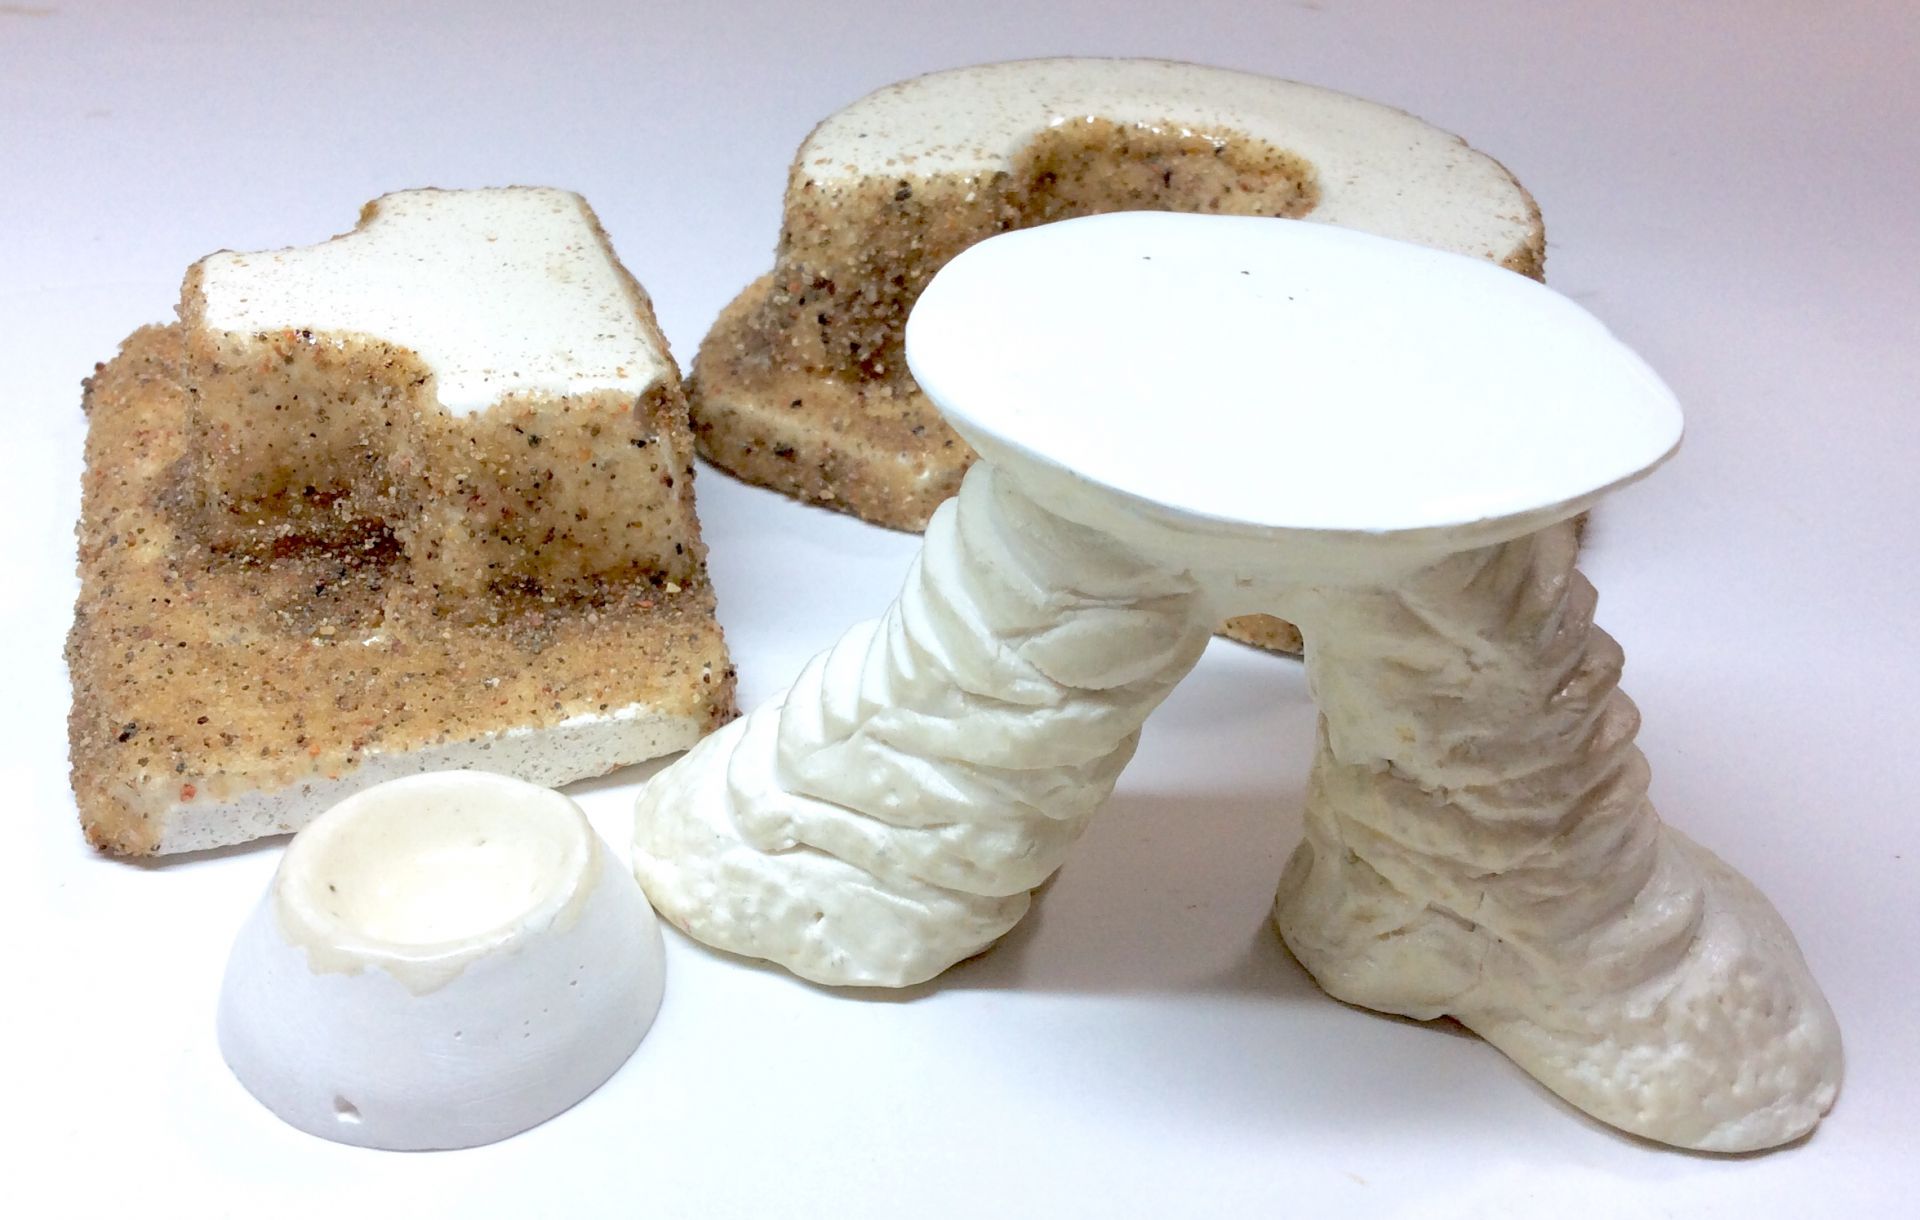
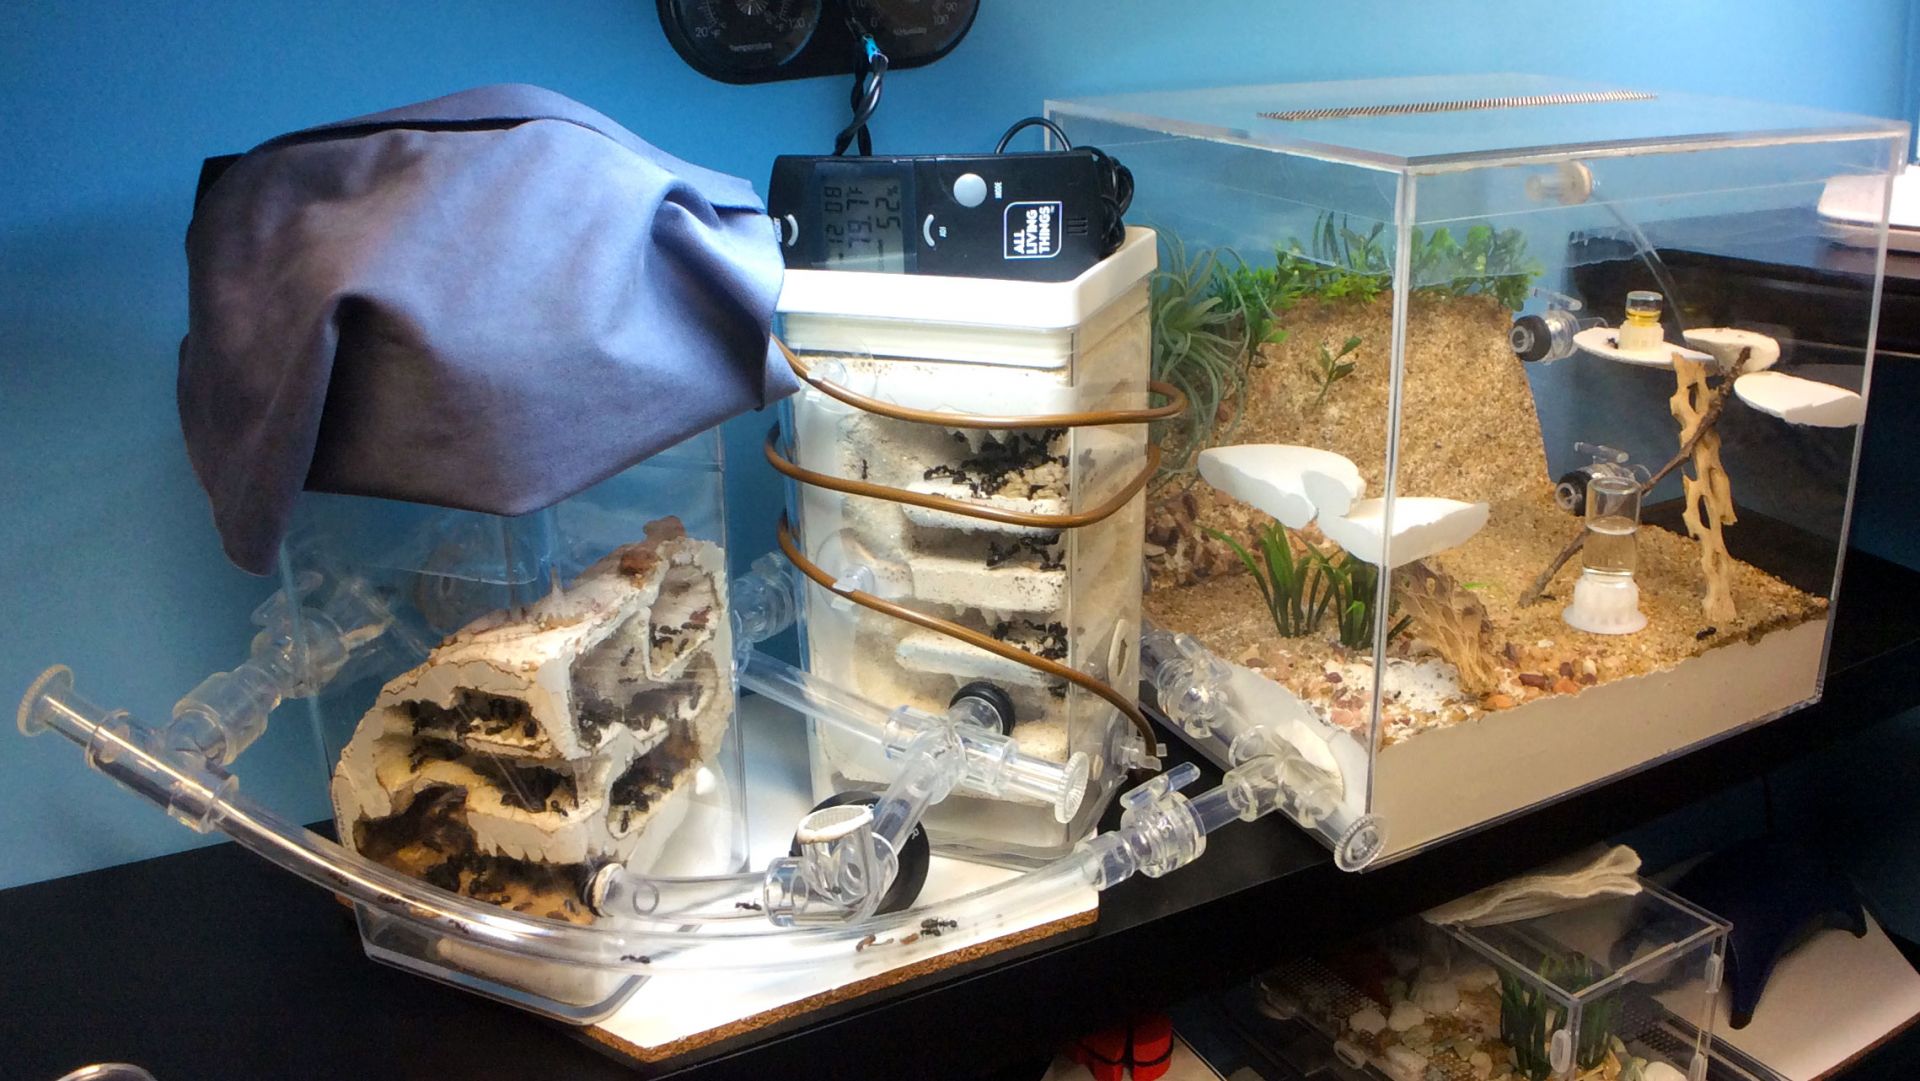
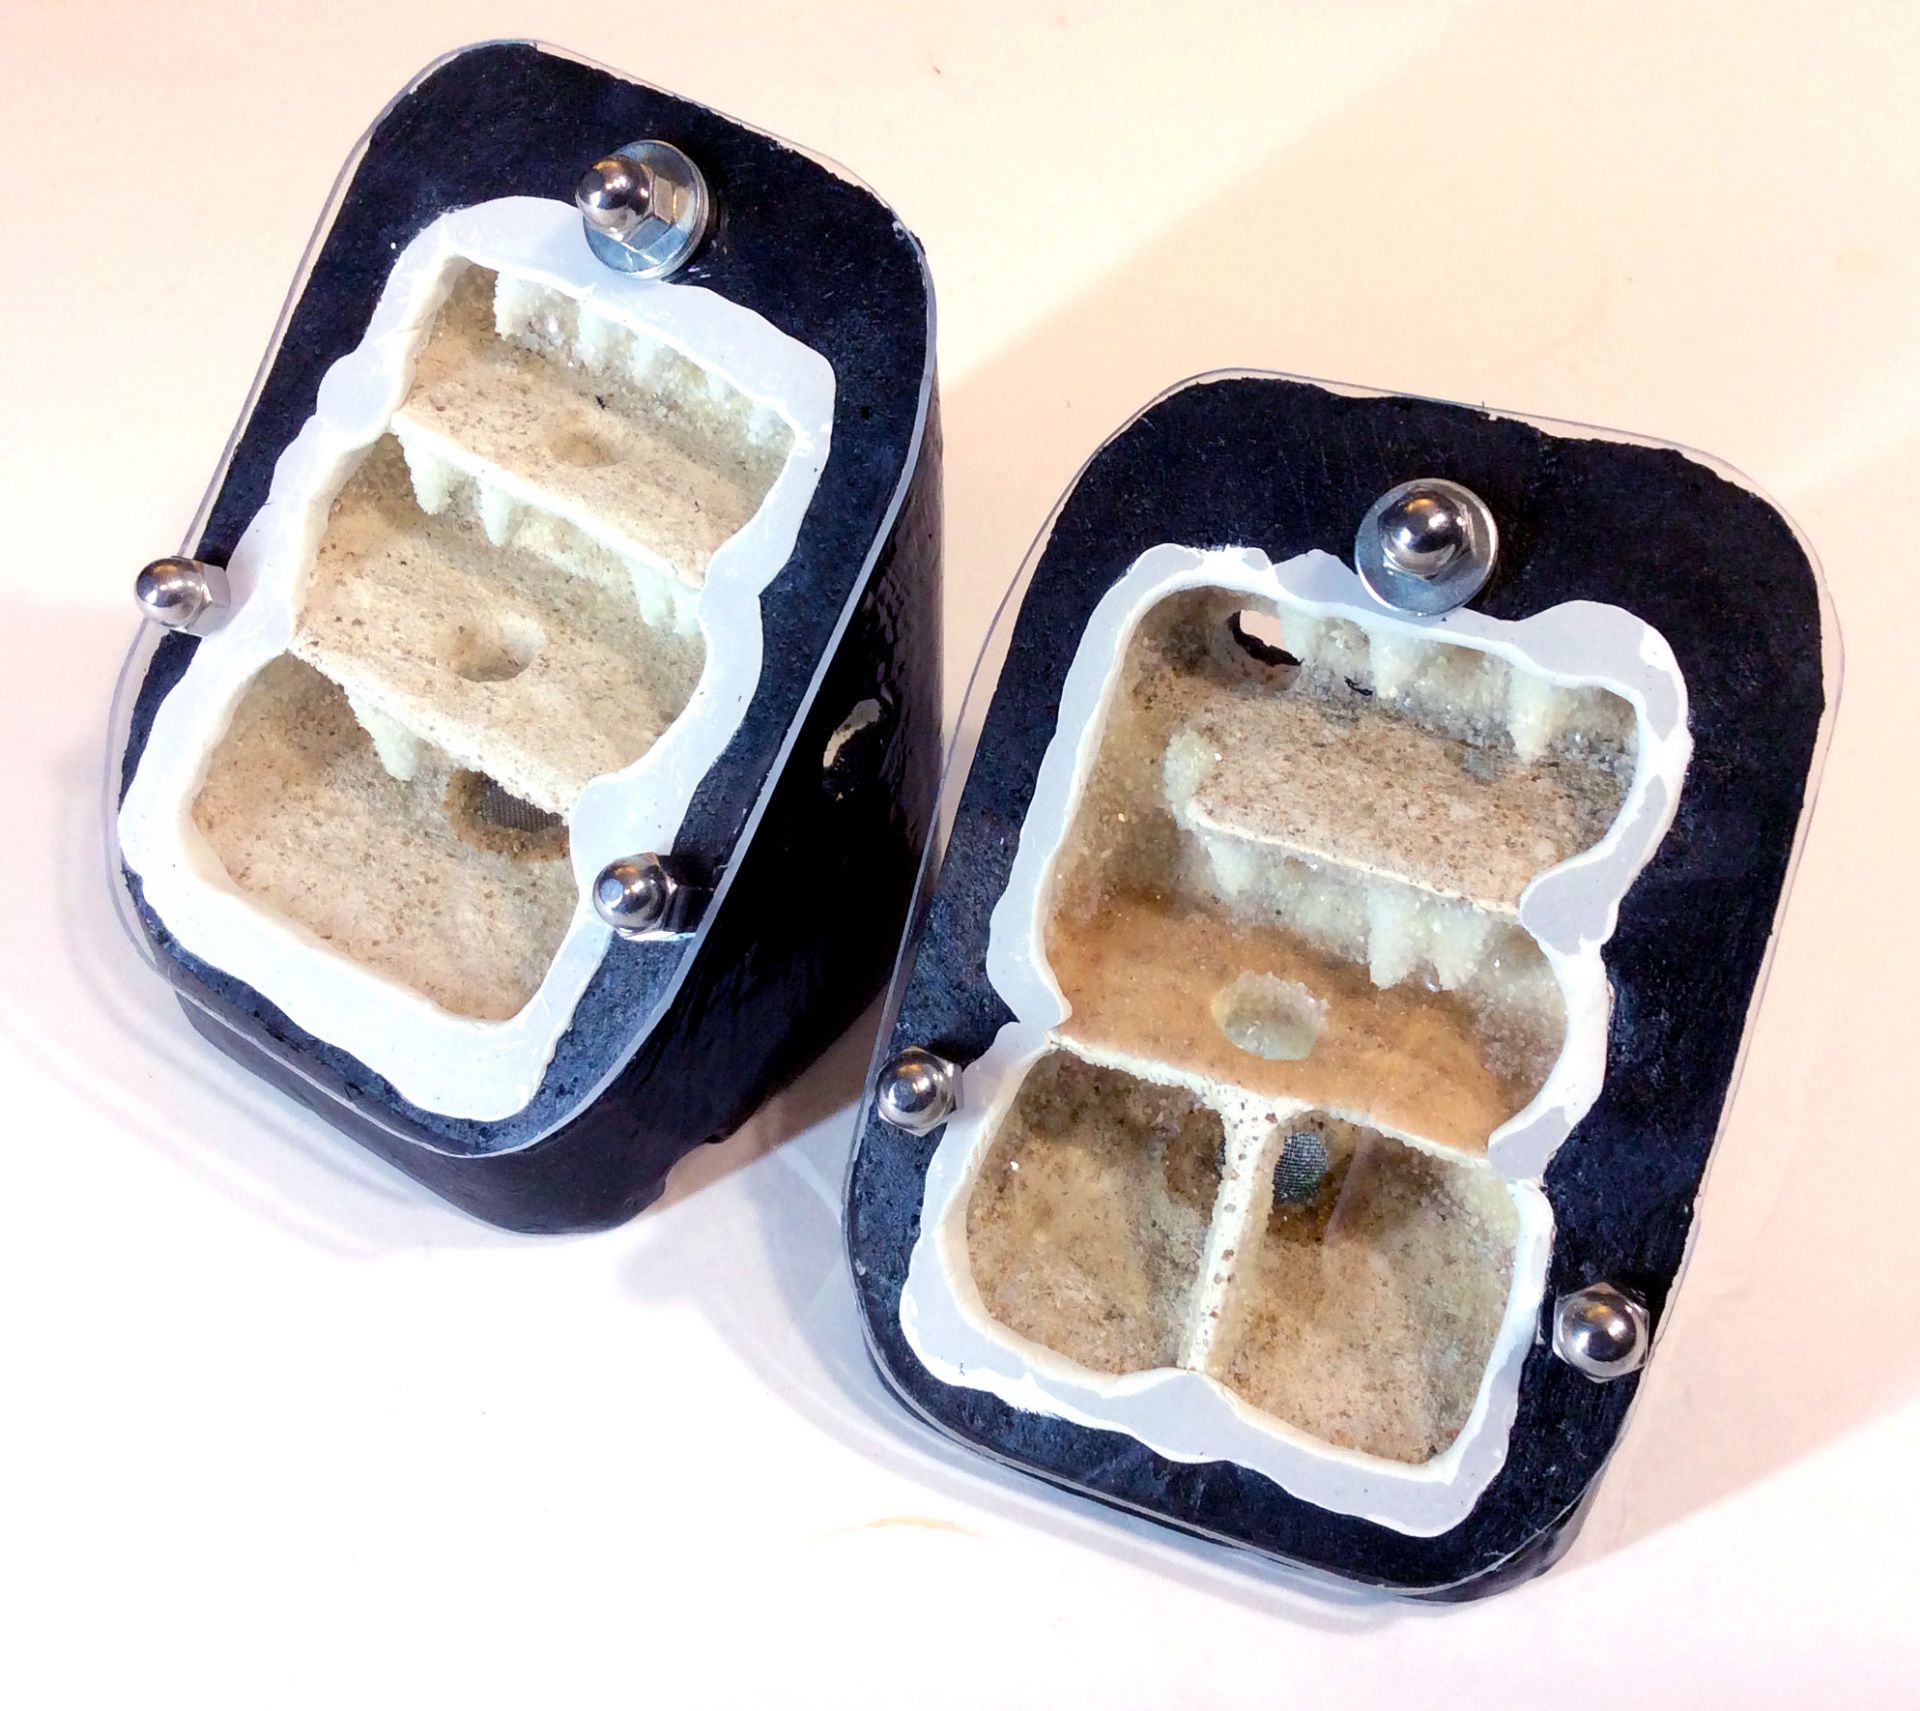
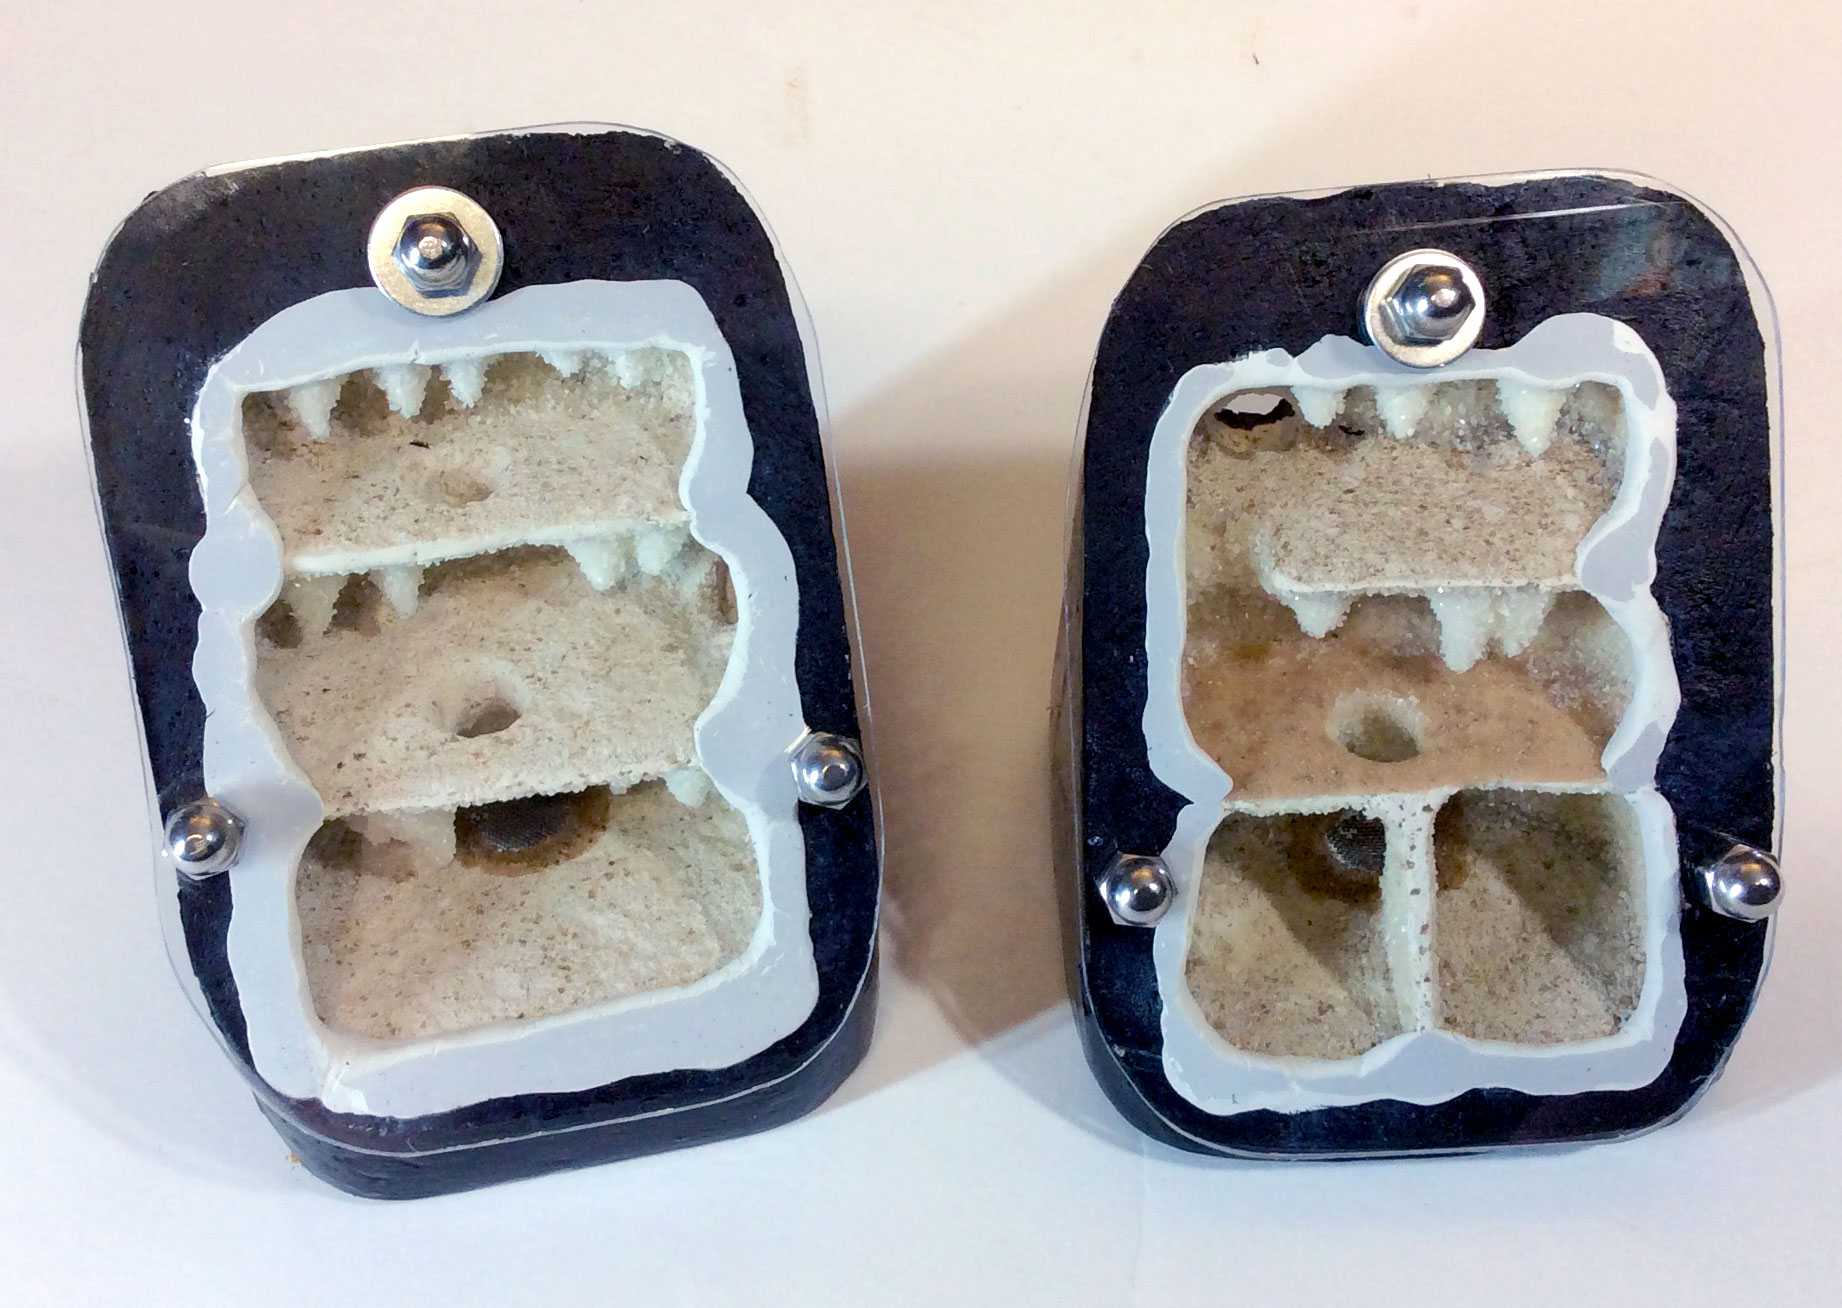
This is Boog’s Bug BUILDS so here’s some updates on the formicaria I’ve got brewing over here! I’m sticking with grout and the same type of container for my C. pennsylvanicus colony so that my two nests look nice sitting next to one another. I placed a wood board diagonally down the working container to mold the grout, I'll use a brand new container for the final one. I let the grout cure for 36 hours then took it out to carve out the levels.

gallery_4140_1698_8399.jpg

I used a mitre box and saw to get straight cuts which took some careful handling with the fragile curing grout and wore a mask and safety glasses. I then used a Dremel to carve away the curved areas of the nest then used two part epoxy to apply a layer of white sand to the back walls of the nest.

gallery_4140_1698_61488.jpg

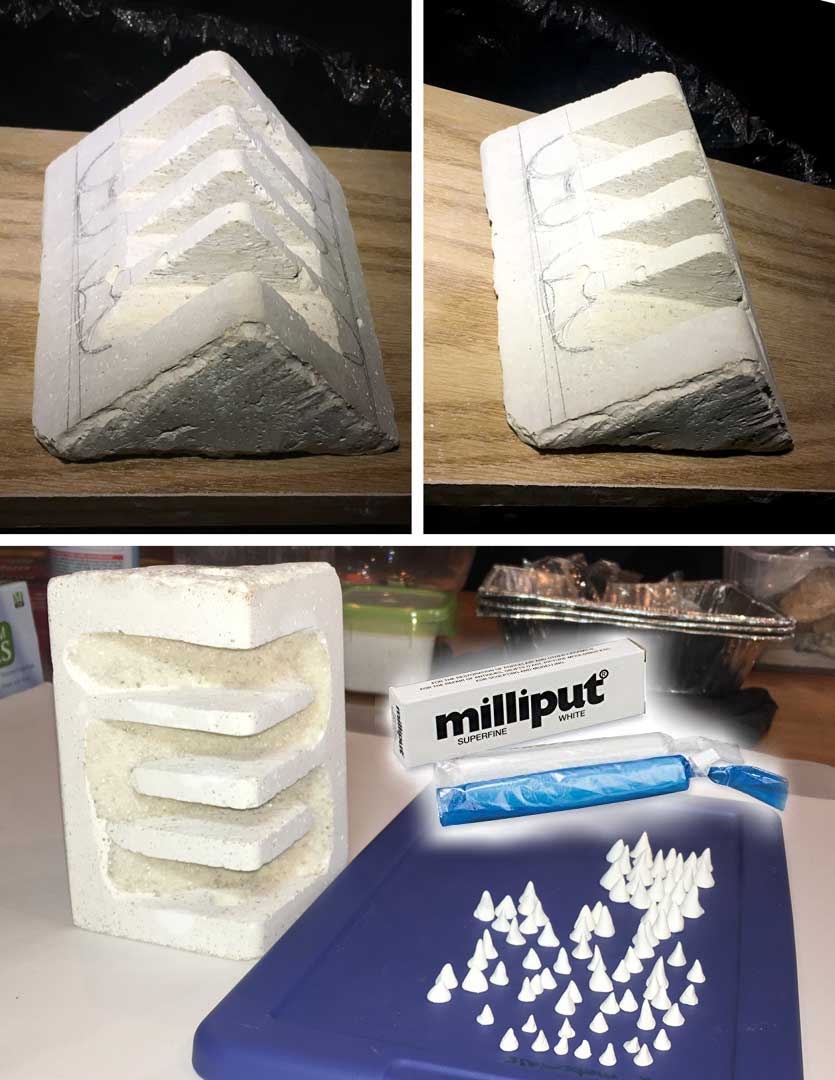
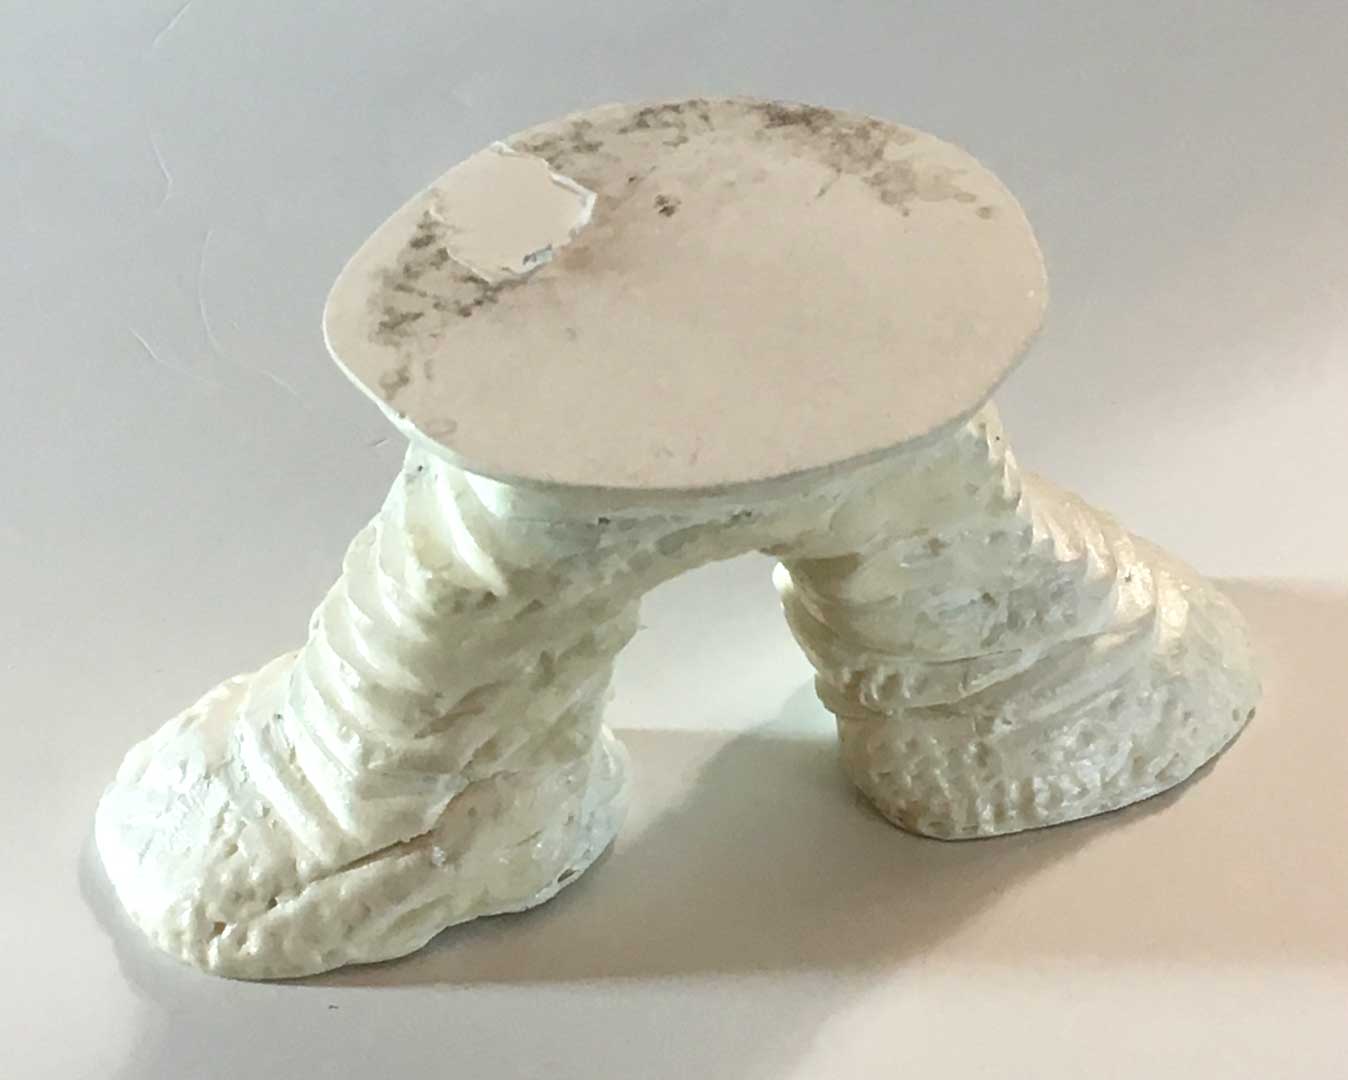
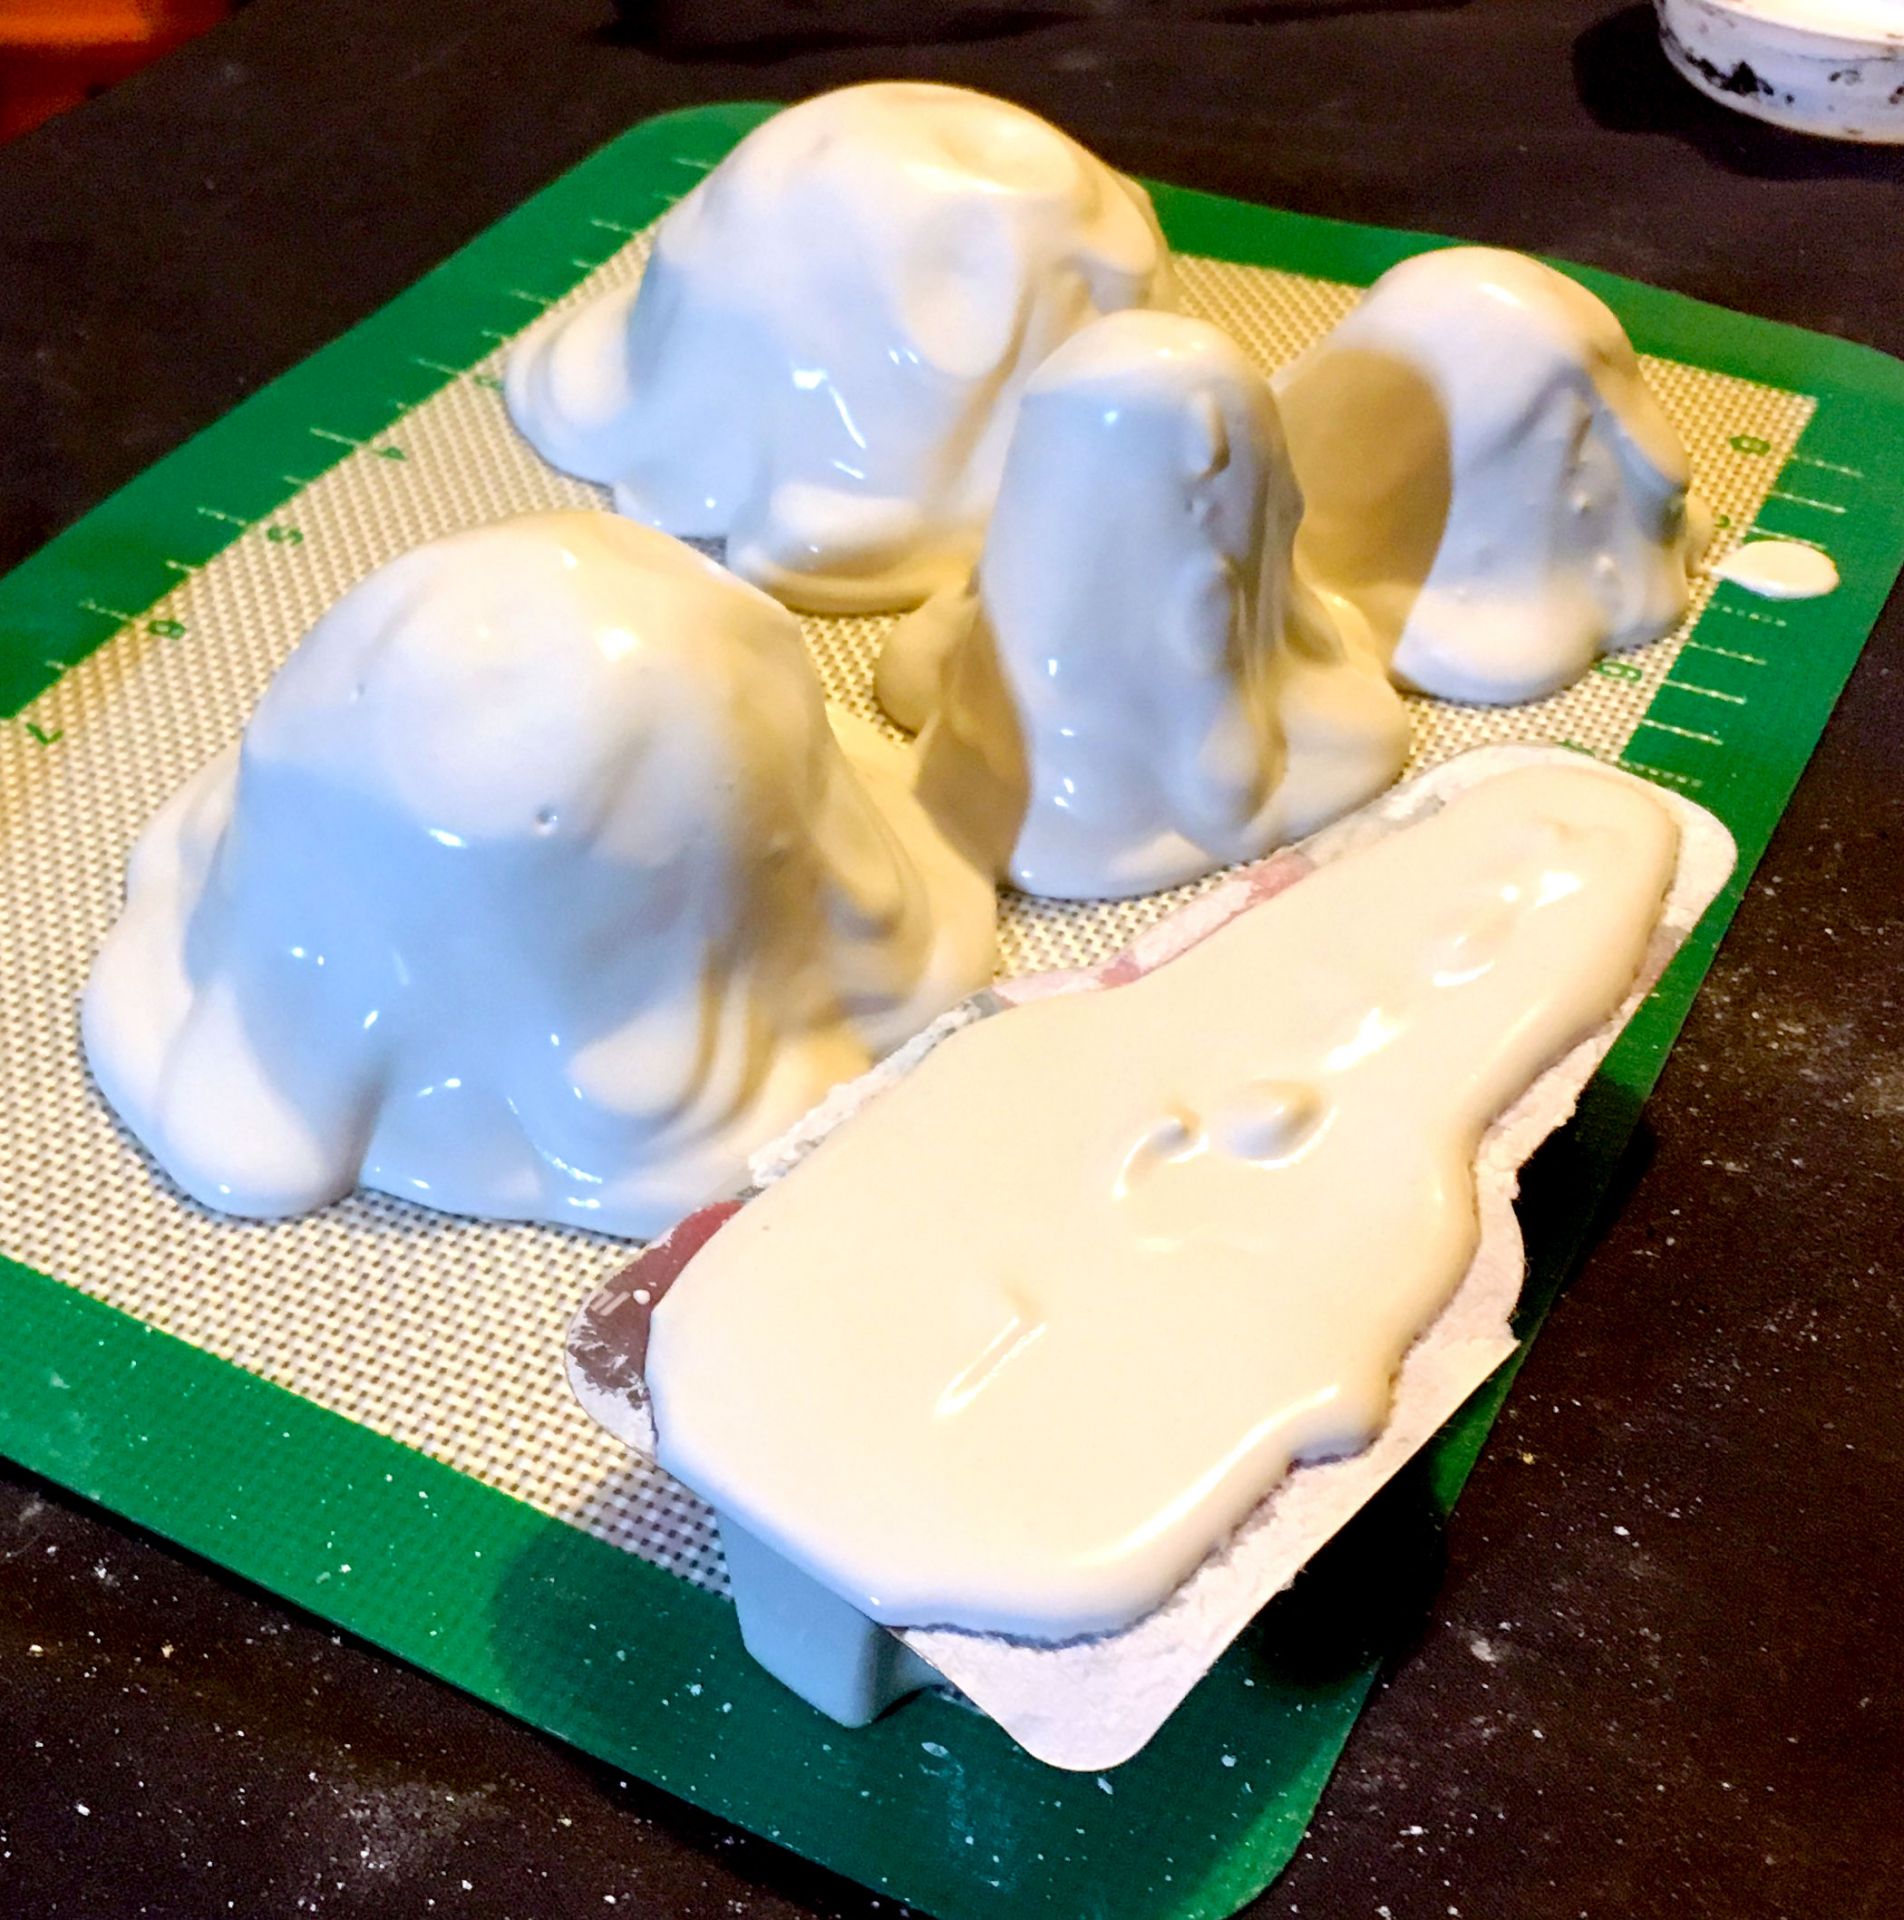
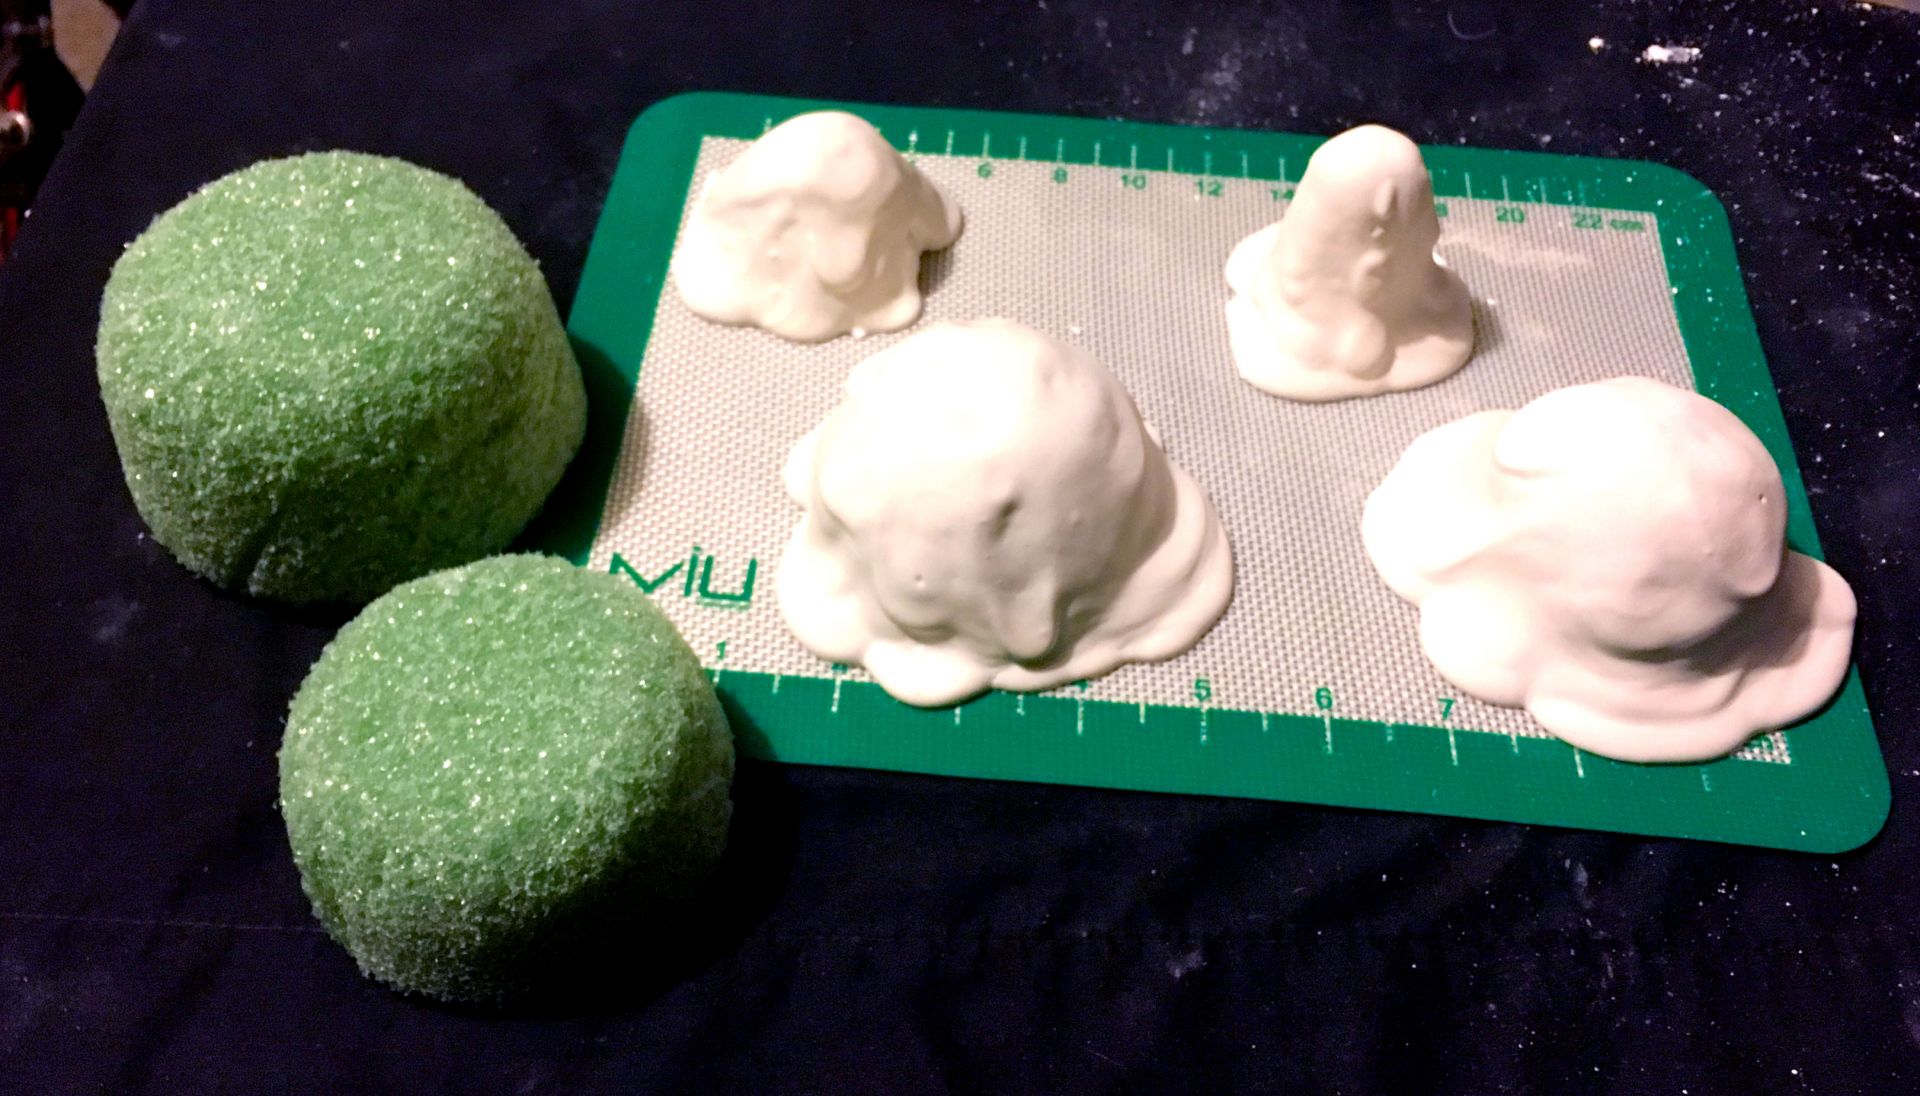
I then made a lot of cones of various sizes from superfine white Milliput with my fingers which I will use for stalactites (cramped up hands are not fun).

gallery_4140_1698_10198.jpg

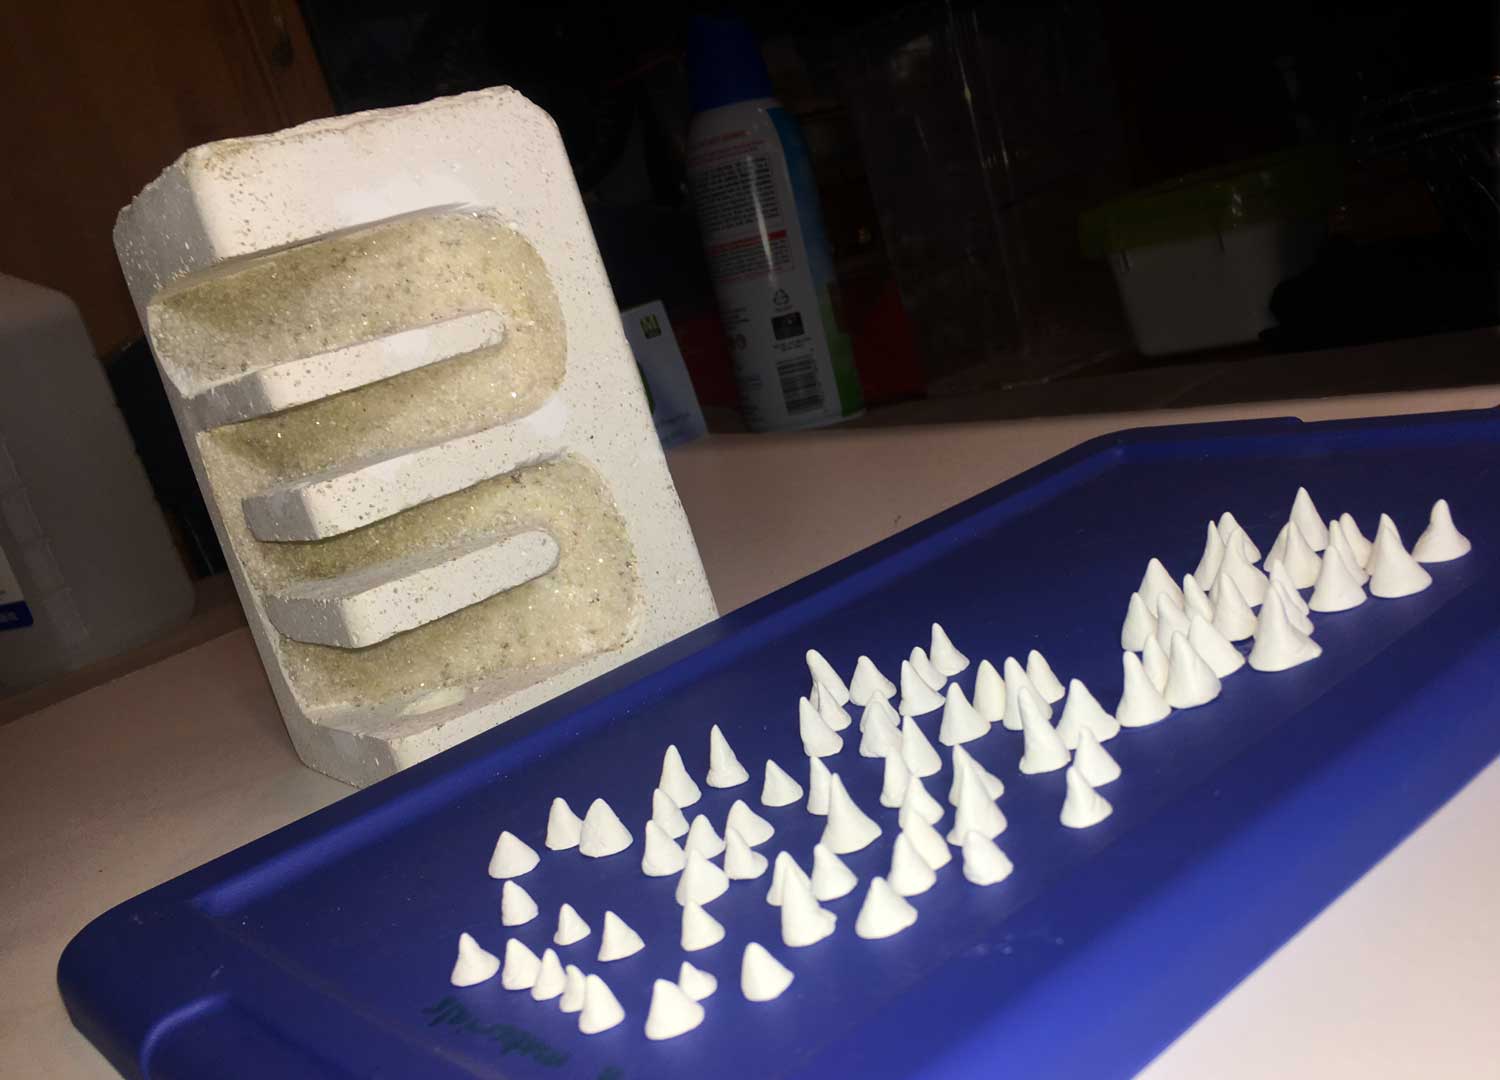
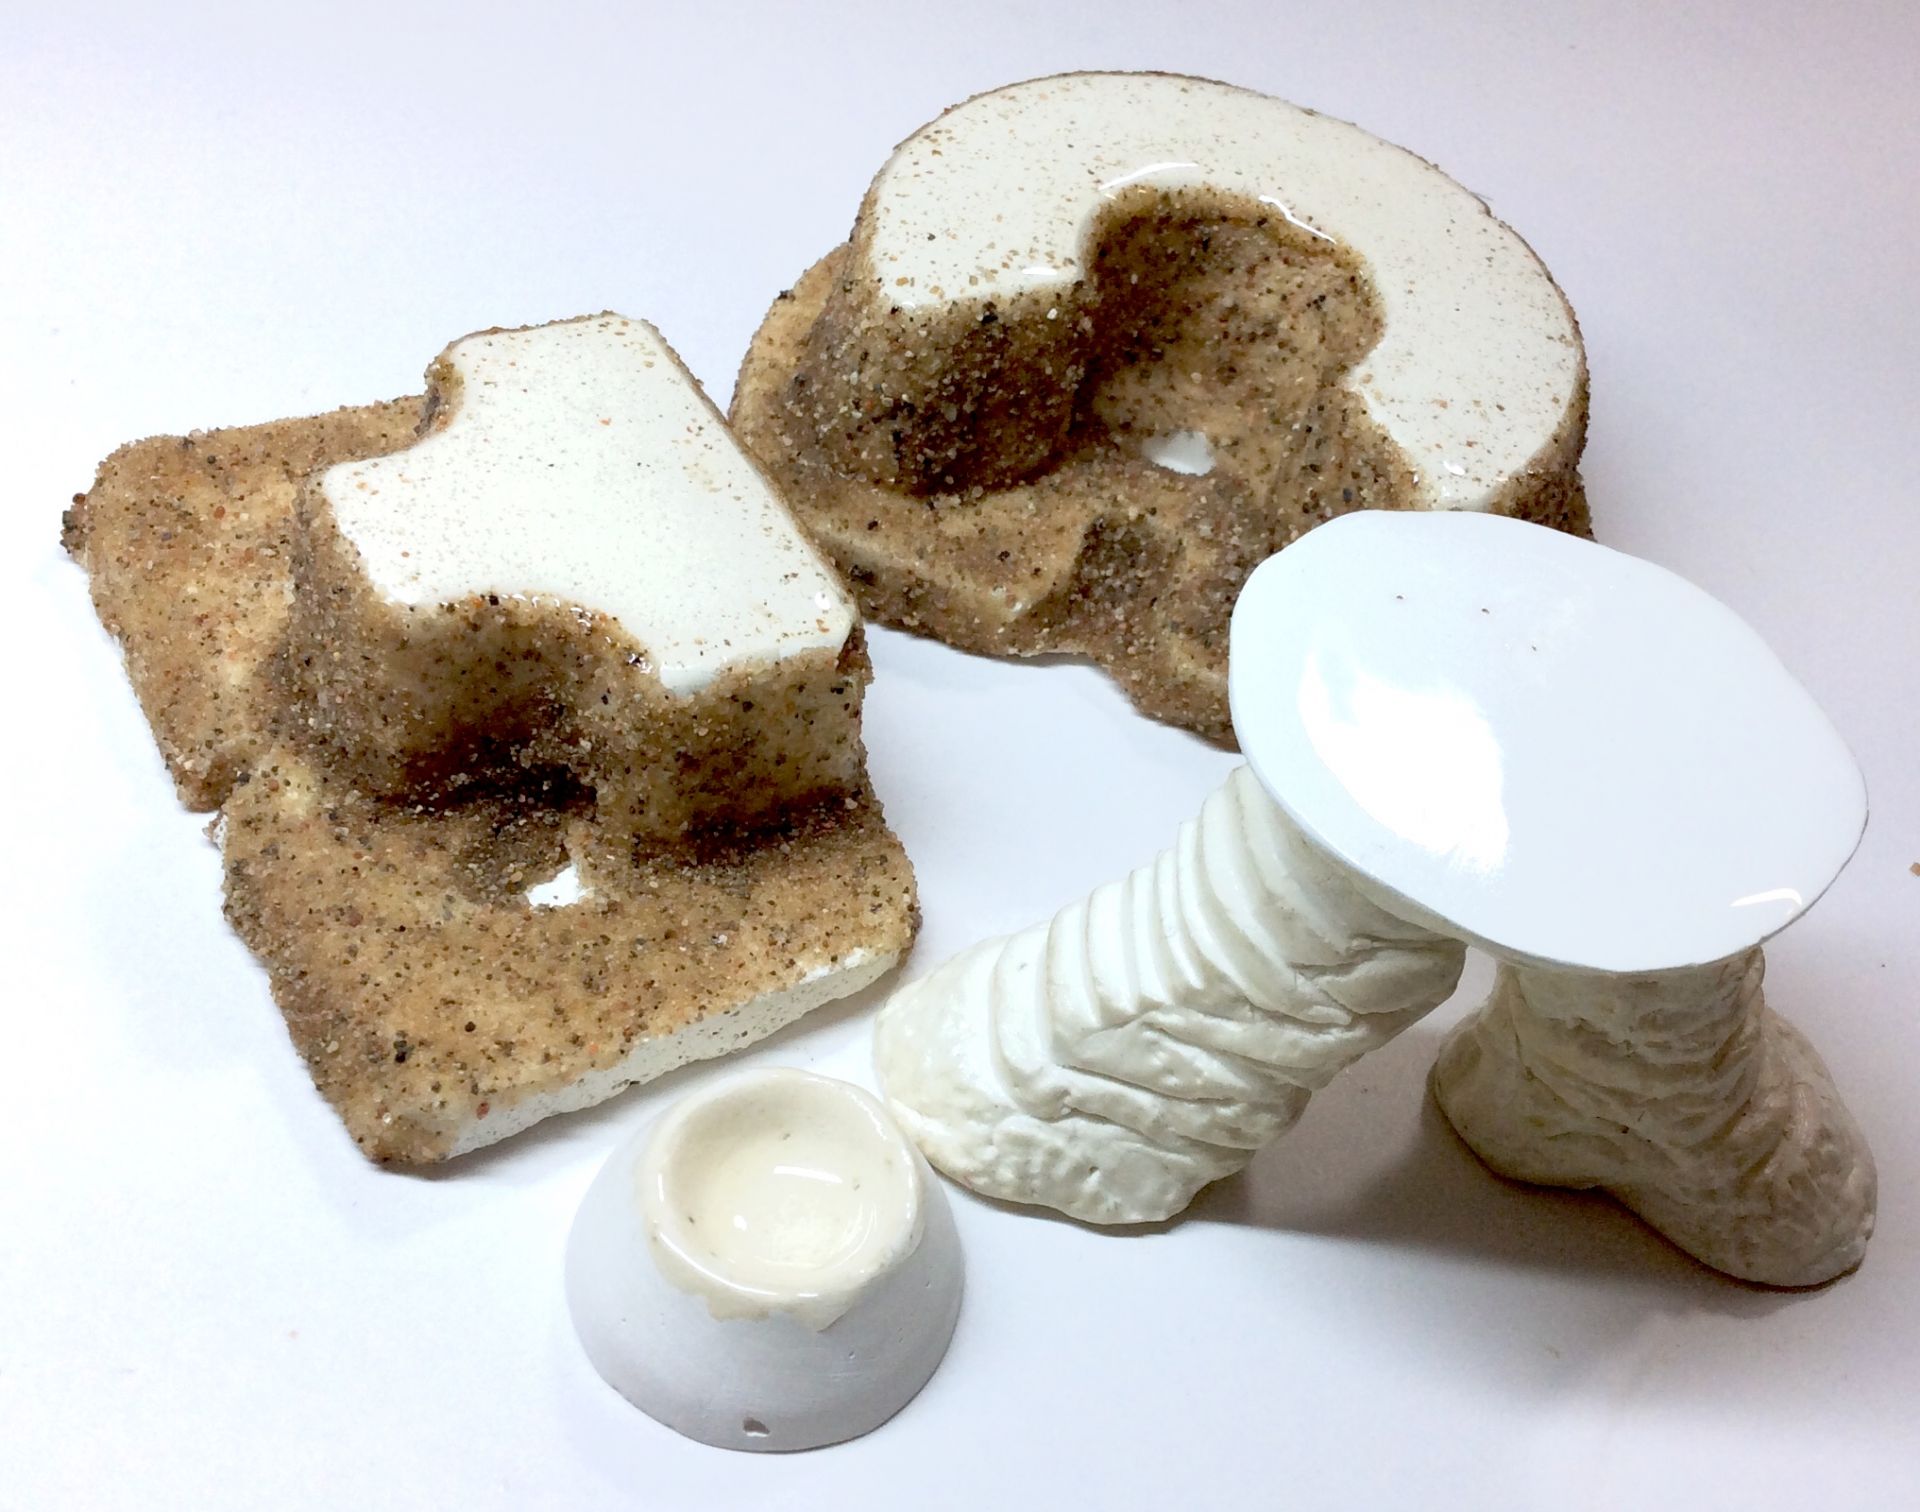
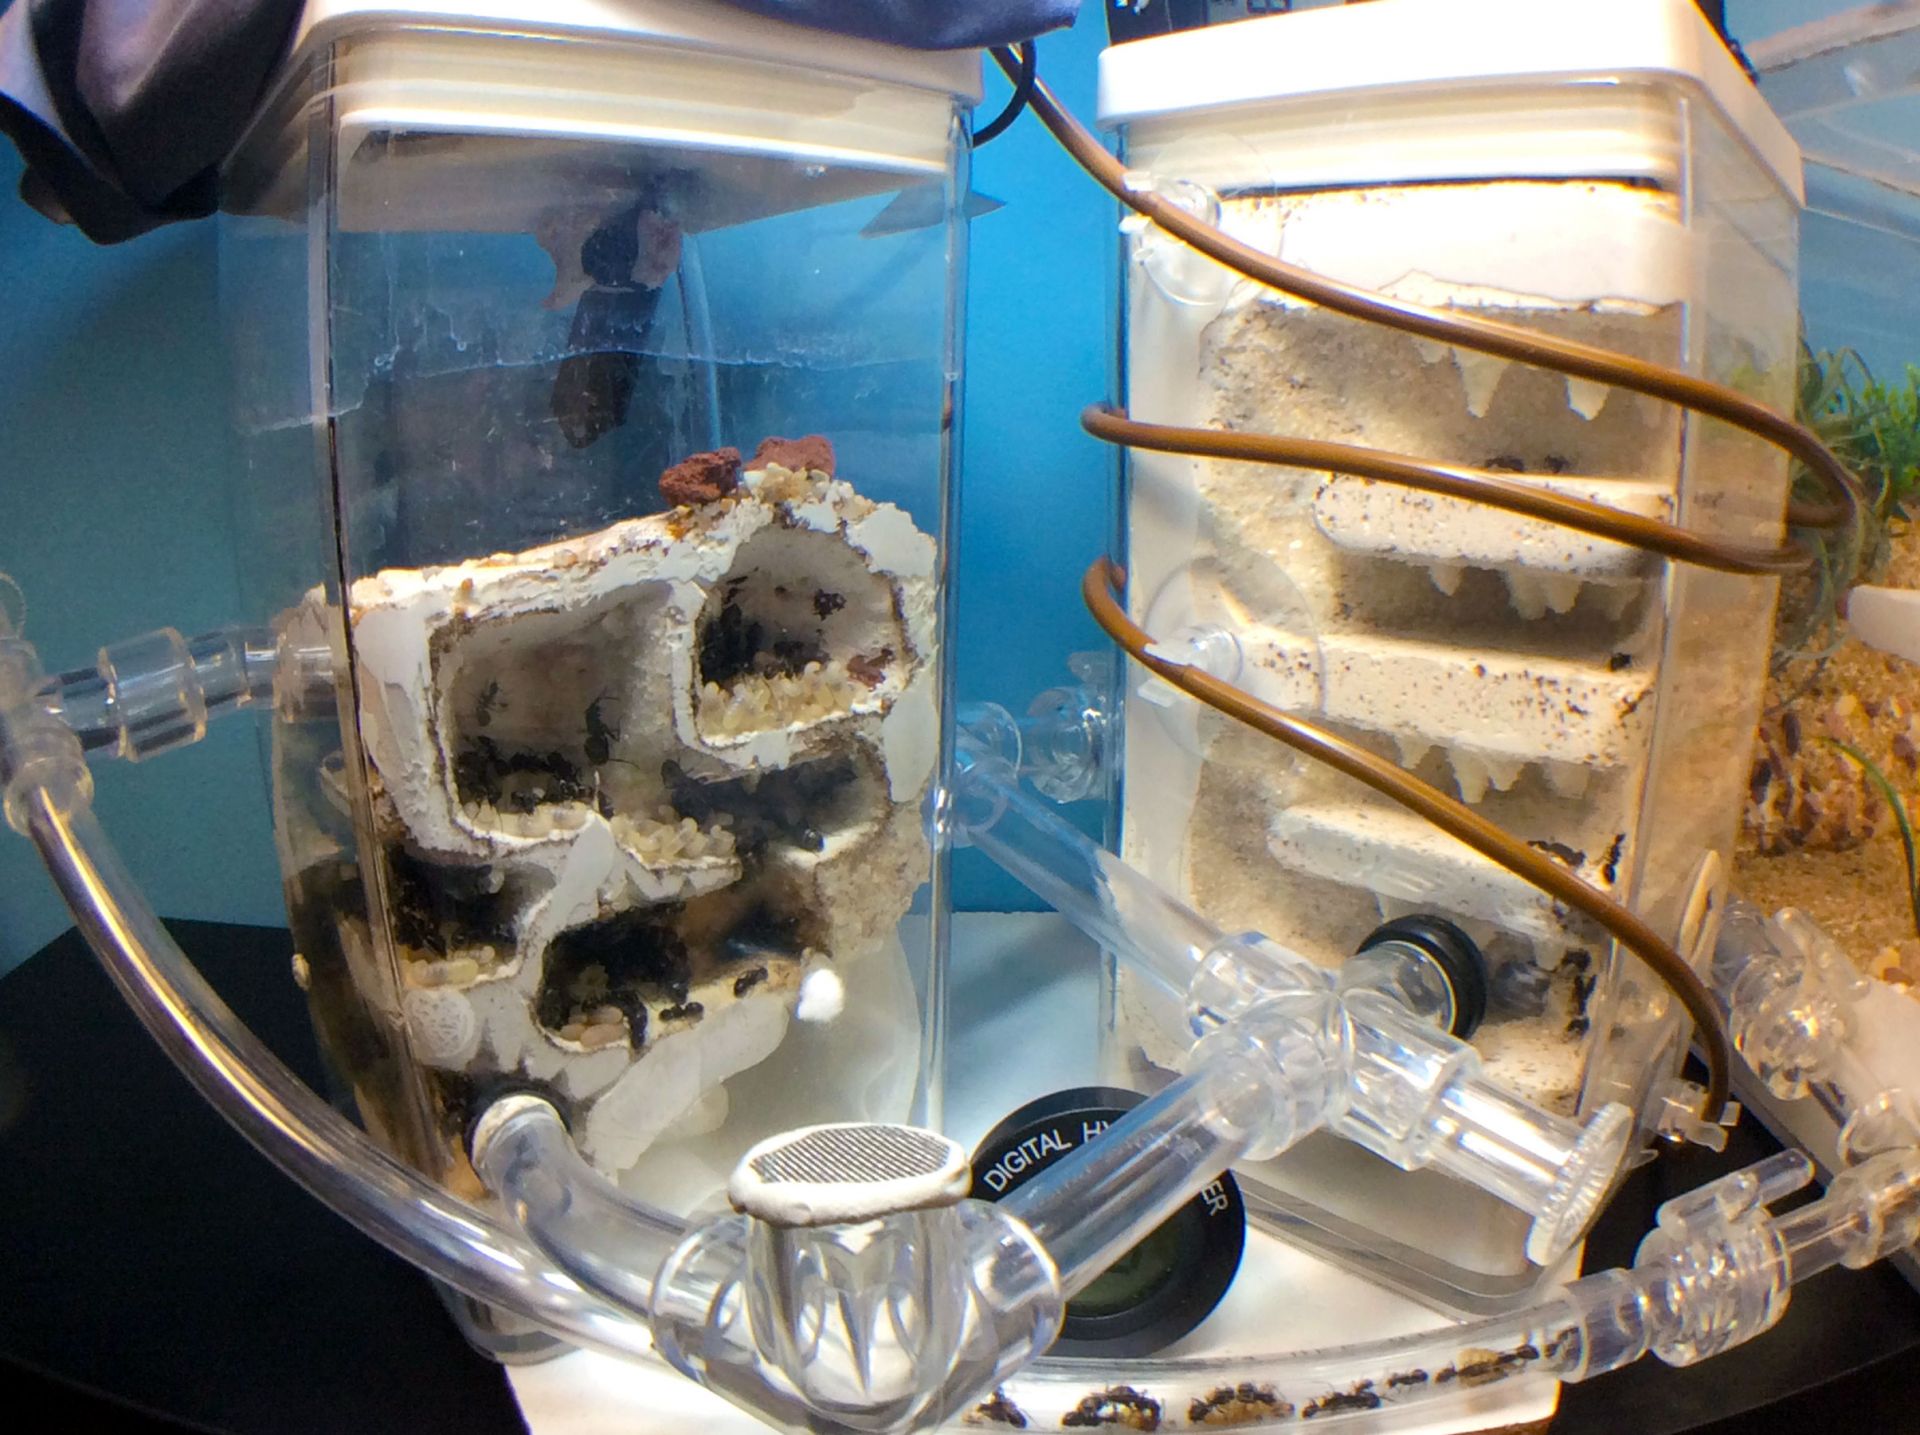
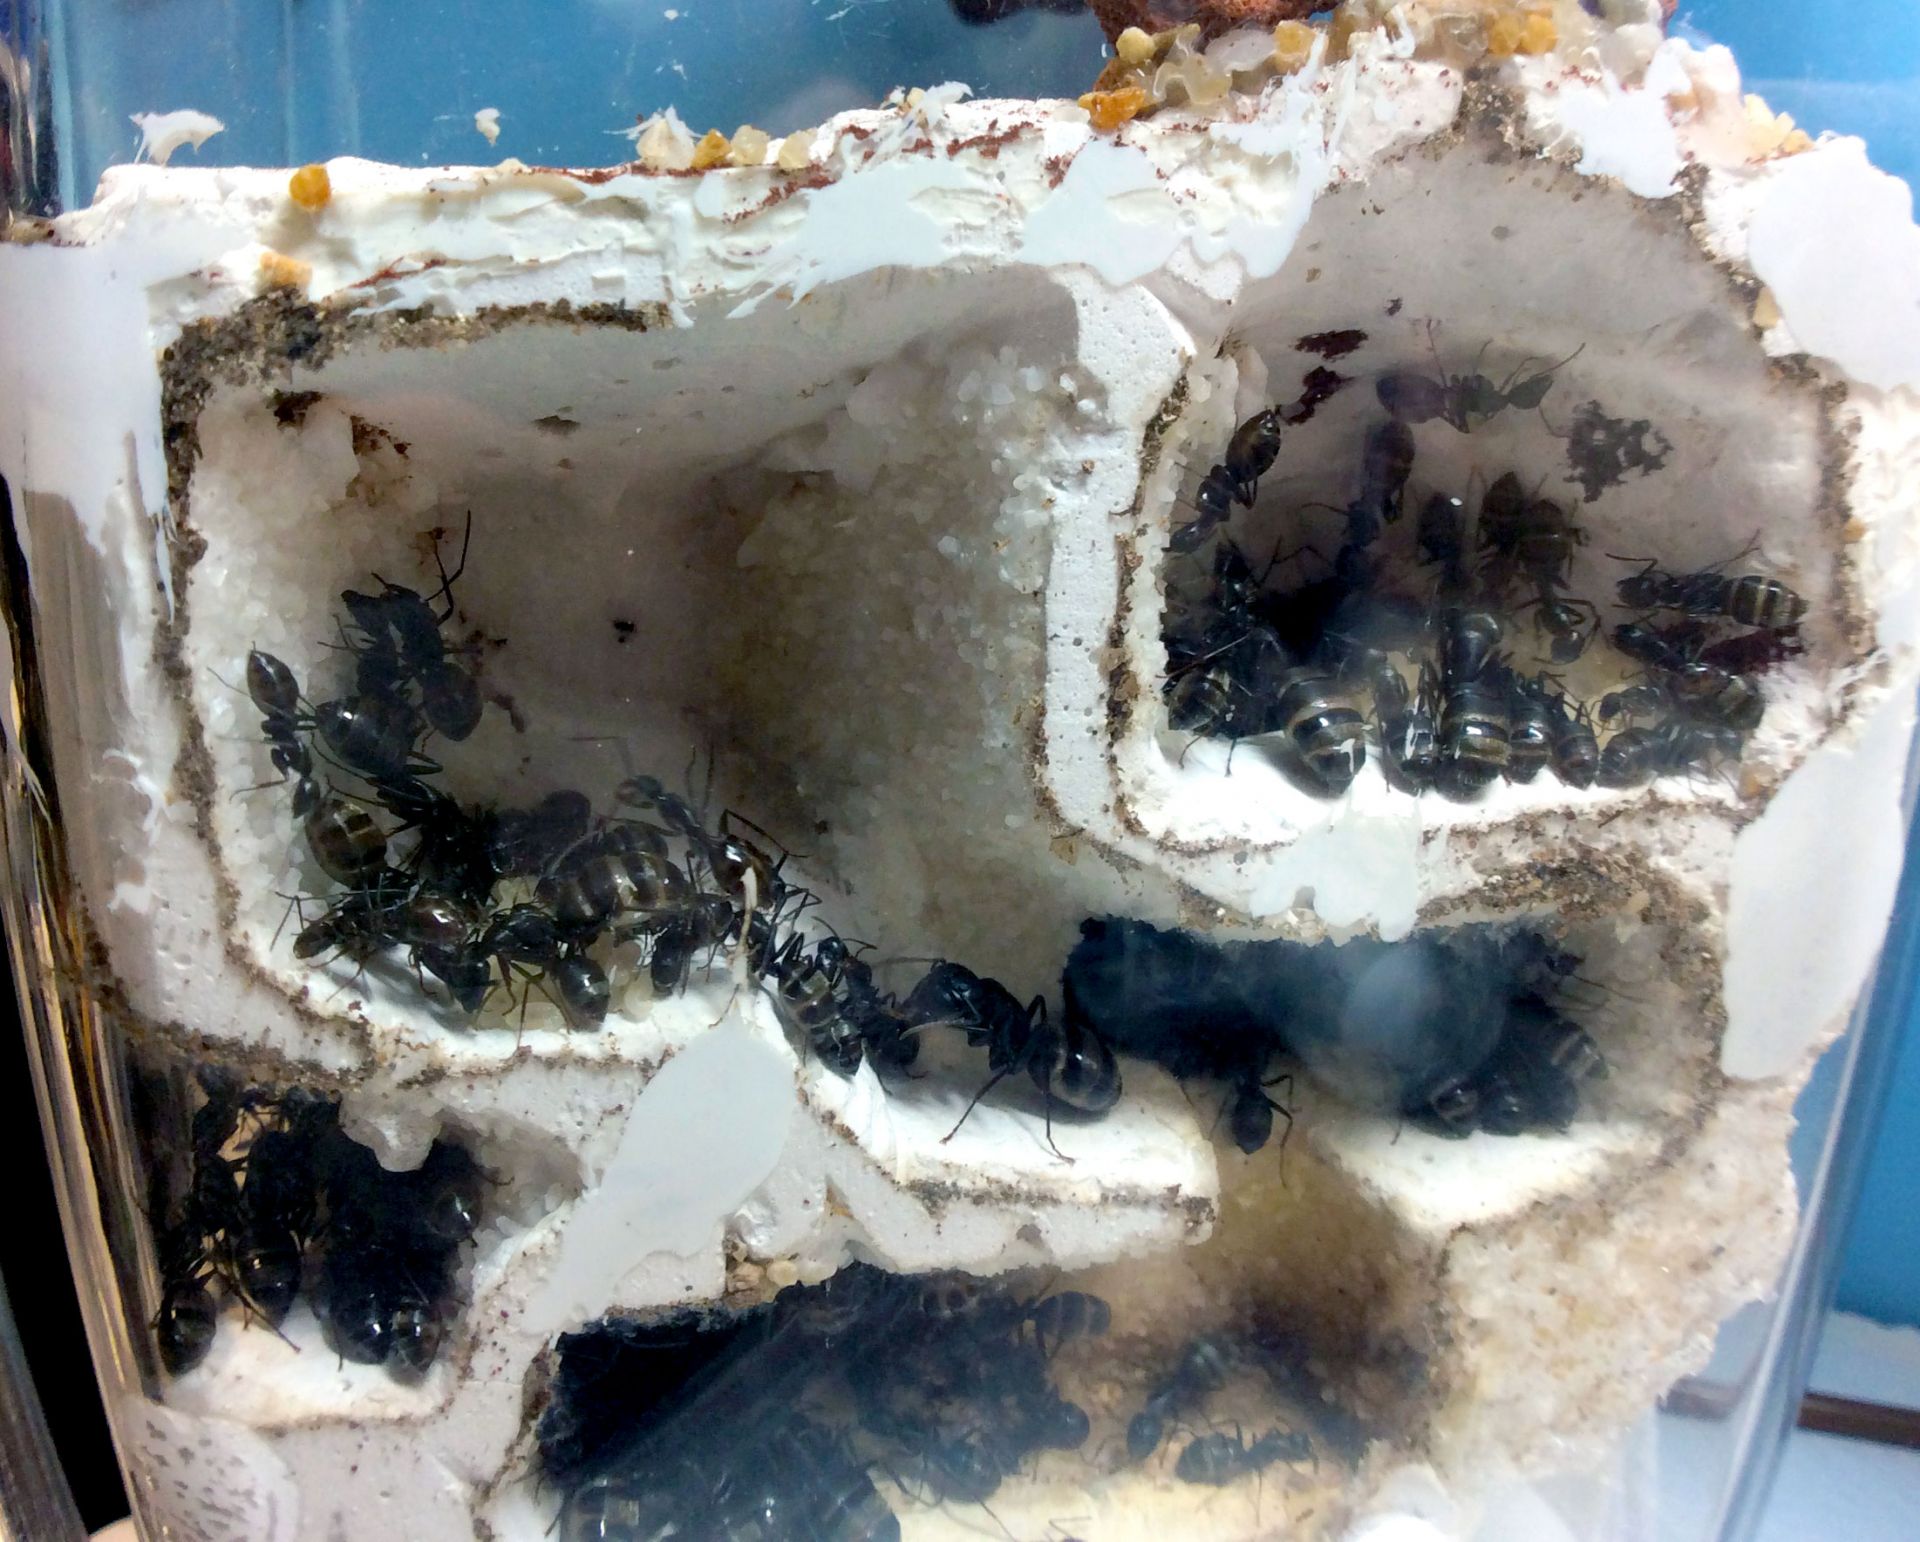
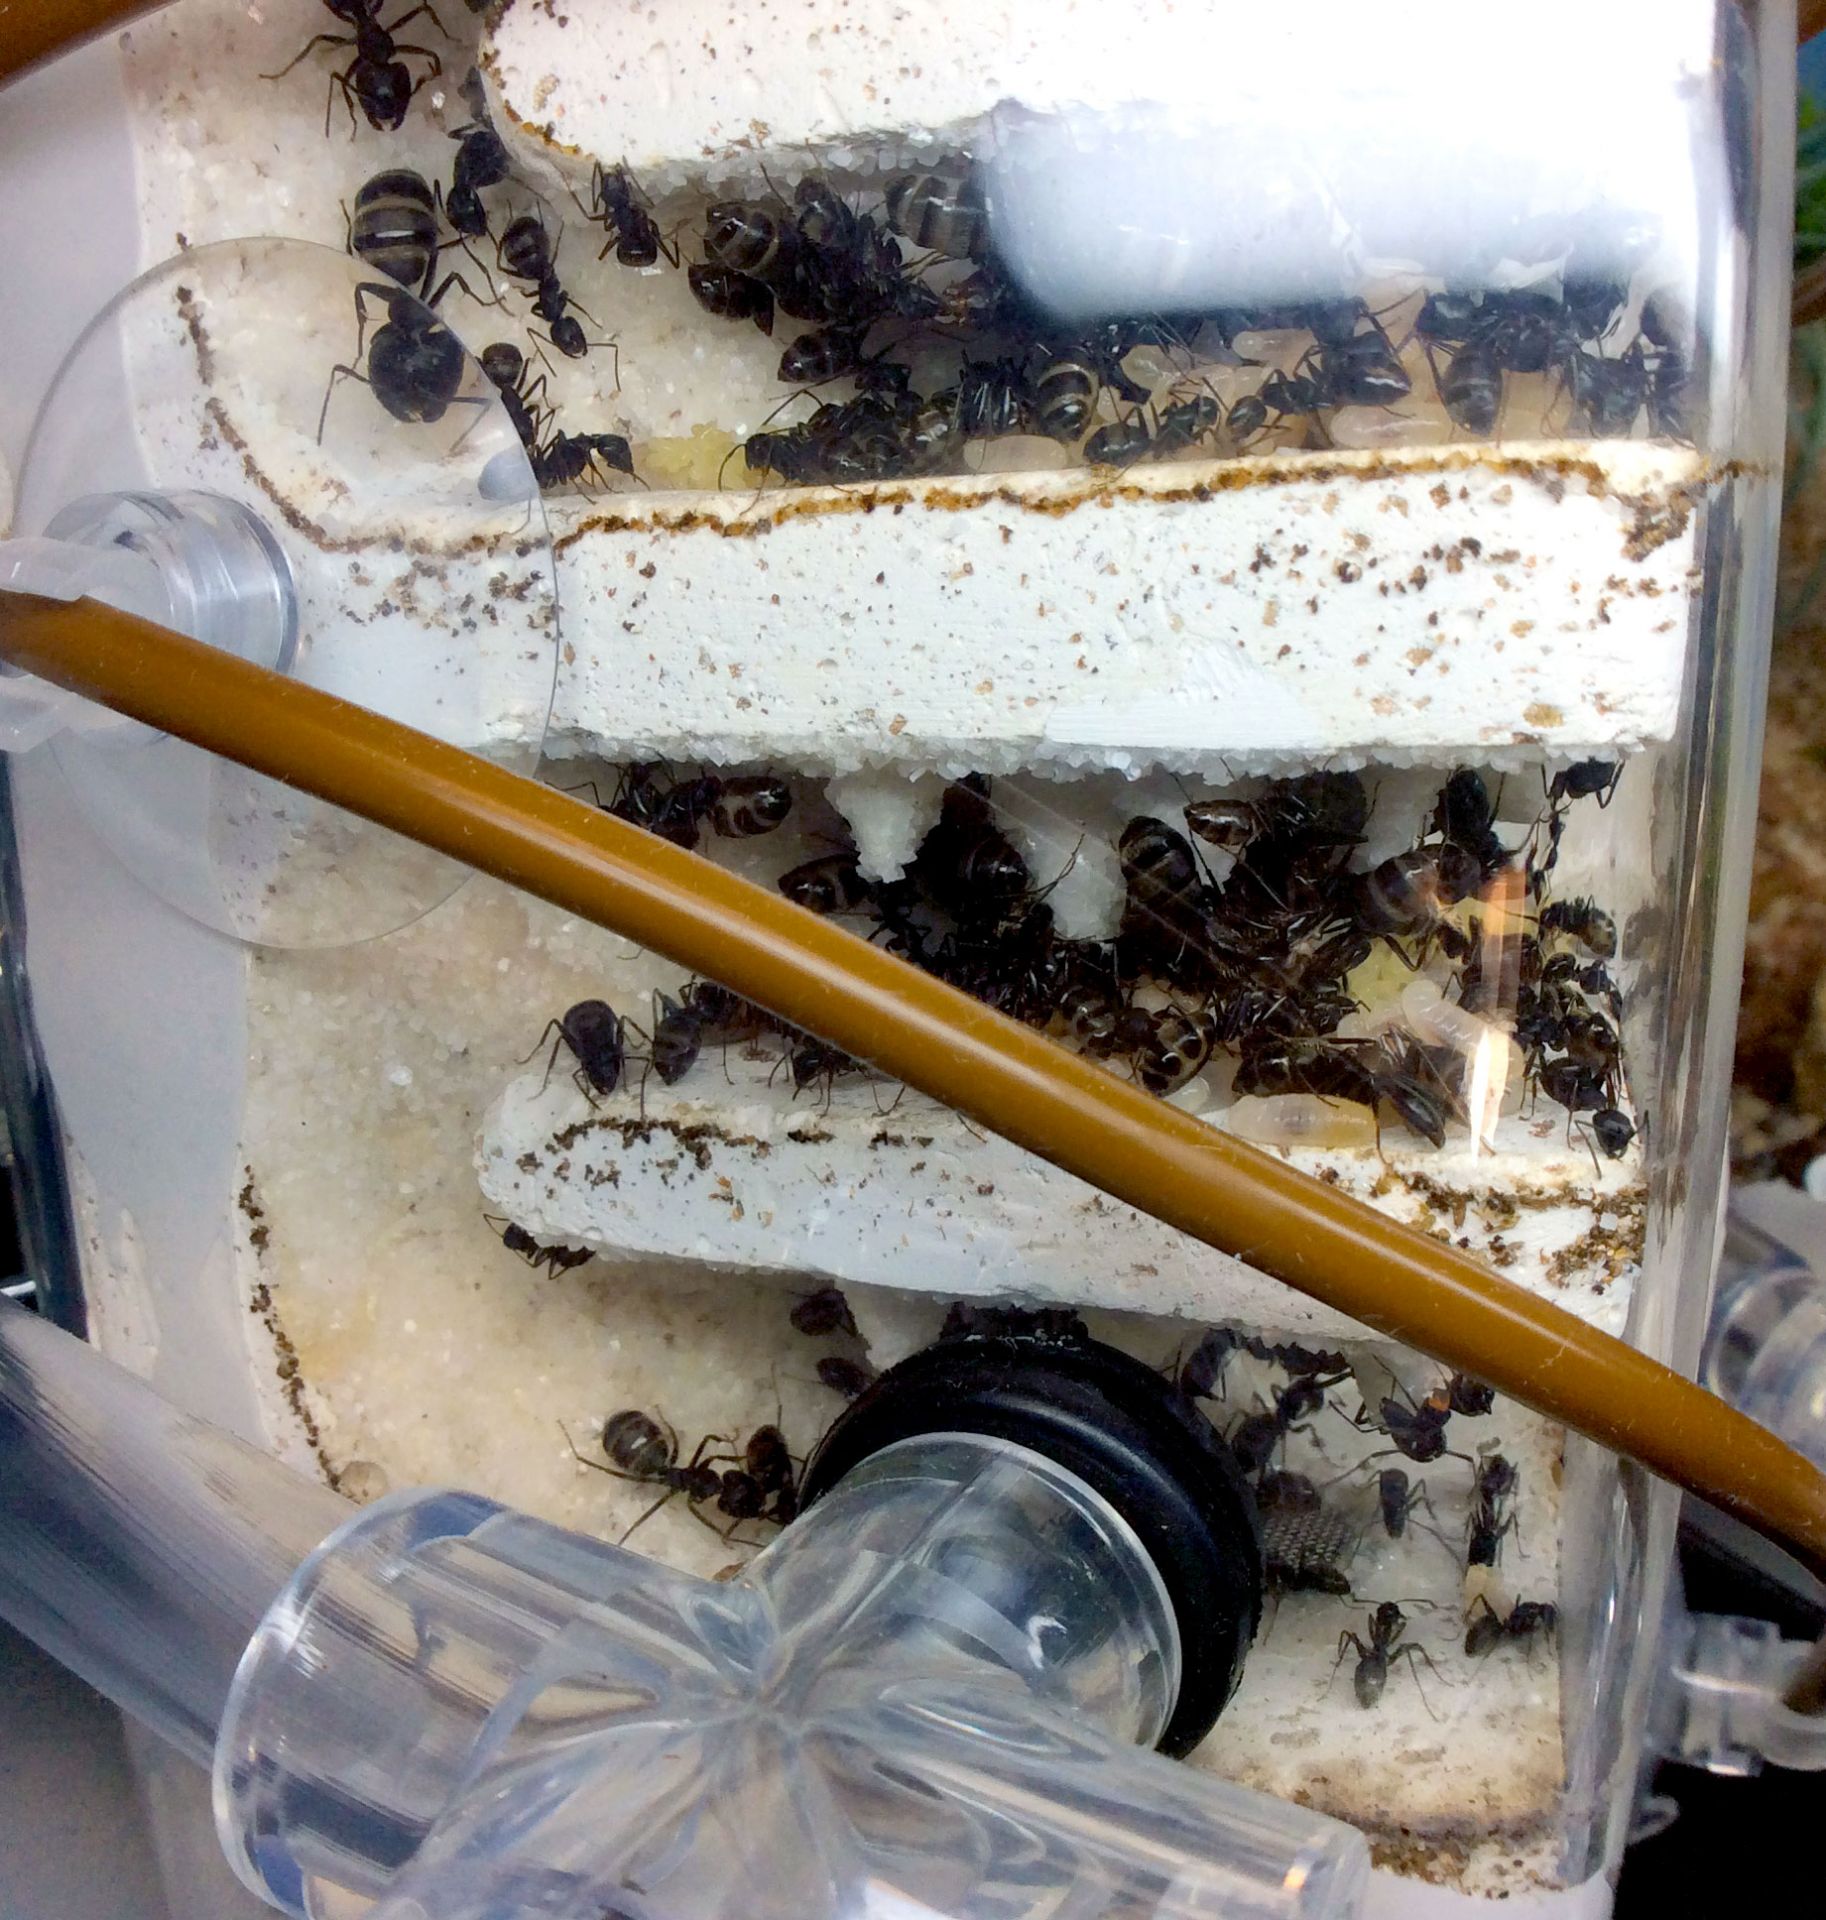
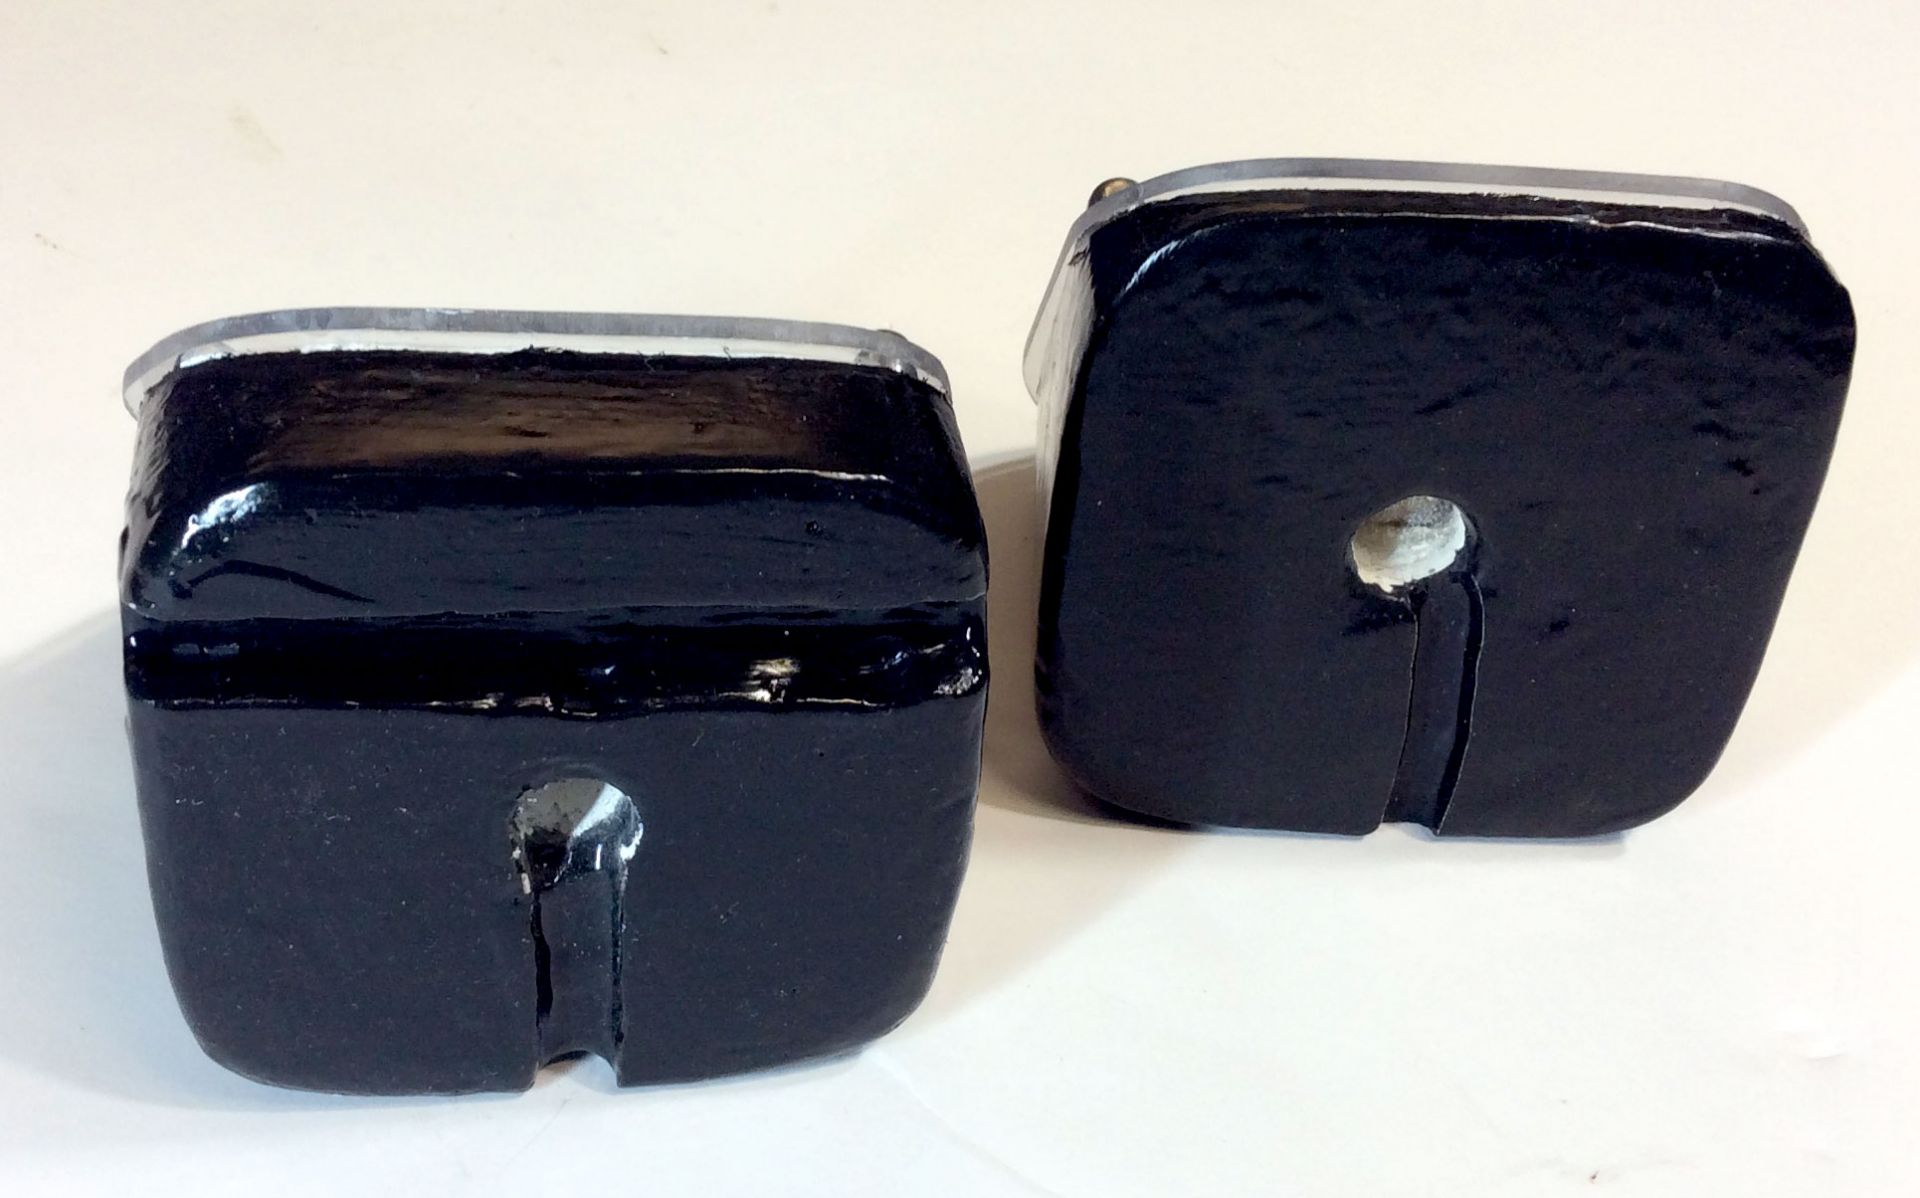
I let the cones cure for several days, I then sanded and drilled their bottoms a bit so that the adhesive could have an area to grab. I like the white nest to contrast with the black ants and my goal was to have grout floors with epoxied sanded walls and stalactites. The exposed grout ground hopefully is absorbent while the epoxied walls hold in humidity and the stalactites provide more surface area for ants to hang from. The nest layout is snaked upwards, one side is closed off on each level and I drilled two holes through the bottom and top.

gallery_4140_1698_67940.jpg

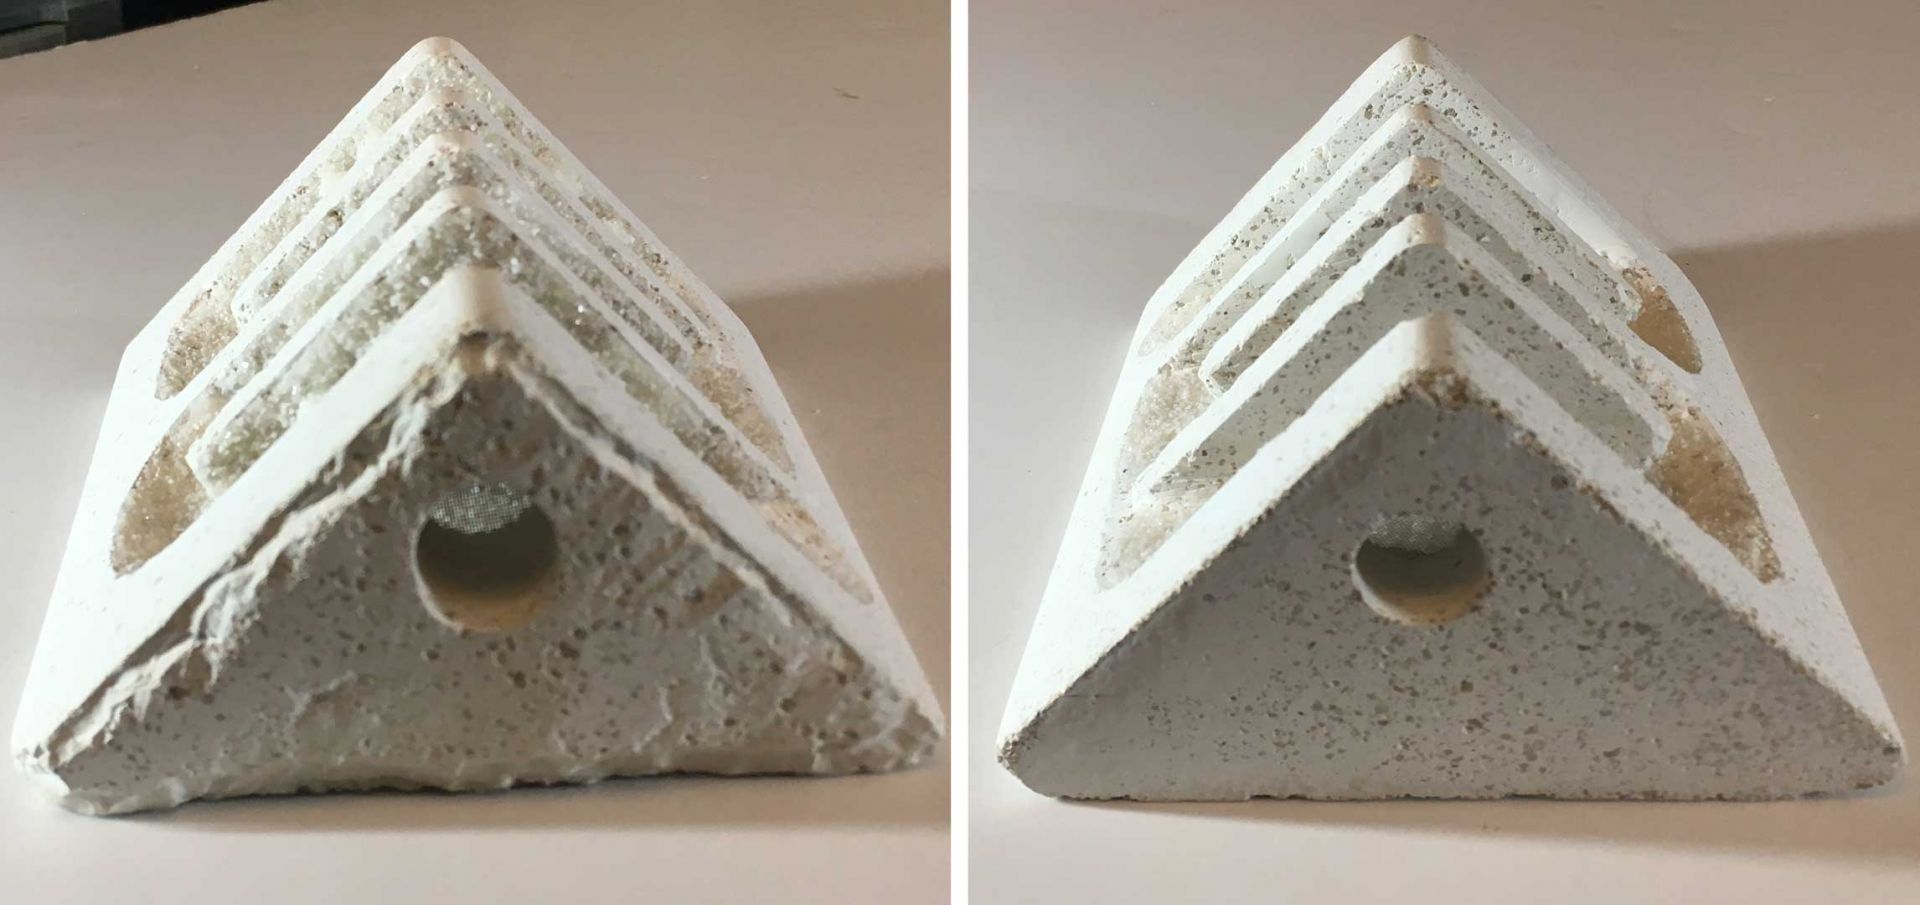
The plan is for the bottom hole to be for evaporating hydration/humidity and the top hole for ventilation. I epoxied in two pipe screens over the holes while also placing the cones where I wanted them, then finished epoxying the stalactites with sand. I had to move level by level and carefully but quickly place everything because I would mix the 5 minute epoxy in batches. After everything cured, I'm pretty happy with how my new grout nest is turning out.

gallery_4140_1698_32156.jpg

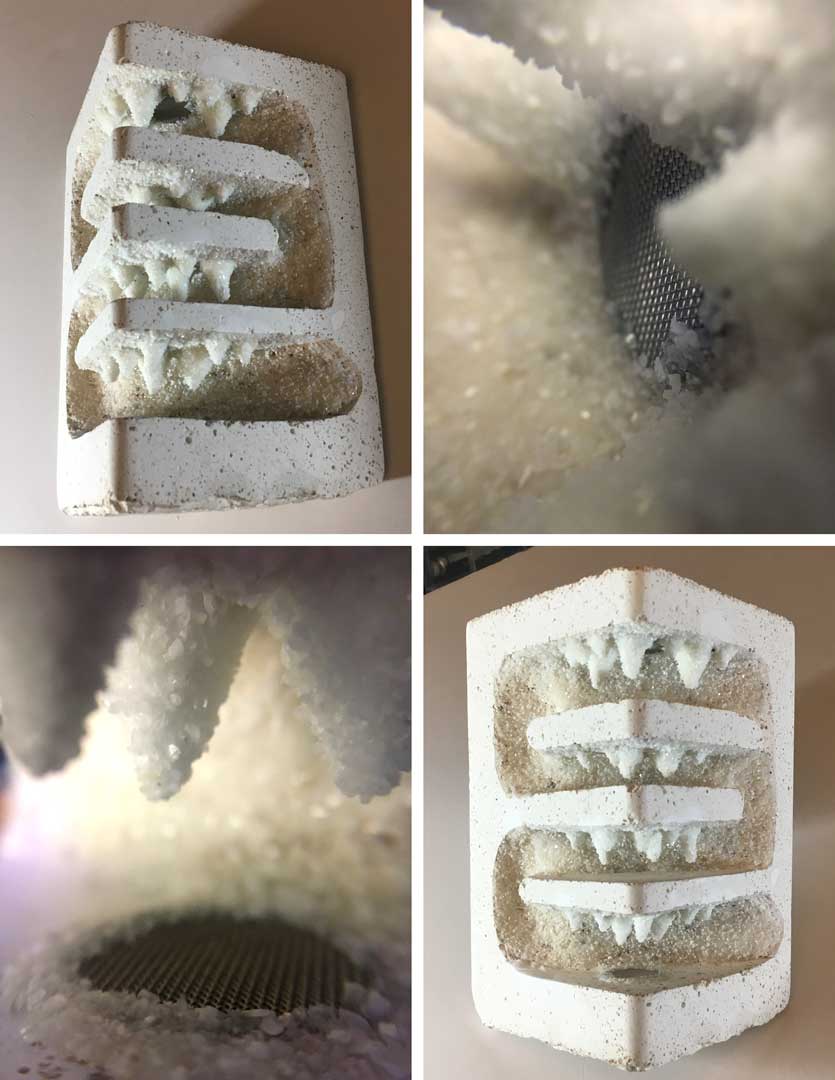
I really enjoy watching my ants hang upside down so I provided more areas for them to hang and hopefully the stalactites allow for more ants in a given area. For the grout mix, I used about 1/3 vermiculite to help with hydrating and maintaining moisture.

gallery_4140_1698_59679.jpg

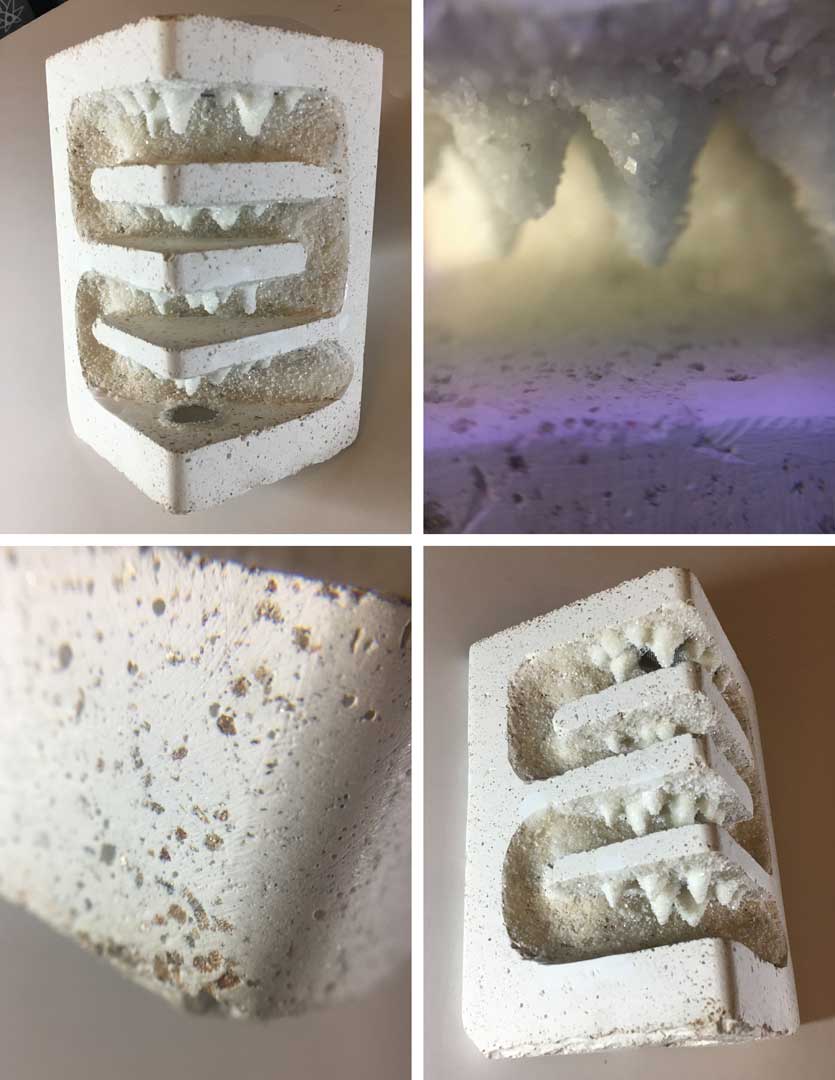
I suggest trying out epoxy and sand for your nests and out worlds, it’s a hassle to get the application right but the results are some sturdy sand-textured walls. Just wear a mask in a well ventilated area when using!

gallery_4140_1698_39558.jpg

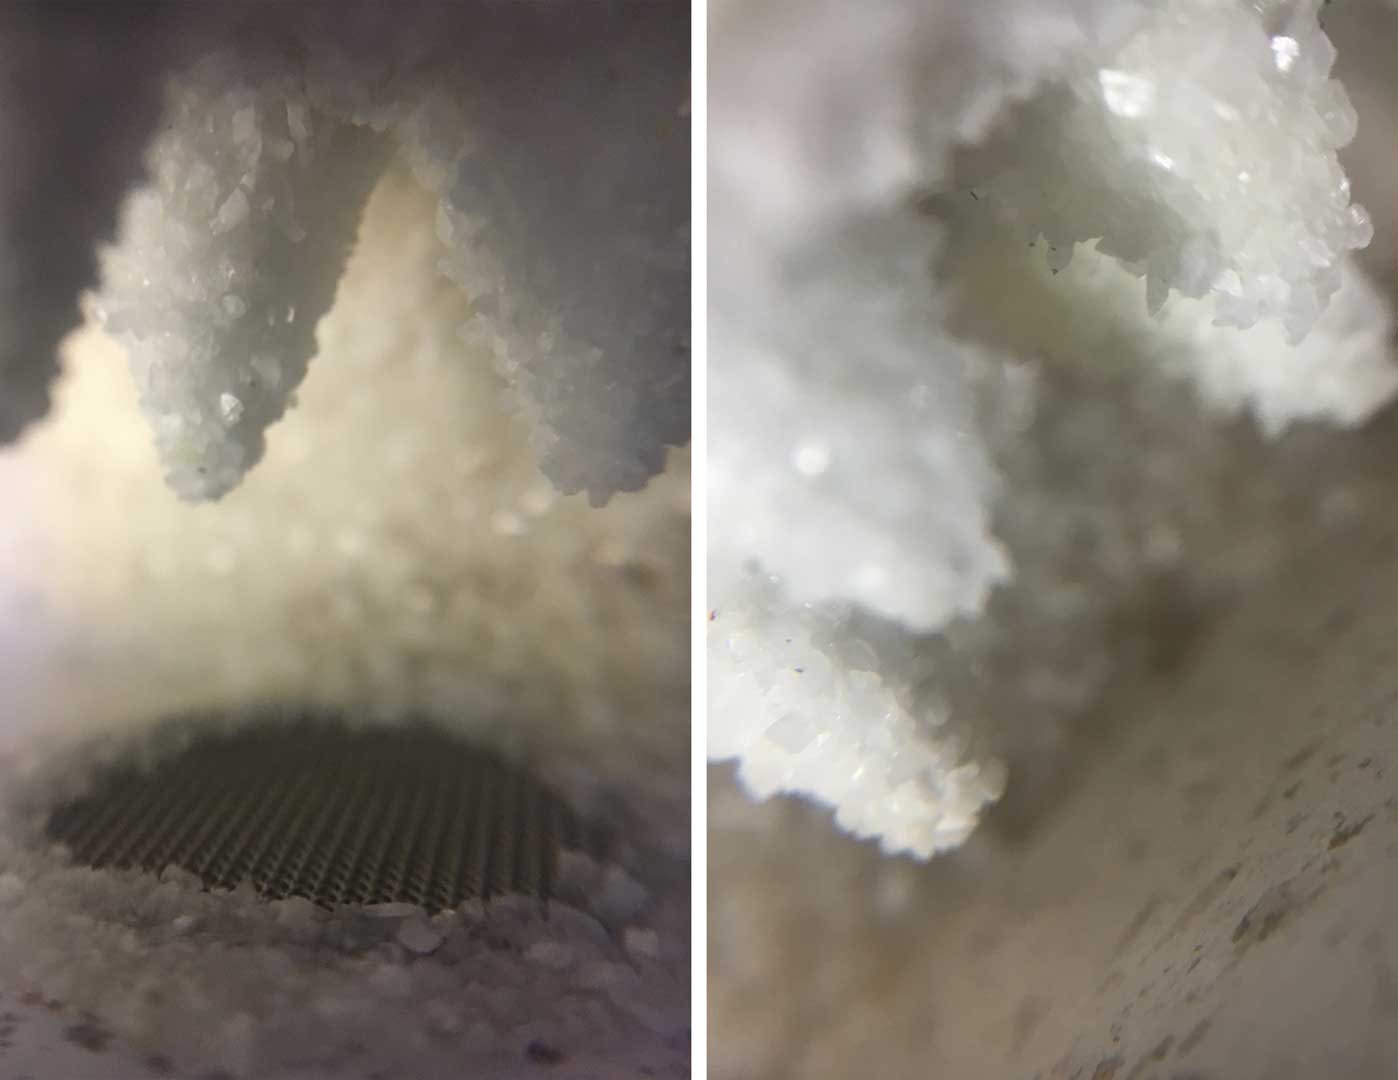
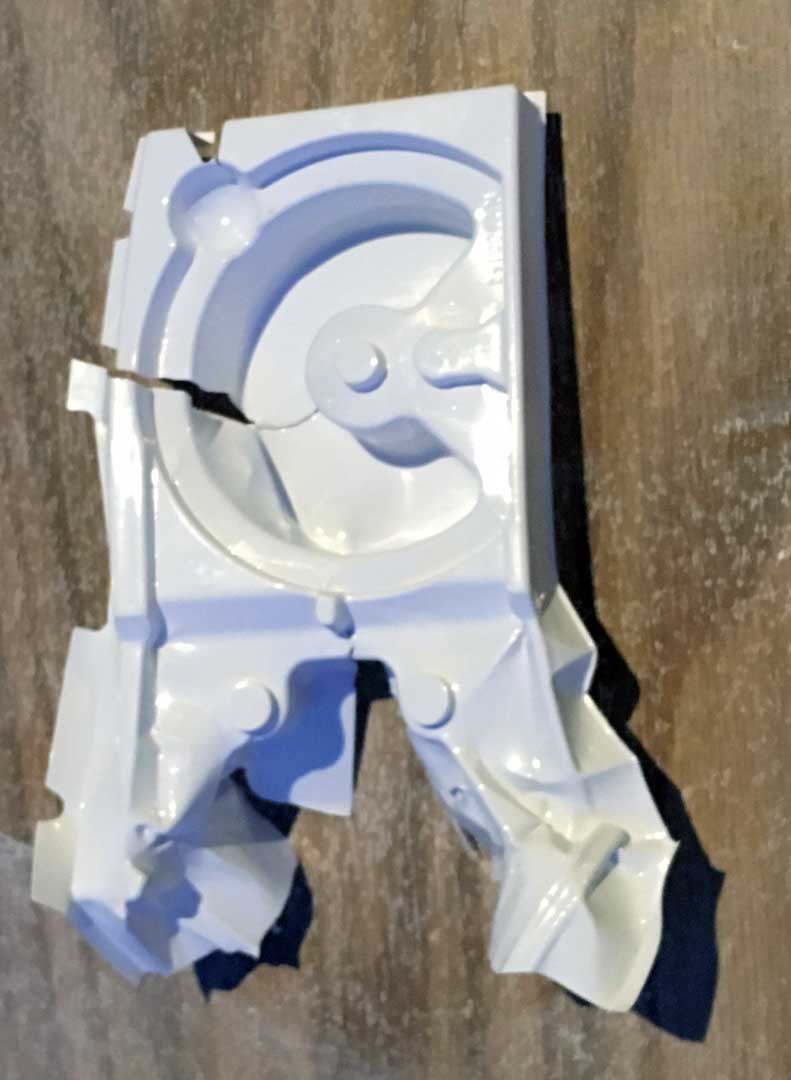
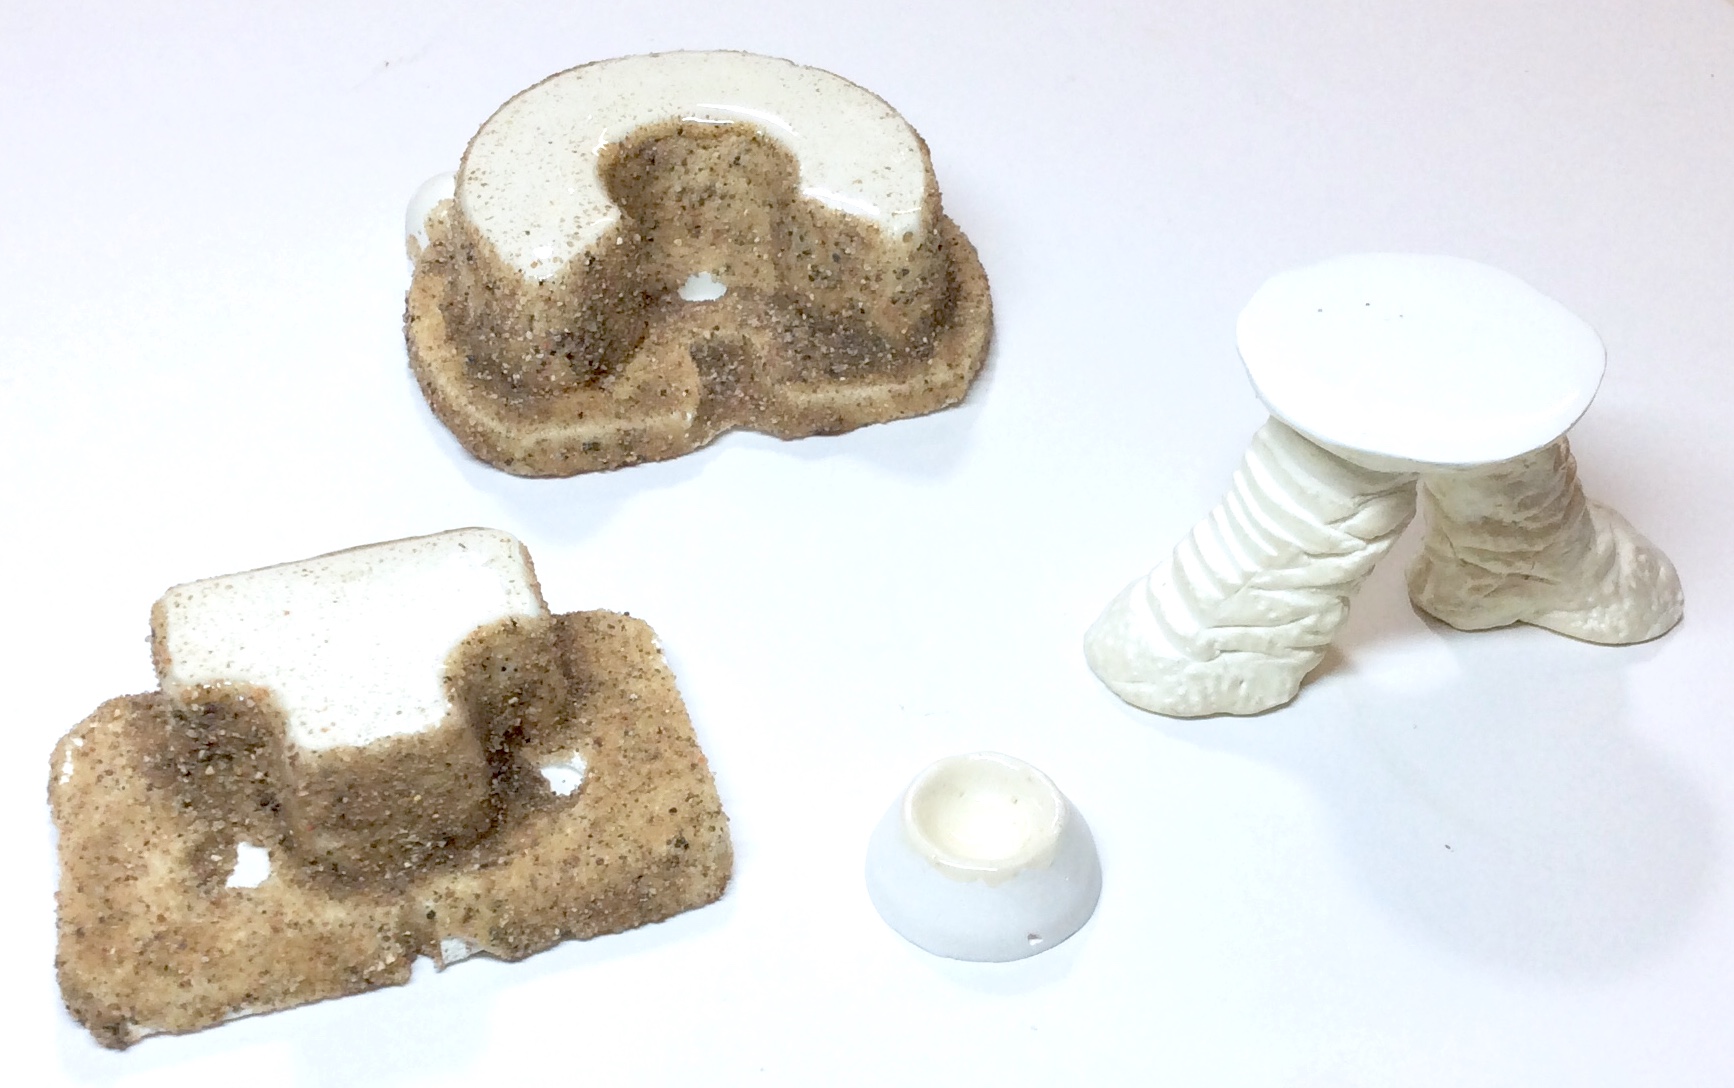
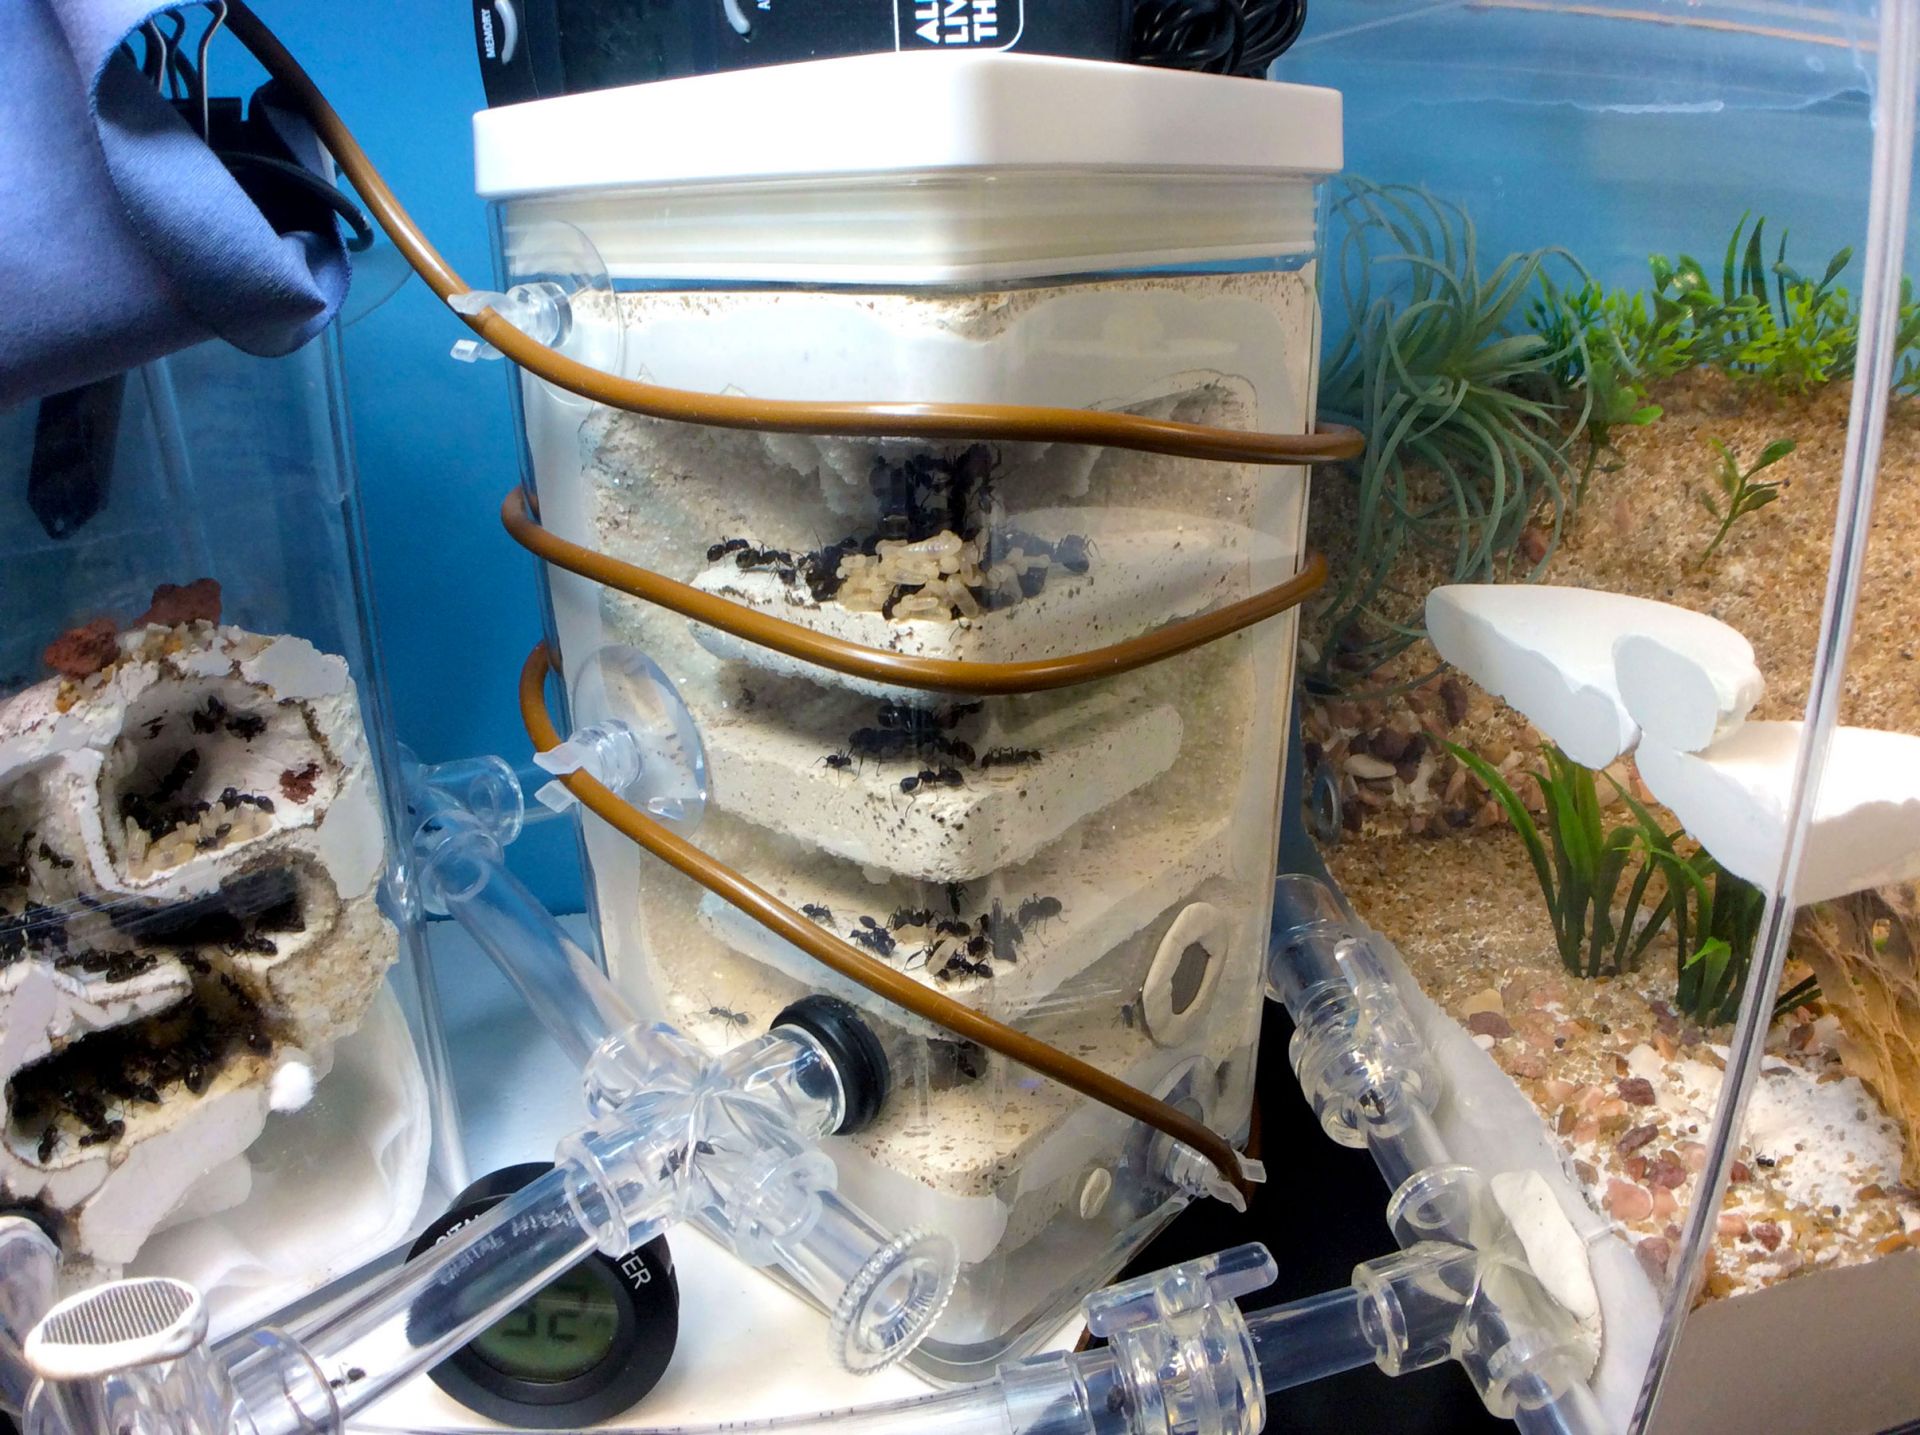
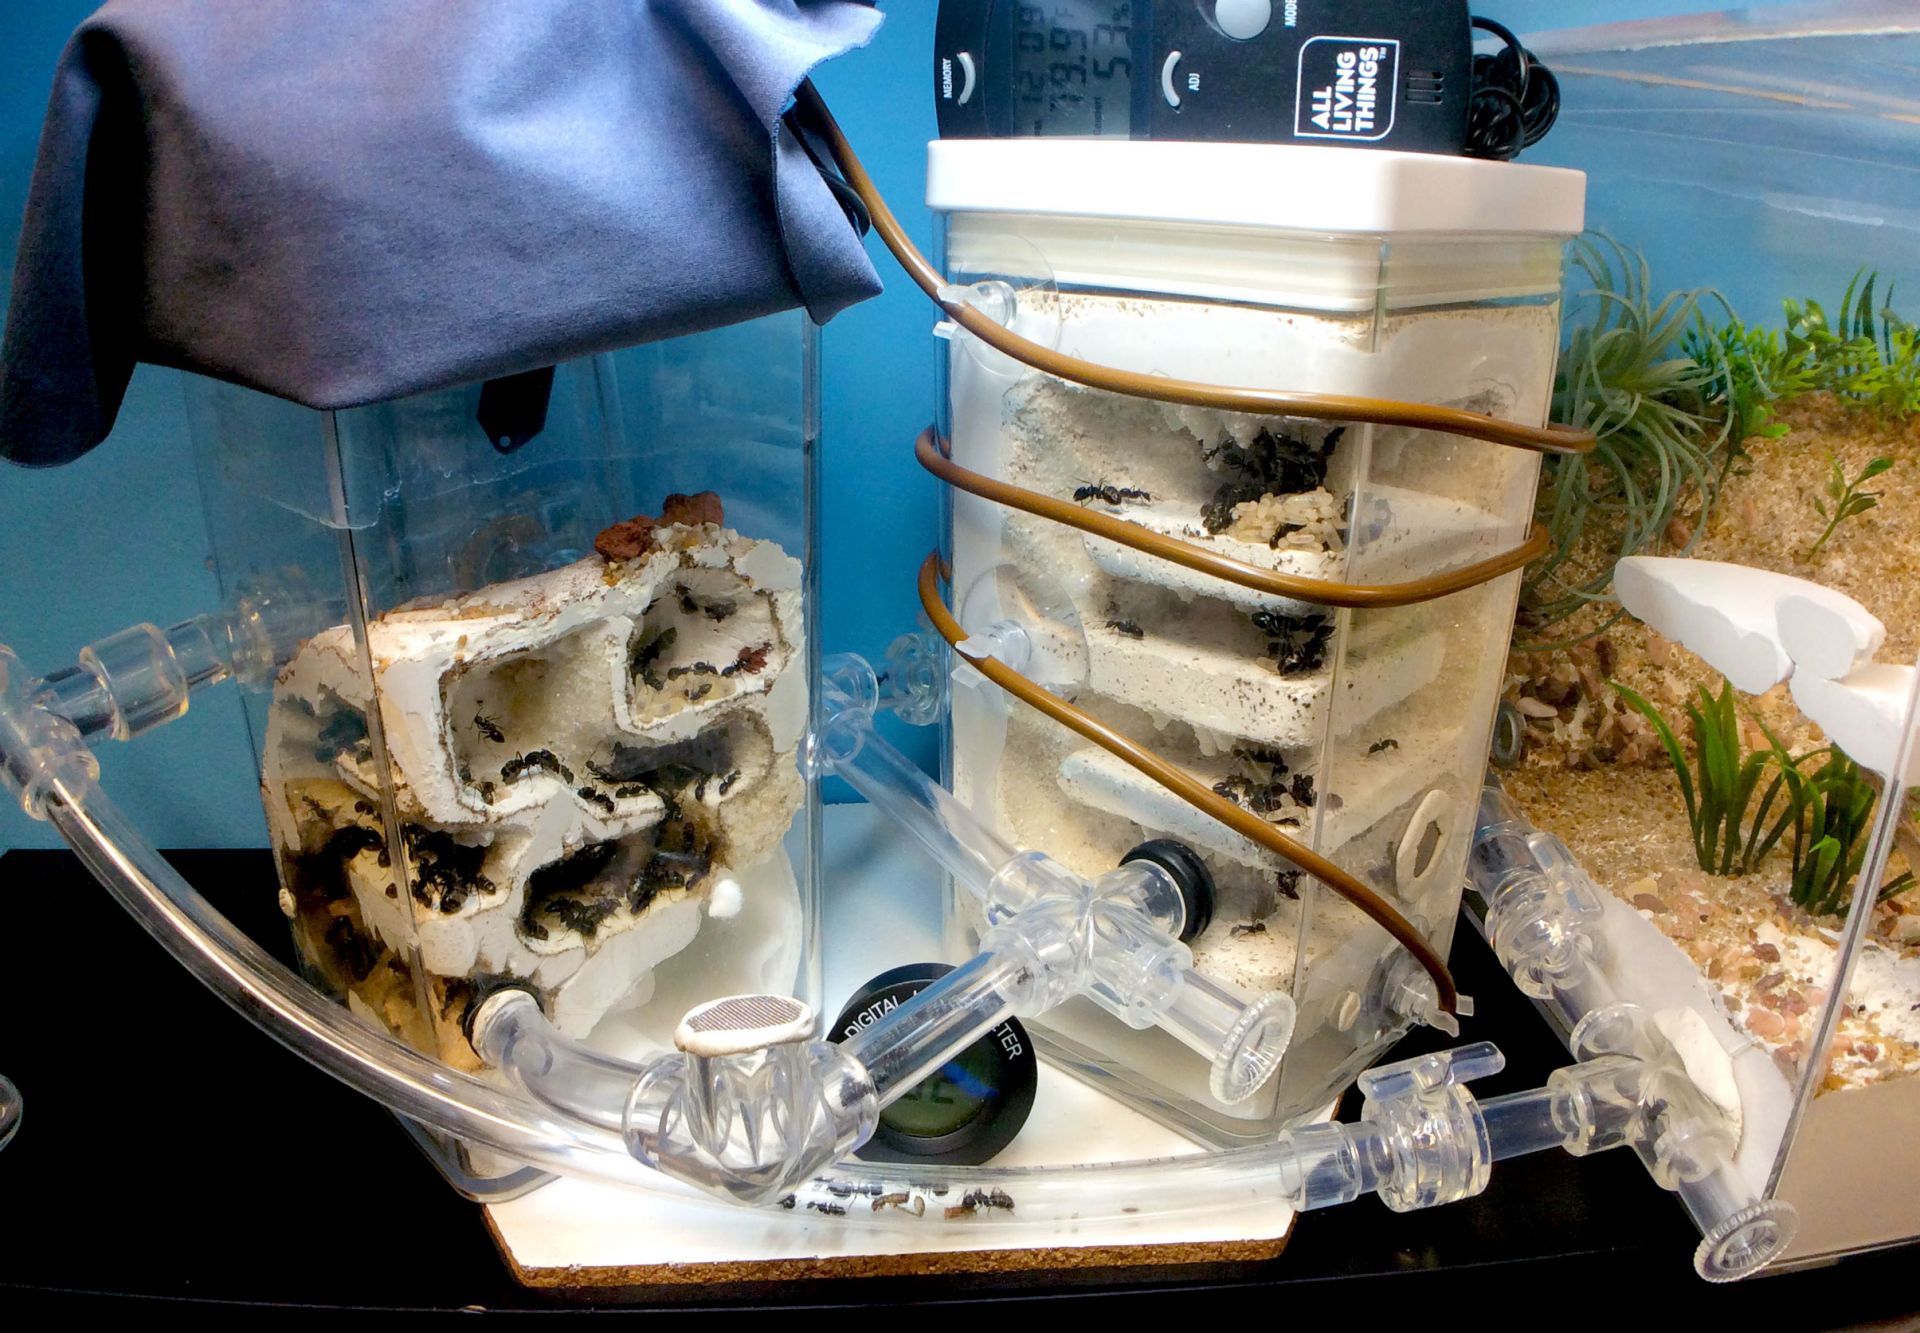
That nest can hold a couple hundred of my Camponotus but I need a bigger nest in case I get some explosive growth this coming year. I’m digging these vertical grout nests so am making an even larger one. This time I’m doing a cylinder with two nest areas so that I could open it according to their size needs. I had a layer of vermiculite at the bottom of a round container, carefully built chambers and tunnels with Sculpey polymer clay against the sides that I brushed over with vegetable oil then poured the grout mix in. Again, I added about 1/3 vermiculite to the grout mix. I had to destroy the container to get the cured nest out so had to purchase another container that matched. If you’re planning on making a nest with certain containers, make sure to have duplicates just in case to use as a mold during the making process.

gallery_4140_1698_27774.jpg

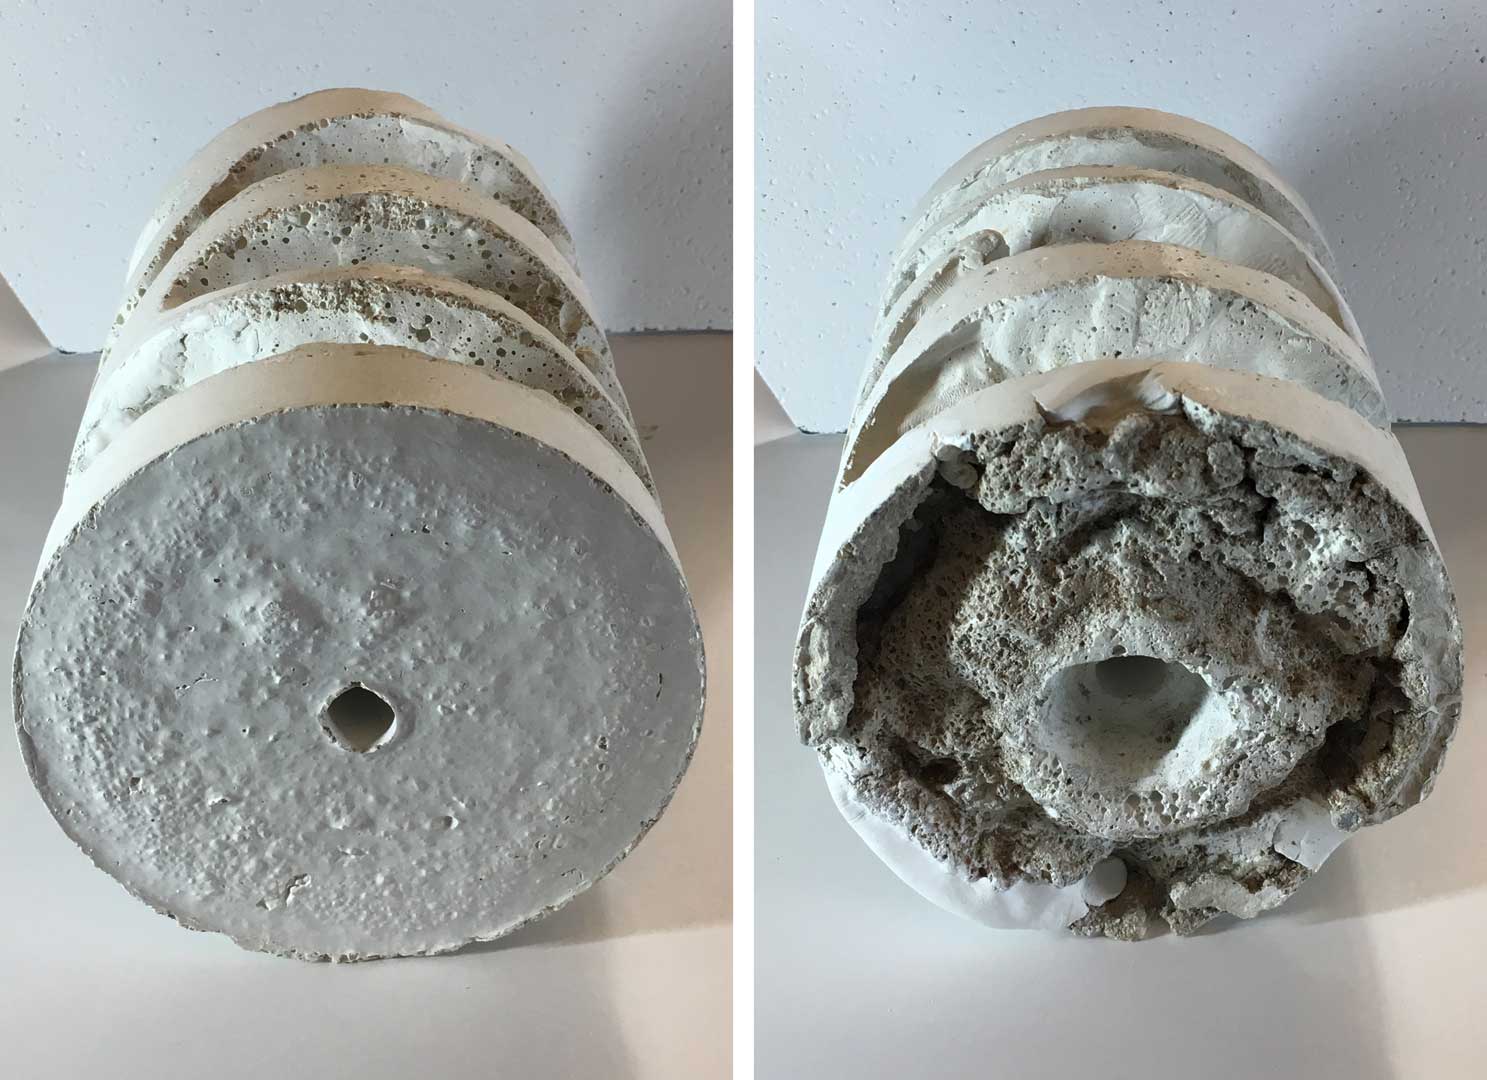
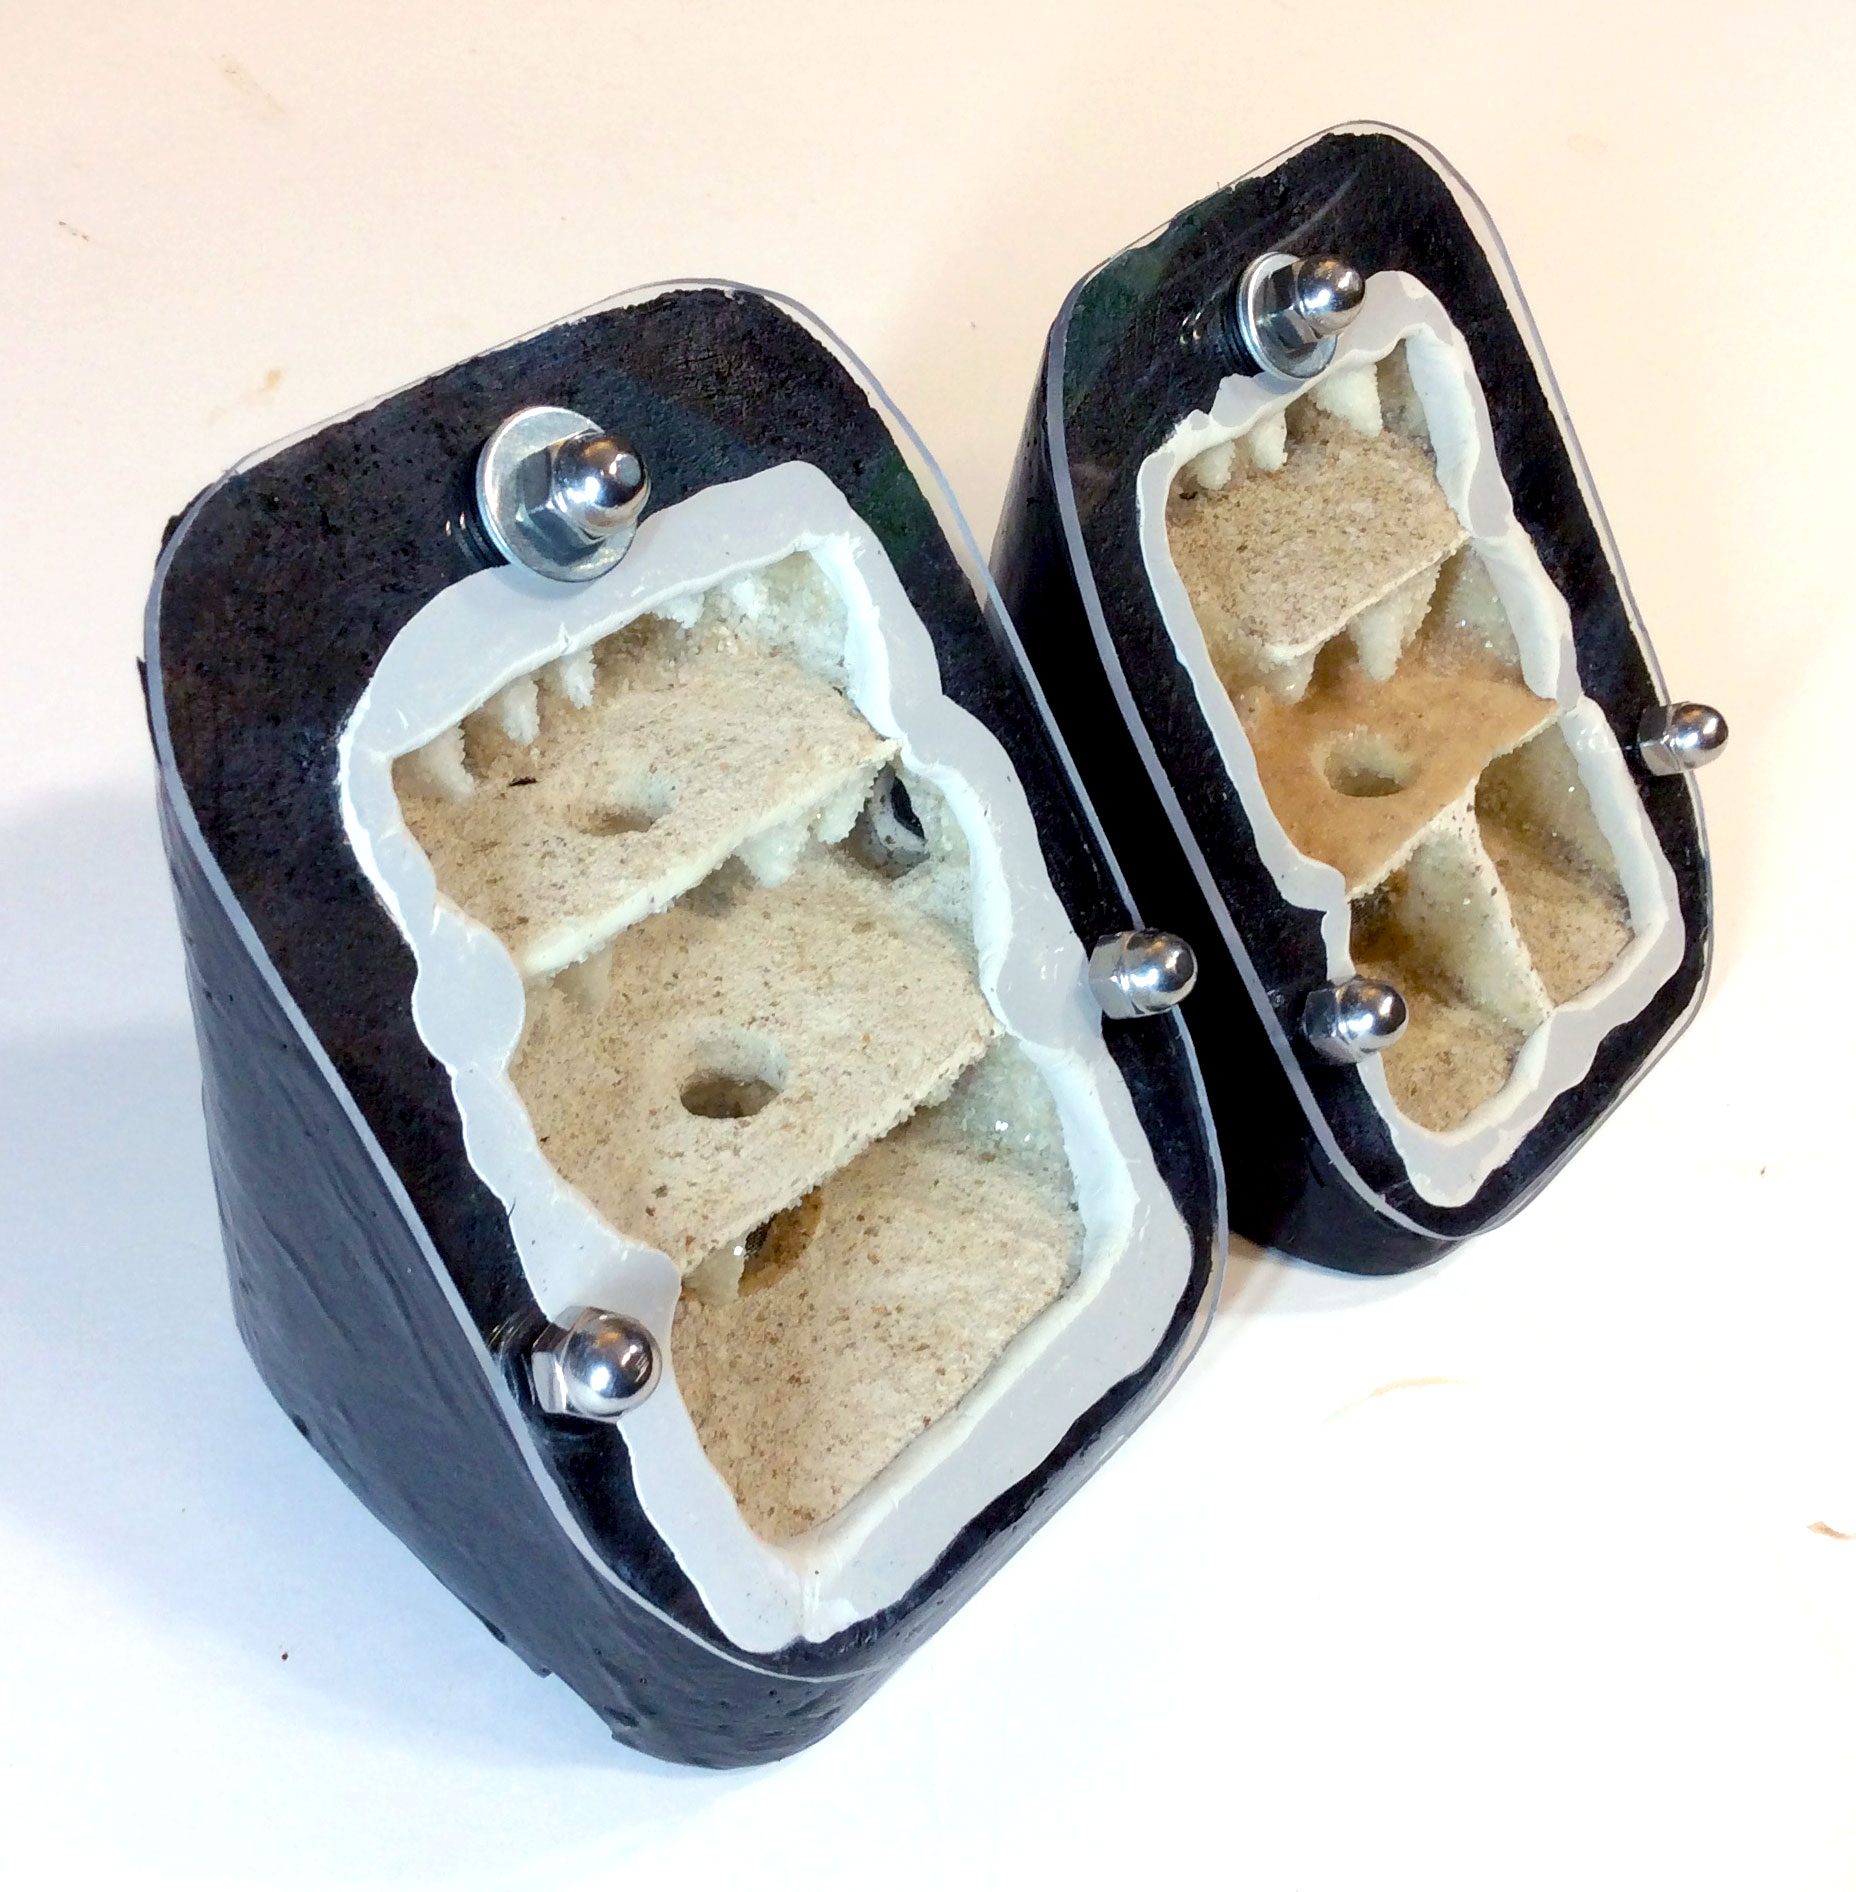
I’m planning to also do more stalactites and sand textured walls/ceilings to this nest. If you look closely, you can see bright white patches where I used superfine white Milliput to fix edges, holes and broken sections I had to silicone back. Chunks at the bottom broke off because of how I poured the grout mix over a layer of vermiculite which I did to help with hydration. I sculpted the epoxy putty in place and made sure the fit with the container was good and sanded the patches to a finish.


gallery_4140_1698_44374.jpg

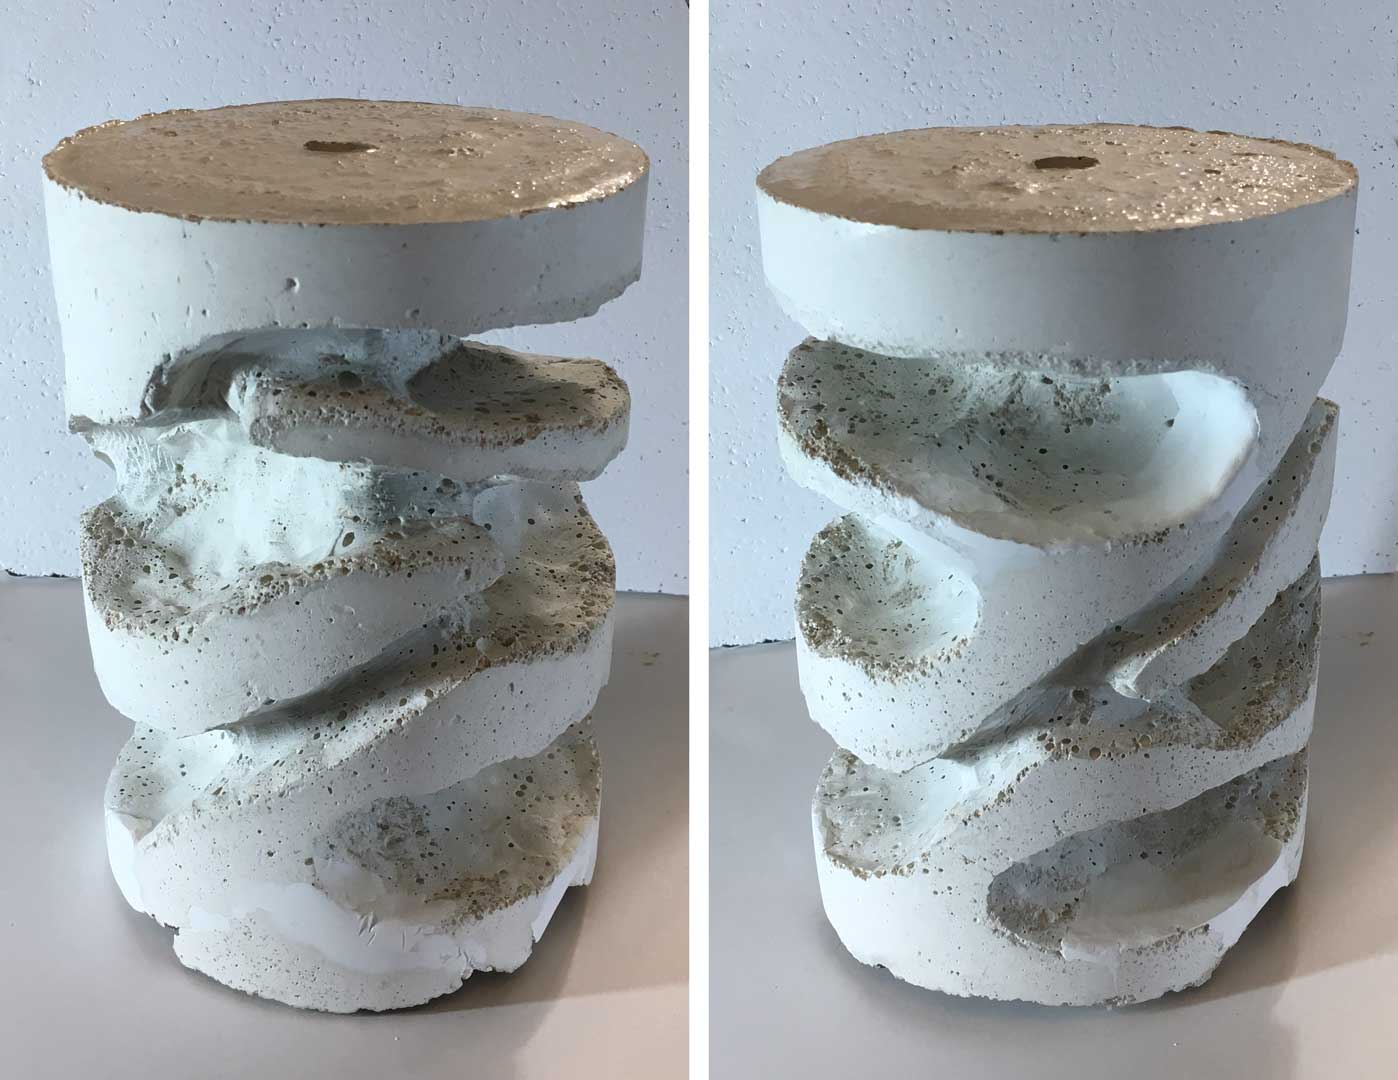
So half the nest is cut off from the other side, I’ll open one side first and then leave the larger chambers for later colony growth needs. I estimate this one can hold a thousand of my Camponotus! I read that this species can grow very quickly in their third year and I want to have my DIY formicaria ready. There is a center hole all the way through, I’ll probably use a layer of cotton at the bottom that I’ll hydrate from the top here. I’ll also need to drill four holes in the grout for the pipe screens used for hydration and ventilation.

gallery_4140_1698_82952.jpg

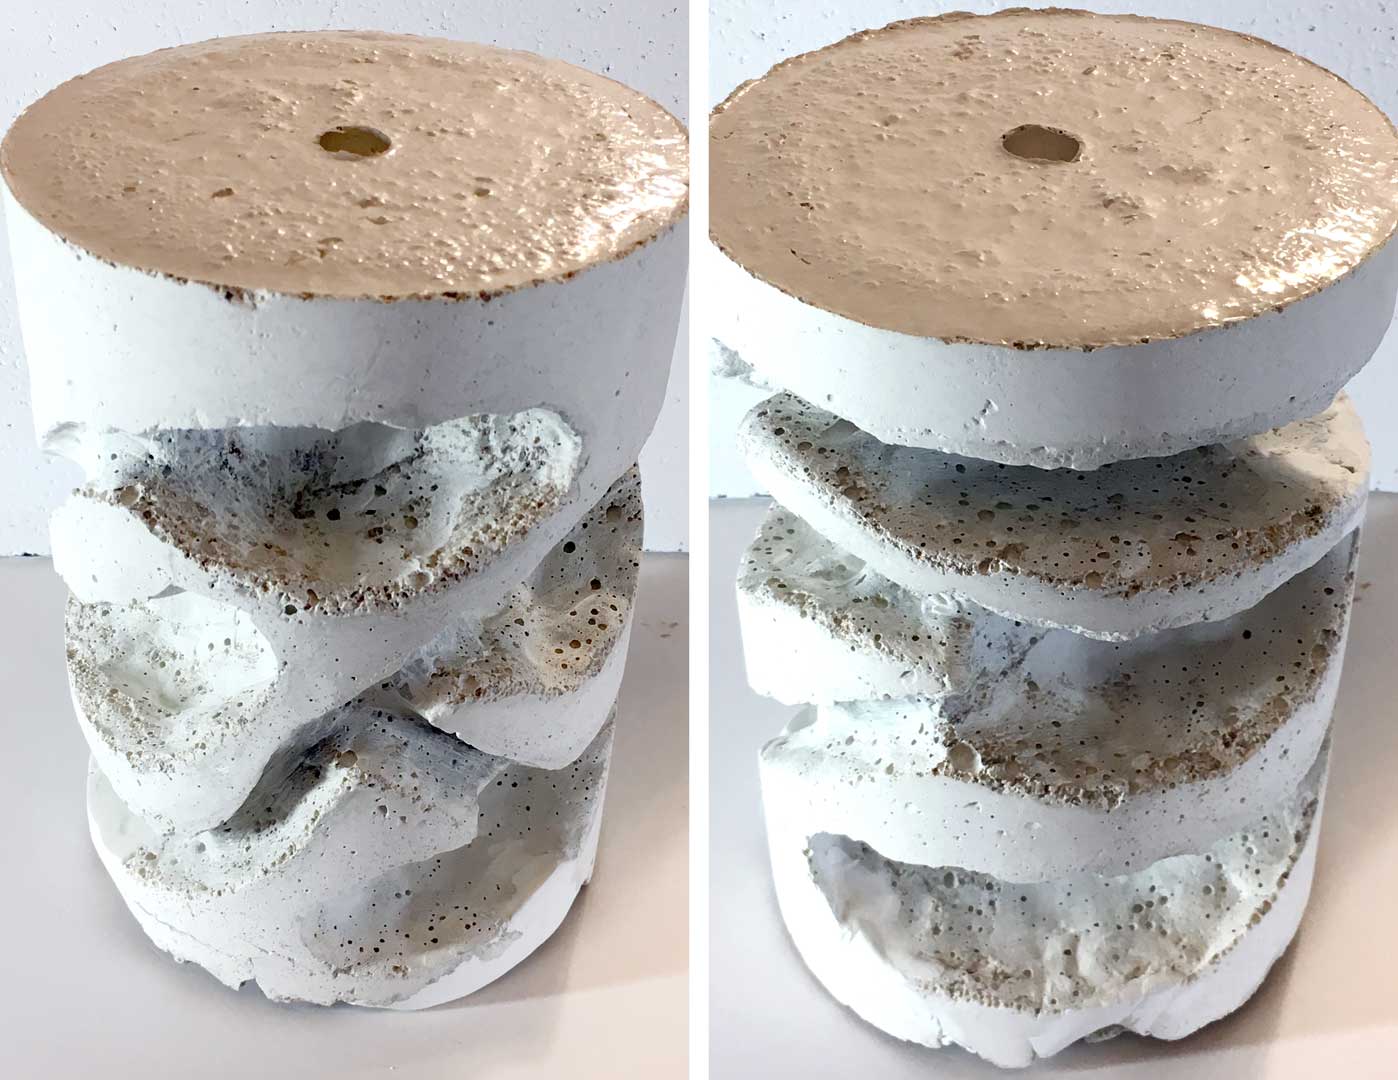
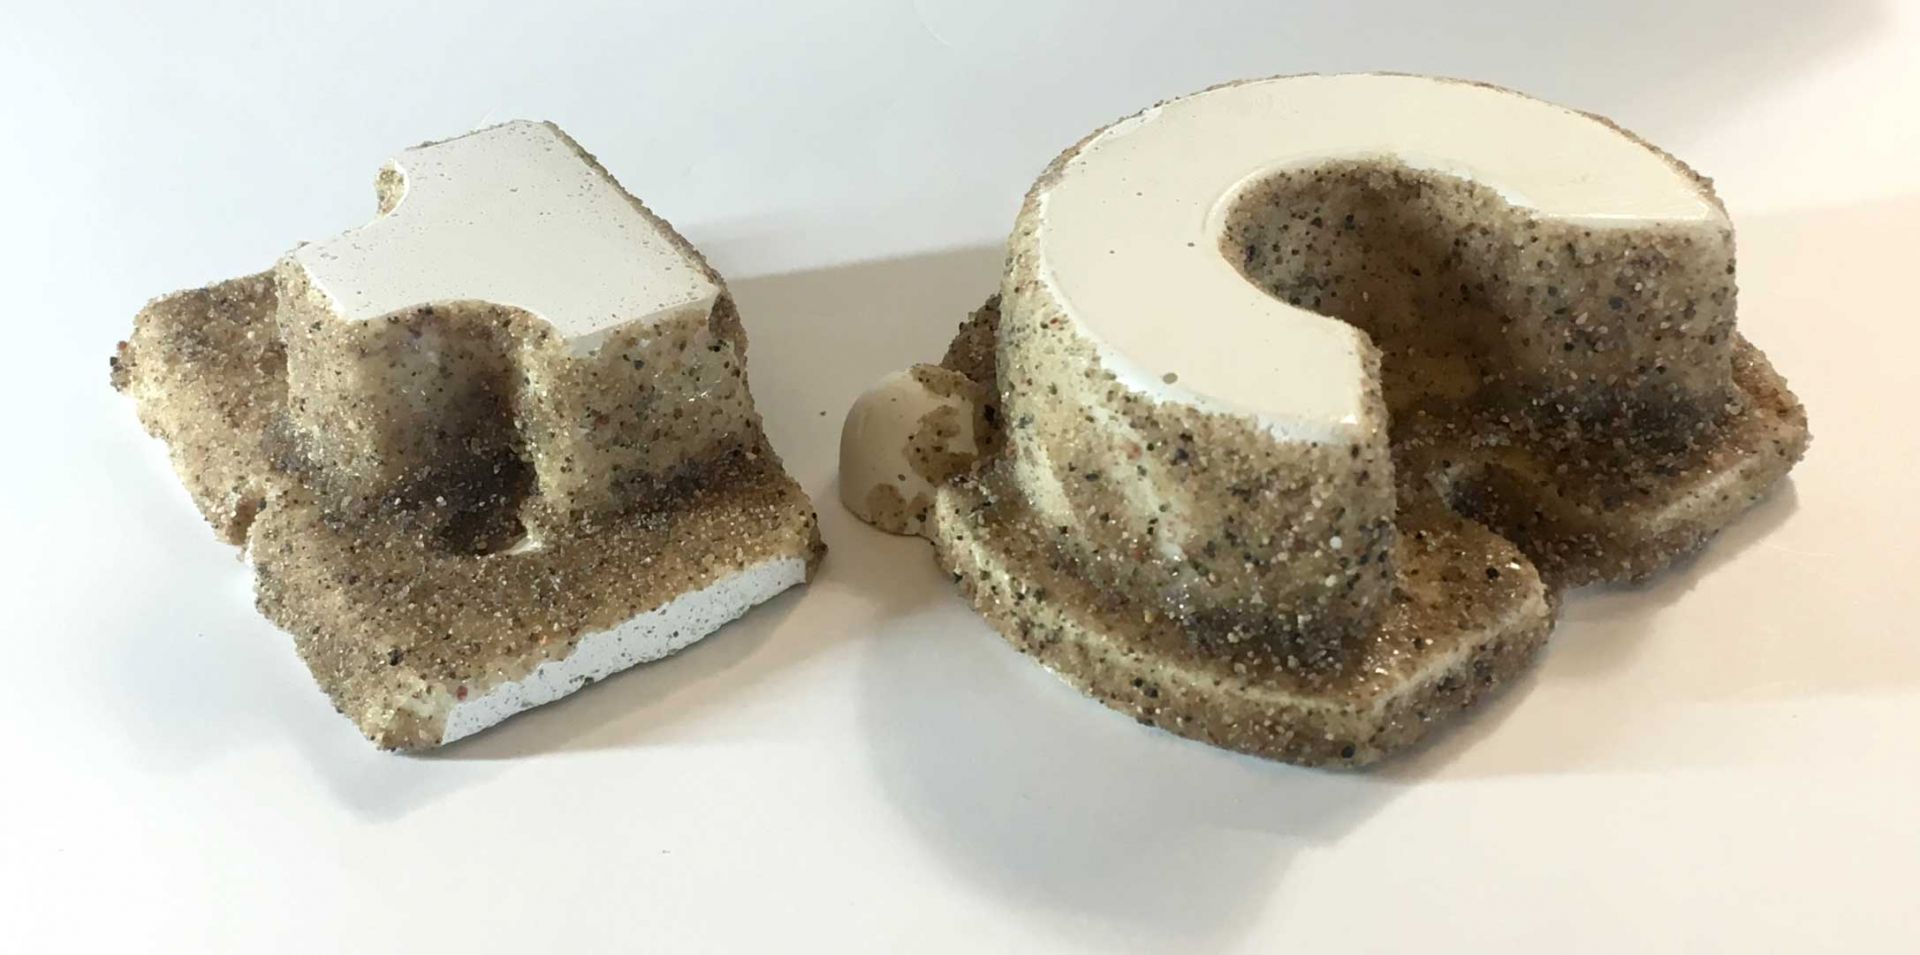
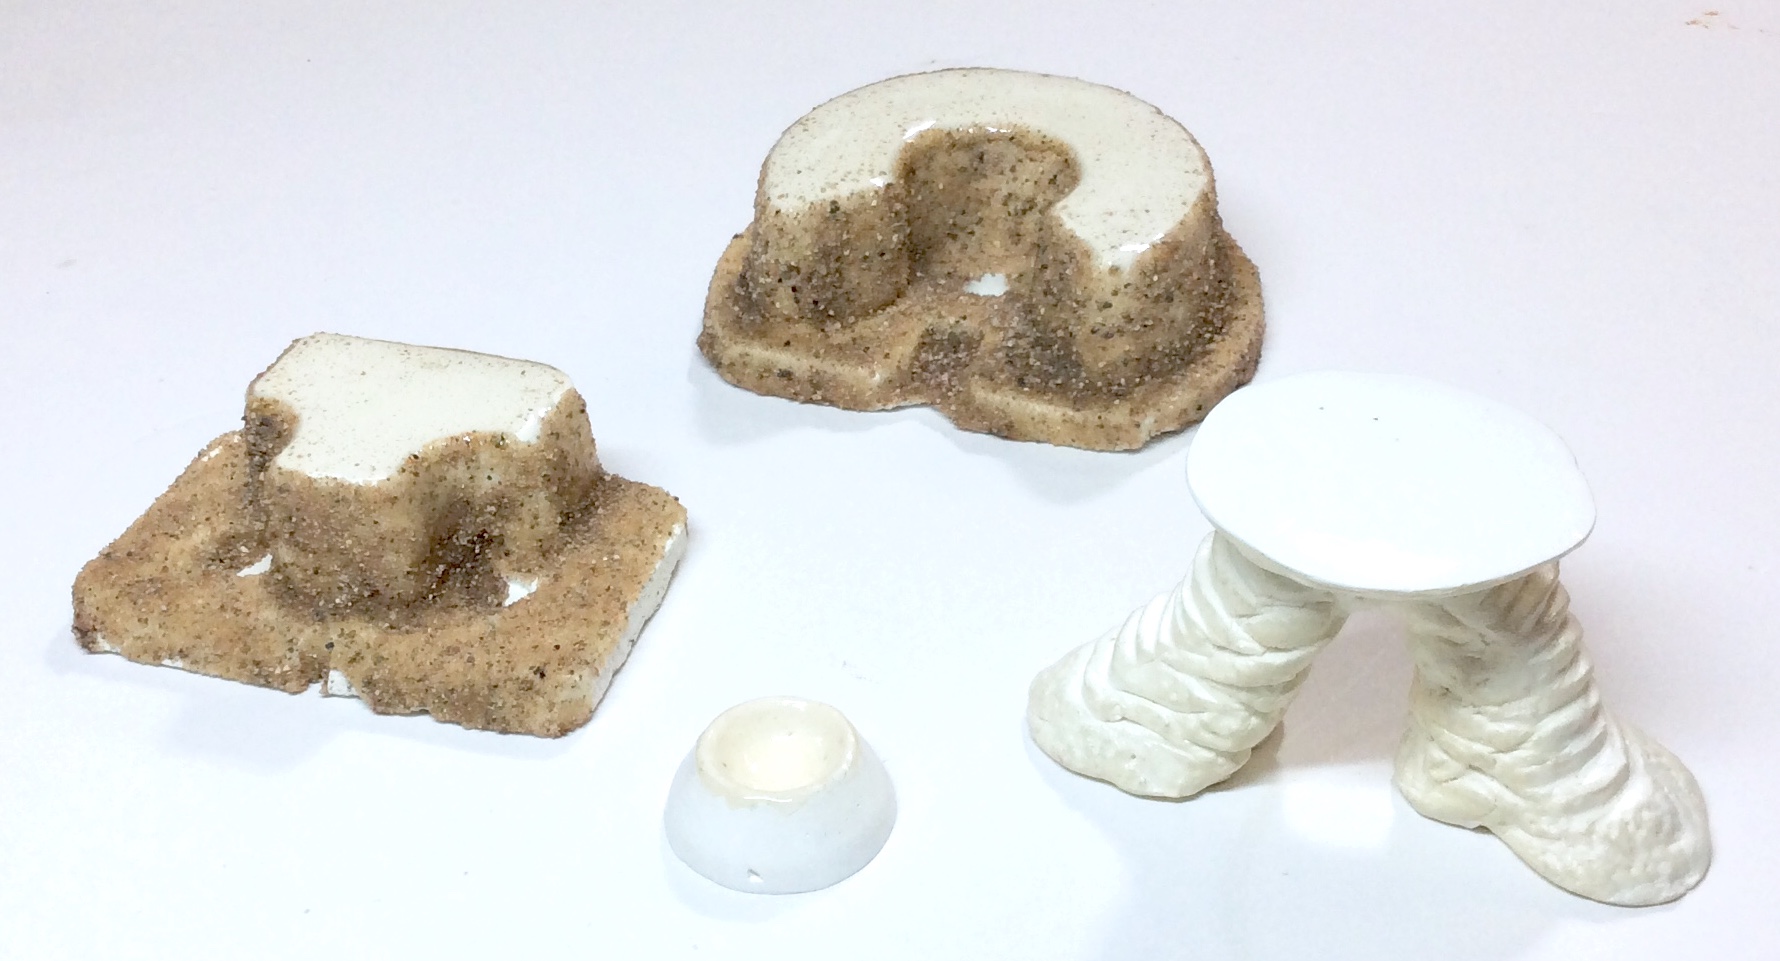
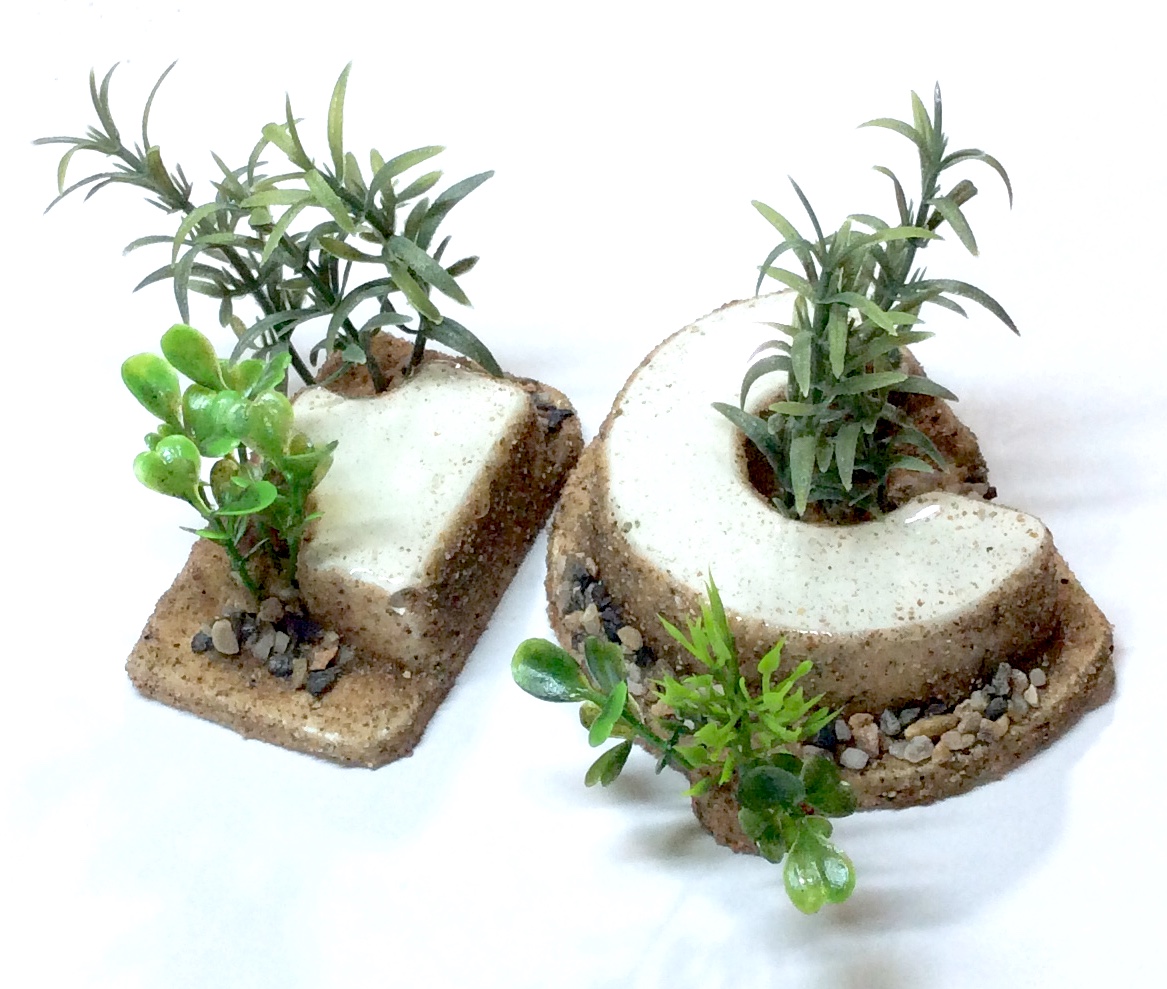
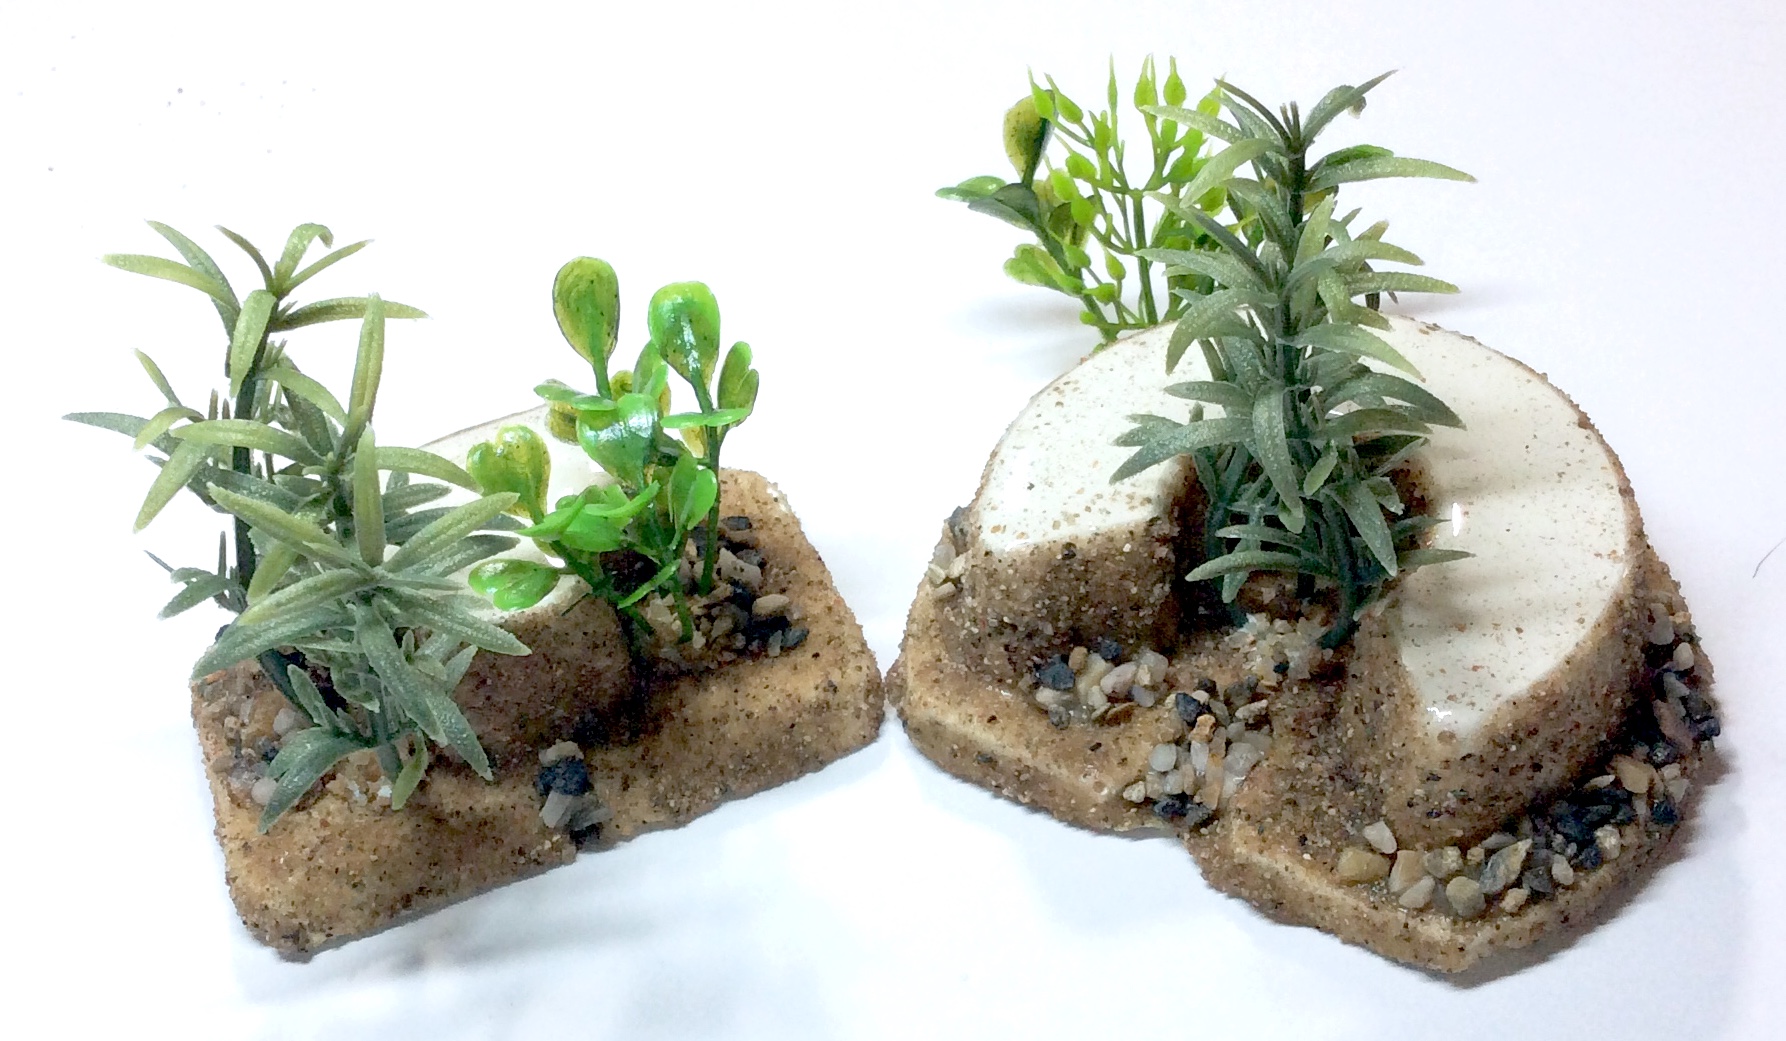
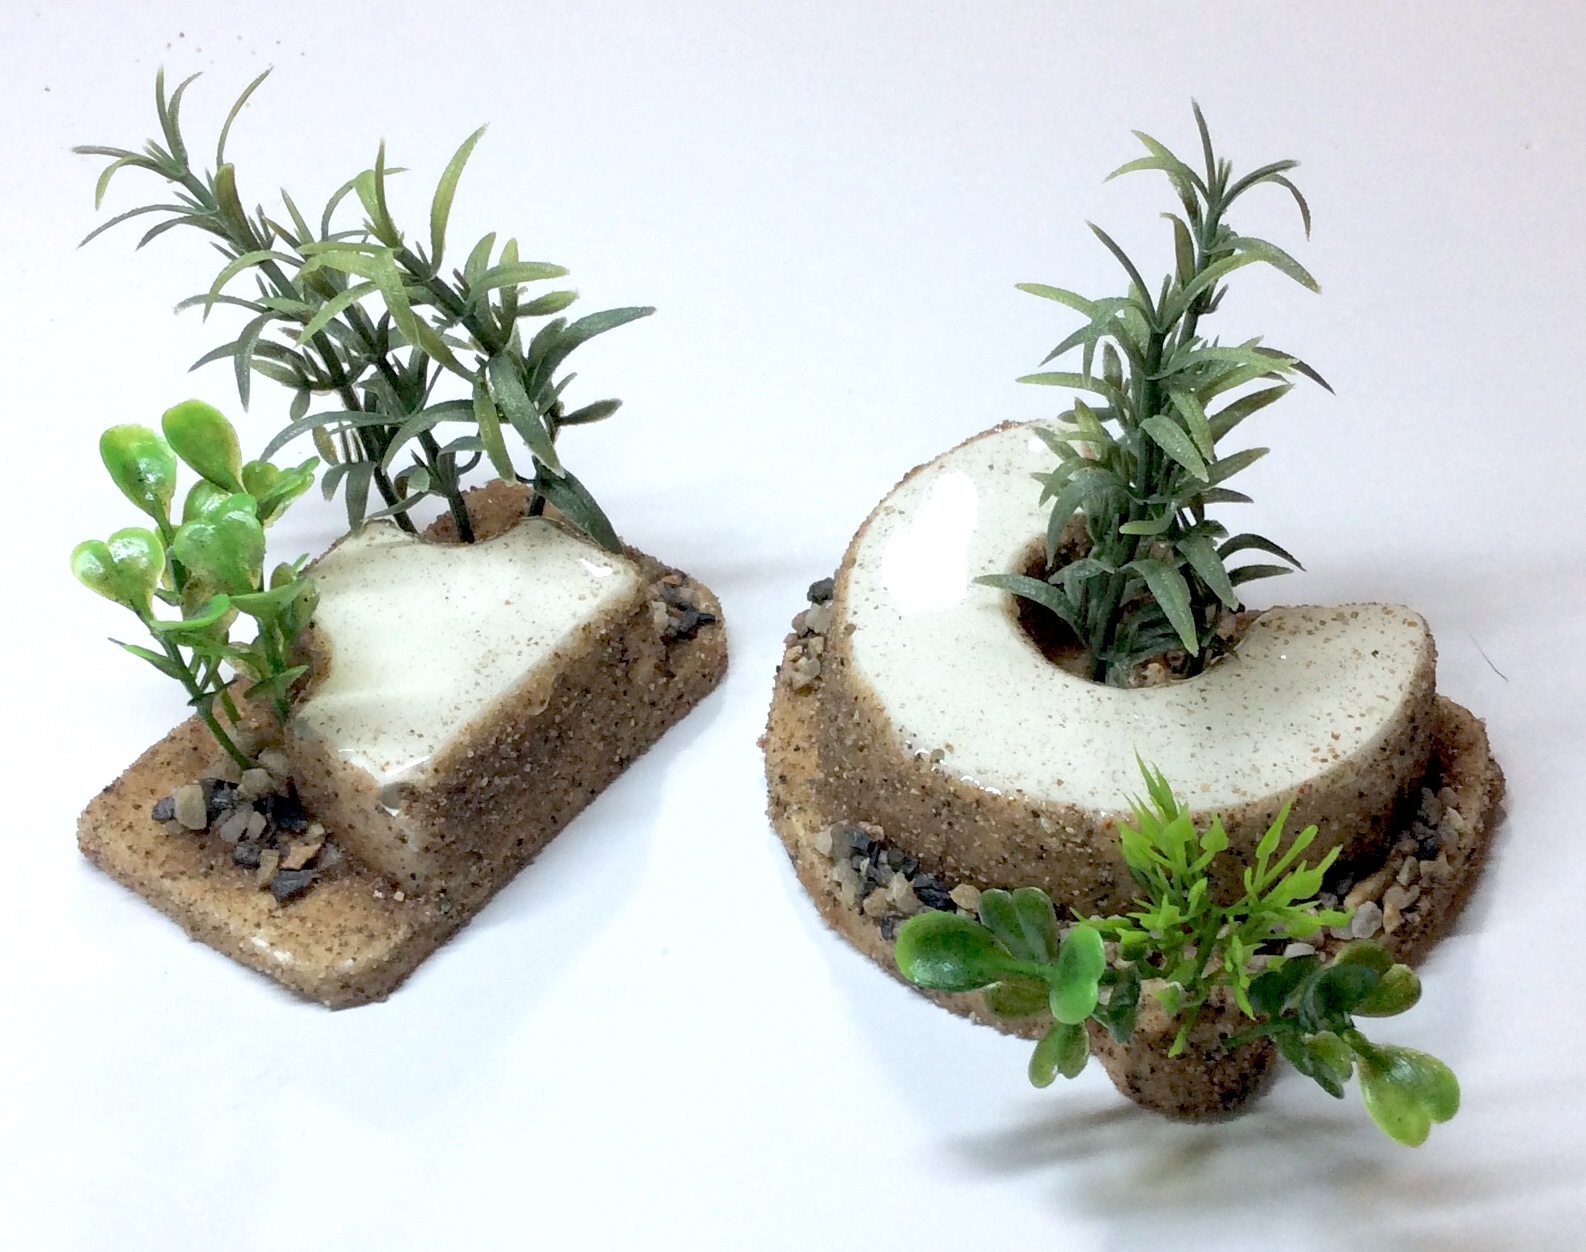
I’ll leave this update with a peek at a couple more nests I’m building. I’m thinking there should be some dry satellite nests for Queen Elizabeth’s colony and have been tinkering with these two plaster/vermiculite nests. They’re carved and sculpted further than what I show here, so keep an eye out for my next build update to see what they turn into!

gallery_4140_1698_135848.jpg


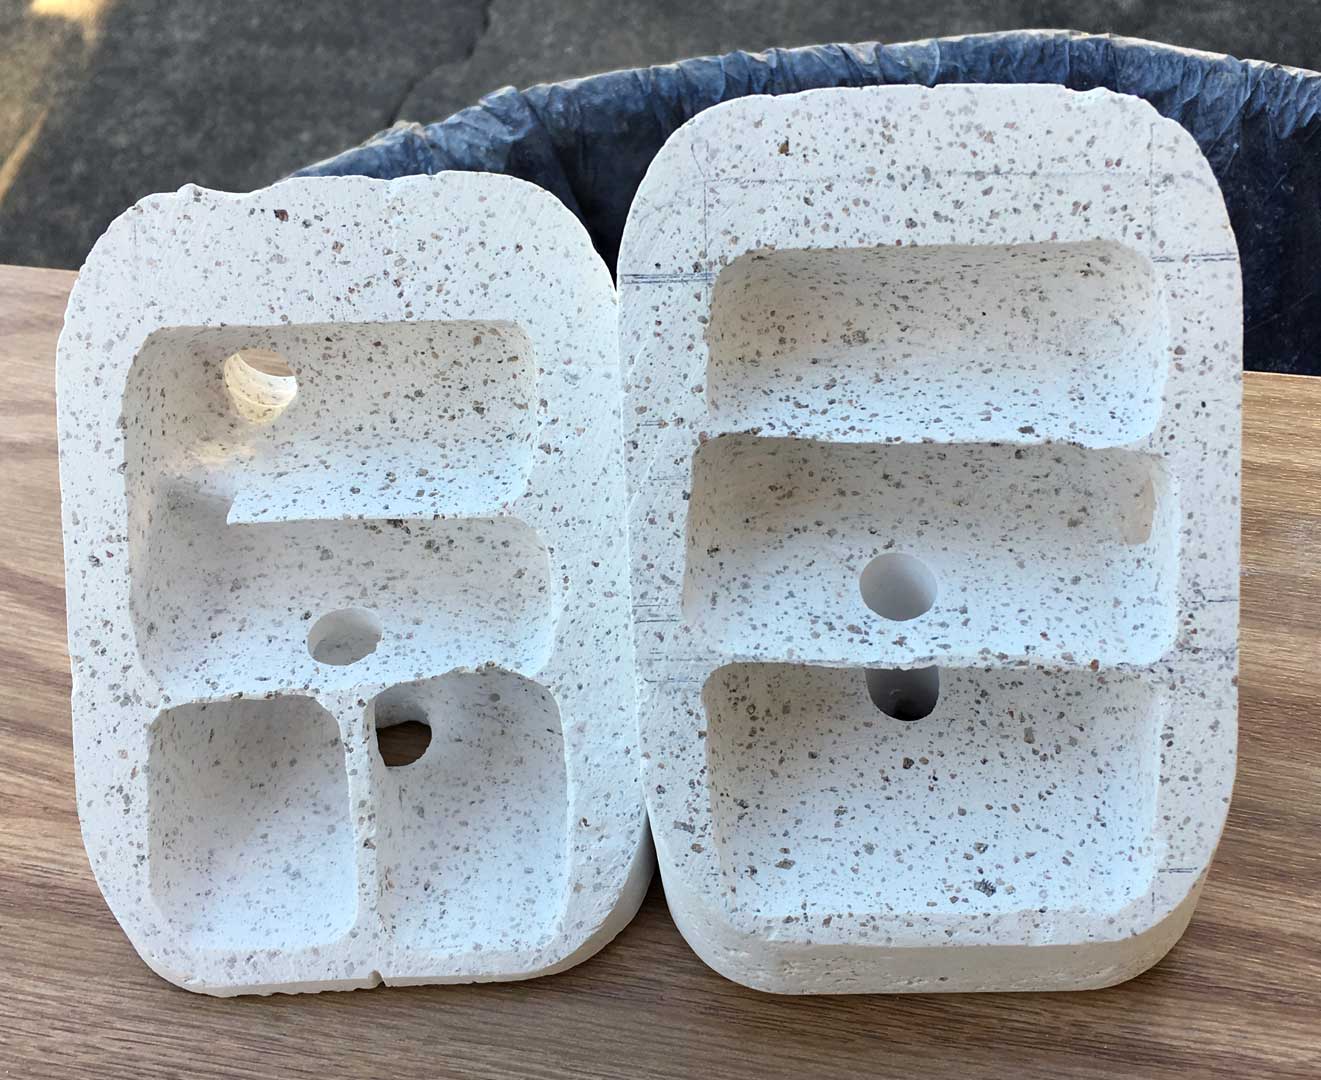
Edited by Boog, January 17 2020 - 12:57 AM.

  • Lazarus and UtahAnts like this
My Youtube channel: Ants Navajo               Keeping- Camponotus pennsylvanicus, Tapinoma sessile x 2, Pheidole sp x 2
 
"We may be witnesses to a Biblical prophecy come true - 'And there shall be destruction and darkness come upon creation and the beasts shall reign over the earth.'" - Dr. Harold Medford

#22 Offline ANTdrew - Posted January 17 2020 - 3:20 AM

ANTdrew

    Advanced Member

  • Moderators
  • PipPipPip
  • 9,402 posts
  • LocationAlexandria, VA
This is magesterial work. My favorite content on this forum is seeing people keep ordinary ants in extraordinary ways like you are doing.
What epoxy do you use to adhere the sand to your chambers?
  • BugFinder, Boog and Devi like this
"The ants are a people not strong, yet they prepare their meat in the summer." Prov. 30:25
Keep ordinary ants in extraordinary ways.

#23 Offline Boog - Posted January 17 2020 - 10:38 AM

Boog

    Advanced Member

  • Members
  • PipPipPip
  • 123 posts
  • LocationNew Jersey

What epoxy do you use to adhere the sand to your chambers?


J-B Weld Clearweld 5 minute epoxy. Smelly stuff but doesn’t change color from the materials I’m using from what I’ve seen.
My Youtube channel: Ants Navajo               Keeping- Camponotus pennsylvanicus, Tapinoma sessile x 2, Pheidole sp x 2
 
"We may be witnesses to a Biblical prophecy come true - 'And there shall be destruction and darkness come upon creation and the beasts shall reign over the earth.'" - Dr. Harold Medford

#24 Offline Boog - Posted March 9 2020 - 12:08 AM

Boog

    Advanced Member

  • Members
  • PipPipPip
  • 123 posts
  • LocationNew Jersey

Updating with a quick view through some feeders I built from Dremel bit packaging I thought had an interesting shape for feeding. I used a plaster/vermiculite mix in the mold and then added decor and substrate with epoxy adhesive (JB Weld clear) along with PVA glue touch ups.


gallery_4140_1698_3049.jpg


Remnants of the packaging after getting the plaster out. Here's the first layer of JB Weld clear epoxy and sand.


gallery_4140_1698_70482.jpg


I also sculpted a feeding platform with air drying Sculpt It! material and finished off the top with two part Milliput epoxy putty. I missed up my first attempt at sealing the feeder and had to peel off this layer. Don't let mistakes deter you if you've got a competent build going, you can make it work out sometimes and happy accidents end up adding character to your builds. So keep at it!


gallery_4140_1698_9759.jpg


After a layer of JB Weld clear epoxy applied to the feeding areas which I had sanded smooth, I heated the application with a heat gun to get that high gloss smooth finish. I messed up the process by being impatient and touching the epoxy before it fully cured so left a few imprints and scuffs that I'll be mindful avoiding in the future.


gallery_4140_1698_159171.jpeg


gallery_4140_1698_30689.jpeg


gallery_4140_1698_164962.jpeg


gallery_4140_1698_176079.jpeg


Then I just finished them off with some fake plants glued in with construction adhesive and gravel added with PVA glue.


gallery_4140_1698_170809.jpeg


gallery_4140_1698_15196.jpeg


gallery_4140_1698_518311.jpeg


I've observed my ants struggling a bit trying to get over the edge but they eventually get a grip and can crawl onto the smooth epoxied surface. I was able to easily wipe away some insect guts which is the reason I wanted the smooth application.


gallery_4140_1524_68803.jpeg


gallery_4140_1698_337500.jpeg


gallery_4140_1524_273809.jpeg


I added more sand after this in order to work the feeders into the substrate a bit more. I also upgraded my out world with more fake greenery and some additional feeding platforms to change up the placement of my sugars and protein. I used Milliput to sculpt the platforms and glued in place with construction adhesive.


gallery_4140_1698_865924.jpeg


gallery_4140_1698_278347.jpeg


I epoxied in the screen of the lid. I've got a layer of acrylic which I used fluon on, so that there is lip after I take of the screened lid.


gallery_4140_1698_79225.jpeg


Here's a quick update on my Camponotus colony which I have taken out of the garage and have given their first protein burst of fruit flies and mealworms. I'll be connecting their grout nest extension soon and am debating on adding their heating cable asap or if I should wait a bit. I'll be updating with a bit of breakdown of the new nest build in the future but here's a preview of the two nest set up.


gallery_4140_1698_536377.jpeg


They've been pretty chill except when I first added their out world connections, they started chewing at the AC plugs and I was getting nervous! I added fruit flies to distract them and that seemed to have worked.


gallery_4140_1524_417997.jpeg


I've tried to count their brood but they're hovering over them but it looks like I'll get double their population after they pupate and eclose. Then  I'll need to really start worrying about their numbers and make sure their setup is manageable.


gallery_4140_1524_703298.jpeg


gallery_4140_1524_386060.jpeg


Thanks for staying tuned! I'm excited to update on the nest extension soon so keep an eye out, thanks!


Edited by Boog, March 9 2020 - 12:16 AM.

  • ANTdrew and UtahAnts like this
My Youtube channel: Ants Navajo               Keeping- Camponotus pennsylvanicus, Tapinoma sessile x 2, Pheidole sp x 2
 
"We may be witnesses to a Biblical prophecy come true - 'And there shall be destruction and darkness come upon creation and the beasts shall reign over the earth.'" - Dr. Harold Medford

#25 Offline Boog - Posted May 2 2020 - 3:42 PM

Boog

    Advanced Member

  • Members
  • PipPipPip
  • 123 posts
  • LocationNew Jersey

This year’s growth for my colonies has been at a superb pace so far! I’ve enjoyed the last couple month’s activity of my Camponotus pennsylvanicus colony due to the addition of the grout nest I made and showed in my last post. I added the heating cable a few weeks in as to entice the colony into their new digs and it took a bit for the population to adjust as they moved their plump brood around.

gallery_4140_1698_143225.jpg


gallery_4140_1698_87345.jpg


It's a plump party ‘round here!


gallery_4140_1698_231305.jpg


The queen’s chamber/corridor which I don’t attempt to properly light for macro shots because I dare not disturb her majesty. So don’t expect to see Queen Elizabeth in my posts much until she decides to move to a more visible area to light, which I suspect won’t happen. You could see a pile of eggs that’s near her and her inner entourage of repletes and pamperers.


gallery_4140_1698_329065.jpg

Here’s a pile of nest shots.

gallery_4140_1698_72769.jpg


gallery_4140_1698_71599.jpg


gallery_4140_1698_687528.jpg


gallery_4140_1698_49746.jpg


gallery_4140_1698_635443.jpg


gallery_4140_1698_47956.jpg


It's been fun watching the larvae this season, got a pile of plump ones coming up.

gallery_4140_1524_107203.jpg


gallery_4140_1524_281820.jpg


gallery_4140_1524_464669.jpg


gallery_4140_1524_15402.jpg

After I turn on the heating cable, which I regulate with a timer and unplug at night, they’d pile their brood close to the container for some nice macro lens shots.


gallery_4140_1524_101719.jpg


gallery_4140_1524_79383.jpg


Here’s a pile of eggs! I’ve not attempted to give a serious count of this year’s census and it’ll be near impossible from here on out, I think.


gallery_4140_1524_453353.jpg


gallery_4140_1524_175103.jpg


gallery_4140_1524_301527.jpg


The pupae have been eclosing recently, the heating cable keeps it around the low to mid 80 degrees F and have helped make this a thriving colony. The earlier pics were from previous months.

I was able to observe the queen laying an egg then watched as it hung out of her for a few minutes before a worker tended to it. Liz tends to like hanging on the ceiling of the formicarium, so I like the nest designs with hanging options for the ants. I kept that aspect for the new grout nest I did and watching the ants hang while they tend to the brood in various positions is an enjoyable antkeeping experience.

gallery_4140_1524_19032.jpg


gallery_4140_1698_404666.jpg


My new cheap lens attachments I’ve acquired have been working well. My phone’s camera no longer can focus properly so have been taking pics with a tablet and trying to get macro shots while hovering with my other hand holding a LED light wand so I could get good shots. That’s important for good macro images, the brightest light you can do will get better results.

gallery_4140_1524_195281.jpg

I’ve been feeding the colony the usual proteins of mealworms, crickets, and fruit flies and they’ve been thriving. I’ll try out the odd piece of cooked meat or bloodworm soup but use insects generally. I decided to try my hand at flightless fruit fly culturing and its been working so far, I’ll maybe share my recipe in a future post as I’m testing out my batches so far and rather new at the process overall. But I'm feeding the ants well with the results so far.

gallery_4140_1524_1720.jpg

gallery_4140_1524_27675.jpg

gallery_4140_1524_57471.jpg

gallery_4140_1524_46825.jpg


gallery_4140_1524_65616.jpg


gallery_4140_1524_95472.jpg


Some well fed ants being lazy now. They're well groomed and living the high life!


gallery_4140_1524_120029.jpg


I had to scratch up the inner side of the vinyl tubing here to help with some ants who kept slipping down the tube and couldn’t get into the nest despite the low incline. They had a mealworm processing line during a feeding.

gallery_4140_1698_52243.jpg

Now onto to some sugar love! I’ve been feeding mainly Sunburst Ant Nectar but cycle in some diluted hummingbird nectar and fruit like melons.


gallery_4140_1698_56557.jpg


gallery_4140_1524_11710.jpg


Watching a bubble of nectar forming during trophallaxis in these two pics was interesting.


gallery_4140_1524_45327.jpg


gallery_4140_1524_157288.jpg


gallery_4140_1524_12423.jpg


gallery_4140_1524_162246.jpg


gallery_4140_1524_5069.jpg


gallery_4140_1524_356790.jpg

I felt awful after giving them some mangoes for one feeding, I will be avoiding them in the future and will stick to melons like honeydew and cantaloupe. The next few days after giving them this chunk of mango (not organic, so my bad) I had over two dozen dead workers. They were of the smaller minor size and probably the oldest workers of the colony, but I’ve been trying to pick out the dead bodies of any worker and am collecting them. I was afraid I did worse and the colony would be gone but they’ve been okay since I did this weeks ago.

gallery_4140_1698_134831.jpg

Now here are recent pictures, a lot of pupating brood is now mainly in the upper chamber of the new nest with eggs and larvae below and a few more in the covered queen’s nest. I keep it covered and only observe the queen at night generally.

gallery_4140_1698_439158.jpg


gallery_4140_1698_356850.jpg


gallery_4140_1698_188307.jpg


gallery_4140_1698_172733.jpg


gallery_4140_1698_259473.jpg

A few of those plumpers became submajors, I just saw these newly eclosed ones today.


gallery_4140_1524_122046.jpg


gallery_4140_1524_262149.jpg

My two Tapinoma sessile colonies deserve their own update which I’ll do later but here’s one setup as they’ve finally moved into a THA nest I customized. Just a single queen I started with two workers last summer and now chilling out here.

gallery_4140_1524_447464.jpg


gallery_4140_1524_614459.jpg

Now this is Boog’s Bug Builds so onto the DIY front! I’ve built a couple of interesting nests I hope to use later this season in case the Camponotus growth needs room. I decided to use a failed plaster pour I had, I was testing a plaster/vermiculite mix that shrunk too much for my intial needs. I then chopped it in half with a new mitre box and saw I bought to test out the angle cutting and liked the result for use as a formicarium. I then reformatted these plaster foundations with a coat of grout and epoxied sand for the interior and a couple coats of Flex Seal liquid for the exterior. I liked the angled viewing into the nest with the addition of some ceiling stalactites so I hope to get some good pics in the future while in use!

gallery_4140_1698_300148.jpg

I used some acrylic I picked up from the hardware store that I cut to size and drilled holes for threading for some nuts. I had to cut some bolt heads off for my use here. The floors of the chambers are a grout/vermiculite mix so as to be absorbant and the walls and ceilings are epoxied sand.

gallery_4140_1698_375441.jpg

I had to use some Milliput two part epoxy to fill the gap that was between the acrylic and nest interior. It was small and probably would work but didn’t want to test that. I have entrance holes for some vinyl tubing and a central ventilation hole covered with a stainless steel mesh in the lower chambers. I dremeled out some of the bottom to allow airflow and a heating cable under one of the nests.

gallery_4140_1698_111330.jpg


gallery_4140_1698_38636.jpg

I’ve been building some outworlds for exploration expansion and different feeding areas for my Camponotus colony so am also building hardscape decor to use in them. Here are some fake greenery bases I’m creating to add surface area to explore and for the aesthetic when viewing. I also want to film some of my builds for a Youtube channel so want some “sets” to view my thriving colony along with some cool macro shots. I used foam cores covered in plaster that I drilled holes into for the plastic plants.

gallery_4140_1698_416651.jpg


I like to pour into plastic packaging to be used as feeders or decor later on so that's what that bottled shape one is. From a glue bottle packaging, I believe.


gallery_4140_1698_430124.jpg


I carved the green foam to the shapes I wanted and covered with plaster. After drying, I further carved and filed down the plaster bases for simple mounds to used as fake plant bases not unlike making gaming tabletop bases.


gallery_4140_1698_271504.jpg


I epoxied the outside with a slow drying clear two part epoxy and covered over with sand before I drilled the holes for the plants. I’m still adding rocks, gravel and some sticks for interest. I’ll be putting them in outworlds buried in a little substrate and see how they react.


gallery_4140_1698_387204.jpg


gallery_4140_1698_272.jpg

My Youtube channel is just getting started. I have some backlog video I want to share in some videos I want to produce, I like adding some production to my projects as you can hopefully tell. Here’s my logo and channel name.

gallery_4140_1784_32643.jpg

The thumbnail I want to use for the video but am having errors trying to verify the channel so I can't for now.


gallery_4140_1784_247845.jpg

I posted up one video and hope to at least post a few more videos and if I can muster up filming a Boog's Bug Builds and narrate one, I’ll share those in the future.


Now for some morbid curiosities! I was saving the dead ant bodies from the start of this ant season for a test. I used them in leftover clear epoxy I mixed up from the previous fake plant builds. I placed the bodies in some epoxy that I poured in some plastic packaging for a mold. Maybe I’ll save my ants in epoxy and build something out of it, a monument of dead sisters that my colony can visit. Heck, I might use the flat disc one here as a feeding tray. Is that too morbid?

gallery_4140_1698_65187.jpg


gallery_4140_1698_295733.jpg

I bought an Ant Shack “large” outworld to see how it is and thought it was too small for my needs. It’s smaller than a shoe and worked better for a smaller occupant. So I caught a spider and put it in here, its been a new observing and feeding experience so I guess I’m a spiderkeeper too. It’s a false black widow of some kind but I need to learn more about spiders so I can identify it. I swear it’s in here, there’s a retreat hole in the lower right towards the back here by the pine cone.

gallery_4140_1783_299552.jpg

So I hope you enjoyed this post’s journey and until my next update, be safe and take care!


Edited by Boog, October 3 2020 - 2:51 AM.

  • AntsMaryland, Kaelwizard and ANTdrew like this
My Youtube channel: Ants Navajo               Keeping- Camponotus pennsylvanicus, Tapinoma sessile x 2, Pheidole sp x 2
 
"We may be witnesses to a Biblical prophecy come true - 'And there shall be destruction and darkness come upon creation and the beasts shall reign over the earth.'" - Dr. Harold Medford

#26 Offline AntsMaryland - Posted May 2 2020 - 4:01 PM

AntsMaryland

    Advanced Member

  • Members
  • PipPipPip
  • 543 posts
  • LocationMaryland

Wonderful read!


  • Boog likes this

Aphaenogaster cf. rudis 

Tetramorium immigrans 

Tapinoma sessile

Formica subsericea

Pheidole sp.

Camponotus nearcticus


#27 Offline ANTdrew - Posted May 2 2020 - 4:59 PM

ANTdrew

    Advanced Member

  • Moderators
  • PipPipPip
  • 9,402 posts
  • LocationAlexandria, VA
Wow, just wow. I want to spend a month long apprenticeship with Boog.
  • TennesseeAnts, Boog and Devi like this
"The ants are a people not strong, yet they prepare their meat in the summer." Prov. 30:25
Keep ordinary ants in extraordinary ways.

#28 Offline ANTdrew - Posted May 2 2020 - 6:07 PM

ANTdrew

    Advanced Member

  • Moderators
  • PipPipPip
  • 9,402 posts
  • LocationAlexandria, VA
I would add, though, that it isn’t really necessary to cycle sugars like it is to cycle proteins. I never feed my ants farm raised fruits. It’s all Sunburst all the time for them, but I never give them the same protein two days in a row.
"The ants are a people not strong, yet they prepare their meat in the summer." Prov. 30:25
Keep ordinary ants in extraordinary ways.

#29 Offline BugFinder - Posted May 2 2020 - 9:24 PM

BugFinder

    Advanced Member

  • Members
  • PipPipPip
  • 872 posts
  • LocationSunnyvale, CA

I would add, though, that it isn’t really necessary to cycle sugars like it is to cycle proteins. I never feed my ants farm raised fruits. It’s all Sunburst all the time for them, but I never give them the same protein two days in a row.


When you say same protein, do you mean the same kind of insect, like you never feed crickets two days in a row, or do you mean something more specific than that?


What is the need to "cycle proteins"?   TIA.


“If an ant carries an object a hundred times its weight, you can carry burdens many times your size.”  ― Matshona Dhliwayo


My Journals:

Pogonomyrmex subdentatus

Camponotus Vicinus

Camponotus sansabeanus

Tetramorium (sp)

Pogonomyrmex Californicus

My Ant Goals!


#30 Offline BugFinder - Posted May 2 2020 - 9:29 PM

BugFinder

    Advanced Member

  • Members
  • PipPipPip
  • 872 posts
  • LocationSunnyvale, CA


The decorations you make are so cool!  Thanks for sharing your technique with us.  This has become one of my favorite threads.


Do you guy your fake plants from a craft store, like Michaels, or are they obtained from aquarium stores?   TIA.


“If an ant carries an object a hundred times its weight, you can carry burdens many times your size.”  ― Matshona Dhliwayo


My Journals:

Pogonomyrmex subdentatus

Camponotus Vicinus

Camponotus sansabeanus

Tetramorium (sp)

Pogonomyrmex Californicus

My Ant Goals!


#31 Offline AntsDakota - Posted May 3 2020 - 5:46 AM

AntsDakota

    Advanced Member

  • Members
  • PipPipPip
  • 3,994 posts
  • LocationSioux Falls, South Dakota

I would add, though, that it isn’t really necessary to cycle sugars like it is to cycle proteins. I never feed my ants farm raised fruits. It’s all Sunburst all the time for them, but I never give them the same protein two days in a row.

 
When you say same protein, do you mean the same kind of insect, like you never feed crickets two days in a row, or do you mean something more specific than that?
 
What is the need to "cycle proteins"?   TIA.
He means insect. Feed a cricket one day, a mealworm the next, fruit flies the next, a roach the next, a superworm the next......... you get the idea.
  • BugFinder, ANTdrew and Froggy like this

"God made..... all the creatures that move along the ground according to their kinds. (including ants) And God saw that it was good. Genesis 1:25 NIV version


#32 Offline ANTdrew - Posted May 3 2020 - 7:23 AM

ANTdrew

    Advanced Member

  • Moderators
  • PipPipPip
  • 9,402 posts
  • LocationAlexandria, VA
Exactly, I don’t repeat feeder insects.
  • BugFinder and AntsDakota like this
"The ants are a people not strong, yet they prepare their meat in the summer." Prov. 30:25
Keep ordinary ants in extraordinary ways.

#33 Offline BugFinder - Posted May 3 2020 - 8:25 AM

BugFinder

    Advanced Member

  • Members
  • PipPipPip
  • 872 posts
  • LocationSunnyvale, CA

Thank you.  Can I ask you why that is?  Just trying to learn as much as I can.  TIA.


“If an ant carries an object a hundred times its weight, you can carry burdens many times your size.”  ― Matshona Dhliwayo


My Journals:

Pogonomyrmex subdentatus

Camponotus Vicinus

Camponotus sansabeanus

Tetramorium (sp)

Pogonomyrmex Californicus

My Ant Goals!


#34 Offline Canadant - Posted June 3 2020 - 5:37 AM

Canadant

    Advanced Member

  • Members
  • PipPipPip
  • 461 posts
  • LocationNova Scotia, Canada
Boog, what do you use to stop the grout from adhering to the sides off the container and then slide out easily for further detailed work? Olive oil? Love your work.
"You don't get what you want. You get what you deserve".

#35 Offline peter - Posted June 14 2020 - 11:30 AM

peter

    Member

  • Members
  • PipPip
  • 16 posts

 so he used  Milliput epoxy putty,stick this to the cambers and sprinkle sand over it and it wil stick?if i understand it.


Edited by peter, June 14 2020 - 11:33 AM.

  • BugFinder likes this

#36 Offline Boog - Posted June 14 2020 - 2:39 PM

Boog

    Advanced Member

  • Members
  • PipPipPip
  • 123 posts
  • LocationNew Jersey

Boog, what do you use to stop the grout from adhering to the sides off the container and then slide out easily for further detailed work? Olive oil? Love your work.


I’ve never had any of these grout pours slide out easily of the container and I’ve tried different kitchen oils. I had to pour these in duplicate containers that have drilled holes on the bottoms I covered with tape and also I could bang up while trying to pull out the drying nest. The drilled holes at the bottom helped with pushing out the drying nest with a rod if needed. I still use oil to help keep a barrier between the grout, clay, and plastic container though.

Edited by Boog, June 14 2020 - 2:46 PM.

My Youtube channel: Ants Navajo               Keeping- Camponotus pennsylvanicus, Tapinoma sessile x 2, Pheidole sp x 2
 
"We may be witnesses to a Biblical prophecy come true - 'And there shall be destruction and darkness come upon creation and the beasts shall reign over the earth.'" - Dr. Harold Medford

#37 Offline Boog - Posted June 14 2020 - 2:43 PM

Boog

    Advanced Member

  • Members
  • PipPipPip
  • 123 posts
  • LocationNew Jersey

 so he used  Milliput epoxy putty,stick this to the cambers and sprinkle sand over it and it wil stick?if i understand it.


Milliput was only used to shape the cones of the stalactites. Any sand adhere in the chambers was placed with clear two part epoxy, JB Clearweld mostly, but I am testing out other clear epoxies. The Milliput could probably hold the sand itself but I don’t think it’d work well.
  • BugFinder likes this
My Youtube channel: Ants Navajo               Keeping- Camponotus pennsylvanicus, Tapinoma sessile x 2, Pheidole sp x 2
 
"We may be witnesses to a Biblical prophecy come true - 'And there shall be destruction and darkness come upon creation and the beasts shall reign over the earth.'" - Dr. Harold Medford

#38 Offline peter - Posted June 14 2020 - 3:09 PM

peter

    Member

  • Members
  • PipPip
  • 16 posts


 so he used  Milliput epoxy putty,stick this to the cambers and sprinkle sand over it and it wil stick?if i understand it.


Milliput was only used to shape the cones of the stalactites. Any sand adhere in the chambers was placed with clear two part epoxy, JB Clearweld mostly, but I am testing out other clear epoxies. The Milliput could probably hold the sand itself but I don’t think it’d work well.


JB Clearweld quite expensive as i see.


#39 Offline Boog - Posted June 15 2020 - 3:05 AM

Boog

    Advanced Member

  • Members
  • PipPipPip
  • 123 posts
  • LocationNew Jersey


 so he used  Milliput epoxy putty,stick this to the cambers and sprinkle sand over it and it wil stick?if i understand it.


Milliput was only used to shape the cones of the stalactites. Any sand adhere in the chambers was placed with clear two part epoxy, JB Clearweld mostly, but I am testing out other clear epoxies. The Milliput could probably hold the sand itself but I don’t think it’d work well.


JB Clearweld quite expensive as i see.


Clear epoxy resin is not cheap but it's very durable for the application needed here, to withstand a colony of chewing ants. I'm currently testing out FamoWood glaze coat that dries overnight as opposed to JB ClearWeld's 5-ish minutes. Getting a quart or so of clear epoxy for 20-30 bucks will last you a whole heap of formicaria builds and I think it's worth it. I'll also use it to coat sand to my future outworlds and fake plant decorations for hardscaping.


Edited by Boog, June 15 2020 - 3:06 AM.

My Youtube channel: Ants Navajo               Keeping- Camponotus pennsylvanicus, Tapinoma sessile x 2, Pheidole sp x 2
 
"We may be witnesses to a Biblical prophecy come true - 'And there shall be destruction and darkness come upon creation and the beasts shall reign over the earth.'" - Dr. Harold Medford

#40 Offline peter - Posted June 15 2020 - 1:10 PM

peter

    Member

  • Members
  • PipPip
  • 16 posts

would hairspray not work?first you sprinkle the sand and then u spray the hairspray.it's just an idea


Also tagged with one or more of these keywords: formicarium, outworld, diy

0 user(s) are reading this topic

0 members, 0 guests, 0 anonymous users