Jump to content

  • Chat
  •  
  •  

Welcome to Formiculture.com!

This is a website for anyone interested in Myrmecology and all aspects of finding, keeping, and studying ants. The site and forum are free to use. Register now to gain access to all of our features. Once registered and logged in, you will be able to create topics, post replies to existing threads, give reputation points to your fellow members, get your own private messenger, post status updates, manage your profile and so much more. If you already have an account, login here - otherwise create an account for free today!

Photo

Dspdrew's Formicarium 08 Research and Design (Updated 11-26-2023)

formicarium container out world enclosure how-to diy design nest dspdrew tutorial

  • Please log in to reply
190 replies to this topic

#61 Offline Myrmicinae - Posted March 1 2015 - 7:15 PM

Myrmicinae

    Advanced Member

  • Members
  • PipPipPip
  • 274 posts
  • LocationFort Collins, CO

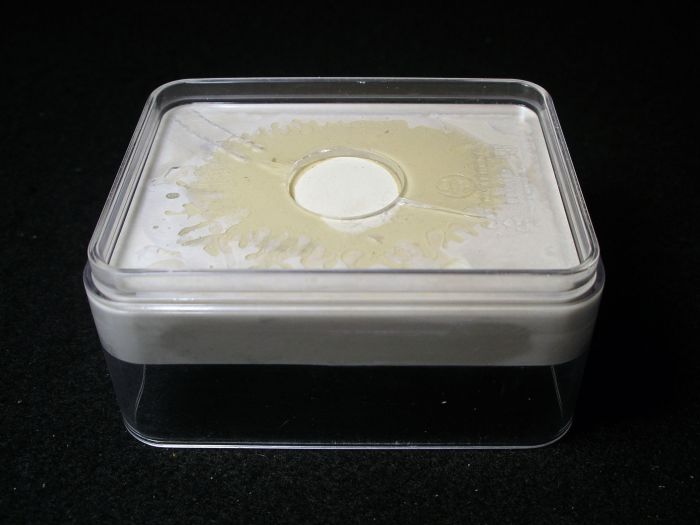
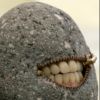
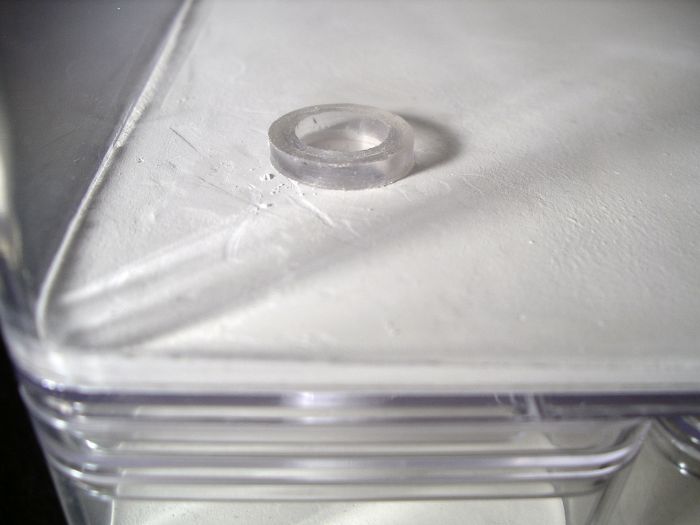
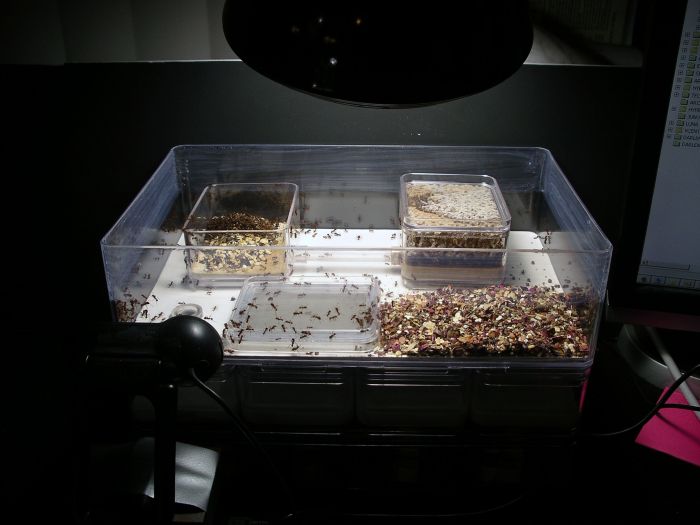
This is very odd.  I have a couple of hydrostone nests that are at least eight months old.  They have a few cracks, but nothing this dramatic.


Edited by Myrmicinae, March 1 2015 - 7:16 PM.

Journals on Formiculture:
Pheidole ceres
Tapinoma sessile

Old YouTube Channel:
ColoradoAnts

#62 Offline dspdrew - Posted March 1 2015 - 7:35 PM

dspdrew
  • LocationSanta Ana, CA

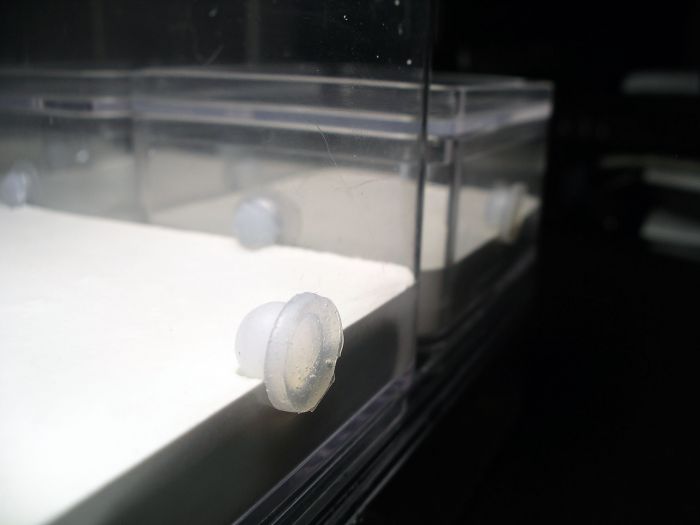
That erosion is caused by water constantly moving through that one spot. It dissolves it a lot faster.


#63 Offline dspdrew - Posted June 25 2015 - 1:25 PM

dspdrew
  • LocationSanta Ana, CA
It's been about four months now, and the nests with the Hydrostone covered ceramic tiles are still working great. The colonies have really grown and thrived in these setups.
 
I have been in need of something larger for a while now, so I came up with a new design. This new design is fully configurable and expandable, so I can start a colony out in it, and continue to expand it up to five times the size of the original design. Obviously it's going to take more containers and materials, but it might actually be a little easier to make.
 
It will utilize the same line of containers I used in the first design and most all of my other formicarium designs.
 
I'm using the largest container they make for the water tank; I just cut it down a little shorter.
 
med_gallery_2_281_61067.jpg
 
 
I need to check and see if they actually make some in this size, because the store where I buy them doesn't always carry all the sizes available.
 
All the containers can be hydrated except for the larger one that is meant to be used as the out world. They all have a tile in the bottom, with a Hydrostone covering.
 
med_gallery_2_281_354106.jpg
 
med_gallery_2_281_152840.jpg
 
med_gallery_2_281_156012.jpg
 
 
All of the containers fit nicely into the top of the water tank, and can be arranged any way you like. Any of them can be hydrated simply by removing the plug that will be covering each port, and inserting the sponge.
 
med_gallery_2_281_337796.jpg
 
med_gallery_2_281_400379.jpg
 
med_gallery_2_281_133597.jpg
 
med_gallery_2_281_215152.jpg
 
med_gallery_2_281_370276.jpg
 
med_gallery_2_281_388914.jpg
 
 
The containers will be held together with silicone grommets. Some will be solid, and some will have holes through the middle. This is how you can choose which containers you would like to be used by the ants. I haven't designed the grommets yet so for this prototype I just used silicone plugs and tubing.
 
med_gallery_2_281_87886.jpg
 
med_gallery_2_281_401941.jpg
 
med_gallery_2_281_14015.jpg
 
med_gallery_2_281_32034.jpg
 
med_gallery_2_281_171831.jpg
 
med_gallery_2_281_68128.jpg
 
med_gallery_2_281_191102.jpg
 
 
The out world will have a mesh lid sort of like the one used in this prototype. The mesh on the final lids however, will be divided up into three sections for strength.
 
med_gallery_2_281_684556.jpg
 
med_gallery_2_281_471488.jpg
 
 
Instead of the grommets being in the viewing area of the sides of the containers, I'm thinking of moving them down below the level of the floor.
  • Crystals, dermy and Wamdar like this

#64 Offline PTAntFan - Posted June 25 2015 - 1:30 PM

PTAntFan

    Advanced Member

  • Members
  • PipPipPip
  • 495 posts
  • LocationBurbank, CA

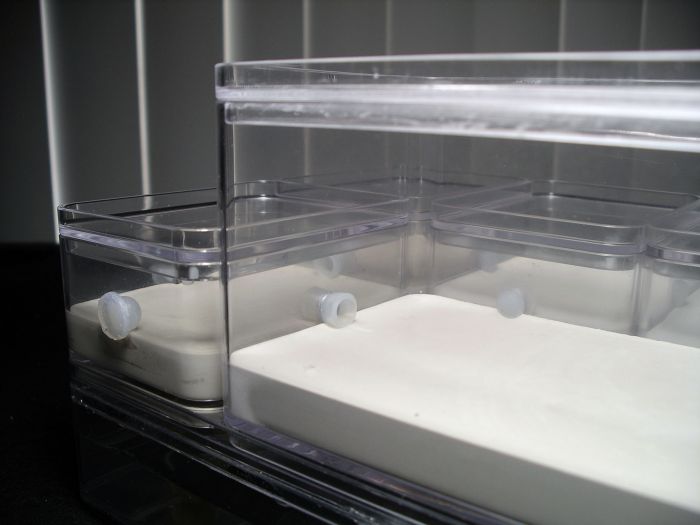
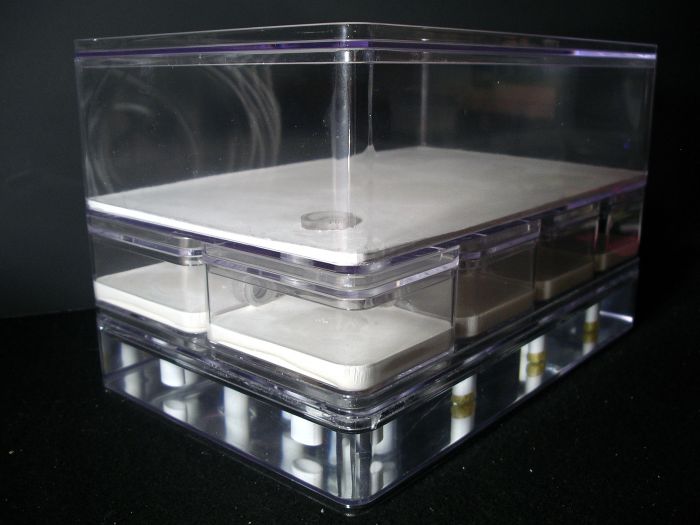
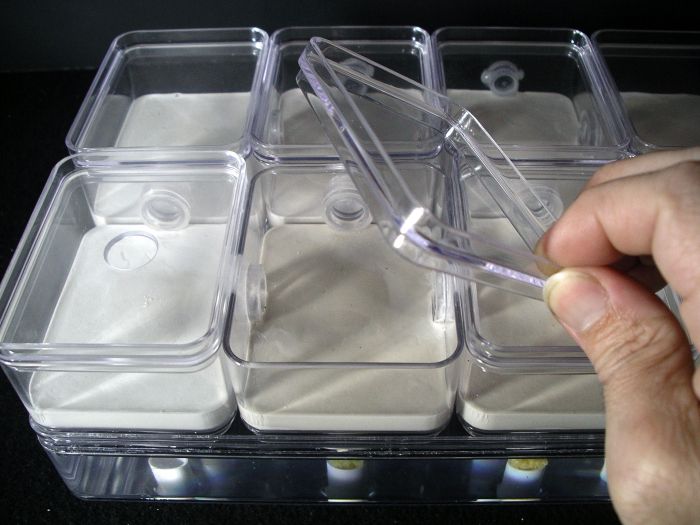
Wicked.  How do you add water?


PTAntFan----------------------------------Pogonomyrmex Californicus*****************************<p>I use the $3 Tower I made up. See it here.

#65 Offline dspdrew - Posted June 25 2015 - 1:40 PM

dspdrew
  • LocationSanta Ana, CA

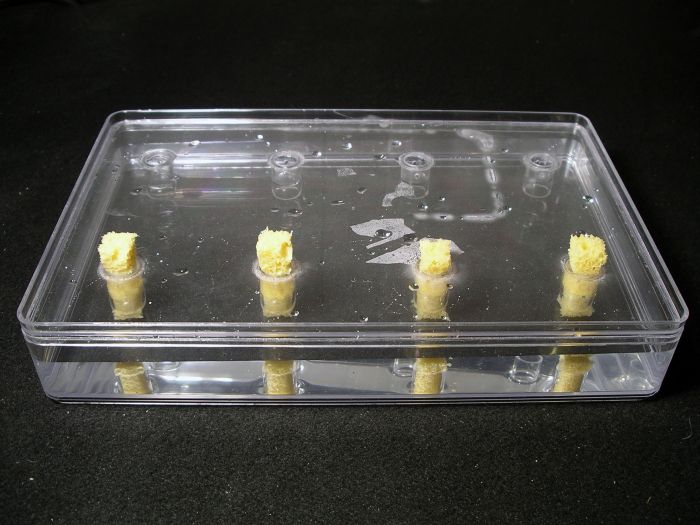
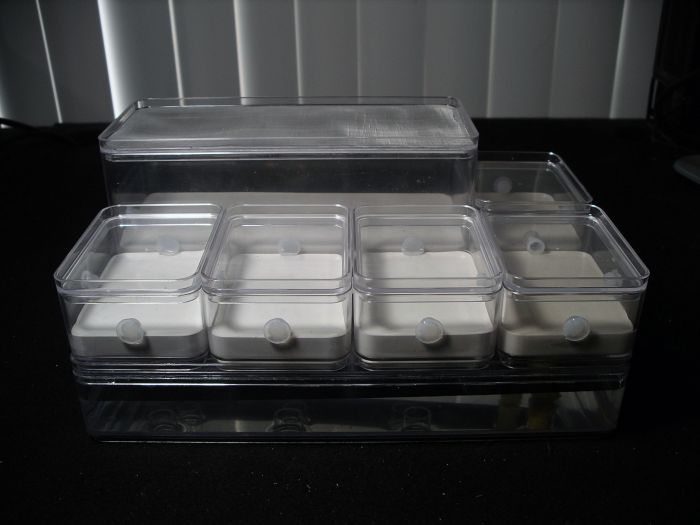
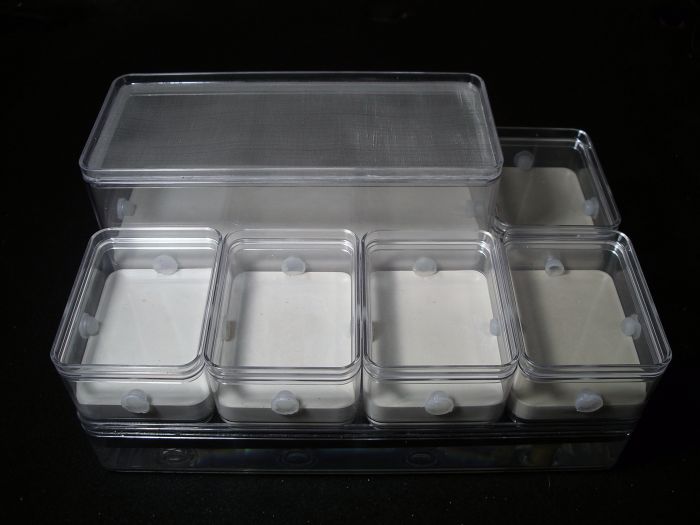
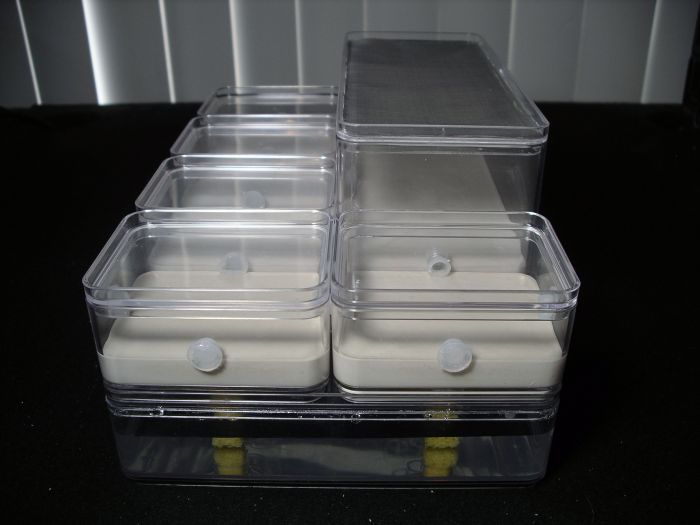
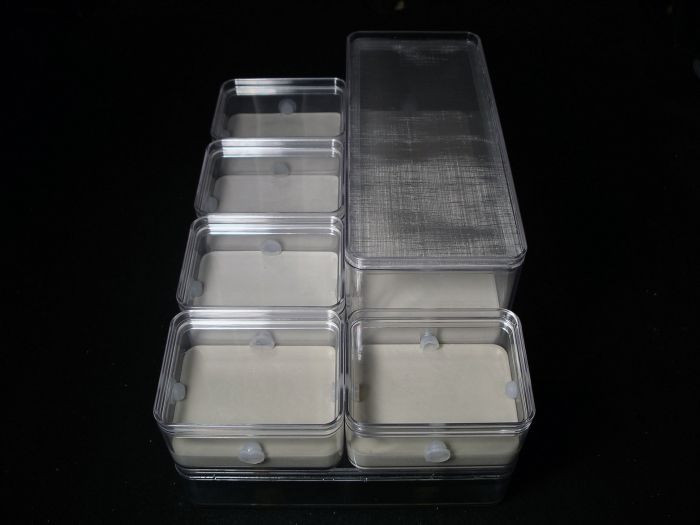
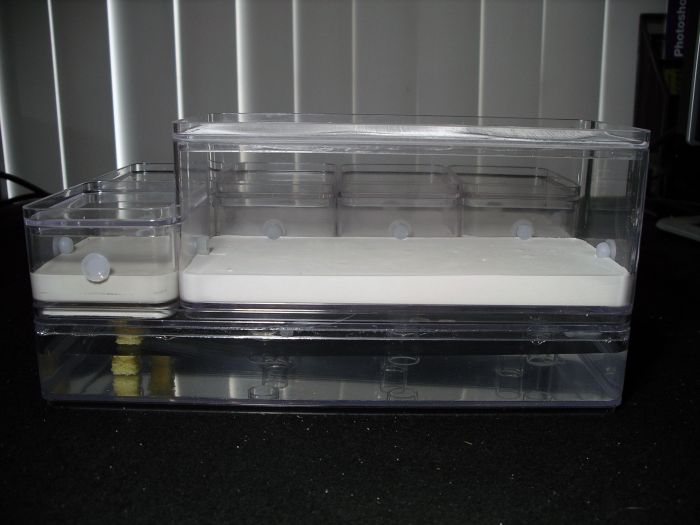
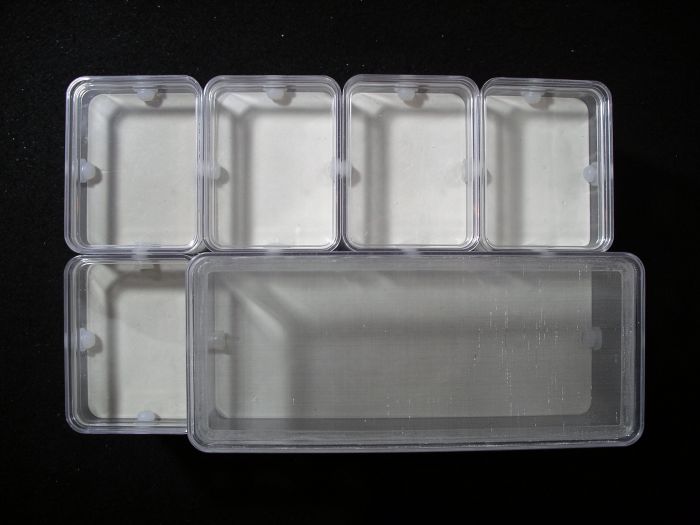
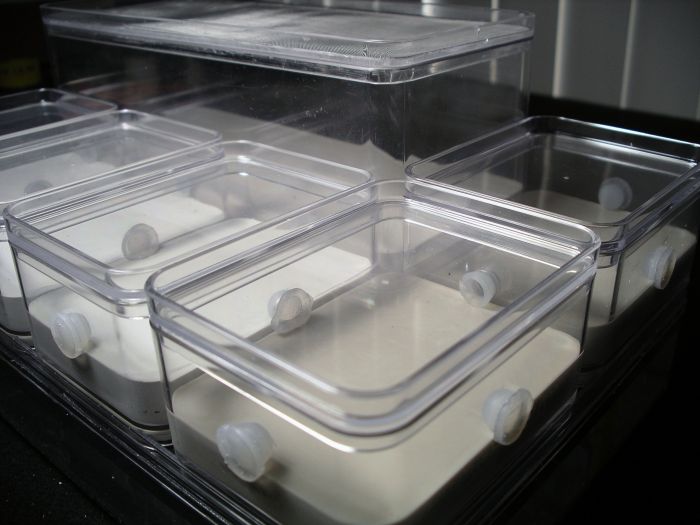
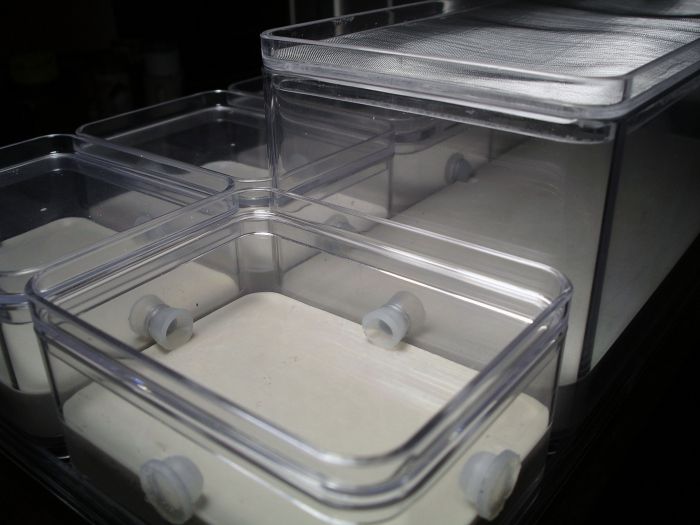
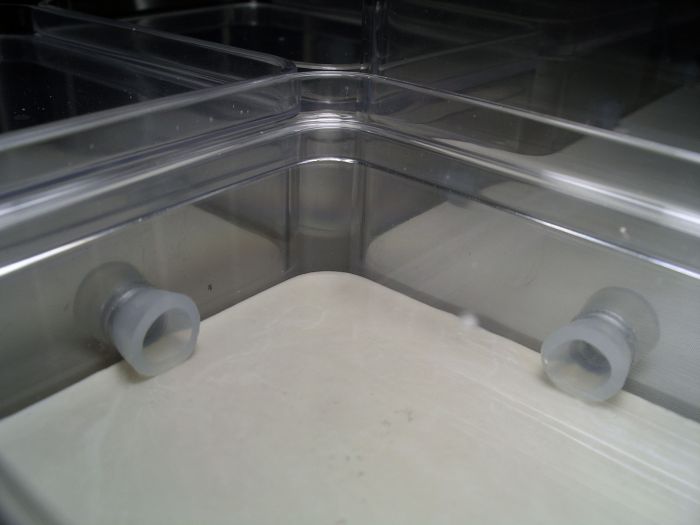
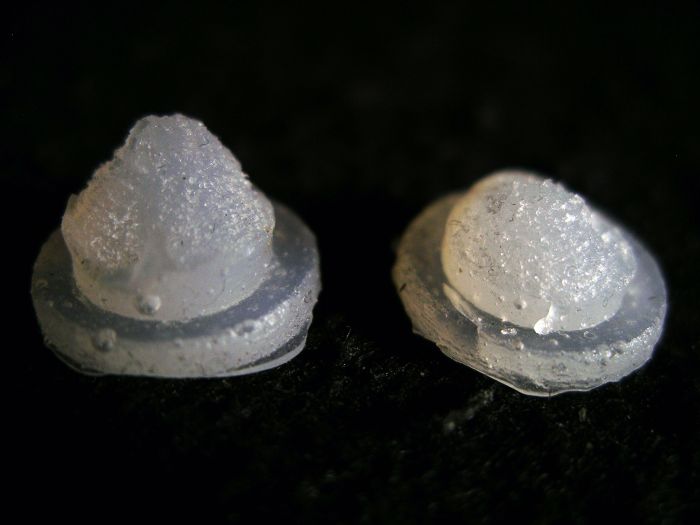
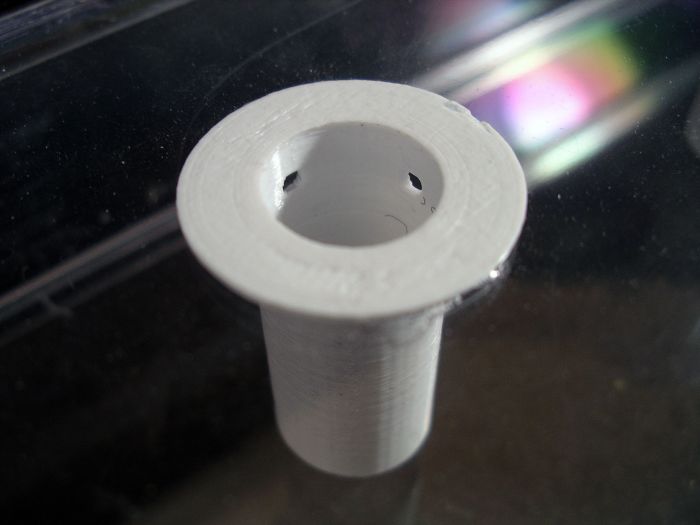
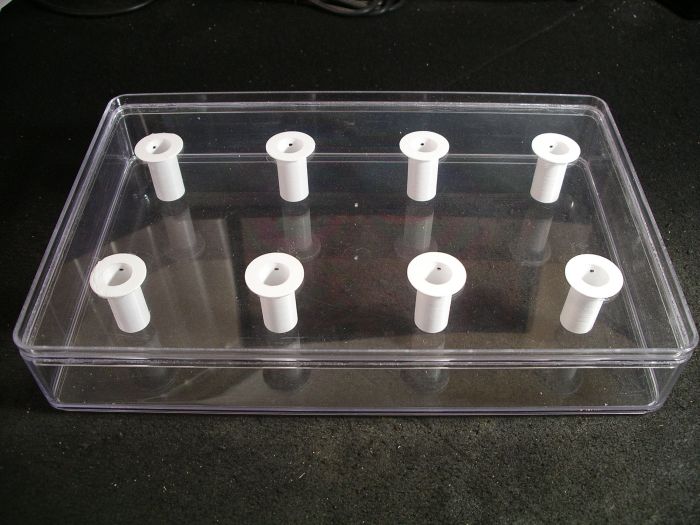
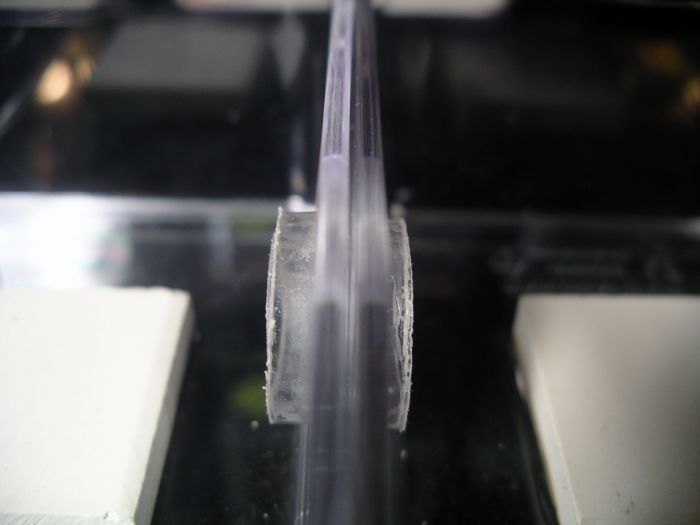
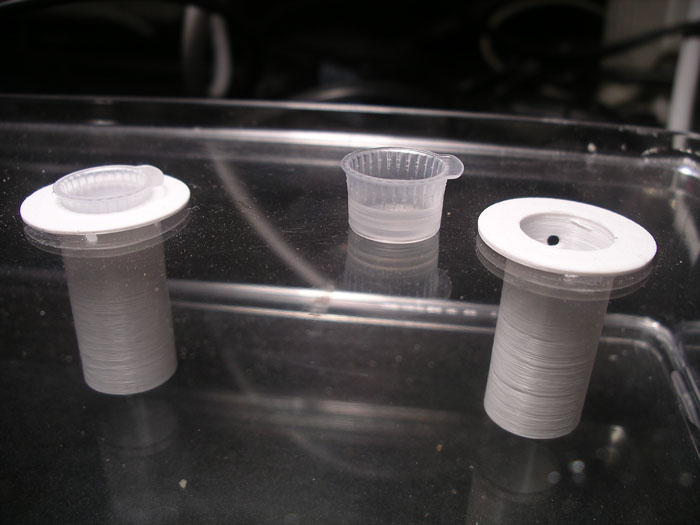
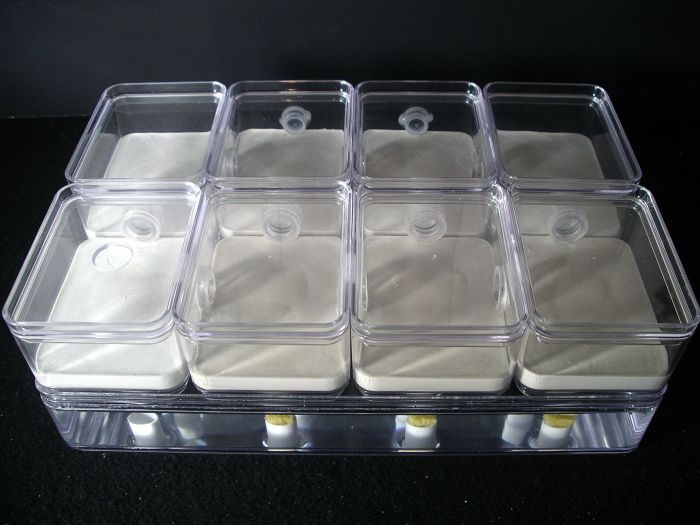
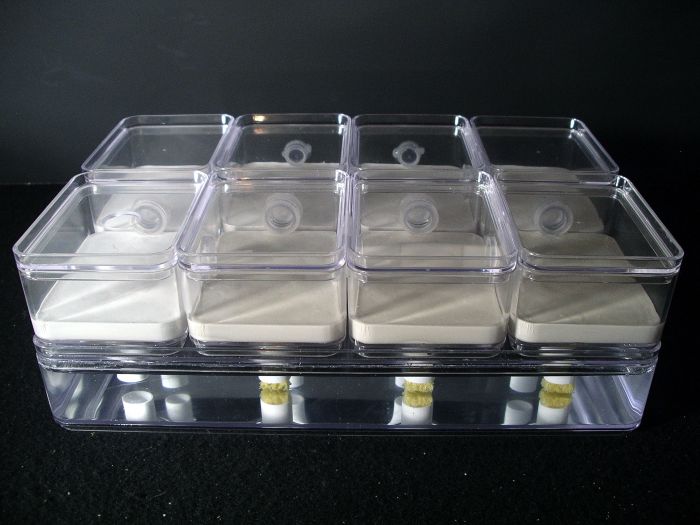
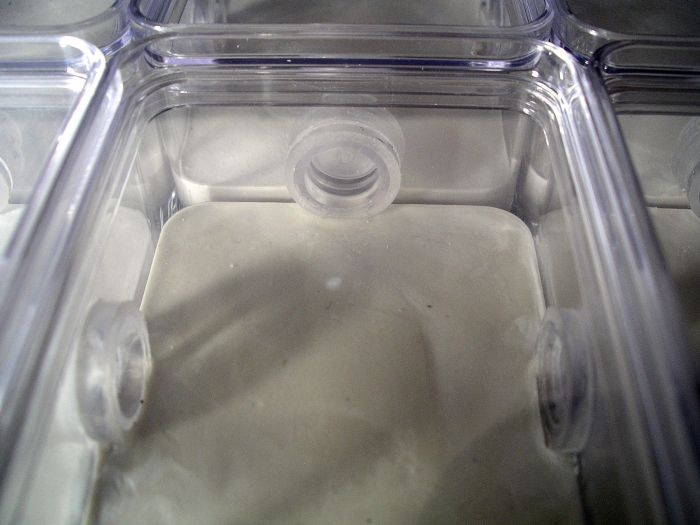
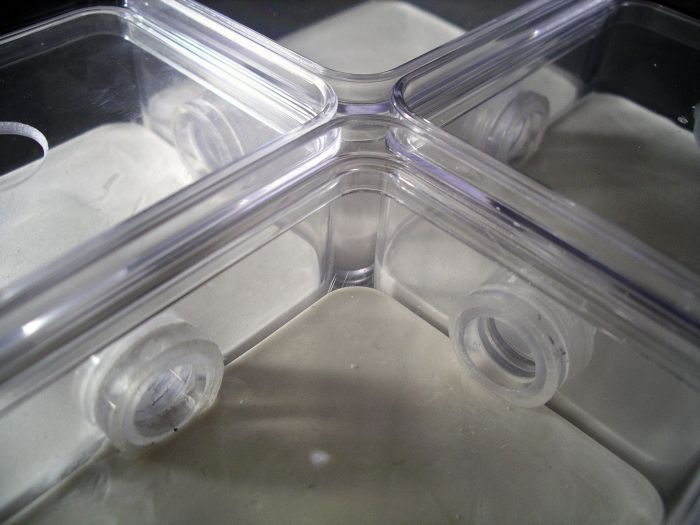
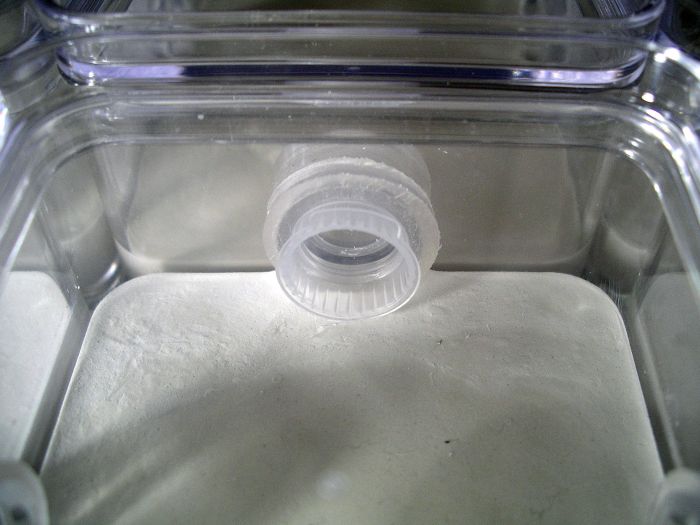
Just pour it right onto the top of the water tank and it will flow down into the ports. They will all have small holes at the top of the water port tubes to allow for the air pressure to stabilize, allowing the water to continue pouring in until it is full. Also, these containers have a lip all around the edge to make them stackable, which also keeps the water from flowing off the sides.


#66 Offline Miles - Posted June 25 2015 - 5:53 PM

Miles

    Advanced Member

  • Members
  • PipPipPip
  • 540 posts
  • LocationFlorida & Arizona

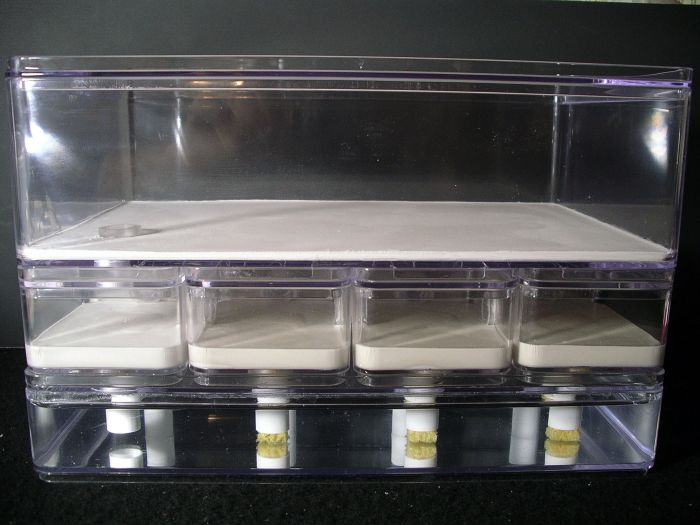
Awesome design Drew! Fun to see how this has progressed.


PhD Student & NSF Graduate Research Fellow | University of Florida Dept. of Entomology & Nematology - Lucky Ant Lab 


Founder & Director of The Ant Network. Ant keeper since 2009. Insect ecologist and science communicator. He/Him.


#67 Offline dspdrew - Posted June 25 2015 - 6:24 PM

dspdrew
  • LocationSanta Ana, CA

Thanks. Wait 'till you hear what happened after moving my Acromyrmex into it.


  • Nes187 likes this

#68 Offline Miles - Posted June 25 2015 - 9:10 PM

Miles

    Advanced Member

  • Members
  • PipPipPip
  • 540 posts
  • LocationFlorida & Arizona

Oh no.  :thinking:


PhD Student & NSF Graduate Research Fellow | University of Florida Dept. of Entomology & Nematology - Lucky Ant Lab 


Founder & Director of The Ant Network. Ant keeper since 2009. Insect ecologist and science communicator. He/Him.


#69 Offline Foogoo - Posted August 7 2015 - 8:27 PM

Foogoo

    Advanced Member

  • Members
  • PipPipPip
  • 1,161 posts
  • LocationLos Angeles, CA

Has anyone experimented with wick? The type used for reusable lighters and vaping. It basically looks like regular string, but sucks up water. I was thinking of how this could be used. Maybe line the circumference of the fungus chamber with a length of wick and have the end in a water reservoir? Maybe this would maintain constant humidity of the chamber in the same way as your reservoir/sponge but with no water-hydrostone contact.


  • LC3 likes this

Camponotus vicinus, Crematogaster 1, Crematogaster 2, Formica francoeuri, *, *, Myrmecocystus testaceus, Novomessor cockerelli, Pheidole hyatti, Pogonomyrmex californicus, Pogonomyrmex rugosus, Solenopsis invicta


#70 Offline dspdrew - Posted August 7 2015 - 8:38 PM

dspdrew
  • LocationSanta Ana, CA

I've thought about a wick, but didn't want something hanging from the bottoms of the containers. I like to keep things as simple and as simple looking as possible.


#71 Offline dspdrew - Posted August 17 2015 - 10:30 AM

dspdrew
  • LocationSanta Ana, CA
After the civil war my colony had, somehow caused by the move, they fully recovered and are glowing growing like crazy. This new design has been working great, except I see one problem arising.
 
med_gallery_2_281_413008.jpg
 
 
I think I am going to have to look into a different material, or a slightly different design. Probably something closer to what I originally intended--grommet-free.

Edited by dspdrew, June 20 2020 - 10:03 PM.


#72 Offline dermy - Posted August 17 2015 - 12:44 PM

dermy

    Advanced Member

  • Members
  • PipPipPip
  • 1,392 posts
  • LocationCanada

Why do you always have civil wars breaking out in your Colonies!?


Also how are your Glowing ants, can you see them in the dark  :lol:


  • LC3 likes this

#73 Offline dspdrew - Posted August 17 2015 - 4:46 PM

dspdrew
  • LocationSanta Ana, CA

Why do you always have civil wars breaking out in your Colonies!?


Also how are your Glowing ants, can you see them in the dark  :lol:


I've only had one civil war, and the glowing ants are awesome! Of course I can see them in the dark! B)


#74 Offline LC3 - Posted August 17 2015 - 5:41 PM

LC3

    Advanced Member

  • Members
  • PipPipPip
  • 1,323 posts
  • LocationBC, Canada

What did you do to make glowing ants? Or is this a joke.


  • Mannomorth likes this

#75 Offline dspdrew - Posted October 11 2015 - 6:03 PM

dspdrew
  • LocationSanta Ana, CA
I came up with a MUCH easier way to make the water tanks using 3D printing of course.
 
I designed these inserts for the water ports. They have four very small holes at the top to allow the water levels to equalize, without allowing the water to slosh around and make a mess.
 
med_gallery_2_281_122489.jpg
 
med_gallery_2_281_606159.jpg

#76 Offline dspdrew - Posted October 16 2015 - 6:58 PM

dspdrew
  • LocationSanta Ana, CA
I'm planning to put the out world on top of all the fungus chambers now, so there will be no need to rearrange anything. This will allow me to permanently or semi-permanently attach all the containers. They will all still have their own lids, so they can still be easily cleaned out separately. Until I come up with a 3D printed connector tube, I'm going to give this a try using vinyl tubing. Hopefully the Acromyrmex can't chew through this too over time.
 
Here's a little test connector I rigged up with vinyl tubing. It's two pieces of larger tube bonded to the edges of the smaller tube to hold it in. I've seen the ants having a lot of trouble trying to get pieces of substrate through the 1/4 inch openings, so I made these 1/2 inch.
 
med_gallery_2_281_321975.jpg
 
med_gallery_2_281_500765.jpg
 
med_gallery_2_281_307909.jpg

#77 Offline dspdrew - Posted October 18 2015 - 3:39 AM

dspdrew
  • LocationSanta Ana, CA
I designed the water tank to allow me to use these test tube plugs to block off the unused water ports.
 
gallery_2_281_34531.jpg
 
gallery_2_281_20948.jpg

#78 Offline dspdrew - Posted October 20 2015 - 10:51 AM

dspdrew
  • LocationSanta Ana, CA
I finished the second prototype. I have the one in the pictures setup to hydrate only the front three right-most chambers since that's all the room the colony I'm moving into it will need right now.
 
med_gallery_2_281_519128.jpg
 
 
The nice thing about this, is I can add as many layers of fungus chambers as I want. Obviously only the ones on the very bottom will be hydrated, but the humidity travels through them and builds up pretty well
 
med_gallery_2_281_344434.jpg
 
 
I wasn't sure if I should make the foraging container connector short or long. These ants can climb very well, so I figured they can just climb across the ceiling and down the sides of the container under the connector. Because of this, I made the connector short, but I'm now seeing that they do fall off the ceiling quite a bit, so I'll be replacing it with a longer tube that reaches the bottom of the fungus chamber. I'll cut an opening for them to crawl into the tube from the floor of the chamber. This should also make it easier to lift up and move the foraging container without pulling the connector tube out completely.
 
med_gallery_2_281_315954.jpg
 
 
This is what it looks like with the foraging container removed.
 
med_gallery_2_281_157068.jpg
 
med_gallery_2_281_165154.jpg
 
med_gallery_2_281_220334.jpg
 
 
Even though all of these fungus chambers are attached, you can still remove the lids individually.
 
med_gallery_2_281_344909.jpg
 
 
These are the vinyl tubing connectors I made just for this prototype. I'm working on some 3D printed connectors that might not be permanent the way these are.
 
med_gallery_2_281_206231.jpg
 
med_gallery_2_281_685037.jpg
 
 
I'm designing the connector tubes so that the 14mm test tube plugs will fit in them perfectly. If these plugs are put in one side of the connector tubes in the correct chambers, you'll can actually remove them as the colony grows without having to open the occupied chamber. It just all depends on how you want your chambers connected.
 
med_gallery_2_281_607423.jpg
 
 
I'm moving one of my large colonies into this now, so I'll soon see what works and what doesn't.
 
med_gallery_2_126_45062.jpg

#79 Offline PTAntFan - Posted October 20 2015 - 2:02 PM

PTAntFan

    Advanced Member

  • Members
  • PipPipPip
  • 495 posts
  • LocationBurbank, CA

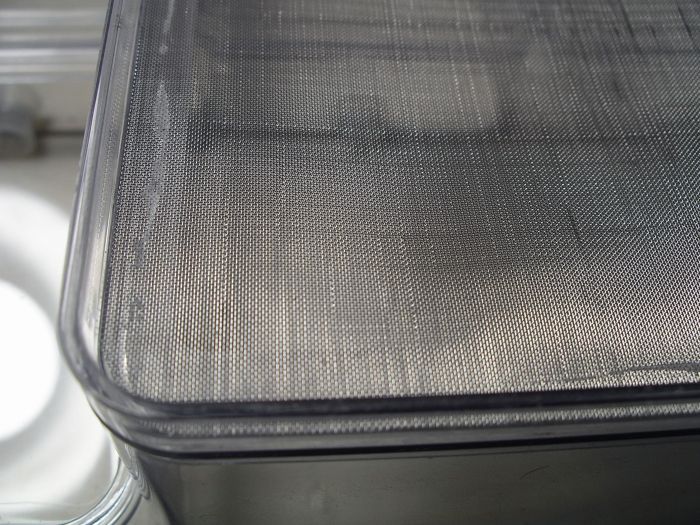
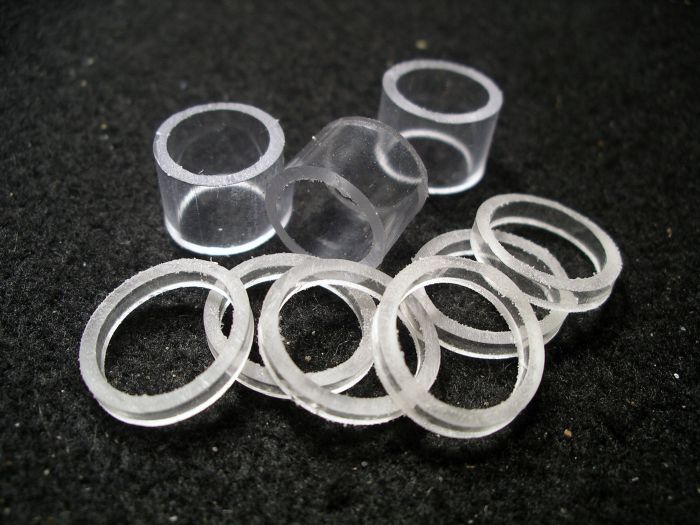
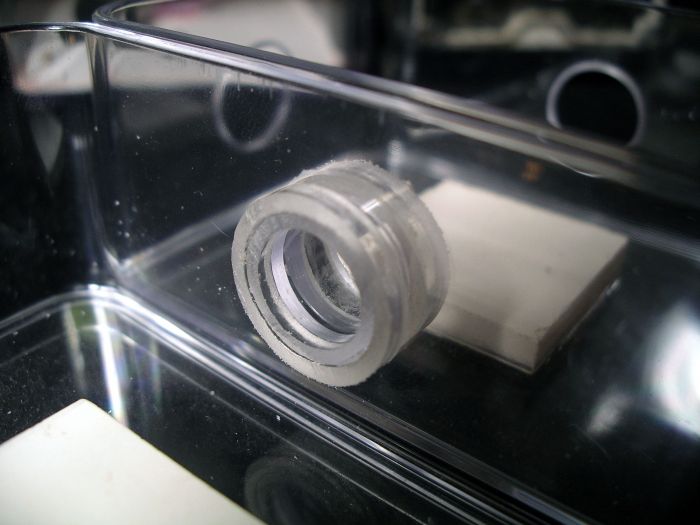
Those hole cuts are so clean!  How? :o


I need your cutting process and I need your connectors and plugs ASAP.  Take my money, please.


PTAntFan----------------------------------Pogonomyrmex Californicus*****************************<p>I use the $3 Tower I made up. See it here.

#80 Offline LC3 - Posted October 20 2015 - 6:23 PM

LC3

    Advanced Member

  • Members
  • PipPipPip
  • 1,323 posts
  • LocationBC, Canada

Very interesting.


Also tagged with one or more of these keywords: formicarium, container, out world, enclosure, how-to, diy, design, nest, dspdrew, tutorial

2 user(s) are reading this topic

0 members, 2 guests, 0 anonymous users