Jump to content

  • Chat
  •  
  •  

Welcome to Formiculture.com!

This is a website for anyone interested in Myrmecology and all aspects of finding, keeping, and studying ants. The site and forum are free to use. Register now to gain access to all of our features. Once registered and logged in, you will be able to create topics, post replies to existing threads, give reputation points to your fellow members, get your own private messenger, post status updates, manage your profile and so much more. If you already have an account, login here - otherwise create an account for free today!

Photo

Dspdrew's Formicarium 09 Research and Design (Updated 11-12-2023)

formicarium out world ant nest how-to tutorial dspdrew

  • Please log in to reply
345 replies to this topic

#121 Offline sgheaton - Posted September 8 2016 - 6:50 AM

sgheaton

    Advanced Member

  • Members
  • PipPipPip
  • 933 posts
  • LocationMinnesota

Startin' the research we all are wanting is why!


3M spray-on glue and sand.


I did some epoxy in sand and it worked..ok. Made sandpaper essentially. Going to try a layering method when I get home -- but what I'm getting at is it doesn't look as "speckled and rough" as yours - which I'm shooting for. Thanks Drew


  • ctantkeeper likes this

"I'm the search bar! Type questions into me and I'll search within the forums for an answer!"


#122 Offline dspdrew - Posted September 8 2016 - 7:21 PM

dspdrew
  • LocationSanta Ana, CA

Hydrostone actually absorbs water really well. I don't know why their documentation states the opposite.


This solves a few problems, but it doesn't only solve problems, it's just better than the current design in a number of ways.


1. It saves me time, because casting it with Hydrostone is actually faster and easier than printing it out and filling it with dirt to the right level.

2. It will hold more water overall, and has better sorptivity than the dirt inside the 3D printed ones.

3. It never needs to be cleaned out.

4. You don't have to worry about the ants finding their way inside it.

5. It allows for a nice sandy texture on a more naturalistic material.


#123 Offline dspdrew - Posted September 8 2016 - 7:34 PM

dspdrew
  • LocationSanta Ana, CA

Startin' the research we all are wanting is why!


3M spray-on glue and sand.


I did some epoxy in sand and it worked..ok. Made sandpaper essentially. Going to try a layering method when I get home -- but what I'm getting at is it doesn't look as "speckled and rough" as yours - which I'm shooting for. Thanks Drew


Can you post a picture of what of mine you are talking about? I thought we were talking about the tank I put gravel and rocks in.


#124 Offline sgheaton - Posted September 9 2016 - 4:57 AM

sgheaton

    Advanced Member

  • Members
  • PipPipPip
  • 933 posts
  • LocationMinnesota

Like...the picture above? I was talking about the hydrostone "cube" you just made and posted about in the thread. Maybe silly because I should know all the problems of saturated hydrostone..but.... is it hollow that you could pour water into it and then kinda controlled through a pin hole?

I'm thinking the epoxy+sand method for outworld use I'm doing will work for me just fine.  


"I'm the search bar! Type questions into me and I'll search within the forums for an answer!"


#125 Offline dspdrew - Posted September 9 2016 - 6:08 AM

dspdrew
  • LocationSanta Ana, CA

Oh well you need larger sand. When trying to stick sand or gravel to something sticky, it is really important that you use sieves to get rid of not only much larger pieces, but any smaller pieces too, especially dust. I had to wash my sand until there was no more dirty water coming from it. This way the dirt doesn't stick to the glue and prevent the larger particles from sticking.


BTW, that is not a tank I made. It's a solid block of Hydrostone. It is meant to replace the plastic tank I was filling with clay dirt.


#126 Offline sgheaton - Posted September 9 2016 - 6:48 AM

sgheaton

    Advanced Member

  • Members
  • PipPipPip
  • 933 posts
  • LocationMinnesota

Yeah the tank question might have sparked a different route/topic/thing. Good to curb it easily. 


The sand I've baked and washed and put in the PT Vases it's....it was like a fine powder. The stuff I have left over is play sand and it's rather fine and really should be used for playgrounds n'things. The "natural sand" I've got in my back yard probably....grainier? Larger? Either way.... I'll try "bake'n'washin" some of that stuff and trying it on my test square. I meant to experiment some last night but got distracted with other chores and forgetting the epoxy at work. Thanks, Drew.


"I'm the search bar! Type questions into me and I'll search within the forums for an answer!"


#127 Offline T.C. - Posted September 9 2016 - 7:21 AM

T.C.

    Advanced Member

  • Members
  • PipPipPip
  • 3,059 posts

I'm Lovin it! Great job


“If I am killed for simply living, let death be kinder than man.” -Althea Davis

#128 Offline dspdrew - Posted September 10 2016 - 10:15 PM

dspdrew
  • LocationSanta Ana, CA
So there it is. I of course decided to dump dirt into it before taking pictures, so it's all dusty. Funny how much it looks like stucco.
 
med_gallery_2_295_354901.jpg
 
med_gallery_2_295_172355.jpg
  • ctantkeeper likes this

#129 Offline dspdrew - Posted September 12 2016 - 8:21 PM

dspdrew
  • LocationSanta Ana, CA
Every mom's worst nightmare.
 
My kitchen floor dirt factory.
 
med_gallery_2_295_718760.jpg
  • ctantkeeper, thosaka and John7429 like this

#130 Offline sgheaton - Posted September 13 2016 - 5:11 AM

sgheaton

    Advanced Member

  • Members
  • PipPipPip
  • 933 posts
  • LocationMinnesota

And to be clear that is a giant solid chunk of hydrostone + with some 3M spray glue and chunkier sand on the outside? 


"I'm the search bar! Type questions into me and I'll search within the forums for an answer!"


#131 Offline dspdrew - Posted September 13 2016 - 6:02 AM

dspdrew
  • LocationSanta Ana, CA

No. The original 3D printed part had the sand glued to it. Once the silicone mold was made using that, I could then cast these with Hydrostone to look like they have sand glued to them.


  • John7429 likes this

#132 Offline sgheaton - Posted September 13 2016 - 7:17 AM

sgheaton

    Advanced Member

  • Members
  • PipPipPip
  • 933 posts
  • LocationMinnesota

Awesome, I understand. Thanks for the clarification. 


"I'm the search bar! Type questions into me and I'll search within the forums for an answer!"


#133 Offline Foogoo - Posted October 1 2016 - 9:55 PM

Foogoo

    Advanced Member

  • Members
  • PipPipPip
  • 1,161 posts
  • LocationLos Angeles, CA

Made some small ones today for my Dolopomyrmex pilatus queens. These should make nice little founding nests.
 
Plastic tubing: 1/2" OD, 7/16" ID, 37 mm length
Hydrostone (hydrated) 1st pour: 15 ml / 28 g
Hydrostone(hydrated) 2nd pour: 15 ml / 28 g
Plug hole (for the silicone plugs I cast): 21/64"
Lid hole: 7/8"
 
med_gallery_2_295_474819.jpg

 
For your original dirt boxes, how did you move colonies out of them? I made a few but neglected to make a bottom hole. My small Veromessor pergandei colony collected a ton of seeds which are all sprouting now and I'm debating if I should get them out...

Camponotus vicinus, Crematogaster 1, Crematogaster 2, Formica francoeuri, *, *, Myrmecocystus testaceus, Novomessor cockerelli, Pheidole hyatti, Pogonomyrmex californicus, Pogonomyrmex rugosus, Solenopsis invicta


#134 Offline dspdrew - Posted October 2 2016 - 2:31 AM

dspdrew
  • LocationSanta Ana, CA

i would pull the plug and wait for it to dry out.


#135 Offline dspdrew - Posted November 15 2016 - 10:18 PM

dspdrew
  • LocationSanta Ana, CA
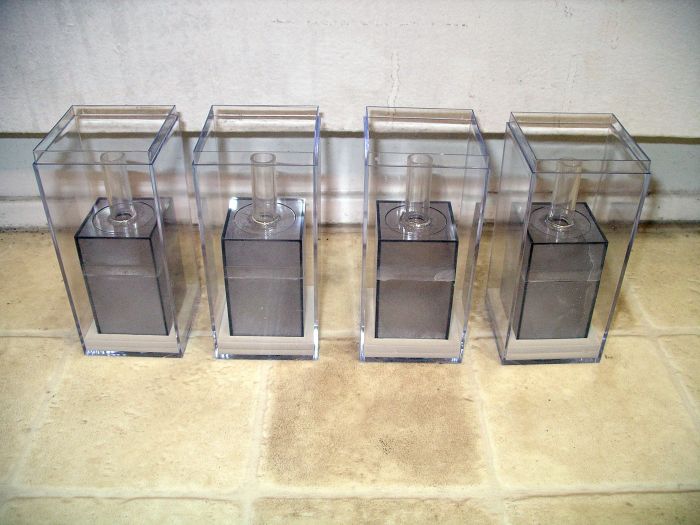
I decided to make one more of these vase setups for another one of my growing Honeypot ant colonies. This time I wanted to coat the pipe with sand and gravel to make the tunnels and chambers look as natural as possible.
 
I normally use resin to hold down sand and gravel, but doing this on a round pipe is a bit of a problem, because well... gravity.
 
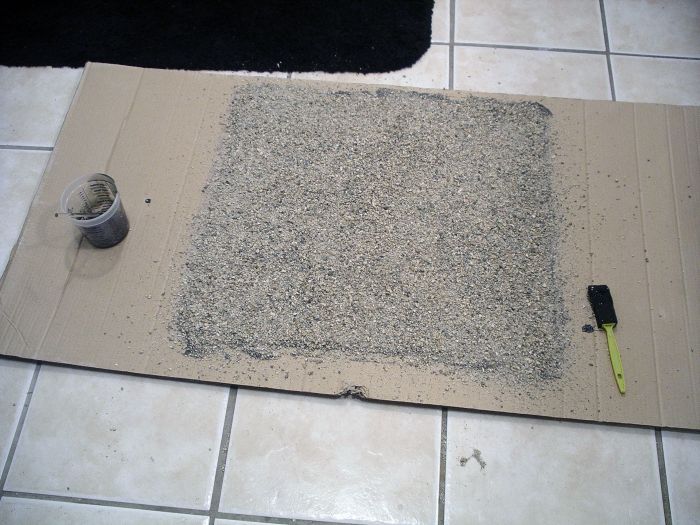
To solve the problem I got a sheet of PVC vinyl and cut just enough to wrap around the pipe.
 
med_gallery_2_295_725640.jpg
 
 
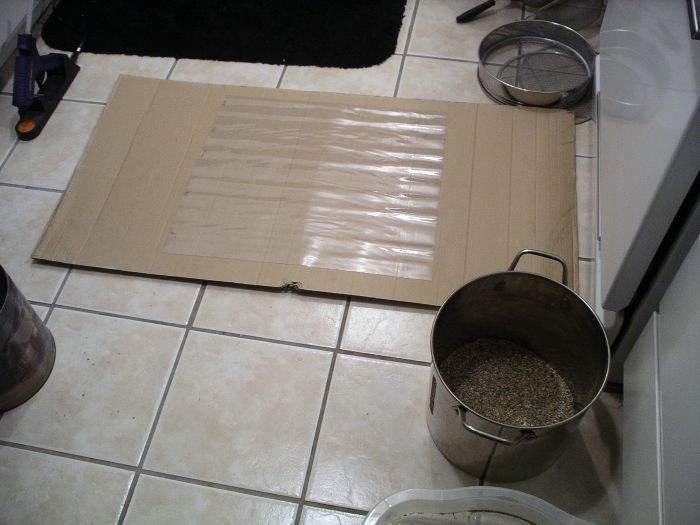
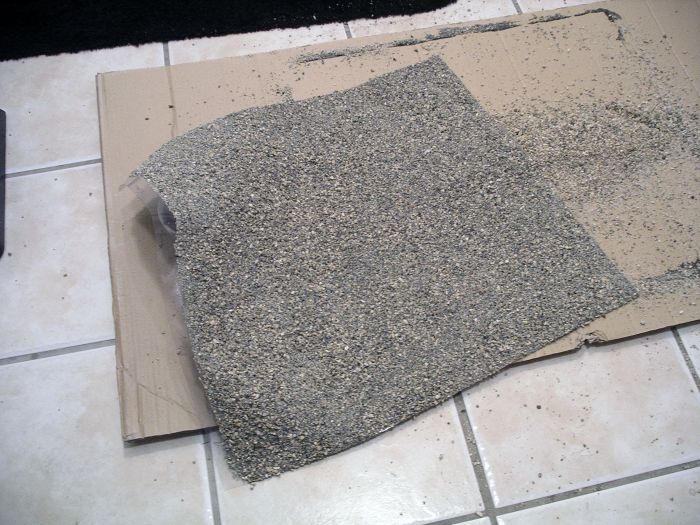
I coated it with black resin and then covered that with sand and gravel. This works much better because it's flat and won't slowly run all over the place.
 
med_gallery_2_295_482281.jpg
 
 
At this point it was half way cured, so even though it was hardly a liquid anymore, it was still malleable.
 
med_gallery_2_295_1015176.jpg
 
 
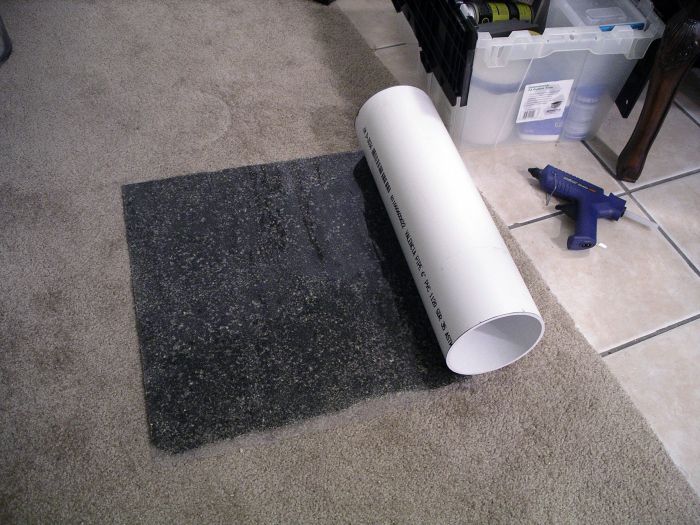
I rolled it on the inner pipe, adhering it with PVC cement.
 
med_gallery_2_295_511643.jpg
 
med_gallery_2_295_18179.jpg
 
 
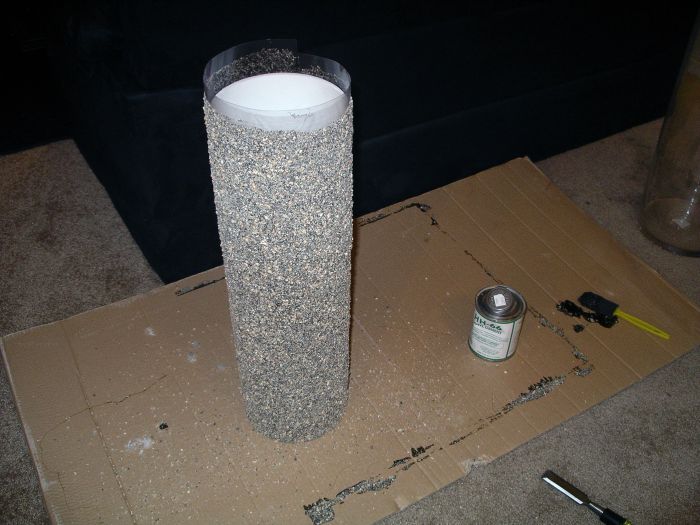
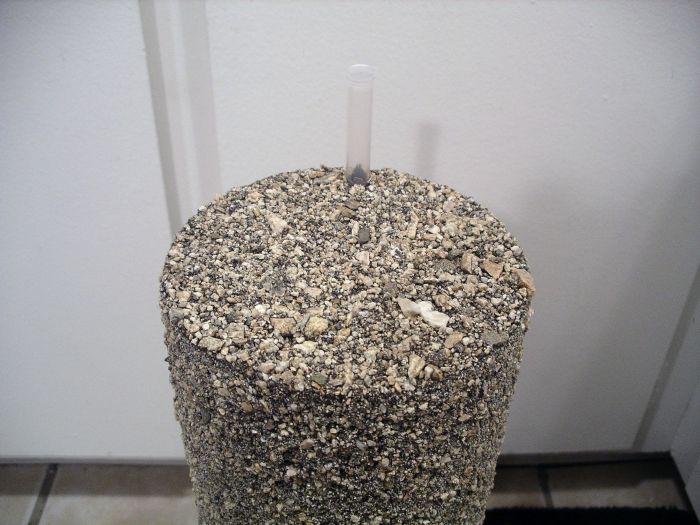
Poured black resin on the top and coated that with sand and gravel.
 
med_gallery_2_295_6892.jpg
 
med_gallery_2_295_388322.jpg
 
 
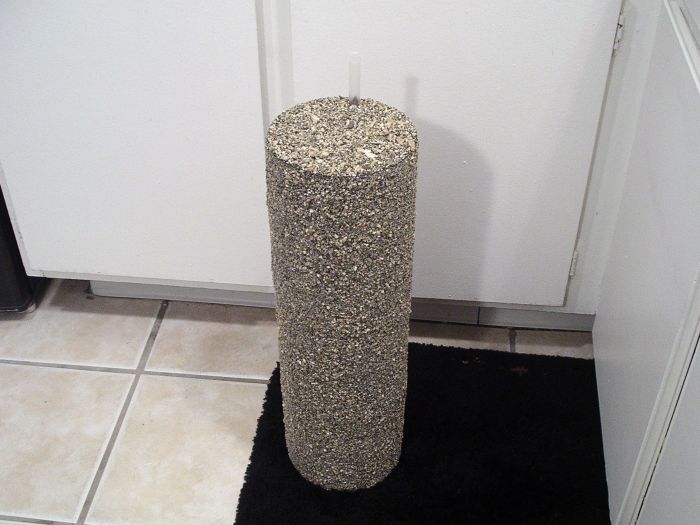
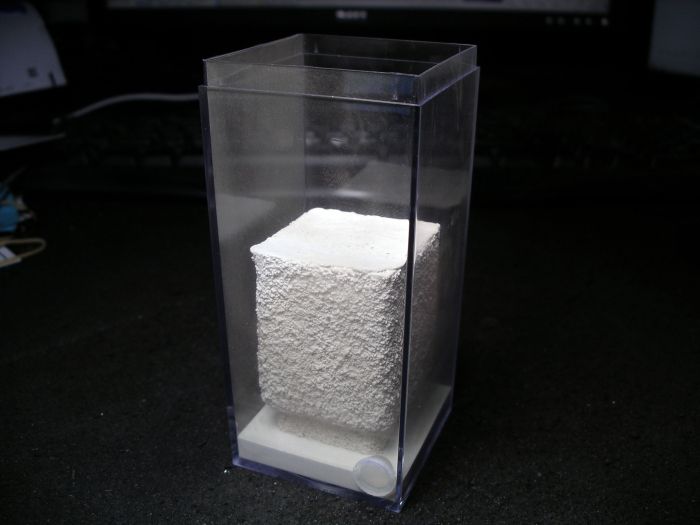
Inner tank installed.
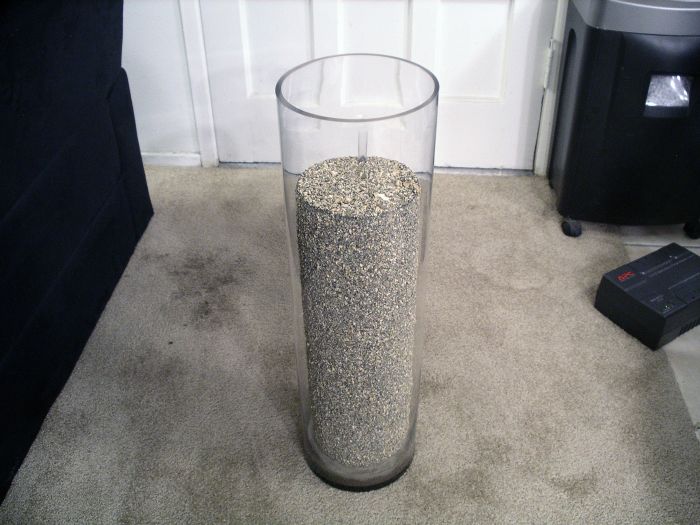
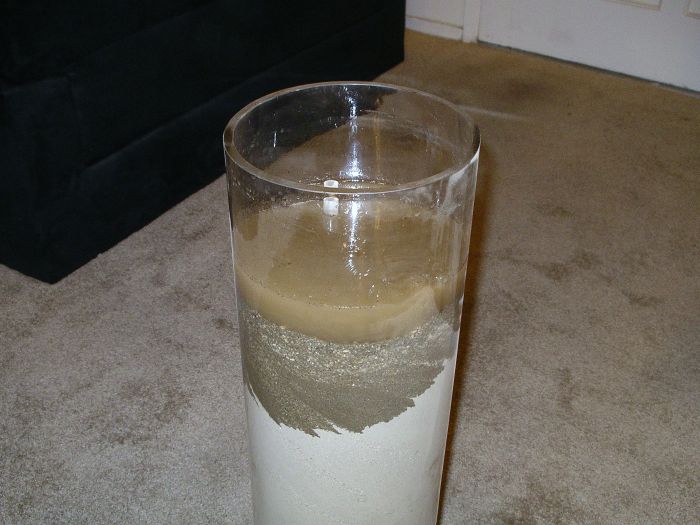
 
med_gallery_2_295_1151467.jpg
 
 
Initial hydration.
 
med_gallery_2_295_356726.jpg
  • dermy and John7429 like this

#136 Offline Leo - Posted November 16 2016 - 3:43 AM

Leo

    Advanced Member

  • Members
  • PipPipPip
  • 1,512 posts
  • LocationHong Kong

that is A LOT of water


  • Jonny8040 likes this

#137 Offline sgheaton - Posted November 16 2016 - 6:06 AM

sgheaton

    Advanced Member

  • Members
  • PipPipPip
  • 933 posts
  • LocationMinnesota

Really like the vinyl backdrop gravel layer. That was a good idea. ... Messing with sand/gravel over carpet? Come on, Drew... 


  • ctantkeeper likes this

"I'm the search bar! Type questions into me and I'll search within the forums for an answer!"


#138 Offline dspdrew - Posted November 16 2016 - 7:01 AM

dspdrew
  • LocationSanta Ana, CA

Really like the vinyl backdrop gravel layer. That was a good idea. ... Messing with sand/gravel over carpet? Come on, Drew... 


Vacuum cleaner.


  • ctantkeeper likes this

#139 Offline Kevin - Posted November 16 2016 - 3:47 PM

Kevin

    Advanced Member

  • Members
  • PipPipPip
  • 833 posts
  • LocationSouth Jersey

Where exactly do you find the cylinders for this?


Hit "Like This" if it helped.


#140 Offline Serafine - Posted November 16 2016 - 4:44 PM

Serafine

    Advanced Member

  • Members
  • PipPipPip
  • 1,782 posts
  • LocationGermany

About that mold experiment from earlier - wood has anti-microbic/anti-fungus substances in itself. Wood is dead material which means the tree can't really react if it gets infected so it has to deposit substances inside it before the cells die. By sterilizing it you may very well wash out or destroy these substances.

Also while working with wood clean hands and clean equipment are VERY important. Most of the mold is actually brought in when the wood is worked on.


We should respect all forms of consciousness. The body is just a vessel, a mere hull.

Welcome to Lazy Tube - My Camponotus Journal


Also tagged with one or more of these keywords: formicarium, out world, ant nest, how-to, tutorial, dspdrew

0 user(s) are reading this topic

0 members, 0 guests, 0 anonymous users