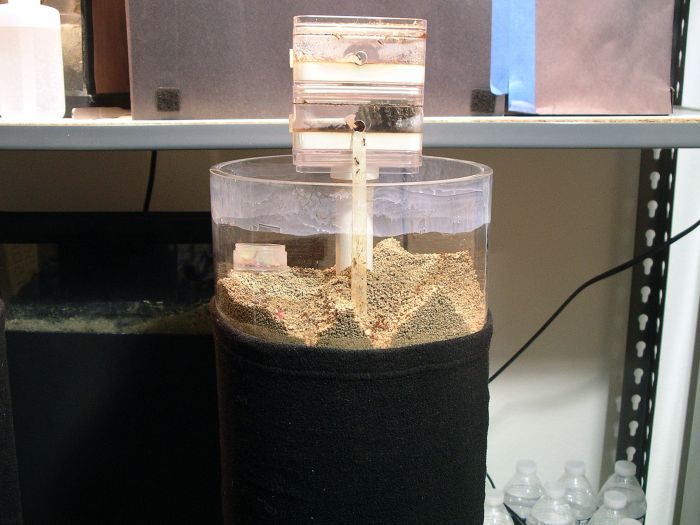
Wow that looks pretty neat! Good idea on putting the fluon on both the inside and outside. I bet that water tastes pretty nasty [the bottled water] because it's probably 90F or something 
- Formiculture.com
- Forums
- Gallery
- Members
- Member Map
- Chat


Advanced Member


Wow that looks pretty neat! Good idea on putting the fluon on both the inside and outside. I bet that water tastes pretty nasty [the bottled water] because it's probably 90F or something
My bottled water tastes great. I only drink it when it's been in the fridge.
Advanced Member

Drew, you're my hero! Haha! So much good information in this thread!
By the way, you know a good source for that mesh? Every place I find has large minimum orders. 
Advanced Member
Ebay is a good place for that. You will probably have to buy at minimum 6"x6" and 12x12 is more common.
My ants | My free feeder design | PM or email me if you need and 3d printing, cnc machining, or manufacturing done: http://www.lrmachining.com
Make your own mold/fungus/bacteria resistant test tube water! Don't get ripped off! Read my simple guide: http://www.formicult...-simple-how-to/
"Self-education is, I firmly believe, the only kind of education there is." - Isaac Asimov
Advanced Member
That's cool, so they will "hopefully" make more chambers on the sides and eventually you can pull them back to see what's going on. [I assume that's the point of the covers]


Advanced Member

Hey! Congratulations at successfully completing the cylinder tube before...well I know I had the exact same plan in the works, and surely some others! I understand the drawling and am sure PT does as well  ! He and I were talking awhile back about a design exactly as such - and resorted to copied vases he had from California for researching vessels (@$6 heck yeah). I ended up using acrylic inserts from MSC Direct as drilling through glass isn't ideal. Work account, for the win! While I could put what would be exact copies of the pictures in this thread..I'm now going to say my version isn't done now compared to yours now..As my Pogonomyrmex are fine (for now) this tank has taken as a second string to the Tetra tank I'm having to do first. Currently have the cap of hydrostone set to the side and will mess with it later today. Anyways.... . Went all fancy with adding wires for a water level. Probably won't be doing something like that so I'm interested in how reliable it is and how much you actually trust/defer to it.
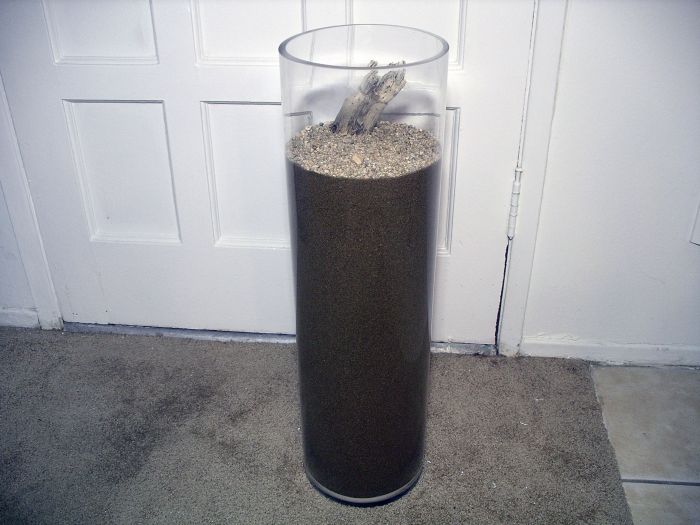
My research models have 1 with hydrostone and 1 without it in the base (the third was drilled full of holes for practice). Comparing the two set ups - Hydrostone DOES HAVE a single hole entrance and is always completely saturated with water. The vase without the hydrostone has TWO HOLES and while it isn't soaked like the other, clearly has a full gradient of water up the whole dirt level. Moving forward...I don't think I'm going to use the hydrostone layer on the bottom. Though I've got some questions because you're moving ants in yet and I can still design my set up.
questions
1 - Are you always going to add a thin layer of hydrostone to the bottom of your tanks? Is there a reason to this besides the whisking properties it provides?
2 - Is this the first application of a water level indicator?
3 - I was planning on making some sort of lid+screen on top. Do you have anything in the works for this or just sticking with the Flu-goo?
4 - What will be your plan for when the colony gets too big? what's your exit strategy for them?
5 - .....I didn't stick things down with resin. What was it you stuck? The "ground-layer"? What is the point/reason of doing this?
Things I'm going to copy
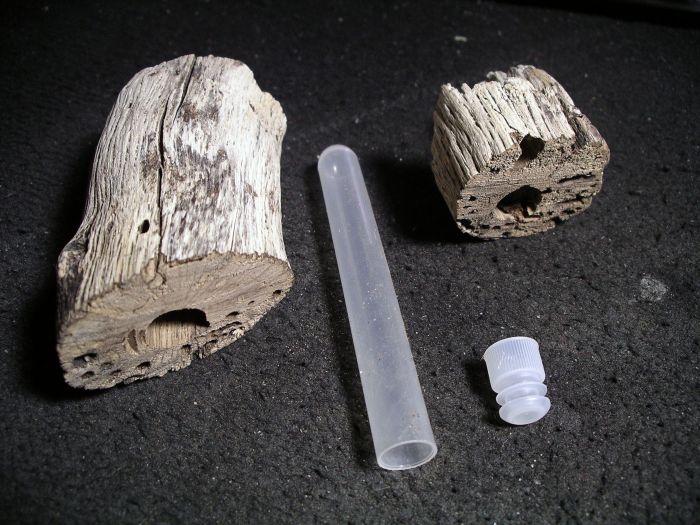
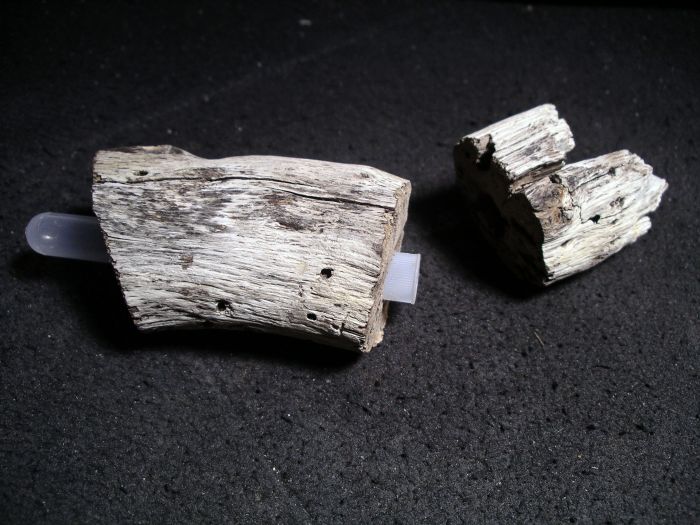
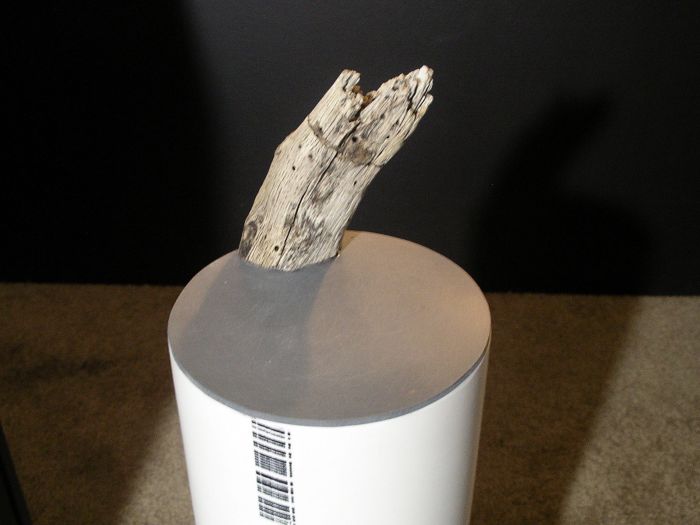
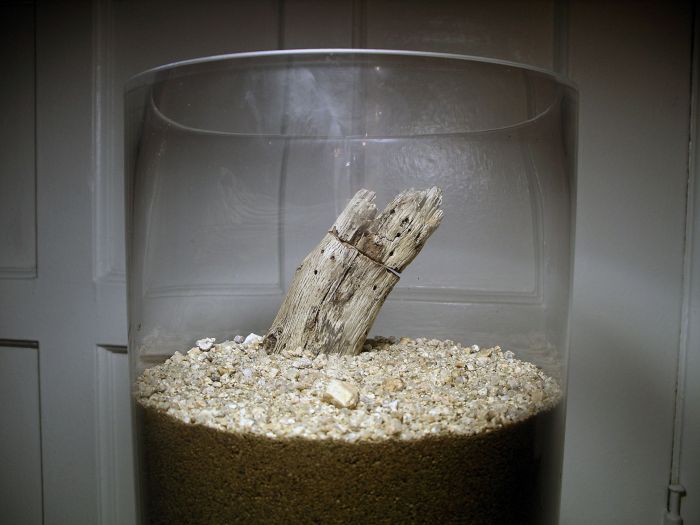
1 - Putting the fill tube in a piece of drift wood. Currently mine is sitting in water, going to need to redesign the insert to allow for the tank to be "inside" the tube. Really like your "all in one" ness though my current design isn't allowing it and needs some modifications.
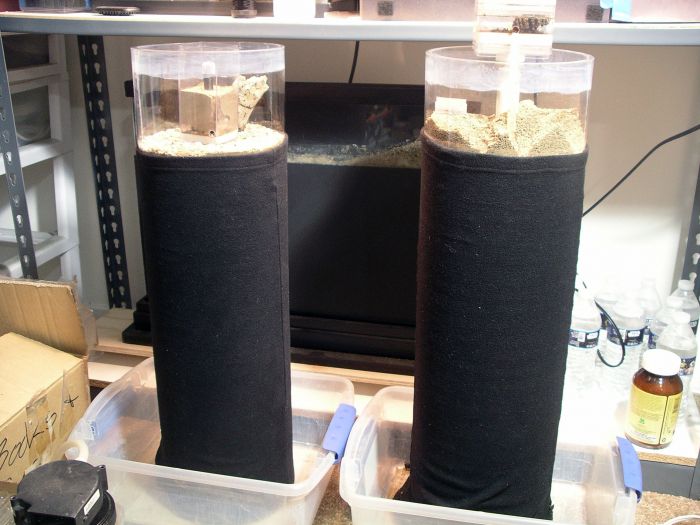
2 - Blanket covers. Wasn't sure what to do yet.
Edited by sgheaton, August 9 2016 - 5:43 AM.

"I'm the search bar! Type questions into me and I'll search within the forums for an answer!"
Hey! Congratulations at successfully completing the cylinder tube before...well I know I had the exact same plan in the works, and surely some others! I understand the drawling and am sure PT does as well
My research models have 1 with hydrostone and 1 without it in the base (the third was drilled full of holes for practice). Comparing the two set ups - Hydrostone DOES HAVE a single hole entrance and is always completely saturated with water. The vase without the hydrostone has TWO HOLES and while it isn't soaked like the other, clearly has a full gradient of water up the whole dirt level. Moving forward...I don't think I'm going to use the hydrostone layer on the bottom. Though I've got some questions because you're moving ants in yet and I can still design my set up.
questions
1 - Are you always going to add a thin layer of hydrostone to the bottom of your tanks? Is there a reason to this besides the whisking properties it provides?
2 - Is this the first application of a water level indicator?
3 - I was planning on making some sort of lid+screen on top. Do you have anything in the works for this or just sticking with the Flu-goo?
4 - What will be your plan for when the colony gets too big? Whats your exit strategy for them?
5 - .....I didn't stick things down with resin. What was it you stuck? The "ground-layer"? What is the point/reason of doing this?
Things I'm going to copy
1 - Putting the fill tube in a piece of drift wood. Currently mine is sitting in water, going to need to redesign the insert to allow for the tank to be "inside" the tube. Really like your "all in one" ness though my current design isn't allowing it and needs some modifications.2 - Blanket covers. Wasn't sure what to do yet.
Not sure I understood everything you were describing, but I can answer your questions.
1. The Hydrostone is there to keep anything but water from moving between the water source and the nest. What is keeping your ants from leaving the nest once digging all the way to the bottom where all your holes are drilled?
2. I only put that float switch in one of these, and never used it. It turned out using the inner tube as a water tank didn't work. I actually don't even remember exactly what happened, but I think the water continued soaking all the way up the dirt to the top, while I only expected it to go up so far due to the tank being air-tight. Same reason a Sparklets bottle doesn't empty out all over the floor. Because of this I only pour enough water in to keep it as wet as I want it. That's really good enough, because even just the dirt from the nest holds enough water to keep it damp for months. The second one I made I actually put dirt in the tank, the same way I did with all my box setups.
3. I haven't gotten around to making lids yet. So far the Fluon has been sufficient.
4. That I don't know. I tried drilling a hole in one of these tanks and destroyed it. Because of the way the light refracts through the glass of these vases, it's impossible to visually tell that they are only 1/16 of an inch thick except at the very top and bottom. I was a bit shocked at how light they were, but obviously never gave it enough thought.
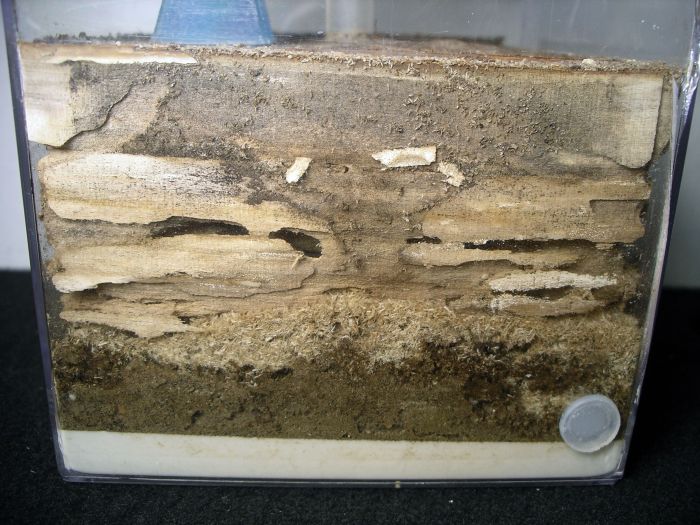
5. I did that so that the ants didn't move all the dirt, leaving smooth plastic showing on the surface.
Advanced Member
Thanks for responding though. It cleared some things up for me
1 - Using a chunk of sponge. Was concerned of the stone eventually eroding away upwards.
2 - OOO - love the idea of the internal cylinder as the water tank. Maybe a next year project. (I'm totally not set up for it that way though..... .......nonono. I have enough on my plate as it is.) I'll have to reread all your posting on this design project.
3 - I'm thinking that I'm wanting a screen lid thingy. Kinda have..some..well much like my french press's screen but on top.
4 - I'm going to defer to you when the time comes. I'm setting myself up for trouble as only 1 set up as an exit "hole" drilled.
5 - I'll view other posts and compare your tanks. I'm guessing your Pogonomyrmex (rug?) ..the Pogonomyrmex in the tank didn't have this as they ...I'm guessing have ran out of dirt at this point? I need to compare your other cylinder set up to this one.
Edit
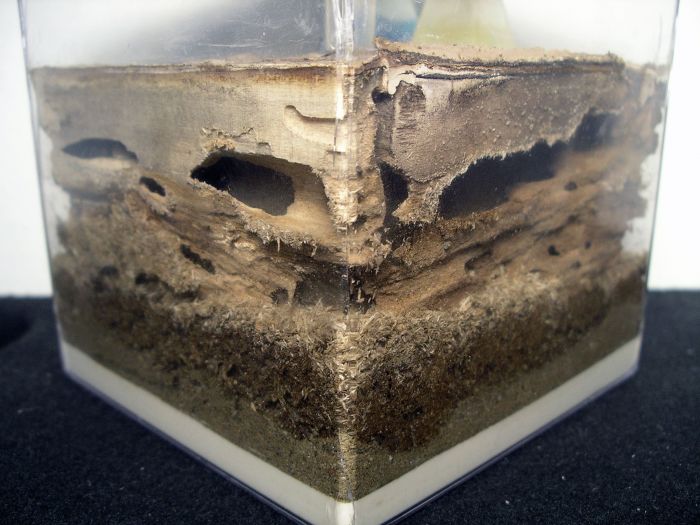
I'm excited to see how quickly your already functional colony moves into and constructs their tunnels.
Edited by sgheaton, August 10 2016 - 5:16 AM.
"I'm the search bar! Type questions into me and I'll search within the forums for an answer!"
Advanced Member
So would probably help if I read the dates when things are posted...Had to do a bit of searchin.
This cylinder tank design is currently holding your Myrmecocystus Mexicanus?
"I'm the search bar! Type questions into me and I'll search within the forums for an answer!"
I have two of them. One has Acromyrmex versicolor in it, and one has Myrmecocystus mexicanus.
Advanced Member
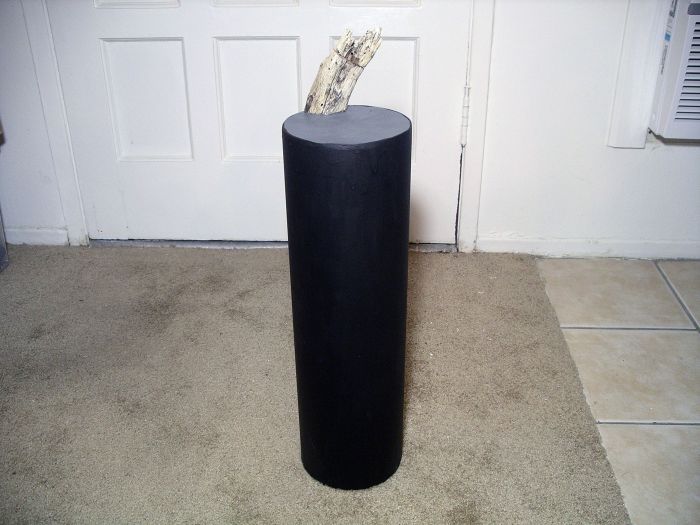
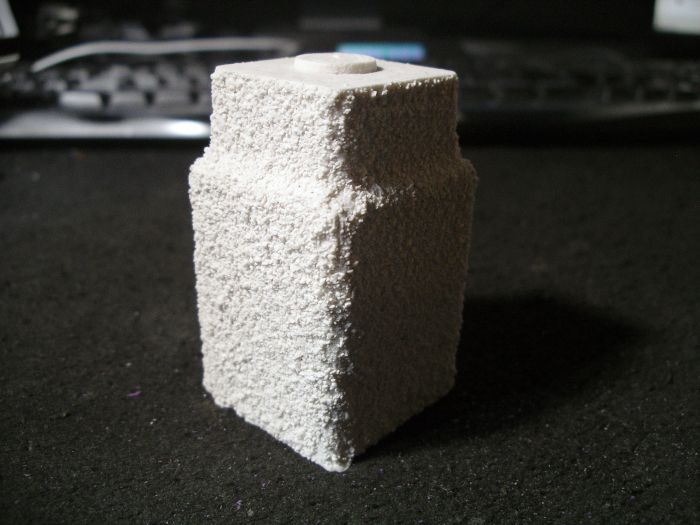
Nice texturing on that block. What was your method to achieve that?
"I'm the search bar! Type questions into me and I'll search within the forums for an answer!"
Vendor

Working on my new "dirt boxes" cast Hydrostone inner block instead of the plastic inner container.


 |
Ant Keeping →
Ant Keeping Journals →
The_Gaming-gate's Ant Nest DesignStarted by The_Gaming-gate , Apr 4 2024 |
|
|
|
|
|
Ants & Myrmecology →
General →
PlasterStarted by The_Gaming-gate , Apr 3 2024 |
|

|
|
Ant Keeping →
General Ant Keeping →
Formicarium concept: slip casting potteryStarted by Nixionika , Mar 5 2024 |
|
|
||
Formiculture.com →
Member Introductions →
Introducing: AntCondo™Started by AntCondo , Jan 5 2024 |
|
|
||
Ant Keeping →
Ant Keeping Journals →
Dspdrew's Camponotus ocreatus Journal [132] (Updated 11-16-2023)Started by dspdrew , Aug 30 2017 |
|
|
0 members, 0 guests, 0 anonymous users
Community Forum Software by IP.Board
Designed By skinod.com

